Search icon CANCEL
Subscription
0
Cart icon
Your Cart (0 item)
Close icon
You have no products in your basket yet
Save more on your purchases! discount-offer-chevron-icon
Savings automatically calculated. No voucher code required.
Arrow left icon
Explore Products
Best Sellers
New Releases
Books
Events
Videos
Audiobooks
Packt Hub
Free Learning
Arrow right icon
timer SALE ENDS IN
0 Days
:
00 Hours
:
00 Minutes
:
00 Seconds
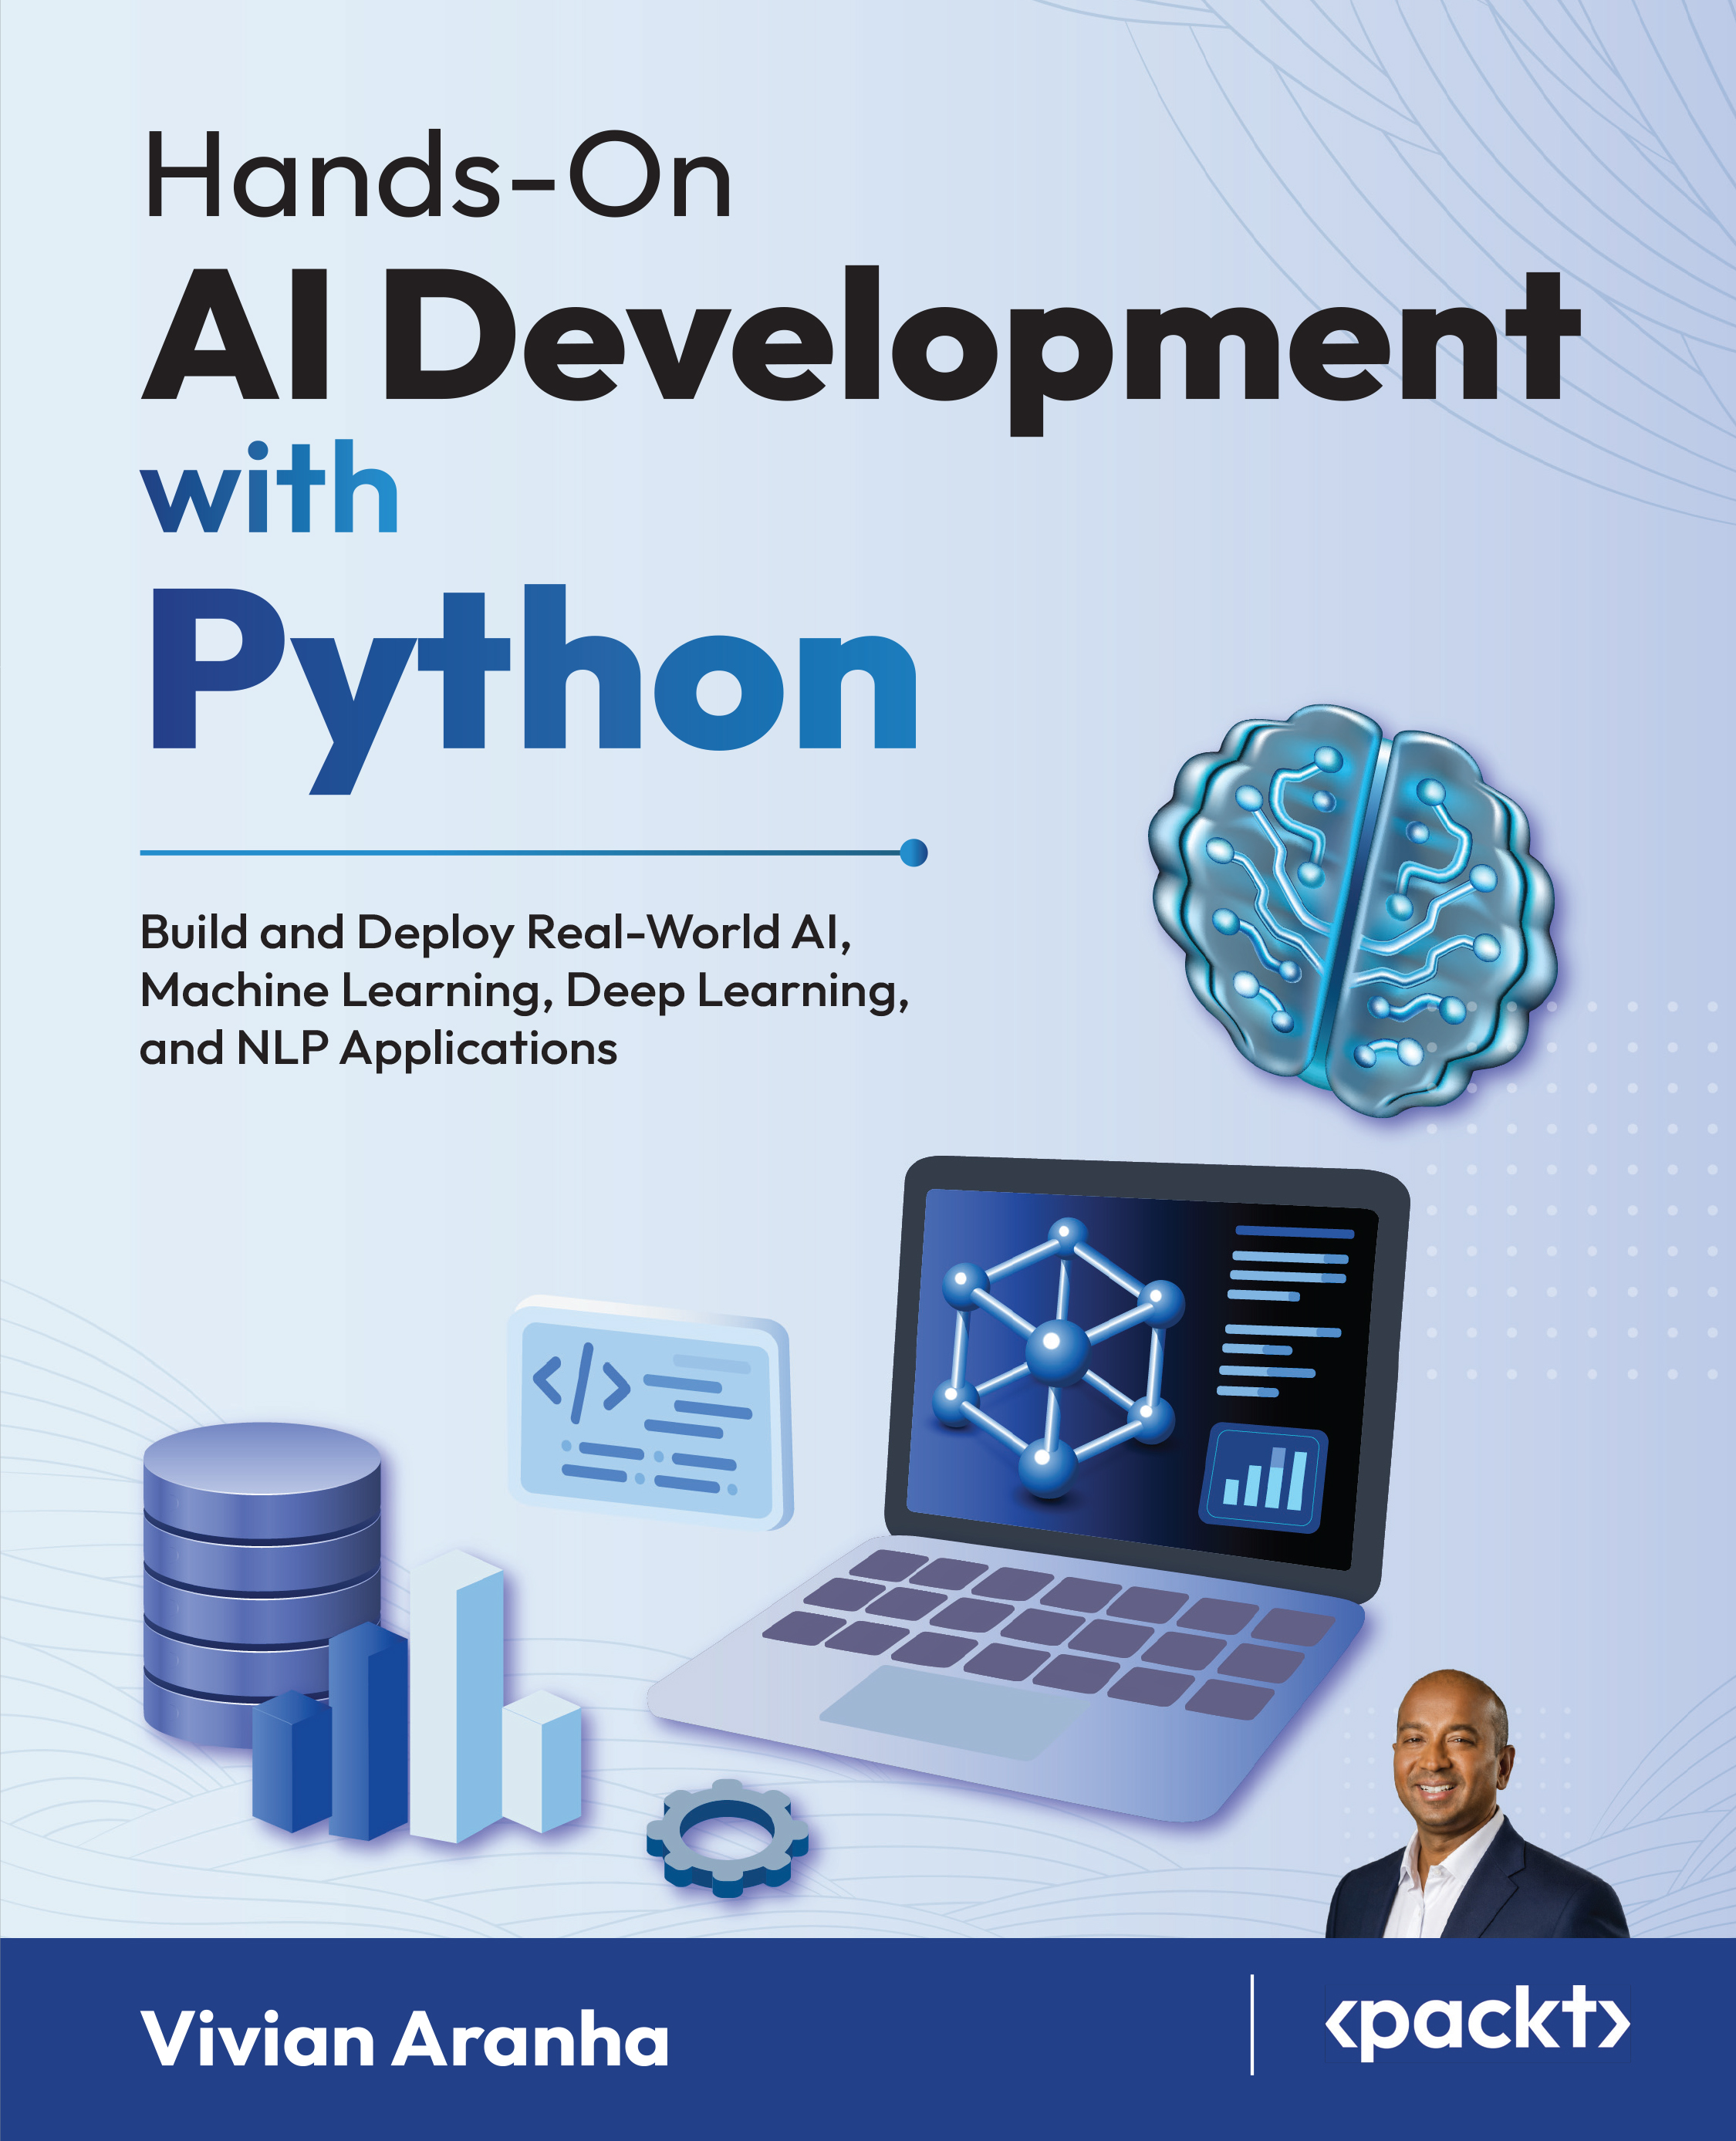
Hands-On AI Development with Python

Hands-On AI Development with Python: Build and Deploy Real-World AI, Machine Learning, Deep Learning, and NLP Applications

Arrow left icon
Profile Icon Vivian Aranha
Arrow right icon
$39.99
Paperback Sep 2026 314 pages 1st Edition
eBook
$28.79 $31.99
Paperback
$39.99
Arrow left icon
Profile Icon Vivian Aranha
Arrow right icon
$39.99
Paperback Sep 2026 314 pages 1st Edition
eBook
$28.79 $31.99
Paperback
$39.99
eBook
$28.79 $31.99
Paperback
$39.99

What do you get with Print?

Product feature icon Instant access to your digital copy whilst your Print order is Shipped
Product feature icon Paperback book shipped to your preferred address
Product feature icon Redeem a companion digital copy on all Print orders
Product feature icon Access this title in our online reader with advanced features
Product feature icon DRM FREE - Read whenever, wherever and however you want
Modal Close icon
Payment Processing...
tick Completed

Shipping Address

Billing Address

Shipping Methods
Table of content icon View table of contents Preview book icon Preview Book

Hands-On AI Development with Python

1

Python for AI and Data Science Foundations

A solid understanding of Python forms the backbone of modern artificial intelligence and data science, enabling practitioners to translate complex ideas into functional solutions. Covering foundational programming concepts alongside essential tools and libraries, Python serves as the primary language for building, testing, and deploying AI-driven applications. Mastery of these basics empowers individuals to efficiently manipulate data, automate tasks, and construct the algorithms that drive intelligent systems.

This chapter focuses on becoming familiar with Python, emphasizing fundamental programming skills that are essential for AI development. It begins with basic Python constructs and progresses toward the use of popular libraries such as NumPy and Pandas for data manipulation.

The topics that will be covered in this chapter are:

  • Introduction to Python and installation
  • Installing Jupyter Notebooks
  • Python basics
  • Working with lists
  • Working with dictionaries
  • Introduction to NumPy
  • Introduction to Pandas
  • Hands-on project: Basic data manipulation and file handling
  • Introduction to exploratory data analysis
  • Data transformation and feature engineering
  • Visualizing data with Matplotlib and Seaborn
  • Hands-on project: Exploratory data analysis on a real dataset

By the end of this chapter, you will be able to:

  • Gain an understanding of basic Python syntax and the process of writing simple Python programs
  • Use variables, data types, and operators effectively
  • Write functions, use loops, and implement control flow using if-else statements
  • Read from and write to files
  • Receive an introduction to the two core libraries, NumPy and Pandas, which are foundational for AI development
  • Load data from various file formats such as CSV and Excel
  • Clean and preprocess data by handling missing values and outliers
  • Create data visualizations to explore relationships between variables
  • Understand basic descriptive statistics and their role in data analysis

Technical requirements

To follow along with the examples and hands-on projects in this chapter, you will need the following:

  • Python 3.8 or above
  • Jupyter Notebook
  • The following Python libraries installed via pip:
    • numpy
    • pandas
    • matplotlib
    • seaborn
    • scikit‑learn

You can install these libraries using the following command:

pip install numpy pandas matplotlib seaborn scikit-learn

Additionally, you will need the following datasets:

A free Kaggle account is required to download these datasets.

All code examples in this chapter assume that you have Jupyter Notebook installed and running. If you have not yet installed Jupyter Notebook, refer to the Installing Jupyter Notebooks section later in this chapter for installation instructions.

Download the code bundle and the PDF version of this book

Your purchase includes a DRM-free PDF copy of this book, the code bundle, and a range of exclusive benefits. To unlock everything, follow the Free benefits with your book section in the Preface.

Introduction to Python and installation

Python is described as a high-level, versatile programming language that is widely used in AI and data science because of its simplicity and the extensive ecosystem of libraries available. The official Python website, https://www.python.org, provides documentation and information about Python, including sections such as getting started, download, docs, and jobs. However, we will only consider the aspects relevant to this book.

To begin working with Python, installation is required. The recommended approach is to visit https://www.python.org/downloads, where a button is available to download the latest version of Python, as shown in Figure 1.1:

Figure 1.1: Python.org downloads section showing the options available

Figure 1.1: Python.org downloads section showing the options available

The Python version can change while you are viewing this chapter.

The website automatically suggests the latest version suitable for the user's operating system, but options for Windows, Linux, macOS, and others are also available.

The screenshot in Figure 1.2 displays the Python releases for Windows page, where various installers for different Windows architectures (64-bit, 32-bit, ARM64) can be selected:

Figure 1.2: Python releases for Windows page showing download links for different Windows installers

Figure 1.2: Python releases for Windows page showing download links for different Windows installers

Similarly, Figure 1.3 shows the download page for macOS, where the latest version of Python can be downloaded directly:

Figure 1.3: Python download page for macOS

Figure 1.3: Python download page for macOS

Once the installer is downloaded, the installation process proceeds as follows:

  1. Click on the downloaded installer to launch it
  2. Read the installation guide
  3. Continue to the next step
  4. Review the history and license agreement
  5. Continue and agree to the license
  6. Click Install
  7. Enter the system password if prompted
  8. Approve the installation of the software

Wait for the installation to complete and close the installer when finished. After installation, to verify if the Python installation was successful, open the terminal and write the following command to display the installed Python version:

python --version

If the terminal displays the version of Python downloaded from the website, then the installation is successful.

Installing Jupyter Notebook

The next required tool is Jupyter Notebooks. The installation instructions are available at https://www.jupyter.org/install. These installation guidelines also include the instructions to download JupyterLab, but our focus is on installing Jupyter Notebooks rather than JupyterLab. Use the following command in the command prompt to install Jupyter Notebooks:

pip install notebook

Once installed, Jupyter Notebook can be launched by running the following command:

jupyter notebook

This command opens a new notebook in the browser, running from the local environment. A new folder can be created on the desktop, and a new notebook can be created inside this folder. The Jupyter Notebook interface allows writing and running Python code interactively.

Let's begin using Jupyter Notebook by writing our first program to print hello world.

Writing your first program in Jupyter Notebook

Let's write a simple program to demonstrate basic Python syntax. In the Jupyter Notebook, create a new folder named code, and create a new file inside it. Write the following code in the cell of the file:

print("Hello World!")

This code uses the print() function to display the string "Hello World!" on the screen. The string is enclosed in double quotes, indicating it is a string data type. The following is the output when you run the code:

Hello World!

The notebook interface provides several ways to execute the code: the play button above the cell, the Run menu with the Run Selected Cell option, or the displayed keyboard shortcut.

The string inside the print function can be modified. For example, changing the text to "Hello My World!" and running the cell again will update the output accordingly. The following code prints "Hello My World!" to the output:

print("Hello My World!")

Further modifications to the string, such as introducing a space within the word "World," will also be reflected in the output after running the cell. The following code prints "Hello My World!" to the output:

print("Hello My World!")

Each time a modification is made to the code cell, an orange indicator appears next to the cell, signaling that changes have occurred. Additionally, when the cell is executed, a number also appears next to the cell, indicating how many times the cell has been run or how many print statements have been executed.

Now that we have understood the setup and print statements, let's move on to Python basic concepts.

Python basics

Now that you have set up Python and Jupyter Notebook, it's time to explore the foundational building blocks of Python programming. Understanding these basics, starting with how to store and work with data through variables and data types, is essential for writing effective Python code. The following sections walk through these concepts with practical examples that you can execute in your notebook.

Variables and data types

Variables are used to store data, and Python supports multiple data types such as integers, floats, strings, and Booleans. In Python, there is no need to declare a variable with a specific type or keyword as required in some other programming languages. Instead, a variable can be created and assigned a value directly.

The following code demonstrates the creation of variables with different data types:

x = 5
y = 2.5
name = "Vivian"
is_student = False

In this example, x is an integer, y is a float, name is a string, and is_student is a Boolean. The Boolean type can have values of either True or False.

Comments in Python are created by placing a hash (#) or pound sign before the text, which is useful for documentation or providing notes to other developers.

Operators

Python provides several arithmetic operators, including addition (+), subtraction (-), multiplication (*), division (/), exponentiation (**), and modulus (%). The following code demonstrates the use of arithmetic operators:

# Operators +, -, *, /, **, %

sum = x + y
sub = x - y
product = x * y
div = x / y
power = x ** 2
mod = x % 2

print(sum)
print(sub)
print(product)
print(div)
print(power)
print(mod)

This will produce the output as:

25

The code adds x and y and stores it in the sum variable, subtracts x and y and stores it in the sub variable, multiplies them and stores the result in the product variable, divides them and stores it in the div variable, raises x to the power of 2 and stores the result in the power variable, and finally calculates the mod of x and y and stores the result in the mod variable.

Control flow

Control flow in Python is managed using if‑else statements and loops such as the for loop and while loop. Let's begin with the if-else statements.

If-else statements

Control flow has if-else statements, which execute certain code based on a particular condition. For example, the following code checks whether x is greater than y and prints a message accordingly:

if x > y:
    print(f"{x} is greater than {y}")
else:
    print(f"{x} is less than or equal to {y}")

The output produced by this is:

5 is greater than 2.5

If the value of y is increased to 20 and the cell is run again, the output changes to indicate that x is less than or equal to y:

5 is less than or equal to 2.5

This is how the if-else statements execute: if the condition in the if block is true, it performs the action; otherwise, it executes the else block.

For loop

The for loop can be used to iterate over a sequence of numbers. The following code demonstrates a for loop that prints numbers from 0 to 4:

for i in range(5):
    print(i)

The output produced by this for loop is:

0
1
2
3
4

This loop iterates through each number from 0 up to, but not including, 5 and prints each number. The value of variable i starts at 0 and increments by 1 on each iteration until it reaches 5. When i becomes 5, it is out of range, and the loop ends.

While loop

The while loop in Python allows repeated execution of a block of code as long as a specified condition remains true. The following code demonstrates a while loop where the variable j is initialized to 0. The loop continues to execute as long as j is less than 5 (j<5). Inside the loop, the current value of j is printed, and then j is incremented by 1 using the increment operator +=:

j = 0
while j < 5:
    print(j)
    j += 1

The output produced is:

0
1
2
3
4

In this example, the output displays the numbers 0 through 4. The loop checks if j is less than 5 before each iteration. When j reaches 5, the condition is no longer true, so the loop exits without printing 5.

Let's change the condition and start value. For example, if j is set to 4 and the loop condition is changed to j < 8, the loop prints the numbers 4, 5, 6, and 7. When j reaches 8, the condition j < 8 is no longer satisfied, so the loop exits as follows:

j = 4
while j < 8:
    print(j)
    j += 1
print("I am out")

The output is as follows:

4
5
6
7
I am out

After the loop, a message is printed to indicate that the loop has finished.

Functions

Functions in Python enable code reusability by encapsulating logic within callable blocks. A function is created using the def keyword, followed by the function name and any parameters inside parentheses. The function block itself is not executed until it is called. The following code defines a function named greet that takes a parameter called name and returns a greeting string:

def greet(name):
    return f"Hello, {name}"

When this function is defined, nothing is executed immediately. Functions exist as callable blocks and require an explicit call to run their logic. To execute the function and display its result, the function can be called within a print statement, passing a string as the argument:

print(greet("Vivian Aranha"))

After we call the function, the following output is produced:

Hello, Vivian Aranha

In this example, the function greet is called with the argument "Vivian Aranha". The function receives this value as the parameter name, constructs the greeting string, and returns it. The print statement then outputs the returned string. We will be using functions a lot throughout this book.

Working with lists

A list in Python is a collection of items. Python lists are dynamic, which means they can grow or shrink as needed. For example, a list called numbers can be created to store an array-like structure containing the numbers one through five. The following code creates a list of five numbers and prints the item at index zero:

numbers = [1, 2, 3, 4, 5]
print(numbers[0])

It prints the item at the given index:

1

In this example, the list contains five items, with indices starting from zero. It prints one as the output because the item at index zero is one. If you want to index the item at index three, use the following:

print(numbers[3])

The item at index three is the number four. Additionally, there are several common list operations in Python such as:

  • append() adds an item to the end of the list
  • remove() deletes a particular item from the list by its value
  • pop() removes an item from a list by its index
  • slice() returns a subset of the list

For example, the following code appends the number six to the end of the list numbers:

numbers.append(6)
print(numbers)

After appending, the list contains one more number at the end:

[1, 2, 3, 4, 5, 6]

The value appended does not have to be in order. We can append any number; for instance, the following code appends the number seven to the list and prints the result, displaying the updated list:

numbers.append(7)
print(numbers)

This appends seven to the end of the list as follows:

[1, 2, 3, 4, 5, 6, 7]

In summary, whatever data is passed to append gets added to the end of the list.

Working with dictionaries

A dictionary in Python stores data as key-value pairs, making it useful for organizing related data. A dictionary is defined using curly brackets, with each item consisting of a key and its corresponding value. For example, a variable named student can be created as a dictionary containing information about a person:

student = {
    "name": "Vivian",
    "age": 40,
    "is_student": True
}

In this dictionary, the keys are "name", "age", and "is_student", and their corresponding values are "Vivian", 40, and True. To display data from a dictionary, the key is used instead of an index. For example, accessing the age of the student is done as follows:

print(student["age"])

It prints the value present in the "age" key:

40

Similarly, accessing the name of the person is done by specifying the "name" key:

print(student["name"])

The output will be:

Vivian

This approach performs the retrieval of values based on their keys, rather than relying on numerical indices.

Introduction to NumPy

NumPy is a powerful library which is used for numerical computation in Python. NumPy provides support for arrays, matrices, and many mathematical functions. Let's see how to create arrays using NumPy.

Creating arrays using NumPy

To create an array using NumPy, the numpy library must be imported first. The following code imports numpy as np, then creates a variable named array using np.array with a list of numbers from 1 to 5. Printing the array displays its contents:

import numpy as np
array = np.array([1, 2, 3, 4, 5])
print(array)

This code prints the array created:

[1 2 3 4 5]

Array operations

NumPy arrays support element-wise operations. For example, to add two arrays together, another array can be created and added to the first. The following code creates a second array with values [5, 4, 3, 2, 1] and prints the result of adding the two arrays:

array_2 = np.array([5, 4, 3, 2, 1])
print(array + array_2)

The output prints the addition of the elements of the two arrays:

[6 6 6 6 6]

The addition operation added the number present at the zero index of array with the number present at the zero index of array_2; similarly, the number present at index one of array got added to the number present at index one of array_2. This is repeated for all the other elements of the two arrays.

If both arrays contain the same numbers, such as [1, 2, 3, 4, 5], the addition produces a new array with each element doubled. The following code demonstrates this:

array_2 = np.array([1, 2, 3, 4, 5])
print(array + array_2)

The output is as follows:

[ 2 4 6 8 10]

Matrix operations

NumPy also supports matrix manipulations, which are useful in machine learning. A matrix in NumPy is defined as a two-dimensional array. For example, a 2 x 2 matrix can be created with the following code:

matrix = np.array([[1, 2], 
                   [3, 4]])

To perform matrix multiplication, the np.dot function is used. Multiplying a matrix by itself produces the matrix product. The following code demonstrates this operation:

print(np.dot(matrix, matrix))

This operation produces the product of the matrix with itself:

[[ 7 10]
 [ 5 22]]

Let us create another matrix, for example with values [[4, 3], [2, 1]], and the product of the two matrices can be computed in the same way:

matrix = np.array([[1, 2],
                   [3, 4]])

matrix_2 = np.array([[4, 3],
                    [2, 1]])

print(np.dot(matrix, matrix_2))

The output matrix produced will be:

[[ 8  5]
 [ 20 13]]

This demonstrates multiplication of two matrices or the product of these two matrices.

Introduction to pandas

Pandas is a library used for data manipulation and analysis. It provides data structures like DataFrames, which make working with structured data easy. This is a significant part of AI applications.

Creating a CSV file

To demonstrate loading and inspecting data, let's create a CSV file. Open Excel and create a blank document. Label the columns as Name, Age, and City to structure the data. Next, populate the data in the columns as shown in Figure 1.4:

Figure 1.4: Excel window showing a worksheet with the columns labelled and populated with data

Figure 1.4: Excel window showing a worksheet with the columns labelled and populated with data

The next step is to save the Excel file as a CSV file. To do that, select the Save As option from File, name the file as you want to (we're naming it data.csv), and choose the format to be saved in CSV (Comma delimited) format as shown in Figure 1.5:

Figure 1.5: Save As dialog box showing the file types available to be saved

Figure 1.5: Save As dialog box showing the file types available to be saved

This will save the file in the required format.

Loading and inspecting data with pandas

To begin working with the data in Python, the pandas library must be imported. The following code imports pandas and assigns it the alias pd:

import pandas as pd

Next, the data is loaded from the CSV file using the read_csv() function. The following code reads the file named data.csv and assigns the resulting DataFrame to the variable data:

data = pd.read_csv('data.csv')

When loading data from a CSV file, the file path depends on where your file is stored. If the CSV file is in the same directory as your Jupyter Notebook, you can simply use the filename as pd.read_csv('data.csv'). However, if the file is located elsewhere on your computer, you need to provide the full path. On Windows, paths can be specified in two ways: using a raw string such as pd.read_csv(r"C:\Users\YourName\Documents\project\data.csv"), or using forward slashes, which work across all operating systems, pd.read_csv("C:/Users/YourName/Documents/project/data.csv").

To inspect the contents of the DataFrame, the head() method is used. This method displays the first few rows of the data:

print(data.head())

The output shows the first rows of the data that were entered in the CSV file, confirming that the data have been read correctly.

Data manipulation in pandas

To perform data manipulation, let's start by selecting a column from the DataFrame that we want to manipulate. For example, to select only the Name column, the following code is used:

name = data['Name']
print(name)

The output will be the column selected:

0      Alice
1        Bob
2    Charlie
3      David
4        Eve
Name: Name, dtype: object

To filter rows based on a condition, such as selecting only those entries where the Age is greater than 18, the following code is used:

filtered_data = data[data['Age'] > 18]
print(filtered_data)

This code will search the data, and where the condition is true (Age > 18), it returns that data:

    Name  Age         City
1    Bob   25  Los Angeles
2 Charlie  19     Chicago
4    Eve   22     Phoenix

The output shows the filtered data set, which includes only those individuals whose age is greater than 18.

To obtain descriptive statistics about the dataset, the describe() method is used. This method provides information such as count, mean, standard deviation, minimum, and maximum values for each numeric column. The following code prints these statistics:

print(data.describe())

The output description is as follows:

               Age
count     5.000000
mean     20.000000
std       3.535534
min      16.000000
25%      18.000000
50%      19.000000
75%      22.000000
max      25.000000

This output includes the count of items, mean, standard deviation, minimum, 25th percentile, median (50th percentile), 75th percentile, and maximum values for the Age column. These statistics are useful for quickly understanding the distribution and summary of the dataset.

Hands-on project: Basic data manipulation and file handling

For this hands-on project, our task is to build a small program that reads from a text file, processes the content, and writes the result to another file. The steps for this exercise are as follows:

  1. Read a text file with multiple lines of numbers (for example, numbers.txt)
  2. Process the data by converting each number to its square
  3. Write the output to another file (for example, output.txt)

To begin, create a new text file named numbers.txt by clicking on New and then Text File. Name this file numbers.txt, populated with numbers such as 1, 2, 3, 4, 5, 10, and 15 as shown in Figure 1.6:

Figure 1.6: Numbers.txt file populated with numerical data

Figure 1.6: Numbers.txt file populated with numerical data

After saving and closing the file, the next step is to open the file in Python. The following code demonstrates how to open the file in read mode (r) using a context manager with, which ensures the file is properly closed after reading:

with open('numbers.txt', 'r') as file:
    numbers = file.readlines()

The numbers.txt file is opened in the file variable, which can be used to interact with the file inside. The numbers variable now contains a list of lines from the file, each representing a number.

Next step is to process the data by converting each number to its square. To do this, we will use list comprehension. The following code strips whitespace from each line, converts it to an integer, squares it, and appends a newline character:

squared_numbers = [str(int(num.strip()) ** 2) + '\n' for num in numbers]

Finally, the last step is to write the squared numbers to a new file named output.txt. The following code uses the write mode (w), which will create the output.txt file if it does not exist:

with open('output.txt', 'w') as file:
    file.writelines(squared_numbers)

After running the program, verify the output file output.txt that will be created. Open it and check if the numbers in the file are squares of the numbers present in the numbers.txt file. The input numbers were 1, 2, 3, 4, 5, 10, and 15; the output file will contain their squares: 1, 4, 9, 16, 25, 100, and 225. This demonstrates successful reading, processing, and writing of data using basic Python file handling and data manipulation techniques.

Introduction to exploratory data analysis

Exploratory data analysis (EDA) is an iterative process to analyze datasets with objectives centered on data exploration, cleaning, and visualization. The process involves loading datasets, handling missing values, and visualizing data using popular libraries such as Pandas, Matplotlib, and Seaborn. This foundational work is essential for understanding data prior to building any machine learning models.

Loading and inspecting data

Pandas is a widely used library that simplifies the process of loading data from different file types, including CSV, Excel, and SQL databases. Let's understand how to load a CSV file.

To obtain a dataset, Kaggle (https://www.kaggle.com) is used as a source. Kaggle provides access to a wide variety of datasets. The process for obtaining a dataset from Kaggle is as follows:

  1. Navigate to the Kaggle website and select Datasets from the left menu
  2. Create an account, if necessary, as most datasets require an account for download
  3. Go to the Education section to find relevant datasets
  4. Select the MBA Admission dataset for this exercise. We are using this one https://www.kaggle.com/datasets/taweilo/mba-admission-dataset
  5. Download the dataset as a zip file
  6. Unzip the downloaded file to extract MBA.csv
  7. Move the extracted MBA.csv file into the project folder on Jupyter Notebook

Figure 1.7 displays the MBA Admission dataset page on Kaggle, showing the dataset description, metadata, and download options:

Figure 1.7: Kaggle MBA Admission dataset page with dataset description, metadata, and download options visible

Figure 1.7: Kaggle MBA Admission dataset page with dataset description, metadata, and download options visible

After preparing the dataset, create a new Python 3 notebook. Follow these steps to load and inspect the data:

  1. Import the pandas library using the alias pd
  2. Load the CSV file using pd.read_csv, specifying the filename mba.csv
  3. Inspect the first few rows of the dataset using the head() method

The following code imports pandas, loads the CSV file, and displays the first few rows of the dataset:

import pandas as pd
data = pd.read_csv('MBA.csv')
data.head()

This produces the output as:

Figure 1.8: Jupyter Notebook cell displaying the first few cells of the MBA admission dataset

Figure 1.8: Jupyter Notebook cell displaying the first few cells of the MBA admission dataset

This approach allows for an initial inspection of the dataset's structure and contents.

Inspecting data structures

To quickly understand the structure of a dataset in pandas, several predefined steps can be followed. These steps provide information about the shape, columns, and summary of the data. To determine the shape of the dataset, which indicates the number of rows and columns, the following code is used:

print(data.shape)

The shape of the current dataset is:

(6194, 10)

The output shows that the dataset contains 6,194 rows and 10 columns.

To view the column names present in the dataset, the following code is executed:

print(data.columns)

The output is as follows:

Index(['application_id', 'gender', 'international', 'gpa', 'major', 'race', 'gmat', 'work_exp', 'work_industry', 'admission'], dtype='object')

This output lists all the columns, including application ID, gender, international status, GPA, major, race, GMAT score, work experience, work industry, and admission status.

To obtain a summary of the entire dataset, including the number of non-null entries and data types for each column, the following code is used:

print(data.info())

The output is as follows:

<class 'pandas.core.frame.DataFrame'>
RangeIndex: 6194 entries, 0 to 6193
Data columns (total 10 columns):
 #   Column          Non-Null Count  Dtype 
---  ------          --------------  ----- 
 0   application_id  6194 non-null   int64 
 1   gender          6194 non-null   object
 2   international   6194 non-null   bool  
 3   gpa             6194 non-null   float64
 4   major           6194 non-null   object
 5   race            4352 non-null   object
 6   gmat            6194 non-null   float64
 7   work_exp        6194 non-null   float64
 8   work_industry   6194 non-null   object
 9   admission       1000 non-null   object
dtypes: bool(1), float64(3), int64(1), object(5)
memory usage: 441.7+ KB
None

This summary provides details about each column, such as the number of non-null values and the data type (e.g., int64, object, bool, float64).

Handling missing data

Upon opening the mba.csv file, it is apparent that some information is missing in various places. Let us proceed to handling this missing data. Create a new notebook in Jupyter Notebook.

The first step is to load the data. The following code imports pandas and reads the MBA.csv file:

import pandas as pd
data = pd.read_csv('MBA.csv')

To verify that the data has been loaded, the head of the DataFrame is printed:

print(data.head())

The output is as follows:

Img

Observe that in the output table, missing values are visible as NaN in the race and admission columns. The next step is to identify the missing data.

Identifying missing data

In real-world datasets, missing values are common, and it is crucial to address them appropriately before conducting further analysis. To identify missing data in the DataFrame, the following code is used:

print(data.isnull().sum())

The isnull() function checks each column for null values, and the sum() function returns the sum of missing entries per column. The following output indicates the number of missing values in each column, such as one missing value in application_id, one in gender, one in international, 1842 in race, and 5194 in admission:

The output is as follows:

application_id       0
gender               0
international        0
gpa                  0
major                0
race              1842
gmat                 0
work_exp             0
work_industry        0
admission         5194
dtype: int64

Now we have the amount of missing data; the next step is to identify how to handle this missing data.

Techniques to handle missing data

Handling missing data is a critical step in preparing datasets for analysis. There are two primary options for addressing missing values: dropping them or filling them with specific values.

The first option is to drop missing values (using the dropna() method), which removes rows and columns containing missing data. The following code creates a new DataFrame, data_clean, by dropping all rows with missing values from the original DataFrame:

data_clean = data.dropna()

This operation results in a dataset where all rows with any missing values have been removed. To verify, run the following code:

print(data_clean.isnull().sum())

Figure 1.9 shows that all the missing values have been dropped:

Figure 1.9: All the missing values have been removed from the dataset

Figure 1.9: All the missing values have been removed from the dataset

The second option is to fill missing values by replacing them (using the fillna() method) with specific values, such as the mean, median, or a placeholder. For example, if the work experience column contains missing information, the following code replaces missing values in the work experience column with the mean value of that column:

data.fillna({'work_exp':data['work_exp'].mean()}, inplace=True)

This command calculates the mean of the work experience values and fills any missing entries in the column with this mean. If there are no missing values in the work experience column, this operation will have no effect. Alternatively, a fixed value can be used as a placeholder. For instance, to assign four years of work experience to all missing entries, the following code can be used:

data.fillna({'work_exp': 4}, inplace=True)

This approach fills all missing values in the work experience column with value 4.

You might be thinking about when to use each of them. So let me make it clear to you. Use dropna() under the following scenarios:

  • When missing values represent less than 5 percent of your dataset
  • When the missing data occurs randomly across the dataset
  • When you have sufficient data and can afford to lose some rows
  • When missing values in a specific column are concentrated in a few records
  • When the analysis requires complete cases without imputed values

Use fillna() under the following scenarios:

  • When missing values represent more than 5 percent of your dataset
  • When removing rows would result in significant data loss
  • When you can reasonably estimate or impute missing values based on the data
  • When you need to preserve all observations for analysis or model training
  • When domain knowledge suggests appropriate replacement values (mean, median, or forward fill)

These methods provide flexibility in handling missing data, allowing either the removal of incomplete records or the imputation of missing values with statistical measures or fixed placeholders.

Data transformation and feature engineering

Data transformation and feature engineering are essential steps in preparing data for machine learning models. This process includes feature scaling and categorical data encoding, also known as one-hot encoding.

Data transformation involves modifying data to meet the requirements of a machine learning model. Many algorithms expect the data to be in a specific format or range, so transforming the data ensures consistency and can improve the model's accuracy.

Feature scaling

Feature scaling is used to ensure that all numerical features are on the same scale. This prevents features with larger magnitudes from dominating those with smaller magnitudes. Normalization is especially important for algorithms such as k-nearest neighbors (K-NN), support vector machines (SVMs), and gradient descent-based methods, including neural networks.

One common method for feature scaling is min-max scaling, which scales features to a specific range, usually 0 to 1. The following code imports the MinMaxScaler from scikit-learn's preprocessing module:

from sklearn.preprocessing import MinMaxScaler

To apply min-max scaling, a MinMaxScaler object is initialized and used to transform the data. For example, if the dataset contains 'Age' and 'Income' as columns, the following code applies min-max normalization to these columns:

scaler = MinMaxScaler()
data[['Age', 'Income']] = scaler.fit_transform(data[['Age', 'Income']])

This code creates a scaler object and transforms the 'Age' and 'Income' columns so that their values are scaled between 0 and 1.

Categorical data encoding

Categorical data encoding is addressed using a technique called one-hot encoding. One-hot encoding converts categorical variables into a set of binary columns, where each category is represented as its own column containing 0s and 1s. Each row will have a 1 in the column corresponding to its category and 0s elsewhere.

One-hot encoding is applied when categorical features are present, particularly for algorithms that require numerical input.

The following code demonstrates how to perform one-hot encoding on a dataset using pandas. In this example, the columns of interest are 'Gender' and 'Purchased':

data_encoded = pd.get_dummies(data, columns=['Gender', 'Purchased'])

This code creates a new DataFrame, data_encoded, in which the 'Gender' and 'Purchased' columns have been transformed into binary columns representing each category.

Visualizing data with matplotlib and seaborn

Visualization is a way to understand trends, distributions, and relationships in data. This is an important skill for an AI engineer, as visualizations can reveal patterns and insights that may not be immediately obvious from raw data.

Matplotlib basics

To begin working with Matplotlib, a dataset is required. Let's use the dataset we had created earlier data.csv, which consisted of columns Name, Age, and City. We'll add two extra columns to the already existing dataset as follows:

Income

Gender

15000

F

30000

M

18000

F

8000

M

28000

F

Table 1.1: Two extra columns to be added to the data.csv file

So, now the CSV file has 5 columns named Name, Age, City, Income, and Gender. Save this CSV file on Jupyter Notebook, and let's get started. To use Matplotlib, the matplotlib.pyplot module is imported as plt. This allows for the creation of various types of plots. The following code imports the Matplotlib pyplot module:

import matplotlib.pyplot as plt

Next, we'll create a line plot for age versus income. To do that, we'll use the plt.plot function, where the first argument is the age data and the second argument is the income data. This produces a line plot that visualizes the relationship between age and income in the dataset:

plt.plot(data['Age'], data['Income'])

To enhance the readability and interpretability of the plot, a title can be added to the age versus income visualization.

plt.title('Age vs Income')

Additionally, labeling the axes clarifies what each axis represents:

plt.xlabel('Age')
plt.ylabel('Income')

Finally, display the plot using plt.show():

plt.show()

But we do not have the data in our code yet! Before plotting, the data must be loaded. This is accomplished by importing the pandas library and reading the CSV file containing the dataset as follows:

import pandas as pd
data = pd.read_csv('data.csv')

The entire code looks like this:

import pandas as pd
import matplotlib.pyplot as plt

data = pd.read_csv('data.csv')
plt.plot(data['Age'], data['Income'])
plt.title('Age vs Income')
plt.xlabel('Age')
plt.ylabel('Income')
plt.show()

The resulting plot displays income as a function of age, with the axes and title clearly labeled. This visualization allows for an immediate understanding of how income varies with age in the dataset. Here's how the resulting plot looks like:

Figure 1.10: Line plot showing the relationship between age and income

Figure 1.10: Line plot showing the relationship between age and income

To visualize categorical data, such as gender distribution, a bar chart can be created. This is accomplished by using the value_counts() method on the gender column to count the occurrences of each category, followed by the plot method with the argument kind='bar'. This approach converts the gender data into a count of values and uses that as input for the bar chart.

The following code generates a bar chart showing the distribution of gender in the dataset, assigns a title to the chart, and displays it:

data['Gender'].value_counts().plot(kind='bar')
plt.title('Gender distribution')
plt.show()

The resulting bar chart displays the counts of females and males in the dataset. In this case, the chart shows that there are three females and two males:

Figure 1.11: Bar chart displaying the distribution of genders in the dataset

Figure 1.11: Bar chart displaying the distribution of genders in the dataset

The bar chart in Figure 1.11 shows the gender distribution, with the x-axis labeled by gender categories and the y-axis indicating the count for each category.

Advanced data visualization with seaborn

Seaborn provides more aesthetic and advanced visualization options compared to basic plotting libraries. For example, Seaborn can generate a correlation heatmap, which visually represents the correlation coefficients between variables in a dataset.

Although the current dataset is too small for a meaningful correlation heat map, here's an example of how such a plot would be created. The following code demonstrates how to use Seaborn to generate a correlation heat map with automatic annotation and a 'coolwarm' color theme:

import seaborn as sns

sns.heatmap(data.corr(), annot=True, cmap='coolwarm')
plt.title('Correlation Matrix')
plt.show()

This code would produce a heat map showing the correlation matrix of the dataset, with annotations for each cell and a color gradient indicating the strength and direction of correlations. However, with a small dataset, this visualization may not be informative.

Instead, a pair plot can be created using Seaborn, which is suitable for the available data. A pair plot visualizes the pairwise relationships between selected variables, displaying distributions along the diagonal and scatter plots for each variable pair. The following code creates a pair plot for the columns 'Age', 'Income', and 'Gender':

sns.pairplot(data[['Age', 'Income', 'Gender']])
plt.show()

This code generates a grid of plots showing the distribution of 'Age' and 'Income', as well as scatter plots of 'Income' versus 'Age', with points colored by 'Gender' if the data supports it. The pair plot provides an overview of how these variables relate to each other in the dataset.

Figure 1.12: Pair plot displaying pairwise relationships between age, income, and gender

Figure 1.12: Pair plot displaying pairwise relationships between age, income, and gender

Descriptive statistics

Descriptive statistics are of two types: basic descriptive statistics and interpretive statistics.

For basic descriptive statistics, it is possible to compute values such as mean, median, mode, and standard deviation to understand the distribution of data. To obtain a summary of these statistics, the describe() function can be used on the dataset. This function provides information including mean, median, mode, standard deviation, minimum, and maximum values, as well as other descriptive metrics. Running data.describe() will output this summary, offering a comprehensive description of the dataset.

Interpretive statistics involves understanding the meaning of these computed values. The mean, median, and mode indicate the central tendency of the data. The standard deviation measures the spread, showing how the data is distributed. Percentiles, such as the minimum, maximum, 25th, 50th, and 75th percentiles, provide further insight into the distribution of values within the dataset.

Hands-on project: Exploratory data analysis of a real dataset

For this hands-on project, our task is to perform exploratory data analysis on the Titanic dataset to understand the survival rate across various features, including age, gender, and class. The steps for this project are as follows:

  • Load the Titanic dataset using Pandas
  • Clean the data by handling missing values, such as missing age values
  • Explore the dataset
  • Visualize the data

Let's start by accessing the dataset. Visit https://www.kaggle.com/datasets, and search for Titanic. The one we are using here is https://www.kaggle.com/datasets/heptapod/titanic. Extract the file and move it to Jupyter Notebook. Rename it to titanic.csv. Create a new Notebook for the hands-on project.

Please note that the dataset consists of a column named 2urvived, which should have been Survived. Please rename the column to Survived and follow the steps as mentioned.

The initial requirement is to import the necessary libraries as follows:

import pandas as pd
import seaborn as sns
import matplotlib.pyplot as plt

The first step in the analysis is to load the Titanic dataset. This is accomplished by reading the CSV file named titanic.csv using pandas:

data = pd.read_csv('titanic.csv')

The next step is to handle missing values in the dataset. The focus is on the 'Age' column. All missing values in the 'Age' column are replaced with the mean age. This is done by obtaining all the age data, calculating the mean, and filling the missing values with this mean. The operation is performed in place:

data.fillna({'Age':data['Age'].mean()}, inplace=True)

The analysis then proceeds to examine the survival rate. The following code prints the normalized value counts for the 'Survived' column, which provides the survival rates:

print(data['Survived'].value_counts(normalize=True))

The next step is to group the data by gender and passenger class to analyze survival rates across these categories. The code groups the data by 'Sex' and 'Pclass', then calculates the mean of the 'survived' column for each group:

print(data.groupby(['Sex', 'Pclass'])['Survived'].mean())

The next task is to visualize the data. A bar plot is created using Seaborn to show the survival rate by gender. The x-axis represents gender, and the y-axis represents the survival rate:

sns.barplot(x='Sex', y='Survived', data=data)
plt.title('Survival Rate by Gender')
plt.show()

The output generated is as follows:

Figure 1.13: Bar chart displaying survival rates by gender for Titanic passengers

Figure 1.13: Bar chart displaying survival rates by gender for Titanic passengers

The plot in Figure 1.13 displays the survival rate by gender, with the x-axis labeled as "Sex" and the y-axis labeled as "Survived". The bar for females is around 0.5-0.6 and the bar for males is about 0.15.

The output printed is:

Survived
0    0.636364
1    0.363636
Name: proportion, dtype: float64
sex     Pclass
female   1         0.968085
         2         0.921053
        3         0.500000
male    1         0.368852
        2         0.157407
        3         0.135447
Name: Survived, dtype: float64

The printed output first displays the survival data, showing the proportion of survivors and non-survivors in the dataset. This is followed by a breakdown of survival rates by gender and passenger class, indicating the number and ratio of females and males, as well as their respective survival rates across different classes.

The bar chart visualizes the survival rate by gender. In this particular dataset, the plot indicates that all females survived, while it appears that no males survived according to the data shown.

The code and output in the notebook cell demonstrate the sequence of steps taken: importing the necessary libraries, loading the Titanic dataset, filling missing age values with the mean, printing normalized survival counts, grouping by gender and passenger class to calculate survival means, and finally plotting the survival rate by gender.

Summary

Python for AI and Data Science Foundations introduces the essential building blocks of Python programming, from basic syntax, variables, and control flow to functions and core data structures such as lists and dictionaries. The chapter guides through practical steps for setting up Python and Jupyter Notebooks and progresses to foundational libraries like NumPy and Pandas for array operations, data manipulation, and handling missing values. Key concepts in data transformation, feature engineering, and visualization using Matplotlib and Seaborn are demonstrated, culminating in hands-on projects that apply these techniques to real-world datasets, including exploratory analysis of the Titanic dataset.

In the next chapter, Chapter 2, Machine Learning and Classification Models, we will move from these foundations into machine learning, building your first regression and classification models.

Left arrow icon Right arrow icon
Download code icon Download Code

Key benefits

  • Build portfolio-ready AI projects with Python, data analysis, ML, NLP, and deployment
  • Use pandas, NumPy, Matplotlib, Seaborn, scikit-learn, and neural networks on real datasets
  • Move from zero programming to practical AI workflows through guided, hands-on projects

Description

Many beginners learn Python syntax or AI theory but struggle to build projects they can explain, demonstrate, and add to a portfolio. This book closes that gap by turning AI fundamentals into practical Python projects that move from first code to working AI deployment. You will begin with Python setup and the foundations needed for AI development, including variables, data types, functions, control flow, and libraries. You will then use NumPy and pandas to load, clean, transform, and inspect datasets, before applying EDA with Matplotlib and Seaborn to uncover patterns, relationships, and missing values. With these foundations in place, you will build machine learning models using scikit-learn. You will work through prediction and classification workflows, prepare features, train models, evaluate results, and understand how choices affect accuracy and usefulness. The book introduces neural networks in a beginner-friendly way, showing how layers, training, and performance connect in applied AI work. You will create an NLP sentiment analysis project, turning text into features and classifying opinions. Finally, you will package a trained model as a web service used beyond a notebook. By the end, you will have a practical AI portfolio and a strong foundation for machine learning, data science, and applied AI development.

Who is this book for?

This book is for absolute beginners, students, career changers, junior developers, analysts, data enthusiasts, and hobbyists who want a practical entry point into AI development. It is useful for readers building their first AI portfolio, exploring machine learning or data science roles, or learning how trained models become simple applications. No prior programming or AI experience is required.

What you will learn

  • Set up Python for hands-on AI and machine learning projects
  • Use core syntax, data types, control flow, functions, and libraries for AI work
  • Clean, transform, analyze, and visualize data with NumPy, pandas, Matplotlib, and Seaborn
  • Apply EDA to find patterns, missing values, relationships, and features
  • Build prediction and classification models using scikit-learn workflows
  • Understand neural network basics and practical deep learning concepts
  • Create an NLP sentiment analysis model from text data
  • Deploy a trained AI model as a web service
Estimated delivery fee Deliver to Taiwan

Standard delivery 10 - 13 business days

$12.95

Premium delivery 5 - 8 business days

$45.95
(Includes tracking information)

Product Details

Country selected
Publication date, Length, Edition, Language, ISBN-13
Publication date : Sep 25, 2026
Length: 314 pages
Edition : 1st
Language : English
ISBN-13 : 9781808088537
Category :
Languages :
Concepts :
Tools :

What do you get with Print?

Product feature icon Instant access to your digital copy whilst your Print order is Shipped
Product feature icon Paperback book shipped to your preferred address
Product feature icon Redeem a companion digital copy on all Print orders
Product feature icon Access this title in our online reader with advanced features
Product feature icon DRM FREE - Read whenever, wherever and however you want
Modal Close icon
Payment Processing...
tick Completed

Shipping Address

Billing Address

Shipping Methods
Estimated delivery fee Deliver to Taiwan

Standard delivery 10 - 13 business days

$12.95

Premium delivery 5 - 8 business days

$45.95
(Includes tracking information)

Product Details

Publication date : Sep 25, 2026
Length: 314 pages
Edition : 1st
Language : English
ISBN-13 : 9781808088537
Category :
Languages :
Concepts :
Tools :

Packt Subscriptions

See our plans and pricing
Modal Close icon
$19.99 billed monthly
Feature tick icon Unlimited access to Packt's library of 7,000+ practical books and videos
Feature tick icon Constantly refreshed with 50+ new titles a month
Feature tick icon Exclusive Early access to books as they're written
Feature tick icon Solve problems while you work with advanced search and reference features
Feature tick icon Offline reading on the mobile app
Feature tick icon Simple pricing, no contract
$199.99 billed annually
Feature tick icon Unlimited access to Packt's library of 7,000+ practical books and videos
Feature tick icon Constantly refreshed with 50+ new titles a month
Feature tick icon Exclusive Early access to books as they're written
Feature tick icon Solve problems while you work with advanced search and reference features
Feature tick icon Offline reading on the mobile app
Feature tick icon Choose a DRM-free eBook or Video every month to keep
Feature tick icon PLUS own as many other DRM-free eBooks or Videos as you like for just $5 each
Feature tick icon Exclusive print discounts
$279.99 billed in 18 months
Feature tick icon Unlimited access to Packt's library of 7,000+ practical books and videos
Feature tick icon Constantly refreshed with 50+ new titles a month
Feature tick icon Exclusive Early access to books as they're written
Feature tick icon Solve problems while you work with advanced search and reference features
Feature tick icon Offline reading on the mobile app
Feature tick icon Choose a DRM-free eBook or Video every month to keep
Feature tick icon PLUS own as many other DRM-free eBooks or Videos as you like for just $5 each
Feature tick icon Exclusive print discounts

Table of Contents

8 Chapters
Chapter 1: Python for AI and Data Science Foundations Chevron down icon Chevron up icon
Chapter 2: Machine Learning and Classification Models Chevron down icon Chevron up icon
Chapter 3: Neural Networks and Natural Language Processing Chevron down icon Chevron up icon
Chapter 4: Deploying an AI Model as a Web Service Chevron down icon Chevron up icon
Chapter 5: Supervised Learning and Forecasting Projects Chevron down icon Chevron up icon
Chapter 6: Vision, Language, Recommendations and AI Projects Chevron down icon Chevron up icon
Chapter 7: Unlock the Code Bundle and the PDF Version Chevron down icon Chevron up icon
Index Chevron down icon Chevron up icon
Get free access to Packt library with over 7500+ books and video courses for 7 days!
Start Free Trial

FAQs

What is the digital copy I get with my Print order? Chevron down icon Chevron up icon

When you buy any Print edition of our Books, you can redeem (for free) the eBook edition of the Print Book you’ve purchased. This gives you instant access to your book when you make an order via PDF, EPUB or our online Reader experience.

What is the delivery time and cost of print book? Chevron down icon Chevron up icon

Shipping Details

USA:

'

Economy: Delivery to most addresses in the US within 10-15 business days

Premium: Trackable Delivery to most addresses in the US within 3-8 business days

UK:

Economy: Delivery to most addresses in the U.K. within 7-9 business days.
Shipments are not trackable

Premium: Trackable delivery to most addresses in the U.K. within 3-4 business days!
Add one extra business day for deliveries to Northern Ireland and Scottish Highlands and islands

EU:

Premium: Trackable delivery to most EU destinations within 4-9 business days.

Australia:

Economy: Can deliver to P. O. Boxes and private residences.
Trackable service with delivery to addresses in Australia only.
Delivery time ranges from 7-9 business days for VIC and 8-10 business days for Interstate metro
Delivery time is up to 15 business days for remote areas of WA, NT & QLD.

Premium: Delivery to addresses in Australia only
Trackable delivery to most P. O. Boxes and private residences in Australia within 4-5 days based on the distance to a destination following dispatch.

India:

Premium: Delivery to most Indian addresses within 5-6 business days

Rest of the World:

Premium: Countries in the American continent: Trackable delivery to most countries within 4-7 business days

Asia:

Premium: Delivery to most Asian addresses within 5-9 business days

Disclaimer:
All orders received before 5 PM U.K time would start printing from the next business day. So the estimated delivery times start from the next day as well. Orders received after 5 PM U.K time (in our internal systems) on a business day or anytime on the weekend will begin printing the second to next business day. For example, an order placed at 11 AM today will begin printing tomorrow, whereas an order placed at 9 PM tonight will begin printing the day after tomorrow.


Unfortunately, due to several restrictions, we are unable to ship to the following countries:

  1. Afghanistan
  2. American Samoa
  3. Belarus
  4. Brunei Darussalam
  5. Central African Republic
  6. The Democratic Republic of Congo
  7. Eritrea
  8. Guinea-bissau
  9. Iran
  10. Lebanon
  11. Libiya Arab Jamahriya
  12. Somalia
  13. Sudan
  14. Russian Federation
  15. Syrian Arab Republic
  16. Ukraine
  17. Venezuela
What is custom duty/charge? Chevron down icon Chevron up icon

Customs duty are charges levied on goods when they cross international borders. It is a tax that is imposed on imported goods. These duties are charged by special authorities and bodies created by local governments and are meant to protect local industries, economies, and businesses.

Do I have to pay customs charges for the print book order? Chevron down icon Chevron up icon

The orders shipped to the countries that are listed under EU27 will not bear custom charges. They are paid by Packt as part of the order.

List of EU27 countries: www.gov.uk/eu-eea:

A custom duty or localized taxes may be applicable on the shipment and would be charged by the recipient country outside of the EU27 which should be paid by the customer and these duties are not included in the shipping charges been charged on the order.

How do I know my custom duty charges? Chevron down icon Chevron up icon

The amount of duty payable varies greatly depending on the imported goods, the country of origin and several other factors like the total invoice amount or dimensions like weight, and other such criteria applicable in your country.

For example:

  • If you live in Mexico, and the declared value of your ordered items is over $ 50, for you to receive a package, you will have to pay additional import tax of 19% which will be $ 9.50 to the courier service.
  • Whereas if you live in Turkey, and the declared value of your ordered items is over € 22, for you to receive a package, you will have to pay additional import tax of 18% which will be € 3.96 to the courier service.
How can I cancel my order? Chevron down icon Chevron up icon

Cancellation Policy for Published Printed Books:

You can cancel any order within 1 hour of placing the order. Simply contact customercare@packt.com with your order details or payment transaction id. If your order has already started the shipment process, we will do our best to stop it. However, if it is already on the way to you then when you receive it, you can contact us at customercare@packt.com using the returns and refund process.

Please understand that Packt Publishing cannot provide refunds or cancel any order except for the cases described in our Return Policy (i.e. Packt Publishing agrees to replace your printed book because it arrives damaged or material defect in book), Packt Publishing will not accept returns.

What is your returns and refunds policy? Chevron down icon Chevron up icon

Return Policy:

We want you to be happy with your purchase from Packtpub.com. We will not hassle you with returning print books to us. If the print book you receive from us is incorrect, damaged, doesn't work or is unacceptably late, please contact Customer Relations Team on customercare@packt.com with the order number and issue details as explained below:

  1. If you ordered (eBook, Video or Print Book) incorrectly or accidentally, please contact Customer Relations Team on customercare@packt.com within one hour of placing the order and we will replace/refund you the item cost.
  2. Sadly, if your eBook or Video file is faulty or a fault occurs during the eBook or Video being made available to you, i.e. during download then you should contact Customer Relations Team within 14 days of purchase on customercare@packt.com who will be able to resolve this issue for you.
  3. You will have a choice of replacement or refund of the problem items.(damaged, defective or incorrect)
  4. Once Customer Care Team confirms that you will be refunded, you should receive the refund within 10 to 12 working days.
  5. If you are only requesting a refund of one book from a multiple order, then we will refund you the appropriate single item.
  6. Where the items were shipped under a free shipping offer, there will be no shipping costs to refund.

On the off chance your printed book arrives damaged, with book material defect, contact our Customer Relation Team on customercare@packt.com within 14 days of receipt of the book with appropriate evidence of damage and we will work with you to secure a replacement copy, if necessary. Please note that each printed book you order from us is individually made by Packt's professional book-printing partner which is on a print-on-demand basis.

What tax is charged? Chevron down icon Chevron up icon

Currently, no tax is charged on the purchase of any print book (subject to change based on the laws and regulations). A localized VAT fee is charged only to our European and UK customers on eBooks, Video and subscriptions that they buy. GST is charged to Indian customers for eBooks and video purchases.

What payment methods can I use? Chevron down icon Chevron up icon

You can pay with the following card types:

  1. Visa Debit
  2. Visa Credit
  3. MasterCard
  4. PayPal
What is the delivery time and cost of print books? Chevron down icon Chevron up icon

Shipping Details

USA:

'

Economy: Delivery to most addresses in the US within 10-15 business days

Premium: Trackable Delivery to most addresses in the US within 3-8 business days

UK:

Economy: Delivery to most addresses in the U.K. within 7-9 business days.
Shipments are not trackable

Premium: Trackable delivery to most addresses in the U.K. within 3-4 business days!
Add one extra business day for deliveries to Northern Ireland and Scottish Highlands and islands

EU:

Premium: Trackable delivery to most EU destinations within 4-9 business days.

Australia:

Economy: Can deliver to P. O. Boxes and private residences.
Trackable service with delivery to addresses in Australia only.
Delivery time ranges from 7-9 business days for VIC and 8-10 business days for Interstate metro
Delivery time is up to 15 business days for remote areas of WA, NT & QLD.

Premium: Delivery to addresses in Australia only
Trackable delivery to most P. O. Boxes and private residences in Australia within 4-5 days based on the distance to a destination following dispatch.

India:

Premium: Delivery to most Indian addresses within 5-6 business days

Rest of the World:

Premium: Countries in the American continent: Trackable delivery to most countries within 4-7 business days

Asia:

Premium: Delivery to most Asian addresses within 5-9 business days

Disclaimer:
All orders received before 5 PM U.K time would start printing from the next business day. So the estimated delivery times start from the next day as well. Orders received after 5 PM U.K time (in our internal systems) on a business day or anytime on the weekend will begin printing the second to next business day. For example, an order placed at 11 AM today will begin printing tomorrow, whereas an order placed at 9 PM tonight will begin printing the day after tomorrow.


Unfortunately, due to several restrictions, we are unable to ship to the following countries:

  1. Afghanistan
  2. American Samoa
  3. Belarus
  4. Brunei Darussalam
  5. Central African Republic
  6. The Democratic Republic of Congo
  7. Eritrea
  8. Guinea-bissau
  9. Iran
  10. Lebanon
  11. Libiya Arab Jamahriya
  12. Somalia
  13. Sudan
  14. Russian Federation
  15. Syrian Arab Republic
  16. Ukraine
  17. Venezuela
Modal Close icon
Modal Close icon