Search icon
Arrow left icon
All Products
Best Sellers
New Releases
Books
Videos
Audiobooks
Learning Hub
Newsletters
Free Learning
Arrow right icon
Moodle Theme Development

You're reading from  Moodle Theme Development

Product type Book
Published in Dec 2016
Publisher
ISBN-13 9781786463210
Pages 302 pages
Edition 1st Edition
Languages
Author (1):
Silvina Paola Hillar Silvina Paola Hillar
Profile icon Silvina Paola Hillar

Table of Contents (19) Chapters

Moodle Theme Development
Credits
About the Author
Acknowledgements
About the Reviewer
www.PacktPub.com
Dedication
Preface
1. An Introduction to Moodle 3 and MoodleCloud 2. Themes in Moodle 3 on-premises and MoodleCloud 3. Setting Up Logos in Moodle Themes 4. Customizing the Header and the Footer 5. Customizing Elements with CSS 6. Locating, Editing, and Using New Icons 7. Optimizing Themes for Mobile Devices 8. Exploring Layouts 9. Course Formats 10. Extending Moodle Theming to Specific Sections Test Your Knowledge Answers

Chapter 4. Customizing the Header and the Footer

In this chapter, we will customize the header and the footer by adding information to our Moodle on-premises or MoodleCloud. We can easily add links or another type of information to the top and the bottom, using the header and the footer of our Moodle course. Therefore, we will work on both of them since there are some slight differences, especially since MoodleCloud has some limitations. Therefore, we will learn how to do it in both of them.

In Moodle on-premises, we will work with the Essential theme, which is complete and lets us work with plenty of customizations. Furthermore, the Essential theme is also available through most Moodle hosting companies. We will work with online HTML editors to test the customization before adding them to the Moodle course.

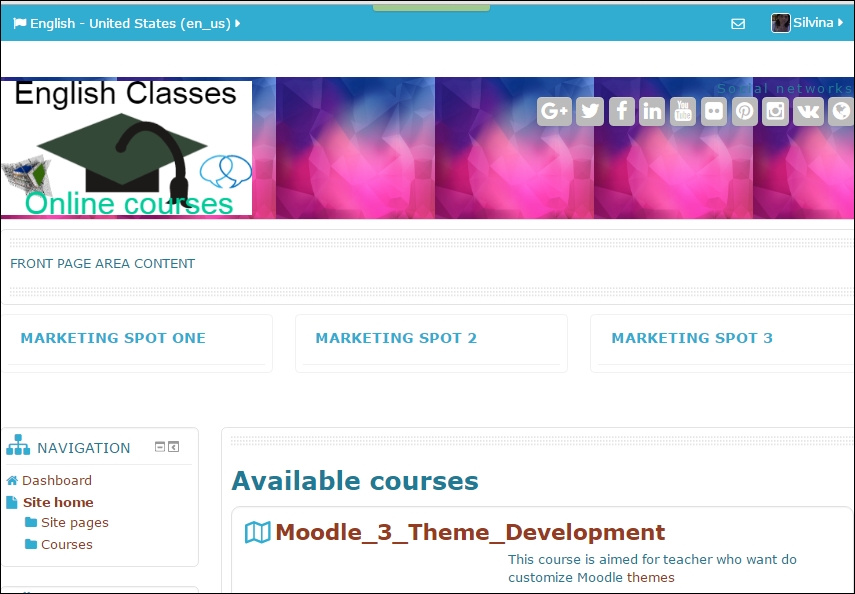
We will make hyperlinks to social networks in the header of Moodle on-premises, so that Moodle can communicate or look for more information. We can also create a profile on these networks...

Adding footnotes in MoodleCloud


We will customize the footer in MoodleCloud; we can add both text and an image using the HTML editor. We can also embed them using some code if desired. So, according to the profile of the Moodle course, we will add a footnote. It will appear throughout the course. It is different from a logo, which appears on two pages only.

In order to add a footnote, these are the steps that we have to follow:

  1. Enter the Moodle course in MoodleCloud.

  2. Click on Appearance | Themes | MoodleCloud (which is the theme to customize).

  3. Scroll down the page and fill in the Footnote block, as shown in the following screenshot:

  4. Click on the show more buttons icon to customize the HTML code. The following HTML editor appears:

  5. Click on the HTML icon to customize the style of the letters.

  6. Open a new tab and go to the following website: http://www.w3schools.com/html/default.asp . There is a guide on working with HTML code; try it online before working in the editor.

  7. In the left-hand margin...

Adding social networks to header


We can add social network icons to the header of Moodle on-premises. Social networking is a must nowadays and there are interactions every second using these networks, so we cannot make a Moodle course without them. We must bear in mind the age of the users of the Moodle course since they may or may not be allowed to use these networks, especially if the organization is a primary or secondary school.

If the Moodle course is targeted at people who are allowed to visit social networking sites it is not a problem whatsoever, since most people have a large number of them.

We will add the icons for social networks to the header of the Essential theme. This can be done in a very simple way. Follow these steps to add social network icons:

  1. Under Administration, click on Site administration | Appearance | Themes | Essential | Header.

  2. Scroll down the page until you get to Engage your users with social networking, as shown in the following screenshot:

  3. Complete the Website...

Customizing the footer in Moodle on-premises Essential theme


We can add a footnote to the footer in Moodle on-premises. Whatever we write as a footnote appears throughout the Moodle course, so we need to choose a message or a slogan that represents the profile of the Moodle site. In this example, we are going to add a message, as we have already done in MoodleCloud. So we enter Moodle on-premises and follow these steps:

  1. Under Administration, click on Site administration | Appearance | Themes | Essential | Footer.

  2. Complete the Copyright block by writing the name of the organization.

  3. Add an image in the Footer block. Go to the following website: https://icons8.com/web-app/for/ios7/school .

  4. Click on the desired icon, as shown in the following screenshot:

  5. The selected icon appears in the right-hand margin, as shown in the previous screenshot.

  6. A menu appears on the icon. The icon can be customized if desired.

  7. After customizing the icon, click on Generate HTML. A window pops up, showing the code.

  8. Highlight...

Editing front page area content


We can edit the front page area content using four blocks. The blocks that we will edit are the ones located under the heading. We can add any valuable information or images to enhance the look and feel of the Moodle course. In this case, we will also customize the Essential theme for Moodle on-premises. The blocks that we will work with are FRONT PAGE AREA CONTENT, MARKETING SPOT ONE, MARKETING SPOT 2, and MARKETING SPOT 3. They are shown in the following screenshot:

The screenshot shows the location of the blocks to edit. The location described in the section that we will work with is the full width of the page between the slide show and the Marketing spots. The following steps are a guide to how to customize and edit these blocks using information related to the Moodle course. These are the steps that we have to follow:

  1. Under Administration, click on Site administration | Appearance | Themes | Essential | Front page.

  2. Scroll down the page and complete the...

Creating a slide show in the front page area content


We can create a slide show in the front page area content. We can design the slides in the Moodle course. We will continue customizing the Essential theme in Moodle on-premises. The slides form a dynamic slide show of up to sixteen slides in order to promote important elements of the site. They can also add more information about the services offered as well as the courses depending on whom the Moodle course is for.

In the example, we will create four slides. If no image is selected, the Moodle icon is to be shown, therefore it is recommended to add an image together with captions.

In order to create a slide show, these are the steps that we have to follow:

  1. Under Administration, click on Site administration| Appearance| Themes| Essential | Slide show.

  2. Click on the down arrow next to the Number of slides block and choose 4 (the maximum number is 16), as shown in the following screenshot:

  3. Scroll down the page and choose the Slide caption text...

Test your knowledge


A. If we customize the footnote in MoodleCloud ...

  1. ...we can see it throughout the course.

  2. ...we can see it in the header of the front page only.

  3. ...we can see it on the login page only.

B. We can add links to social networks in the Essential theme in Moodle on-premises by ...

  1. ...editing HTML code.

  2. ...adding the URL to the belonging blocks under Header within Theme | Appearance.

  3. ...editing widgets from websites and pasting the HTML code.

C. If we want to add an image to the footer ...

  1. ...we can do it using HTML code.

  2. ...we can upload an image to the course and use it as the footer.

  3. ...we can't do it.

D. When we customize the front page area we can see it in ...

  1. ...the whole course.

  2. ...site home.

  3. ...the login page.

E. We can add ...

  1. ...not more than 16 slides.

  2. ...however many slides we want.

  3. ...four slides, as shown in the example.

Summary


In this chapter, we have learned how to add images and text to the footer and the header. We have also added hyperlinks to social networks in Moodle on-premises. As well as that, we have also added a slide show and modified the front page, changing the look and feel of the Moodle course. We have made some changes to MoodleCloud, taking into account its limitations. There are customizable areas, though.

We are ready to keep on changing the look and feel of Moodle on-premises and MoodleCloud in the next chapter, in which we will customize elements with CSS.

lock icon The rest of the chapter is locked
You have been reading a chapter from
Moodle Theme Development
Published in: Dec 2016 Publisher: ISBN-13: 9781786463210
Register for a free Packt account to unlock a world of extra content!
A free Packt account unlocks extra newsletters, articles, discounted offers, and much more. Start advancing your knowledge today.
Unlock this book and the full library FREE for 7 days
Get unlimited access to 7000+ expert-authored eBooks and videos courses covering every tech area you can think of
Renews at $15.99/month. Cancel anytime}