


Native compilation
When .NET code is compiled, it is compiled into Microsoft Intermediate Language (MSIL). MSIL gets interpreted by a JIT compiler when it is needed. The JIT compiler then compiles the necessary MSIL code into native binary code. Subsequent calls to the same code call the binary version of the code, not the MSIL version of the code. This means that MSIL code is always slower than native code, as it is compiled to native on the first run.
JIT code has the advantage of being cross-platform code at the expense of longer startup times. The code of an MSIL assembly that runs is compiled to native code by the JIT compiler. The native code is optimized by the JIT compiler for the target hardware it is running on.
By default, UWP applications are compiled to native code using .NET Native, while iOS applications are compiled to native code via Xamarin/Xamarin.Forms. Microsoft .NET Core can also be compiled into native code.
Performing native compilation of .NET Core applications
When using dotnet to compile an assembly to native code, you will need to specify a target framework. For a list of supported target frameworks, please refer to https://docs.microsoft.com/en-us/dotnet/standard/frameworks. You will also need to specify a Runtime Identifier (RID). For a list of supported RIDs, please refer to https://docs.microsoft.com/en-us/dotnet/core/rid-catalog.
Note
At the time of writing, native compilation against .NET 5.0 does have its issues. So, to keep things simple, we will demonstrate native compilation into a single executable against netcoreapp3.1 and win10-x64.
To demonstrate the compilation of Microsoft .NET Core applications into natively compiled single executables, we will write a simple demonstration application that traverses a directory structure and converts audio files from one format into another:
- Start a new console application and target .NET 6.
- Visit https://ffmpeg.org/download.html and download
ffmpegfor your operating system. Mine is Windows 10. - On Windows 10, extract the
ffmpegfiles into theC:\Tools\ffmpegfolder. Add the followingusingstatements to the top of theProgram.csfile:using System; using System.Diagnostics; using System.IO;
- We will be batch processing audio files in a folder hierarchy on our local systems. Here, the
usingstatements listed will help us debug our code and perform I/O on the filesystem. Now, at the top of theProgramclass, add the following three fields:private static string _baseDirectory = string.Empty; private static string _sourceExtension = string.Empty; private static string _destinationExtension = string .Empty;
- The
BaseDirectorymember holds the starting directory that will be processed.sourceExtensionholds the extension of the file type, such as.wav, we are after converting to, whiledestinationExtensionholds the extension, such as.ogg, of the file type we are after converting to. Update yourMainmethod so that it looks as follows:static void Main(string[] args) { Console.Write("Enter Source Directory: "); _baseDirectory = Console.ReadLine(); Console.Write("Enter Source Extension: "); _sourceExtension = Console.ReadLine(); Console.Write("Enter Destination Extension: "); _destinationExtension = Console.ReadLine(); new Program().BatchConvert(); } - In our
Mainmethod, we have requested that the user enters the source directory, source extension, and destination extension. Then, we set out member variables and called theBatchConvertmethod. Let's add ourBatchConvertmethod:private void BatchConvert() { var directory = new DirectoryInfo(_baseDirectory); ProcessFolder(directory); } - The
BatchConvertmethod creates a newDirectoryInfoobject calleddirectoryand then passes thedirectoryobject into theProcessFoldermethod. Let's add this method now:private void ProcessFolder(DirectoryInfo directoryInfo) { Console.WriteLine($"Processing Directory: {directoryInfo.FullName}"); var fileInfos = directoryInfo.EnumerateFiles(); var directorieInfos = directoryInfo. EnumerateDirectories(); foreach (var fileInfo in fileInfos) if (fileInfo.Extension.Replace(".", "") == sourceExtension) ConvertFile(fileInfo); foreach (var dirInfo in directorieInfos) ProcessFolder(dirInfo); } - The
ProcessFoldermethod outputs a message to the screen so that the user knows what folder is being processed. Then, it obtains an enumeration of theFileInfoandDirectoryInfoobjects from thedirectoryInfoparameter. After this, it converts all the files in that folder that have the required source file extension. Once all the files have been processed, each of theDirectoryInfoobjects is processed by calling theProcessFoldermethod recursively. Finally, let's add ourConvertFilemethod:private void ConvertFile(FileInfo fileInfo) { } - Our
ConvertFilemethod takes aFileInfoparameter. This parameter contains the file that is to undergo conversion. The remaining code will be added to thisConvertFilemethod. Add the following three variables:var timeout = 10000; var source = $"\"{fileInfo.FullName}\""; var destination = $"\"{fileInfo.FullName.Replace (_sourceExtension, _destinationExtension)}\""; - The
timeoutvariable is set to 10 seconds. This gives the process 10 seconds to process each file. Thesourcevariable contains the full name of the file to be converted, while thedestinationvariable contains the full path of the newly converted file. Now, add the check to see if the converted file exists:if (File.Exists(fileInfo.FullName.Replace (_sourceExtension, _destinationExtension))) { Console.WriteLine($"Unprocessed: {fileInfo.FullName}"); return; } - If the
destinationfile exists, then the conversion has already taken place, so we do not need to process the file. So, let's output a message to the user to inform them that the file is unprocessed, and then return from the method. Let's add the code to perform the conversion:Console.WriteLine($"Converting file: {fileInfo.FullName} from {_sourceExtension} to {_destination Extension}."); using var ffmpeg = new Process { StartInfo = { FileName = @"C:\Tools\ffmpeg\bin \ffmpeg.exe", Arguments = $"-i {source} {destination}", UseShellExecute = false, RedirectStandardOutput = true, RedirectStandardError = true, CreateNoWindow = true } }; ffmpeg.EnableRaisingEvents = false; ffmpeg.OutputDataReceived += (s, e) => Debug.WriteLine ($"Debug: e.Data"); ffmpeg.ErrorDataReceived += (s, e) => Debug.WriteLine ($@"Error: {e.Data}"); ffmpeg.Start(); ffmpeg.BeginOutputReadLine(); ffmpeg.BeginErrorReadLine(); ffmpeg.WaitForExit(timeout); - Here, we output a message to the window informing the user of the file being processed. Then, we instantiate a new process that executes
ffmpeg.exeand converts an audio file from one format into another, as specified by the user. The converted file is then saved in the same directory as the original file. - With that, we have completed our sample project. So, let's see it running. On an external hard disk, I have some Ghosthack audio samples that I own. The files are in
.wavfile format. However, they need to be transformed into.oggfiles to be used in an Android program that I use. You can use your own audio file or music folders.Note
If you don't have any audio files to hand to test this small program, you can download some royalty-free sounds from https://www.bensound.com. You can check the following page for links to various public music domains: https://www.lifewire.com/public-domain-music-3482603.
- Fill out the questions and press Enter:
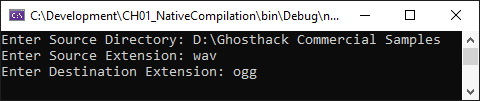
Figure 1.12 – Our file converter showing the directory and file conversion formats
The program will now process all files and folders under the specified parent folder and process them.
The program is working as expected in its MSIL form. However, we can see the delay in performing the file conversions. Let's compile our file converter into a single native executable, and then see if it is visibly any faster:
- Open the Visual Studio Developer Command Prompt as an administrator and navigate to the folder that contains your solution and project file. When publishing the file, it is worth noting that the
TargetFrameworkproperty of the project should also be updated to netcoreapp3.1; otherwise, this may not work – that is, if it is set tonet5.0. Type the following command and then press Enter:dotnet publish --framework netcoreapp3.1 - p:PublishSingleFile=true --runtime win10-x64
- When the command has finished running, your command window should look as follows:
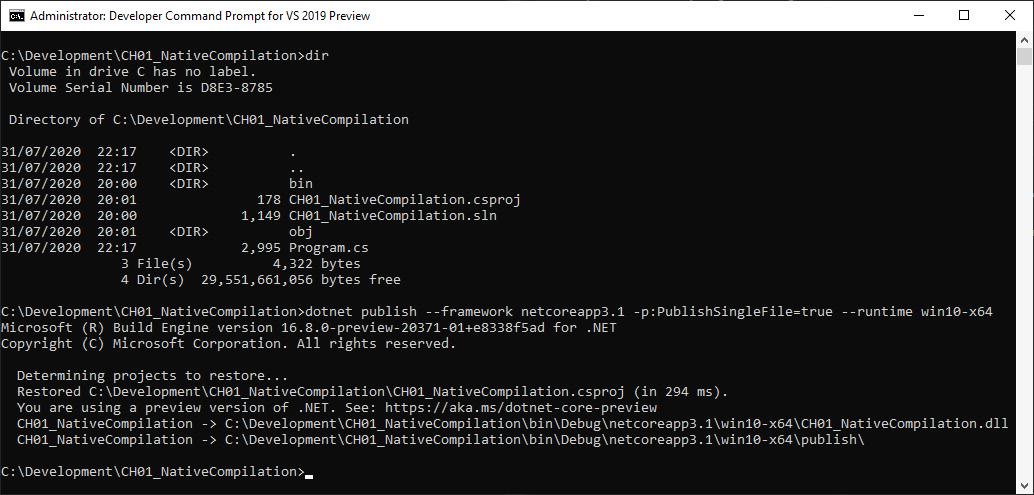
Figure 1.13 – The Developer Command Prompt in administrative mode showing the native compilation output
- If you navigate to the publish directory, you will see the following output:
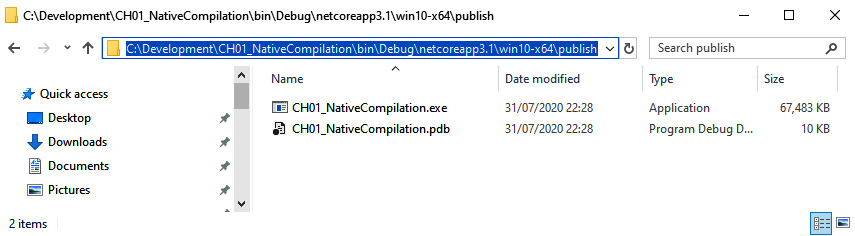
Figure 1.14 – Windows Explorer displaying the output files resulting from native compilation
- Run the
CH01_NativeCompilation.exefile. You will see that.wavfiles are processed into.oggfiles much quicker.
In this section, we learned how to write a console app. We compile the console app to MSIL and then compile the console app into a single native executable file. Visually, from the user's perspective, the file processes batch audio files much quicker in native form than in MSIL form.
Now, let's learn how to improve Windows Store applications.


