Search icon
Subscription
0
Cart icon
Close icon
You have no products in your basket yet
Save more on your purchases!
Savings automatically calculated. No voucher code required
Arrow left icon
All Products
Best Sellers
New Releases
Books
Videos
Audiobooks
Learning Hub
Newsletters
Free Learning
Arrow right icon
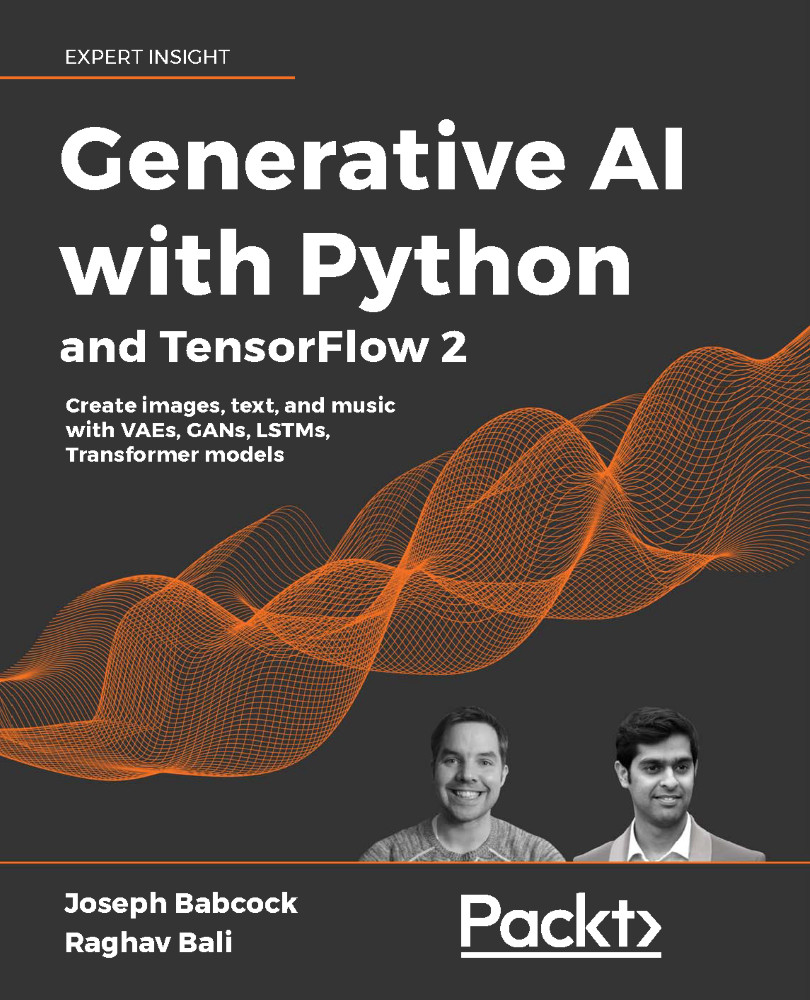
Generative AI with Python and TensorFlow 2

Generative AI with Python and TensorFlow 2: Create images, text, and music with VAEs, GANs, LSTMs, Transformer models

By Joseph Babcock , Raghav Bali
€25.99 €17.99
Book Apr 2021 488 pages 1st Edition
eBook
€25.99 €17.99
Print
€32.99
Subscription
€14.99 Monthly
eBook
€25.99 €17.99
Print
€32.99
Subscription
€14.99 Monthly

What do you get with eBook?

Product feature icon Instant access to your Digital eBook purchase
Product feature icon Download this book in EPUB and PDF formats
Product feature icon AI Assistant (beta) to help accelerate your learning
Product feature icon Access this title in our online reader with advanced features
Product feature icon DRM FREE - Read whenever, wherever and however you want
Buy Now

Product Details


Publication date : Apr 30, 2021
Length 488 pages
Edition : 1st Edition
Language : English
ISBN-13 : 9781800200883
Category :
Table of content icon View table of contents Preview book icon Preview Book

Generative AI with Python and TensorFlow 2

Setting Up a TensorFlow Lab

Now that you have seen all the amazing applications of generative models in Chapter 1, An Introduction to Generative AI: "Drawing" Data from Models, you might be wondering how to get started with implementing these projects that use these kinds of algorithms. In this chapter, we will walk through a number of tools that we will use throughout the rest of the book to implement the deep neural networks that are used in various generative AI models. Our primary tool is the TensorFlow 2.0 framework, developed by Google1 2; however, we will also use a number of additional resources to make the implementation process easier (summarized in Table 2.1).

We can broadly categorize these tools:

  • Resources for replicable dependency management (Docker, Anaconda)
  • Exploratory tools for data munging and algorithm hacking (Jupyter)
  • Utilities to deploy these resources to the cloud and manage their lifecycle (Kubernetes, Kubeflow, Terraform)

Tool

Project site

Use

Docker

https://www.docker.com/

Application runtime dependency encapsulation

Anaconda

https://www.anaconda.com/

Python language package management

Jupyter

https://jupyter.org/

Interactive Python runtime and plotting / data exploration tool

Kubernetes

https://kubernetes.io/

Docker container orchestration and resource management

Kubeflow

https://www.kubeflow.org/

Machine learning workflow engine developed on Kubernetes

Terraform

https://www.terraform.io/

Infrastructure scripting language for configurable and consistent deployments of Kubeflow and Kubernetes

VSCode

https://code.visualstudio.com/

Integrated development environment (IDE)

Table 2.1: Tech stack for generative adversarial model development

On our journey to bring our code from our laptops to the cloud in this chapter, we will first describe some background on how TensorFlow works when running locally. We will then describe a wide array of software tools that will make it easier to run an end-to-end TensorFlow lab locally or in the cloud, such as notebooks, containers, and cluster managers. Finally, we will walk through a simple practical example of setting up a reproducible research environment, running local and distributed training, and recording our results. We will also examine how we might parallelize TensorFlow across multiple CPU/GPU units within a machine (vertical scaling) and multiple machines in the cloud (horizontal scaling) to accelerate training. By the end of this chapter, we will be all ready to extend this laboratory framework to tackle implementing projects using various generative AI models.

First, let's start by diving more into the details of TensorFlow, the library we will use to develop models throughout the rest of this book. What problem does TensorFlow solve for neural network model development? What approaches does it use? How has it evolved over the years? To answer these questions, let us review some of the history behind deep neural network libraries that led to the development of TensorFlow.

Deep neural network development and TensorFlow

As we will see in Chapter 3, Building Blocks of Deep Neural Networks, a deep neural network in essence consists of matrix operations (addition, subtraction, multiplication), nonlinear transformations, and gradient-based updates computed by using the derivatives of these components.

In the world of academia, researchers have historically often used efficient prototyping tools such as MATLAB3 to run models and prepare analyses. While this approach allows for rapid experimentation, it lacks elements of industrial software development, such as object-oriented (OO) development, that allow for reproducibility and clean software abstractions that allow tools to be adopted by large organizations. These tools also had difficulty scaling to large datasets and could carry heavy licensing fees for such industrial use cases. However, prior to 2006, this type of computational tooling was largely sufficient for most use cases. However, as the datasets being tackled with deep neural network algorithms grew, groundbreaking results were achieved such as:

  • Image classification on the ImageNet dataset4
  • Large-scale unsupervised discovery of image patterns in YouTube videos5
  • The creation of artificial agents capable of playing Atari video games and the Asian board game GO with human-like skill6 7
  • State-of-the-art language translation via the BERT model developed by Google8

The models developed in these studies exploded in complexity along with the size of the datasets they were applied to (see Table 2.2 to get a sense of the immense scale of some of these models). As industrial use cases required robust and scalable frameworks to develop and deploy new neural networks, several academic groups and large technology companies invested in the development of generic toolkits for the implementation of deep learning models. These software libraries codified common patterns into reusable abstractions, allowing even complex models to be often embodied in relatively simple experimental scripts.

Model Name

Year

# Parameters

AlexNet

2012

61M

YouTube CNN

2012

1B

Inception

2014

5M

VGG-16

2014

138M

BERT

2018

340M

GPT-3

2020

175B

Table 2.2: Number of parameters by model by year

Some of the early examples of these frameworks include Theano,9 a Python package developed at the University of Montreal, and Torch,10 a library written in the Lua language that was later ported to Python by researchers at Facebook, and TensorFlow, a C++ runtime with Python bindings developed by Google11.

In this book, we will primarily use TensorFlow 2.0, due to its widespread adoption and its convenient high-level interface, Keras, which abstracts much of the repetitive plumbing of defining routine layers and model architectures.

TensorFlow is an open-source version of an internal tool developed at Google called DistBelief.12 The DistBelief framework consisted of distributed workers (independent computational processes running on a cluster of machines) that would compute forward and backward gradient descent passes on a network (a common way to train neural networks we will discuss in Chapter 3, Building Blocks of Deep Neural Networks), and send the results to a Parameter Server that aggregated the updates. The neural networks in the DistBelief framework were represented as a Directed Acyclic Graph (DAG), terminating in a loss function that yielded a scalar (numerical value) comparing the network predictions with the observed target (such as image class or the probability distribution over a vocabulary representing the most probable next word in a sentence in a translation model).

A DAG is a software data structure consisting of nodes (operations) and data (edges) where information only flows in a single direction along the edges (thus directed) and where there are no loops (hence acyclic).

While DistBelief allowed Google to productionize several large models, it had limitations:

  • First, the Python scripting interface was developed with a set of pre-defined layers corresponding to underlying implementations in C++; adding novel layer types required coding in C++, which represented a barrier to productivity.
  • Secondly, while the system was well adapted for training feed-forward networks using basic Stochastic Gradient Descent (SGD) (an algorithm we will describe in more detail in Chapter 3, Building Blocks of Deep Neural Networks) on large-scale data, it lacked flexibility for accommodating recurrent, reinforcement learning, or adversarial learning paradigms – the latter of which is crucial to many of the algorithms we will implement in this book.
  • Finally, this system was difficult to scale down – to run the same job, for example, on a desktop with GPUs as well as a distributed environment with multiple cores per machine, and deployment also required a different technical stack.

Jointly, these considerations prompted the development of TensorFlow as a generic deep learning computational framework: one that could allow scientists to flexibly experiment with new layer architectures or cutting-edge training paradigms, while also allowing this experimentation to be run with the same tools on both a laptop (for early-stage work) and a computing cluster (to scale up more mature models), while also easing the transition between research and development code by providing a common runtime for both.

Though both libraries share the concept of the computation graph (networks represented as a graph of operations (nodes) and data (edges)) and a dataflow programming model (where matrix operations pass through the directed edges of a graph and have operations applied to them), TensorFlow, unlike DistBelief, was designed with the edges of the graph being tensors (n-dimensional matrices) and nodes of the graph being atomic operations (addition, subtraction, nonlinear convolution, or queues and other advanced operations) rather than fixed layer operations – this allows for much greater flexibility in defining new computations and even allowing for mutation and stateful updates (these being simply additional nodes in the graph).

The dataflow graph in essence serves as a "placeholder" where data is slotted into defined variables and can be executed on single or multiple machines. TensorFlow optimizes the constructed dataflow graph in the C++ runtime upon execution, allowing optimization, for example, in issuing commands to the GPU. The different computations of the graph can also be executed across multiple machines and hardware, including CPUs, GPUs, and TPUs (custom tensor processing chips developed by Google and available in the Google Cloud computing environment)11, as the same computations described at a high level in TensorFlow are implemented to execute on multiple backend systems.

Because the dataflow graph allows mutable state, in essence, there is also no longer a centralized parameter server as was the case for DistBelief (though TensorFlow can also be run in a distributed manner with a parameter server configuration), since different nodes that hold state can execute the same operations as any other worker nodes. Further, control flow operations such as loops allow for the training of variable-length inputs such as in recurrent networks (see Chapter 3, Building Blocks of Deep Neural Networks). In the context of training neural networks, the gradients of each layer are simply represented as additional operations in the graph, allowing optimizations such as velocity (as in the RMSProp or ADAM optimizers, described in Chapter 3, Building Blocks of Deep Neural Networks) to be included using the same framework rather than modifying the parameter server logic. In the context of distributed training, TensorFlow also has several checkpointing and redundancy mechanisms ("backup" workers in case of a single task failure) that make it suited to robust training in distributed environments.

TensorFlow 2.0

While representing operations in the dataflow graph as primitives allows flexibility in defining new layers within the Python client API, it also can result in a lot of "boilerplate" code and repetitive syntax. For this reason, the high-level API Keras14 was developed to provide a high-level abstraction; layers are represented using Python classes, while a particular runtime environment (such as TensorFlow or Theano) is a "backend" that executes the layer, just as the atomic TensorFlow operators can have different underlying implementations on CPUs, GPUs, or TPUs. While developed as a framework-agnostic library, Keras has been included as part of TensorFlow's main release in version 2.0. For the purposes of readability, we will implement most of our models in this book in Keras, while reverting to the underlying TensorFlow 2.0 code where it is necessary to implement particular operations or highlight the underlying logic. Please see Table 2.3 for a comparison between how various neural network algorithm concepts are implemented at a low (TensorFlow) or high (Keras) level in these libraries.

Object

TensorFlow implementation

Keras implementation

Neural network layer

Tensor computation

Python layer classes

Gradient calculation

Graph runtime operator

Python optimizer class

Loss function

Tensor computation

Python loss function

Neural network model

Graph runtime session

Python model class instance

Table 2.3: TensorFlow and Keras comparison

To show you the difference between the abstraction that Keras makes versus TensorFlow 1.0 in implementing basic neural network models, let's look at an example of writing a convolutional layer (see Chapter 3, Building Blocks of Deep Neural Networks) using both of these frameworks. In the first case, in TensorFlow 1.0, you can see that a lot of the code involves explicitly specifying variables, functions, and matrix operations, along with the gradient function and runtime session to compute the updates to the networks.

This is a multilayer perceptron in TensorFlow 1.015:

X = tf.placeholder(dtype=tf.float64)
Y = tf.placeholder(dtype=tf.float64)
num_hidden=128
# Build a hidden layer
W_hidden = tf.Variable(np.random.randn(784, num_hidden))
b_hidden = tf.Variable(np.random.randn(num_hidden))
p_hidden = tf.nn.sigmoid( tf.add(tf.matmul(X, W_hidden), b_hidden) )
# Build another hidden layer
W_hidden2 = tf.Variable(np.random.randn(num_hidden, num_hidden))
b_hidden2 = tf.Variable(np.random.randn(num_hidden))
p_hidden2 = tf.nn.sigmoid( tf.add(tf.matmul(p_hidden, W_hidden2), b_hidden2) )
# Build the output layer
W_output = tf.Variable(np.random.randn(num_hidden, 10))
b_output = tf.Variable(np.random.randn(10))
p_output = tf.nn.softmax( tf.add(tf.matmul(p_hidden2, W_output), 
           b_output) )
loss = tf.reduce_mean(tf.losses.mean_squared_error(
        labels=Y,predictions=p_output))
accuracy=1-tf.sqrt(loss)
minimization_op = tf.train.AdamOptimizer(learning_rate=0.01).minimize(loss)
feed_dict = {
    X: x_train.reshape(-1,784),
    Y: pd.get_dummies(y_train)
}
with tf.Session() as session:
    session.run(tf.global_variables_initializer())
    for step in range(10000):
        J_value = session.run(loss, feed_dict)
        acc = session.run(accuracy, feed_dict)
        if step % 100 == 0:
            print("Step:", step, " Loss:", J_value," Accuracy:", acc)
            session.run(minimization_op, feed_dict)
    pred00 = session.run([p_output], feed_dict={X: x_test.reshape(-1,784)})

In contrast, the implementation of the same convolutional layer in Keras is vastly simplified through the use of abstract concepts embodied in Python classes, such as layers, models, and optimizers. Underlying details of the computation are encapsulated in these classes, making the logic of the code more readable.

Note also that in TensorFlow 2.0 the notion of running sessions (lazy execution, in which the network is only computed if explicitly compiled and called) has been dropped in favor of eager execution, in which the session and graph are called dynamically when network functions such as call and compile are executed, with the network behaving like any other Python class without explicitly creating a session scope. The notion of a global namespace in which variables are declared with tf.Variable() has also been replaced with a default garbage collection mechanism.

This is a multilayer perceptron layer in Keras15:

import TensorFlow as tf
from TensorFlow.keras.layers import Input, Dense
from keras.models import Model
l = tf.keras.layers
model = tf.keras.Sequential([
    l.Flatten(input_shape=(784,)),
    l.Dense(128, activation='relu'),
    l.Dense(128, activation='relu'),
    l.Dense(10, activation='softmax')
])
model.compile(loss='categorical_crossentropy', 
              optimizer='adam',
              metrics = ['accuracy'])
model.summary()
model.fit(x_train.reshape(-1,784),pd.get_dummies(y_train),nb_epoch=15,batch_size=128,verbose=1)

Now that we have covered some of the details of what the TensorFlow library is and why it is well-suited to the development of deep neural network models (including the generative models we will implement in this book), let's get started building up our research environment. While we could simply use a Python package manager such as pip to install TensorFlow on our laptop, we want to make sure our process is as robust and reproducible as possible – this will make it easier to package our code to run on different machines, or keep our computations consistent by specifying the exact versions of each Python library we use in an experiment. We will start by installing an Integrated Development Environment (IDE) that will make our research easier – VSCode.

VSCode

Visual Studio Code (VSCode) is an open-source code editor developed by Microsoft Corporation which can be used with many programming languages, including Python. It allows debugging and is integrated with version control tools such as Git; we can even run Jupyter notebooks (which we will describe later in this chapter) within VSCode. Instructions for installation vary by whether you are using a Linux, macOS, or Windows operating system: please see individual instructions at https://code.visualstudio.com for your system. Once installed, we need to clone a copy of the source code for the projects in this book using Git, with the command:

git clone git@github.com:PacktPublishing/Hands-On-Generative-AI-with-Python-and-TensorFlow-2.git

This command will copy the source code for the projects in this book to our laptop, allowing us to locally run and modify the code. Once you have the code copied, open the GitHub repository for this book using VSCode (Figure 2.1). We are now ready to start installing some of the tools we will need; open the file install.sh.

Figure 2.1: VSCode IDE

One feature that will be of particular use to us is the fact that VSCode has an integrated (Figure 2.2) terminal where we can run commands: you can access this by selecting View, then Terminal from the drop-down list, which will open a command-line prompt:

Figure 2.2: VSCode terminal

Select the TERMINAL tab, and bash for the interpreter; you should now be able to enter normal commands. Change the directory to Chapter_2, where we will run our installation script, which you can open in VSCode.

The installation script we will run will download and install the various components we will need in our end-to-end TensorFlow lab; the overarching framework we will use for these experiments will be the Kubeflow library, which handles the various data and training pipelines that we will utilize for our projects in the later chapters of this volume. In the rest of this chapter, we will describe how Kubeflow is built on Docker and Kubernetes, and how to set up Kubeflow on several popular cloud providers.

Kubernetes, the technology which Kubeflow is based on, is fundamentally a way to manage containerized applications created using Docker, which allows for reproducible, lightweight execution environments to be created and persisted for a variety of applications. While we will make use of Docker for creating reproducible experimental runtimes, to understand its place in the overall landscape of virtualization solutions (and why it has become so important to modern application development), let us take a detour to describe the background of Docker in more detail.

Docker: A lightweight virtualization solution

A consistent challenge in developing robust software applications is to make them run the same on a machine different than the one on which they are developed. These differences in environments could encompass a number of variables: operating systems, programming language library versions, and hardware such as CPU models.

Traditionally, one approach to dealing with this heterogeneity has been to use a Virtual Machine (VM). While VMs are useful to run applications on diverse hardware and operating systems, they are also limited by being resource-intensive (Figure 2.3): each VM running on a host requires the overhead resources to run a completely separate operating system, along with all the applications or dependencies within the guest system.

Figure 2.3: Virtual machines versus containers16

However, in some cases this is an unnecessary level of overhead; we do not necessarily need to run an entirely separate operating system, rather than just a consistent environment, including libraries and dependencies within a single operating system. This need for a lightweight framework to specify runtime environments prompted the creation of the Docker project for containerization in 2013. In essence, a container is an environment for running an application, including all dependencies and libraries, allowing reproducible deployment of web applications and other programs, such as a database or the computations in a machine learning pipeline. For our use case, we will use it to provide a reproducible Python execution environment (Python language version and libraries) to run the steps in our generative machine learning pipelines.

We will need to have Docker installed for many of the examples that will appear in the rest of this chapter and the projects in this book. For instructions on how to install Docker for your particular operating system, please refer to the directions at (https://docs.docker.com/install/). To verify that you have installed the application successfully, you should be able to run the following command on your terminal, which will print the available options:

docker run hello-world

Important Docker commands and syntax

To understand how Docker works, it is useful to walk through the template used for all Docker containers, a Dockerfile. As an example, we will use the TensorFlow container notebook example from the Kubeflow project (https://github.com/kubeflow/kubeflow/blob/master/components/example-notebook-servers/jupyter-tensorflow-full/cpu.Dockerfile).

This file is a set of instructions for how Docker should take a base operating environment, add dependencies, and execute a piece of software once it is packaged:

FROM public.ecr.aws/j1r0q0g6/notebooks/notebook-servers/jupyter-tensorflow:master-abf9ec48
# install - requirements.txt
COPY --chown=jovyan:users requirements.txt /tmp/requirements.txt
RUN python3 -m pip install -r /tmp/requirements.txt --quiet --no-cache-dir \
 && rm -f /tmp/requirements.txt

While the exact commands will differ between containers, this will give you a flavor for the way we can use containers to manage an application – in this case running a Jupyter notebook for interactive machine learning experimentation using a consistent set of libraries. Once we have installed the Docker runtime for our particular operating system, we would execute such a file by running:

Docker build -f <Dockerfilename> -t <image name:tag>

When we do this, a number of things happen. First, we retrieve the base filesystem, or image, from a remote repository, which is not unlike the way we collect JAR files from Artifactory when using Java build tools such as Gradle or Maven, or Python's pip installer. With this filesystem or image, we then set required variables for the Docker build command such as the username and TensorFlow version, and runtime environment variables for the container. We determine what shell program will be used to run the command, then we install dependencies we will need to run TensorFlow and the notebook application, and we specify the command that is run when the Docker container is started. Then we save this snapshot with an identifier composed of a base image name and one or more tags (such as version numbers, or, in many cases, simply a timestamp to uniquely identify this image). Finally, to actually start the notebook server running this container, we would issue the command:

Docker run <image name:tag>

By default, Docker will run the executable command in the Dockerfile file; in our present example, that is the command to start the notebook server. However, this does not have to be the case; we could have a Dockerfile that simply builds an execution environment for an application, and issue a command to run within that environment. In that case, the command would look like:

Docker run <image name:tag> <command>

The Docker run commands allow us to test that our application can successfully run within the environment specified by the Dockerfile; however, we usually want to run this application in the cloud where we can take advantage of distributed computing resources or the ability to host web applications exposed to the world at large, not locally. To do so, we need to move our image we have built to a remote repository, which may or may not be the same one we pulled the initial image from, using the push command:

Docker push <image name:tag>

Note that the image name can contain a reference to a particular registry, such as a local registry or one hosted on one of the major cloud providers such as Elastic Container Service (ECS) on AWS, Azure Kubernetes Service (AKS), or Google Container Registry. Publishing to a remote registry allows developers to share images, and us to make containers accessible to deploy in the cloud.

Connecting Docker containers with docker-compose

So far we have only discussed a few basic Docker commands, which would allow us to run a single service in a single container. However, you can probably appreciate that in the "real world" we usually need to have one or more applications running concurrently – for example, a website will have both a web application that fetches and processes data in response to activity from an end user and a database instance to log that information. In complex applications, the website might even be composed of multiple small web applications or microservices that are specialized to particular use cases such as the front end, user data, or an order management system. For these kinds of applications, we will need to have more than one container communicating with each other. The docker-compose tool (https://docs.docker.com/compose/) is written with such applications in mind: it allows us to specify several Docker containers in an application file using the YAML format. For example, a configuration for a website with an instance of the Redis database might look like:

version: '3'
services:
  web:
    build: .
    ports:
    - "5000:5000"
    volumes:
    - .:/code
    - logvolume01:/var/log
    links:
    - redis
  redis:
    image: redis
volumes:
  logvolume01: {}

Code 2.1: A yaml input file for Docker Compose

The two application containers here are web and the redis database. The file also specified the volumes (disks) linked to these two applications. Using this configuration, we can run the command:

docker-compose up

This starts all the containers specified in the YAML file and allows them to communicate with each other. However, even though Docker containers and docker-compose allow us to construct complex applications using consistent execution environments, we may potentially run into issues with robustness when we deploy these services to the cloud. For example, in a web application, we cannot be assured that the virtual machines that the application is running on will persist over long periods of time, so we need processes to manage self-healing and redundancy. This is also relevant to distributed machine learning pipelines, in which we do not want to have to kill an entire job because one node in a cluster goes down, which requires us to have backup logic to restart a sub-segment of work. Also, while Docker has the docker-compose functionality to link together several containers in an application, it does not have robust rules for how communication should happen among those containers, or how to manage them as a unit. For these purposes, we turn to the Kubernetes library.

Left arrow icon Right arrow icon

Key benefits

  • Code examples are in TensorFlow 2, which make it easy for PyTorch users to follow along
  • Look inside the most famous deep generative models, from GPT to MuseGAN
  • Learn to build and adapt your own models in TensorFlow 2.x
  • Explore exciting, cutting-edge use cases for deep generative AI

Description

Machines are excelling at creative human skills such as painting, writing, and composing music. Could you be more creative than generative AI? In this book, you’ll explore the evolution of generative models, from restricted Boltzmann machines and deep belief networks to VAEs and GANs. You’ll learn how to implement models yourself in TensorFlow and get to grips with the latest research on deep neural networks. There’s been an explosion in potential use cases for generative models. You’ll look at Open AI’s news generator, deepfakes, and training deep learning agents to navigate a simulated environment. Recreate the code that’s under the hood and uncover surprising links between text, image, and music generation.

What you will learn

Export the code from GitHub into Google Colab to see how everything works for yourself Compose music using LSTM models, simple GANs, and MuseGAN Create deepfakes using facial landmarks, autoencoders, and pix2pix GAN Learn how attention and transformers have changed NLP Build several text generation pipelines based on LSTMs, BERT, and GPT-2 Implement paired and unpaired style transfer with networks like StyleGAN Discover emerging applications of generative AI like folding proteins and creating videos from images

What do you get with eBook?

Product feature icon Instant access to your Digital eBook purchase
Product feature icon Download this book in EPUB and PDF formats
Product feature icon AI Assistant (beta) to help accelerate your learning
Product feature icon Access this title in our online reader with advanced features
Product feature icon DRM FREE - Read whenever, wherever and however you want
Buy Now

Product Details


Publication date : Apr 30, 2021
Length 488 pages
Edition : 1st Edition
Language : English
ISBN-13 : 9781800200883
Category :

Table of Contents

16 Chapters
Preface Chevron down icon Chevron up icon
1. An Introduction to Generative AI: "Drawing" Data from Models Chevron down icon Chevron up icon
2. Setting Up a TensorFlow Lab Chevron down icon Chevron up icon
3. Building Blocks of Deep Neural Networks Chevron down icon Chevron up icon
4. Teaching Networks to Generate Digits Chevron down icon Chevron up icon
5. Painting Pictures with Neural Networks Using VAEs Chevron down icon Chevron up icon
6. Image Generation with GANs Chevron down icon Chevron up icon
7. Style Transfer with GANs Chevron down icon Chevron up icon
8. Deepfakes with GANs Chevron down icon Chevron up icon
9. The Rise of Methods for Text Generation Chevron down icon Chevron up icon
10. NLP 2.0: Using Transformers to Generate Text Chevron down icon Chevron up icon
11. Composing Music with Generative Models Chevron down icon Chevron up icon
12. Play Video Games with Generative AI: GAIL Chevron down icon Chevron up icon
13. Emerging Applications in Generative AI Chevron down icon Chevron up icon
14. Other Books You May Enjoy Chevron down icon Chevron up icon
15. Index Chevron down icon Chevron up icon

Customer reviews

Filter icon Filter
Top Reviews
Rating distribution
Empty star icon Empty star icon Empty star icon Empty star icon Empty star icon 0
(0 Ratings)
5 star 0%
4 star 0%
3 star 0%
2 star 0%
1 star 0%

Filter reviews by


No reviews found
Get free access to Packt library with over 7500+ books and video courses for 7 days!
Start Free Trial

FAQs

How do I buy and download an eBook? Chevron down icon Chevron up icon

Where there is an eBook version of a title available, you can buy it from the book details for that title. Add either the standalone eBook or the eBook and print book bundle to your shopping cart. Your eBook will show in your cart as a product on its own. After completing checkout and payment in the normal way, you will receive your receipt on the screen containing a link to a personalised PDF download file. This link will remain active for 30 days. You can download backup copies of the file by logging in to your account at any time.

If you already have Adobe reader installed, then clicking on the link will download and open the PDF file directly. If you don't, then save the PDF file on your machine and download the Reader to view it.

Please Note: Packt eBooks are non-returnable and non-refundable.

Packt eBook and Licensing When you buy an eBook from Packt Publishing, completing your purchase means you accept the terms of our licence agreement. Please read the full text of the agreement. In it we have tried to balance the need for the ebook to be usable for you the reader with our needs to protect the rights of us as Publishers and of our authors. In summary, the agreement says:

  • You may make copies of your eBook for your own use onto any machine
  • You may not pass copies of the eBook on to anyone else
How can I make a purchase on your website? Chevron down icon Chevron up icon

If you want to purchase a video course, eBook or Bundle (Print+eBook) please follow below steps:

  1. Register on our website using your email address and the password.
  2. Search for the title by name or ISBN using the search option.
  3. Select the title you want to purchase.
  4. Choose the format you wish to purchase the title in; if you order the Print Book, you get a free eBook copy of the same title. 
  5. Proceed with the checkout process (payment to be made using Credit Card, Debit Cart, or PayPal)
Where can I access support around an eBook? Chevron down icon Chevron up icon
  • If you experience a problem with using or installing Adobe Reader, the contact Adobe directly.
  • To view the errata for the book, see www.packtpub.com/support and view the pages for the title you have.
  • To view your account details or to download a new copy of the book go to www.packtpub.com/account
  • To contact us directly if a problem is not resolved, use www.packtpub.com/contact-us
What eBook formats do Packt support? Chevron down icon Chevron up icon

Our eBooks are currently available in a variety of formats such as PDF and ePubs. In the future, this may well change with trends and development in technology, but please note that our PDFs are not Adobe eBook Reader format, which has greater restrictions on security.

You will need to use Adobe Reader v9 or later in order to read Packt's PDF eBooks.

What are the benefits of eBooks? Chevron down icon Chevron up icon
  • You can get the information you need immediately
  • You can easily take them with you on a laptop
  • You can download them an unlimited number of times
  • You can print them out
  • They are copy-paste enabled
  • They are searchable
  • There is no password protection
  • They are lower price than print
  • They save resources and space
What is an eBook? Chevron down icon Chevron up icon

Packt eBooks are a complete electronic version of the print edition, available in PDF and ePub formats. Every piece of content down to the page numbering is the same. Because we save the costs of printing and shipping the book to you, we are able to offer eBooks at a lower cost than print editions.

When you have purchased an eBook, simply login to your account and click on the link in Your Download Area. We recommend you saving the file to your hard drive before opening it.

For optimal viewing of our eBooks, we recommend you download and install the free Adobe Reader version 9.