Pop-up browser windows have received mixed reviews in recent years. Originally created before tabbed browsers existed to display additional information without interfering with the page the user had navigated to, they were quickly hijacked and used to display advertisements and spam. Pop ups should be used sparingly in applications and wherever possible in response to an action by the user.
The target attribute can be specified as _blank on HTML hyperlink tags to open the link in a new window, but all modern browsers allow the user to specify that new windows should be opened as new tabs instead. Also, if the browser does open the URL in a new window, it will be of the same size as the existing window and block most of it. Opening a window in JavaScript allows for fine-grained control over many aspects of the pop-up window, for example, the size, and whether to display a toolbar.
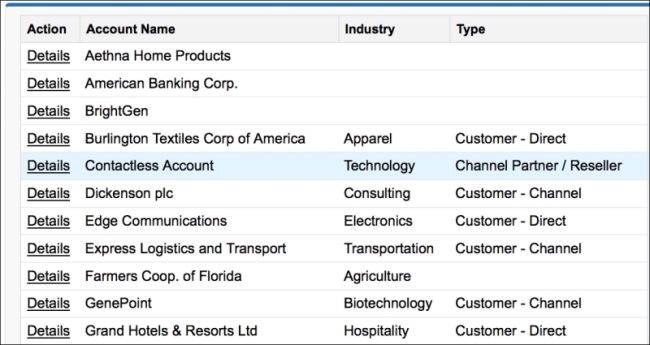
In this recipe we will create a page that renders a list of accounts, displaying a very small subset of fields per row. A link will be provided on each row to allow the user to view full details of the account in a pop-up window.
Note
Note that there is no way to ensure that a browser will display a pop-up window. Pop-up blockers generally allow windows to be opened in response to an action by the user, such as clicking on a link, but it is possible for users to configure their browser to block all pop ups regardless of how they were triggered.
This recipe requires two Visualforce pages to be created: the main page containing the list of accounts and the pop-up window page. The pop-up page is referenced by the main page, so this will be created first.
Navigate to the Visualforce setup page by clicking on Your Name | Setup | Develop | Pages.
Click on the New button.
Enter
Popupin the Label field.Accept the default Popup that is automatically generated for the Name field.
Paste the contents of the
Popup.pagefile from the code download into the Visualforce Markup area.Click on the Save button to save the page.
Navigate to the Visualforce setup page by clicking on Your Name | Setup | Develop | Pages.
Locate the entry for the Setup page and click on the Security link.
On the resulting page, select which profiles should have access and click on the Save button.
Next, create the main account list page by navigating to the Visualforce setup page by clicking on Your Name | Setup | Develop | Pages.
Click on the New button.
Enter
PopupMainin the Label field.Accept the default PopupMain that is automatically generated for the Name field.
Paste the contents of the
PopupMain.pagefile from the code download into the Visualforce Markup area.Click on the Save button to save the page.
Navigate to the Visualforce setup page by clicking on Your Name | Setup | Develop | Pages.
Locate the entry for the PopupMain page and click on the Security link.
On the resulting page, select which profiles should have access and click on the Save button.
Opening the following URL in your browser displays a list of accounts: https://<instance>/apex/PopupMain.
Here, <instance> is the Salesforce instance specific to your organization, for example, na6.salesforce.com.

Note
Note that as this page uses a standard list controller, the list of accounts displayed will be that of the last list view that the user accessed.
The detail link markup is as follows:
<apex:outputLink title="View detail in a popup window"
    onclick="return openPopup('{!acc.Id}');">
    Details
</apex:outputLink>
The onclick attribute defines the JavaScript function to be invoked when the link is clicked; note the {!acc.id} merge field, which passes the ID of the chosen account to the function.
The JavaScript function uses the window.open function to open the new window.
var newWin=window.open('{!$Page.Popup}?id=' + id, 'Popup', 'height=600,width=650,left=100,top=100,resizable=no,scrollbars=yes,toolbar=no,status=no');The final parameter details the features required for the new window as a comma separated list of name=value pairs.
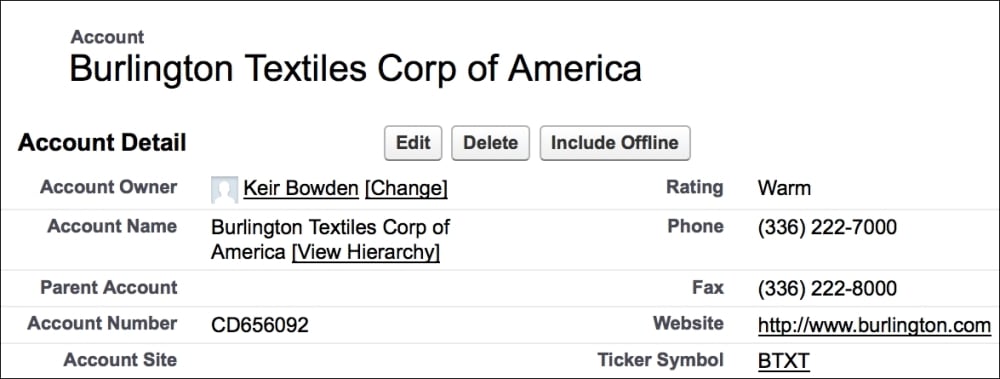
Clicking on the Details link displays the full account details in a pop-up window.

The Adding a custom lookup to a form recipe in Chapter 3, Capturing Data Using Forms shows how information can be captured in a pop-up window and passed back to the main window to populate input fields.


