Chapter 9. Deployment of ASP.NET Core Application
Once we have completed the development for our ASP.NET core application, we need to deploy the application so that it can be accessed by our users.
In any application, irrespective of whether it is the web, desktop, or mobile application, not all the functionalities have been achieved through code. In fact, you should not try to achieve everything through code.
In this chapter, you are going to learn about the following topics:
Configuration in the ASP.NET Core application
Signing up to the Microsoft Azure platform
Deploying the ASP.NET Core application to the Azure Cloud platform
If you have built a web application using any of the previous versions of ASP.NET MVC, there will be a file by the name of Web.config (an XML file) where you can configure all the dependencies for your application. But in ASP.NET Core, there will be no Web.config file in your solution:
Instead, we have project.json (a JSON file), where we will configure the dependencies...
All of the project configuration should go into the project.json file for the ASP.NET Core application. The following is the project.json file that was created when using the predefined ASP.NET Core web application template:
There are different predefined nodes in this JSON file for different functionalities. Let us take some important nodes in this project.json file and discuss them.
The dependencies node lists all the dependencies for your ASP.NET Core application.
The following is a fragment of the dependencies node in the ASP.NET Core application. Each dependency is an attribute value pair where the attribute represents the dependency and the value represents the version of the dependency. If you need to provide more information for the dependency, you can have a nested JSON configuration as it is in Microsoft.NETCore.App:
"dependencies":{
  "Microsoft.NETCore.App":{
    "version": "1.0.0-rc2-3002702",
    "type": "platform"...
Microsoft Azure is a cloud computing platform and infrastructure from Microsoft for building, deploying, and managing applications and services. It supports different programming languages and arrays of services.
You can deploy your application in any server with Internet Information Service (IIS) in your network. But this restricts your application to being accessed only from within your network, assuming your server could only be accessed from within your network (as in most network setups). In this section, we are going to deploy the ASP.NET Core application in Microsoft Azure so that your users across the globe can access your application.
Signing up to Microsoft Azure
In order for your application to be deployed to Azure, you need to have an account with Azure. You can create an Azure account for free and you'll have sufficient credits to deploy your application for free within the first 30 days (
https://azure.microsoft.com/en-in/):
Click the Try for free button or Free...
Deploying the ASP.NET Core application in Azure
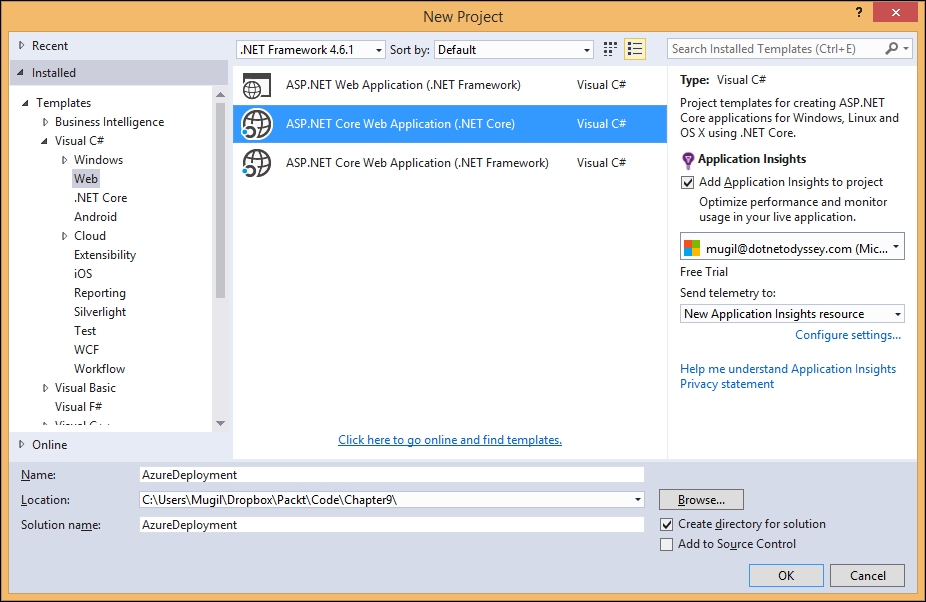
Let's create an ASP.NET Core application that we can deploy in Microsoft Azure:
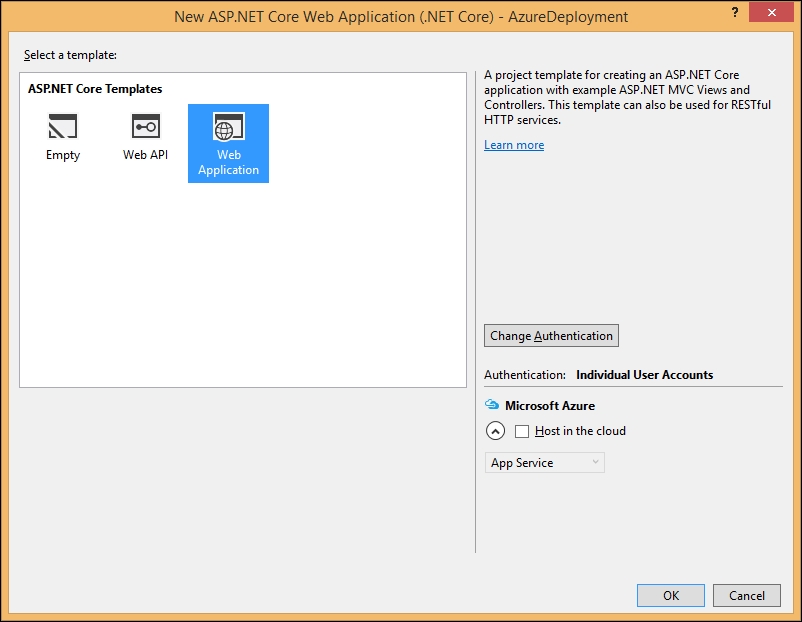
The ASP.NET Core application will be created once you click the OK button:
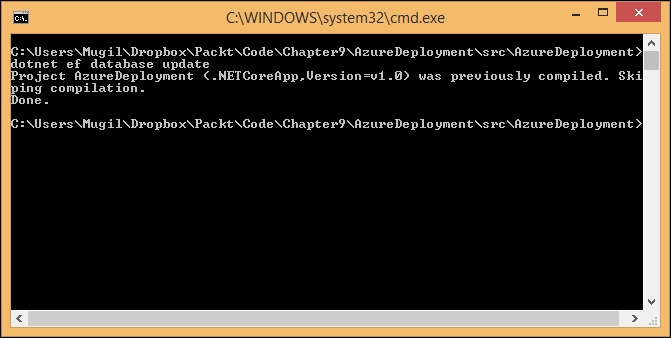
As the default ASP.NET Core Web Application template uses the Entity Framework, we need to execute the following command in order to create the database migration:
dotnet ef database update
Once you enter the command in Command Prompt (in the project's path), the migration file will be created. This migration file will contain all the changes to the database. This migration will be applied at the time of deployment at Azure so that Azure can create the necessary database scripts for Azure deployment:
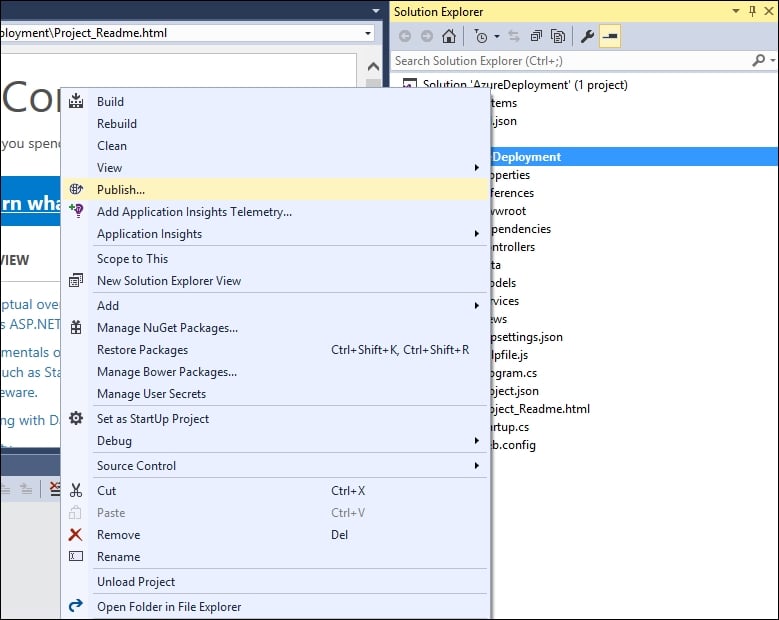
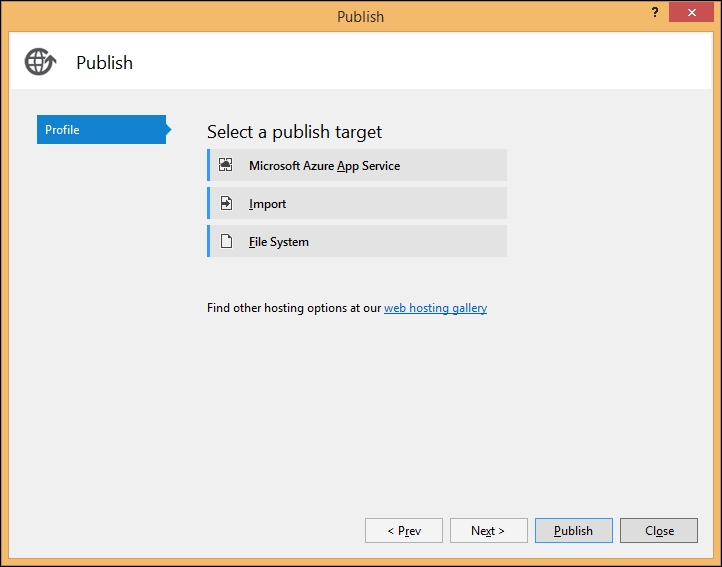
Once the database migration is completed, right-click on the created Core application and select the Publish option, as shown in the following screenshot:
When you click the Publish option, you'll be shown the following screen, depicting various publishing options available for you:
Please...
Deploying the ASP.NET Core web application in the Linux environment
In this section of the chapter, we are going to learn how to create and deploy the ASP.NET Core web application in the Linux platform. I am going to deploy the application in the cloud using Amazon Web Services (AWS). Obviously, you don't need AWS to deploy the ASP.NET Core application on Linux. I am just using it so that I do not need to install Linux on my local machine. And another advantage of hosting with AWS (or any other public cloud service provider or any hosting provider) is that I can access the web application from anywhere as it will be publicly available.
We have the following prerequisites to create and deploy in the Linux environment:
We are going to use AWS to create a Linux machine. The advantage of using AWS or any other cloud provider is that we can use their service only when we need it and we can wind down the machine...
Creating a new ASP.NET 5 project
Issue the following commands to create a new directory where we will create the ASP.NET 5 application. The first command (
mkdir
- make directory) is for creating a directory in Linux and the second command (
cd
- change directory) is for going inside the folder. And the last command is the command line to create a .NET Core application:
mkdir aspnetcoreapp
cd aspnetcoreapp
dotnet new
The following screen will be displayed:
This will create the .NET Core application, which has a couple of files—Program.cs and project.json. It's a bare minimum application that does not have even Startup file.
We need to add the Kestrel HTTP Server package as a dependency in project.json. You can edit the file by issuing the command
vi project.json
. By default, the vi editor will open the file in read-only mode. You need to press Esc + I in order to make it to the edit mode. Add the line "Microsoft.AspNetCore.Server.Kestrel": "1.0.0" as shown in the following...
Configuring the Nginx server
Configure the Nginx server by modifying the file (/etc/nginx/sites-available/default) to have the following content—so that Nginx will forward the request to ASP.NET. In order to modify this file, you need to have sufficient rights—try switching to a super user. The
Sudo su
is the command for switching it to a super user. See the following code:
server {
  listen 80;
  location / {
    proxy_pass http://localhost:5000;
    proxy_http_version 1.1;
    proxy_set_header Upgrade $http_upgrade;
    proxy_set_header Connection keep-alive;
    proxy_set_header Host $host;
    proxy_cache_bypass $http_upgrade;
  }
}
The code looks like the following:
Run the application by executing the following command:
dotnet run
You will see the following screen:
Now access the application from your browser using the public DNS (AWS created the public DNS when the instance was launched):
Voila! We have created the ASP.NET Core...
In this chapter, you have learned about the different components available in the project.json file, where all the configuration of your ASP.NET Core goes. We have discussed how to sign up to the Microsoft Azure cloud platform and deploy the ASP.NET Core application in the Azure platform. We have also learned how to create and deploy the ASP.NET Core web application in Linux using Amazon Web Services in the cloud.