Search icon
Arrow left icon
All Products
Best Sellers
New Releases
Books
Videos
Audiobooks
Learning Hub
Newsletters
Free Learning
Arrow right icon
ZBrush 4 Sculpting for Games: Beginner's Guide

ZBrush 4 Sculpting for Games: Beginner's Guide: Sculpt machines, environments, and creatures for your game development projects

By Manuel Scherer
€28.99 €19.99
Book Mar 2011 348 pages 1st Edition
eBook
€28.99 €19.99
Print
€37.99
Subscription
€14.99 Monthly
eBook
€28.99 €19.99
Print
€37.99
Subscription
€14.99 Monthly

What do you get with eBook?

Product feature icon Instant access to your Digital eBook purchase
Product feature icon Download this book in EPUB and PDF formats
Product feature icon Access this title in our online reader with advanced features
Product feature icon DRM FREE - Read whenever, wherever and however you want
Buy Now

Product Details


Publication date : Mar 16, 2011
Length 348 pages
Edition : 1st Edition
Language : English
ISBN-13 : 9781849690805
Vendor :
Pixologic
Category :
Concepts :
Table of content icon View table of contents Preview book icon Preview Book

ZBrush 4 Sculpting for Games: Beginner's Guide

Chapter 1. Getting Started

In this chapter, we will discuss who this book is for and what will be covered. We'll also discuss why we use ZBrush and why it is so important nowadays. After that we'll go over the basic terminology and preparatory steps for this book and finally talk about some basics of working in the field of digital art.

Who this book is for


This book is for aspiring (game-)artists who want to dig deeper into highly detailed game model production. It's good if you have a basic understanding of 3D and its possibilities and are also familiar with other 3D-software like Maya, 3D-Studio Max, Softimage, Blender, and others, which are good companions for ZBrush. Also, for someone looking for a more intuitive way of creating 3D models, this book and ZBrush are the right tools to start with.

What we will learn in this book


In this book, we'll focus on learning how to use ZBrush for creating models for game production. We'll start with a quick look at the interface and then immediately start learning by solving little exercises. All these exercises will be based on fictional tasks to explain things in context. This means you'll not only be able to choose the appropriate solution for your task, but also consider the creative process as a whole. This is especially important if you do not only work on your own, but in a team of maybe a hundred or more people.

By the end of the book, you would have finished four complete game-specific modeling tasks, which will walk you through all the essentials of using ZBrush in a game production pipeline. Here's one of the four models we'll create:

Why ZBrush?


Why do we use ZBrush and why is it so widely used in the game and film industry? Because it is very good for creating highly detailed models in a very short time. This may sound trivial, but it is very sought-after and if you have seen the amazing detail on some creatures in Avatar (film), The Lord of the Rings (film) or Gears of War (game), you'll know how much this adds to the experience. Without the possibilities of ZBrush, we weren't able to achieve such an incredible level of detail that looks almost real, like this detailed close-up of an arm:

But apart from creating hyper-realistic models in games or films, ZBrush also focuses on making model creation easier and more lifelike. For these reasons, it essentially tries to mimic working with real clay, which is easy to understand. So it's all about adding and removing digital clay, which is quite a fun and intuitive way of creating 3D-models.

Yet it is important to know that ZBrush is a very specialized tool, so it is mostly used in conjunction with other 3D Software to animate or export the models into a game engine, for example. Still, specialization comes along with efficiency and you will be amazed how easily we can realize our ideas with ZBrush in no time.

How ZBrush is used in a game's production


To better understand the workflow using ZBrush, let's think of a simplified way a 3D model is created to be used in our game. As always, there are many ways of doing the same thing, and many companies do it differently. By the end of this book, you will know some of the different ways of model creation, to blend into an existing workflow or to even create your own.

It all starts with an idea or ideally a concept drawing. This 2D concept is then roughly created in 3D, often in a 3D software such as Maya, 3D Max, Blender, Softimage, and others. Once this is done, ZBrush comes into play to detail the model and finish the digital sculpture, which is the fun part, but may also easily consume most of the time during model creation. After that, you may have something like a very detailed and lifelike sculpture of Caesar, but it has no color variation, it is just stone gray. So you paint it, usually in a 2D application like Photoshop or GIMP. This process of applying color to a model is called texturing. Depending on whether you would like to create a stiff statue or a walking Caesar, you may want to animate your creation, which is again done in a 3D software like Maya. With this step done, you're all set to export your model into any game engine you like, to make your own game or just view your model.

So in short, a simplified pipeline of creating a model using ZBrush, Maya, and Photoshop would look like this:

As shown in the previous image, there is more than one way of creating game models. We'll see in the later chapters that ZBrush could even be used for all of the first four steps, covering more than half of the workflow for game model production, as shown in the second diagram.

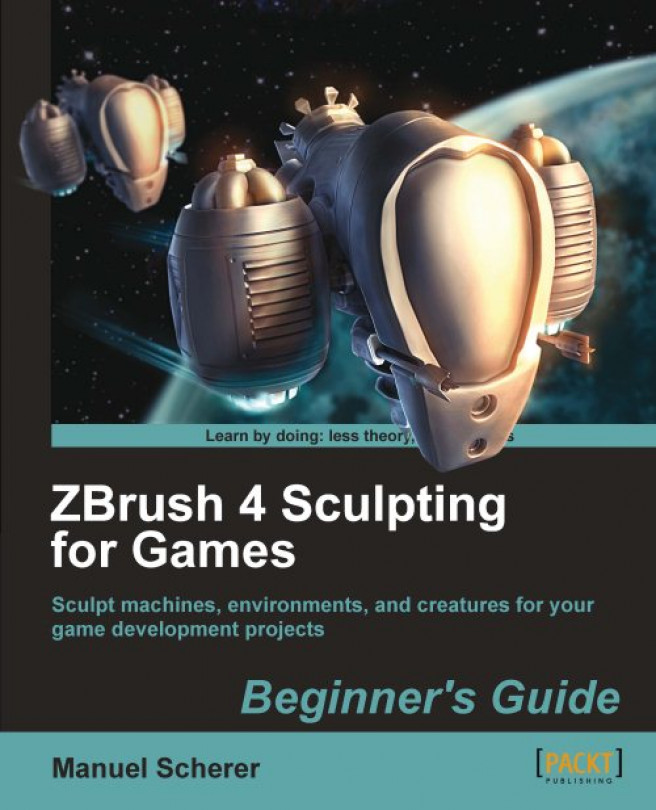
Here's another highly detailed example we're going to sculpt and view in real time:

What you'll need for this book


First of all, make sure, you have at least ZBrush version 4.0 installed on your computer.

Note

ZBrush is very fast, but still requires a computer with a bit of horsepower. It takes full advantage of multiple cores in your computer or more RAM-Memory, the more the better. Still, a dual core processor with 1 or better 2 GB of RAM will probably be sufficient to work you through this book. If this is all Greek to you, but your computer isn't age-old, it will probably work out well, too.

Another important point to mention are pen tablets. They usually consist of a tablet and a pen, imitating real drawing on your computer. You can still work in ZBrush just with your mouse, but it is highly recommended to use a pen tablet. They are affordable, depending on the working size you choose. Using ZBrush with a pen tablet not only saves you a lot of time, but is also more fun, because it feels very intuitive and natural.

If you ever tried to paint with a mouse, you know that it's a lot faster with a pencil.

Note

If you think of buying a pen tablet www.wacom.com is a very well-known manufacturer.

This book assumes you're working with ZBrush on Windows. So if you're on a Mac, remember that the Control Key (Ctrl) we'll refer to is the Command Key (Cmd) on your keyboard instead.

Terminology


There are six terms we will refer to most of the time in this book: Vertex, Edge, Polygon, Quad, Triangle, and Mesh. Let's see, how we can use them to describe a model of a hand, as shown in the following image:

Let's see what they mean in detail:

  • A point in 3D space, is also called Vertex

  • Two connected vertices form a line in 3D space, which is called an Edge

  • At least three points form a "polygon", which is sometimes also called a Face

  • More precisely, a polygon made out of exactly three vertices is called a Triangle, four vertices form a Quad

  • The entire hand is composed of several "polygons" forming a Mesh

Working in the field of digital art


The most important thing about working in digital art seems to be very obvious but is often overlooked. It's a form of art and it should also be treated this way. This is something that you should have in mind when working on 3D game models or even concept art, because things such as color and composition will always be part of your work, even if not addressed explicitly.

This doesn't mean that you have to be the world's best painter to start in game art, but just think of your work as art, and also apply the rules of art to it.

Although job positions in game production include the term "artist", for example "concept artist" or "character artist", it is still a field that combines technical and artistic knowledge, and sometimes one outweighs the other.

ZBrush is a very good example of how creating digital art becomes less technical, so more and more people are able to give it a try. As this becomes easier and easier, the real distinction between digital artists will lie in their artistic capability, not their technical knowledge.

If you already have some experience in drawing or painting or even sculpting, it will be even easier for you to use ZBrush. I personally believe that if you can draw it, you can also sculpt it in ZBrush, because both mediums have so much in common.

Like every skill, creating art requires practice. We'll address decisions made out of artistic reasons in this book, so you can decide if you follow them, or alter the examples to your own imagination. Because at the end of the day, it all comes down to being able to give reasons for your decisions.

The concept


The concept is quite an important step in the creative process. Some people like to do it in writing to maybe share it with others, some just do it for themselves. Like the preceding paragraph stated, it's important to be able to explain your decisions. So at first, you need to know the purpose of your 3D-model. Sometimes, you may get such a concept from your Art Director, or you're given the freedom to create your own. To illustrate the latter case, let's imagine a character and do this process in short, so you can see how much this first concept can improve the process and the resulting piece of work.

This example will be written like a really short background story for the character, to give it some personality. Again, there are many ways of doing this and you are encouraged to find the ones that work best for you, because it depends on your personal style of working.

Time for action - a short example of a concept


Let's imagine we want to create a robot for a game and are given all the freedom we want (which will probably only be the case in personal projects, but it's a good example of how things could work). So we write down short, let's say three, sentences to better define our character.

  1. 1. Let's imagine there is not just one, but two robots guarding a city for over a thousand years.

  2. 2. Both of them were given orders at the time of creation, but are not to be controlled any further.

  3. 3. They haven't moved since their creation, so they probably won't in the future, it's just a tale, right?

What just happened?

Let's see how our imagined robot takes form with each sentence.

"create a robot for a game"

At this stage we don't have much of a clue what the robot could look like.

  1. 1. Let's imagine there is not just one, but two robots guarding a city for over a thousand years.

    Now we could imagine two robots, maybe like brothers in arms, big enough to guard a whole city. They must be strong, but also protective, so that bright, positive colors in combination with white come to mind. Maybe they have features of a knight being loyal beyond death. They could even feature building parts of the city itself as being a part of it. As for the posture, something very calm and resting could fit. Maybe they are sitting opposite to each other, awaiting their call.

  2. 2. Both of them were given orders at the time of creation, but are not to be controlled any further.

    This may result in a neutral, machine-like expression on their face, following orders, without emotion and questioning, for ages.

  3. 3. They haven't moved since their creation, so they probably won't in the future, it's just a tale, right?

    This even tells something about their future movement, maybe they move like a child, who has to learn walking and is struggling to keep the balance. It's crucial to bear in mind how the character would move while creating or modelling. Don't waste your time by modeling a character that can't move properly in the end.

    The second part of the sentence also implies how others feel or think about the character, giving some hints about the background story and even creating some air of mystery with the uncertainty of their power.

    When coming up with concepts for mediums like film or games, which have a high demand for emotions, it's often helpful to also express them in writing style.

    This was just the beginning. Depending on the rest of the storyline, especially the period these characters live in or even the target audience, many different robots could arise from this short concept.

    However, only three sentences made up a much clearer image of what we would like to achieve. With such goals in mind, you can always step back and check if your digital sculpture serves the same purpose as the concept. This will greatly improve your final work, because every part of it will serve a purpose, defined in the beginning. Searching such a purpose in other digital characters is also a great exercise.

    It's also important to notice that a concept not only tells you what to do, but also what not to. Nonetheless, it's just a starting point, and it will evolve during the whole process.

Have a go hero - imagine your own concept!

Try to write a short concept on your own. Just start with a "thing" and then create a story around it, as shown in the previous example in around three sentences.

Explore ZBrush on the Web


Now that you're digging into ZBrush, these websites are worth a visit:

http://www.pixologic.com. As the developers of ZBrush, this site features many customer stories, tutorials, and most interestingly the turntable gallery, where you can rotate freely around ZBrush models from others.

http://www.ZBrushcentral.com. The main forum with answers for all ZBrush-related questions and a nice "top-row-gallery".

http://www.ZBrush.info. This is a wiki, hosted by pixologic, containing the online documentation for ZBrush.

Summary


In this chapter, we've learned quite a lot about ZBrush, how to use it in production, discussed the most important terminology and finally talked about digital art in general and the importance of a concept.

So, now that we've covered all the preliminary steps, let's throw a glance at the interface of ZBrush and create our first model.

Left arrow icon Right arrow icon

Key benefits

  • Fast-paced friendly guide to using ZBrush in game development
  • No prior knowledge of ZBrush required
  • Covers all aspects of sculpting for games ‚Äì from developing your concept art to integrating your models with the game environment
  • Uses realistic, impressive examples throughout the book

Description

ZBrush is a fantastic tool for creating models for use in computer games. Using a wide range of powerful tools you can create models for vehicles, props, environments, and characters. This book makes creating game art in ZBrush fast and easy. It covers everything you need to create models of all kinds for your game projects, even if you've never used ZBrush before. Built around four complete ZBrush projects, the book gives you everything you need to sculpt props, vehicles, and creatures in ZBrush. You'll start by creating a "spooky tree" model, mastering the sculpting, texturing, and decoration skills that are essential for all ZBrush topics. Next you'll move to man-made objects with a sci-fi drone. Next you'll see how to sculpt monsters and other creatures, deal with cloth and other soft materials, and prepare the model to become an animated, controllable character in a game. The final project returns to machines, building a complete, detailed spaceship for use in your sci-fi games.

What you will learn

Model solid and organic matter in ZBrush Produce low-poly models suitable for use in 3D games Work with textures, materials, and other details Produce outstanding visual results Incorporate material from photos and other sources into your sculptures Produce complex creatures and objects with moving parts

What do you get with eBook?

Product feature icon Instant access to your Digital eBook purchase
Product feature icon Download this book in EPUB and PDF formats
Product feature icon Access this title in our online reader with advanced features
Product feature icon DRM FREE - Read whenever, wherever and however you want
Buy Now

Product Details


Publication date : Mar 16, 2011
Length 348 pages
Edition : 1st Edition
Language : English
ISBN-13 : 9781849690805
Vendor :
Pixologic
Category :
Concepts :

Table of Contents

24 Chapters
ZBrush 4 Sculpting for Games Chevron down icon Chevron up icon
Credits Chevron down icon Chevron up icon
About the Author Chevron down icon Chevron up icon
About the Reviewers Chevron down icon Chevron up icon
www.PacktPub.com Chevron down icon Chevron up icon
Preface Chevron down icon Chevron up icon
Getting Started Chevron down icon Chevron up icon
Learning the Interface Chevron down icon Chevron up icon
Modeling a Spooky Tree with ZSpheres Chevron down icon Chevron up icon
Adding Details to the Tree Chevron down icon Chevron up icon
Texturing the Tree with Polypaint Chevron down icon Chevron up icon
Adding an Environment to the Tree Chevron down icon Chevron up icon
Modeling a Sci-Fi Drone Chevron down icon Chevron up icon
Sci-Fi-Drone: Hard Surface Sculpting Chevron down icon Chevron up icon
Sci-Fi-Drone: Creating a Normal Map Chevron down icon Chevron up icon
Modeling a Creature with ZSketch Chevron down icon Chevron up icon
Sculpting the Creature's Body Chevron down icon Chevron up icon
Sculpting Fur and Accessories Chevron down icon Chevron up icon
Preparing the Creature for Games Chevron down icon Chevron up icon
Modeling the Harvester Ship Chevron down icon Chevron up icon
Detailing the Harvester Ship Chevron down icon Chevron up icon
Finishing the Harvester Ship Chevron down icon Chevron up icon
Epilogue Chevron down icon Chevron up icon
Pop quiz - Chevron down icon Chevron up icon

Customer reviews

Filter icon Filter
Top Reviews
Rating distribution
Empty star icon Empty star icon Empty star icon Empty star icon Empty star icon 0
(0 Ratings)
5 star 0%
4 star 0%
3 star 0%
2 star 0%
1 star 0%

Filter reviews by


No reviews found
Get free access to Packt library with over 7500+ books and video courses for 7 days!
Start Free Trial

FAQs

How do I buy and download an eBook? Chevron down icon Chevron up icon

Where there is an eBook version of a title available, you can buy it from the book details for that title. Add either the standalone eBook or the eBook and print book bundle to your shopping cart. Your eBook will show in your cart as a product on its own. After completing checkout and payment in the normal way, you will receive your receipt on the screen containing a link to a personalised PDF download file. This link will remain active for 30 days. You can download backup copies of the file by logging in to your account at any time.

If you already have Adobe reader installed, then clicking on the link will download and open the PDF file directly. If you don't, then save the PDF file on your machine and download the Reader to view it.

Please Note: Packt eBooks are non-returnable and non-refundable.

Packt eBook and Licensing When you buy an eBook from Packt Publishing, completing your purchase means you accept the terms of our licence agreement. Please read the full text of the agreement. In it we have tried to balance the need for the ebook to be usable for you the reader with our needs to protect the rights of us as Publishers and of our authors. In summary, the agreement says:

  • You may make copies of your eBook for your own use onto any machine
  • You may not pass copies of the eBook on to anyone else
How can I make a purchase on your website? Chevron down icon Chevron up icon

If you want to purchase a video course, eBook or Bundle (Print+eBook) please follow below steps:

  1. Register on our website using your email address and the password.
  2. Search for the title by name or ISBN using the search option.
  3. Select the title you want to purchase.
  4. Choose the format you wish to purchase the title in; if you order the Print Book, you get a free eBook copy of the same title. 
  5. Proceed with the checkout process (payment to be made using Credit Card, Debit Cart, or PayPal)
Where can I access support around an eBook? Chevron down icon Chevron up icon
  • If you experience a problem with using or installing Adobe Reader, the contact Adobe directly.
  • To view the errata for the book, see www.packtpub.com/support and view the pages for the title you have.
  • To view your account details or to download a new copy of the book go to www.packtpub.com/account
  • To contact us directly if a problem is not resolved, use www.packtpub.com/contact-us
What eBook formats do Packt support? Chevron down icon Chevron up icon

Our eBooks are currently available in a variety of formats such as PDF and ePubs. In the future, this may well change with trends and development in technology, but please note that our PDFs are not Adobe eBook Reader format, which has greater restrictions on security.

You will need to use Adobe Reader v9 or later in order to read Packt's PDF eBooks.

What are the benefits of eBooks? Chevron down icon Chevron up icon
  • You can get the information you need immediately
  • You can easily take them with you on a laptop
  • You can download them an unlimited number of times
  • You can print them out
  • They are copy-paste enabled
  • They are searchable
  • There is no password protection
  • They are lower price than print
  • They save resources and space
What is an eBook? Chevron down icon Chevron up icon

Packt eBooks are a complete electronic version of the print edition, available in PDF and ePub formats. Every piece of content down to the page numbering is the same. Because we save the costs of printing and shipping the book to you, we are able to offer eBooks at a lower cost than print editions.

When you have purchased an eBook, simply login to your account and click on the link in Your Download Area. We recommend you saving the file to your hard drive before opening it.

For optimal viewing of our eBooks, we recommend you download and install the free Adobe Reader version 9.