


Trying ReactJS
It is time to hack some code and create our first application with ReactJS. We'll start configuring React in a simple web page by adding the ReactJS script dependency. Then, we'll create a JavaScript file that will hold our ReactJS component code and render it in an HTML element.
Then, we'll rebuild the same example using JSX syntax and learn how to configure that in the page. Don't worry about JSX for now as it will be covered in detail in the Chapter 2, Exploring JSX and the ReactJS Anatomy.
This is going to be a simple application for learning purposes. In following chapters, we're going to create a full web application that will consume the Facebook Open Graph API, log in with your Facebook's account, render your friend list, and so on. So, let's get our hands dirty!
Configuring ReactJS in a web page
After downloading ReactJS scripts dependencies, we need to create an HTML file with a simple element inside its body. We're going to call the file root.html. It will be responsible for rendering our ReactJS component.
Here is how your HTML file should look like:
<!DOCTYPE html>
<html>
<head>
  <script src="http://fb.me/react-0.12.2.js"></script>
</head>
<body>
  <div id="root"></div>
</body>
</html>
It references Facebook CDN scripts, but you can reference the scripts that we have downloaded (fb-react-0.12.2.js) locally.
Here is how your HTML file should look like if the locally downloaded ReactJS file is used instead of CDN:
<!DOCTYPE html>
<html>
<head>
  <script src="fb-react-0.12.2.js"></script>
</head>
<body>
  <div id="root"></div>
</body>
</html>
Creating your first React component
Now create a JavaScript file named hello-world.js and reference that in the HTML file by placing this code after the root div element:
<div id="root"></div>
<script src="hello-world.js"></script>
We will make use of React.createElement to create React element. The format of React.createElement is:
ReactElement createElement(
  string/ReactClass type,
  [object props],
  [children ...]
)
Paste the following code into hello-world.js:
var HelloWorld = React.createClass({
  render: function () {
    return React.createElement('h1', null, "Hello World from Learning ReactJS");
  }
});

React.render(
  React.createElement(HelloWorld, null),
  document.getElementById('root')
);

In the above code
return React.createElement('h1', null, "Hello World from Learning ReactJS");
h1 → Is the type of HTML element to be created
null → means there is no object properties presentation
Third argument → the content of the h1 tag
Details of this code will be covered in more detail in the following chapters.
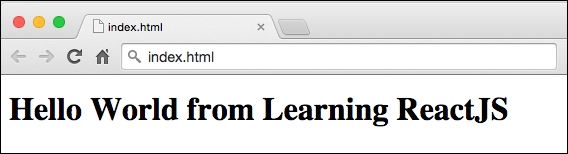
Now open the page in any browser and check that it created an h1 html element and placed the text inside it. You should see something like this:
Configuring JSX
Now we are going to make the same application using JSX syntax. First, we need to configure that in our HTML page by adding the JSX transformer script file JSXTransformer-0.12.2.js after the ReactJS script react-0.12.2.js within the head element:
<head>
  <script src="http://fb.me/react-0.12.2.js"></script>
  <script src="http://fb.me/JSXTransformer-0.12.2.js"></script>
</head>
You also need to change the hello-world.js type reference to text/jsx in the HTML page. It must be like this:
<script type="text/jsx" src="hello-world.js"></script>
Serving files through the web server
Google Chrome doesn't accept requests to local files of type text/jsx, it throws a cross-origin request error (commonly named as the CORS error). CORS is sharing a resource on a different domain than the current one. Chrome security doesn't allow it by default; however, you can access it on Firefox and Safari. It's also possible to work around with CORS errors by starting a local server, such as Python, Node, or any other web server you want.
Another way is to install the node package httpster:
npm install -g httpster
Once installed, run the command httpster from the react application directory. The application will load up in your browser (default port 3333):

Another way is to install the simple Python server. Install it and run its command inside the folder you want to serve and then you're ready to go. You can find out how to install python at https://www.python.org/. After installing python, you can run the following command inside your project folder:
python -m SimpleHTTPServer
It will output a message saying the port it's running such as Serving HTTP on 0.0.0.0 port 8000. You can now navigate to http://localhost:8000/. If this port is being used by another application, consider passing the desired port number as the last parameter in the same command as follows:
python -m SimpleHTTPServer 8080
If you don't want to use python, ReactJS has provided a tutorial page with scripts in other languages to run a simple web server and you should be able to test it. You can check it out at https://github.com/reactjs/react-tutorial/.
Creating a React component with the JSX syntax
With our HTML page configured, we can now change the hello-world.js script file to follow the JSX Syntax. Your script file should look like this:
var HelloWorld = React.createClass({
  render: function () {
    return <h1>Hello World from Learning ReactJS</h1>;
  }
});

React.render(
  <HelloWorld />,
  document.getElementById('root')
);
It will generate the same result as in the previous Hello World example. As you can see, there is no need to call the createElement method explicitly.
Thus, the JSX will produce the same output as the JavaScript, but without the extra braces and semicolons.
In the following chapter, Chapter 2, Exploring JSX and the ReactJS Anatomy you're going to learn how JSX works and why it is highly recommended.