Parallel programming and concurrency are becoming more prevalent in modern .NET development. Most developers today have been exposed to asynchronous programming with the async
and await
keywords in C#. This book will cover all of these concepts in the chapters ahead.
In this chapter, we will start with the basics of how to work with managed threading in .NET. You will learn how to create and destroy threads, handle exceptions, synchronize data, and utilize the objects provided by .NET to handle background operations. Additionally, you will gain a basic understanding of how threads can be managed in a .NET application. The practical examples in this chapter will illustrate how to leverage managed threading in C# projects.
In this chapter, we will cover the following topics:
By starting with the core concepts of threading in .NET, you will gain a solid foundation as you move forward with your learning throughout this book. It is important to understand the basics to prevent common mistakes from being made while introducing threading and asynchrony to .NET applications. It is all too easy to exhaust resources or put the application’s data in an invalid state. Let’s get started with managed threading with C#.
To follow along with the examples in this chapter, the following software is recommended:
While these are recommended, as long as you have .NET 6 installed, you can use your preferred editor. For example, Visual Studio 2022 for Mac, JetBrains Rider, or Visual Studio Code will work just as well.
All the code examples for this chapter can be found on GitHub at https://github.com/PacktPublishing/Parallel-Programming-and-Concurrency-with-C-sharp-10-and-.NET-6/tree/main/chapter01.
It’s time to get started by learning about the basics of threading in C# and .NET. We will be covering the managed threading concepts that are available in .NET 6, but many of these features have been part of .NET since the beginning. The System.Threading
namespace has been available since .NET Framework 1.0. In the subsequent 20 years, there have been many useful features added for developers.
In order to responsibly use threading in your applications, you should understand exactly what a thread is and how threads are used by your application’s processes.
We will start our journey with the basic units of application processing, threads, and processes. A process encapsulates all the execution of an application. This is true for all platforms and frameworks. In .NET, you can think of a process as your .exe
or hosted service.
Note
In .NET Framework, the concept of application domains (or app domains), which create isolation units within a process, was introduced. These app domains provide security and reliability by isolating the execution of code loaded into a new app domain. App domains still exist but are not available for developers to create or unload in .NET Core and modern versions of .NET. To read more about app domains, check out this Microsoft Docs article at https://docs.microsoft.com/dotnet/framework/app-domains/application-domains.
A thread represents a single unit of execution within a process. By default, a .NET application will execute all its logic on a single thread (that is, the primary or main thread). Developers can leverage managed threads and other .NET constructs to move from a single-threaded to a multithreaded world, but how do you know when to take this step?
There are multiple factors to consider when deciding whether to introduce threading to an application. These factors are both internal and external to the application. The external factors include the hardware in terms of where the application will be deployed, how powerful the processors are where the application will be running, and what other types of processes will be running on these systems?
If your application will be competing for limited resources, it is best to be judicious with the use of multiple threads. If users get the impression that your application is impacting the performance of their systems, you will need to scale back on the number of threads being consumed by your process. Another factor that comes into play is how critical your application is in relation to others on the system. Mission-critical applications will have more resources allocated to remain responsive when needed.
Other common reasons for introducing threading relate to the application itself. Desktop and mobile applications need to keep the user interface (UI) responsive to user input. If the application needs to process a large amount of data or load it from a database, file, or network resource, executing on the main thread can cause the UI to freeze or lag. Also, executing long-running tasks in parallel on multiple threads can reduce the overall execution time of the task.
These operations can be offloaded to background threads if the execution of the tasks is not critical to the application state. Let’s look at the difference between foreground threads and background threads in .NET.
The difference between foreground threads and background threads might not be what you think. A managed thread created as a foreground thread is not the UI thread or the main thread. Foreground threads are threads that will prevent the managed process from terminating if they are running. If an application is terminated, any running background threads will be stopped so that the process can shut down.
By default, newly created threads are foreground threads. To create a new background thread, set the Thread.IsBackground
property to true
before starting the thread. Additionally, you can use the IsBackground
property to determine the background status of an existing thread. Let’s look at an example where you might want to use a background thread in your application.
In this example, we will create a console application in Visual Studio that will continuously check the status of a network connection on a background thread. Create a new .NET 6 console app project, name it BackgroundPingConsoleApp
, and in Program.cs
, enter the following code:
Console.WriteLine("Hello, World!"); var bgThread = new Thread(() => { while (true) { bool isNetworkUp = System.Net.NetworkInformation .NetworkInterface.GetIsNetworkAvailable(); Console.WriteLine($"Is network available? Answer: {isNetworkUp}"); Thread.Sleep(100); } }); bgThread.IsBackground = true; bgThread.Start(); for (int i = 0; i < 10; i++) { Console.WriteLine("Main thread working..."); Task.Delay(500); } Console.WriteLine("Done"); Console.ReadKey();
Let’s discuss each part of the preceding code before we run it and examine the output:
Console.WriteLine
statement was created by the project template. We’ll keep this here to help illustrate the order output in the console.Thread
type named bgThread
. Inside the body of the thread, there is a while
loop that will execute continuously until the thread is terminated. Inside the loop, we’re calling the GetIsNetworkAvailable
method and outputting the result of that call to the console. Before starting over again, we’re using Thread.Sleep
to inject a 100-millisecond delay.bgThread.IsBackground = true;
Setting the IsBackground
property to true
is what makes our new thread a background thread. This tells our application that the code executing inside the thread is not critical to the application, and the process can terminate without needing to wait for the thread to complete its work. That is a good thing here because the while
loop we created will never be complete.
Start
method.for
loop will execute 10 times and output "Main thread working..."
to the console. At the end of each iteration of the loop, Task.Delay
is used to wait 500 milliseconds, hopefully providing some time for the background thread to perform some work.for
loop, the application will output "Done"
to the console and wait for the user input to terminate the application with the Console.ReadKey
method.
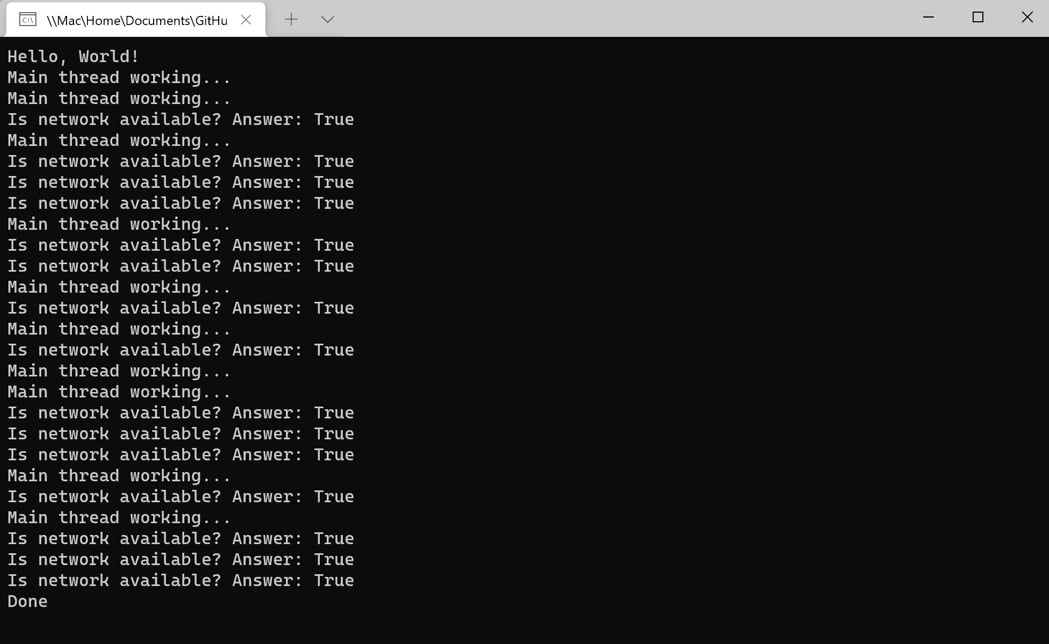
Now, run the application and examine the console output. You can press any key to stop the application when you feel you have let it run for long enough:
Figure 1.1 – Viewing the threaded console application output
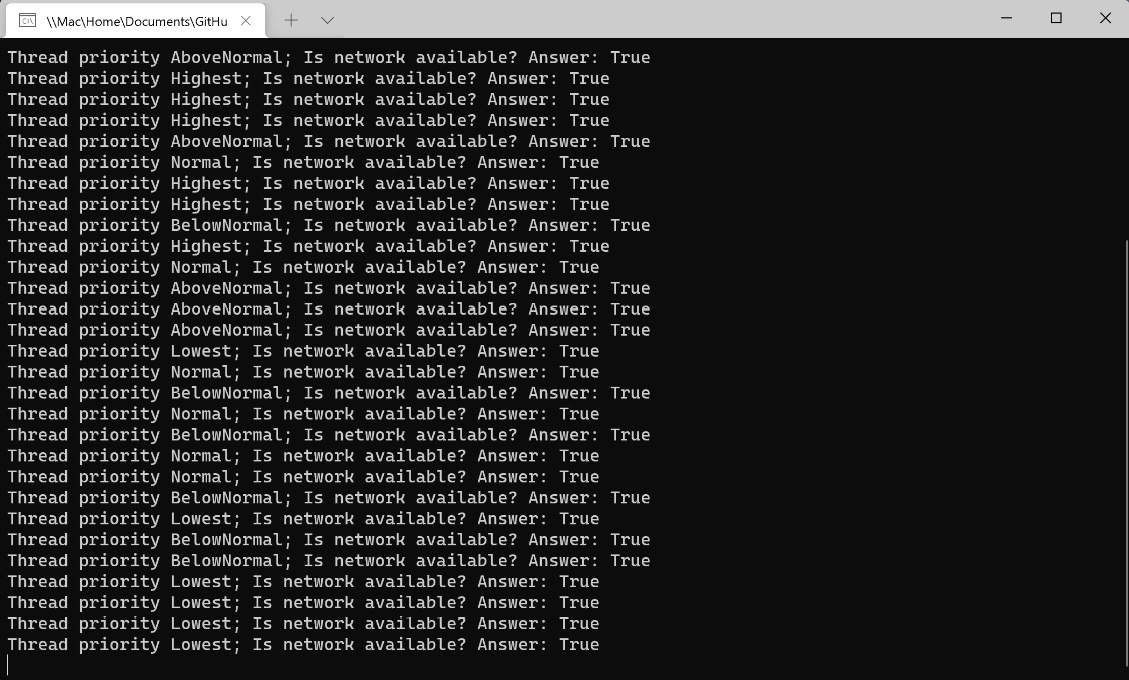
The result might not be what you expected. You can see that the program executed all the logic on the primary thread before starting any of the background thread work. Later, we’ll see how to change the priority of the threads to manipulate which work will be processed first.
What is important to understand, in this example, is that we were able to stop the console application by pressing a key to execute the Console.ReadKey
command. Even though the background thread is still running, the process does not consider the thread to be critical to the application. If you comment out the following line, the application will no longer terminate by pressing a key:
bgThread.IsBackground = true;
The application will have to be stopped by closing the command window or using the Debug | Stop Debugging menu item in Visual Studio. Later, in the Scheduling and canceling work section, we will learn how to cancel work in a managed thread.
Before we look at any more examples of using managed threads, we will take some time to learn exactly what they are.
In .NET, managed threading is implemented by the System.Threading.Thread
class that we used in the previous example. The managed execution environment for the current process monitors all the threads that have been run as part of the process. Unmanaged threading is how threads are managed when programming in C++ with native Win32 threading elements. It is possible for unmanaged threads to enter a managed process through COM interop or through platform invoke (PInvoke
) calls from .NET code. If this thread is entering the managed environment for the first time, .NET will create a new Thread
object to be managed by the execution environment.
A managed thread can be uniquely identified using the ManagedThreadId
property of the Thread
object. This property is an integer that is guaranteed to be unique across all threads and will not change over time.
The ThreadState
property is a read-only property that provides the current execution state of the Thread
object. In the example in the .NET threading basics section, if we had checked the ThreadState
property before calling bgThread.Start()
, it would have been Unstarted
. After calling Start
, the state will change to Background
. If it were not a background thread, calling Start
would change the ThreadState
property to Running
.
Here is a full list of the ThreadState
enum values:
Aborted
: The thread has been aborted.AbortRequested
: An abort has been requested but has not yet been completed.Background
: The thread is running in the background (IsBackground
has been set to true).Running
: The thread is currently running.Stopped
: The thread has been stopped.StopRequested
: A stop has been requested but has not yet been completed.Suspended
: The thread has been suspended.SuspendRequested
: Thread suspension has been requested but has not yet been completed.Unstarted
: The thread has been created but not yet started.WaitSleepJoin
: The thread is currently blocked.The Thread.IsAlive
property is a less specific property that can tell you whether a thread is currently running. It is a boolean
property that will return true
if the thread has started and has not been stopped or aborted in some way.
Threads also have a Name
property that defaults to null
if they have never been set. Once a Name
property is set on a thread, it cannot be changed. If you attempt to set the Name
property of a thread that is not null, it will throw InvalidOperationException
.
We will cover additional aspects of managed threads in the remainder of this chapter. In the next section, we will dive deeper into the available methods and options for creating and destroying threads in .NET.
Creating and destroying threads are fundamental concepts of managed threading in .NET. We have already seen one code example that created a thread, but there are some additional constructors of the Thread
class that should be discussed first. Also, we will look at a few methods of pausing or interrupting thread execution. Finally, we will cover some ways to destroy or terminate a thread’s execution.
Let’s get started by going into more detail regarding creating and starting threads.
Creating managed threads in .NET is accomplished by instantiating a new Thread
object. The Thread
class has four constructor overloads:
Thread(ParameterizedThreadStart)
: This creates a new Thread
object. It does this by passing a delegate with a constructor that takes an object as its parameter that can be passed when calling Thread.Start()
.Thread(ThreadStart)
: This creates a new Thread
object that will execute the method to be invoked, which is provided as the ThreadStart
property.Thread(ParameterizedThreadStart, Int32):
This adds a maxStackSize
parameter. Avoid using this overload because it is best to allow .NET to manage the stack size.Thread(ThreadStart, Int32):
This adds a maxStackSize
parameter. Avoid using this overload because it is best to allow .NET to manage the stack size.Our first example used the Thread(ThreadStart)
constructor. Let’s look at a version of that code that uses ParameterizedThreadStart
to pass a value by limiting the number of iterations of the while
loop:
Console.WriteLine("Hello, World!"); var bgThread = new Thread((object? data) => { if (data is null) return; int counter = 0; var result = int.TryParse(data.ToString(), out int maxCount); if (!result) return; while (counter < maxCount) { bool isNetworkUp = System.Net.NetworkInformation .NetworkInterface.GetIsNetworkAvailable(); Console.WriteLine($"Is network available? Answer: {isNetworkUp}"); Thread.Sleep(100); counter++; } }); bgThread.IsBackground = true; bgThread.Start(12); for (int i = 0; i < 10; i++) { Console.WriteLine("Main thread working..."); Task.Delay(500); } Console.WriteLine("Done"); Console.ReadKey();
If you run the application, it will run just like the last example, but the background thread should only output 12 lines to the console. You can try passing different integer values into the Start
method to see how that impacts the console output.
If you want to get a reference to the thread that is executing the current code, you can use the Thread.CurrentThread
static property:
var currentThread = System.Threading.Thread.CurrentThread;
This can be useful if your code needs to check the current thread’s ManagedThreadId
, Priority
, or whether it is running in the background.
Next, let’s look at how we can pause or interrupt the execution of a thread.
Sometimes, it is necessary to pause the execution of a thread. A common real-life example of this is a retry mechanism on a background thread. If you have a method that sends log data to a network resource, but the network is unavailable, you can call Thread.Sleep
to wait for a specific interval before trying again. Thread.Sleep
is a static method that will block the current thread for the number of milliseconds specified. It is not possible to call Thread.Sleep
on a thread other than the current one.
We have already used Thread.Sleep
in the examples in this chapter, but let’s change the code slightly to see how it can impact the order of events. Change the Thread.Sleep
interval inside the thread to 10
, remove the code that makes it a background thread, and change the Task.Delay()
call to Thread.Sleep(100)
:
Console.WriteLine("Hello, World!"); var bgThread = new Thread((object? data) => { if (data is null) return; int counter = 0; var result = int.TryParse(data.ToString(), out int maxCount); if (!result) return; while (counter < maxCount) { bool isNetworkUp = System.Net.NetworkInformation. NetworkInterface.GetIsNetworkAvailable(); Console.WriteLine($"Is network available? Answer: {isNetworkUp}"); Thread.Sleep(10); counter++; } }); bgThread.Start(12); for (int i = 0; i < 12; i++) { Console.WriteLine("Main thread working..."); Thread.Sleep(100); } Console.WriteLine("Done"); Console.ReadKey();
When running the application again, you can see that putting a greater delay on the primary thread allows the process inside bgThread
to begin executing before the primary thread completes its work:
Figure 1.2 – Using Thread.Sleep to change the order of events
The two Thread.Sleep
intervals can be adjusted to see how they impact the console output. Give it a try!
Additionally, it is possible to pass Timeout.Infinite
to Thread.Sleep
. This will cause the thread to pause until it is interrupted or aborted by another thread or the managed environment. Interrupting a blocked or paused thread is accomplished by calling Thread.Interrupt
. When a thread is interrupted, it will receive a ThreadInterruptedException
exception.
The exception handler should allow the thread to continue working or clean up any remaining work. If the exception is unhandled, the runtime will catch the exception and stop the thread. Calling Thread.Interrupt
on a running thread will have no effect until that thread has been blocked.
Now that you understand how to create an interrupt thread, let’s wrap up this section by learning how to destroy a thread.
Generally, destroying a managed thread is considered an unsafe practice. That is why .NET 6 no longer supports the Thread.Abort
method. In .NET Framework, calling Thread.Abort
on a thread would raise a ThreadAbortedException
exception and stop the thread from running. Aborting threads was not made available in .NET Core or any of the newer versions of .NET. If some code needs to be forcibly stopped, it is recommended that you run it in a separate process from your other code and use Process.Kill
to terminate the other process.
Any other thread termination should be handled cooperatively using cancelation. We will see how to do this in the Scheduling and canceling work section. Next, let’s discuss some of the exceptions to handle when working with managed threads.
There are a couple of exception types that are specific to managed threading, including the ThreadInterruptedException
exception that we covered in the previous section. Another exception type that is specific to threading is ThreadAbortException
. However, as we discussed in the previous section, Thread.Abort
is not supported in .NET 6, so, although this exception type exists in .NET 6, it is not necessary to handle it, as this type of exception is only possible in .NET Framework applications.
Two other exceptions are the ThreadStartException
exception and the ThreadStateException
exception. The ThreadStartException
exception is thrown if there is a problem starting the managed thread before any user code in the thread can be executed. The ThreadStateException
exception is thrown when a method on the thread is called that is not available when the thread is in its current ThreadState
property. For example, calling Thread.Start
on a thread that has already started is invalid and will cause a ThreadStateException
exception. These types of exceptions can usually be avoided by checking the ThreadState
property before acting on the thread.
It is important to implement comprehensive exception handling in multithreaded applications. If code in managed threads begins to fail silently without any logging or causing the process to terminate, the application can fall into an invalid state. This can also result in degrading performance and unresponsiveness. While this kind of degradation might be noticed quickly for many applications, some services, and other non-GUI-based applications, could continue for some time without any issues being noticed. Adding logging to the exception handlers along with a process to alert users when logs are reporting failures will help to prevent problems with undetected failing threads.
In the next section, we’ll discuss another challenge with multithreaded code: keeping data in-sync across multiple threads.
In this section, we will look at some of the methods that are available in .NET for synchronizing data across multiple threads. Shared data across threads can be one of the primary pain points of multithreaded development if not handled properly. Classes in .NET that have protections in place for threading are said to be thread-safe.
Data in multithreaded applications can be synchronized in several different ways:
Monitor
class or with some help from the .NET compiler. In this section, we’ll look at the first two methods. Let’s start by discussing how to synchronize code regions in your application.
There are several techniques you can use to synchronize regions of your code. The first one we will discuss is the Monitor
class. You can surround a block of code that can be accessed by multiple threads with calls to Monitor.Enter
and Monitor.Exit
:
... Monitor.Enter(order); order.AddDetails(orderDetail); Monitor.Exit(order); ...
In this example, imagine you have an order
object that is being updated by multiple threads in parallel. The Monitor
class will lock access from other threads while the current thread adds an orderDetail
item to the order
object. The key to minimizing the chance of introducing wait time to other threads is by only locking the lines of code that need to be synchronized.
Note
The Interlocked
class, as discussed in this section, performs atomic operations in user mode rather than kernel mode. If you want to read more about this distinction, I recommend checking out this blog post by Nguyen Thai Duong: https://duongnt.com/interlocked-synchronization/.
The Interlocked
class provides several methods for performing atomic operations on objects shared across multiple threads. The following list of methods is part of the Interlocked
class:
Add
: This adds two integers, replacing the first one with the sum of the twoAnd
: This is a bitwise and
operation for two integersCompareExchange
: This compares two objects for equality and replaces the first if they are equalDecrement
: This decrements an integerExchange
: This sets a variable to a new valueIncrement
: This increments an integerOr
: This is a bitwise or
operation for two integersThese Interlocked
operations will lock access to the target object only for the duration of that operation.
Additionally, the lock
statement in C# can be used to lock access to a block of code to only a single thread. The lock
statement is a language construct implemented using the .NET Monitor.Enter
and Monitor.Exit
operations.
There is some built-in compiler support for the lock
and Monitor
blocks. If an exception is thrown inside one of these blocks, the lock is automatically released. The C# compiler generates a try/finally
block around the synchronized code and makes a call to Monitor.Exit
in the finally
block.
Let’s finish up this section on synchronization by looking at some other .NET classes that provide support for manual data synchronization.
The use of manual synchronization is common when synchronizing data across multiple threads. Some types of data cannot be protected in other ways, such as these:
These fields do not have method bodies, so there is no way to put a synchronized code region around them. With manual synchronization, you can protect all the areas where these objects are used. These regions can be protected with lock
statements in C#, but some other synchronization primitives provide access to shared data and can coordinate the interactions between threads on a more granular level. The first construct we will examine is the System.Threading.Mutex
class.
The Mutex
class is similar to the Monitor
class in that it blocks access to a region of code, but it can also provide the ability to grant access to other processes. When using the Mutex
class, use the WaitOne()
and ReleaseMutex()
methods to acquire and release the lock. Let’s look at the same order/order details example. This time, we’ll use a Mutex
class declared at the class level:
private static Mutex orderMutex = new Mutex(); ... orderMutex.WaitOne(); order.AddDetails(orderDetail); orderMutex.ReleaseMutex(); ...
If you want to enforce a timeout period on the Mutex
class, you can call the WaitOne
overload with a timeout value:
orderMutex.WaitOne(500);
It is important to note that Mutex
is a disposable type. You should always call Dispose()
on the object when you are finished using it. Additionally, you can also enclose a disposable type within a using
block to have it disposed of indirectly.
In this section, the last .NET manual locking construct we are going to examine is the ReaderWriterLockSlim
class. You can use this type if you have an object that is used across multiple threads, but most of the code is reading data from the object. You don’t want to lock access to the object in the blocks of code that are reading data, but you do want to prevent reading while the object is being updated or simultaneously written. This is referred to as "multiple readers, single writer."
This ContactListManager
class contains a list of contacts that can be added to or retrieved by a phone number. The class assumes that these operations can be called from multiple threads and uses the ReaderWriterLockSlim
class to apply a read lock in the GetContactByPhoneNumber
method and a write lock in the AddContact
method. The locks are released in a finally
block to ensure they are always released, even when exceptions are encountered:
public class ContactListManager { private readonly List<Contact> contacts; private readonly ReaderWriterLockSlim contactLock = new ReaderWriterLockSlim(); public ContactListManager( List<Contact> initialContacts) { contacts = initialContacts; } public void AddContact(Contact newContact) { try { contactLock.EnterWriteLock(); contacts.Add(newContact); } finally { contactLock.ExitWriteLock(); } } public Contact GetContactByPhoneNumber(string phoneNumber) { try { contactLock.EnterReadLock(); return contacts.FirstOrDefault(x => x.PhoneNumber == phoneNumber); } finally { contactLock.ExitReadLock(); } } }
If you were to add a DeleteContact
method to the ContactListManager
class, you would leverage the same EnterWriteLock
method to prevent any conflicts with the other operations in the class. If a lock is forgotten in one usage of contacts
, it can cause any of the other operations to fail. Additionally, it is possible to apply a timeout to the ReaderWriterLockSlim
locks:
contacts.EnterWriteLock(1000);
There are several other synchronization primitives that we have not covered in this section, but we have discussed some of the most common types that you will use. To read more about the available types for manual synchronization, you can visit Microsoft Docs at https://docs.microsoft.com/dotnet/standard/threading/overview-of-synchronization-primitives.
Now that we have examined different ways of synchronizing data when working with managed threads, let’s cover two more important topics before wrapping up this first chapter. We are going to discuss techniques to schedule work on threads and how to cancel managed threads cooperatively.
When orchestrating multithreaded processing in an application, it is important to understand how to schedule and cancel work on managed threads.
Let’s start by looking at how scheduling works with managed threads in .NET.
When it comes to managed threads, scheduling is not as explicit as it might sound. There is no mechanism to tell the operating system to kick off work at specific times or to execute within certain intervals. While you could write this kind of logic, it is probably not necessary. The process of scheduling managed threads is simply managed by setting priorities on the threads. To do this, set the Thread.Priority
property to one of the available ThreadPriority
values: Highest
, AboveNormal
, Normal
(default), BelowNormal
, or Lowest
.
Generally, higher priority threads will execute before those of lower priority. Usually, a thread of Lowest
priority will not execute until all the higher priority threads have been completed. If the Lowest
priority thread has started and a Normal
thread kicks off, the Lowest
priority thread will be suspended so that the Normal
thread can be run. These rules are not absolute, but you can use them as a guide. Most of the time, you will leave the default of Normal
for your threads.
When there are multiple threads of the same priority, the operating system will cycle through them, giving each thread up to a maximum allotment of time before suspending work and moving on to the next thread of the same priority. The logic will vary by the operating system, and the prioritization of a process can change based on whether the application is in the foreground of the UI.
Let’s use our network checking code to test thread priorities:
NetworkingWork
, and add a method named CheckNetworkStatus
with the following implementation:public void CheckNetworkStatus(object data) { for (int i = 0; i < 12; i++) { bool isNetworkUp = System.Net. NetworkInformation.NetworkInterface .GetIsNetworkAvailable(); Console.WriteLine($"Thread priority {(string)data}; Is network available? Answer: {isNetworkUp}"); i++; } }
The calling code will be passing a parameter with the priority of the thread that is currently executing the message. That will be added as part of the console output inside the for
loop, so users can see which priority threads are running first.
Program.cs
with the following code:using BackgroundPingConsoleApp_sched; Console.WriteLine("Hello, World!"); var networkingWork = new NetworkingWork(); var bgThread1 = new Thread(networkingWork.CheckNetworkStatus); var bgThread2 = new Thread(networkingWork.CheckNetworkStatus); var bgThread3 = new Thread(networkingWork.CheckNetworkStatus); var bgThread4 = new Thread(networkingWork.CheckNetworkStatus); var bgThread5 = new Thread(networkingWork.CheckNetworkStatus); bgThread1.Priority = ThreadPriority.Lowest; bgThread2.Priority = ThreadPriority.BelowNormal; bgThread3.Priority = ThreadPriority.Normal; bgThread4.Priority = ThreadPriority.AboveNormal; bgThread5.Priority = ThreadPriority.Highest; bgThread1.Start("Lowest"); bgThread2.Start("BelowNormal"); bgThread3.Start("Normal"); bgThread4.Start("AboveNormal"); bgThread5.Start("Highest"); for (int i = 0; i < 10; i++) { Console.WriteLine("Main thread working..."); } Console.WriteLine("Done"); Console.ReadKey();
The code creates five Thread
objects, each with a different Thread.Priority
value. To make things a little more interesting, the threads are being started in reverse order of their priorities. You can try changing this on your own to see how the order of execution is impacted.
Figure 1.3 – Console output from five different threads
You can see that the operating system, which, in my case, is Windows 11, sometimes executes lower priority threads before all the higher priority threads have completed their work. The algorithm for selecting the next thread to run is a bit of a mystery. You should also remember that this is multithreading. Multiple threads are running at once. The exact number of threads that can run simultaneously will vary by the processor or virtual machine configuration.
Let’s wrap things up by learning how to cancel a running thread.
Canceling managed threads is one of the more important concepts to understand about managed threading. If you have long-running operations running on foreground threads, they should support cancelation. There are times when you might want to allow users to cancel the processes through your application’s UI, or the cancelation might be part of a cleanup process while the application is closing.
To cancel an operation in a managed thread, you will use a CancellationToken
parameter. The Thread
object itself does not have built-in support for cancellation tokens like some of the modern threading constructs .NET. So, we will have to pass the token to the method running in the newly created thread. In the next exercise, we will modify the previous example to support cancelation:
NetworkingWork.cs
so that the parameter passed to CheckNetworkStatus
is a CancellationToken
parameter:public void CheckNetworkStatus(object data) { var cancelToken = (CancellationToken)data; while (!cancelToken.IsCancellationRequested) { bool isNetworkUp = System.Net .NetworkInformation.NetworkInterface .GetIsNetworkAvailable(); Console.WriteLine($"Is network available? Answer: {isNetworkUp}"); } }
The code will keep checking the network status inside a while loop until IsCancellationRequested
becomes true
.
Program.cs
, we’re going to return to working with only one Thread
object. Remove or comment out all of the previous background threads. To pass the CancellationToken
parameter to the Thread.Start
method, create a new CancellationTokenSource
object, and name it ctSource
. The cancellation token is available in the Token
property:var pingThread = new Thread(networkingWork.CheckNetworkStatus); var ctSource = new CancellationTokenSource(); pingThread.Start(ctSource.Token); ...
for
loop, add a Thread.Sleep(100)
statement to allow pingThread
to execute while the main thread is suspended:for (int i = 0; i < 10; i++) { Console.WriteLine("Main thread working..."); Thread.Sleep(100); }
for
loop is complete, invoke the Cancel()
method, join the thread back to the main thread, and dispose of the ctSource
object. The Join
method will block the current thread and wait for pingThread
to complete using this thread:... ctSource.Cancel(); pingThread.Join(); ctSource.Dispose();
Thread.Sleep
statement on the main thread has been executed:Figure 1.4 – Canceling a thread in the console application
Now the network checker application is gracefully canceling the threaded work before listening for a keystroke to close the application.
When you have a long-running process on a managed thread, you should check for cancellation as the code iterates through loops, begins a new step in a process, and at other logical checkpoints in the process. If the operation uses a timer to periodically perform work, the token should be checked each time the timer executes.
Another way to listen for cancellation is by registering a delegate to be invoked when a cancellation has been requested. Pass the delegate to the Token.Register
method inside the managed thread to receive a cancellation callback. The following CheckNetworkStatus2
method will work exactly like the previous example:
public void CheckNetworkStatus2(object data) { bool finish = false; var cancelToken = (CancellationToken)data; cancelToken.Register(() => { // Clean up and end pending work finish = true; }); while (!finish) { bool isNetworkUp = System.Net.NetworkInformation .NetworkInterface.GetIsNetworkAvailable(); Console.WriteLine($"Is network available? Answer: {isNetworkUp}"); } }
Using a delegate like this is more useful if you have multiple parts of your code that need to listen for a cancellation request. A callback method can call several cleanup methods or set another flag that is monitored throughout the thread. It encapsulates the cleanup operation nicely.
We will revisit cancellation in Chapter 11, as we introduce new parallelism and concurrency concepts. However, this section should provide a solid foundation for understanding what comes next.
That concludes the final section on managed threads. Let’s wrap things up and review what we have learned.
In this chapter, we covered the basics of managed threading and the System.Threading.Thread
class. You should now have a good understanding of how to create and schedule a thread in .NET. You learned about some of the techniques for passing data to threads and how to use background threads for non-critical operations, so they don’t prevent your application from terminating. Finally, we used two different techniques for canceling threads in .NET.
In the next chapter, Chapter 2, we will learn how .NET has simplified and improved parallel programming and concurrency for developers over the last 20 years. Significant improvements were added in .NET 4.5 in the form of the async
and await
keywords, and .NET Core removed some of the legacy threading constructs of .NET Framework.
IsBackground
property of a running thread?Thread.Abort()
in .NET 6?Where there is an eBook version of a title available, you can buy it from the book details for that title. Add either the standalone eBook or the eBook and print book bundle to your shopping cart. Your eBook will show in your cart as a product on its own. After completing checkout and payment in the normal way, you will receive your receipt on the screen containing a link to a personalised PDF download file. This link will remain active for 30 days. You can download backup copies of the file by logging in to your account at any time.
If you already have Adobe reader installed, then clicking on the link will download and open the PDF file directly. If you don't, then save the PDF file on your machine and download the Reader to view it.
Please Note: Packt eBooks are non-returnable and non-refundable.
Packt eBook and Licensing When you buy an eBook from Packt Publishing, completing your purchase means you accept the terms of our licence agreement. Please read the full text of the agreement. In it we have tried to balance the need for the ebook to be usable for you the reader with our needs to protect the rights of us as Publishers and of our authors. In summary, the agreement says:
If you want to purchase a video course, eBook or Bundle (Print+eBook) please follow below steps:
Our eBooks are currently available in a variety of formats such as PDF and ePubs. In the future, this may well change with trends and development in technology, but please note that our PDFs are not Adobe eBook Reader format, which has greater restrictions on security.
You will need to use Adobe Reader v9 or later in order to read Packt's PDF eBooks.
Packt eBooks are a complete electronic version of the print edition, available in PDF and ePub formats. Every piece of content down to the page numbering is the same. Because we save the costs of printing and shipping the book to you, we are able to offer eBooks at a lower cost than print editions.
When you have purchased an eBook, simply login to your account and click on the link in Your Download Area. We recommend you saving the file to your hard drive before opening it.
For optimal viewing of our eBooks, we recommend you download and install the free Adobe Reader version 9.