Search icon
Arrow left icon
All Products
Best Sellers
New Releases
Books
Videos
Audiobooks
Learning Hub
Newsletters
Free Learning
Arrow right icon
Angular Cookbook - Second Edition

You're reading from  Angular Cookbook - Second Edition

Product type Book
Published in Dec 2023
Publisher Packt
ISBN-13 9781803233444
Pages 536 pages
Edition 2nd Edition
Languages
Author (1):
Muhammad Ahsan Ayaz Muhammad Ahsan Ayaz
Profile icon Muhammad Ahsan Ayaz

Table of Contents (16) Chapters

Preface 1. Winning Component Communication 2. Working with Angular Directives and Built-In Control Flow 3. The Magic of Dependency Injection in Angular 4. Understanding Angular Animations 5. Angular and RxJS – Awesomeness Combined 6. Reactive State Management with NgRx 7. Understanding Angular Navigation and Routing 8. Mastering Angular Forms 9. Angular and the Angular CDK 10. Writing Unit Tests in Angular with Jest 11. E2E Tests in Angular with Cypress 12. Performance Optimization in Angular 13. Building PWAs with Angular 14. Other Books You May Enjoy
15. Index

Lazily loaded routes in Angular

In the previous recipe, we learned how to create a basic routing app with eagerly loaded routes. In this recipe, you'll learn how to work with feature modules to lazily load them instead of loading them when the app loads. For this recipe, we'll assume that we already have the routes in place and we just need to load them lazily.

Getting ready

The app that we are going to work with resides in start/apps/chapter07/ng-lazy-routing inside the cloned repository:

  1. Open the code repository in your Code Editor.
  2. Open the terminal, navigate to the code repository directory and run npm run serve ng-lazy-routing to serve the project

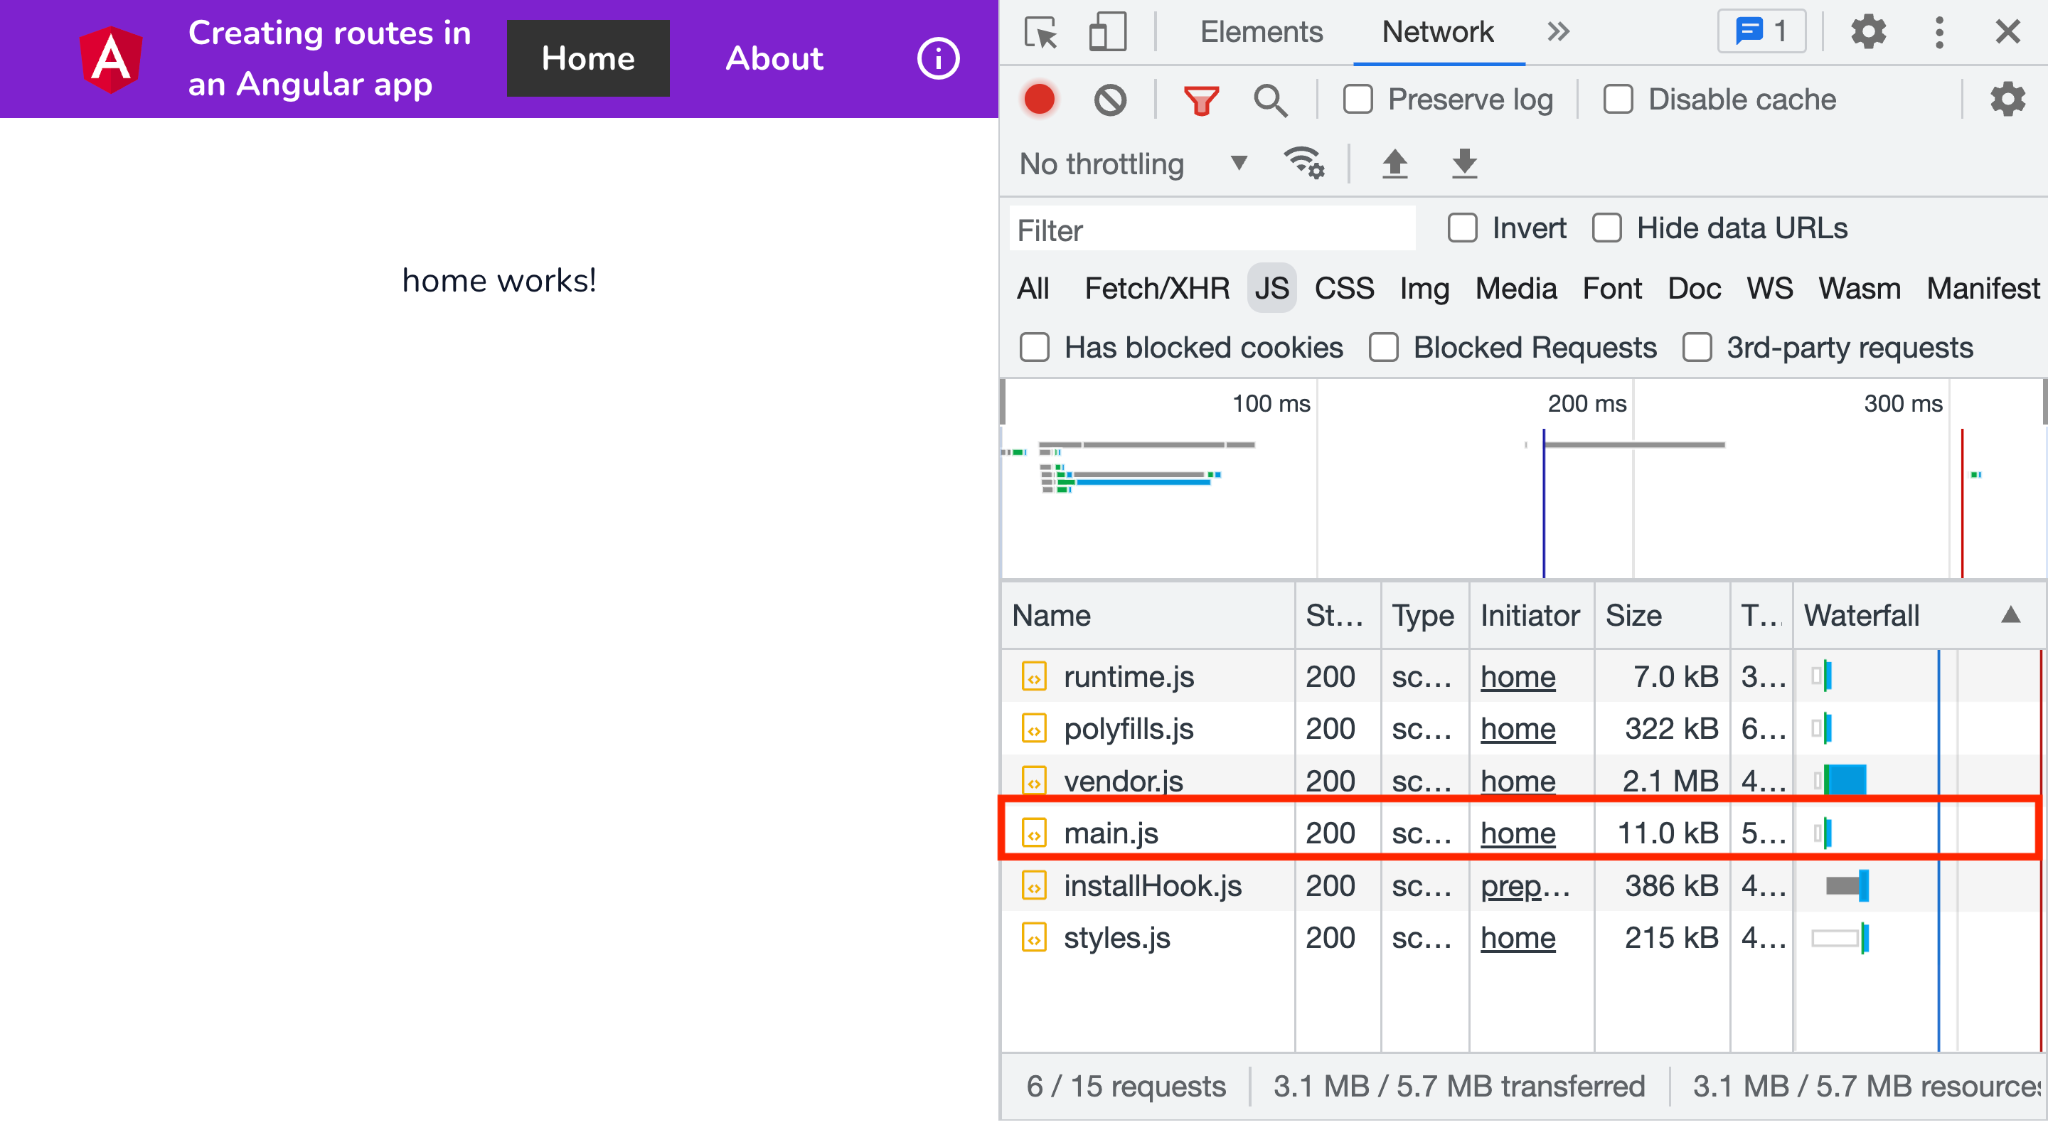
This should open the app in a new browser tab. If you open the network tab, you and you should see the following:

Figure 7.4 – ng-lazy-routing app running on http://localhost:4200

Now that we have the app running locally, let's see the steps of the recipe in the next section.

How to do it…

As shown in...

Authorized access to routes using route guards

Not all routes in your Angular app should be accessible by everyone in the world. In this recipe, we'll learn how to create route guards in Angular to prevent unauthorized access to routes.

Getting ready

The app that we are going to work with resides in start/apps/chapter07/ng-route-guards inside the cloned repository:

  1. Open the code repository in your Code Editor.
  2. Open the terminal, navigate to the code repository directory and run npm run serve ng-route-guards to serve the project

This should open the app in a new browser tab. And you should see the following:

Figure 7.7 – ng-route-guards app running on http://localhost:4200

Now that we have the app running locally, let's see the steps of the recipe in the next section.

How to do it…

We have an app with a couple of routes already set up. You can log in as either an employee or an admin to get to the bucket list of the app. However, if you tap any of the two...

Working with route parameters

Whether it is about building a REST API using Node.js or configuring routes in Angular, setting up routes is an absolute art, especially when it comes to working with parameters. In this recipe, you'll create some routes with parameters and will learn how to get those parameters in your components once the route is active.

Getting ready

The app that we are going to work with resides in start/apps/chapter07/ng-route-guards inside the cloned repository:

  1. Open the code repository in your Code Editor.
  2. Open the terminal, navigate to the code repository directory and run npm run serve ng-route-guards to serve the project

This should open the app in a new browser tab. And you should see the following:

Figure 7.8 – ng-route-params app running on localhost:4200

Now that we have the app running locally, let's see the steps of the recipe in the next section.

How to do it…

The problem right now is that we have a route for opening the user...

Showing a global loader between route changes

Building user interfaces that are snappy and fast is key to winning users. The apps become much more enjoyable for the end users and it could bring a lot of value to the owners/creators of the apps. One of the core experiences on the modern web is to show a loader when something is happening in the background. In this recipe, you'll learn how to create a global user interface loader in your Angular app that shows whenever there is a route transition in the app.

Getting ready

The app that we are going to work with resides in start/apps/chapter07/ng-global-loader inside the cloned repository:

  1. Open the code repository in your Code Editor.
  2. Open the terminal, navigate to the code repository directory and run npm run serve ng-global-loader to serve the project

This should open the app in a new browser tab. And you should see the following:

Figure 7.10 – ng-global-loader app running on http://localhost:4200

Now that we have the app...

Preloading route strategies

We're already familiar with how to lazy load different feature modules upon navigation. Although sometimes, you might want to preload subsequent routes to make the next route navigation instantaneous or might even want to use a custom preloading strategy based on your application's business logic. In this recipe, you'll learn about the PreloadAllModules strategy and will also implement a custom strategy to cherry-pick which modules should be preloaded.

Getting ready

The app that we are going to work with resides in start/apps/chapter07/ng-route-preload-strat inside the cloned repository:

  1. Open the code repository in your Code Editor.
  2. Open the terminal, navigate to the code repository directory and run npm run serve ng-route-preload-strat to serve the project

This should open the app in a new browser tab. If you log in as an admin, you should see the following:

Figure 7.11 – ng-route-preload-strat app running on http://localhost:4200

Server-side validation using asynchronous validator functions

Form validations are straightforward in Angular, with the reason being the super-awesome validators that Angular provides out of the box. These validators are synchronous, meaning that as soon as you change the input, the validators kick in and provide you with information about the validity of the values right away. However, sometimes, you might rely on some validations from a backend API or have some asynchronous logic that you need to execute to validate the form value. These situations would require something called asynchronous validators. In this recipe, you’re going to create your first asynchronous validator.

Getting ready

The app that we are going to work with resides in start/apps/chapter08/ng-rf-async-validator inside the cloned repository:

  1. Open the code repository in your code editor.
  2. Open the terminal, navigate to the code repository directory, and run the following command to...

Implementing complex forms with reactive FormArray

This is definitely one of the most requested recipes from the readers of the first edition of Angular Cookbook. In this recipe, we’ll work with reactive Forms and specifically, the FormArray class from reactive forms. We’re going to implement a complex form, which has a list of projects that can be submitted with reactive forms. The user will be able to add as many projects as they want and will be able to remove the ones they don’t want.

Getting ready

The app that we are going to work with resides in start/apps/chapter08/ng-form-arrays inside the cloned repository:

  1. Open the code repository in your code editor.
  2. Open the terminal, navigate to the code repository directory, and run the following command to serve the project:
    npm run serve ng-form-arrays
    

    This should open the app in a new browser tab, and you should see the following:

    Figure 8.15: reactive FormArray...

Writing your own custom form control using ControlValueAccessor

Angular forms are great. While they support the default HTML tags like input, textarea, etc., sometimes, you might want to define your own components that take a value from the user. What if your components could work seamlessly with Angular forms, i.e., using formControlName, ngModel, and so on? That would be cool, right?

In this recipe, you’ll learn how to create a component with your own custom form control using the ControlValueAccessor API, allowing you to use your component with both template-driven forms and reactive forms.

Getting ready

The app that we are going to work with resides in start/apps/chapter08/ng-form-cva inside the cloned repository:

  1. Open the code repository in your code editor.
  2. Open the terminal, navigate to the code repository directory, and run the following command to serve the project:
    npm run serve ng-form-cva
    

    This should open the app...

lock icon The rest of the chapter is locked
You have been reading a chapter from
Angular Cookbook - Second Edition
Published in: Dec 2023 Publisher: Packt ISBN-13: 9781803233444
Register for a free Packt account to unlock a world of extra content!
A free Packt account unlocks extra newsletters, articles, discounted offers, and much more. Start advancing your knowledge today.
Unlock this book and the full library FREE for 7 days
Get unlimited access to 7000+ expert-authored eBooks and videos courses covering every tech area you can think of
Renews at €14.99/month. Cancel anytime}