


My first app
Let’s put our acquired tools and knowledge to the test by creating our very first Vue.js application, shall we?
You would usually start by opening your CLI and navigating to a folder where you want to start your projects. Typing the following command creates a new empty project using the official create-vue tool:
npm init vue@latest
Hit y to proceed, choose my-first-vue as the project name, and select the options shown in the following figure:
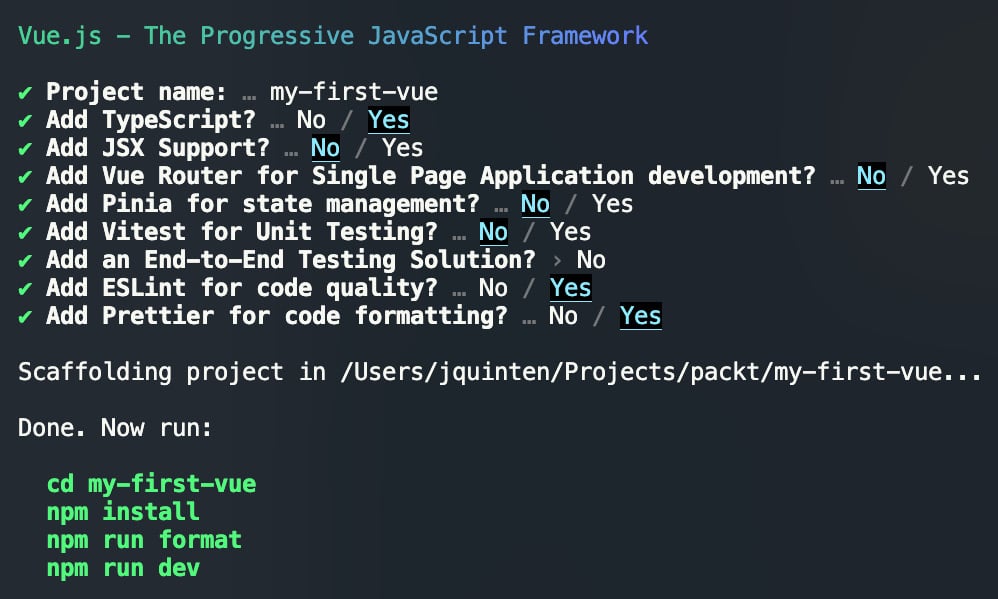
Figure 1.1 – Using the Vue CLI to scaffold out an app with presets
We’ve selected TypeScript as a superset of JavaScript, which adds static typing. We’ve also enabled ESLint and Prettier. ESLint checks for syntax errors, formatting issues, and code style inconsistencies, and can even integrate with your IDE to visually mark problematic code. Prettier is used to enforce a consistent code style. These three options enhance the developer experience by highlighting potential issues before you run your code.
Then, following the instructions, you can move into the created folder and type npm install to install the required dependencies. This will download the required package files from the npm registry and install them in the node_modules subfolder of your project.
If you run npm run dev the project will spin up a development server, which you can access with your browser. Usually, the local address will be something similar to http://127.0.0.1:5173/.
If you open that URL in the browser, you should see your first Vue.js application! The default is an empty starter that holds many of the pointers and links that we’ve already covered at this point, but it is a good starting point for any developer starting with Vue.js.
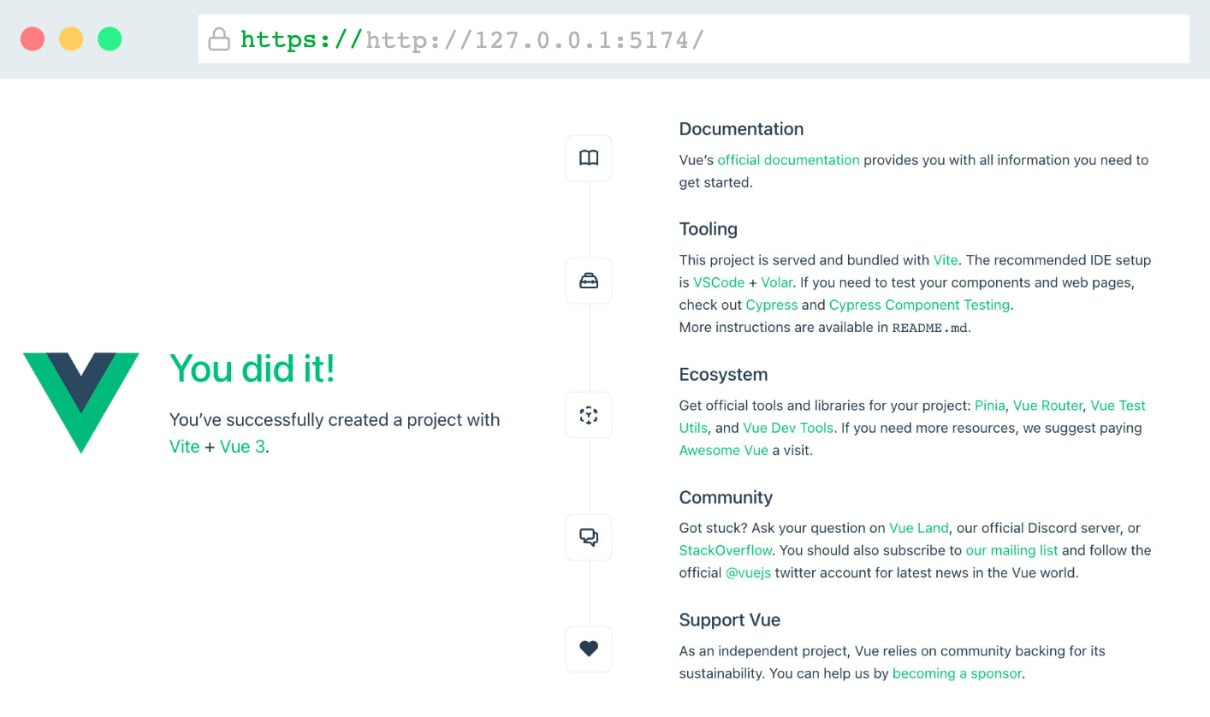
Figure 1.2 – Your very first Vue.js app!
With successful installation, we can take a closer look at what has actually been installed. Let’s dive into the installation files!
The project in the IDE
Now, if you open up the project in your IDE of choice, you will notice a predetermined structure. This will be applicable to all the projects that are scaffolded out this way. Let’s take a quick look at the structure:
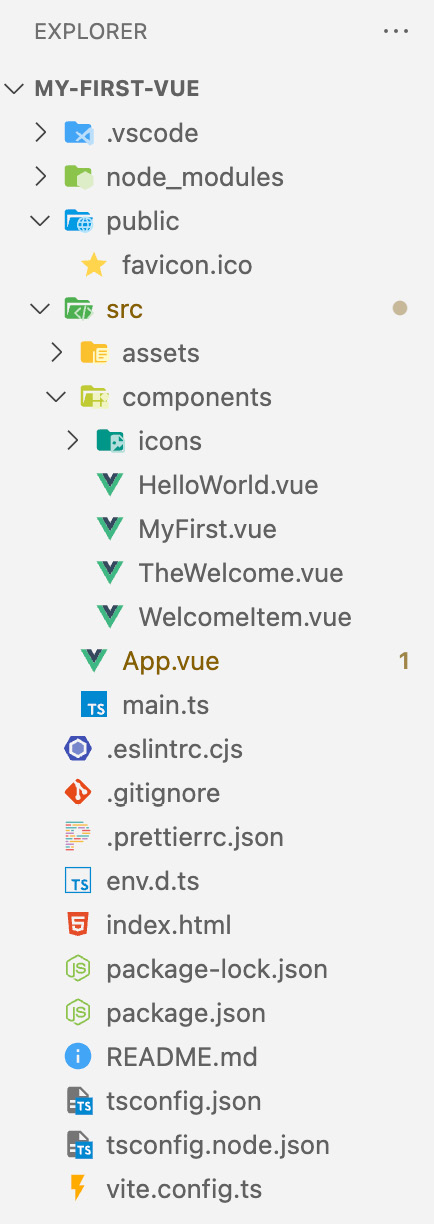
Figure 1.3 – The expanded folder structure of the starter app
At the root of the project, you’ll find different types of files that are specific to configuring the project. The main files here are index.html and package.json. The index.html file is the entry point of the app. It is a lightweight HTML template with a div element that has the id app will be the mounting point of the application.
The package.json file is a file that describes the project as a package, defines node scripts that can be executed, and also holds the references to all packages that the project depends on. The node_modules folder is the folder that holds all of the installed packages from the package.json file. This can be considered a read-only folder for our purposes.
Then we have the public and src folders. The public folder contains static assets, such as fonts, images, and icons that do not have to be processed by the build system. In the starter project, you will find a default favicon.ico present.
Lastly, the src (short for source) folder is the folder in which we will be making the most changes. It contains two root files at this point. The main.ts file registers the Vue application and the styles and mounts it to the HTML template.
The App.vue file is the entry point of the Vue.js application. If you open it, you might find some familiar syntaxes mixed in a single file, such as script tags, HTML, and CSS. We will get to that later.
It also contains an assets folder similar to the public folder, with the difference that these folders can and will be processed by the build system. And finally, there is the components folder, where you can place the components that make up the application. If you adopt Single File Components, each will fulfill a specific role and encapsulate the template, script, and styles. You can already see a couple of components, which make up the default starting page.
Your first coding steps
Let’s create the first component and add it to the app:
- Create a new file in the
componentsfolder calledMyFirst.vue.A Vue.js component is preferably named using at least two camel-cased words and typically consists of a
script,template, andstyleblock. None of these are mandatory (although astyleblock without context would be of little value). - Let’s create a small HTML snippet:
<template> <div>My first <span>Vue.js</span> component!</div></template>
- In
App.vue, you can use this as a Vue.js component already! If you open it up, you will see ascripttag withimportstatements. You can remove theTheWelcomeimport line and replace it with this:import MyFirst from './components/MyFirst.vue'
- Next, in the
templatetag, you can remove the<TheWelcome />HTML-like tag and replace it with the<MyFirst />HTML notation.If you were still running the code, you would have noticed that the browser updated itself to reflect the changes. This is called hot reloading and makes for a smooth development flow. If you have stopped the process, you can restart it and revisit the page in the browser.
You should see the component that you’ve created!
- Let’s add a styling block to add some CSS to the component and see the hot reloading in action. In the
MyFirst.vuefile, add the following code below thetemplateblock:<style scoped>div { color: #35495f; font-size: 1.6rem;}span { color: #41b883; font-weight: 700;}</style>The contents of the style block will be processed like a normal CSS file. The
scopedattribute means that thedivandspanstyle definitions are scoped down to only this component. Vue adds a unique data attribute to the virtual DOM and attaches the CSS rules to that attribute. InApp.vue, you can see that global styles are also supported.
In the browser, you will see the component update itself with the new styling! Now that we’re familiar with the development environment, we’ll start to create a more interactive component in the next chapter.


