

One basic functionality offered by OpenCV is drawing basic shapes. OpenCV provides functions to draw lines, circles, rectangles, ellipses, and so on. When building a computer vision project, you usually want to modify the image by drawing some shapes. For example, if you develop a face detection algorithm, you should draw a rectangle highlighting the detected faces in the computed image. Additionally, if you develop a face recognition algorithm, you should draw a rectangle highlighting the detected faces and also write some text showing the identity of the detected faces. And finally, it is a common approach to write some debugging information. You could show, for example, the number of detected faces (in order to see the performance of your face detection algorithm) or the processing time. In this chapter, you are going to see how to draw basic...
Technical requirements
The technical requirements are as follows:
- Python and OpenCV
- Python-specific IDE
- NumPy and Matplotlib packages
- Git client
For further details about how to install these, see Chapter 1, Setting Up OpenCV. The GitHub repository containing all the supporting project files necessary to work through the book from the first chapter to the last one can be accessed here: https://github.com/PacktPublishing/Mastering-OpenCV-4-with-Python.
A theoretical introduction to drawing in OpenCV
OpenCV provides many functions to draw basic shapes. Common basic shapes include lines, rectangles, and circles. However, with OpenCV we can draw more basic shapes. As mentioned briefly in the introduction, it is a common approach to draw basic shapes on the image in order to do the following:
- Show some intermediate results of your algorithm
- Show the final results of your algorithm
- Show some debugging information
In the next screenshot, you can see an image modified to include some useful information in connection with the two algorithms mentioned in the introduction (face detection and face recognition). In this way, you can process all the images in a directory and, afterward, you can see where your algorithm has detected wrong faces (false positives) or even missing faces (false negatives):
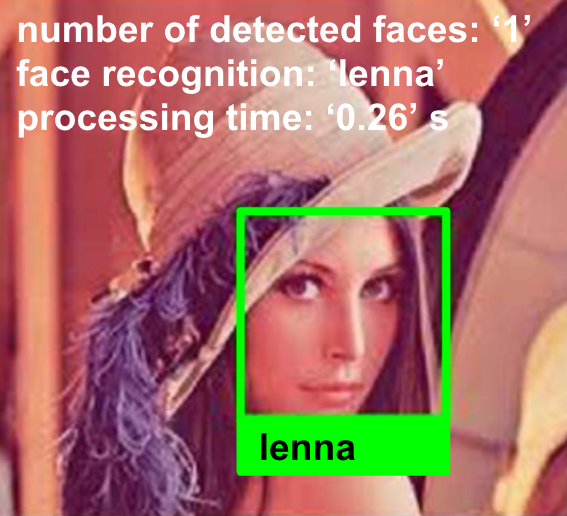
A false positive is an error where...
Drawing shapes
In this section, we are going to see how to draw shapes using OpenCV capabilities. Firstly, we will look at how to draw the basic shapes, and then we will focus on more advanced shapes.
Basic shapes – lines, rectangles, and circles
In the next example, we are going to see how to draw basic shapes in OpenCV. These basic shapes include lines, rectangles, and circles, which are the most common and simple shapes to draw. The first step is to create an image where the shapes will be drawn. To this end, a 400  400 image with the 3 channels (to properly display a BGR image) and a uint8 type (8-bit unsigned integers) will be created:
# We create the canvas to draw: 400 x 400 pixels, 3 channels, uint8 (8-bit unsigned...
Writing text
OpenCV can also be used to render text in images. In this section, we will see how to draw text by using the cv2.putText() function. Additionally, we will see all the available fonts you can use. Lastly, we will see some OpenCV functions in connection with text drawing.
Drawing text
The cv2.putText() function has the following signature:
img = cv.putText( img, text, org, fontFace, fontScale, color, thickness=1, lineType= 8, bottomLeftOrigin=False)
This function draws the provided text string starting at the org coordinate (upper-left corner if bottomLeftOrigin = False and lower-left corner otherwise) using the font type provided by fontFace and the fontScale factor. In connection with this example, you can see...
Dynamic drawing with mouse events
In this section, you will learn how to perform dynamic drawing using mouse events. We are going to see some examples in increasing order of complexity.
Drawing dynamic shapes
Th next example gives you an introduction into how to handle mouse events with OpenCV. The cv2.setMouseCallback() function performs this functionality. The signature for this method is as follows:
cv2.setMouseCallback(windowName, onMouse, param=None)
This function establishes the mouse handler for the window named windowName. The onMouse function is the callback function, which is called when a mouse event is performed (for example, double-click, left-button down, left-button up, among others). The optional param parameter...
Advanced drawing
In this section, we are going to see how to combine some of the aforementioned functions to draw basic shapes in OpenCV (for example, lines, circles, rectangles, and text, among others) to render a more advanced drawing. To put all these pieces together, we have built an analog clock to show you the current time (hour, minutes, and seconds). For this, two scripts are coded:
- analog_clock_values.py
- analog_clock_opencv.py
The analog_clock_opencv.py script draws an analog clock, using cv.line(), cv.circle(), cv.rectangle(), and cv2.putText(). In this script, we first draw the static drawing. In this sense, you can see that there are two arrays containing fixed coordinates:
hours_orig = np.array(
    [(620, 320), (580, 470), (470, 580), (320, 620), (170, 580), (60, 470), (20, 320), (60, 170), (169, 61), (319, 20),
     (469, 60), (579, 169)])

hours_dest = np.array(
...
Summary
In this chapter, we reviewed the functionality OpenCV offers in connection with drawing shapes and text. In connection with shapes, we have seen how to draw very basic shapes (lines, rectangles, and circles), and also more advanced shapes (clip lines, arrows, ellipses, and polygons). In connection with text, we have seen how to draw it and how to render all the available fonts in the OpenCV library. Additionally, we have also covered how to capture mouse events and use them to perform specific actions (for example, drawing a point associated with the (x, y) coordinates of the performed mouse event). Finally, we rendered an analog clock, trying to summarize all the previous concepts of this chapter.
In the next chapter, we are going to see the main concepts concerning image processing techniques. We will also tackle how to perform basic image transformations (for example...
Questions
- Which parameter should you configure properly to draw a filled shape (for example, circle or rectangle)?
- Which parameter should you configure properly to draw anti-aliased line types?
- Create a diagonal line starting at (0,0) and ending at (512,512).
- Render the text Hello OpenCV using the parameters you want.
- Draw a polygon (with the shape of a circle) using 12 points.
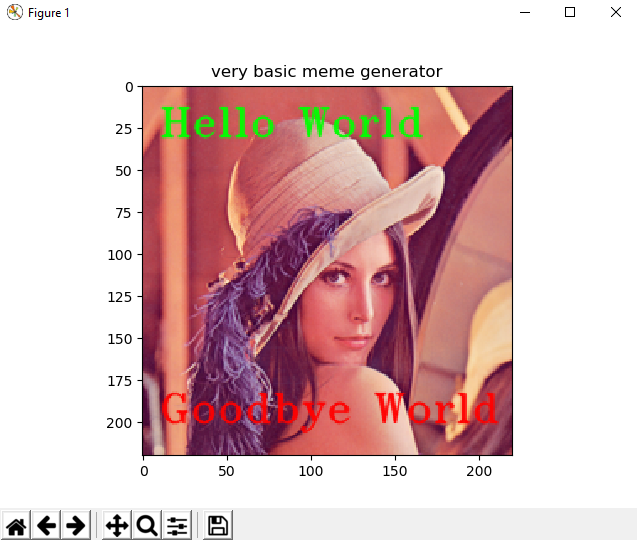
- Draw a rectangle using the mouse events with Matplotlib events when a double left-click is performed.
- Try to draw this very simple meme generator using the lenna.png image as background:
Further reading
The following references will help you dive deeper into Matplotlib:
- Mastering matplotlib by Duncan M. McGreggor (https://www.packtpub.com/big-data-and-business-intelligence/mastering-matplotlib)
- Matplotlib for Python Developers by Benjamin Keller (https://www.packtpub.com/big-data-and-business-intelligence/matplotlib-python-developers-video)
The rest of the chapter is locked
You have been reading a chapter from
Mastering OpenCV 4 with PythonPublished in: Mar 2019Publisher: PacktISBN-13: 9781789344912
Register for a free Packt account to unlock a world of extra content!
A free Packt account unlocks extra newsletters, articles, discounted offers, and much more. Start advancing your knowledge today.
undefined
Unlock this book and the full library FREE for 7 days
Get unlimited access to 7000+ expert-authored eBooks and videos courses covering every tech area you can think of
Renews at $15.99/month. Cancel anytime