Search icon
Arrow left icon
All Products
Best Sellers
New Releases
Books
Videos
Audiobooks
Learning Hub
Newsletters
Free Learning
Arrow right icon
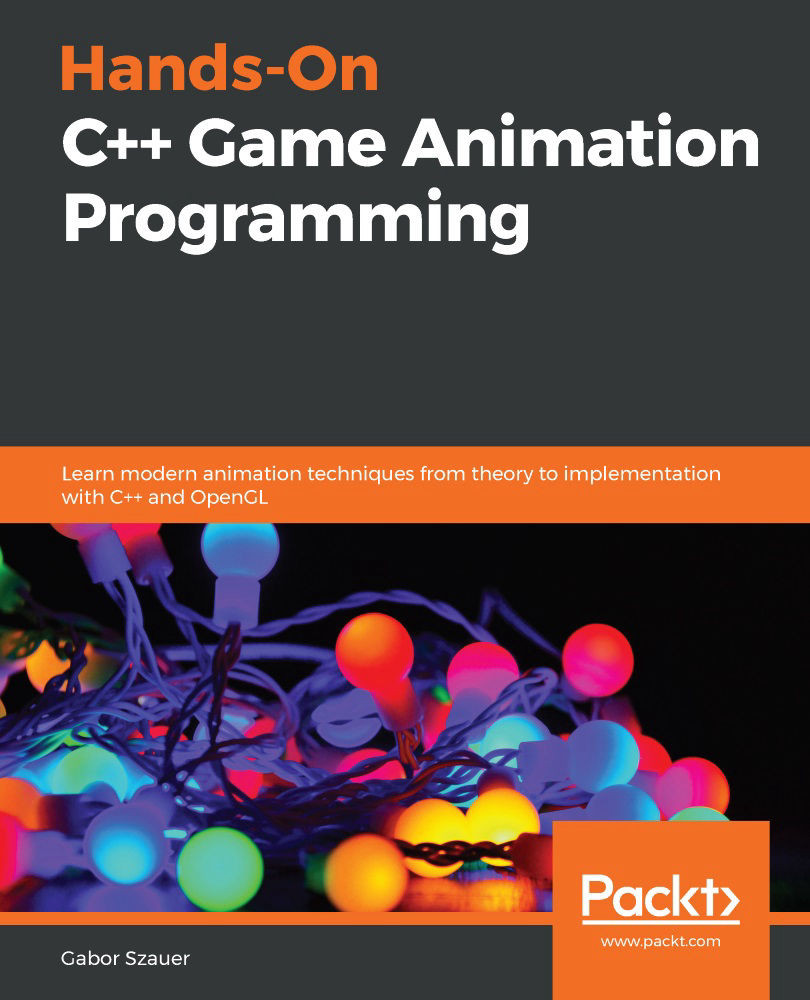
Hands-On C++ Game Animation Programming

Hands-On C++ Game Animation Programming: Learn modern animation techniques from theory to implementation with C++ and OpenGL

By Gabor Szauer
€22.99 €15.99
Book Jun 2020 368 pages 1st Edition
eBook
€22.99 €15.99
Print
€28.99
Subscription
€14.99 Monthly
eBook
€22.99 €15.99
Print
€28.99
Subscription
€14.99 Monthly

What do you get with eBook?

Product feature icon Instant access to your Digital eBook purchase
Product feature icon Download this book in EPUB and PDF formats
Product feature icon Access this title in our online reader with advanced features
Product feature icon DRM FREE - Read whenever, wherever and however you want
Buy Now

Product Details


Publication date : Jun 12, 2020
Length 368 pages
Edition : 1st Edition
Language : English
ISBN-13 : 9781800208087
Category :
Languages :
Concepts :
Table of content icon View table of contents Preview book icon Preview Book

Hands-On C++ Game Animation Programming

Chapter 1: Creating a Game Window

In this chapter, you will set up a simple Win32 window and bind an OpenGL context to it. You will be using OpenGL 3.3 Core throughout this book. The actual OpenGL code is going to be very minimal.

Most OpenGL-specific code will be abstracted into helper objects and functions, which will allow you to focus on animation rather than any specific graphics APIs. You will write the abstraction layer in Chapter 6, Building an Abstract Renderer, but for now, it's important to create a window ready to be drawn to.

By the end of this chapter, you should be able to do the following:

  • Open a Win32 window
  • Create and bind an OpenGL 3.3 Core context
  • Use glad to load OpenGL 3.3 Core functions
  • Enable vsynch for the created window
  • Understand the downloadable samples for this book

Technical requirements

To follow along with the code in this book, you will need a computer running Windows 10 with a recent version of Visual Studio installed. All of the downloadable code samples are built using Visual Studio 2019. You can download Visual Studio from https://visualstudio.microsoft.com/.

You can find all of the sample code for the book on GitHub at https://github.com/PacktPublishing/Game-Animation-Programming.

Creating an empty project

Throughout this book, you will be creating code from scratch as much as possible. Because of this, there will be very few external dependencies. To get started, follow these steps to create a new blank C++ project in Visual Studio:

  1. Open Visual Studio and create a new project by going to File|New|Project:
    Figure 1.1: Creating a new Visual Studio project

    Figure 1.1: Creating a new Visual Studio project

  2. You will see your project templates on the left-hand side of the window that pops up. Navigate to Installed|Visual C++|Other. Then, select Empty Project:
    Figure 1.2: Creating an empty C++ project

    Figure 1.2: Creating an empty C++ project

  3. Enter a project name and select a project location. Finally, click Create.
Figure 1.3: Specifying a new project name

Figure 1.3: Specifying a new project name

If you have followed the preceding steps, you should have a new blank project. Throughout the rest of this chapter, you will add an application framework and an OpenGL-enabled window.

Creating the application class

It would be difficult to maintain a cluttered window entry function. Instead, you need to create an abstract Application class. This class will contain some basic functions, such as Initialize, Update, Render, and Shutdown. All of the code samples provided for this book will be built on top of the Application base class.

Create a new file, Application.h. The declaration of the Application class is provided in the following code sample. Add this declaration to the newly created Application.h file:

#ifndef _H_APPLICATION_
#define _H_APPLICATION_
class Application {
private:
    Application(const Application&);
    Application& operator=(const Application&);
public:
    inline Application() { }
    inline virtual ~Application() { }
    inline virtual void Initialize() { }
    inline virtual void Update(float inDeltaTime) { }
    inline virtual void Render(float inAspectRatio) { }
    inline virtual void Shutdown() { }
};
#endif

The Initialize, Update, Render, and Shutdown functions are the life cycle of an application. All these functions will be called directly from the Win32 window code. Update and Render take arguments. To update a frame, the delta time between the current and last frame needs to be known. To render a frame, the aspect ratio of the window must be known.

The life cycle functions are virtual. Each chapter in the downloadable materials for this book has an example that is a subclass of the Application class that demonstrates a concept from that chapter.

Next, you will be adding an OpenGL loader to the project.

Adding an OpenGL loader

There is some external code that this chapter depends on, called glad. When you create a new OpenGL context on Windows, it's created with a legacy OpenGL context. The extension mechanism of OpenGL will let you use this legacy context to create a new modern context.

Once the modern context is created, you will need to get function pointers to all OpenGL functions. The functions need to be loaded with wglGetProcAdress, which returns a function pointer.

Loading every OpenGL function in this fashion would be very time-consuming. This is where having an OpenGL loader comes in; glad will do all this work for you. An OpenGL loader is a library or some code that calls wglGetProcAdress on the functions that the OpenGL API defines.

There are several OpenGL loaders available on Windows.; this book will use glad. glad is a small library that consists of only a few files. It has a simple API; you call one function and get access to all the OpenGL functions. glad has a web-based interface; you can find it at https://glad.dav1d.de/.

Important note

When using an X Windows system, such as many popular Linux distributions, the function to load OpenGL functions is glXGetProcAddress. As with Windows, there are OpenGL loaders available for Linux as well. Not all OSes need an OpenGL loader; for example, macOS, iOS, and Android don't need a loader. Both iOS and Android run on OpenGL ES.

Getting glad

You can get glad from https://glad.dav1d.de/, a web-based generator:

  1. Go to the site, select Version 3.3 from the gl dropdown, and select Core from the Profile dropdown:
    Figure 1.4: Configuring glad

    Figure 1.4: Configuring glad

  2. Scroll to the bottom and hit the Generate button. This should start downloading a ZIP file that contains all of the required code.

The code presented in this book is forward compatible with OpenGL version 3.3 or a more recent version. If you want to use a newer OpenGL version, such as 4.6, change the gl dropdown under API to the desired version. You will be adding the contents of this ZIP file to your main project in the next section.

Adding glad to the project

Once glad.zip is downloaded, extract its contents. Add the following files from the ZIP file to your project. The directory structure does not need to be maintained; all of these files can be placed next to each other:

  • src/glad.c
  • include/glad/glad.h
  • include/KHR/khrplatform.h

These files will be included as normal project files—you don't have to set up include paths—but that does mean that the contents of the files need to be edited:

  1. Open glad.c and find the following #include:

    #include <glad/glad.h>

  2. Replace the include path with the relative path of glad.h:

    #include "glad.h"

  3. Similarly, open glad.h and find the following #include:

    #include <KHR/khrplatform.h>

  4. Replace the include path with the relative path of khrplatform.h:

    #include "khrplatform.h"

glad should now be added to the project and there should be no compilation errors. In the next section, you will start implementing the Win32 window.

Creating a window

In this section, you will create a window. This means you will be using Win32 API calls directly to open a window and control its life cycle from code. You will also set up a debug console that can run alongside the window, which is useful for viewing logs.

Important note

An in-depth discussion of the Win32 API is beyond the scope of this book. For additional information on any of the Win32 APIs, refer to the Microsoft Developers Network (MSDN) at https://docs.microsoft.com/en-us/windows/win32/api/.

To make logging a bit easier, two windows will be open at the same time in debug mode. One will be the standard Win32 window, and the other will be a console window for viewing logs. This can be achieved by setting the linker conditionally. In debug mode, the application should link to the console subsystem. In release mode, it should link to the window subsystem.

Setting the linker subsystem can be done through the project's properties or in code using a #pragma comment. Once the subsystem is set to the console, the WinMain function can be called from main, which will launch a window that is attached to the console.

Additional linker actions, such as linking to external libraries, can be done from code, too. You will be using a #pragma command to link with OpenGL.

Start the window implementation by creating a new file, WinMain.cpp. This file will contain all of the window logic. Then, do the following:

  1. Add the following code to the beginning of the file. It creates #define constants that reduce the amount of code that is brought in by including <windows.h>:
    #define _CRT_SECURE_NO_WARNINGS
    #define WIN32_LEAN_AND_MEAN
    #define WIN32_EXTRA_LEAN
    #include "glad.h"
    #include <windows.h>
    #include <iostream>
    #include "Application.h"
  2. The window entry function and the window event processing function both need to be forward declared. These are the two Win32 functions that we will need to open a new window:
    int WINAPI WinMain(HINSTANCE, HINSTANCE, PSTR, int);
    LRESULT CALLBACK WndProc(HWND, UINT, WPARAM, LPARAM);
  3. Use a #pragma comment to link to OpenGL32.lib in code, rather than going through the project's properties window. Add the following code to WinMain.cpp:
    #if _DEBUG
        #pragma comment( linker, "/subsystem:console" )
        int main(int argc, const char** argv) {
            return WinMain(GetModuleHandle(NULL), NULL,
                    GetCommandLineA(), SW_SHOWDEFAULT);
        }
    #else
        #pragma comment( linker, "/subsystem:windows" )
    #endif
    #pragma comment(lib, "opengl32.lib")

Now, a few OpenGL functions need to be declared. Creating a modern OpenGL context is done through wglCreateContextAttribsARB, but there is no reference to this function. This is one of the functions that needs to be loaded through wglGetProcAddress, as it's an extension function.

The function signature of wglCreateContextAttribsARB can be found in wglext.h. The wglext.h header is hosted by Khronos and can be found online in the OpenGL registry at https://www.khronos.org/registry/OpenGL/index_gl.php.

There is no need to include the entire wglext.h header file; you will only need the function relevant to creating a modern context. The following code is directly copied from the file. It contains the declarations for the relevant #define constants and the function pointer types:

#define WGL_CONTEXT_MAJOR_VERSION_ARB     0x2091
#define WGL_CONTEXT_MINOR_VERSION_ARB     0x2092
#define WGL_CONTEXT_FLAGS_ARB             0x2094
#define WGL_CONTEXT_CORE_PROFILE_BIT_ARB  0x00000001
#define WGL_CONTEXT_PROFILE_MASK_ARB      0x9126
typedef HGLRC(WINAPI* PFNWGLCREATECONTEXTATTRIBSARBPROC) 
             (HDC, HGLRC, const int*);

The previous code defines a function pointer type for wglCreatecontextAttribsARB. In addition to this, there are #define constants that are needed to make an OpenGL 3.3 Core context. The samples for this book will have vsynch enabled, which can be done through wglSwapIntervalEXT.

As you will guess, this function needs to be loaded using OpenGL's extension mechanism, too. It also needs two additional support functions: wglGetExtensionStringEXT and wglGetSwapIntervalEXT. All three of these functions are found in wgl.h, which is hosted by Khronos in the OpenGL registry linked previously.

Instead of including wgl.h, add the following code to WinMain.cpp. The code defines function pointer signatures for wglGetExtensionStringEXT, wglSwapIntervalEXT, and wglGetSwapIntervalEXT, copied out of wgl.h:

typedef const char* 
        (WINAPI* PFNWGLGETEXTENSIONSSTRINGEXTPROC) (void);
typedef BOOL(WINAPI* PFNWGLSWAPINTERVALEXTPROC) (int);
typedef int (WINAPI* PFNWGLGETSWAPINTERVALEXTPROC) (void);

The preceding code is required to work with OpenGL. It's common to copy the code instead of including these headers directly. In the next section, you will begin working on the actual window.

Global variables

Two global variables are required for easy window cleanup: a pointer to the currently running application and a handle to the global OpenGL Vertex Array Object (VAO). Instead of each draw call having its own VAO, one will be bound for the entire duration of the sample.

To do this, create the following global variables:

Application* gApplication = 0;
GLuint gVertexArrayObject = 0;

Throughout the rest of this book, there will be no other global variables. Global variables can make the program state harder to track. The reason these two exist is to easily reference them when the application is shutting down later. Next, you will start implementing the WinMain function to open a new window.

Opening a window

Next, you need to implement the window entry function, WinMain. This function will be responsible for creating a window class, registering the window class, and opening a new window:

  1. Start the definition of WinMain by creating a new instance of the Application class and storing it in the global pointer:
    int WINAPI WinMain(HINSTANCE hInstance, HINSTANCE 
                       hPrevInstance, PSTR szCmdLine, 
                       int iCmdShow) {
    gApplication = new Application();
  2. Next, an instance of WNDCLASSEX needs to be filled out. There isn't anything special that goes into this; it's just a standard window definition. The only thing to look out for is whether the WndProc function is set correctly:
        WNDCLASSEX wndclass;
        wndclass.cbSize = sizeof(WNDCLASSEX);
        wndclass.style = CS_HREDRAW | CS_VREDRAW;
        wndclass.lpfnWndProc = WndProc;
        wndclass.cbClsExtra = 0;
        wndclass.cbWndExtra = 0;
        wndclass.hInstance = hInstance;
        wndclass.hIcon = LoadIcon(NULL, IDI_APPLICATION);
        wndclass.hIconSm = LoadIcon(NULL, IDI_APPLICATION);
        wndclass.hCursor = LoadCursor(NULL, IDC_ARROW);
        wndclass.hbrBackground = (HBRUSH)(COLOR_BTNFACE + 1);
        wndclass.lpszMenuName = 0;
        wndclass.lpszClassName = "Win32 Game Window";
        RegisterClassEx(&wndclass);
  3. A new application window should launch in the center of the monitor. To do this, find the width and height of the screen using GetSystemMetrics. Then, adjust windowRect to the desired size around the center of the screen:
        int screenWidth = GetSystemMetrics(SM_CXSCREEN);
        int screenHeight = GetSystemMetrics(SM_CYSCREEN);
        int clientWidth = 800;
        int clientHeight = 600;
        RECT windowRect;
        SetRect(&windowRect, 
                (screenWidth / 2) - (clientWidth / 2), 
                (screenHeight / 2) - (clientHeight / 2), 
                (screenWidth / 2) + (clientWidth / 2), 
                (screenHeight / 2) + (clientHeight / 2));
  4. To figure out the size of the window, not just the client area, the style of the window needs to be known. The following code sample creates a window that can be minimized or maximized but not resized. To resize the window, use a bitwise OR (|) operator with the WS_THICKFRAME defined:
        DWORD style = (WS_OVERLAPPED | WS_CAPTION | 
            WS_SYSMENU | WS_MINIMIZEBOX | WS_MAXIMIZEBOX); 
        // | WS_THICKFRAME to resize
  5. Once the desired window style is defined, call the AdjustWindowRectEx function to adjust the size of the client rectangle to include all the window dressing in its size as well. When the final size is known, CreateWindowEx can be used to create the actual window. Once the window is created, store a reference to its device context:
        AdjustWindowRectEx(&windowRect, style, FALSE, 0);
        HWND hwnd = CreateWindowEx(0, wndclass.lpszClassName, 
                    "Game Window", style, windowRect.left, 
                    windowRect.top, windowRect.right - 
                    windowRect.left, windowRect.bottom - 
                    windowRect.top, NULL, NULL, 
                    hInstance, szCmdLine);
        HDC hdc = GetDC(hwnd);
  6. Now that the window is created, you will next create an OpenGL context. To do this, you first need to find the correct pixel format, and then apply it to the device context of the window. The following code shows you how to do this:
        PIXELFORMATDESCRIPTOR pfd;
        memset(&pfd, 0, sizeof(PIXELFORMATDESCRIPTOR));
        pfd.nSize = sizeof(PIXELFORMATDESCRIPTOR);
        pfd.nVersion = 1;
        pfd.dwFlags = PFD_SUPPORT_OPENGL | PFD_DRAW_TO_WINDOW 
                      | PFD_DOUBLEBUFFER;
        pfd.iPixelType = PFD_TYPE_RGBA;
        pfd.cColorBits = 24;
        pfd.cDepthBits = 32;
        pfd.cStencilBits = 8;
        pfd.iLayerType = PFD_MAIN_PLANE;
        int pixelFormat = ChoosePixelFormat(hdc, &pfd);
        SetPixelFormat(hdc, pixelFormat, &pfd);
  7. With the pixel format set, create a temporary OpenGL context using wglCreateContext. This temporary context is only needed to get a pointer to wglCreateContextAttribsARB, which will be used to create a modern context:
        HGLRC tempRC = wglCreateContext(hdc);
        wglMakeCurrent(hdc, tempRC);
        PFNWGLCREATECONTEXTATTRIBSARBPROC
           wglCreateContextAttribsARB = NULL;
        wglCreateContextAttribsARB =
           (PFNWGLCREATECONTEXTATTRIBSARBPROC)
           wglGetProcAddress("wglCreateContextAttribsARB");
  8. A temporary OpenGL context exists and is bound, so call the wglCreateContextAttribsARB function next. This function will return an OpenGL 3.3 Core context profile, bind it, and delete the legacy context:
        const int attribList[] = {
            WGL_CONTEXT_MAJOR_VERSION_ARB, 3,
            WGL_CONTEXT_MINOR_VERSION_ARB, 3,
            WGL_CONTEXT_FLAGS_ARB, 0,
            WGL_CONTEXT_PROFILE_MASK_ARB,
            WGL_CONTEXT_CORE_PROFILE_BIT_ARB,
            0, };
        HGLRC hglrc = wglCreateContextAttribsARB(
                           hdc, 0, attribList);
        wglMakeCurrent(NULL, NULL);
        wglDeleteContext(tempRC);
        wglMakeCurrent(hdc, hglrc);
  9. With an OpenGL 3.3 Core context active, glad can be used to load all the OpenGL 3.3 Core functions. Call gladLoadGL to do this:
        if (!gladLoadGL()) {
            std::cout << "Could not initialize GLAD\n";
        }
        else {
            std::cout << "OpenGL Version " << 
            GLVersion.major << "." << GLVersion.minor <<
              "\n";
        }
  10. An OpenGL 3.3 Core context should now be initialized, with all of the core OpenGL functions loaded. Next, you will enable vsynch on the window. vsynch is not a built-in function; it's an extension and, as such, support for it needs to be queried with wglGetExtensionStringEXT. The extension string for vsynch is WGL_EXT_swap_control. Check whether this is in the list of extension strings:
        PFNWGLGETEXTENSIONSSTRINGEXTPROC
           _wglGetExtensionsStringEXT =
           (PFNWGLGETEXTENSIONSSTRINGEXTPROC)
           wglGetProcAddress("wglGetExtensionsStringEXT");
        bool swapControlSupported = strstr(
             _wglGetExtensionsStringEXT(), 
             "WGL_EXT_swap_control") != 0;
  11. If the WGL_EXT_swap_control extension is available, it needs to be loaded. The actual function is wglSwapIntervalEXT, which can be found in wgl.h. Passing an argument to wglSwapIntervalEXT turns on vsynch:
        int vsynch = 0;
        if (swapControlSupported) {
            PFNWGLSWAPINTERVALEXTPROC wglSwapIntervalEXT = 
                (PFNWGLSWAPINTERVALEXTPROC)
                wglGetProcAddress("wglSwapIntervalEXT");
            PFNWGLGETSWAPINTERVALEXTPROC 
                wglGetSwapIntervalEXT =
                (PFNWGLGETSWAPINTERVALEXTPROC)
                wglGetProcAddress("wglGetSwapIntervalEXT");
            if (wglSwapIntervalEXT(1)) {
                std::cout << "Enabled vsynch\n";
                vsynch = wglGetSwapIntervalEXT();
            }
            else {
                std::cout << "Could not enable vsynch\n";
            }
        }
        else { // !swapControlSupported
            cout << "WGL_EXT_swap_control not supported\n";
        }
  12. There is just a little bit more housekeeping to do to finish setting up an OpenGL-enabled window. OpenGL 3.3 Core requires a VAO to be bound for all draw calls. Instead of creating a VAO for each draw call, you will create one global VAO that is bound in WinMain and never unbound until the window is destroyed. The following code creates this VAO and binds it:
        glGenVertexArrays(1, &gVertexArrayObject);
        glBindVertexArray(gVertexArrayObject);
  13. Call the ShowWindow and UpdateWindow functions to display the current window; this is also a good place to initialize the global application. Depending on the amount of work that the application's Initialize function ends up doing, the window may appear frozen for a little bit:
        ShowWindow(hwnd, SW_SHOW);
        UpdateWindow(hwnd);
        gApplication->Initialize();
  14. You're now ready to implement the actual game loop. You will need to keep track of the last frame time to calculate the delta time between frames. In addition to game logic, the loop needs to handle window events by peeking at the current message stack and dispatching messages accordingly:
        DWORD lastTick = GetTickCount();
        MSG msg;
        while (true) {
            if (PeekMessage(&msg, NULL, 0, 0, PM_REMOVE)) {
                if (msg.message == WM_QUIT) {
                    break;
                }
                TranslateMessage(&msg);
                DispatchMessage(&msg);
            }
  15. After the window events are processed, the Application instance needs to update and render. First, find the delta time between the last frame and this one, converting it into seconds. For example, a game that's running at 60 FPS should have a delta time of 16.6 milliseconds, or 0.0166 seconds:
            DWORD thisTick = GetTickCount();
            float dt = float(thisTick - lastTick) * 0.001f;
            lastTick = thisTick;
            if (gApplication != 0) {
                gApplication->Update(dt);
            }
  16. Rendering the currently running application needs just a little bit more housekeeping. Set the OpenGL viewport with glViewport every frame and clear the color, depth, and stencil buffer. In addition to this, make sure all OpenGL states are correct before rendering. This means that the correct VAO is bound, depth test and face culling are enabled, and the appropriate point size is set:
            if (gApplication != 0) {
                RECT clientRect;
                GetClientRect(hwnd, &clientRect);
                clientWidth = clientRect.right - 
                              clientRect.left;
                clientHeight = clientRect.bottom - 
                               clientRect.top;
                glViewport(0, 0, clientWidth, clientHeight);
                glEnable(GL_DEPTH_TEST);
                glEnable(GL_CULL_FACE);
                glPointSize(5.0f);
                glBindVertexArray(gVertexArrayObject);
                glClearColor(0.5f, 0.6f, 0.7f, 1.0f);
                glClear(GL_COLOR_BUFFER_BIT | 
                GL_DEPTH_BUFFER_BIT | GL_STENCIL_BUFFER_BIT);
                float aspect = (float)clientWidth / 
                               (float)clientHeight;
                gApplication->Render(aspect);
            }
  17. After the current Application instance has updated and rendered, the back buffer needs to be presented. This is done by calling SwapBuffers. If vsynch is enabled, glFinish needs to be called right after SwapBuffers:
            if (gApplication != 0) {
                SwapBuffers(hdc);
                if (vsynch != 0) {
                    glFinish();
                }
            }
  18. That's it for the window loop. After the window loop exits, it's safe to return from the WinMain function:
        } // End of game loop
        if (gApplication != 0) {
            std::cout << "Expected application to 
                          be null on exit\n";
            delete gApplication;
        }
        return (int)msg.wParam;
    }

If you want to use a version of OpenGL other than 3.3, adjust the major and minor values in the attribList variable presented in Step 8. Even though the WinMain function is written, you still can't compile this file; it would fail because WndProc was never defined. The WndProc function handles events such as mouse motion or resizing for a window. In the next section, you will implement the WndProc function.

Creating the event handler

In order to have a properly functioning window, or to even compile the application, at this point, the event processing function, WndProc, must be defined. The implementation here will be very simple, mostly focusing on how to destroy the window:

  1. Start implementing the WndProc function in WinMain.cpp:
    LRESULT CALLBACK WndProc(HWND hwnd, UINT iMsg, 
                        WPARAM wParam, LPARAM lParam) {
        switch (iMsg) {
  2. When the WM_CLOSE message is received, you need to shut down the Application class and emit a destroy window message. Once the application is shut down, don't forget to delete it:
        case WM_CLOSE:
            if (gApplication != 0) {
                gApplication->Shutdown();
                delete gApplication;
                gApplication = 0;
                DestroyWindow(hwnd);
            }
            else {
                std::cout << "Already shut down!\n";
            }
            break;
  3. When the destroy message is received, the window's OpenGL resources need to be released. This means deleting the global vertex array object, and then deleting the OpenGL context:
        case WM_DESTROY:
            if (gVertexArrayObject != 0) {
                HDC hdc = GetDC(hwnd);
                HGLRC hglrc = wglGetCurrentContext();
                glBindVertexArray(0);
                glDeleteVertexArrays(1, &gVertexArrayObject);
                gVertexArrayObject = 0;
                wglMakeCurrent(NULL, NULL);
                wglDeleteContext(hglrc);
                ReleaseDC(hwnd, hdc);
                PostQuitMessage(0);
            }
            else {
                std::cout << "Multiple destroy messages\n";
            }
            break;
  4. The paint and erase background messages are safe to ignore since OpenGL is managing rendering to the window. If the message received isn't one of the messages already handled, forward it to the default window message function:
        case WM_PAINT:
        case WM_ERASEBKGND:
            return 0;
        }
        return DefWindowProc(hwnd, iMsg, wParam, lParam);
    }

Now that you have written the windows event loop, you should be able to compile and run a blank window. In the following section, you'll explore the downloadable samples for this book.

Exploring the samples

All of the code presented in this book is available in the downloadable content for the book. There is one large sample, called AllChapters, which includes every sample in a single application. There is a Bin ZIP file that contains a pre-compiled executable of the AllChapters sample.

There are also individual folders for each chapter that contain multiple sub-folders. Every chapter contains Sample00, which is the code as it was written in the book with no additional content. The subsequently numbered samples add content.

The AllChapters sample looks a bit different from the samples in the individual chapter folders. This application uses Nuklear (https://github.com/vurtun/nuklear) to display its UI. The part of the UI that is displayed is a stats counter in the upper-right corner of the screen. It looks like this:

Figure 1.5: Stats counter for the AllChapters sample

Figure 1.5: Stats counter for the AllChapters sample

The top box contains some general information about the display that the application opened on. This information contains the display frequency, whether vsynch is enabled, and what the frame budget is in milliseconds.

The second box down contains high-level frame timings. The time displayed will turn red if there was a stale frame in the last 60 frames. Some stale frames are unavoidable; if the frame rate drops to 59.9, the text will show red for a second. Seeing red here occasionally is OK; it's only a concern if the numbers are solid red.

The third box down contains two GPU timers; these measure how fast the sample is running on the GPU. This is useful for debugging any heavy draw calls. The final box contains CPU timers, which are helpful for figuring out which phase of the problem has a bottleneck.

Important note

Throughout this book, you will use C++ stl containers. The Standard Library is a bit slow in debug mode, mostly due to error checking. It's a good idea to profile any samples in release mode only.

These examples should do a fair job of demonstrating what you will learn in each of the upcoming chapters. They also provide an example for you to compare your code against.

Summary

In this chapter, you explored the process of setting up a new Win32 window. An OpenGL 3.3 Core context was set up to render to the window, with vsynch enabled. You learned about OpenGL loaders and how glad can load all the relevant OpenGL functions.

This window will serve as a foundation for you to build on; all future samples are built on the framework you created in this chapter. In the next chapter, you will start to explore some of the math required for rendering and animation.

Left arrow icon Right arrow icon
Download code icon Download Code

Key benefits

  • Build a functional and production-ready modern animation system with complete features using C++
  • Learn basic, advanced, and skinned animation programming with this step-by-step guide
  • Discover the math required to implement cutting edge animation techniques such as inverse kinematics and dual quaternions

Description

Animation is one of the most important parts of any game. Modern animation systems work directly with track-driven animation and provide support for advanced techniques such as inverse kinematics (IK), blend trees, and dual quaternion skinning. This book will walk you through everything you need to get an optimized, production-ready animation system up and running, and contains all the code required to build the animation system. You’ll start by learning the basic principles, and then delve into the core topics of animation programming by building a curve-based skinned animation system. You’ll implement different skinning techniques and explore advanced animation topics such as IK, animation blending, dual quaternion skinning, and crowd rendering. The animation system you will build following this book can be easily integrated into your next game development project. The book is intended to be read from start to finish, although each chapter is self-contained and can be read independently as well. By the end of this book, you’ll have implemented a modern animation system and got to grips with optimization concepts and advanced animation techniques.

What you will learn

Get the hang of 3D vectors, matrices, and transforms, and their use in game development Discover various techniques to smoothly blend animations Get to grips with GLTF file format and its design decisions and data structures Design an animation system by using animation tracks and implementing skinning Optimize various aspects of animation systems such as skinned meshes, clip sampling, and pose palettes Implement the IK technique for your game characters using CCD and FABRIK solvers Understand dual quaternion skinning and how to render large instanced crowds

What do you get with eBook?

Product feature icon Instant access to your Digital eBook purchase
Product feature icon Download this book in EPUB and PDF formats
Product feature icon Access this title in our online reader with advanced features
Product feature icon DRM FREE - Read whenever, wherever and however you want
Buy Now

Product Details


Publication date : Jun 12, 2020
Length 368 pages
Edition : 1st Edition
Language : English
ISBN-13 : 9781800208087
Category :
Languages :
Concepts :

Table of Contents

17 Chapters
Preface Chevron down icon Chevron up icon
Chapter 1: Creating a Game Window Chevron down icon Chevron up icon
Chapter 2: Implementing Vectors Chevron down icon Chevron up icon
Chapter 3: Implementing Matrices Chevron down icon Chevron up icon
Chapter 4: Implementing Quaternions Chevron down icon Chevron up icon
Chapter 5: Implementing Transforms Chevron down icon Chevron up icon
Chapter 6: Building an Abstract Renderer Chevron down icon Chevron up icon
Chapter 7: Exploring the glTF File Format Chevron down icon Chevron up icon
Chapter 8: Creating Curves, Frames, and Tracks Chevron down icon Chevron up icon
Chapter 9: Implementing Animation Clips Chevron down icon Chevron up icon
Chapter 10: Mesh Skinning Chevron down icon Chevron up icon
Chapter 11: Optimizing the Animation Pipeline Chevron down icon Chevron up icon
Chapter 12: Blending between Animations Chevron down icon Chevron up icon
Chapter 13: Implementing Inverse Kinematics Chevron down icon Chevron up icon
Chapter 14: Using Dual Quaternions for Skinning Chevron down icon Chevron up icon
Chapter 15: Rendering Instanced Crowds Chevron down icon Chevron up icon
Other Books You May Enjoy Chevron down icon Chevron up icon

Customer reviews

Filter icon Filter
Top Reviews
Rating distribution
Empty star icon Empty star icon Empty star icon Empty star icon Empty star icon 0
(0 Ratings)
5 star 0%
4 star 0%
3 star 0%
2 star 0%
1 star 0%

Filter reviews by


No reviews found
Get free access to Packt library with over 7500+ books and video courses for 7 days!
Start Free Trial

FAQs

How do I buy and download an eBook? Chevron down icon Chevron up icon

Where there is an eBook version of a title available, you can buy it from the book details for that title. Add either the standalone eBook or the eBook and print book bundle to your shopping cart. Your eBook will show in your cart as a product on its own. After completing checkout and payment in the normal way, you will receive your receipt on the screen containing a link to a personalised PDF download file. This link will remain active for 30 days. You can download backup copies of the file by logging in to your account at any time.

If you already have Adobe reader installed, then clicking on the link will download and open the PDF file directly. If you don't, then save the PDF file on your machine and download the Reader to view it.

Please Note: Packt eBooks are non-returnable and non-refundable.

Packt eBook and Licensing When you buy an eBook from Packt Publishing, completing your purchase means you accept the terms of our licence agreement. Please read the full text of the agreement. In it we have tried to balance the need for the ebook to be usable for you the reader with our needs to protect the rights of us as Publishers and of our authors. In summary, the agreement says:

  • You may make copies of your eBook for your own use onto any machine
  • You may not pass copies of the eBook on to anyone else
How can I make a purchase on your website? Chevron down icon Chevron up icon

If you want to purchase a video course, eBook or Bundle (Print+eBook) please follow below steps:

  1. Register on our website using your email address and the password.
  2. Search for the title by name or ISBN using the search option.
  3. Select the title you want to purchase.
  4. Choose the format you wish to purchase the title in; if you order the Print Book, you get a free eBook copy of the same title. 
  5. Proceed with the checkout process (payment to be made using Credit Card, Debit Cart, or PayPal)
Where can I access support around an eBook? Chevron down icon Chevron up icon
  • If you experience a problem with using or installing Adobe Reader, the contact Adobe directly.
  • To view the errata for the book, see www.packtpub.com/support and view the pages for the title you have.
  • To view your account details or to download a new copy of the book go to www.packtpub.com/account
  • To contact us directly if a problem is not resolved, use www.packtpub.com/contact-us
What eBook formats do Packt support? Chevron down icon Chevron up icon

Our eBooks are currently available in a variety of formats such as PDF and ePubs. In the future, this may well change with trends and development in technology, but please note that our PDFs are not Adobe eBook Reader format, which has greater restrictions on security.

You will need to use Adobe Reader v9 or later in order to read Packt's PDF eBooks.

What are the benefits of eBooks? Chevron down icon Chevron up icon
  • You can get the information you need immediately
  • You can easily take them with you on a laptop
  • You can download them an unlimited number of times
  • You can print them out
  • They are copy-paste enabled
  • They are searchable
  • There is no password protection
  • They are lower price than print
  • They save resources and space
What is an eBook? Chevron down icon Chevron up icon

Packt eBooks are a complete electronic version of the print edition, available in PDF and ePub formats. Every piece of content down to the page numbering is the same. Because we save the costs of printing and shipping the book to you, we are able to offer eBooks at a lower cost than print editions.

When you have purchased an eBook, simply login to your account and click on the link in Your Download Area. We recommend you saving the file to your hard drive before opening it.

For optimal viewing of our eBooks, we recommend you download and install the free Adobe Reader version 9.