


Starting an Angular project
We have our tools installed and configured and now we are going to start our Angular application. First, we are going to install the Angular CLI, which will be responsible for creating and building our application. In your terminal, type the following command:
npm install -g @angular/cli@16
After installing the CLI, use the following command to confirm the installation:
ng version
The following figure should appear in your terminal (the Angular version may be newer):
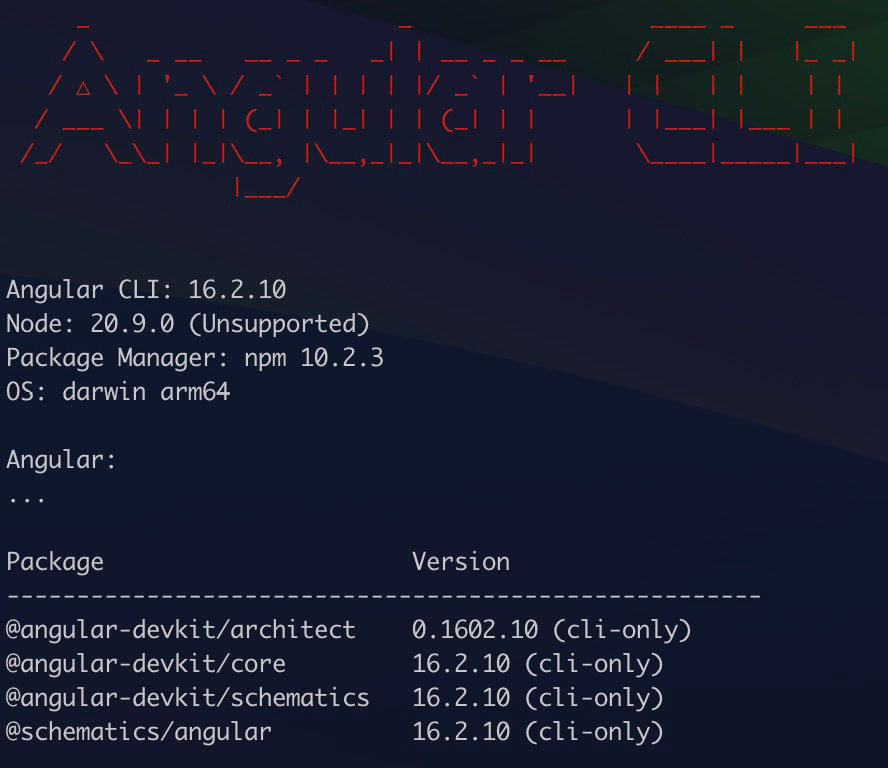
Figure 1.4 – Angular CLI prompt confirming you have correctly installed the tool
If the ng command is not recognized, restart the terminal. This ng command is the CLI call and will be used in this and other chapters of the book.
Let’s start our project using the ng new command. The Angular CLI will ask for some definitions of your project:
- The first is the name of the project; for this example, enter
angular-start. - The second prompt is whether you’d like to configure your project’s routing, for which we’ll input
Yes. This request will tell the CLI to create the base files for the route, which is recommended for most applications; an exception could be an Angular library you would like to create. - The next prompt will tell you which CSS format your project will use. Angular by default supports conventional CSS and the SCSS, Sass, and Less tools. For this and other examples in the book, we will use
CSS. - Confirming the Angular CLI will create the entire initial structure of the project and will install the dependencies using the
npm icommand, leaving everything ready for the start of development, as in the following example.
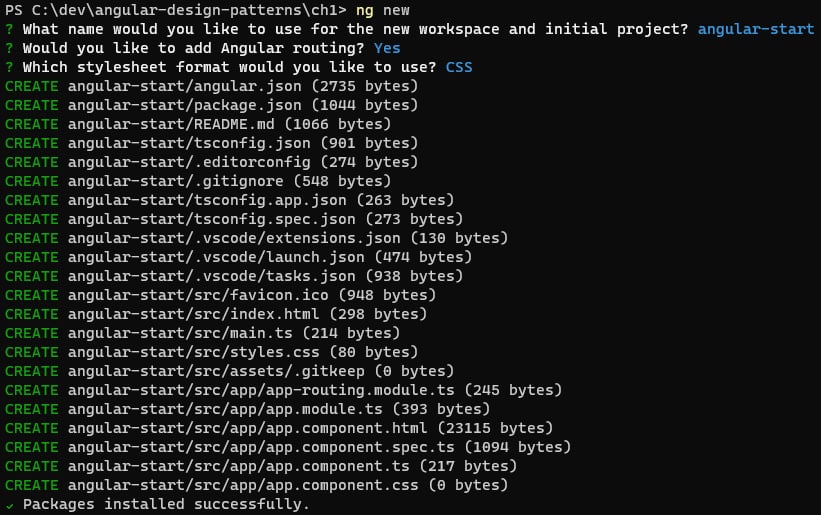
Figure 1.5 – Prompt of files generated by angular-cli
To verify that the project was successfully installed, in your operating system’s terminal, type the following command:
ng serve
This command will start the development web server and load the example project page, as shown in Figure 1.6:

Figure 1.6 – Example page generated by angular-cli on project creation
The ng new command has other options that can be used for specific needs in your project. They are listed in the official documentation (https://angular.io/cli/new), and here are some that may be interesting:
Parameter '—package-manager': With this parameter, it is possible to choose another node package manager such as yarn (https://yarnpkg.com/).Parameter '--skip-install': With this parameter, the CLI does not perform the package installation step, which can be useful for creating automation tools for your team.Parameter '--strict': This parameter is set totrueby default, but it is important to mention it because it configures your project instrictmode, which configures the TypeScript and Angular mechanisms to improve type and template validations. For more details, see Chapter 3, TypeScript Patterns for Angular.
Project structure
The Angular CLI creates the project in the structure recommended by the Angular team with all files configured by default. To deepen our knowledge of the framework, we need to know the main files, their functions, and available customizations as follows:
src: This is the folder where your project will be, including all components, modules, and services.assets: Contains the static files you will need in your project, such as images and icons. In the build process, by default, it will export the files from this folder without any changes to the production build.index.html: This is the initial file of your application. This file will be used in the build process, and it is recommended not to change it unless there is a very specific need. The title information must be changed with an Angular feature and not directly in this file.main.ts: This is the first JavaScript file that will be loaded in your application. You shouldn’t change it unless your project has a very specific need for it to be changed.styles.css: This is the file that can contain the global CSS of your application, that is, the CSS that can be read by all components since Angular by default isolates the CSS of each component. This file is usually modified when your project uses a design system such as Material (https://material.angular.io/)..editorconfig: As described in the VS Code section of this chapter, this file, together with the extension that interprets and configures the IDE, allows standardization in your code conventions, such as the use of double or single quotes and the use of tabs or indentation spaces.angular.json: This is the most important configuration file for an Angular application. In it, you can customize the way your project is built, and define budgets for the size of bundles (more details in Chapter 12, Packaging Everything – Best Practices for Deployment), among other settings.package.jsonandpackage-lock.json: These files refer to the dependencies of thenpmpackages of your project and also the place to create thenpmscripts that will be used in the creation of the CI/CD pipes of the Angular application (more details in Chapter 12, Packaging Everything – Best Practices for Deployment).
As of version 15 of Angular, the CLI hides Karma configuration files and environment variables files (enviroment.ts) by default with the justification of simplifying the project structure. It is still possible to create these files for fine-tuning your application build, test, and environment processes (more details in Chapter 8, Improving Backend Integrations: the Interceptor Pattern).
We created our project using the angular-cli tool, but this tool can help us even more, as we will learn next.


