


Simulating the toolpath
At the moment, our screen should look a bit like this:
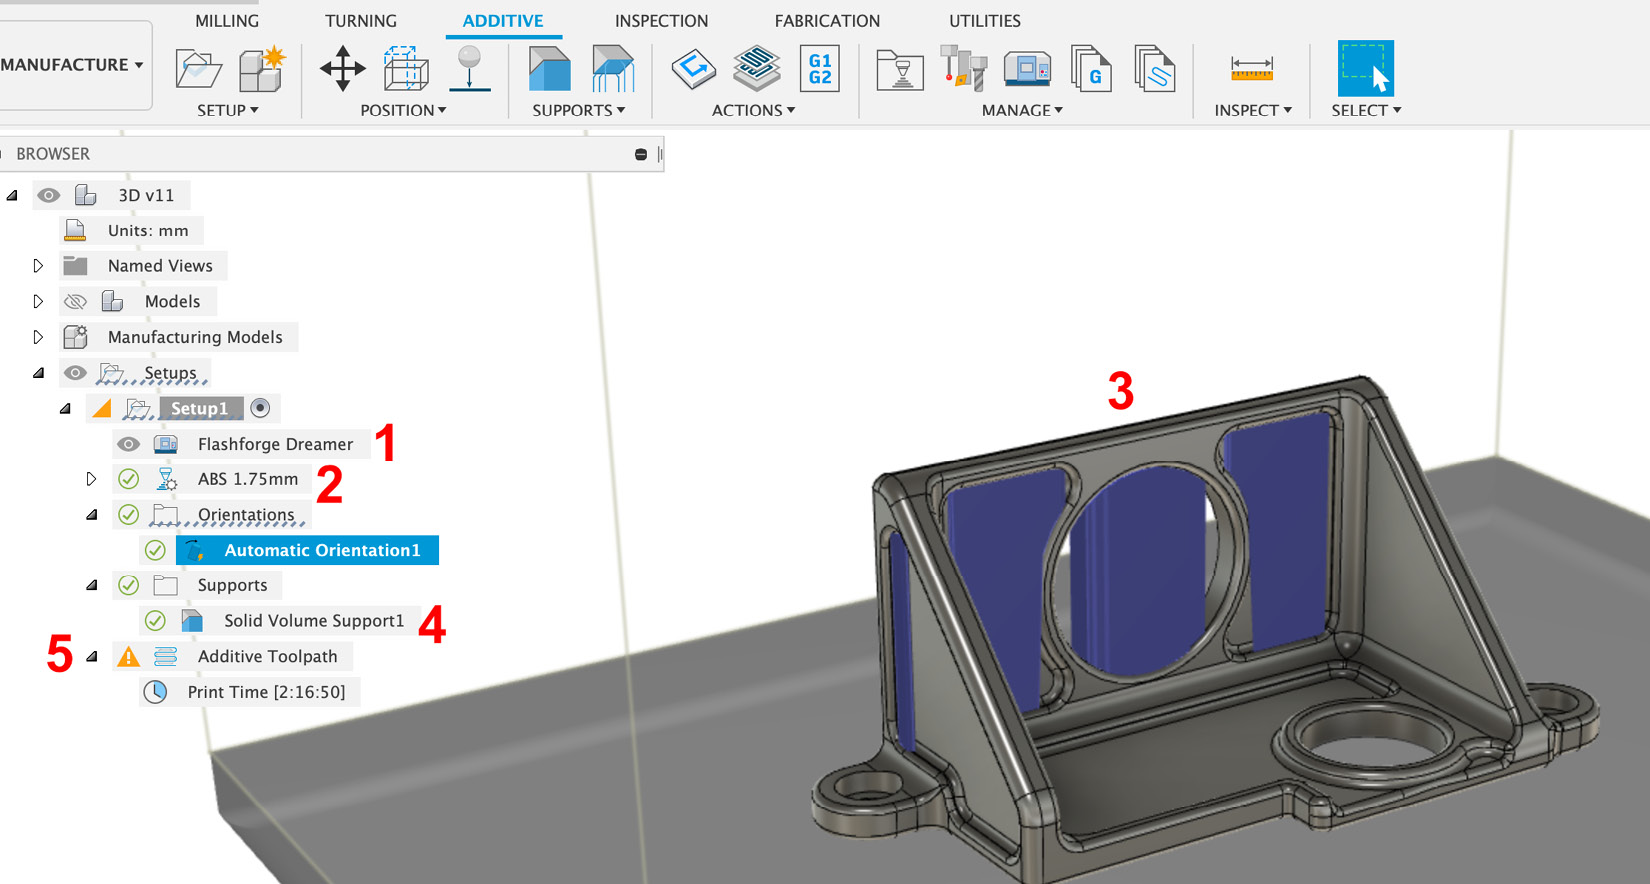
Figure 16.23: Printing environment
The 3D printer (and its printing volume) have been set (1), the printing settings have been selected (2), the part has been properly oriented onto the build platform (3), and the support structures are up to date (4).
However, there is still a warning for the Additive Toolpath area (5) – the yellow triangle on the left means that the toolpath data is outdated.
Luckily, updating the toolpath is very simple. To do this, we just need to click the Generate command, which we can find in the ADDITIVE tab under the ACTIONS drop-down menu:
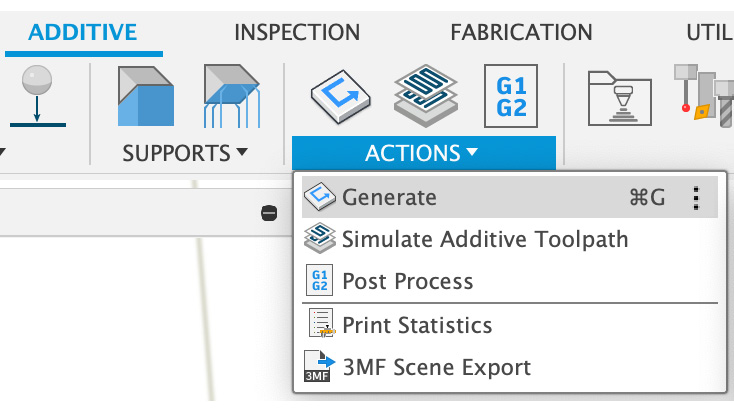
Figure 16.24: The Generate command
After updating the toolpath, we can check the simulation results using the Simulate Additive Toolpath command:
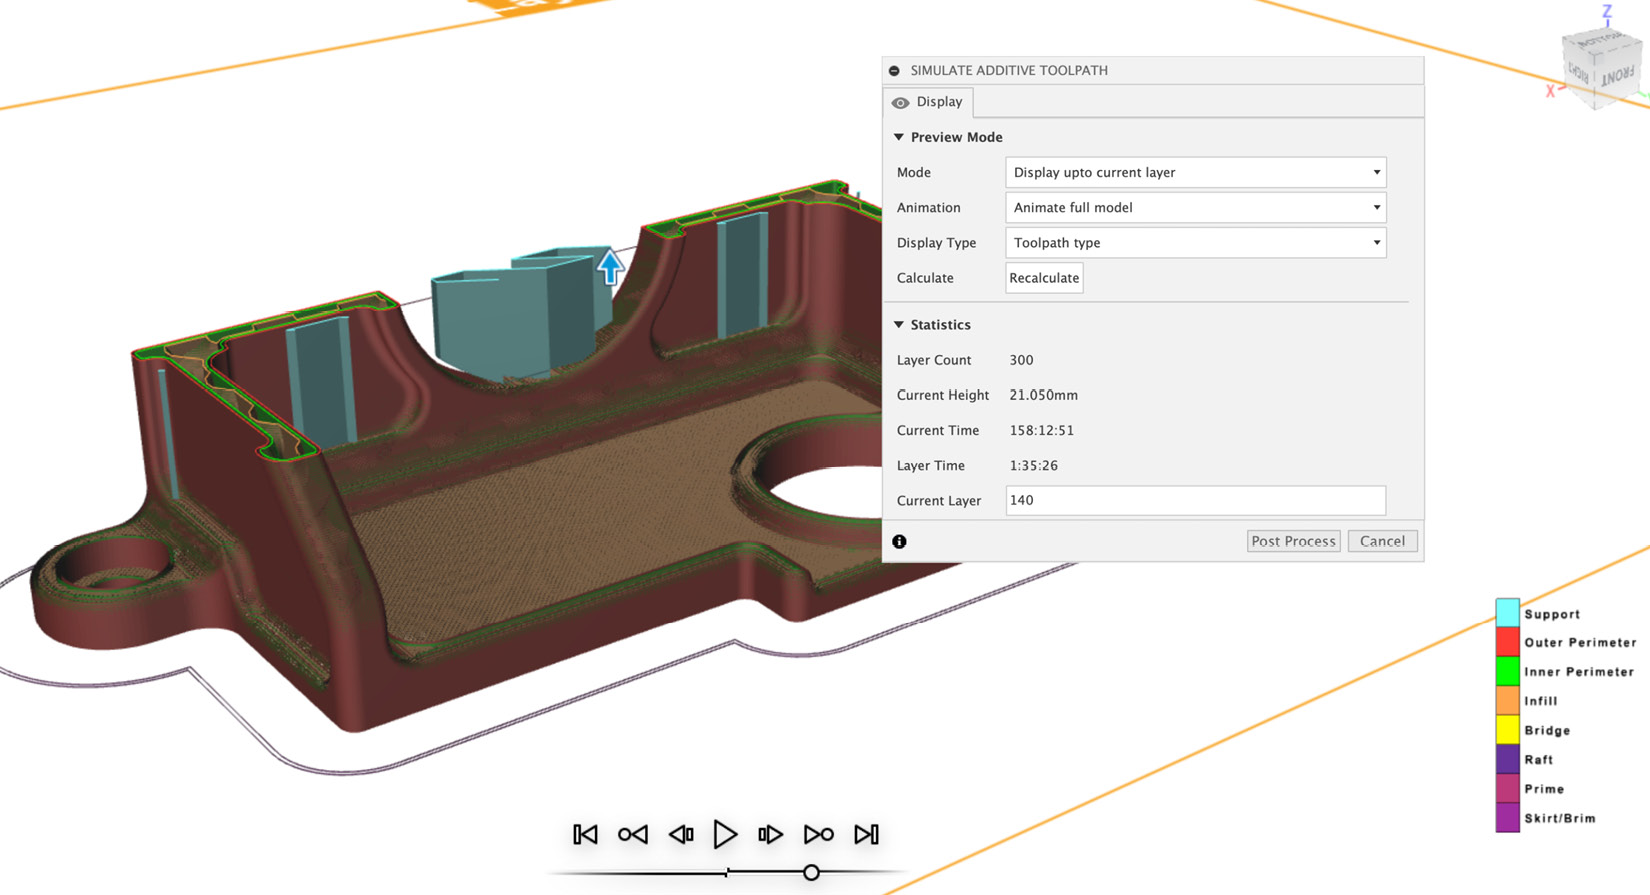
Figure 16.25: Simulated toolpath
The simulation environment is quite similar to those found for...


