Search icon CANCEL
Subscription
0
Cart icon
Your Cart (0 item)
Close icon
You have no products in your basket yet
Save more on your purchases! discount-offer-chevron-icon
Savings automatically calculated. No voucher code required.
Arrow left icon
Explore Products
Best Sellers
New Releases
Books
Events
Videos
Audiobooks
Packt Hub
Free Learning
Arrow right icon
timer SALE ENDS IN
0 Days
:
00 Hours
:
00 Minutes
:
00 Seconds
Arrow up icon
GO TO TOP
Learn SwiftUI

You're reading from   Learn SwiftUI An introductory guide to creating intuitive cross-platform user interfaces using Swift 5

Arrow left icon
Product type Paperback
Published in Apr 2020
Publisher Packt
ISBN-13 9781839215421
Length 316 pages
Edition 1st Edition
Languages
Tools
Arrow right icon
Author (1):
Arrow left icon
Chris Barker Chris Barker
Author Profile Icon Chris Barker
Chris Barker
Arrow right icon
View More author details
Toc

Table of Contents (17) Chapters Close

Preface 1. Getting Started with SwiftUI 2. Understanding Declarative Syntax FREE CHAPTER 3. Building Layout and Structure 4. Creating Your First Application 5. Understanding Controls, Views, and Lists 6. Working with Navigation in SwiftUI 7. Creating a Form with States and Data Binding 8. Networking and Linking to Your Existing App Logic 9. Maps and Location Services 10. Updating for iPad with NavigationViewStyle 11. SwiftUI on watchOS 12. SwiftUI versus UIKit 13. Basic Animation in Views 14. Animations in Transitions 15. Testing in SwiftUI 16. Other Books You May Enjoy

Visualizing declarative syntax

As we mentioned in the previous chapter, declarative syntax is used by many languages. A relatively recent framework, Google's Flutter, took on the declarative syntax approach and the wider developer community was immediately hooked. With this, it was only a matter of time before other frameworks started to follow.

At the time of writing this book, Google has just announced Jetpack Compose for Android, which itself adopts the same approach to UI development.

Now, let's take our first steps into programming with SwiftUI. We'll start by getting to grips with Xcode, learn the basics of how to create a new project, and start to write our very first SwiftUI code!

Getting started with SwiftUI in Xcode

Let's start by opening Xcode and taking a look at how to set up our first SwiftUI project:

  1. Start by opening Xcode.
  2. Select Create a new Xcode project.
  3. Select Single View App.
  4. Finally, select Next.

Fill in the details as per the following screenshot while paying careful attention to the User Interface. SwiftUI should be selected for this:

Also, note that Team will be different – if you've not set up Xcode before, you'll need select Xcode | Preferences | Account from the toolbar and add your Apple developer ID. If you don't have an Apple developer ID, you can register for one here: https://developer.apple.com/.

There are multiple types of Apple Developer account options, but, for the purpose of this book, you won't need a paid membership, although, if you would like to run your app on a physical device at some point, you will need either a standard Developer membership or an Enterprise membership. For more information on Apple Developer memberships, please go to the following link: https://developer.apple.com/support/compare-memberships/.

Now that we are all set up with our project, we can write out the first piece of SwiftUI and start to truly understand the declarative syntax. Next, we'll fire up Xcode for the first time and start building our very first application.

Making a "Hello World" app

Learning a new programming language always starts with "Hello World", no matter how experienced a developer you are (and I won't have anyone tell me any different).

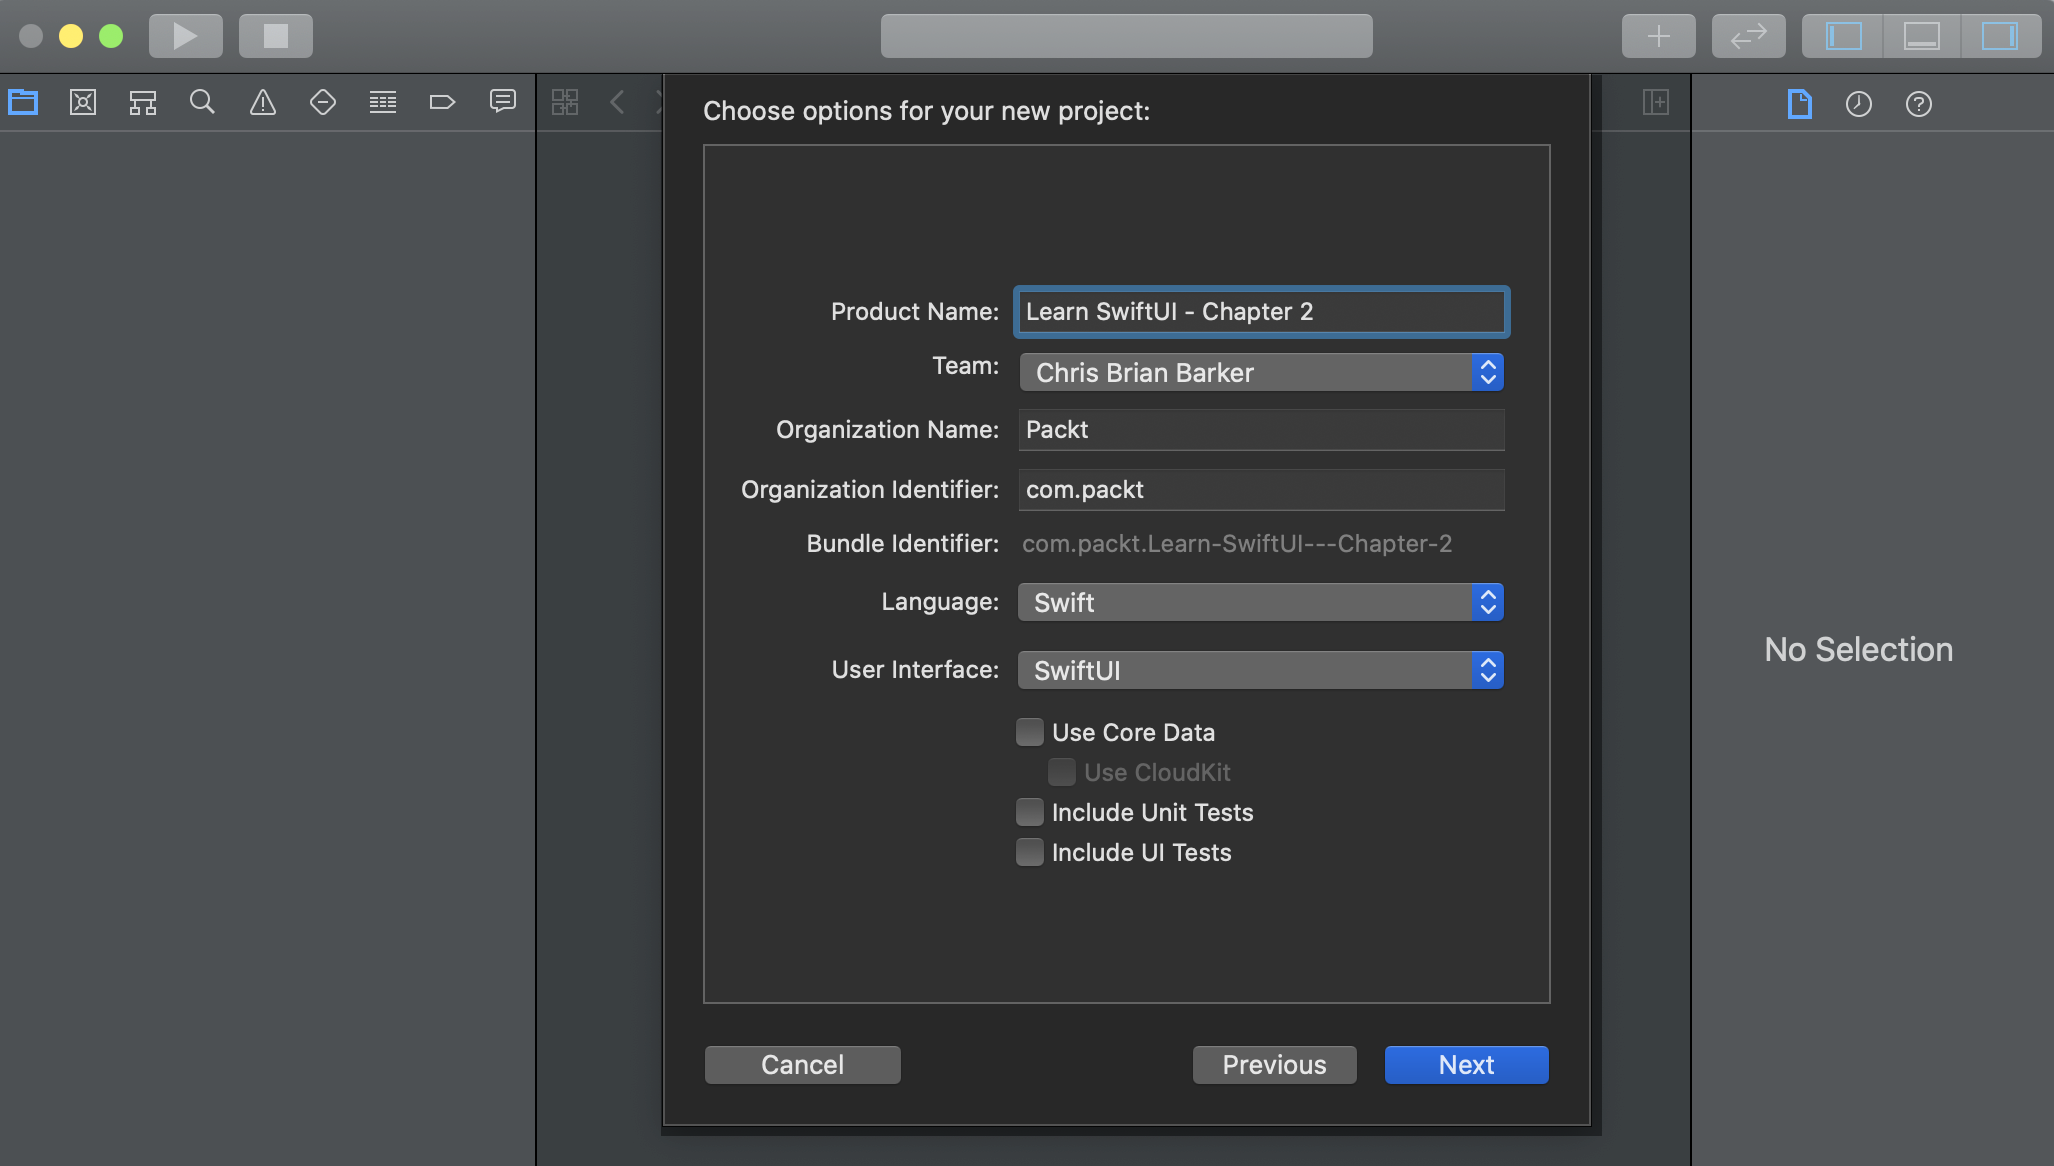
SwiftUI is no different. By default, it will give you some very basic boilerplate code to get you started. If you followed the preceding sections correctly, you'll be presented with the following:

struct ContentView: View {
var body: some View {
Text("Hello World")
}
}

This is your first look at SwiftUI's declarative syntax – looks great, doesn't it? Well, actually, it doesn't look like a lot, but when we break it down, you'll see how powerful it is and how much is actually being done.

Let's start by taking a look at the first couple of lines:

struct ContentView: View {
var body: some View { }
}

What does this mean? Well, this is your main Content View for the Single View App you're about to create. In terms of UIKit, this is your main UIView, which may sit inside your existing UIViewController or simply be a view on its own. Everything that is going to be displayed on your screen will be returned in this one single view. We can, however, have multiple views being returned inside the body of ContentView, which leads us on to the next part – a TextView:

struct ContentView: View {
var body: some View {
TextView("Hello World")
}
}

As you can see. there is a TextView inside our body that accepts a constructor of the String type. What we've done here is create a label with the text of "Hello World" and added it to our app, all with one line of code!

Notice how I said we were returning a TextView and I mentioned that we can return multiple views within our ContentView body, yet we appear to be missing the return keyword in front of our TextView. This is because SwiftUI (along with Swift 5.2) can now make use of implicit returns from single-expression functions.

For more details on implicit returns from single-expression functions, take a look at the following read me from the open source Swift repository: https://github.com/apple/swift-evolution/blob/master/proposals/0255-omit-return.md.

Now that we've learned how to successfully return a single View, we can move on to returning more than one View. The next section is important as every element on a page in SwiftUI is of the View type and you will almost never return just a single View for your app.

Returning multiple views

Even with implicit returns, we can add multiple views to our body without the need for the return keyboard. First, let's try adding another TextView and see what happens:

struct ContentView: View {
var body: some View {
Text("Hello World")
Text("Learn SwiftUI")
}
}

Looking at the preceding example and trying to add another TextView underneath the existing one looks the right thing to do, but, unfortunately, if you duplicate the TextView in the current body, you'll be immediately presented with the following error:

Function declares an opaque return type, but has no return statements in its body from which to infer an underlying type

Basically, this means that body is expecting a single return type of View, but we are passing back two Views (and it's not sure which one to use).

We solve this by first asking the question of how we want to display the text. If the desired effect is a list, then we simply make the following change:

struct ContentView: View {
var body: some View {
List {
Text("Hello World")
Text("Learn SwiftUI")
}
}
}

By wrapping our multiple Text views inside a List view, our body is again only being presented with one single view to which it can successfully compile based on its implicit return.

In this section, we've learned how to return multiple views that will form the foundations for many iOS and macOS applications. Next, we'll take a look at some more examples of other views we can create in SwiftUI, along with how to best handle nesting.

CONTINUE READING
83
Tech Concepts
36
Programming languages
73
Tech Tools
Icon Unlimited access to the largest independent learning library in tech of over 8,000 expert-authored tech books and videos.
Icon Innovative learning tools, including AI book assistants, code context explainers, and text-to-speech.
Icon 50+ new titles added per month and exclusive early access to books as they are being written.
Learn SwiftUI
You have been reading a chapter from
Learn SwiftUI
Published in: Apr 2020
Publisher: Packt
ISBN-13: 9781839215421
Register for a free Packt account to unlock a world of extra content!
A free Packt account unlocks extra newsletters, articles, discounted offers, and much more. Start advancing your knowledge today.
Unlock this book and the full library FREE for 7 days
Get unlimited access to 7000+ expert-authored eBooks and videos courses covering every tech area you can think of
Renews at $19.99/month. Cancel anytime
Modal Close icon
Modal Close icon