Search icon CANCEL
Subscription
0
Cart icon
Your Cart (0 item)
Close icon
You have no products in your basket yet
Arrow left icon
Explore Products
Best Sellers
New Releases
Books
Events
Videos
Audiobooks
Packt Hub
Free Learning
Arrow right icon
timer SALE ENDS IN
0 Days
:
00 Hours
:
00 Minutes
:
00 Seconds
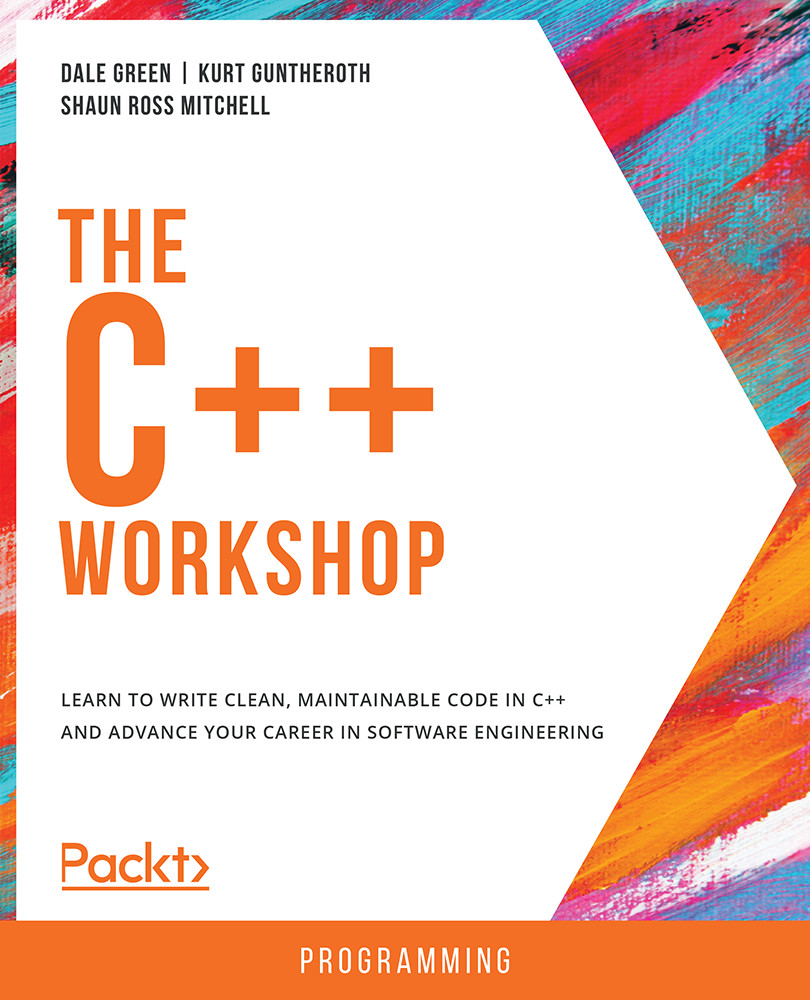
The C++ Workshop
The C++ Workshop

The C++ Workshop: Learn to write clean, maintainable code in C++ and advance your career in software engineering

Arrow left icon
Profile Icon Dale Green Profile Icon Kurt Guntheroth Profile Icon Shaun Ross Mitchell Profile Icon Anil Achary
Arrow right icon
₹3425.99
Full star icon Full star icon Full star icon Full star icon Full star icon 5 (8 Ratings)
Paperback Feb 2020 606 pages 1st Edition
eBook
₹999.99 ₹2740.99
Paperback
₹3425.99
Arrow left icon
Profile Icon Dale Green Profile Icon Kurt Guntheroth Profile Icon Shaun Ross Mitchell Profile Icon Anil Achary
Arrow right icon
₹3425.99
Full star icon Full star icon Full star icon Full star icon Full star icon 5 (8 Ratings)
Paperback Feb 2020 606 pages 1st Edition
eBook
₹999.99 ₹2740.99
Paperback
₹3425.99
eBook
₹999.99 ₹2740.99
Paperback
₹3425.99

What do you get with Print?

Product feature icon Instant access to your digital copy whilst your Print order is Shipped
Product feature icon Paperback book shipped to your preferred address
Product feature icon Redeem a companion digital copy on all Print orders
Product feature icon Access this title in our online reader with advanced features
Product feature icon DRM FREE - Read whenever, wherever and however you want
Product feature icon AI Assistant (beta) to help accelerate your learning
Modal Close icon
Payment Processing...
tick Completed

Shipping Address

Billing Address

Shipping Methods
Table of content icon View table of contents Preview book icon Preview Book

The C++ Workshop

2. Control Flow

Overview

This chapter presents various tools and techniques that are used to control the flow of execution throughout applications. This includes, but is not limited to: if statements, switch statements, and various loops. We will also look at how we control the lifetime of our applications using these techniques, and how they are to be used efficiently. The chapter will end with the creation of a number guessing that that will implement various loops and conditional statements.

Introduction

In the first chapter, we covered the absolute essentials of C++ and looked at the key components of a C++ application. We looked at how applications run, how they're built, and how we can get information in and out of them with some basic I/O. Up until this point, the applications we've built have mainly run sequentially; that is, the code we've written has been executed line by line, sequentially. While that's great for demonstration purposes, this generally isn't how real-world applications work.

In order to represent logical systems correctly, we need to be flexible in what we do and when. For example, we may only want to perform a certain action if a given statement is true or to return to an earlier piece of code again. Manipulating execution in this manner is known as control flow (or program flow), and is the topic of this chapter.

To begin with, we are going to look at the humble if statement, one of the most fundamental logic statements. We'll then branch out into looking at switch statements, a nice alternative to long chains of if/else statements. Next, we'll look at loops. Specifically, we'll see how we can use them to repeat code execution, and how we can make them more efficient and precise with break and continue statements.

The chapter will conclude with a fun activity in which we'll create a number-guessing game from the ground up. This will not only require the skills we learned in Chapter 1, Your First C++ Application, but also the program flow skills that we're about to cover. When this chapter is finished, not only will you have a solid understanding of the core logic statements and loops, but you will have also implemented them within practical exercises.

if/else

One of the most basic, yet most important, control flow statements is if. This simple keyword is at the heart of all logic, allowing us to perform a given action only if a specified condition is true. By chaining these if statements together in creative ways, we can model any logical system.

The syntax for an if statement is as follows:

    if (condition) { // do stuff. }

If the statement we use as our condition resolves to true, then the code within the curly braces will be executed. If the statement is false, then it will be skipped. Our condition can be anything that can be either true or false. This can be something simple, such as checking the value of a Boolean, or something more complex, such as the result of another operation or function.

We also have the else statement. This allows code to be executed if, and only if, a preceding if statement's condition evaluates to false. If the condition evaluates to true, however, and the if statement is thereby executed, the code within the else statement will not be executed. Here's an example:

    if (MyBool1)
    {
        // Do something.
    }
    else
    {
        // Do something else.
    }

In this example, if MyBool1 was true, then we'd execute the // Do something code but not // Do something else. If MyBool1 evaluated to false, however, we'd execute the // Do something else code but not // Do something.

An else statement can also be used together with an if statement. With an else/if block in place, should the first if check fail, then the second will be evaluated. Here is an example:

    if (MyBool1)
    {
        // Do something.
    }
    else if (MyBool2)
    {
        // Do something else.
    }

In this example, MyBool1 will be checked first. If that returns true, then the // Do Something code will be executed but // Do something else will not. If MyBool1 was false, however, MyBool2 would then be checked, and the same rules would apply: if MyBool2 was true, then // Do something else would execute. So, if MyBool1 and MyBool2 were both false, then neither code would be executed.

It's also possible to place if statements inside one another. This practice is referred to as nesting. Here's an example:

    if (MyBool1)
    {
        if (MyBool2)
        {
            // Do something
        }
    }

In this example, if MyBool1 returns true, then the second if statement will be evaluated. If MyBool2 is also true, then // Do Something will be executed; otherwise, nothing will get executed. C++ allows us to nest many levels deep. The standard suggests 256 (although this isn't enforced), but the more levels deep you go, generally, the more confusing the code. It's good practice to minimize nesting where possible.

Now, let's get some code written and see these if / else statements in action.

Exercise 5: Implementing if/else Statements

In this exercise, we will write a simple application that will output a certain string based on an input value. The user will input a number, and the application will use if/else statements to determine whether it's either above or below 10.

Follows these steps to complete the exercise:

Note

The complete code can be found here: https://packt.live/2qnQHRV.

  1. Enter the main() function and then define a variable called number:
    // if/else example 1.
    #include <iostream>
    #include <string>
    int main()
    {
        std::string input;
        int number;
  2. Write code that prints the Please enter a number: string, gets the user input, and then assigns it to the number variable:
        std::cout << "Please enter a number: ";
        getline (std::cin, input);
        number = std::stoi(input);

    Note

    We've used the std::stoi function here, which we first saw in Chapter 1, Your First C++ Application. This function converts a string value into its integer equivalent. For example, the string 1 would be returned as int 1. Combining it with getline, as we did previously, is a good way to parse integer inputs.

  3. Use if/else statements to evaluate the condition based on the user input and then print either The number you've entered was less than 10! or The number you've entered was greater than 10!:
        if (number < 10)
        {
            std::cout << "The number you entered was less than 10!\n";
        }
        else if (number > 10) 
        {
            std::cout << "The number you entered was greater than 10!\n";
        }
        return 0;
    }
  4. The complete code looks like this:
    // if/else example 1.
    #include <iostream>
    #include <string>
    int main() 
    {
        std::string input;
        int number;
        std::cout << "Please enter a number: ";
        getline(std::cin, input);
        number = std::stoi(input);
        if (number < 10) 
        {
            std::cout << "The number you entered was less than 10!\n";
        } 
        else if (number > 10) 
        {
            std::cout << "The number you entered was greater than 10!\n";
        }
        return 0;
    }
  5. Run the complete code in your editor. You will see that it evaluates the statements and outputs the correct string, as shown in the following screenshot:
    Figure 2.1: The if/else statement allows us to execute certain code based on conditions

Figure 2.1: The if/else statement allows us to execute certain code based on conditions

In this preceding exercise, we used two if statements that both evaluate a condition, but what if we want a default action if neither condition is true? We can achieve this by using an else statement on its own:

    if (condition1)
    {
        // Do stuff.
    }
    else if (condition2)
    {
        // Do different stuff.
    }
    else
    {
        // Do default stuff.
    }

In this case, if neither condition1 nor condition2 proves to be true, then the code in the else block will be executed as a default. This is because there's no if statement, so nothing has to be true to enter it.

Applying this to our simple number example, we currently check whether the number is less than or greater than 10, but not if it's exactly 10. We could handle this with an else statement, as follows:

    if (number < 10)
    {
        std::cout << "The number you entered was less than 10!\n";
    }
    else if (number > 10) 
    {
        std::cout << "The number you entered was greater than 10!\n";
    }
    else
    {
        std::cout << "The number you entered was exactly 10!\n";
    }

Ternary Operator

The ternary operator is a neat feature that allows us to quickly assign a value based on the outcome of an if statement. This is best shown with an example. Perhaps we have a float variable, the value of which depends on a Boolean. Without using the ternary operator, we could write this as follows:

    if (MyBool == true)
    {
        MyFloat = 10.f;
    }
    else
    {
        MyFloat = 5.f;
    }

Note

Here, we've used == instead of just =. The = operator assigns a value to a variable, whereas the == operator checks whether two values are equal, returning true if they are, and false otherwise. This will be covered in more detail in a later chapter on operators.

Using the ternary operator, we could also write this same code as follows:

    MyFloat = MyBool ? 10.f : 5.f;

That's much more concise. Let's break down the syntax here and see what's happening. A ternary statement is written as follows:

    variable = condition ? value_if_true : value_if_false;

Note

While ternary statements can be nested as we saw earlier with if statements, it's probably best to avoid it. They can be a real pain to read and understand at a glance.

We start by specifying the condition that we want to evaluate and follow it with the ? character. This sets our ternary statement in motion. We then define the different values we want to use if the value is true or false. We always start with the true value, followed by the false value, with them separated by the : character. This is a great way to concisely handle an if/else scenario.

Exercise 6: Creating a Simple Menu Program Using an if/else Statement

In this exercise, we're going to write a simple program that provides menu options for a food outlet. Users will be able to select multiple options from a menu, and we will present the price information based on that choice.

Here are the steps to complete the exercise:

Note

The complete code for this exercise can be found here: https://packt.live/35wflPd.

  1. Create the template application, and output our three menu options to the user:
    // if/else exercise – Menu Program
    #include <iostream>
    #include <string>
    int main()
    {
        std::string input;
        int number;
        std::cout << "Menu\n";
        std::cout << "1: Fries\n";
        std::cout << "2: Burger\n";
        std::cout << "3: Shake\n";
  2. Next, we'll ask them to input their choice and store it:
        std::cout << "Please enter a number 1-3 to view an item price: ";
        getline (std::cin, input);
        number = std::stoi(input);
  3. Now, we can use our if/else statements to check the user input and output the correct information:
        if (number == 1)
        {
            std::cout << "Fries: $0.99\n";
        }
        else if (number == 2) 
        {
            std::cout << "Burger: $1.25\n";
        }
        else if (number == 3)
        {
            std::cout << "Shake: $1.50\n";
        }
        else
        {
            std::cout << "Invalid choice.";
        }
        return 0;
    }
  4. The complete code looks like this:
    // if/else exercise – Menu Program
    #include <iostream>
    #include <string>
    int main() 
    {
        std::string input;
        int number;
        std::cout << "Menu\n";
        std::cout << "1: Fries\n";
        std::cout << "2: Burger\n";
        std::cout << "3: Shake\n";
        std::cout << "Please enter a number 1-3 to view an item price: ";
        getline(std::cin, input);
        number = std::stoi(input);
        if (number == 1) 
        {
            std::cout << "Fries: $0.99\n";
        } 
        else if (number == 2) 
        {
            std::cout << "Burger: $1.25\n";
        } 
        else if (number == 3) 
        {
            std::cout << "Shake: $1.50\n";
        } 
        else 
        {
            std::cout << "Invalid choice.";
        }
        return 0;
    }
  5. Run the application. When we input our menu option, we're presented with the correct information for that item, as shown in the following screenshot:
Figure 2.2: We can make menu selections and output the correct information

Figure 2.2: We can make menu selections and output the correct information

This ability to perform an action if a given condition is true really is at the heart of all programming. If you break down any system far enough, it will comprise "if x is true, do y." With this covered, the possibilities are endless.

switch/case

As we've seen, we can use if/else to perform certain actions based on which conditions are true. This is great when you're evaluating multiple conditional statements to determine flow, such as the following:

    if (checkThisCondition)
    {
        // Do something ...
    }
    else if (checkAnotherCondition)
    {
        // Do something else ...
    }

When we're evaluating the different possibilities of a single variable, however, we have a different statement available to us: the switch statement. This allows us to branch in a similar way to an if/else statement, but each branch is based on a different possible value of a single variable that we're switching on.

A good example of where this would be suitable is the menu application we created in the previous exercise. Currently, we chain if/else statements to handle the different possible values, but since we're switching on a single variable (the menu index), it would be more suitable as a switch statement.

A basic implementation of a switch statement block is as follows:

    switch (condition)
    {
        case value1:
            // Do stuff.
        break;
        case value2:
            // Do stuff.
        break;
        default:
            // Do stuff.
        break;
    }

Applying this to the previous menu example, the condition would be the selected menu index that we read from our user, and the different values would be our supported possibilities (1-3). The default statement would then catch the cases where the user inputs an option that we're not handling. We could print an error message in those cases and have them select a different option.

A switch statement comprises a number of keywords:

  • switch: This denotes the condition that we're evaluating. We're going to switch our behavior based on its value.
  • case: Each case statement is followed by the value that we want to handle. We can then define our behavior for that scenario.
  • break: This statement signals the end of our code for that given case. More on these in the next topic.
  • default: This is the default case and is what will get called should none of the other cases match.

    Note

    A default case is not required but is recommended. It allows us to handle all other values, perhaps throwing an exception.

An important limitation of switch statements is that they can only be used with certain types. These are whole numbers and enum values. This means that, for example, we couldn't use either string or float types within a switch statement.

Note

Enumerated type, or enum, is a user-generated data type in C++. A detailed discussion on this is beyond the scope of this book. However, you can refer to the following documentation for further details: https://packt.live/35l6QWT.

It's also worth noting that not every case needs a break statement. They are optional, though will likely be required in the vast majority of cases. If the break statement is omitted, however, then the flow of execution will continue to the next case statement until a break is hit. Be careful here because missing break statements is a common cause of hard-to-find bugs; ensuring each case has a break statement where needed could save you lots of potential debugging time down the line.

Perhaps the best way to see the use of a switch statement is to convert some if/else chains to switch statements. This will be the objective of the following exercise.

Exercise 7: Refactor an if/else Chain into switch/case

In this exercise, we will reuse the code from the previous exercise and refactor it into a switch statement. This will clearly show how we can represent the same functionality using either method. Since we're only checking the different possible values of a single variable, however, a switch statement is preferred.

Note

Ensure that you have copied the code from the previous exercise (steps 1-2) in the compiler window. The complete code can be found here: https://packt.live/32ZZ5Ek.

We will break this down into a number of simple steps:

  1. First, the variable we're checking here is number, so that's going to be the condition that we're switching on. Add that to a switch statement and open our curly brackets ready for the rest of the switch block:
        switch (number)
        {
  2. Next, we'll convert our first if statement into a case statement. If we look at the first one, we're checking whether number is equal to 1. Add this as our first case value and copy the output into the case body:
        case 1:
            std::cout << "Fries: $0.99\n";
        break;
  3. Now, repeat this for each of the if statements, apart from the last one. If you remember, this statement had no condition that it checked; it's simply the last option. This meant that if all other checks failed, execution would fall right through to that final default statement. This is exactly how the default case works, so we will end by moving that else statement into a default case. We should end up with the following switch statement, which will replace our if/else chain:
        switch (number)
        {
            case 1:
                std::cout << "Fries: $0.99\n";
            break;
            case 2:
                std::cout << "Burger: $1.25\n";
            break;
            case 3:
                std::cout << "Shake: $1.50\n";
            break;
            default:
                std::cout << "Invalid choice.";
            break;
        }

    This statement is functioning the same as the chained if/else, so you could use either; however, you generally see switch statements over long if chains. Now, let's run this code and check that it's behaving how we'd expect.

  4. The complete code looks like this:
    // if/else to switch/case
    #include <iostream>
    #include <string>
    int main() 
    {
        std::string input;
        int number;
        std::cout << "Menu\n";
        std::cout << "1: Fries\n";
        std::cout << "2: Burger\n";
        std::cout << "3: Shake\n";
        std::cout << "Please enter a number 1-3 to view an item price: ";
        getline(std::cin, input);
        number = std::stoi(input);
        switch (number) 
        {
        case 1:
            std::cout << "Fries: $0.99\n";
        break;
        case 2:
            std::cout << "Burger: $1.25\n";
        break;
        case 3:
            std::cout << "Shake: $1.50\n";
        break;
        default:
            std::cout << "Invalid choice.";
        break;
        }
    }
  5. Run the complete code. You will obtain an output that's similar to the following:
Figure 2.3: The code works the same, but this time presented as a switch statement

Figure 2.3: The code works the same, but this time presented as a switch statement

The program behaves in the same way but is arguably neater and easier to follow. We can clearly see each possible behavior branch and the case that will let it execute.

Loops

Alongside if statements, loops are among the most fundamental of programming concepts. Without loops, our code would execute by running through our logic statements one by one and then ending. That's how our applications have worked so far; however, in reality, this really isn't practical. Systems tend to consist of many moving parts, and code execution will jump all around the code base to where it's needed.

We've seen how this can be achieved by creating branches in our code where statements can be evaluated, and we do different things based on the outcome. Another way we do this is via loops. Loops allow us to rerun sections of code, either a set or indefinite number of times depending on which one we choose. We're going to be looking at three: while, do while, and for loops.

while

A while loop is one of the most basic loops in your arsenal and is usually the outermost loop in an application. When execution enters a while loop it typically won't leave until the condition is false. We say generally because multithreaded applications can break this rule; however, they're beyond the scope of this introductory book. Here is the basic implementation of a while loop:

    while (condition)
    {
        // Do stuff.
    }

The following flowchart shows the structure and logic flow of a while loop:

Figure 2.4: A while loop flowchart

Figure 2.4: A while loop flowchart

A common thing to see in an application is an outmost while loop that will evaluate a bool such as bIsRunning. With this, you set an indefinite lifespan for your application, which is usually what we want. We want the software to run for as long as the user wants it to. As soon as we want the loop to stop running, we just change the bool to false. We need to be careful here, however, as it's easy to make a while loop that never ends as the condition never evaluates false. In this case, your loop will get stuck indefinitely with no way out.

The following code snippet shows this approach of using a while loop as an outermost loop to control the lifetime of the application. While bIsRunning is true, the application will run indefinitely:

int main()
{
    bool bIsRunning;
    
    // Do application setup.
    while (bIsRunning)
    {
        // Run application logic.
    }
    // Do application cleanup.
    return 0;
}

We've written a few example apps that accept user input, but generally stop after the first input. Let's take one of our existing applications and modify it so that it runs in a while loop; we'll continue with the menu application that we refactored into a switch. We want to put all of the code that we want to rerun inside the while loop. This includes the outputting of the menu items, the user selection, and the outputting of their answers.

Exercise 8: Implementing a while Loop

In this exercise, we will reuse the code from Exercise 7, Re-factor an if/else Chain into switch/case, and implement a while loop in our menu program.

Note

The complete code for this exercise can be found here: https://packt.live/35lj81p.

Follow these steps to complete the exercise:

  1. Copy the code from the previous exercise into the compiler window.
  2. Now, implement a while loop and pass the value true into it shown in the following:
    #include <iostream>
    #include <string>
    int main()
    bool bIsRunning = true;
    {
        while (bIsRunning)
        {
            std::string input;
            int number;
            std::cout << "Menu\n";
            std::cout << "1: Fries\n";
            std::cout << "2: Burger\n";
            std::cout << "3: Shake\n";
            std::cout << "Please enter a number 1-3 to view an                   item price: ";
            getline (std::cin, input);
            number = std::stoi(input);
            switch (number)
            {
                case 1:
                    std::cout << "Fries: $0.99\n";
                break;
                case 2:
                    std::cout << "Burger: $1.25\n";
                break;
                case 3:
                    std::cout << "Shake: $1.50\n";
                break;
                default:
                    std::cout << "Invalid choice.";
                break;
             }
        }
    }
  3. The complete code looks like this:
    #include <iostream>
    #include <string>
    int main() 
    bool bIsRunning = true;
    {
       while (bIsRunning)
        {
            std::string input;
            int number;
            std::cout << "Menu\n";
            std::cout << "1: Fries\n";
            std::cout << "2: Burger\n";
            std::cout << "3: Shake\n";
            std::cout << "Please enter a number 1-3 to view an                   item price: ";
            getline(std::cin, input);
            number = std::stoi(input);
            switch (number) 
            {
                case 1:
                    std::cout << "Fries: $0.99\n";
                break;
                case 2:
                    std::cout << "Burger: $1.25\n";
                break;
                case 3:
                    std::cout << "Shake: $1.50\n";
                break;
                default:
                    std::cout << "Invalid choice.";
                break;
            }
        }
    }
  4. Run the program.

    For now, we just want this application to run indefinitely, hence we have used true as our expression. We can see that it loops, re-asking the user for their selection again, as shown in the following output:

Figure 2.5: The application now loops and is able to process multiple user inputs

Figure 2.5: The application now loops and is able to process multiple user inputs

do while

The structure of a do while loop is very similar to that of a while loop, with one fundamental difference: the condition check is after the body. This subtle difference means that the body will always be executed at least once. The basic structure of a do while loop is as follows:

    do
    {
        // code
    }
    while (condition);

The following flowchart shows the structure and logic flow of a do while loop:

Figure 2.6: Diagram of a do while loop

Figure 2.6: Diagram of a do while loop

Look at the following example:

    while (false)
    {
        // Do stuff.
    }

The code inside this while statement will never be executed because we first evaluate the expression, false, and thus skip over that code. If we were to use the same condition with a do while loop, however, as shown in the following code snippet, we would see different behavior:

    do
    {
        // Do stuff.
    }
    while (false);

In this case, since the execution runs from top to bottom, the code is executed first, and then the condition; even though it's false, the code has already run once. We will see this with the help of our old friend—the Hello World program.

Exercise 9: Implementing while and do while Loops with a False Condition

In this exercise, we will edit our "Hello World" program to include a while and then a do while loop. For both of these loops, we will pass the false condition and observe the outputs.

Note

The complete code for this exercise can be found here: https://packt.live/2rc9vU2.

Follow these steps to complete the exercise:

  1. Insert the following code, which includes a while loop only, in the compiler window, and then execute it:
    // While loop.
    #include <iostream>
    #include <string>
    int main()
    {
        while (false)
        {
            std::cout << "Hello World!";
        }
        return 0;
    }

    You will obtain the following output:

    Figure 2.7: Output when using the while loop

    Figure 2.7: Output when using the while loop

    As can be seen in the output, we see nothing in the execution window. Since we did the evaluation first, the program never executed the code. This changes, however, if we replace the while loop with a do while loop.

  2. Edit the code to include a do while loop, as shown in the following snippet:
    // do ... while loop.
    #include <iostream>
    #include <string>
    int main()
    {
        do
        {
            std::cout << "Hello World!";
        }
        while (false);
        return 0;
    }
  3. Run the code. You should obtain the following output:
Figure 2.8: A do while loop showing that the body is executed at least once

Figure 2.8: A do while loop showing that the body is executed at least once

Now, we can see that we do indeed get the words Hello World printed to the console; so, while the two loops are similar in nature, they have a big difference. The while loop will evaluate the condition first, whereas the do while loop evaluates it after.

for

Both while and do while loops are indefinite loops, meaning they will only stop when their conditions evaluate false. Generally, when constructing these loops, we don't know how many iterations we need; we simply set it going and stop it at some later juncture. for loops, however, are used when we know how many iterations of something we need, and when we need to know what iteration we're currently on.

For example, let's say we have a collection of contacts and we want to run through them all, printing out their names and numbers. Since we know the size of this collection, we could write a for loop that would iterate the correct number of times, allowing us to visit every element in the collection sequentially. Since we also know which iteration we're currently on, we could use that to determine how we output the data. Perhaps, for the first half of the contact list, we want to output both the name and number, whereas, for the second half, we only require numbers. Or perhaps we want to do something special with the first and last contacts in the list. A for loop would allow us to do all of these things.

Note

One iteration is just a loop running once. If a loop is said to iterate five times, it just means it ran five times.

The basic structure of a for loop is as follows:

    for (initialization; condition; iteration expression) 
    {
        statement(s);
    }

The following flowchart shows the structure and logic flow of a for loop:

Figure 2.9: A for loop diagram

Figure 2.9: A for loop diagram

There are three clauses that are used in a for loop:

  • Initialization: This is a statement that is run once at the very start of the loop. This is used to declare a variable that will be used as a counter.
  • Condition: This is the condition that is checked each time before the loop runs. If the condition is true, the loop will run. If the condition is false, that's the end of the for loop. This is used to check that the counter variable is below a specified value. This is how we control how many times the loop will run.
  • Iteration Expression: This is a statement that's run at the end of each loop. It's used to increment the counter variable.

Now, let's implement a basic for loop in the next exercise to cement our understanding.

Exercise 10: Implementing a for Loop

In this exercise, we will create a for loop that will run five times to print out a string of numbers: 01234.

Note

The complete code for this exercise can be found here: https://packt.live/332boQl.

Perform the following steps to complete the exercise:

  1. Begin with the main function:
    #include <iostream>
    #include <string>
    int main()
    {
  2. Create a for loop with the variable i initialized to 0, and i set to be less than 5; increment the counter, and then finally print the output. You can use the following code for this:
        for (int i = 0; i < 5; ++i)
        {
            std::cout << i;
        }
    }
  3. The complete code looks like this:
    #include <iostream>
    #include <string>
    int main() 
    {
        for (int i = 0; i < 5; ++i) 
        {
            std::cout << i;
        }
    }
  4. Run the code. You will obtain the following output:
Figure 2.10: Output of the for loop

Figure 2.10: Output of the for loop

We can see that 5 numbers are printed out, 0 through 4, as shown in the preceding screenshot. Notice that the numbers are 0 through 4, as the increment runs after the main loop body, and i starts with a value of 0.

We can break the code down into the three statements we identified in the preceding section: initialization, condition, and increment. Our initialization statement in this loop is as follows:

    int i = 0

With this statement, we're creating our counter and setting its value to 0. This counter is what will be used to keep track of how many times we want our loop to run. Our condition statement in this loop is as follows:

    i < 5

This is the condition that we check to ensure that the loop can run, similar to how the while loop works. At the start of each iteration, this condition is checked. If I (our counter variable) is less than the value specified, then the loop will run. Our increment statement in this loop is as follows:

    ++i

This statement is called after each iteration of the loop and increments our counter so we can keep track of how many times the loop has run.

Range-based for loop

The last loop we're going to look at, and more briefly than the previous three, is the range-based loop. Introduced in C++ 11, this loop allows us to quickly iterate over all objects in a collection. We've not yet covered collections, so we will only address the basics here.

When iterating over collections using a for loop, we use the iterator. In our use cases, that's been the i variable to access the elements as shown in the following snippet:

    int myVector[] {0, 1, 2, 3, 4};
    for (int i = 0; i < myVector.size(); ++i)
    {
        int currentValue = myVector[i];
        std::cout << "\n" << currentValue;
    }

With a range-based for loop, however, we don't manually get the element via our incrementing value. Instead, the loop simply gives us each value in the collection:

    int myVector[] {0, 1, 2, 3, 4};
    for (int currentValue : myVector)
    {
        std::cout << "\n" << currentValue;
    }

Both these loops will produce the same output, but we can see that the second loop is more concise, less prone to error because we aren't manually fetching our elements, and is also very likely to be more efficient. Generally, if you don't need an index value, then this kind of loop will allow you to have cleaner, more solid code.

Exercise 11: Generating Random Numbers Using Loops

In this exercise, we're going to build an app that will generate a set of random numbers for the user. Our application will consist of a main outer loop and another loop within it to control the generation of our numbers.

For the outer loop, we're going to use a while loop—a common setup for an application. We know that this loop will run indefinitely, so it is perfect for controlling the outermost scope of an application. For the inner loop, we'll use a for loop, because we'll know how many numbers our user wants to generate.

Note

The complete code for this exercise can be found here: https://packt.live/2s4it6l.

Follow these steps to complete the exercise:

  1. We'll start by creating our main function and defining our main variables. This includes the bIsRunning bool, which will control the lifetime of our application:
    #include <iostream>
    #include <string>
    #include <cstdlib> 
    #include <ctime>
    int main()
    {
        bool bIsRunning = true;
        std::string input = "";
        int count = 0;
  2. Next, we'll output our heading content and create the main loop. We're using a while loop, and our condition is going to be that bool we just defined:
        std::cout << "***Random number generator***\n";
        while (bIsRunning)
        {
  3. With our while loop in place, we can now add all the code that we want to run during each iteration of the main loop. This starts with outputting our instructions and reading the user input:
            std::cout << "Enter amount of numbers to generate,                   or 0 to exit: ";
            // Get count from user.
            getline(std::cin, input); 
            count = std::stoi(input);

    We've covered break in this chapter, and we can now use it to check whether the user wants to exit the application. If the user entered a 0, indicating this, we can call break, exiting the main while loop and ending the application. We'll also set the seed for our random number generation.

    Note

    To generate our random numbers, we're using rand and srand. rand gives us our random number, and srand sets a seed for the random number generation. By using time(0), time in seconds since the epoch, we get a seed and number random enough for our needs.

  4. Input the following code to insert a break statement to allow the user to exit the application. We'll cover 'break' in more detail shortly:
            // Check if user wants to quit application.
            if (count == 0)
            {
                break;
            }
            // Generate and output random numbers.
            srand((unsigned)time(0));
  5. Now, we can write the main loop that will generate our random numbers and output them to the user. Since we got a count variable from our user, we can use that to ensure we iterate the correct number of times. Within the loop, we'll generate a random number and do a bit of formatting. After each number, we want to print a comma to create a well-formatted list, but not after the last one. We can use a continue statement for this:

    Note

    The continue statement will be covered in the next topic. For now, note that it allows us to skip the rest of the current loop, starting the next one immediately.

            for (int i = 0; i < count; ++i)
            {
                std::cout << rand() % 10;
                if (i == count - 1)
                {
                    continue; 
                }
                std::cout << ", ";
            }

    Note

    The modulus % operator returns the remainder after division. In the preceding step, we are using it, along with rand(), to generate numbers between 0 to 9. We'll cover this, and many other operators, in more detail in Chapter 4, Operators.

  6. Finally, we'll output a couple of blank lines for presentation and add our final curly braces:
            std::cout << "\n\n";
        }
    }
  7. The complete code looks like this:
    #include <iostream>
    #include <string>
    #include <cstdlib>
    #include <ctime>
    int main() 
    {
        bool bIsRunning = true;
        std::string input = "";
        int count = 0;
        std::cout << "***Random number generator***\n";
        while (bIsRunning) 
        {
            std::cout << "Enter amount of numbers to generate,                   or 0 to exit: ";
            // Get count from user.
            getline(std::cin, input);
            count = std::stoi(input);
            // Check if user wants to quit application.
            if (count == 0) 
            {
                break;
            }
            // Generate and output random numbers.
            srand((unsigned) time(0));
            for (int i = 0; i < count; ++i) 
            {
                std::cout << rand() % 10;
                if (i == count - 1) 
                {
                    continue;
                }
                std::cout << ", ";
            }
            std::cout << "\n\n";
        }
    }
  8. Run the application. When complete, the application should be able to generate the specified number of random integers, as shown here:
    Figure 2.11: Program that will run indefinitely, outputting a series of numbers if the user doesn't quit

Figure 2.11: Program that will run indefinitely, outputting a series of numbers if the user doesn't quit

By using a while loop, we've been able to create an application that can be used for an indefinite amount of time. Imagine if every time you went to do something on your computer, you could only do one thing before it needed to be rebooted. This would not be very practical. Having the ability to loop code and manipulate program flow is essential.

break/continue

Having the ability to loop sections of code is very important, but it has to be used carefully. We've seen that it's possible to create loops that never end, and another concern is ensuring that they're used efficiently. So far, the loops we've looked at have been small, and we've been happy to see them run through in their entirety. But what if we needed more control over our loops, perhaps to end one early? Thankfully, we have two important keywords to help us with that—break and continue.

break

break is a C++ keyword that will exit the current loop, with execution jumping to the next section of code if there is any. This keyword works with the different types of loop that we've covered so far, and we can demonstrate it nicely using a simple counting application, as shown in the following snippet:

// Break example.
#include <iostream>
#include <string>
int main()
{
    std::cout << "Loop Starting ...\n";
    int count = 0;
    while (count < 5)
    {
        ++count;
        std::cout << "\n" << count;
    }
    std::cout << "\n\nLoop finished.";
}

In this example, we're going to print out 5 numbers, 0-4. If we run this code as is, we can see that the loop runs in its entirety and gives us our expected outcome. We've also got statements at the start and end of the loop so we can see the flow execution more clearly:

Figure 2.12: Example counting application will print out numbers 0-4

Figure 2.12: Example counting application will print out numbers 0-4

Now, what if there was a condition that meant we wanted this loop to stop executing when the count was equal to 2? Well, we can put a break statement inside that check using an if statement:

#include <iostream>
using namespace std;
int main()
{
    std::cout << "Loop Starting ...\n";
    int count = 1; // init
    while (count <= 5) // condition
    {
        std::cout << "\n" << count;
        if (count == 2)
        break;
        ++count; // increment
    }
    std::cout << "\n\nLoop finished.";
   
    return 0;
}

With that break condition in place, as soon as the count is equal to 2 (meaning we'll have had 2 iterations of the loop) then the break will be hit and we'll exit the loop. Now, let's run the application and see what we get:

Figure 2.13: With the break statement in place, we only execute 2 loop iterations

Figure 2.13: With the break statement in place, we only execute 2 loop iterations

We can now see, as soon as that condition is met and the break statement is hit, that the loop stops iterating, and code execution picks up immediately after the loop. The outcome of this will be exactly the same if we write it as a dowhile:

#include <iostream>
using namespace std;
int main()
{
    std::cout << "Loop Starting ...\n";
    int count = 1; // init
    do
    {
        std::cout << "\n" << count;
        if (count == 2)
        break;
        ++count; // increment
        }
        while (count <= 5); // condition
        
        std::cout << "\n\nLoop finished.";
        return 0;
}

And it will be the same if we write it as a for loop:

#include <iostream>
using namespace std;
int main()
{   
    std::cout << "Loop Starting ...\n";
    // init condition increment
    for (int count = 1; count <= 5; ++count)
    {
        std::cout << "\n" << count;
        if (count == 2)
        break;
    }
   
    std::cout << "\n\nLoop finished.";
    return 0;
}

Both these loops give the exact same behavior; two iterations before hitting the break statement and exiting the loop:

Figure 2.14: All loops give the same outcome: two iterations before exiting

Figure 2.14: All loops give the same outcome: two iterations before exiting

This shows that these loops are sometimes interchangeable, though some are more suited to certain use cases than others. For instance, with the counting example we're using here, a for loop is probably most suitable since it comes with an integer value that increments each loop—something we have to do manually with while and do while loops. When an incrementing integer is not required, however, a range-based for loop is recommended.

continue

The other keyword we have at our disposal is continue. This keyword allows us to skip over the current loop iteration but remain in the loop, in contrast with break. Again, the counting example will allow us to demonstrate this. In our example, we're printing the numbers 0-4; let's use the continue keyword to skip the printing of the number 3.

As we did with break, we can write a condition to check whether the count is equal to 3, and call count if so:

    if (count == 3)
    {
        continue;
    }

We also need to change the location of this within our function. The continue keyword will skip the rest of the loop's body. Currently, this code is at the end of that body, so we won't actually be skipping anything. In order for continue to work as expected, it needs to come before any code that we want to skip but after any code we want to execute.

For this example, we will place the continue keyword with the if statement:

// continue example.
#include <iostream>
#include <string>
int main() 
{
    std::cout << "Loop Starting ...\n";
    int count = 0;
    while (count < 5) 
    {
        ++count;
        if (count == 3) 
        {
            continue;
        }
        std::cout << "\n" << count;
    }
    std::cout << "\n\nLoop finished.";
}

Here, we're always going to increment our counter variable and then check whether we want to skip the current iteration. If we do skip it, we'll just go back to the start of the next loop, and if we don't, we'll execute the remainder of the loop as usual. Once you run this code, you will obtain the following output:

Figure 2.15: The printing of number 3 has been skipped

Figure 2.15: The printing of number 3 has been skipped

We've skipped the printing of number 3 as we wanted, but the loop continued to execute the rest of the way. This can be extremely useful when searching for something. Imagine we have a list of names, and we only want to do things with those that start with the letter D. We could iterate over all our names, first checking whether or not the first letter is D; if not, we continue. In this way, we efficiently skip the use cases that don't interest us.

Exercise 12: Making a Loop More Efficient Using break and continue

In this exercise, we're going to make use of break and continue to make a loop more efficient. We'll create a loop that will run over the numbers 1-100, printing out only specific multiples of a given value.

Note

The complete code for this can be found here: https://packt.live/2KJrnN8.

Follow these steps to complete the exercise:

  1. We'll first ask the user to choose the value whose multiples will be printed, as well as the maximum number of multiples to print:
    #include <iostream>
    #include <string>
    int main()
    {
        int multiple = 0;
        int count = 0;
        int numbersPrinted = 0;
        std::string input = "";
        std::cout << "Enter the value whose multiples will be printed: ";
        getline(std::cin, input);
        multiple = std::stoi(input);
        std::cout << "Enter maximum amount of numbers to print: ";
        getline(std::cin, input);
        count = std::stoi(input);
  2. Next, we'll create the for loop to iterate over the numbers 1-100:
        for (int i = 1; i <= 100; ++i)
        {
        }
  3. Now, within the for loop, we can write the logic for determining our multiples. First of all, we have a set amount of numbers that we're going to print, so we can check that and break if that number has been reached:
            if (numbersPrinted == count)
            {
                break;
            }
  4. We're only interested in numbers of our given multiple, so if that's not the case, we can use the continue statement to jump straight to the next iteration:
            if (i % multiple != 0)
            {
                continue;
            }
  5. If the loop iteration makes it past both of these statements, then we've found a valid number. In this case, we'll print it, and then increment our numbersPrinted variable using the following snippet:
                std::cout << i << "\n";
                ++numbersPrinted;
            }
  6. The complete code looks like this:
    #include <iostream>
    #include <string>
    int main()
    {
        int multiple = 0;
        int count = 0;
        int numbersPrinted = 0;
        std::string input = "";
        
        std::cout << "Enter the value whose multiples will be printed: ";
        getline(std::cin, input);
        multiple = std::stoi(input);
        
        std::cout << "Enter maximum amount of numbers to print: ";
        getline(std::cin, input);
        count = std::stoi(input);
        for (int i = 1; i <= 100; ++i)
        {
              if (numbersPrinted == count)
              {
                  break;
              }
              if (i % multiple != 0)
              {
                  continue;
              }
              std::cout << i << "\n";
              ++numbersPrinted;
        }
    }
  7. Run the application. You will obtain the following output:
Figure 2.16: We use break and continue to control loop execution

Figure 2.16: We use break and continue to control loop execution

By using the break and continue statements, we're able to control the execution of our loops, making them more efficient and controlled.

Activity 2: Creating a Number-Guessing Game Using Loops and Conditional Statements

For this chapter's activity, we're going to write a small number-guessing game. This will allow us to utilize the techniques that we've covered in this chapter. Thus, before attempting this activity, ensure that you have completed all the previous exercises in this chapter.

The program will allow the user to select a number of guesses: a minimum number and a maximum number. The application will generate a number within that range and then allow the user to guess the number. If they do so within the number of guesses they specified at the start, they win the game. Upon winning a game, the final output should be similar to the following:

Figure 2.17: Number-guessing game output

Figure 2.17: Number-guessing game output

Note

The complete code for this activity can be found here: https://packt.live/2pBYnPT.

Here are the steps to complete the activity, along with a few hints:

  1. Declare all the variables we'll need. This includes guessCount, minNumber, maxNumber, and randomNumber.
  2. Create a main outer loop that will run the application.
  3. Present the user with some introductory text ("Enter the number of guesses") and get from them the following: a number of guesses, a minimum number, and a maximum number.

    Note

    You can pass the user input for the number of guesses, the minimum number, and the maximum number, to the variables.

  4. Generate a random number within the range specified by the user.

    Note

    In Exercise 11, Generating Random Numbers Using Loops, we've used rand() for generating random numbers between 0 to 9. Here, you can use a function similar to rand () % (maxNumber - minNumber + 1) to generate random numbers between two arbitrary limits.

  5. Create a loop that will iterate the number of times that the user specified as their guess count.
  6. Inside the count loop, fetch the user's guess.
  7. Inside the count loop, check whether the user's guess is correct or too high/low. We can use break here to exit when the correct value has been guessed.

    Hint: Refer to Exercise 7, Refactor an if/else Chain into switch/case, to see how we used break to exit loops early.

  8. When the number has been found, or the user has run out of guesses, present them with the option to either continue or exit the application.

    Note

    The solution for this activity can be found via this link.

Within this application, we've used a number of techniques to control the flow of code to replicate a more complex scenario. We used a while loop for the main application loop, as we didn't know initially how many iterations were required. We then used a for loop to run the code a set number of times, and if/else statements to check the user's input and act accordingly.

Summary

In this chapter, we've learned about program flow and how we can manipulate the flow of execution through our applications. This is fundamental for representing logical systems.

We started by looking at basic if/else statements. These allow us to branch our code based on conditions and are one of the most fundamental ideas in programming. With this branching ability, we're able to replicate logical systems and behaviors by controlling the flow of execution through our application. We then looked at some alternatives to the basic if/else statement, such as switch and ternary statements.

Next, we looked at a number of different loops. We started with while and do while loops; loops that run indefinitely so long as the condition they're checking is true. We then looked at for loops, which run for a set number of iterations. Finally, we looked at range-based loops, which are useful for iterating over collections. We ended by looking at how we can ensure our loops are efficient, ending them early with the break statement, or by skipping iterations with the continue statement.

We put all of these new skills to practice by building a simple game that allowed the user to guess a number that had been randomly selected. We allowed the user to input a number of values in order to set up the game, and then gave them a number of guesses to try to find the number. We employed everything we learned in Chapter 1, Your First C++ Application, as well as if/else statements and a couple of the loops that we looked at in this chapter.

In the next chapter, we're going to take a closer look at the various data types that C++ offers. We'll start by looking at the various built-in types (int, double, char, and so on), moving onto looking at arrays and collections of these types. We'll then move onto ideas such as storage lifetime, scope, classes, and structs. With an understanding of C++ applications in general, controlling the flow of execution, and soon how to represent and store our data in various data types, we're well on our way to a functional understanding of the C++ language.

Left arrow icon Right arrow icon
Download code icon Download Code

Key benefits

  • Gain a solid understanding of the syntax and anatomy of C++
  • Implement best practices when building high-performance C++ programs
  • Prepare for real-world development tasks by tackling engaging activities

Description

C++ is the backbone of many games, GUI-based applications, and operating systems. Learning C++ effectively is more than a matter of simply reading through theory, as the real challenge is understanding the fundamentals in depth and being able to use them in the real world. If you're looking to learn C++ programming efficiently, this Workshop is a comprehensive guide that covers all the core features of C++ and how to apply them. It will help you take the next big step toward writing efficient, reliable C++ programs. The C++ Workshop begins by explaining the basic structure of a C++ application, showing you how to write and run your first program to understand data types, operators, variables and the flow of control structures. You'll also see how to make smarter decisions when it comes to using storage space by declaring dynamic variables during program runtime. Moving ahead, you'll use object-oriented programming (OOP) techniques such as inheritance, polymorphism, and class hierarchies to make your code structure organized and efficient. Finally, you'll use the C++ standard library?s built-in functions and templates to speed up different programming tasks. By the end of this C++ book, you will have the knowledge and skills to confidently tackle your own ambitious projects and advance your career as a C++ developer.

Who is this book for?

This Workshop is for anyone who is new to C++ who wants to build a strong foundation for C++ game programming or application development. Basic prior knowledge of data structures and OOP concepts, as well as experience in any other programming language, will help you grasp the concepts covered in this book more easily.

What you will learn

  • Understand how a C++ program is written, executed, and compiled
  • Efficiently work with the essential C++ data types and variables
  • Build your own C++ applications by writing clear and error-free code
  • Grasp the core principles behind object-oriented programming
  • Simplify your code by using templates and the standard library
  • Debug logical errors and handle exceptions in your program
Estimated delivery fee Deliver to India

Premium delivery 5 - 8 business days

₹630.95
(Includes tracking information)

Product Details

Country selected
Publication date, Length, Edition, Language, ISBN-13
Publication date : Feb 07, 2020
Length: 606 pages
Edition : 1st
Language : English
ISBN-13 : 9781839216626
Category :
Languages :

What do you get with Print?

Product feature icon Instant access to your digital copy whilst your Print order is Shipped
Product feature icon Paperback book shipped to your preferred address
Product feature icon Redeem a companion digital copy on all Print orders
Product feature icon Access this title in our online reader with advanced features
Product feature icon DRM FREE - Read whenever, wherever and however you want
Product feature icon AI Assistant (beta) to help accelerate your learning
Modal Close icon
Payment Processing...
tick Completed

Shipping Address

Billing Address

Shipping Methods
Estimated delivery fee Deliver to India

Premium delivery 5 - 8 business days

₹630.95
(Includes tracking information)

Product Details

Publication date : Feb 07, 2020
Length: 606 pages
Edition : 1st
Language : English
ISBN-13 : 9781839216626
Category :
Languages :

Packt Subscriptions

See our plans and pricing
Modal Close icon
₹800 billed monthly
Feature tick icon Unlimited access to Packt's library of 7,000+ practical books and videos
Feature tick icon Constantly refreshed with 50+ new titles a month
Feature tick icon Exclusive Early access to books as they're written
Feature tick icon Solve problems while you work with advanced search and reference features
Feature tick icon Offline reading on the mobile app
Feature tick icon Simple pricing, no contract
₹4500 billed annually
Feature tick icon Unlimited access to Packt's library of 7,000+ practical books and videos
Feature tick icon Constantly refreshed with 50+ new titles a month
Feature tick icon Exclusive Early access to books as they're written
Feature tick icon Solve problems while you work with advanced search and reference features
Feature tick icon Offline reading on the mobile app
Feature tick icon Choose a DRM-free eBook or Video every month to keep
Feature tick icon PLUS own as many other DRM-free eBooks or Videos as you like for just ₹400 each
Feature tick icon Exclusive print discounts
₹5000 billed in 18 months
Feature tick icon Unlimited access to Packt's library of 7,000+ practical books and videos
Feature tick icon Constantly refreshed with 50+ new titles a month
Feature tick icon Exclusive Early access to books as they're written
Feature tick icon Solve problems while you work with advanced search and reference features
Feature tick icon Offline reading on the mobile app
Feature tick icon Choose a DRM-free eBook or Video every month to keep
Feature tick icon PLUS own as many other DRM-free eBooks or Videos as you like for just ₹400 each
Feature tick icon Exclusive print discounts

Frequently bought together


Stars icon
Total 15,342.97
Modern C++ Programming Cookbook
₹7447.99
The C++ Workshop
₹3425.99
C++ High Performance
₹4468.99
Total 15,342.97 Stars icon

Table of Contents

13 Chapters
1. Your First C++ Application Chevron down icon Chevron up icon
2. Control Flow Chevron down icon Chevron up icon
3. Built-In Data Types Chevron down icon Chevron up icon
4. Operators Chevron down icon Chevron up icon
5. Pointers and References Chevron down icon Chevron up icon
6. Dynamic Variables Chevron down icon Chevron up icon
7. Ownership and Lifetime of Dynamic Variables Chevron down icon Chevron up icon
8. Classes and Structs Chevron down icon Chevron up icon
9. Object-Oriented Principles Chevron down icon Chevron up icon
10. Advanced Object-Oriented Principles Chevron down icon Chevron up icon
11. Templates Chevron down icon Chevron up icon
12. Containers and Iterators Chevron down icon Chevron up icon
13. Exception Handling in C++ Chevron down icon Chevron up icon

Customer reviews

Top Reviews
Rating distribution
Full star icon Full star icon Full star icon Full star icon Full star icon 5
(8 Ratings)
5 star 100%
4 star 0%
3 star 0%
2 star 0%
1 star 0%
Filter icon Filter
Top Reviews

Filter reviews by


Syed Oct 29, 2025
Full star icon Full star icon Full star icon Full star icon Full star icon 5
Well explained and easy to understand.
Subscriber review Packt
RAJA MOHAN REDDY May 16, 2021
Full star icon Full star icon Full star icon Full star icon Full star icon 5
Awesome book. It is really recommendated for the starters. They have explained about SOLID principle and important data structures topis like queue, and stack vector.
Amazon Verified review Amazon
Grant A. Sep 03, 2021
Full star icon Full star icon Full star icon Full star icon Full star icon 5
C++ and unreal engine 4 = choose this book if you wanna learn the basics
Amazon Verified review Amazon
Martin Sinnaeve Sep 26, 2021
Full star icon Full star icon Full star icon Full star icon Full star icon 5
Clear and simple start in the C++ language, a steady built up in knowledge, and not focusing on any IDE.
Amazon Verified review Amazon
Luis Carlos Absalon Rojas Torres Dec 10, 2021
Full star icon Full star icon Full star icon Full star icon Full star icon 5
Ja seguia o autor no QUORA onde sempre dava aquelas respostas sobre c++, ai quando fiquei sabendo que lançou um livro de c++ geral comprei. Olha conteudo muito bom hein!
Amazon Verified review Amazon
Get free access to Packt library with over 7500+ books and video courses for 7 days!
Start Free Trial

FAQs

What is the digital copy I get with my Print order? Chevron down icon Chevron up icon

When you buy any Print edition of our Books, you can redeem (for free) the eBook edition of the Print Book you’ve purchased. This gives you instant access to your book when you make an order via PDF, EPUB or our online Reader experience.

What is the delivery time and cost of print book? Chevron down icon Chevron up icon

Shipping Details

USA:

'

Economy: Delivery to most addresses in the US within 10-15 business days

Premium: Trackable Delivery to most addresses in the US within 3-8 business days

UK:

Economy: Delivery to most addresses in the U.K. within 7-9 business days.
Shipments are not trackable

Premium: Trackable delivery to most addresses in the U.K. within 3-4 business days!
Add one extra business day for deliveries to Northern Ireland and Scottish Highlands and islands

EU:

Premium: Trackable delivery to most EU destinations within 4-9 business days.

Australia:

Economy: Can deliver to P. O. Boxes and private residences.
Trackable service with delivery to addresses in Australia only.
Delivery time ranges from 7-9 business days for VIC and 8-10 business days for Interstate metro
Delivery time is up to 15 business days for remote areas of WA, NT & QLD.

Premium: Delivery to addresses in Australia only
Trackable delivery to most P. O. Boxes and private residences in Australia within 4-5 days based on the distance to a destination following dispatch.

India:

Premium: Delivery to most Indian addresses within 5-6 business days

Rest of the World:

Premium: Countries in the American continent: Trackable delivery to most countries within 4-7 business days

Asia:

Premium: Delivery to most Asian addresses within 5-9 business days

Disclaimer:
All orders received before 5 PM U.K time would start printing from the next business day. So the estimated delivery times start from the next day as well. Orders received after 5 PM U.K time (in our internal systems) on a business day or anytime on the weekend will begin printing the second to next business day. For example, an order placed at 11 AM today will begin printing tomorrow, whereas an order placed at 9 PM tonight will begin printing the day after tomorrow.


Unfortunately, due to several restrictions, we are unable to ship to the following countries:

  1. Afghanistan
  2. American Samoa
  3. Belarus
  4. Brunei Darussalam
  5. Central African Republic
  6. The Democratic Republic of Congo
  7. Eritrea
  8. Guinea-bissau
  9. Iran
  10. Lebanon
  11. Libiya Arab Jamahriya
  12. Somalia
  13. Sudan
  14. Russian Federation
  15. Syrian Arab Republic
  16. Ukraine
  17. Venezuela
What is custom duty/charge? Chevron down icon Chevron up icon

Customs duty are charges levied on goods when they cross international borders. It is a tax that is imposed on imported goods. These duties are charged by special authorities and bodies created by local governments and are meant to protect local industries, economies, and businesses.

Do I have to pay customs charges for the print book order? Chevron down icon Chevron up icon

The orders shipped to the countries that are listed under EU27 will not bear custom charges. They are paid by Packt as part of the order.

List of EU27 countries: www.gov.uk/eu-eea:

A custom duty or localized taxes may be applicable on the shipment and would be charged by the recipient country outside of the EU27 which should be paid by the customer and these duties are not included in the shipping charges been charged on the order.

How do I know my custom duty charges? Chevron down icon Chevron up icon

The amount of duty payable varies greatly depending on the imported goods, the country of origin and several other factors like the total invoice amount or dimensions like weight, and other such criteria applicable in your country.

For example:

  • If you live in Mexico, and the declared value of your ordered items is over $ 50, for you to receive a package, you will have to pay additional import tax of 19% which will be $ 9.50 to the courier service.
  • Whereas if you live in Turkey, and the declared value of your ordered items is over € 22, for you to receive a package, you will have to pay additional import tax of 18% which will be € 3.96 to the courier service.
How can I cancel my order? Chevron down icon Chevron up icon

Cancellation Policy for Published Printed Books:

You can cancel any order within 1 hour of placing the order. Simply contact customercare@packt.com with your order details or payment transaction id. If your order has already started the shipment process, we will do our best to stop it. However, if it is already on the way to you then when you receive it, you can contact us at customercare@packt.com using the returns and refund process.

Please understand that Packt Publishing cannot provide refunds or cancel any order except for the cases described in our Return Policy (i.e. Packt Publishing agrees to replace your printed book because it arrives damaged or material defect in book), Packt Publishing will not accept returns.

What is your returns and refunds policy? Chevron down icon Chevron up icon

Return Policy:

We want you to be happy with your purchase from Packtpub.com. We will not hassle you with returning print books to us. If the print book you receive from us is incorrect, damaged, doesn't work or is unacceptably late, please contact Customer Relations Team on customercare@packt.com with the order number and issue details as explained below:

  1. If you ordered (eBook, Video or Print Book) incorrectly or accidentally, please contact Customer Relations Team on customercare@packt.com within one hour of placing the order and we will replace/refund you the item cost.
  2. Sadly, if your eBook or Video file is faulty or a fault occurs during the eBook or Video being made available to you, i.e. during download then you should contact Customer Relations Team within 14 days of purchase on customercare@packt.com who will be able to resolve this issue for you.
  3. You will have a choice of replacement or refund of the problem items.(damaged, defective or incorrect)
  4. Once Customer Care Team confirms that you will be refunded, you should receive the refund within 10 to 12 working days.
  5. If you are only requesting a refund of one book from a multiple order, then we will refund you the appropriate single item.
  6. Where the items were shipped under a free shipping offer, there will be no shipping costs to refund.

On the off chance your printed book arrives damaged, with book material defect, contact our Customer Relation Team on customercare@packt.com within 14 days of receipt of the book with appropriate evidence of damage and we will work with you to secure a replacement copy, if necessary. Please note that each printed book you order from us is individually made by Packt's professional book-printing partner which is on a print-on-demand basis.

What tax is charged? Chevron down icon Chevron up icon

Currently, no tax is charged on the purchase of any print book (subject to change based on the laws and regulations). A localized VAT fee is charged only to our European and UK customers on eBooks, Video and subscriptions that they buy. GST is charged to Indian customers for eBooks and video purchases.

What payment methods can I use? Chevron down icon Chevron up icon

You can pay with the following card types:

  1. Visa Debit
  2. Visa Credit
  3. MasterCard
  4. PayPal
What is the delivery time and cost of print books? Chevron down icon Chevron up icon

Shipping Details

USA:

'

Economy: Delivery to most addresses in the US within 10-15 business days

Premium: Trackable Delivery to most addresses in the US within 3-8 business days

UK:

Economy: Delivery to most addresses in the U.K. within 7-9 business days.
Shipments are not trackable

Premium: Trackable delivery to most addresses in the U.K. within 3-4 business days!
Add one extra business day for deliveries to Northern Ireland and Scottish Highlands and islands

EU:

Premium: Trackable delivery to most EU destinations within 4-9 business days.

Australia:

Economy: Can deliver to P. O. Boxes and private residences.
Trackable service with delivery to addresses in Australia only.
Delivery time ranges from 7-9 business days for VIC and 8-10 business days for Interstate metro
Delivery time is up to 15 business days for remote areas of WA, NT & QLD.

Premium: Delivery to addresses in Australia only
Trackable delivery to most P. O. Boxes and private residences in Australia within 4-5 days based on the distance to a destination following dispatch.

India:

Premium: Delivery to most Indian addresses within 5-6 business days

Rest of the World:

Premium: Countries in the American continent: Trackable delivery to most countries within 4-7 business days

Asia:

Premium: Delivery to most Asian addresses within 5-9 business days

Disclaimer:
All orders received before 5 PM U.K time would start printing from the next business day. So the estimated delivery times start from the next day as well. Orders received after 5 PM U.K time (in our internal systems) on a business day or anytime on the weekend will begin printing the second to next business day. For example, an order placed at 11 AM today will begin printing tomorrow, whereas an order placed at 9 PM tonight will begin printing the day after tomorrow.


Unfortunately, due to several restrictions, we are unable to ship to the following countries:

  1. Afghanistan
  2. American Samoa
  3. Belarus
  4. Brunei Darussalam
  5. Central African Republic
  6. The Democratic Republic of Congo
  7. Eritrea
  8. Guinea-bissau
  9. Iran
  10. Lebanon
  11. Libiya Arab Jamahriya
  12. Somalia
  13. Sudan
  14. Russian Federation
  15. Syrian Arab Republic
  16. Ukraine
  17. Venezuela
Modal Close icon
Modal Close icon