Search icon CANCEL
Subscription
0
Cart icon
Your Cart (0 item)
Close icon
You have no products in your basket yet
Arrow left icon
Explore Products
Best Sellers
New Releases
Books
Events
Videos
Audiobooks
Packt Hub
Free Learning
Arrow right icon
timer SALE ENDS IN
0 Days
:
00 Hours
:
00 Minutes
:
00 Seconds
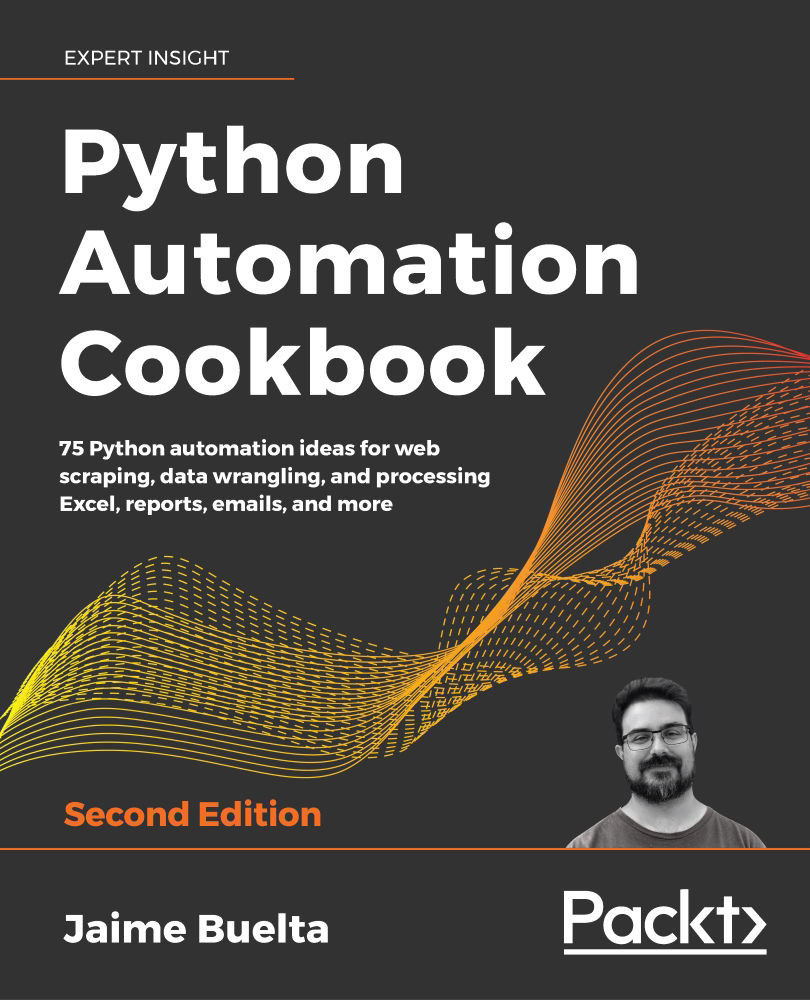
Python Automation Cookbook

Python Automation Cookbook: 75 Python automation ideas for web scraping, data wrangling, and processing Excel, reports, emails, and more , Second Edition

eBook
₹999.99 ₹4766.99
Paperback
₹5958.99
eBook + Subscription
₹1000 Monthly

What do you get with eBook?

Product feature icon Instant access to your Digital eBook purchase
Product feature icon Download this book in EPUB and PDF formats
Product feature icon Access this title in our online reader with advanced features
Product feature icon DRM FREE - Read whenever, wherever and however you want
Product feature icon AI Assistant (beta) to help accelerate your learning
Modal Close icon
Payment Processing...
tick Completed

Billing Address

Table of content icon View table of contents Preview book icon Preview Book

Python Automation Cookbook

Automating Tasks Made Easy

To properly automate tasks, we need a way to make them execute automatically at the proper times. A task that needs to be started manually is not really fully automated.

However, in order to be able to leave them running in the background while worrying about more pressing issues, the task will need to be adequate to run in fire-and-forget mode. We should be able to monitor that it executes correctly, be sure that we capture relevant information (such as receiving notifications if something interesting arises), and know whether there have been any errors while running it.

Ensuring that a piece of software runs consistently with high reliability is actually a very big deal. It is one area that, in order to be done properly, requires specialized knowledge and staff, who typically go by the names of sysadmin, operations, or SRE (Site Reliability Engineering). Big operations, such as Amazon and Google, require huge investment in ensuring that everything works 24/7.

The objective for this book is way more modest than that, as most software doesn't require this kind of high availability. Designing systems with downtimes of less than a few seconds per year is challenging, but executing a task with reasonable reliability is a much easier thing to do. However, be aware that there's maintenance to be done, and plan accordingly.

In this chapter, we'll cover the following recipes:

  • Preparing a task
  • Setting up a cron job
  • Capturing errors and problems
  • Sending email notifications

We'll begin by going over how we ought to prepare a task before we automate it.

Preparing a task

It all starts with defining precisely the work that needs to be executed, and designing it in a way that doesn't require human intervention to run.

Some ideal characteristic points are as follows:

  1. Single, clear entry point: No confusion on how to start the task.
  2. Clear parameters: If there are any parameters, they should be as explicit as possible.
  3. No interactivity: Stopping the execution to request information from the user is not possible.
  4. The result should be stored: In order to be checked at a different time than when it runs.
  5. Clear result: When we oversee the execution of a program ourselves, we can accept more verbose results, such as unlabeled data or extra debugging information. However, for an automated task, the final result should be as concise and to the point as possible.
  6. Errors should be logged: To analyze what went wrong.

A command-line program has a lot of those characteristics already. It always has a clear entry point, with defined parameters, and the result can be stored, even if just in text format. And it can be improved ensuring a config file that clarifies the parameters, and an output file.

Note that point 6 is the objective of the Capturing errors and problems recipe, and will be covered there.

To avoid interactivity, do not use any function that waits for user input, such as input. Remember to delete debugger breakpoints!

Getting ready

We'll start by following a structure in which a main function will serve as the entry point, and all parameters are supplied to it.

This is the same basic structure that was presented in the Adding command-line arguments recipe in Chapter 1, Let's Begin Our Automation Journey.

The definition of a main function with all of the explicit arguments covers points 1 (single, clear entry point) and 2 (clear parameters). Point 3 (no interactivity) is not difficult to achieve.

To improve points 2 (clear parameters) and 5 (clear result), we'll look at retrieving the configuration from a file and storing the result in another. Another option is to send a notification, such as an email, which will be covered later in this chapter.

How to do it...

  1. Prepare the following command-line program by multiplying two numbers, and save it as prepare_task_step1.py:
    import argparse
    def main(number, other_number):
        result = number * other_number
        print(f'The result is {result}')
    if __name__ == '__main__':
        parser = argparse.ArgumentParser()
        parser.add_argument('-n1', type=int, help='A number', default=1)
        parser.add_argument('-n2', type=int, help='Another number', default=1)
        args = parser.parse_args()
        main(args.n1, args.n2)
    

    Run prepare_task_step1.py by multiplying two numbers:

    $ python3 prepare_task_step1.py -n1 3 -n2 7
    The result is 21
    
  2. Update the file to define a config file that contains both arguments, and save it as prepare_task_step3.py. Note that defining a config file overwrites any command-line parameters:
    import argparse
    import configparser
    def main(number, other_number):
        result = number * other_number
        print(f'The result is {result}')
    if __name__ == '__main__':
        parser = argparse.ArgumentParser()
        parser.add_argument('-n1', type=int, help='A number', default=1)
        parser.add_argument('-n2', type=int, help='Another number', default=1)
        parser.add_argument('--config', '-c', type=argparse.FileType('r'),
                            help='config file')
        args = parser.parse_args()
        if args.config:
            config = configparser.ConfigParser()
            config.read_file(args.config)
            # Transforming values into integers
            args.n1 = int(config['ARGUMENTS']['n1'])
            args.n2 = int(config['ARGUMENTS']['n2'])
        main(args.n1, args.n2)
    
  3. Create the config file, config.ini. See the ARGUMENTS section and the n1 and n2 values:
    [ARGUMENTS]
    n1=5
    n2=7
    
  4. Run the command with the config file. Note that the config file overwrites the command-line parameters, as described in step 2:
    $ python3 prepare_task_step3.py -c config.ini
    The result is 35
    $ python3 prepare_task_step3.py -c config.ini -n1 2 -n2 3
    The result is 35
    
  5. Add a parameter to store the result in a file, and save it as prepare_task_step6.py:
    import argparse
    import sys
    import configparser
    def main(number, other_number, output):
        result = number * other_number
        print(f'The result is {result}', file=output)
    if __name__ == '__main__':
        parser = argparse.ArgumentParser()
        parser.add_argument('-n1', type=int, help='A number', default=1)
        parser.add_argument('-n2', type=int, help='Another number', default=1)
        parser.add_argument('--config', '-c', type=argparse.FileType('r'),
                            help='config file')
        parser.add_argument('-o', dest='output', type=argparse.FileType('w'),
                            help='output file',
                            default=sys.stdout)
        args = parser.parse_args()
        if args.config:
            config = configparser.ConfigParser()
            config.read_file(args.config)
            # Transforming values into integers
            args.n1 = int(config['ARGUMENTS']['n1'])
            args.n2 = int(config['ARGUMENTS']['n2'])
        main(args.n1, args.n2, args.output)
    
  6. Run the result to check that it's sending the output to the defined file. Note that there's no output outside the result files:
    $ python3 prepare_task_step6.py -n1 3 -n2 5 -o result.txt
    $ cat result.txt
    The result is 15
    $ python3 prepare_task_step6.py -c config.ini -o result2.txt
    $ cat result2.txt
    The result is 35
    

How it works…

Note that the argparse module allows us to define files as parameters, with the argparse.FileType type, and opens them automatically. This is very handy and will raise an error if the file path leads to an invalid location.

Remember to open the file in the correct mode. In step 5, the config file is opened in read mode (r) and the output file in write mode (w), which will overwrite the file if it exists. You may find the append mode (a) useful, which will add the next piece of data at the end of an existing file.

configparser module allows us to use config files with ease. As demonstrated in step 2, the parsing of the file is simple, as follows:

config = configparser.ConfigParser()
config.read_file(file)

The config will then be accessible as a dictionary. This will have the sections of the config file as the keys, and inside another dictionary with each of the config values. So, the value n2 in the ARGUMENTS section is accessed as config['ARGUMENTS']['n2'].

Note that the values are always stored as strings, which are required to be transformed into other types, such as integers.

If you need to obtain Boolean values, do not perform value = bool(config[raw_value]), as any string will be transformed into True no matter what; for instance, the string False is a true string, as it's not empty. Using an empty string is a bad option as well, as they are very confusing. Use the .getboolean method instead, for example, value = config.getboolean(raw_value). There are similar getint() and getfloat() for integers and float values.

Python 3 allows us to pass a file parameter to the print function, which will write to that file. Step 5 shows the usage to redirect all of the printed information to a file.

Note that the default parameter is sys.stdout, which will print the value to the terminal (standard output). This means that calling the script without an -o parameter will display the information on the screen, which is helpful when developing and debugging the script:

$ python3 prepare_task_step6.py -c config.ini
The result is 35
$ python3 prepare_task_step6.py -c config.ini -o result.txt
$ cat result.txt
The result is 35

There's more...

Please refer to the full documentation of configparser in the official Python documentation: https://docs.python.org/3/library/configparser.html.

In most cases, this configuration parser should be good enough, but if more power is needed, you can use YAML files as configuration files. YAML files (https://learn.getgrav.org/advanced/yaml) are very common as configuration files. They are well structured and can be parsed directly, taking into account of various data types:

  1. Add PyYAML to the requirements.txt file:
    PyYAML==5.3
    
  2. Install the requirements in the virtual environment:
    $ pip install -r requirements.txt
    
  3. Create the prepare_task_yaml.py file:
    import yaml
    import argpars
    import sys
    def main(number, other_number, output):
        result = number * other_number
        print(f'The result is {result}', file=output)
    if __name__ == '__main__':
        parser = argparse.ArgumentParser()
        parser.add_argument('-n1', type=int, help='A number', default=1)
        parser.add_argument('-n2', type=int, help='Another number', default=1)
        parser.add_argument('-c', dest='config', type=argparse.FileType('r'),
     help='config file in YAML format',
     default=None)
        parser.add_argument('-o', dest='output', type=argparse.FileType('w'),
                            help='output file',
                            default=sys.stdout)
        args = parser.parse_args()
        if args.config:
            config = yaml.load(args.config, Loader= yaml.FullLoader)
            # No need to transform values
            args.n1 = config['ARGUMENTS']['n1']
            args.n2 = config['ARGUMENTS']['n2']
        main(args.n1, args.n2, args.output)
    

    Note that the PyYAML yaml.load() function requires a Loader parameter. This is to avoid arbitrary code execution if the YAML file comes from an untrusted source. Always use yaml.SafeLoader unless you need a set of YAML language features. Never use loaders other than yaml.SafeLoader if any part of the data coming from a YAML file comes from an untrusted source (for example, user input). Refer to this article for more information: https://github.com/yaml/pyyaml/wiki/PyYAML-yaml.load(input)-Deprecation.

  4. Define the config file, config.yaml:
    ARGUMENTS:
        n1: 7
        n2: 4
    
  5. Then, run the following:
    $ python3 prepare_task_yaml.py -c config.yaml
    The result is 28
    

There's also the possibility of setting a default config file, as well as a default output file. This can be handy to create a task that requires no input parameters.

As a general rule, try to avoid creating too many input and configuration parameters if the task has a very specific objective in mind. Try to limit the input parameters to different executions of the task. A parameter that never changes is probably fine being defined as a constant. A high number of parameters will make config files or command-line arguments complicated and will create more maintenance in the long run. On the other hand, if your objective is to create a very flexible tool to be used in very different situations, then creating more parameters is probably a good idea. Try to find your own proper balance!

See also

  • The Command-line arguments recipe in Chapter 1, Let's Begin Our Automation Journey, to get more information about command-line arguments.
  • The Sending email notifications recipe, covered later in this chapter, to see a more fleshed-out example of an automated task.
  • The Debugging with breakpoints recipe in Chapter 13, Debugging Techniques, to learn how to debug the code before executing it automatically.

Setting up a cron job

Cron is an old-fashioned but reliable way of executing commands. It has been around since the 1970s in Unix, and it's an old favorite in system administration to perform maintenance tasks such as freeing up disk space, rotating log files, making backups, and other common, repetitive operations.

This recipe is Unix and Unix-like operating systems specific, so it will work in Linux and macOS. While it's possible to schedule a task in Windows, it's very different and uses Task Scheduler, which won't be described here. If you have access to a Linux server, this can be a good way of scheduling periodic tasks.

The main advantages are as follows:

  • It's present in virtually all Unix or Linux systems and configured to run automatically.
  • It's easy to use, although a little deceptive at first.
  • It's well known. Almost anyone involved with admin tasks will have a general idea of how to use it.
  • It allows for easy periodic commands, with good precision.

However, it also has some disadvantages, including the following:

  • By default, it may not give much feedback. Retrieving the output, logging execution, and errors are critical.
  • The task should be as self-contained as possible to avoid problems with environment variables, such as using the wrong Python interpreter, or what path should execute.
  • It is Unix-specific.
  • Only fixed periodic times are available.
  • It doesn't control how many tasks run at the same time. Each time the countdown goes off, it creates a new task. For example, a task that takes 1 hour to complete, and that is scheduled to run once every 45 minutes, will have 15 minutes of overlap where two tasks will be running.

Don't understate the latest effect. Running multiple expensive tasks at the same time can have a bad effect on performance. Having expensive tasks overlapping may result in a race condition where each task stops the others from ever finishing! Allow ample time for your tasks to finish and keep an eye on them. Keep in mind that any other program running in the same host may have their performance affected, which can include any service, such as web servers, databases, and email. Check how loaded the host where the task will execute is so as to avoid surprises.

Getting ready

We will produce a script, called cron.py:

import argparse
import sys
from datetime import datetime
import configparser
def main(number, other_number, output):
    result = number * other_number
    print(f'[{datetime.utcnow().isoformat()}] The result is {result}', 
          file=output)
if __name__ == '__main__':
    parser = argparse.ArgumentParser(formatter_class=argparse.ArgumentDefaultsHelpFormatter)
    parser.add_argument('--config', '-c', type=argparse.FileType('r'),
                        help='config file',
                        default='/etc/automate.ini')
    parser.add_argument('-o', dest='output', type=argparse.FileType('w'),
                        help='output file',
                        default=sys.stdout)
    args = parser.parse_args()
    if args.config:
        config = configparser.ConfigParser()
        config.read_file(args.config)
        # Transforming values into integers
        args.n1 = int(config['ARGUMENTS']['n1'])
        args.n2 = int(config['ARGUMENTS']['n2'])
    main(args.n1, args.n2, args.output)

Note the following details:

  1. The config file is, by default, /etc/automate.ini. Reuse config.ini from the previous recipe.
  2. A timestamp has been added to the output. This will make it explicit when the task is run.
  3. The result is being added to the file, as shown with the a mode where the file is open.
  4. The ArgumentDefaultsHelpFormatter parameter automatically adds information about default values when printing the help using the -h argument.

Check that the task is producing the expected result and that you can log to a known file:

$ python3 cron.py
[2020-01-15 22:22:31.436912] The result is 35
$ python3 cron.py -o /path/automate.log
$ cat /path/automate.log
[2020-01-15 22:28:08.833272] The result is 35

How to do it...

  1. Obtain the full path of the Python interpreter. This is the interpreter that's in your virtual environment:
    $ which python
    /your/path/.venv/bin/python
    
  2. Prepare the cron job to be executed. Get the full path and check that it can be executed without any problems. Execute it a couple of times:
    $ /your/path/.venv/bin/python /your/path/cron.py -o /path/automate.log
    $ /your/path/.venv/bin/python /your/path/cron.py -o /path/automate.log
    
  3. Check that the result is being added correctly to the result file:
    $ cat /path/automate.log
    [2020-01-15 22:28:08.833272] The result is 35
    [2020-01-15 22:28:10.510743] The result is 35
    
  4. Edit the crontab file to run the task once every 5 minutes:
    $ crontab -e
    */5 * * * * /your/path/.venv/bin/python /your/path/cron.py -o /path/automate.log
    

    Note that this opens an editing terminal with your default command-line editor.

    If you haven't set up your default command-line editor, then, by default, it is likely to be Vim. This can be disconcerting if you don't have experience with Vim. Press I to start inserting text and Esc when you're done. Then, exit after saving the file with wq. For more information about Vim, refer to this introduction: https://null-byte.wonderhowto.com/how-to/intro-vim-unix-text-editor-every-hacker-should-be-familiar-with-0174674.

    For information on how to change the default command-line editor, refer to the following link: https://www.a2hosting.com/kb/developer-corner/linux/setting-the-default-text-editor-in-linux.

  5. Check the crontab contents. Note that this displays the crontab contents, but doesn't set it to edit:
    $ contab -l
    */5 * * * * /your/path/.venv/bin/python /your/path/cron.py -o /path/automate.log
    
  6. Wait and check the result file to see how the task is being executed:
    $ tail -F /path/automate.log
    [2020-01-17 21:20:00.611540] The result is 35
    [2020-01-17 21:25:01.174835] The result is 35
    [2020-01-17 21:30:00.886452] The result is 35
    

How it works...

The crontab line consists of a line describing how often to run the task (the first six elements), plus the task. Each of the initial six elements means a different unit of time to execute. Most of them are stars, meaning any:

* * * * * *
| | | | | | 
| | | | | +-- Year              (range: 1900-3000)
| | | | +---- Day of the Week   (range: 1-7, 1 standing for Monday)
| | | +------ Month of the Year (range: 1-12)
| | +-------- Day of the Month  (range: 1-31)
| +---------- Hour              (range: 0-23)
+------------ Minute            (range: 0-59)

Therefore, our line, */5 * * * * *, means every time the minute is divisible by 5, in all hours, all days... all years.

Here are some examples:

30  15 * * * * means "every day at 15:30"
30   * * * * * means "every hour, at 30 minutes"
0,30 * * * * * means "every hour, at 0 minutes and 30 minutes"
*/30 * * * * * means "every half hour"
0    0 * * 1 * means "every Monday at 00:00"

Do not try to guess too much. Use a cheat sheet such as https://crontab.guru/ for examples and tweaks. Most of the common usages will be described there directly. You can also edit a formula and get a descriptive piece of text of how it's going to run.

After the description of how to run the cron job, include the line to execute the task, as prepared in step 2 of the How to do it… section.

Note that the task is described with all of the full paths for every related file—the interpreter, the script, and the output file. This removes all ambiguity related to the paths and reduces the chances of possible errors. A very common error is for cron to not be able to determine one or more of these three elements.

There's more...

The description of the default output (standard output) can be a bit verbose. When calling python3 cron.py -h, it gets displayed as:

-o OUTPUT   output file (default: <_io.TextIOWrapper name='<stdout>' mode='w' encoding='utf-8'>)

This is the description of the standard output (stdout). The format of the parameter can be changed using the formatter_class argument in the ArgumentParser. This means that you can use a custom formatter inheriting from the available default ones to tweak the display of the value. Refer to the documentation at https://docs.python.org/2/library/argparse.html#formatter-class

If there's any problem in the execution of the crontab, you should receive a system mail. This will show up as a message in the terminal like this:

You have mail.
$
This can be read with mail:
$ mail
Mail version 8.1 6/6/93. Type ? for help.
"/var/mail/jaime": 1 message 1 new
>N 1 jaime@Jaimes-iMac-5K Fri Jun 17 21:15 20/914 "Cron <jaime@Jaimes-iM"
? 1
Message 1:
...
/usr/local/Cellar/python/3.8.1/Frameworks/Python.framework/Versions/3.8/Resources/Python.app/Contents/MacOS/Python: can't open file 'cron.py': [Errno 2] No such file or directory

In the next recipe, we will explore methods to capture the errors independently so that the task can run smoothly.

See also

  • The Adding command-line options recipe in Chapter 1, Let's Begin Our Automation Journey, to understand the basic concepts of command-line options.
  • The Capturing errors and problems recipe, next in this chapter, to learn how to store events happening during the execution.

Capturing errors and problems

An automated task's main characteristic is its fire-and-forget quality. We are not actively looking at the result, but making it run in the background.

Most of the recipes in this book deal with external information, such as web pages or other reports, so the likelihood of finding an unexpected problem when running it is high. This recipe will present an automated task that will safely store unexpected behaviors in a log file that can be checked afterward.

Getting ready

As a starting point, we'll use a task that will divide two numbers, as described in the command line.

This task is very similar to the one presented in step 5 of How it works for the Preparing a task recipe, earlier this chapter. However, instead of multiplying two numbers, we'll divide them.

How to do it...

  1. Create the task_with_error_handling_step1.py file, as follows:
    import argparse
    import sys
    def main(number, other_number, output):
        result = number / other_number
        print(f'The result is {result}', file=output)
    if __name__ == '__main__':
        parser = argparse.ArgumentParser()
        parser.add_argument('-n1', type=int, help='A number', default=1)
        parser.add_argument('-n2', type=int, help='Another number', default=1)      
        parser.add_argument('-o', dest='output', type=argparse.FileType('w'),
                            help='output file', default=sys.stdout)
        args = parser.parse_args()
        main(args.n1, args.n2, args.output)
    
  2. Execute it a couple of times to see that it divides two numbers:
    $ python3 task_with_error_handling_step1.py -n1 3 -n2 2
    The result is 1.5
    $ python3 task_with_error_handling_step1.py -n1 25 -n2 5
    The result is 5.0
    
  3. Check that dividing by 0 produces an error, and that the error is not logged on the result file:
    $ python task_with_error_handling_step1.py -n1 5 -n2 1 -o result.txt
    $ cat result.txt
    The result is 5.0
    $ python task_with_error_handling_step1.py -n1 5 -n2 0 -o result.txt
    Traceback (most recent call last):
     File "task_with_error_handling_step1.py", line 20, in <module>
     main(args.n1, args.n2, args.output)
     File "task_with_error_handling_step1.py", line 6, in main  result = number / other_number
    ZeroDivisionError: division by zero
    $ cat result.txt
    
  4. Create the task_with_error_handling_step4.py file:
    import argparse
    import sys
    import logging
    LOG_FORMAT = '%(asctime)s %(name)s %(levelname)s %(message)s'
    LOG_LEVEL = logging.DEBUG
    def main(number, other_number, output):
        logging.info(f'Dividing {number} between {other_number}')
        result = number / other_number
        print(f'The result is {result}', file=output)
    if __name__ == '__main__':
        parser = argparse.ArgumentParser()
        parser.add_argument('-n1', type=int, help='A number', default=1)
        parser.add_argument('-n2', type=int, help='Another number', default=1)
        parser.add_argument('-o', dest='output', type=argparse.FileType('w'),
                            help='output file', default=sys.stdout)
        parser.add_argument('-l', dest='log', type=str, help='log file',
                            default=None)
        args = parser.parse_args()
        if args.log:
            logging.basicConfig(format=LOG_FORMAT, filename=args.log,
                                level=LOG_LEVEL)
        else:
            logging.basicConfig(format=LOG_FORMAT, level=LOG_LEVEL)
        try:
            main(args.n1, args.n2, args.output)
        except Exception as exc:
            logging.exception("Error running task")
            exit(1)
    
  5. Run it to check that it displays the proper INFO and ERROR logs, and that it stores it on the log file:
    $ python3 task_with_error_handling_step4.py -n1 5 -n2 0
    2020-01-19 14:25:28,849 root INFO Dividing 5 between 0
    2020-01-19 14:25:28,849 root ERROR division by zero
    Traceback (most recent call last):
      File "task_with_error_handling_step4.py", line 31, in <module>
        main(args.n1, args.n2, args.output)
      File "task_with_error_handling_step4.py", line 10, in main
        result = number / other_number
    ZeroDivisionError: division by zero
    $ python3 task_with_error_handling_step4.py -n1 5 -n2 0 -l error.log
    $ python3 task_with_error_handling_step4.py -n1 5 -n2 0 -l error.log
    $ cat error.log
    2020-01-19 14:26:15,376 root INFO Dividing 5 between 0
    2020-01-19 14:26:15,376 root ERROR division by zero
    Traceback (most recent call last):
      File "task_with_error_handling_step4.py", line 33, in <module>
        main(args.n1, args.n2, args.output)
      File "task_with_error_handling_step4.py", line 11, in main
        result = number / other_number
    ZeroDivisionError: division by zero
    2020-01-19 14:26:19,960 root INFO Dividing 5 between 0
    2020-01-19 14:26:19,961 root ERROR division by zero
    Traceback (most recent call last):
      File "task_with_error_handling_step4.py", line 33, in <module>
        main(args.n1, args.n2, args.output)
      File "task_with_error_handling_step4.py", line 11, in main
        result = number / other_number
    ZeroDivisionError: division by zero
    

How it works...

To properly capture any unexpected exceptions, the main function should be wrapped in a try-except block, as implemented in step 4 of the How to do it… section. Compare this to how step 1 does not wrap the code:

    try:
        main(...)
    except Exception as exc:
        # Something went wrong
        logging.exception("Error running task")
        exit(1)

Note that logging the exception is important for getting information on what went wrong.

This kind of exception is nicknamed Pokémon Exception because it can catch 'em all. It will capture any unexpected error at the highest level. Do not use it in other areas of the code, as capturing everything can hide unexpected errors. At the very least, any unexpected exception should be logged to allow for further analysis.

The extra step, to exit with status 1 by using the exit(1) call, informs the operating system that something went wrong with our script.

The logging module allows us to log. Note the basic configuration, which includes an optional file to store the logs, the format, and the level of the logs to display.

The available levels for logs are—from less critical to more critical—DEBUG, INFO, WARNING, ERROR, and CRITICAL. The logging level will set the minimum severity required to log the message. For example, an INFO log won't be stored if the severity is set to WARNING.

Creating logs is easy. You can do this by making a call to the logging.<logging level> method (where the logging level is debug, info, and so on). For example:

>>> import logging
>>> logging.basicConfig(level=logging.INFO)
>>> logging.warning('a warning message')
WARNING:root:a warning message
>>> logging.info('an info message')
INFO:root:an info message
>>> logging.debug('a debug message')
>>>

Note how logs with a severity lower than INFO are not displayed. Use the level definition to tweak how much information to display. This may change, for example, how DEBUG logs may be used only while developing the task, but not be displayed when running it. Notice that task_with_error_handling_step4.py defines the logging level to be DEBUG, by default.

A good definition of log levels is key to displaying relevant information while reducing noise. It is not easy to set up sometimes, but especially if more than one person is involved, try to agree on exactly what WARNING versus ERROR means to avoid misinterpretations.

logging.exception() is a special case that will create an ERROR log, but it will also include information about the exception, such as the stack trace.

Remember to check logs to discover errors. A useful reminder is to add a note to the results file, like this:

try:
    main(args.n1, args.n2, args.output)
except Exception as exc:
    logging.exception(exc)
    print('There has been an error. Check the logs', file=args.output)

There's more...

The Python logging module has many capabilities, including the following:

  • It provides further tweaks to the format of the log, for example, including the file and line number of the log that was produced.
  • It defines different logger objects, each one with its own configuration, such as logging level and format. This allows us to publish logs to different systems in different ways, though, normally, a single logger object is used to keep things simple.
  • It sends logs to multiple places, such as the standard output and file, or even a remote logger.
  • It automatically rotates logs, creating new log files after a certain time or size. This is handy for keeping logs organized by day or week. It also allows for the compression or removal of old logs. Logs take up space when they accumulate.
  • It reads standard logging configurations from files.

Instead of creating complex rules on what to log, try to log extensively using the proper level for each, and then filter by level.

For comprehensive details, refer to the Python documentation of the module at https://docs.python.org/3.8/library/logging.html, or the tutorial at https://docs.python.org/3.8/howto/logging.html.

See also

  • The Adding command-line options recipe in Chapter 1, Let's Begin Our Automation Journey, to describe the basic elements of the command-line options.
  • The Preparing a task recipe, covered earlier in the chapter, to learn about the strategy to follow when designing an automated task.

Sending email notifications

Email has become an inescapable tool for everyday use. It's arguably the best place to send a notification if an automated task has detected something. On the other hand, email inboxes are already too full up with spam messages, so be careful.

Spam filters are also a reality. Be careful with whom to send emails to and the number of emails to be sent. An email server or address can be labeled as a spam source, and all emails may be quietly dropped by the internet.

This recipe will show you how to send a single email using an existing email account.

This approach is viable for spare emails sent to a couple of people, as a result of an automated task, but no more than that. Refer to Chapter 9, Dealing with Communication Channels, for more ideas on how to send emails, including groups.

Getting ready

For this recipe, we require a valid email account set up, which includes the following:

  • A valid email server using SMTP; SMTP is the standard email protocol
  • A port to connect to
  • An address
  • A password

These four elements should be enough to be able to send an email.

Some email services, for example, Gmail, will encourage you to set up 2FA, meaning that a password is not enough to send an email. Typically, they'll allow you to create a specific password for apps to use, bypassing the 2FA request. Check your email provider's information for options.

The email service you use should indicate what the SMTP server is and what port to use in their documentation. This can be retrieved from email clients as well, as they are the same parameters. Check your provider documentation. In the following example, we will use a Gmail account.

How to do it...

  1. Create the email_task.py file, as follows:
    import argparse
    import configparser
    import smtplib 
    from email.message import EmailMessage
    def main(to_email, server, port, from_email, password):
        print(f'With love, from {from_email} to {to_email}')
        # Create the message
        subject = 'With love, from ME to YOU'
        text = '''This is an example test'''
        msg = EmailMessage()
        msg.set_content(text)
        msg['Subject'] = subject
        msg['From'] = from_email
        msg['To'] = to_email
        # Open communication and send
        server = smtplib.SMTP_SSL(server, port)
        server.login(from_email, password)
        server.send_message(msg)
        server.quit()
    if __name__ == '__main__':
        parser = argparse.ArgumentParser()
        parser.add_argument('email', type=str, help='destination email')
        parser.add_argument('-c', dest='config', type=argparse.FileType('r'),
                            help='config file', default=None)
        args = parser.parse_args()
        if not args.config:
            print('Error, a config file is required')
            parser.print_help()
            exit(1)
        config = configparser.ConfigParser()
        config.read_file(args.config)
        main(args.email,
             server=config['DEFAULT']['server'],
             port=config['DEFAULT']['port'],
             from_email=config['DEFAULT']['email'],
             password=config['DEFAULT']['password'])
    
  2. Create a configuration file called email_conf.ini with the specifics of your email account. For example, for a Gmail account, fill in the following template. The template is available in GitHub at https://github.com/PacktPublishing/Python-Automation-Cookbook-Second-Edition/blob/master/Chapter02/email_conf.ini but be sure to fill it in with your data:
    [DEFAULT]
    email = EMAIL@gmail.com
    server = smtp.gmail.com
    port = 465
    password = PASSWORD
    
  3. Ensure that the file cannot be read or written by other users on the system, setting the permissions of the file to allow only our user. 600 permissions mean read and write access for the file owner, and no access to anyone else:
    $ chmod 600 email_conf.ini
    
  4. Run the script to send a test email:
    $ python3 email_task.py -c email_conf.ini destination_email@server.com
    
  5. Check the inbox of the destination email; an email should be received with the subject With love, from ME to YOU.

How it works...

There are two key steps in the preceding scripts—the generation of the message and the sending.

The message needs to contain mainly the To and From email addresses, as well as the Subject. If the content is pure text, as in this case, calling .set_content() is enough. The whole message can then be sent.

It is technically possible to send an email that is tagged as coming from a different email address than the one you used to send it. This is discouraged, though, as it can be considered by your email provider as trying to impersonate a different email. You can use the reply-to header to allow answering to a different account.

Sending the email requires you to connect to the specified server and start an SMTP connection. SMTP is the standard for email communication.

The steps are quite straightforward—configure the server, log into it, send the prepared message, and quit.

If you need to send more than one message, you can log in, send multiple emails, and then quit, instead of connecting each time.

There's more...

If the objective is a bigger operation, such as a marketing campaign, or even production emails, such as confirming a user's email, please refer to Chapter 9, Dealing with Communication Channels.

The email message content used in this recipe is very simple, but emails can be much more complicated than that.

The To field can contain multiple recipients. Separate them with commas, like this:

message['To'] = ','.join(recipients)

Emails can be defined in HTML, with an alternative plain text, and have attachments. The basic operation is to set up a MIMEMultipart and then attach each of the MIME parts that compose the email:

from email.mime.multipart import MIMEMultipart
from email.mime.text import MIMEText
from email.mime.image import MIMEImage
message = MIMEMultipart()
part1 = MIMEText('some text', 'plain')
message.attach(part1)
with open('path/image', 'rb') as image:
    part2 = MIMEImage(image.read())
message.attach(part2)

The most common SMTP connection is SMTP_SSL, which is more secure, as all communication with the server is encrypted and always requires a login and password. However, plain, unauthenticated SMTP exists—check your email provider documentation.

Remember that this recipe is aimed toward simple notifications. Emails can grow quite complex if attaching different information. If your objective is an email for customers or any general group, try to use the ideas in Chapter 9, Dealing with Communication Channels.

See also

  • The Adding command-line options recipe in Chapter 1, Let's Begin Our Automation Journey, to understand the basic concepts of command-line options.
  • The Preparing a task recipe, covered earlier in this chapter, to learn about the strategy to follow when designing an automated task.
Left arrow icon Right arrow icon
Download code icon Download Code

Key benefits

  • Automate integral business processes such as report generation, email marketing, and lead generation
  • Explore automated code testing and Python’s growth in data science and AI automation in three new chapters
  • Understand techniques to extract information and generate appealing graphs, and reports with Matplotlib

Description

In this updated and extended version of Python Automation Cookbook, each chapter now comprises the newest recipes and is revised to align with Python 3.8 and higher. The book includes three new chapters that focus on using Python for test automation, machine learning projects, and for working with messy data. This edition will enable you to develop a sharp understanding of the fundamentals required to automate business processes through real-world tasks, such as developing your first web scraping application, analyzing information to generate spreadsheet reports with graphs, and communicating with automatically generated emails. Once you grasp the basics, you will acquire the practical knowledge to create stunning graphs and charts using Matplotlib, generate rich graphics with relevant information, automate marketing campaigns, build machine learning projects, and execute debugging techniques. By the end of this book, you will be proficient in identifying monotonous tasks and resolving process inefficiencies to produce superior and reliable systems.

Who is this book for?

Python Automation Cookbook - Second Edition is for developers, data enthusiasts or anyone who wants to automate monotonous manual tasks related to business processes such as finance, sales, and HR, among others. Working knowledge of Python is all you need to get started with this book.

What you will learn

  • Learn data wrangling with Python and Pandas for your data science and AI projects
  • Automate tasks such as text classification, email filtering, and web scraping with Python
  • Use Matplotlib to generate a variety of stunning graphs, charts, and maps
  • Automate a range of report generation tasks, from sending SMS and email campaigns to creating templates, adding images in Word, and even encrypting PDFs
  • Master web scraping and web crawling of popular file formats and directories with tools like Beautiful Soup
  • Build cool projects such as a Telegram bot for your marketing campaign, a reader from a news RSS feed, and a machine learning model to classify emails to the correct department based on their content
  • Create fire-and-forget automation tasks by writing cron jobs, log files, and regexes with Python scripting

Product Details

Country selected
Publication date, Length, Edition, Language, ISBN-13
Publication date : May 29, 2020
Length: 526 pages
Edition : 2nd
Language : English
ISBN-13 : 9781800202597
Category :
Languages :

What do you get with eBook?

Product feature icon Instant access to your Digital eBook purchase
Product feature icon Download this book in EPUB and PDF formats
Product feature icon Access this title in our online reader with advanced features
Product feature icon DRM FREE - Read whenever, wherever and however you want
Product feature icon AI Assistant (beta) to help accelerate your learning
Modal Close icon
Payment Processing...
tick Completed

Billing Address

Product Details

Publication date : May 29, 2020
Length: 526 pages
Edition : 2nd
Language : English
ISBN-13 : 9781800202597
Category :
Languages :

Packt Subscriptions

See our plans and pricing
Modal Close icon
₹800 billed monthly
Feature tick icon Unlimited access to Packt's library of 7,000+ practical books and videos
Feature tick icon Constantly refreshed with 50+ new titles a month
Feature tick icon Exclusive Early access to books as they're written
Feature tick icon Solve problems while you work with advanced search and reference features
Feature tick icon Offline reading on the mobile app
Feature tick icon Simple pricing, no contract
₹4500 billed annually
Feature tick icon Unlimited access to Packt's library of 7,000+ practical books and videos
Feature tick icon Constantly refreshed with 50+ new titles a month
Feature tick icon Exclusive Early access to books as they're written
Feature tick icon Solve problems while you work with advanced search and reference features
Feature tick icon Offline reading on the mobile app
Feature tick icon Choose a DRM-free eBook or Video every month to keep
Feature tick icon PLUS own as many other DRM-free eBooks or Videos as you like for just ₹400 each
Feature tick icon Exclusive print discounts
₹5000 billed in 18 months
Feature tick icon Unlimited access to Packt's library of 7,000+ practical books and videos
Feature tick icon Constantly refreshed with 50+ new titles a month
Feature tick icon Exclusive Early access to books as they're written
Feature tick icon Solve problems while you work with advanced search and reference features
Feature tick icon Offline reading on the mobile app
Feature tick icon Choose a DRM-free eBook or Video every month to keep
Feature tick icon PLUS own as many other DRM-free eBooks or Videos as you like for just ₹400 each
Feature tick icon Exclusive print discounts

Frequently bought together


Stars icon
Total 17,279.97
Python Automation Cookbook
₹5958.99
Modern Python Cookbook
₹7447.99
40 Algorithms Every Programmer Should Know
₹3872.99
Total 17,279.97 Stars icon

Table of Contents

15 Chapters
Let's Begin Our Automation Journey Chevron down icon Chevron up icon
Automating Tasks Made Easy Chevron down icon Chevron up icon
Building Your First Web Scraping Application Chevron down icon Chevron up icon
Searching and Reading Local Files Chevron down icon Chevron up icon
Generating Fantastic Reports Chevron down icon Chevron up icon
Fun with Spreadsheets Chevron down icon Chevron up icon
Cleaning and Processing Data Chevron down icon Chevron up icon
Developing Stunning Graphs Chevron down icon Chevron up icon
Dealing with Communication Channels Chevron down icon Chevron up icon
Why Not Automate Your Marketing Campaign? Chevron down icon Chevron up icon
Machine Learning for Automation Chevron down icon Chevron up icon
Automatic Testing Routines Chevron down icon Chevron up icon
Debugging Techniques Chevron down icon Chevron up icon
Other Books You May Enjoy Chevron down icon Chevron up icon
Index Chevron down icon Chevron up icon

Customer reviews

Top Reviews
Rating distribution
Full star icon Full star icon Full star icon Half star icon Empty star icon 3.8
(16 Ratings)
5 star 56.3%
4 star 6.3%
3 star 18.8%
2 star 0%
1 star 18.8%
Filter icon Filter
Top Reviews

Filter reviews by


siebo Jun 11, 2020
Full star icon Full star icon Full star icon Full star icon Full star icon 5
This book shows how Python can be applied to many common workflows. It covers tasks like file manipulation, text processing, structured data, graphing and reporting, and marketing automation. The code examples are written in modern, well-structured Python code. Reading the book sequentially gives you a tour of some of the things can do with Python. It helps you recognize opportunities to automate your work, using the language, and helps build up your abilities to confidently use Python this way. It can also be used as a Cookbook, where you refer to specific chapters when working with particular use cases. I think this book is approachable even for people who are new to Python. I'd also recommend it to developers who already work with Python, for example with a web framework, and want to expand their knowledge into using the language to automate their daily workflows.
Amazon Verified review Amazon
Steven Klassen Jun 12, 2020
Full star icon Full star icon Full star icon Full star icon Full star icon 5
Disclaimer: I was offered a review copy by the publisher to write an honest review.I skimmed through this book over the course of a week paying close attention to the code samples. The writing is really very good and didn't set off any of my grammar alarms that are constantly waiting in the background when I'm reading anything. That made the technical bits a lot more enjoyable.There were a lot of examples that were light and that you could go through from start to finish without getting mired in complicated logic. I didn't find any issues with the code itself which was also nice.If I had to offer a critique for a 2nd edition (if it remains a cookbook style offering) it would be to maybe explain less and show more. While the information in this one was really well written it could have almost dropped cookbook from the title and still been worth its salt.
Amazon Verified review Amazon
James Anzalone Jun 12, 2020
Full star icon Full star icon Full star icon Full star icon Full star icon 5
Chapters are very well organized, following a coherent sequence. Although the book has 500+ pages, the way that is structured, in little doses, makes it easier to follow and be focused. Sections like How to do it and How it works help the reader showing all the necessary steps.I love the functionality of the book, with everyday examples like ordering a pizza, how to create a report about watched movies or how to create a CSV spreadsheet, the book is more interesting. Although the book is created for people with a knowledge about Python, it has a lot of information for a lower level reader. ​
Amazon Verified review Amazon
Viktor Kis Jun 11, 2020
Full star icon Full star icon Full star icon Full star icon Full star icon 5
Really appreciate any book that starts off driving home the importance of setting virtual environments properly. Yes, a lot of information now days can be searched online, but if you are here, you are willing to chip in a little for a fresh set of neatly laid out concepts – and this book is just that. It is a great compilation of relatable example driven concepts. Regular expression, argument parsing, logging, directory manipulation, reading txt/pdf/image/csv/word/excel files are all bread and butter now days and if any of these topics daunted you, this book gives you a nice high-level intro into them. The web sections were great for me who has really only scrapped the web, I was exposed to other ideas such as automated emails and text messages. Although you don’t have to read the book chapter by chapter, I would have preferred to put the testing section up front to drive test driven development home a bit more. Overall it was a great read – thanks for collecting these ideas/examples and contributing back to the python community!
Amazon Verified review Amazon
Stephan Miller Jun 22, 2020
Full star icon Full star icon Full star icon Full star icon Full star icon 5
This book has a lot of information. First it shows you how to set up a Python environment for automation, including installing Python, setting up cron jobs to run your tasks on schedule, and adding notifications so you can get details on your jobs delivered to your email.And then it gets interesting. This book differs slightly from other cookbooks I have read that just list a bunch of small coding examples to do specific things. These recipes build on each other and can be mixed and matched to automate a process you are doing manually.The topics covered are web scraping, file processing, report generation, spreadsheet manipulation, data processing and cleaning, graph and chart generation, communication, marketing automation, machine learning, code testing and debugging. You will definitely find enough examples here to automate any process you may have and free up time.
Amazon Verified review Amazon
Get free access to Packt library with over 7500+ books and video courses for 7 days!
Start Free Trial

FAQs

How do I buy and download an eBook? Chevron down icon Chevron up icon

Where there is an eBook version of a title available, you can buy it from the book details for that title. Add either the standalone eBook or the eBook and print book bundle to your shopping cart. Your eBook will show in your cart as a product on its own. After completing checkout and payment in the normal way, you will receive your receipt on the screen containing a link to a personalised PDF download file. This link will remain active for 30 days. You can download backup copies of the file by logging in to your account at any time.

If you already have Adobe reader installed, then clicking on the link will download and open the PDF file directly. If you don't, then save the PDF file on your machine and download the Reader to view it.

Please Note: Packt eBooks are non-returnable and non-refundable.

Packt eBook and Licensing When you buy an eBook from Packt Publishing, completing your purchase means you accept the terms of our licence agreement. Please read the full text of the agreement. In it we have tried to balance the need for the ebook to be usable for you the reader with our needs to protect the rights of us as Publishers and of our authors. In summary, the agreement says:

  • You may make copies of your eBook for your own use onto any machine
  • You may not pass copies of the eBook on to anyone else
How can I make a purchase on your website? Chevron down icon Chevron up icon

If you want to purchase a video course, eBook or Bundle (Print+eBook) please follow below steps:

  1. Register on our website using your email address and the password.
  2. Search for the title by name or ISBN using the search option.
  3. Select the title you want to purchase.
  4. Choose the format you wish to purchase the title in; if you order the Print Book, you get a free eBook copy of the same title. 
  5. Proceed with the checkout process (payment to be made using Credit Card, Debit Cart, or PayPal)
Where can I access support around an eBook? Chevron down icon Chevron up icon
  • If you experience a problem with using or installing Adobe Reader, the contact Adobe directly.
  • To view the errata for the book, see www.packtpub.com/support and view the pages for the title you have.
  • To view your account details or to download a new copy of the book go to www.packtpub.com/account
  • To contact us directly if a problem is not resolved, use www.packtpub.com/contact-us
What eBook formats do Packt support? Chevron down icon Chevron up icon

Our eBooks are currently available in a variety of formats such as PDF and ePubs. In the future, this may well change with trends and development in technology, but please note that our PDFs are not Adobe eBook Reader format, which has greater restrictions on security.

You will need to use Adobe Reader v9 or later in order to read Packt's PDF eBooks.

What are the benefits of eBooks? Chevron down icon Chevron up icon
  • You can get the information you need immediately
  • You can easily take them with you on a laptop
  • You can download them an unlimited number of times
  • You can print them out
  • They are copy-paste enabled
  • They are searchable
  • There is no password protection
  • They are lower price than print
  • They save resources and space
What is an eBook? Chevron down icon Chevron up icon

Packt eBooks are a complete electronic version of the print edition, available in PDF and ePub formats. Every piece of content down to the page numbering is the same. Because we save the costs of printing and shipping the book to you, we are able to offer eBooks at a lower cost than print editions.

When you have purchased an eBook, simply login to your account and click on the link in Your Download Area. We recommend you saving the file to your hard drive before opening it.

For optimal viewing of our eBooks, we recommend you download and install the free Adobe Reader version 9.

Modal Close icon
Modal Close icon