


 Download code from GitHub
Architectural Overview and Building a Simple App in Angular
It doesn't matter if you are new to AngularJS or new to Angular. If you want to quickly develop great web apps with rich UIs and with the features of Angular components, templates, and services, you need to master Angular, and this book is for you.
Angular is a JavaScript framework that enables developers to build web and mobile applications. Applications built with Angular can target any device, such as mobiles, tablets, and desktops. Angular is not an incremental version of AngularJS. It was completely rewritten with improved Dependency Injection, dynamic loading, and simpler routing, and recommends that developers use TypeScript and leverage OOPS, static typing, generics, and lambdas.
In this chapter, we will cover the following topics:
- Angular architecture
- Basics of TypeScript
- Building a simple application
Angular architecture
Before we discuss architecture, let's see what's new in Angular. The primary focus of Angular is mobiles, as it is important to consider the performance and loading time of the application on a mobile phone. Many modules are decoupled from the Angular core, leaving only the modules that are definitely core; removing unwanted modules from Angular core leads to better performance.
Angular targets ES6 and leverages TypeScript as a development script language that enables compile time checks for types, rather than at runtime. TypeScript provides additional information about classes when instantiating them by annotating metadata to the classes. You can also use ES5 and Dart as the development language. There is an improved version of Dependency Injection that supports child injectors and instance scope. Router was rewritten completely and the component router was introduced. The Component Directive, the Decorator Directive, and the Template Directive are supported in Angular. The $scope has been completely removed from Angular.
The architecture of Angular comprises Modules, Components, Templates, Metadata, Directives, and Services:

NgModules
Angular framework has various libraries that are grouped as modules in order to build an application. Angular applications are modular in nature and are constructed by assembling various modules. Modules may have components, services, functions, and/or values. Some modules may have a collection of other modules and are known as library modules.
Angular packages, such as core, common, http, and router that are prefixed with @angular comprise many modules. We import what our application needs from these library modules as follows:
import {Http, Response} from @angular/http';
Here, we import Http and Response from the library module, @angular/http. @angular/http refers to a folder in the Angular package. Any module defined to be exported can be imported into another module by referring to the filename of the module.
However, we can also refer to the folder as we referred to @angular/http. This can be achieved by adding an index.ts file to the folder and adding the code to export modules from the folder. This is a best practice suggested by Angular's style guide and is called the barrel technique:
export * from './http';
This is the export statement in the index.ts found in @angular/http. The statement means that it exports all the modules in HTTP and that they can be imported to our application wherever needed.
When we write an Angular application, we start by defining an AppComponent (not necessarily with the same name) and exporting it.
Components
A component is a class that has properties and methods to be used in the view. These properties and methods exposed to view enable the view to interact with components. We code logic that supports the view in the component class:

For example, next is a component class book that has a properties title and author and a getPubName method that returns the name of the book:
export class BookComponent {
  title: string;
  author: string;
  constructor() {
      this.title = 'Learning Angular for .Net Developers';
      this.author = 'Rajesh Gunasundaram';
  }
  getPubName() : string {
    return 'Packt Publishing';
  }
}
The life cycle of a component is managed by Angular according to user interactions with the application. We can also add an event method that will be fired according to the state changes of the component. These event methods are known as life cycle hooks and are optional.
We will learn in detail about components in Chapter 5, Implementing Angular Routing and Navigation.
Templates
Templates can be thought of as a representation of a component that is visualized according to the UI/UX needs of an application. A component will have a template associated with it. The template is responsible for displaying and updating data according to user events:

Here is a simple template that displays the title and author of a book:
<h1>Book Details</h1>
<p>Title of the Book: {{title}}</p>
<p>Author Name : {{author}}</p>
Here, the title and author values wrapped in curly braces will be supplied by the associated component instance.
We will discuss templates and their syntax in detail in Chapter 8, Template and Data Binding Syntax.
Metadata
A class can be turned into a component by annotating it with @Component and passing the necessary metadata, such as selector, template, or templateUrl. Angular considers a class as a component only after attaching metadata to it:

Let's revisit the BookComponent class we defined earlier. Angular does not consider this class as a component unless we annotate it. TypeScript leverages the ES7 feature by providing a way to decorate a class with metadata as follows:
@Component({
  selector:    'book-detail',
  templateUrl: 'app/book.component.html'
})
export class BookComponent { ... }
Here, we have decorated the BookComponent class with @Component and attached metadata selector and templateUrl. It means that, wherever Angular sees the special <book-detail/> tag in the view, it will create an instance of BookComponent and render the view assigned to templateUrl, which is book.component.html.
A decorator provided by TypeScript is a function that takes configuration parameters that are used by Angular to create an instance of the component and render the associated view. Configuration parameters may also have information about directives and providers, which will be made available by Angular when the component is created.
Data Binding
Data Binding is one of the core responsibilities of developers when writing code to bind data to the user interface and update changing data according to user interactions with the user interface. Angular has reduced the burden of writing large amounts of code to handle Data Binding:

Angular handles Data Binding by coordinating with templates and components. The templates provide instructions to Angular on how and what to bind. There are two types of binding in Angular: globally One-way Data Binding and Two-way Data Binding. One-way Data Binding deals with either binding data from the component to the DOM or from the DOM to the component. Two-way Data Binding deals with both sides of communication, that is, the component to the DOM and the DOM to the component.
<div>Title: {{book.title}}<br/>
  Enter Author Name: <input [(ngModel)]="book.author">
</div>
Here, book.title wrapped in double curly braces deals with One-way Data Binding. The value of book title, if available in the component instance, will be displayed in the view. book.author, assigned to the ngModel property of the input element, deals with Two-way Data Binding. If the component instance has a value in the author property, then it will be assigned to the input elements, and if the value is changed by the user in the input control, then the updated value will be available in the component instance.
We will learn in detail about Data Binding in Chapter 8, Template and Data Binding Syntax.
Directives
A directive is instructions or guidelines for rendering a template. A class decorated with @Directive to attached metadata is called a directive. There are three types of directive supported by Angular, namely Component Directive, Structural Directive, and Attribute Directive:

A component is one form of a directive with a template that is decorated with @Component: it is actually an extended @Directive with a template feature:
<book-detail></book-detail>
Structural Directives manipulate the DOM elements and alter their structure by adding, removing, and replacing DOM elements. The following code snippet uses two Structural Directives:
<ul>
<li *ngFor="let book of books">
    {{book.title}}
</li>
</ul>
Here, the div element has a *ngFor directive that iterates through the books collection object and replaces the title of each book.
An Attribute Directive helps to update the behavior or the appearance of an element. Let's use the Attribute Directive to set the font size of a paragraph. The following code snippet shows an HTML statement implemented with an Attribute Directive:
<p [myFontsize]>Fontsize is sixteen</p>
We need to implement a class annotated with @Directive along with the selector for the directive. This class should be implemented with the instructions on the behavior of the directive:
import { Directive, ElementRef, Input } from '@angular/core';
@Directive({ selector: '[myFontsize]' })
export class FontsizeDirective {
    constructor(el: ElementRef) {
       el.nativeElement.style.fontSize = 16;
    }
}
Here, Angular will look for elements with the [myFontsize] directive and sets the font size to 16.
It is necessary to pass the myFontSize directive to the declarations metadata of @NgModule as follows:
import { NgModule } from '@angular/core';
import { BrowserModule } from '@angular/platform-browser';
import { AppComponent } from './app.component';
import { FontsizeDirective } from './fontsize.directive';
@NgModule({
  imports: [ BrowserModule ],
  declarations: [
    AppComponent,
    FontsizeDirective
  ],
  bootstrap: [ AppComponent ]
})
export class AppModule { }
We will discuss directives in detail in Chapter 6, Creating Directives and Implementing Change Detection.
Services
Services are user-defined classes used to solve problems. Angular recommends only having template-specific codes in components. A component's responsibility is to enrich the UI/UX in the Angular application and delegate business logic to services. Components are consumers of services:
Application-specific or business logic such as persisting application data, logging errors, and file storage should be delegated to services, and components should consume the respective services to deal with the appropriate business or application-specific logic:

For example, we can have a service called BookService that deals with inserting new books, editing or deleting existing books, and fetching a list of all the books available.
We will see more about services in Chapter 11, Implementing Angular Pipes.
Dependency Injection
When an instance of a class is created, supplying the required dependencies of that class for it to function properly is called Dependency Injection. Angular provides a modern and improved version of Dependency Injection:

In Angular, the injector maintains the containers to hold the instances of the dependencies and serves them as and when required. If the instance of a dependency is not available in the container, then the injector creates an instance of the dependency and serves it:

As stated earlier, components have logic that is related to templates and mostly consume services to perform business logic. So, components depend on services. When we write code for components, we create a parameter constructor that takes the service as an argument. It means that creating an instance of the component depends on the service parameter in the constructor. Angular requests that the injector provide the instance of the service in the parameter of the constructor of the component. The injector will serve the instance of the requested service, if available; otherwise, it creates a new one and serves it:
export class BookComponent {
  constructor(private service: BookService) { }
}
In this code snippet, the : symbol comes from TypeScript and is not Angular syntactical sugar. The private keyword is also from TypeScript and enables assigning the passed constructor to the class instance automatically. The type information is used to infer the type to be injected. The BookComponent has a dependency to BookService and is injected in the constructor. So when an instance of the BookComponent is created, Angular will also make sure the instance of BookService is readily available for the BookComponent instance to consume.
The injector has knowledge of the dependencies to be created from providers that are configured with the required dependency types when bootstrapping the application or when decorating the components, as follows:
@NgModule({
  imports: [BrowserModule],
  declarations: [AppComponent,],
  providers: [BookService],
  bootstrap: [ AppComponent ]
})
export class AppModule { }
The preceding code snippet adds BookService as a provider to the bootstrap function. The injector will create an instance of BookService and keep it available in the container for the entire application to inject whenever it's requested:
@Component({
  providers:   [BookService]
})
export class BookComponent { ... }
The preceding code snippet adds BookService as a provider in the metadata of the component. The injector will create an instance of BookService when it encounters a request to create an instance of BookComponent.
We will discuss Dependency Injection and hierarchical Dependency Injection in detail in
Chapter 12, Implementing Angular Services.
Basics of TypeScript
TypeScript is a superset of JavaScript and is an open source language developed by Microsoft. Code written in TypeScript will be compiled to JavaScript and executed on any browser or server running Node.js. TypeScript is actually a type of JavaScript. TypeScript helps to improve the quality of code you write in JavaScript. If we use external libraries, we need to use type definition files for the imported libraries. Type definition files provide JavaScript tooling support and also enable compile time checks, code refactoring, and variable renaming support by inferring the structure of the code. TypeScript is evolving and keeps adding additional features aligned with the ES2016 specification and later.
There are various editors available on the market that write TypeScript code and compile them using a TypeScript compiler. These editors take care of compiling your TypeScript into JavaScript. Some popular editors are shown here:
- Visual Studio
- Visual Studio Code
- Sublime text
- Atom
- Eclipse
- Emacs
- WebStorm
- Vim
You can also download TypeScript as a Node.js package by executing the following command in the Node.js command-line tool to install TypeScript globally:
npm install -g typescript
To transpile the TypeScript code into JavaScript, you can execute the following command in the command-line tool:
tsc mytypescriptcodefile.ts
Here, tsc is the TypeScript compiler that converts a TypeScript file into a JavaScript file. mytypescriptfile is the name of your TypeScript code file and .ts is the extension of the TypeScript file. On executing the tsc command, it generates a .js file with the same name as the .ts source file.
We will be using Visual Studio Code editor for our sample code demos in this chapter. Let us see basic features of TypeScript with examples.
Basic types
Let's explore some of the basic types in TypeScript and how to use them. Basic types include primitive types such as number, string, boolean, and array in TypeScript. JavaScript only validates types during runtime, but TypeScript validates variable types during compile time and greatly reduces the possibility of typecast issues during runtime.
Number type
The number type represents floating point values. It can hold values such as decimal, binary, hexadecimal, and octal literals:
let decimal: number = 6;
let hex: number = 0xf00d;
let binary: number = 0b1010;
let octal: number = 0o744;
Boolean type
The Boolean type is a very simple type that can hold either of two values, true or false. This Boolean type is used to maintain the state in a variable:
let isSaved: Boolean;
isSaved = true;
Here, the isSaved variable of type Boolean is assigned with the value true.
String
The string data type can hold a sequence of characters. Declaring and initializing the string variable is very simple, as follows:
var authorName: string = "Rajesh Gunasundaram";
Here, we declared a variable named authorName as a string, and it is assigned the value Rajesh Gunasundaram. TypeScript supports surrounding the string value with either a double quotes (") or single quotes (').
Array
The array data type is meant to hold a collection of values of specific types. In TypeScript, we can define arrays in two ways, which are as follows:
var even:number[] = [2, 4, 6, 8, 10];
This statement declares an array variable of the number type using square brackets ([]) after the data type number, and it is assigned with a series of even numbers from 2 to 10. The second way to define array is as follows:
var even:Array<number> = [2, 4, 6, 8, 10];
This statement uses the generic array type, which uses the Array keyword followed by angle brackets (<>) that wrap the number data type.
Enum
The enum data type will have a named set of values. We use enumerators to give user-friendly names to constants that identify certain values:
enum Day {Mon, Tue, Wed, Thu, Fri, Sat, Sun};
var firstDay: Day = Day.Mon;
Here, we have the Day enum variable, which holds a series of values that represent each day of the week. The second statement shows how to access a particular enum value in a day and assign it to another variable.
Any
The any data type is a dynamic data type that can hold any value. TypeScript throws compile time errors if you assign a string variable to an integer variable. If you are not sure about what value a variable is going to hold and you would like to opt out of compiler-checking for the type in the assignment, you can use the any data type:
var mixedList:any[] = [1, "I am string", false];
mixedList [2] = "no you are not";
Here, we used an array of the any type so that it can hold any type, such as numbers, strings, and booleans.
Void
Void is actually nothing. It can be used as the return type of a function to declare that this function will not return any value:
function alertMessage(): void {
    alert("This function does not return any value");
}
Classes
A class is an extensible template that is used to create objects with member variables to hold the state of the object and member functions that deal with the behavior of the object.
JavaScript only supports function-based and prototype-based inheritance to build reusable components. ECMAScript 6 provides the syntactic sugar of using classes in supporting object-oriented programming. However, not all browsers understand ES6 and we need transpilers, such as TypeScript, that compile the code down to JavaScript and target ES5, which is compatible with all browsers and platforms:
class Customer {
    name: string;
    constructor(name: string) {
        this.name = name;
   }
    logCustomer() {
        console.log('customer name is ' + this.name;
   }
}

var customer = new Customer("Rajesh Gunasundaram");
This Customer class has three members: a name property, a constructor, and a logCustomer method. The last statement outside the customer class creates an instance of the customer class using the new keyword.
Interfaces
An interface is an abstract type that defines the behavior of a class. An interface is a contract that abstracts the implementation. An interface provides a type definition for an object that can be exchanged between clients. This enables the client to only exchange an object that is complied with the interface type definition. Otherwise, we get a compile time error.
In TypeScript, interfaces define contracts for an object within your code and the code outside your project. Let's see how to use TypeScript with an example:
function addCustomer(customerObj: {name: string}) {
  console.log(customerObj.name);
}

var customer = {id: 101, name: "Rajesh Gunasundaram"};
addCustomer(customer);
The type checker verifies the addCustomer method call and examines its parameter. addCustomer expects an object with the name property of the string type. But the client that calls addCustomer is passed an object with two parameters, id and name, respectively.
However, the compiler does not check the id property as it is not available in the parameter type of the addCustomer method. It only matters for the compiler that the required properties are present.
Let's rewrite the method applying interface as a parameter type as follows:
interface Customer {
  name: string;
}

function addCustomer(customerObj: Customer) {
  console.log(customerObj.name);
}
var customer = {id: 101, name: "Rajesh Gunasundaram"};
addCustomer(customer);
Here, we declared the Customer interface with the name parameter, and we modified the addCustomer signature to accept the parameter of the type Customer interface. The remaining statements are same as in the previous code snippet. The compiler only checks for the shape of the object as TypeScript implements the structural type system. It will not check whether the object we are passing implements the Customer interface. It only looks for the name property of the string type in the parameter and then allows it, if it's present.
Optional properties using an interface
In some scenarios, we may want to pass values only for minimal parameters. In such cases, we can define the properties in an interface as optional properties, as follows:
interface Customer {
  id: number;
  name: string;
  bonus?: number;
}

function addCustomer(customer: Customer) {
  if (customer.bonus) {
    console.log(customer.bonus);
  }
}

addCustomer({id: 101, name: "Rajesh Gunasundaram"});
Here, the bonus property has been defined as an optional property by concatenating a question mark (?) at the end of the name property.
Function type interfaces
We just saw how to define properties in interfaces. Similarly, we can also define function types in interfaces. We can define function types in interfaces by just giving the signature of the function with the return type. Note that, in the following code snippet, we have not added the function name:
interface AddCustomerFunc {
  (firstName: string, lastName: string): string;
}
Now, we have AddCustomerFunc ready. Let's define an interface variable called AddCustomerFunc and assign a function of the same signature to it as follows:
var addCustomer: AddCustomerFunc;
addCustomer = function(firstName: string, lastName: string) {
  console.log('Full Name: ' + firstName + ' ' + lastName);
  return firstName + ' ' + lastName;
}
The parameter name in the function signature can vary, but not the data type. For example, we can alter the fn and ln function parameters of the string type as follows:
addCustomer = function(fn: string, ln: string) {
  console.log('Full Name: ' + fn + ' ' + ln);
}
So, if we change the data type of the parameter or the return type of the function here, the compiler will throw an error about the parameter not matching or the return type not matching with the AddCustomerFunc interface.
Array type interfaces
We can also define an interface for array types. We can specify the data type for the index array and the data type to the array item as follows:
interface CutomerNameArray {
  [index: number]: string;
}

var customerNameList: CutomerNameArray;
customerNameList = ["Rajesh", "Gunasundaram"];
TypeScript supports two types of index: number and string. This array type interface also stipulates that the return type of the array should match the declaration.
Class type interfaces
Class type interfaces define the contract for classes. A class that implements an interface should meet the requirement of the interface:
interface CustomerInterface {
    id: number;
    firstName: string;
    lastName: string;
    addCustomer(firstName: string, lastName: string);
    getCustomer(id: number): Customer;
}

class Customer implements CustomerInterface {
    id: number;
    firstName: string;
    lastName: string;
    constructor() { }
    addCustomer(firstName: string, lastName: string) {
        // code to add customer
   }
    getCustomer(id: number): Customer {
        return this;
    }
}
The class type interface only deals with public members of the class. So, it is not possible to add private members to the interface.
Extending interfaces
Interfaces can be extended. Extending an interface makes it share the properties of another interface, as follows:
interface Manager {
    hasPower: boolean;
}

interface Employee extends Manager {
    name: string;
}

var employee = <Employee>{};
employee.name = "Rajesh Gunasundaram";
employee.hasPower = true;
Here, the Employee interface extends the Manager interface and shares its hasPower with the Employee interface.
Hybrid type interfaces
Hybrid type interfaces are used when we want to use the object both as a function and an object. We can call an object like a function if it implements a hybrid type interface, or we can use it as an object and access its properties. This type of interface enables you to use an interface as an object and a function, as follows:
interface Customer {
    (name: string);
    name: string;
    deleteCustomer(id: number): void;
}

var c: Customer;
c('Rajesh Gunasundaram');
c.name = 'Rajesh Gunasundaram';
c.deleteCustomer(101);
Inheritance
Inheritance is the concept of inheriting behaviors from another class or object. It helps to achieve code reusability and build a hierarchy in relationships of classes or objects. Also, inheritance helps you to cast similar classes.
JavaScript, by targeting ES5, doesn't support classes, and so class inheritance is impossible to implement. However, we can implement prototype inheritance instead of class inheritance. Let's explore inheritance in ES5 with examples.
First, create a function named Animal as follows:
var Animal = function() {

    this.sleep = function() {
       console.log('sleeping');
   }

    this.eat = function() {
       console.log('eating');
   }
}
Here, we created a function named Animal with two methods: sleep and eat. Now, let's extend this Animal function using the prototype as follows:
Animal.prototype.bark = function() {
    console.log('barking');
}
Now, we can create an instance of Animal and call the extended function, bark, as follows:
var a = new Animal();
a.bark();
We can use the Object.Create method to clone a prototype of the parent and create a child object. Then, we can extend the child object by adding methods. Let's create an object named Dog and inherit it from Animal:
var Dog = function() {
    this.bark = new function() {
       console.log('barking');
   }
}
Now, let's clone the prototype of Animal and inherit all the behavior in the Dog function. Then, we can call the Animal method using the Dog instance, as follows:
Dog.prototype = Object.create(animal.prototype);
var d = new Dog();
d.sleep();
d.eat();
Inheritance in TypeScript
We just saw how to implement an inheritance in JavaScript using a prototype. Now, we will see how an inheritance can be implemented in TypeScript, which is basically ES6 inheritance.
In TypeScript, similar to extending interfaces, we can also extend a class by inheriting another class, as follows:
class SimpleCalculator {
   z: number;
    constructor() { }
   addition(x: number, y: number) {
        this.z = this.x + this.y;
   }
    subtraction(x: number, y: number) {
        this.z = this.x - this.y;
   }
}

class ComplexCalculator extends SimpleCalculator {
    constructor() { super(); }
   multiplication(x: number, y: number) {
        this.z = x * y;
   }
    division(x: number, y: number) {
        this.z = x / y;
   }
}
var calculator = new ComplexCalculator();
calculator.addition(10, 20);
calculator.Substraction(20, 10);
calculator.multiplication(10, 20);
calculator.division(20, 10);
Here, we are able to access the methods of SimpleCalculator using the instance of ComplexCalculator as it extends SimpleCalculator.
Private and public modifiers
In TypeScript, all members in a class are public by default. We have to add the private keyword explicitly to control the visibility of the members, and this useful feature is not available in JavaScript:
class SimpleCalculator {
    private x: number;
    private y: number;
    z: number;
    constructor(x: number, y: number) {
       this.x = x;
       this.y = y;
    }
    addition() {
        this.z = this.x + this.y;
   }
   subtraction() {
        this.z = this.x - this.y;
   }
}

class ComplexCalculator {
    z: number;
    constructor(private x: number, private y: number) { }
    multiplication() {
       this.z = this.x * this.y;
   }
    division() {
        this.z = this.x / this.y;
   }
}
Note that in the SimpleCalculator class, we defined x and y as private properties, which will not be visible outside the class. In ComplexCalculator, we defined x and y using parameter properties. These Parameter properties will enable us to create and initialize a member in one statement. Here, x and y are created and initialized in the constructor itself without writing any further statements inside it.
Accessors
We can also implement getters and setters to the properties to control accessing them from the client. We can intercept a process before setting a value to a property variable or before getting a value of the property variable:
var updateCustomerNameAllowed = true;
class Customer {
    private _name: string;
    get name: string {
          return this._name;
   }
    set name(newName: string) {
          if (updateCustomerNameAllowed == true) {
               this._name = newName;
          }
          else {
               alert("Error: Updating Customer name not allowed!");
          }
   }
}
Here, the setter for the name property ensures that the customer name can be updated. Otherwise, it shows an alert message to the effect that it is not possible.
Static properties
These properties are not instance-specific and are accessed by a class name instead of using the this keyword:
class Customer {
     static bonusPercentage = 20;
     constructor(public salary: number) {  }

   calculateBonus() {
          return this.salary * Customer.bonusPercentage/100;
     }
}
var customer = new Customer(10000);
var bonus = customer.calculateBonus();
Here, we declared a static variable called bonusPercentage that is accessed using the class name Customer in the calculateBonus method. This bonusPercentage property is not instance-specific.
Modules
JavaScript is a powerful and dynamic language. With dynamic programming in JavaScript, we need to structure and organize the code so that it will make its maintainability easier and also enable us to easily locate the code for a specific functionality. We can organize code by applying a modular pattern. Code can be separated into various modules, and relevant code can be put in each module.
TypeScript made it easier to implement modular programming using the module keyword. Modules enable you to control the scope of variables, code reusability, and encapsulation. TypeScript supports two types of module: internal and external modules.
Namespaces
We can create namespaces in TypeScript using the namespace keyword as follows. All the classes defined under namespace will be scoped under this namespace and will not be attached to the global scope:
namespace Inventory {
      class Product {
             constructor (public name: string, public quantity:
                  number) {   }
      }
      // product is accessible
      var p = new Product('mobile', 101);
}

// Product class is not accessible outside namespace
var p = new Inventory.Product('mobile', 101);
To make the Product class available for access outside the namespace, we need to add an export keyword when defining the Product class, as follows:
module Inventory {
      export class Product {
             constructor (public name: string, public quantity: number) {   }
      }
}

// Product class is now accessible outside namespace
var p = new Inventory.Product('mobile', 101);
We can also share namespaces across files by adding a reference statement at the beginning of the code in the referring files, as follows:
/// <reference path="Inventory.ts" />
Modules
TypeScript also supports modules As we deal with a large number of external JavaScript libraries, this modularity will really help us organize our code. Using the import statement, we can import modules as follows:
Import { inv } from "./Inventory";
var p = new inv.Product('mobile', 101);
Here, we just imported the previously created module, Inventory, created an instance of Product and assigned it to the variable p.
Functions
JavaScript, which follows the ES5 specs, does not support classes and modules. However, we tried to scope variables and modularity using functional programming in JavaScript. Functions are the building blocks of an application in JavaScript.
Though TypeScript supports classes and modules, functions play a key role in defining a specific logic. We can define both named functions and anonymous functions in JavaScript as follows:
//Named function
function multiply(a, b) {
    return a * b;
}

//Anonymous function
var result = function(a, b) { return a * b; };
In TypeScript, we define functions with the type of the parameters and the return type using function arrow notation, which is also supported in ES6, as follows:
var multiply:(a: number, b: number) => number =
          function(a: number, b: number): number { return a * b; };
Optional and default parameters
Say, for example, we have a function with three parameters, and sometimes we may only pass values for the first two parameters in the function. In TypeScript, we can handle such scenarios using the optional parameter. We can define the first two parameters as normal and the third parameter as optional, as given in the following code snippet:
function CustomerName(firstName: string, lastName: string, middleName?: string) {
    if (middleName)
        return firstName + " " + middleName + " " + lastName;
    else
        return firstName + " " + lastName;
}
//ignored optional parameter middleName
var customer1 = customerName("Rajesh", "Gunasundaram");
//error, supplied too many parameters
var customer2 = customerName("Scott", "Tiger", "Lion", "King");
//supplied values for all
var customer3 = customerName("Scott", "Tiger", "Lion");
Here, middleName is the optional parameter, and it can be ignored when calling the function.
Now, let's see how to set default parameters in a function. If a value is not supplied to a parameter in the function, we can define it to take the default value that is configured:
function CustomerName(firstName: string, lastName: string, middleName:
     string = 'No Middle Name') {
    if (middleName)
        return firstName + " " + middleName + " " + lastName;
    else
        return firstName + " " + lastName;
}
Here, middleName is the default parameter that will have No Middle Name by default if the value is not supplied by the caller.
Rest parameter
Using the rest parameter, you can pass an array of values to the function. This can be used in scenarios where you are not sure about how many values will be supplied to the function:
function clientName(firstClient: string, ...restOfClient: string[]) {
   console.log(firstClient + " " + restOfClient.join(" "));
}
clientName ("Scott", "Steve", "Bill", "Sergey", "Larry");
Here, note that the restOfClient rest parameter is prefixed with an ellipsis (...), and it can hold an array of strings. In the caller of the function, only the value of the first parameter that is supplied will be assigned to the firstClient parameter, and the remaining values will be assigned to restOfClient as array values.
Generics
Generics are very useful for developing reusable components that can work against any data type. So, the client that consumes this component will decide what type of data it should act upon. Let's create a simple function that returns whatever data is passed to it:
function returnNumberReceived(arg: number): number {
    return arg;
}
unction returnStringReceived(arg: string): string {
    return arg;
}
As you can see, we need individual methods to process each data type. We can implement them in a single function using the any data type, as follows:
function returnAnythingReceived (arg: any): any {
    return arg;
}
This is similar to generics. However, we don't have control over the return type. If we pass a number and we can't predict whether the number will be returned or not by the function, the return type can be of any type.
Generics offers a special variable of type T. Applying this type to the function as follows enables the client to pass the data type they would like this function to process:
function returnWhatReceived<T>(arg: T): T {
    return arg;
}
So, the client can call this function for various data types as follows:
var stringOutput = returnWhatReceived<string>("return this");
// type of output will be 'string'
var numberOutput = returnWhatReceived<number>(101);
// type of output will be number
Generic interfaces
We can also define generic interfaces using the T type variable, as follows:
interface GenericFunc<T> {
    (arg: T): T;
}
function func<T>(arg: T): T {
    return arg;
}
var myFunc: GenericFunc<number> = func;
Here, we defined a generic interface and the myFunc variable of the GenericFunc type, passing the number data type for the T type variable. Then, this variable is assigned with a function named func.
Generic classes
Similar to generic interfaces, we can also define generic classes. We define classes with a generic type in angle brackets (<>) as follows:
class GenericClass<T> {
    add: (a: T, b: T) => T;
}

var myGenericClass = new GenericClass<number>();
myGenericClass.add = function(a, b) { return a + b; };
Here, the generic class is instantiated by passing the generic data type as number. So, the add function will process and add two variables of type number passed as parameters.
Decorators
Decorators enable us to extend a class or object by adding behaviors without modifying code. Decorators wrap the class with extra functionality. Decorators can be attached to a class, property, method, parameter, and accessor. In ECMAScript 2016, decorators are proposed to modify the behavior of a class. Decorators are prefixed with the @ symbol and a decorator name that resolves to a function called at runtime.
The following code snippet shows the authorize function, and it can be used as the @authorize decorator on any other class:
function authorize(target) {
    // check the authorization of the use to access the "target"
}
Class decorators
Class decorators are declared above the class declaration. Class decorators can observe, modify, and replace a class' definition that it is decorated by applying to the constructor of that class. The signature of ClassDecorator in TypeScript is as follows:
declare type ClassDecorator = <TFunction extends Function>(target:
      TFunction) => TFunction | void;
Consider a Customer class; we would like that class to be frozen. Its existing properties should not be removed or new properties should not be added.
We can create a separate class that can take any object and freeze it. We can then decorate the customer class with @freezed to prevent adding new properties or removing the existing properties from the class:
@freezed
class Customer {

  public firstName: string;
  public lastName: string;

  constructor(firstName : string, lastName : string) {
    this.firstName = firstName;
    this.lastName = lastName;
  }
}
The preceding class takes four arguments in the firstname and lastname constructors. The following are the code snippets of the function written for the @freezed decorator:
function freezed(target: any) {
    Object.freeze(target);
}
Here, the freezed decorator takes target, which is the Customer class that is being decorated, and freezes it when it gets executed.
Method decorators
Method decorators are declared before the method declaration. This decorator is used to modify, observe, or replace a method definition and is applied to the property descriptor for the method. The following code snippet shows a simple class with an applied method decorator:
class Hello {
    @logging
    increment(n: number) {
        return n++;
   }
}
The Hello class has the increment method that increments a number supplied to its parameter. Note that the increment method is decorated with the @logging decorator to log input and output of the increment method. The following is the code snippet of the logging function:
function logging(target: Object, key: string, value: any) {

        value.value = function (...args: any[]) {
            var result = value.apply(this, args);
            console.log(JSON.stringify(args));
            return result;
        }
    };
}
The method decorator function takes three arguments: target, key, and value. target holds the method that is being decorated; key holds the name of the method being decorated; and value is the property descriptor of the specified property if it exists on the object.
The logging method gets invoked when the increment method is called and it logs the value to the console.
Accessor decorators
Accessor decorators are prefixed before the accessor declaration. These decorators are used to observe, modify, or replace an accessor definition and are applied to the property descriptor. The following code snippet shows a simple class with the applied accessor decorator applied:
class Customer {
  private _firstname: string;
  private _lastname: string;

  constructor(firstname: string, lastname: string) {
        this._firstname = firstname;
        this._lastname = lastname;
  }

  @logging(false)
  get firstname() { return this._firstname; }

  @logging(false)
  get lastname() { return this._lastname; }
}
In this class, we decorate the get accessor of firstname and lastname with @logging and pass boolean to enable or disable logging. The following code snippet shows the function for the @logging decorator:
function logging(value: boolean) {
    return function (target: any, propertyKey: string, descriptor:
                PropertyDescriptor) {
        descriptor.logging = value;
    };
}
The logging function sets the Boolean value to the logging property descriptor.
Property decorators
Property decorators are prefixed to property declarations. They actually redefine the property decorated by adding extra behavior. The signature of PropertyDecorator in the TypeScript source code is as follows:
declare type PropertyDecorator = (target: Object, propertyKey: string |
    symbol) => void;
The following is a code snippet of a class with a property decorator applied to a property:
class Customer {
  @hashify
  public firstname: string;
  public lastname: string;

  constructor(firstname : string, lastname : string) {
    this.firstname = firstname;
    this.lastname = lastname;
  }
}
In this code, the firstname property is decorated with the @hashify property decorator. Now, we will see the code snippet of the @hashify property decorator function:
function hashify(target: any, key: string) {
  var _value = this[key];

  var getter = function () {
        return '#' + _value;
  };

  var setter = function (newValue) {
    _value = newValue;
  };

  if (delete this[key]) {
    Object.defineProperty(target, key, {
      get: getter,
      set: setter,
      enumerable: true,
      configurable: true
    });
  }
}
The _value holds the value of the property that is being decorated. Both getter and setter functions will have access to the variable _value and here we can manipulate the _value by adding extra behaviors. I have concatenated # in the getter to return a hash-tagged firstname. Then we delete the original property from the class prototype using the delete operator. A new property will be created with the original property name with the extra behavior.
Parameter decorators
Parameter decorators are prefixed to parameter declarations, and they are applied to a function for a class constructor or a method declaration. The signature of ParameterDecorator is as follows:
declare type ParameterDecorator = (target: Object, propertyKey:
   string | symbol, parameterIndex: number) => void;
Now, let's define the Customer class and use a parameter decorator to decorate a parameter in order to make it required and validate whether the value has been served:
class Customer {
    constructor() {  }

    getName(@logging name: string) {
        return name;
   }
}
Here, the name parameter has been decorated with @logging. The parameter decorator implicitly takes three inputs, namely prototype of the class that has this decorator, the name of the method that has this decorator, and the index of the parameter that is being decorated. The logging function implementation of the parameter decorator is as follows:
function logging(target: any, key : string, index : number) {

  console.log(target);
  console.log(key);
  console.log(index);
}
Here, target is the class that has the decorator, key is the function name, and index contains the parameter index. This code just logs target, key, and index to the console.
Building a simple application
I assume that you have installed Node.js, npm, and Visual Studio Code and are ready to use them for development. Now let us create an Angular application by cloning the Git repository and performing the following steps:
- Open the Node.Js command prompt and execute the following command:
git clone https://github.com/angular/quickstart my-angular
Open the cloned my-angular application using Visual Studio Code. This command will clone the Angular quickstart repository and creates an Angular application named my-angular for you with all the boilerplate codes required.
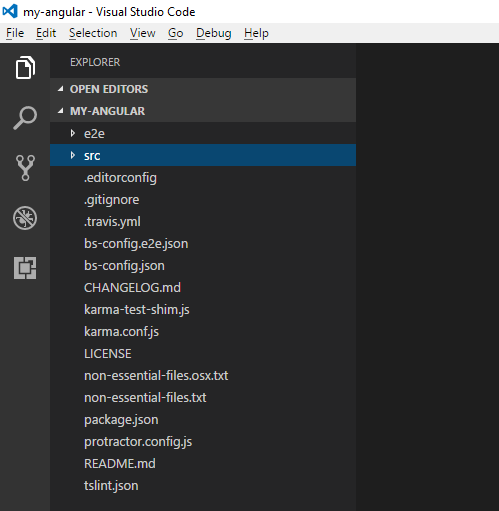
The folder structure and the boilerplate code are organized according to the official style guide in https://angular.io/docs/ts/latest/guide/style-guide.html. The src folder has the code files related to application logic, and the e2e folder has the files related to end-to-end testing. Don't worry about other files in the application now. Let's focus on package.json for now
- Click on the package.json file, and it will have information about the configurations of the metadata and project dependencies. Here is the content of the package.json file:
{
   "name":"angular-quickstart",
   "version":"1.0.0",
   "description":"QuickStart   package.json from the documentation,
         supplemented with testing support",
   "scripts":{
      "build":"tsc   -p src/",
      "build:watch":"tsc   -p src/ -w",
      "build:e2e":"tsc   -p e2e/",
      "serve":"lite-server   -c=bs-config.json",
      "serve:e2e":"lite-server   -c=bs-config.e2e.json",
      "prestart":"npm   run build",
      "start":"concurrently   \"npm run build:watch\" \"npm run
            serve\"",
      "pree2e":"npm   run build:e2e",
      "e2e":"concurrently   \"npm run serve:e2e\" \"npm run
            protractor\" --kill-others   --success first",
      "preprotractor":"webdriver-manager   update",
      "protractor":"protractor   protractor.config.js",
      "pretest":"npm   run build",
      "test":"concurrently   \"npm run build:watch\" \"karma start
           karma.conf.js\"",
      "pretest:once":"npm   run build",
      "test:once":"karma   start karma.conf.js --single-run",
      "lint":"tslint   ./src/**/*.ts -t verbose"
   },
   "keywords":[

   ],
   "author":"",
   "license":"MIT",
   "dependencies":{
      "@angular/common":"~4.0.0",
      "@angular/compiler":"~4.0.0",
      "@angular/core":"~4.0.0",
      "@angular/forms":"~4.0.0",
      "@angular/http":"~4.0.0",
      "@angular/platform-browser":"~4.0.0",
      "@angular/platform-browser-dynamic":"~4.0.0",
      "@angular/router":"~4.0.0",
      "angular-in-memory-web-api":"~0.3.0",
      "systemjs":"0.19.40",
      "core-js":"^2.4.1",
      "rxjs":"5.0.1",
      "zone.js":"^0.8.4"
   },
   "devDependencies":{
      "concurrently":"^3.2.0",
      "lite-server":"^2.2.2",
      "typescript":"~2.1.0",
      "canonical-path":"0.0.2",
      "tslint":"^3.15.1",
      "lodash":"^4.16.4",
      "jasmine-core":"~2.4.1",
      "karma":"^1.3.0",
      "karma-chrome-launcher":"^2.0.0",
      "karma-cli":"^1.0.1",
      "karma-jasmine":"^1.0.2",
      "karma-jasmine-html-reporter":"^0.2.2",
      "protractor":"~4.0.14",
      "rimraf":"^2.5.4",
      "@types/node":"^6.0.46",
      "@types/jasmine":"2.5.36"
   },
   "repository":{

   }
}
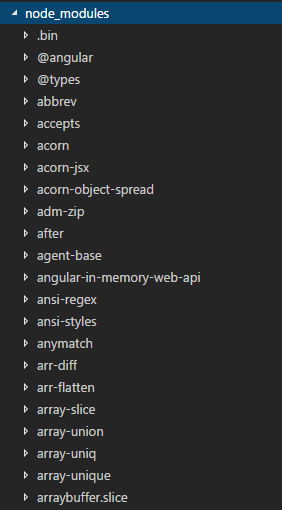
- Now we need to run the npm install command in a command window, navigating to the application folder to install the required dependencies specified in package.json:

Now, you will have all the dependencies added to the project under the node_modules folder, as shown in this screenshot:
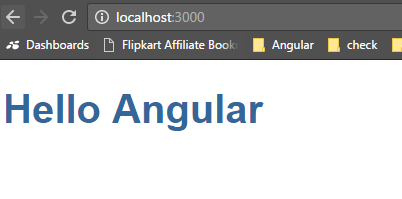
- Now, let's run this application. To run it, execute the following command in the command window:
npm start
Running this command builds the application, starts the lite server, and hosts the application onto it.
Open any browser and navigate to http://localhost:3000/; and you will get the following page displayed, which is rendered through our Angular application:
Let's now walk through the content of index.html. Here is the content of index.html:
<!DOCTYPE html>
<html>
<head>
<title>Hello Angular 4</title>
<base href="/">
<meta charset="UTF-8">
<meta name="viewport" content="width=device-width,                  initial-scale=1">
<link rel="stylesheet" href="styles.css">
<!-- Polyfill(s) for older browsers -->
<script src="node_modules/core-
                js/client/shim.min.js">
      </script>
<script
         src="node_modules/zone.js/dist/zone.js">
      </script>
<script
         src="node_modules/systemjs/dist/system.src.js">
      </script>
<script src="systemjs.config.js"></script>
<script>
            System.import('main.js').catch(function(err){
              console.error(err); });
         </script>

</head>
<body>
<my-app>My first Angular 4   app for Packt
               Publishing...</my-app>
</body>
</html>
Notice that scripts are loaded using System.js. System.js is the module loader that loads modules during runtime.
Voila! Finally, our first Angular app is up-and-running. So far, we have seen how to create an Angular application by cloning the official quickstart repository from GitHub. We ran the application and saw it in the browser successfully.
Summary
Wow! This has been a great introduction, hasn't it? We started by learning about Angular's architecture. We discussed various artifacts of Angular's architecture. Then we dived into the basics of TypeScript. We have seen basic types with examples. We have also learned about writing classes, using interfaces, and implementing them in classes. We have also learned about inheritance.
We have learned about structuring our code by using modules and namespaces. We have also covered some advanced topics of TypeScript such as modifiers, accessors, static properties, generics, and decorators
And finally, we created a simple application using Angular and TypeScript. This chapter has equipped you with what you need to develop Angular applications using TypeScript with the syntactic sugar it has provided.
In the next chapter, we will discuss migrating AngularJS apps to Angular.