


Creating a velocity vector
Let’s start this exercise off by opening the project file from Figure 16.18 in Chapter 16, where we created a Point Emitter with Points falling down at a constant speed.
This time, we will rework our node tree to have a velocity vector, which allows a more realistic effect of gravity.
Let’s start this chapter off by adding a velocity vector, which we will do by utilizing a Store Named Attribute node, just like we used for our age attribute.
Let’s add in a Store Named Attribute node right before our Join Geometry node. Let’s also set the datatype of this node to Vector, because our velocity will consist of an X, Y, and Z axis. Let’s name our attribute vel, as seen in Figure 17.2.
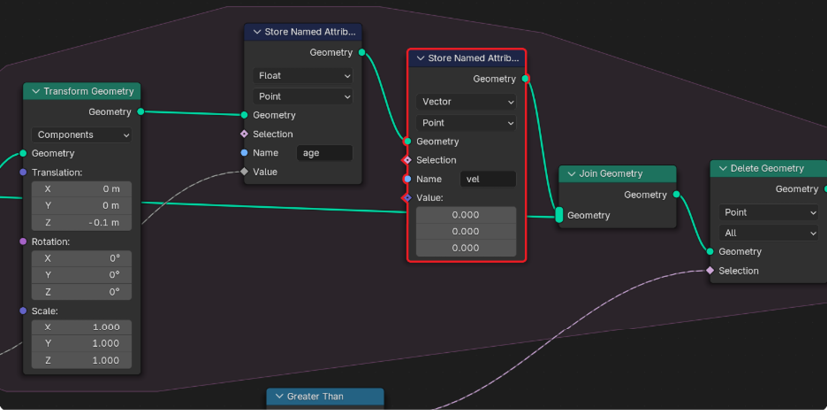
Figure 17.2: Settings for the Store Named Attribute node
The idea is that we want to lower the Z velocity of each point per frame by a certain value.
Note
Our named attribute called vel stands for velocity...


