


Getting ready for your first cluster
Before we start creating clusters, we should install a couple of tools such as the Docker client and kubectl. These days, the most convenient way to install Docker and kubectl on Mac and Windows is via Rancher Desktop. If you already have them installed, feel free to skip this section.
Installing Rancher Desktop
Rancher Desktop is a cross-platform desktop application that lets you run Docker on your local machine. It will install additional tools such as:
- Helm
- Kubectl
- Nerdctl
- Moby (open source Docker)
- Docker Compose
Installation on macOS
The most streamlined way to install Rancher Desktop on macOS is via Homebrew:
brew install --cask rancher
Installation on Windows
The most streamlined way to install Rancher Desktop on Windows is via Chocolatey:
choco install rancher-desktop
Additional installation methods
For alternative methods to install Docker Desktop, follow the instructions here:
https://docs.rancherdesktop.io/getting-started/installation/
Let’s verify docker was installed correctly. Type the following commands and make sure you don’t see any errors (the output doesn’t have to be identical if you installed a different version than mine):
$ docker version
Client:
 Version:           20.10.9
 API version:       1.41
 Go version:        go1.16.8
 Git commit:        c2ea9bc
 Built:             Thu Nov 18 21:17:06 2021
 OS/Arch:           darwin/arm64
 Context:           rancher-desktop
 Experimental:      true
Server:
 Engine:
  Version:          20.10.14
  API version:      1.41 (minimum version 1.12)
  Go version:       go1.17.9
  Git commit:       87a90dc786bda134c9eb02adbae2c6a7342fb7f6
  Built:            Fri Apr 15 00:05:05 2022
  OS/Arch:          linux/arm64
  Experimental:     false
 containerd:
  Version:          v1.5.11
  GitCommit:        3df54a852345ae127d1fa3092b95168e4a88e2f8
 runc:
  Version:          1.0.2
  GitCommit:        52b36a2dd837e8462de8e01458bf02cf9eea47dd
 docker-init:
  Version:          0.19.0
  GitCommit:
And, while we’re at it, let’s verify kubectl has been installed correctly too:
$ kubectl version
Client Version: version.Info{Major:"1", Minor:"23", GitVersion:"v1.23.4", GitCommit:"e6c093d87ea4cbb530a7b2ae91e54c0842d8308a", GitTreeState:"clean", BuildDate:"2022-02-16T12:38:05Z", GoVersion:"go1.17.7", Compiler:"gc", Platform:"darwin/amd64"}
Server Version: version.Info{Major:"1", Minor:"23", GitVersion:"v1.23.6+k3s1", GitCommit:"418c3fa858b69b12b9cefbcff0526f666a6236b9", GitTreeState:"clean", BuildDate:"2022-04-28T22:16:58Z", GoVersion:"go1.17.5", Compiler:"gc", Platform:"linux/arm64"}
The Server section may be empty if no active Kubernetes server is up and running. When you see this output, you can rest assured that kubectl is ready to go.
Meet kubectl
Before we start creating clusters, let’s talk about kubectl. It is the official Kubernetes CLI, and it interacts with your Kubernetes cluster’s API server via its API. It is configured by default using the ~/.kube/config file, which is a YAML file that contains metadata, connection info, and authentication tokens or certificates for one or more clusters. Kubectl provides commands to view your configuration and switch between clusters if it contains more than one. You can also point kubectl at a different config file by setting the KUBECONFIG environment variable or passing the --kubeconfig command-line flag.
The code below uses a kubectl command to check the pods in the kube-system namespace of the current active cluster:
$ kubectl get pods -n kube-system
NAME                                      READY   STATUS    RESTARTS         AGE
svclb-traefik-fv84n                       2/2     Running   6 (7d20h ago)    8d
local-path-provisioner-84bb864455-s2xmp   1/1     Running   20 (7d20h ago)   27d
metrics-server-ff9dbcb6c-lsffr            0/1     Running   88 (10h ago)     27d
coredns-d76bd69b-mc6cn                    1/1     Running   11 (22h ago)     8d
traefik-df4ff85d6-2fskv                   1/1     Running   7 (3d ago)       8d
Kubectl is great, but it is not the only game in town. Let’s look at some alternative tools.
Kubectl alternatives – K9S, KUI, and Lens
Kubectl is a no-nonsense command-line tool. It is very powerful, but it may be difficult or less convenient for some people to visually parse its output or remember all the flags and options. There are many tools the community developed that can replace (or more like complement) kubectl. The best ones, in my opinion, are K9S, KUI, and Lens.
K9S
K9S is a terminal-based UI for managing Kubernetes clusters. It has a lot of shortcuts and aggregated views that will require multiple kubectl commands to accomplish.
Here is what the K9S window looks like:
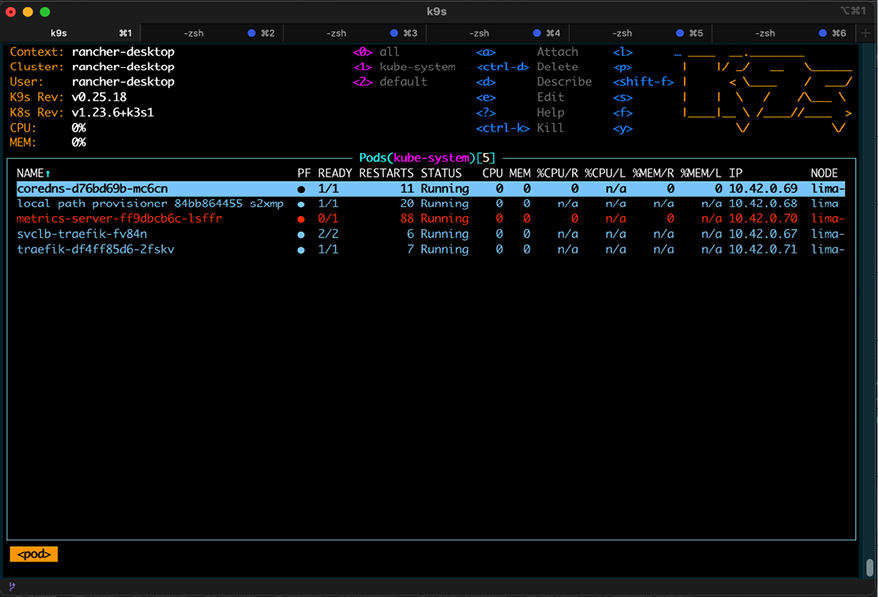
Figure 2.1: K9S window
Check it out here: https://k9scli.io
KUI
KUI is a framework for adding graphics to CLIs (command-line interfaces). This is a very interesting concept. KUI is focused on Kubernetes of course. It lets you run Kubectl commands and returns the results as graphics. KUI also collects a lot of relevant information and presents it in a concise way with tabs and detail panes to explore even deeper.
KUI is based on Electron, but it is fast.
Here is what the KUI window looks like:
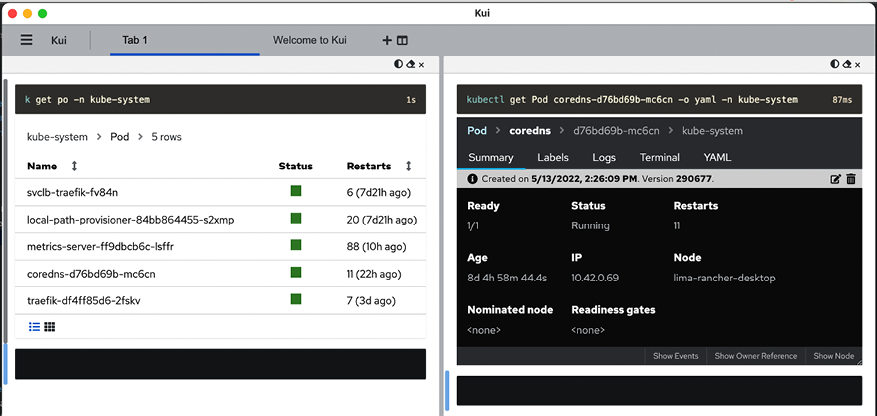
Figure 2.2: KUI window
Check it out here: https://kui.tools
Lens
Lens is a very polished application. It also presents a graphical view of clusters and allows you to perform a lot of operations from the UI and drop to a terminal interface when necessary. I especially appreciate the ability to work easily with multiple clusters that Lens provides.
Here is what the Lens window looks like:
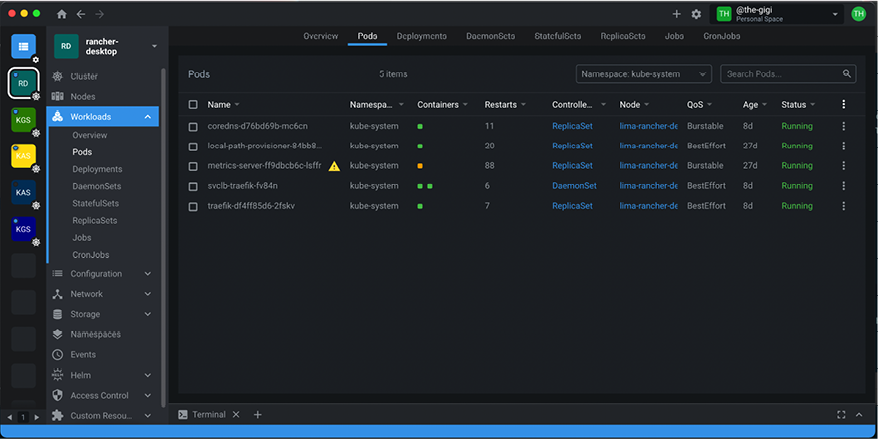
Figure 2.3: Lens window
Check it out here: https://k8slens.dev
All these tools are running locally. I highly recommend that you start playing with kubectl and then give these tools a test drive. One of them may just be your speed.
In this section, we covered the installation of Rancher Desktop, introduced kubectl, and looked at some alternatives. We are now ready to create our first Kubernetes cluster.


