


If you are reading this book, you probably already have a deep love for C#, .NET, and tools like Microsoft Visual Studio. Mobile development with the native SDKs seems daunting when you think about the work of learning a new platform, a new IDE, new application models, and perhaps a programming language or two. Xamarin aims to delight .NET developers with the tools for developing native iOS, Android, and Mac applications in C#.
There are many advantages of choosing Xamarin to develop mobile applications instead of Java on Android and Objective-C/Swift on iOS. You can share code between both of these platforms and you can be more productive by taking advantage of the advanced language features of C# and the .NET base class libraries. Alternatively, you would have to write an entire application, twice, for both Android and iOS.
In comparison with other techniques for developing cross-platform applications with JavaScript and HTML, Xamarin has some distinct advantages. C# is generally more performant than JavaScript, and Xamarin gives developers direct access to the native APIs on each platform. This allows Xamarin applications to have a native look and perform in a manner similar to their Java or Objective-C counterparts. Xamarin's tooling works by compiling your C# into a native ARM executable that can be packaged as an iOS or Android application. It bundles a stripped-down version of the Mono runtime with your application that only includes the features of the base class libraries your app uses.
In this chapter, we'll set up everything you need to get started on developing with Xamarin. By the end of this chapter, we'll have all the proper SDKs and tools installed, and all the developer accounts needed for app-store submission.
In this chapter, we will cover:
An introduction to Xamarin tools and technology
Installing Xcode, Apple's IDE
Setting up all Xamarin tools and software
Connecting Visual Studio to a Mac
Setting up the Android emulator
Enrolling in the iOS developer program
Registering for Google Play
Xamarin has developed three core products for developing cross-platform applications: Xamarin Studio, Xamarin.iOS, and Xamarin.Android. Xamarin Studio is a C# IDE, while Xamarin.iOS and Xamarin.Android are the core tooling that enable C# applications to run on iOS and Android, respectively. These tools allow developers to leverage the native libraries on iOS and Android, and are built on the Mono runtime.
Mono, an open source implementation of C# and the .NET framework, was originally developed by Novell to be used on Linux operating systems. Since iOS and Android are similarly based on Linux, Novell was able to develop MonoTouch and Mono for Android as products to target the new mobile platforms. Shortly after their release, a larger company acquired Novell, and the Mono team left to form a new company aimed primarily at mobile development. Xamarin was founded to focus on these tools for developing with C# on iOS and Android.
Getting a development machine ready for cross-platform application development can take some time. And to make matters worse, Apple and Google both have their own requirements for development on their respective platforms. If you plan on developing on Windows with Visual Studio, your setup will be a bit different than on Mac OS X. Keep in mind that iOS development on Windows requires a Mac on your local network. Let's go over what needs to be installed on your machine.
The building blocks for Xamarin development on Mac OS X are as follows:
Xcode: Apple's core IDE for developing iOS and Mac applications in Objective-C
The Mono runtime for Mac: This is required for compiling and running C# programs on OS X
Java: This is the core runtime for running Java applications on OS X
Android SDK: This contains Google's standard SDK, device drivers, and emulators for native Android development
Xamarin.iOS: This is Xamarin's core product for iOS development
Xamarin.Android: This is Xamarin's core product for Android development
The required software for Xamarin development on Windows are as follows:
Visual Studio or Xamarin Studio: Either IDE will work for Xamarin development on Windows.
.NET Framework 4.5 or later: This comes with Visual Studio or recent versions of Windows.
Java: This is the core runtime for running Java applications on Windows.
Android SDK: This contains Google's standard SDK, device drivers, and emulators for native Android development.
A Mac on your local network set up for Xamarin.iOS development: Apple requires iOS development to be done on OS X as part of their licensing agreement. A Mac will need to be set up for Xamarin.iOS development as listed above.
Xamarin for Windows: This is Xamarin's core product for Windows; it includes both Xamarin.Android and Xamarin.iOS.
Each of these will take some time to download and install. If you can access a fast Internet connection, it will help speed up the installation and setup process. With everything ready to go, let's move ahead step by step and, hopefully, we can skip a few dead ends you might otherwise run into.
To make things progress more smoothly, let's start off by installing Xcode for Mac. Along with Apple's IDE, it will also install the most commonly-used developer tools on the Mac. Make sure you have at least OS X 10.10 (Yosemite), and locate Xcode in the App Store, as shown in the following screenshot:

This will take quite some time to download and install. I'd recommend taking the time to enjoy a nice cup of coffee or working on another project side-by-side.
Installing Xcode installs the iOS SDK, which is a requirement for iOS development in general. As a restriction from Apple, the iOS SDK can only run on a Mac. Xamarin has done everything possible to make sure they follow Apple's guidelines for iOS, such as dynamic code generation. Xamarin's tools also leverage features of Xcode wherever possible to avoid reinventing the wheel.
After installing Xcode, there are several other dependencies that need to be installed, prior to developing with Xamarin's tooling. Luckily, Xamarin has improved the experience by creating a simple all-in-one installer.
Install Xamarin by performing the following steps:
Go to http://xamarin.com and click on the large Download Xamarin button.
Fill out some basic information about yourself and click Download Xamarin Studio for OS X.
Download
XamarinInstaller.dmgand mount the disk image.Launch the
Xamarin.appand accept any OS X security warnings that appear.Progress through the installer; the default options will work fine. You can optionally install
Xamarin.Mac, but that topic is not covered in this book.
The Xamarin installer will download and install prerequisites such as the Mono runtime, Java, the Android SDK (including the Android emulator and tools), and everything else you need to be up and running.
You will end up with something similar to what is shown in the following screenshot, and we can move on to conquer bigger topics in cross-platform development:

The Android emulator has historically been known to be sluggish compared to developing on a physical device. To help solve this issue, Google has produced an x86 emulator that supports hardware acceleration on desktop computers. It isn't installed by default in the Android Virtual Device (AVD) Manager, so let's set that up.
The x86 Android emulator can be installed by performing the following steps:
Open Xamarin Studio.
Launch Tools | Open Android SDK Manager....
Scroll down to Extras; install Intel x86 Emulator Accelerator (HAXM Installer).
Scroll to Android 6.0 (API 23); install Intel x86 Atom System Image.
Optionally, install any other packages you are interested in. At the minimum, make sure you have everything that the Android SDK Manager selects for you to install by default.
Close the Android SDK Manager and navigate to your Android SDK directory, by default located at
~/Library/Developer/Xamarin/android-sdk-macosx.Navigate to
extras/intel/Hardware_Accelerated_Execution_Managerand launchIntelHAXM_6.0.3.dmgto install the HAXM driver.Switch back to Xamarin Studio and launch Tools | Open Google Emulator Manager....
Click on Create....
Enter an AVD name of your choice, such as
x86 Emulator.Pick a generic device that will be appropriately sized for your display, such as the Nexus 5.
As CPU/ABI, make sure you select an option that supports Intel Atom (x86).
After creating the device, go ahead and click on Start... to make sure the emulator runs properly.
Tip
These instructions should be very similar on Windows. By default, the Android SDK is installed at C:\Program Files (x86)\Android\android-sdk on Windows. Likewise, the HAXM installer is named intelhaxm-android.exe on Windows.
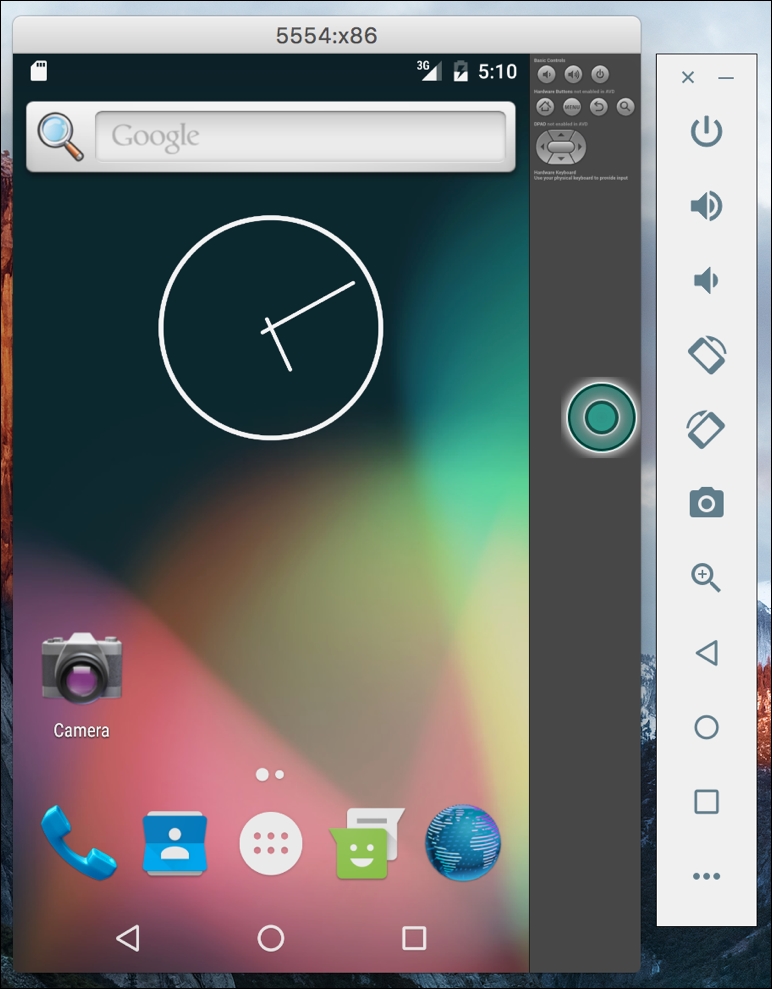
The emulator will take some time to start up, so it is a good idea to leave the emulator running while working on an Android project. Xamarin is using the standard Android tools here, so even Java developers feel the pain of the sluggish emulator. If everything starts properly, you will see an Android boot screen followed by a virtual Android device ready for deploying applications from Xamarin Studio, as shown in the following screenshot:
There are many options out there for Android emulators, such as Genymotion or Visual Studio Android Emulator. Using Xamarin will not limit your choices in Android emulators, so feel free to experiment if the default Android emulator isn't working for you.
Since Microsoft acquired Xamarin in 2016, Xamarin is included with any edition of Visual Studio. The editions are as follows:
Visual Studio Community: This is a free version available to anyone. There are restrictions for using this edition for companies.
Visual Studio Professional: This is the general edition companies should use. On the Visual Studio side, it includes features for Team Foundation Server.
Visual Studio Enterprise: Contains additional features in both Visual Studio and Xamarin. Xamarin features include embedded assemblies, the live Xamarin Inspector, and the Xamarin profiler.
When first setting up a Windows PC for Xamarin development, there are two choices to consider. If you already have Visual Studio, then you can merely use the Xamarin installer to add the necessary Visual Studio extensions and item templates to your existing installation. If you do not have Visual Studio installed yet, then there is simply an option in the Visual Studio 2015 installer for installing Xamarin.
If you want to install from the Visual Studio installer:
Download your desired version of Visual Studio from https://www.visualstudio.com/downloads/.
Run the Visual Studio installer.
Under Cross Platform Mobile Development, make sure to select C#/.NET (Xamarin v4.1.0) (the version number will change according to the version you use). This should automatically select the Android SDK and other components you will need for Xamarin development.
You may also choose to install other useful tools such as Microsoft Web Developer Tools or Universal Windows App Development tools for targeting Windows 10.
Your installer should look something like this before you click Next:

The second option for installing Xamarin is from Xamarin's website:
Download the Xamarin installer for Windows from https://xamarin.com/download.
Run
XamarinInstaller.exe, which will download and install all required components on your PC.
The Xamarin installer is a very similar experience to what you see on Mac OS X, and should be very straightforward. It will add Xamarin to an existing Visual Studio installation if needed and install Xamarin Studio.
iOS development requires Xcode running on Mac OS X. Luckily, Xamarin has made remote development possible from a Windows PC.
To connect your PC to a Mac:
First open or create a Xamarin.iOS project.
Visual Studio will automatically prompt Xamarin Mac Agent Instructions.
Follow the detailed instructions and screenshots in Visual Studio to enable remote login on your Mac.
A Xamarin Mac Agent dialog should appear with your Mac's address listed.
Click Connect... and enter your username and password for your Mac.
When connected, you should see something like the following screenshot:

Once connected, you can simply press the play button to debug your project against the iOS simulator or an iOS device of your choice. All the features in Visual Studio you expect will also work with iOS development: break points, mouse-over evaluation, add watch, and so on.
To deploy to an iOS device, Apple requires membership to its iOS Developer Program. Membership is $99 USD per year and gives you access to deploy 200 devices for development purposes. You also get access to test servers for implementing more advanced iOS features such as in-app purchases, push notifications, and iOS Game Center. Testing your Xamarin.iOS applications on a physical device is important, so I recommend that you get an account prior to starting iOS development. Performance is very different in a simulator running on your desktop versus a real mobile device. There are also a few Xamarin-specific optimizations that only occur when running on a real device. We'll fully cover the reasons for testing your apps on devices in later chapters.
Tip
Since iOS 9, Apple has created a way to sideload apps from iOS devices from any Apple ID. It is recommended only to be used for testing purposes on a few devices, and there is no way to test advanced features such as in-app purchases or push notifications. If you are just toying with iOS, however; it is a good way to get started without paying the $99 developer fee.
Signing up for the iOS developer program can be performed through the following steps:
Click on Enroll.
Sign in with an existing iTunes account or create a new one. This can't be changed later, so choose the one that is appropriate for your company.
Enroll either as an individual or a company. Both are priced at $99, but registering as a company will require paperwork to be faxed to Apple with the assistance of your company's accountant.
Review the developer agreement.
Fill out Apple's survey for developers.
Purchase the $99 developer registration.
Wait for a confirmation e-mail.
You should receive an e-mail that looks something like the following screenshot within two business days:

From here, you can continue setting up your account:
Either click on Log in now from the e-mail you received or go to https://itunesconnect.apple.com.
Log in with your iTunes account.
Agree to any additional agreements that appear on the home page of your dashboard.
From the iTunes Connect dashboard, go to Agreements, Tax, and Banking.
In this section, you will see three columns, for Contact Info, Bank Info, and Tax Info.
Fill out the appropriate information for your account in all of these sections. Assistance from an accountant will most likely be needed for a company account.
When all is said and done, your Agreements, Tax, and Banking section should look something like the following screenshot:

With your iOS developer account successfully registered, you will now be able to deploy to iOS devices and publish your apps to the Apple App Store.
Unlike iOS, deploying your applications to Android devices is free and only requires a few changes in your device settings. A Google Play developer account has only a one-time fee of $25 and doesn't have to be renewed each year. However, just like iOS, you will need a Google Play account to develop in-app purchases, push notifications, or Google Play Game Services. I would recommend setting up an account ahead of time if you inevitably plan on submitting an app to Google Play or need to implement one of these features.
To register as a developer for Google Play, perform the following steps:
Log in with an existing Google account, or create a new one. This can't be changed later, so choose the one that is appropriate for your company, if needed.
Accept the agreement and enter your credit card information.
Choose a developer name and enter other important information for your account. Again, choose names appropriate for your company to be seen by users in the app store.
If you get everything filled out correctly, you will end up with the following Google Play Developer Console:

If you plan on selling paid apps or in-app purchases, at this point, I would recommend setting up your Google Merchant Account. This will enable Google to pay you the proceeds toward your app sales by applying the appropriate tax laws in your country. If setting this up for your company, I would recommend getting the assistance of your company's accountant or bookkeeper.
The following are the steps to set up a Google Merchant Account:
Click on the set up a merchant account button.
Log in with your Google account a second time.
Fill out the appropriate information for selling apps: address, phone number, tax information, and a display name to appear on your customers' credit card bills.
When done, you will notice that the help tip for setting up a merchant account is now missing from the developer console, as shown in the following screenshot:

At this point, one would think our account would be fully set up, but there is one more crucial step prior to being able to sell apps: we have to enter the banking information.
Setting up banking for your Google Merchant Account can be performed with the following steps:
Go back to the Google Play Developer Console at https://play.google.com/apps/publish.
Click on the Financial Reports section.
Click on the small link titled Visit your merchant account for details.
You should see a warning indicating that you do not have a bank account set up. Click on the Specify a Bank Account link to get started.
Enter your banking information. Again, a company accountant might be needed.
In a few days, look for a small deposit in your account from Google.
Confirm the amount by going to http://checkout.google.com/sell.
Click on the Settings tab, then Financials.
Next, click on Verify Account.
Enter the amount that appeared in your bank account and click on Verify deposit.
Your Google Merchant Account is also the place where you can cancel or refund customer orders. Google Play is different from the iOS App Store in that all customer issues are directed to the developers.
In this chapter, we discussed Xamarin's core products for developing Android and iOS applications in C# whether you are using Mac OS X or a Windows PC. We installed Xcode and then ran the Xamarin all-in-one installer, which installs Java, the Android SDK, Xamarin Studio, Xamarin.iOS, and Xamarin.Android. On Windows, we set up Xamarin for use inside Visual Studio and connected a Mac on our local network for iOS development. We set up the x86 Android emulator for a faster, more fluid experience when debugging applications. Finally, we set up iOS and Google Play developer accounts for distributing our applications.
In this chapter, you should have acquired everything you need to get started on building cross-platform applications with Xamarin. Your development computer should be ready to go and you should have all the native SDKs installed and ready for creating the next great app to take the world by storm.
The concepts in this chapter will set us up for more advanced topics, which will require the proper software installed as well as developer accounts with Apple and Google. We will be deploying applications to real devices and implementing more advanced features such as push notifications. In the following chapter, we'll create our first iOS and Android application and cover the basics of each platform.
