Home Game Development Unity 2020 Mobile Game Development - Second Edition

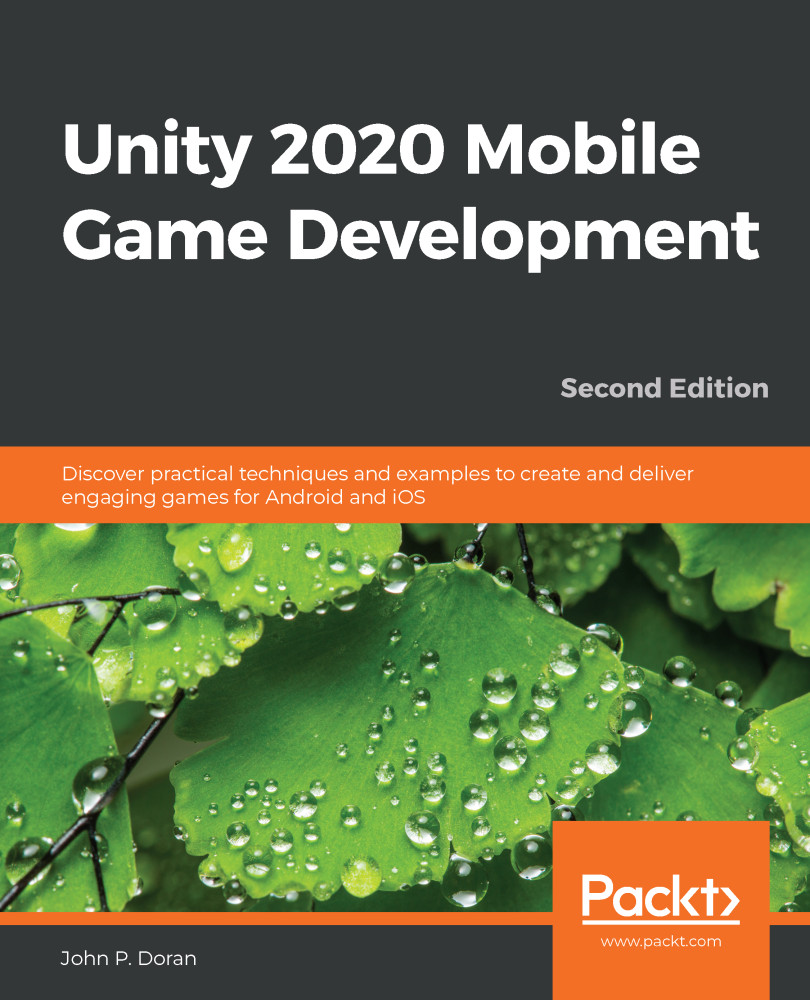
Unity 2020 Mobile Game Development - Second Edition

By John P. Doran
books-svg-icon Book
eBook $55.99 $38.99
Print $69.99
Subscription $15.99 $10 p/m for three months
$10 p/m for first 3 months. $15.99 p/m after that. Cancel Anytime!
What do you get with a Packt Subscription?
This book & 7000+ ebooks & video courses on 1000+ technologies
60+ curated reading lists for various learning paths
50+ new titles added every month on new and emerging tech
Early Access to eBooks as they are being written
Personalised content suggestions
Customised display settings for better reading experience
50+ new titles added every month on new and emerging tech
Playlists, Notes and Bookmarks to easily manage your learning
Mobile App with offline access
What do you get with a Packt Subscription?
This book & 6500+ ebooks & video courses on 1000+ technologies
60+ curated reading lists for various learning paths
50+ new titles added every month on new and emerging tech
Early Access to eBooks as they are being written
Personalised content suggestions
Customised display settings for better reading experience
50+ new titles added every month on new and emerging tech
Playlists, Notes and Bookmarks to easily manage your learning
Mobile App with offline access
What do you get with eBook + Subscription?
Download this book in EPUB and PDF formats, plus a monthly download credit
This book & 6500+ ebooks & video courses on 1000+ technologies
60+ curated reading lists for various learning paths
50+ new titles added every month on new and emerging tech
Early Access to eBooks as they are being written
Personalised content suggestions
Customised display settings for better reading experience
50+ new titles added every month on new and emerging tech
Playlists, Notes and Bookmarks to easily manage your learning
Mobile App with offline access
What do you get with a Packt Subscription?
This book & 6500+ ebooks & video courses on 1000+ technologies
60+ curated reading lists for various learning paths
50+ new titles added every month on new and emerging tech
Early Access to eBooks as they are being written
Personalised content suggestions
Customised display settings for better reading experience
50+ new titles added every month on new and emerging tech
Playlists, Notes and Bookmarks to easily manage your learning
Mobile App with offline access
What do you get with eBook?
Download this book in EPUB and PDF formats
Access this title in our online reader
DRM FREE - Read whenever, wherever and however you want
Online reader with customised display settings for better reading experience
What do you get with video?
Download this video in MP4 format
Access this title in our online reader
DRM FREE - Watch whenever, wherever and however you want
Online reader with customised display settings for better learning experience
What do you get with video?
Stream this video
Access this title in our online reader
DRM FREE - Watch whenever, wherever and however you want
Online reader with customised display settings for better learning experience
What do you get with Audiobook?
Download a zip folder consisting of audio files (in MP3 Format) along with supplementary PDF
What do you get with Exam Trainer?
Flashcards, Mock exams, Exam Tips, Practice Questions
Access these resources with our interactive certification platform
Mobile compatible-Practice whenever, wherever, however you want
BUY NOW $10 p/m for first 3 months. $15.99 p/m after that. Cancel Anytime!
eBook $55.99 $38.99
Print $69.99
Subscription $15.99 $10 p/m for three months
What do you get with a Packt Subscription?
This book & 7000+ ebooks & video courses on 1000+ technologies
60+ curated reading lists for various learning paths
50+ new titles added every month on new and emerging tech
Early Access to eBooks as they are being written
Personalised content suggestions
Customised display settings for better reading experience
50+ new titles added every month on new and emerging tech
Playlists, Notes and Bookmarks to easily manage your learning
Mobile App with offline access
What do you get with a Packt Subscription?
This book & 6500+ ebooks & video courses on 1000+ technologies
60+ curated reading lists for various learning paths
50+ new titles added every month on new and emerging tech
Early Access to eBooks as they are being written
Personalised content suggestions
Customised display settings for better reading experience
50+ new titles added every month on new and emerging tech
Playlists, Notes and Bookmarks to easily manage your learning
Mobile App with offline access
What do you get with eBook + Subscription?
Download this book in EPUB and PDF formats, plus a monthly download credit
This book & 6500+ ebooks & video courses on 1000+ technologies
60+ curated reading lists for various learning paths
50+ new titles added every month on new and emerging tech
Early Access to eBooks as they are being written
Personalised content suggestions
Customised display settings for better reading experience
50+ new titles added every month on new and emerging tech
Playlists, Notes and Bookmarks to easily manage your learning
Mobile App with offline access
What do you get with a Packt Subscription?
This book & 6500+ ebooks & video courses on 1000+ technologies
60+ curated reading lists for various learning paths
50+ new titles added every month on new and emerging tech
Early Access to eBooks as they are being written
Personalised content suggestions
Customised display settings for better reading experience
50+ new titles added every month on new and emerging tech
Playlists, Notes and Bookmarks to easily manage your learning
Mobile App with offline access
What do you get with eBook?
Download this book in EPUB and PDF formats
Access this title in our online reader
DRM FREE - Read whenever, wherever and however you want
Online reader with customised display settings for better reading experience
What do you get with video?
Download this video in MP4 format
Access this title in our online reader
DRM FREE - Watch whenever, wherever and however you want
Online reader with customised display settings for better learning experience
What do you get with video?
Stream this video
Access this title in our online reader
DRM FREE - Watch whenever, wherever and however you want
Online reader with customised display settings for better learning experience
What do you get with Audiobook?
Download a zip folder consisting of audio files (in MP3 Format) along with supplementary PDF
What do you get with Exam Trainer?
Flashcards, Mock exams, Exam Tips, Practice Questions
Access these resources with our interactive certification platform
Mobile compatible-Practice whenever, wherever, however you want
  1. Free Chapter
    Project Setup for Android and iOS Development
About this book
Unity 2020 brings a lot of new features that can be harnessed for building powerful games for popular mobile platforms. This updated second edition delves into Unity development, covering the new features of Unity, modern development practices, and augmented reality (AR) for creating an immersive mobile experience. The book takes a step-by-step approach to building an endless runner game using Unity to help you learn the concepts of mobile game development. This new edition also covers AR features and explains how to implement them using ARCore and ARKit with Unity. The book explores the new mobile notification package and helps you add notifications for your games. You’ll learn how to add touch gestures and design UI elements that can be used in both landscape and portrait modes at different resolutions. The book then covers the best ways to monetize your games using Unity Ads and in-app purchases before you learn how to integrate your game with various social networks. Next, using Unity’s analytics tools, you’ll enhance your game by gaining insights into how players like and use your game. Finally, you’ll take your games into the real world by implementing AR capabilities and publishing them on both Android and iOS app stores. By the end of this book, you will have learned Unity tools and techniques and be able to use them to build robust cross-platform mobile games.
Publication date:
August 2020
Publisher
Packt
Pages
464
ISBN
9781838987336

 
Project Setup for Android and iOS Development

We now have a project to start off with, but currently, it's built with playing on a PC in mind. Since this book is about mobile development, it's very important to have the game working on the device itself before we get much further.

In this chapter, we will go through all of the setup that we'll need to perform in order to deploy the project in its current state to our mobile devices. At the time of writing this book, mobile development is typically done either for Android or iOS, so we will cover those two.

This chapter will be split into a number of topics. The chapter itself will be a simple step-by-step process from beginning to end. The following is the outline of our tasks:

  • An introduction to build settings
  • Building a project for a PC
  • Exporting your project for Android
  • Putting the project on your Android device
  • Unity iOS installation and Xcode setup
  • Building a project for iOS
 

Technical requirements

This book utilizes Unity 2020.1.0f1 and Unity Hub 2.3.1, but the steps should work with minimal changes in future versions of the editor. If you would like to download the exact version used in this book, and there is a new version out, you can visit Unity's download archive at https://unity3d.com/get-unity/download/archive. You can also find the system requirements for Unity at https://docs.unity3d.com/2020.1/Documentation/Manual/system-requirements.html in the Unity Editor system requirements section.

If you wish to deploy to an Android device, you can use Mac, Linux, or Windows, and depending on the features you wish to use, it is possible to export your game in such a way to run apps on Android 4.4 KitKat and above.

For more information on the different types of Android versions that are supported, check out https://docs.unity3d.com/ScriptReference/AndroidSdkVersions.html.

To develop for an iOS device, in addition to the device itself, you'll also need to do some work on a Mac computer that runs OS X 10.11 or a later version. I'll be using 10.14.5 macOS Mojave. If you do not have one, it is possible to develop your game using Windows and, when you want to publish the game, bring your project to a Mac to do the final export.

There are some other potential ways to build iOS apps using Windows but they are not within the scope of this book. One possible option is to use Unity's Cloud Build service, which will automatically create versions of your game; however, at the time of writing, it is $9.00 a month. For more information, check out https://unity3d.com/unity/features/cloud-build.

Another potential option would be to rent a Mac via the cloud to do the building yourself. For more information on that and other potential options, check out https://mindster.com/how-develop-ios-apps-windows/.

You can find the code files present in this chapter on GitHub at https://github.com/PacktPublishing/Unity-2020-Mobile-Game-Development-Second-Edition/tree/master/Chapter%2002/Export.


An introduction to build settings

There are times during development when you may want to see what your game looks like outside of the editor. It can give you a sense of accomplishment; I know, I felt that way the first time I pushed a build to a console devkit. Whether it's for PC, Mac, Linux, web player, mobile, or console, we have to go through the same menu – the Build Settings menu:

  1. Start off by opening up the project that we created in Chapter 1, Building Your Game. In addition, open the Scene we created (SampleScene.unity, which is inside the Scenes folder):
  1. Since the Scene is our gameplay, let's rename the file by right-clicking on the object in the Project window and selecting Rename. Rename the file Gameplay. Unity will ask whether you want to reload the Scene. Do so by clicking Reload.
  1. From here, we will open the Build Settings menu by selecting File | Build Settings:
You may alternatively press Ctrl + Shift + B or command + Shift + B to bring the menu up as well.

In the preceding screenshot, you will notice that the Build Settings menu came up. This menu contains three sections:

    • Scenes in Build: This window contains the scenes in our project that we want to include when we build our project. This ensures that things such as test levels won't be included unless you specify so.
    • Platform: This is a list of all of the platforms that you can export your game to. The Unity logo shows up on the current platform you're compiling for. In order to change your platform, you'll need to select it from this list and then click on the Switch Platform button, which appears below the list.
    • Options: To the right of the Platform section, you'll see some settings that can be tweaked based on how you want the build to work, with certain options that change based on the platform you will work with.
  1. By default, we have no scenes in our build, so let's go ahead and change that. Click on the Add Open Scenes button; you should see the Gameplay level appear in the list at index 0, which means that when your game is played, this level will be the first one to load:
You may also add scenes to the Scenes in Build section by dragging and dropping them from the Project window. You may also drag the scenes to reorder them however you wish.

Now that we know how the build settings work, let's see how to build the project for PC to understand the general case before continuing to build our mobile game.


Building a project for PC

By default, our platform is set to PC, Mac & Linux Standalone. Just to verify that everything is working correctly, let's go ahead and get the game working on our own platform before moving to mobile:

  1. To get started, we will select the Build option. In my instance, I'll be exporting the project to Windows, but the process is similar for Mac and Linux.
  2. Once this is done, a window will pop up asking for a name and a location to put the game in. I'm going create a new Export folder located in the same folder that contains Assets and Library, so it won't show up in the Project window, but it will be in the same folder as my project:
  1. Click on Select Folder and wait for it to finish. Once it's done, you should have a window appear, as follows:

We have the executable, but we also have a data folder that contains all the assets for our application (right now, it's called MobileDev_Data). You must include the data folder and the other files created with your game, or it will not run.

If you build for Mac, it will bundle the app and data altogether, so once you export it, all you need to provide is the application.

  1. If you double-click on the .exe file to run the game, you'll be taken to the proper game screen, as shown in the following screenshot:

With that, we should be able to control and play the game as we usually would do. This is great!

You'll have to use Alt + F4 (command + Q on Mac) to quit the game, and you can switch to Windowed mode by pressing Alt + Enter.

Now that we have talked about the universal ways of building a project, let's dive into the specifics for different platforms. In the next section, we will discuss getting our project onto an Android device.


Exporting a project for Android

Now that we have all of the setup done, we can open Unity with our project and export it for Android devices. In this section, we will first check whether we have Android Build Support installed, and then we will update the build and player settings to export our project. So, let's get started.

Installing Android Build Support for Unity

First of all, if you haven't done so already, you'll need to have selected to add Android Build Support as an option when you are installing Unity. If you have installed it, you can skip this section. If you did not install it when doing the initial installation, that is what we will cover in the following steps:

  1. Close the Unity Editor and then open up the Unity Hub and select the Installs section.
  2. From there, click on the three dots to the right of your current version of Unity and select the Add Modules option:
  1. Check the Android Build Support option, which should also check the Android SDK and NDK Tools and OpenJDK options. Afterward, click on the NEXT button:
  1. You'll be brought to a license terms page. Read it over and if you agree to it, check the agreement box and click on the DONE button:
  1. Wait for it to finish installing. Once finished, you should see the Android logo at the bottom of your install:

This means that Android Build Support has now been added to our version of Unity and we can build projects there. Next, we will see how to actually build the project for Android and the settings required to do so.

Updating build and player settings for Android projects

Now that we have Android support, let's open up our project again and change the platform we are developing for:

  1. At this point, we will dive into Unity and move into our Build Settings menu once again by going to File | Build Settings.
  1. Click on the Android option from the Platform list and then click on the Switch Platform button to make the change:

Note that this will make Unity reimport all of the assets in our game, so this may be time-consuming when you start to build larger projects. Once completed, you should notice that the Unity logo is now next to the Android option, signifying that's the platform to be built for:

  1. Now, in order to be able to build our project, we must set the bundle identifier for our game, which is a string that identifies the app. It's written like a URL in reverse, for example, com.yourCompanyName.yourGameName. To modify this, we'll need to open up the Player Settings menu, which we can get to by clicking on the Player Settings... button in the bottom-left part of the Build Settings menu or by going into Edit | Project Settings | Player. You'll note that the menu shows up as a new window:

Now that we're in Android mode (note the text on the title bar of the Unity Editor), we can change these properties:

  1. We'll discuss more of these in a later chapter, but for now, scroll down until you get to the Other Settings option, and from there, you'll see the Package Name property. We will change this to something else; for example, I used com.JohnPDoran.MobileDev. There's also a Minimum API Level option; make sure that your option is set to the same version as your phone or earlier, depending on what you want to support. Note that the earlier you go, the fewer things you'll have access to, but your project will be able to support more phones:
  1. Close the Project Settings window and open up the Build Settings menu again by going to File | Build Settings. Now, we can try to build the project by clicking on the Build button, saving it in the same Export folder we created earlier. It will ask for the name you'd like the file to have. I will use MobileDev as we did previously, because instead of a .exe file, it will be creating a .apk file:

Wait a bit, and once it's finished, you should have a new .apk file located in the folder. Of course, just having the APK file doesn't do much if we can't put it on our actual phone; so, in the next section, we will enable our phone to test the game on our device.


Putting the project on your Android device

The following steps may be different for you depending on your Android version. If you are using Android Oreo or higher, start with step 5. If you have version 7 or lower, start at the beginning:

  1. On your Android device, you'll need to go to your Settings app.
  2. From there, scroll down till you get to the Security | Security & location section or similar, and then tap on it to go into the menu.
  1. Inside there, you'll see a section called Unknown sources, which you'll want to enable:

With this enabled, your device can now install the .apk file, but now you will need to move your game over to the device so that you can install it. The easiest way is to transfer it to your device via USB; we'll do that now.

For those of you who'd rather not use USB, I would suggest using a cloud storage app, such as Dropbox, to upload the .apk file and then download it from the app and install that way. There's also another tool called ADB, which can send files to your phone via USB or WiFi. For more information on that and the rest of the Android build process, check out https://docs.unity3d.com/Manual/android-BuildProcess.html.
  1. Connect your phone to your computer via USB. Upon being connected, your phone will show a notification saying that it's connected via USB for charging. Click on that notification and change the option to File Transfer:
  1. After that, go back to your computer and go into Windows Explorer/Finder, and then go to the Devices and Drives section; you should see your device appear there:
  1. Double-click on your device and access the internal shared storage section from there. Then, drag the .apk file we made before into this folder:
  1. Now, back in your phone, open the Files/File Explorer app. From there, click on the button on the right-hand side and select Show internal storage:
  1. Then, click on the button in the top-left corner and select your phone's name (in my case, Pixel 3a XL):
  1. From there, select your .apk file listed from the files included:
  1. You'll be asked to confirm the installation. Hit the Continue button:
  1. This will open up the installer. Go ahead and click on the Install button and wait for it to finish:
  1. You may see a window pop up that mentions that Play Protect doesn't recognize the developer. We will see how to solve this issue later on in Chapter 12, Game Build and Submission, but for now, click INSTALL ANYWAY and wait for the installation to finish:
Of course, I can't note the steps for all devices as some have different drivers that are required or additional steps that need to be performed in order to open files on the device. If these steps do not work and you do not know how to get files onto your device and access them and add new ones to them, go ahead and search for phone name file transfer, replacing the phone name with your phone's name.
  1. Once it's finished, go ahead and click on the Open button to open our game:

As you can see, the game is on there and it's working. Granted, you can't control it yet, and there are a lot of new things that you can't do, but this lets you know that you've set up your Android device properly. Now that you have your game on an Android device, you now need to get it working on iOS, which we will cover in the next section.


Unity for iOS setup and Xcode installation

With Android, there's a lot of setup, but building and getting a game onto your device is less work, whereas, with iOS, there's less work on the setup end and more involvement with getting the game actually onto the device.

Previously, you had to have a paid Apple Developer license in order to get your game onto an iOS device. Although that's still required to get the game on the App Store, you are no longer required to get it for testing. Note that the free option doesn't have everything available to you, most notably In-App Purchases (IAPs) and the Game Center; however, for making sure that it works on your device, it'll work just nicely. We will go over how to adjust your project to reflect being in the Apple Developer portal in Chapter 11, Game Build and Submission, when we go over putting our project on the App Store.

To develop for an iOS device, in addition to the device itself, you'll also need to go on a Mac computer that runs OS X High Sierra 10.13+ or a later version. I'll be using 10.15.6 macOS Catalina. Just like working with Android, we'll also need to do some setup before we can actually do the exporting. Let's get started on that now:

  1. First of all, if you haven't done so already, you'll need to add iOS Build Support (*) as an option when you are installing Unity. If you did not install it when doing the initial installation, you may open up the Unity Hub and select the Installs section.
  2. From there, click on the three dots to the right of your current version of Unity and select the Add Modules option:
  1. From the menu that pops up, check the iOS Build Support option:
  1. Click on the DONE button and wait for the installation to finish. Once completed, you should see the icon for iOS support show up:

This makes it so you can export your projects for iOS. Since I'll be using my Windows machine mainly, I'm only adding in iOS support, but you can do both iOS and Android from your Mac computer.

  1. You'll also need to have Xcode, which is the program used to build iOS apps. To download it, you'll need to open up the App Store application on your computer. From the search bar in the top-left corner, type in Xcode and press Enter.
  2. From there, you'll see the Xcode program at the top left of the page. Click on it and then on the Install/Update button:

You may need to enter your Apple ID information; go ahead and do so and then wait for it to finish.

If you do not have an Apple ID, you may get one from http://appleid.apple.com/.
  1. Once Xcode is installed, open it up. There will be a license agreement for Xcode and the iOS SDK; go ahead and click on Agree. It'll then begin installing components that are needed for it to work.
  1. You'll then be brought to a welcome screen, but we want to do some setup first. From the top menu bar, go ahead and select Xcode | Preferences (or press command + ,). From there, click on the Accounts button. This will display all of the Apple IDs that you want to be able to use in Xcode:
  1. Click on the plus icon at the bottom left of the screen and then select Apple ID when it asks what kind of account to create:
  1. From the menu that pops up, go ahead and add in your Apple ID information and you should see it appear on the screen.

If you select the name, you'll see additional information on the right side, such as what teams you are on. If you are not enrolled in the Apple Developer Program, it'll just be a personal team, but if you are paying for it, you should see additional teams there as well.

Now that we have completed the setup and installation of iOS and Xcode, let's continue to building our project.


Building a project for iOS

While there are some similarities to working with Android, there are some differences that are very important to note, so keep that in mind while reading this section. Let's build our project for the iOS device using the following steps:

  1. At this point, we will dive into Unity and then move into our Build Settings menu once again by going to File | Build Settings.
  1. Click on the iOS option from the Platform list and then click on the Switch Platform button to make the change:

Note that this will make Unity reimport all of the assets in our game, so this may be time-consuming as you build larger and larger projects. This now also means that when we build our project, it will create an Xcode project instead of just an app, which we will need to open and work with once it's built.

  1. If we didn't do so earlier when building for iOS, we must set the bundle identifier for our game at this point, which is a string that identifies the app. It's written like a URL in reverse, for example, com.yourCompanyName.
    yourGameName
    . To modify this, we'll need to open up the Player Settings menu, which we can get to by clicking on the Player Settings... button in the Build Settings menu or by going to Edit | Project Settings | Player.
  2. Open up the Other Settings section, and then put in a value that you'd like under Package Name. (As mentioned in the previous section, I used com.JohnPDoran.MobileDev.)
Note that if you have already changed this property when building for Android, it will already be done; there's no need to do this again.
  1. Now, we can try to build the project by clicking on the Build button and saving it in the same Export folder we created earlier—in this case, I named it MobileDev_iOS:
You can press the down arrow button to search for folders in the Finder window that pops up.
  1. You may be asked to give permission for the Unity Hub to perform actions to Xcode. Allow it by pressing OK:
  1. Once the project has been built, we will be taken to a Finder window at the location where we created the project. From there, we can double-click on the .xcodeproj file to open the project inside Xcode:
  1. In Xcode, after waiting for everything to load in, you'll notice a yellow triangle with a ! in the center of it in the top-center console. If you click on it, you'll see some information appear on the left-hand side.
  2. Double-click on the Update to recommended settings option on the left-hand side of the screen and then click on the Perform Changes button in the window that pops up:
  1. Then, go to the drop-down in the middle of the window and select the Unity-iPhone option under Targets:
  1. Afterward, under the Signing & Capabilities section, check the Automatically manage signing option, clicking on Enable Automatic when the popup comes up. Then, in the window that pops up, assign your team to your profile.
  1. If you have an iOS development account or if no errors show up, you can continue to Step 13; however, it is also possible that you may see an error stating that you need to set the code signing identity value to iOS Developer. If that is the case, from the top-center area go to the Build Settings section and under the Signing section, change all of the Code Signing Identity items to iOS Developer:

Afterward, select the Product | Clean command from the top toolbar. You should then be able to proceed to Step 11.

  1. Once all the preceding steps are done, plug in your phone via USB. After loading all of the symbols it needs (wait until the top-middle section says Ready); at the top right, instead of Generic iOS Device, change it to the device you've connected.
  2. When you click on the Play button, the computer will ask whether you want to enable developer mode; to do so, go ahead and select Enable and enter your password when it asks for it.
  3. Your phone may be busy, so you may need to wait a bit before you're able to build to the device. You may get a window asking you to access the key access in your keychain. Go ahead and click Allow. You'll also need to unlock your phone at some point as well so that it can make the install.
  1. The app will now be on your iOS device, as you can see in the following screenshot:

Right now, it has a generic Unity icon, just like in Android, and we will customize it later on in this book, but for right now, we have an issue: the game won't run.

In order to run the app, you must verify that you want the device to be able to run the app to prevent security issues. To let you know that this is an issue, Xcode will give you a warning that it couldn't launch it, so we'll need to say we want to be able to run it.

  1. From your iOS device, open up the Settings app. From there, go to General | Profiles or Profiles & Device Management. Then, from the menu that pops up, you'll need to say Trust [Developer Name], with [Developer Name] being your Apple ID account. You'll need to verify again that you wish to trust apps created by this account, so go ahead and agree, and all of the steps are done.
  2. With that, exit out of settings by clicking on the home button and then go over to the location where the app was installed and tap on it to run:

With that, we have the game running on the iOS side as well.

Note that when building in the following manner, without the paid license, apps will only work for a limited time, possibly up to a week. If your game crashes immediately and it worked correctly beforehand, this is most likely the culprit. Redeploy to the device again to check whether that is the issue before modifying your actual project.
 

Summary

We now have our game running on both Android and iOS devices, and we have learned the steps that we'll need to take each time we want to deploy our games on these devices.

While I will not be writing about exporting to both kinds of devices again until we get to Chapter 10, Game Build and Submission, it's a good idea for you to see how the changes that we will make will work with both platforms and keep testing on each platform to make sure that your project works correctly and at a frame rate that you are okay with.

This is especially important to note as running the project on your PC via the editor or an emulator will not always accurately represent how the game will run on a different device. You may find that certain things will slow down your device and make your game choppy. You may also find that certain aspects of your game that run fine on your mobile device will cause your computer to be choppy instead. The thing is, you won't know unless you are always checking the games on devices, so I highly advise that you do so.

We have our game working on mobile devices now, but it currently will not react to anything we do due to how we wrote our input code. In the next chapter, we will explore how we can add input to our project as well as the design considerations we need to make in regards to how the different forms of input will change our game.

About the Author
  • John P. Doran

    John P. Doran is a passionate and seasoned Technical Game Designer, Software Engineer, and Author who is based in Incheon, South Korea. His passion for game development began at an early age. He later graduated from DigiPen Institute of Technology with a Bachelor of Science in Game Design. For over a decade, John has gained extensive hands-on expertise in game development working in various roles ranging from game designer to lead UI programmer working in teams consisting of just himself to over 70 people in student, mod, and professional game projects including working at LucasArts on Star Wars: 1313. Additionally, John has worked in game development education teaching in Singapore, South Korea, and the United States. To date, he has authored over 10 books pertaining to game development. John is currently a Technical Game Design Instructor at George Mason University Korea. Prior to his present ventures, he was an award-winning videographer.

    Browse publications by this author
Latest Reviews (1 reviews total)
This book has many helpful tips and references.
Unity 2020 Mobile Game Development - Second Edition
Unlock this book and the full library FREE for 7 days
Start now