


 Download code from GitHub
Chapter 2: Scaffolding Your Svelte Project
After hopefully selling you on the benefits of building your next project as a JAMstack app with Svelte 3, we're now ready to start developing our proof-of-concept application.
However, as with every new technology or framework, we first need to prepare our environment to be ready to work with it. This requires installing the necessary interpreter and runtime dependency, setting up tooling, and scaffolding a new project.
In this chapter, we'll be covering the following topics:
- Setting up your environment: We'll install Node.js, set up Visual Studio Code as our editor (optional, but recommended), and start the backend service for our app.
- Scaffolding a project with Webpack: We'll create our Svelte project and scaffold it using Webpack as a bundler.
- "Hello, Svelte!": Our take on "hello world".
- Debugging Svelte applications in a web browser.
At the end of this chapter, you'll have a scaffolded project for Svelte 3. You can find the end result on GitHub at https://bit.ly/sveltebook-ch2.
Setting up your environment
Before we start coding, we need to ensure that we have everything we need installed and ready to use.
The only thing that is absolutely necessary in order to use Svelte is to have Node.js installed. The Svelte compiler itself is written in JavaScript, and it requires Node.js to be executed. Additionally, our development toolchain (the Webpack bundler and all the other build tools) run on Node.js, too.
For our sample application to work, we will also need a back-end service, as mentioned in the previous chapter, which we can run on our development machine.
Installing Node.js
If you don't have it already, you need to install the Node.js framework in your development machine.
While Svelte 3 officially requires Node.js 8 or higher, my recommendation is to use the latest Long-Term Support (LTS) version; at the time of writing, this is version 12.
The default Node.js installation comes with NPM too, which is the main package manager for JavaScript applications. Our Svelte project will heavily depend on NPM, too.
Installing on Windows
On Windows, the easiest approach is to install Node.js using the official installer downloaded from https://nodejs.org/en/download/.
From that page, fetch the Windows Installer (.msi) for the LTS version, selecting the correct architecture of your operating system (64-bit is the most common one at the time of writing). After downloading the installer, launch the application and follow the installation instructions on screen. The official installer includes NPM too. Note that the installer requires Administrator privileges, and you might need to authenticate with the system.
Using WSL on Windows 10
If you're on Windows 10, you have the option of using the Windows Subsystem for Linux (WSL) tool, which lets you run a full-fledged Linux environment within your Windows machine, and it is deeply integrated with Visual Studio Code. Many Node.js developers prefer to use WSL on Windows as some packages on NPM are not optimized for Windows.
If you decide to use WSL, you first need to enable it on Windows 10. Microsoft has published the necessary instructions at https://aka.ms/wsldocs. After WSL is installed and you have a Linux distribution ready, follow the instructions for Linux in the following section.
Installing on macOS
Just like on Windows, on macOS, you can install Node.js and NPM with the official installer published on https://nodejs.org/en/download/.
From that page, fetch the macOS Installer (.pkg) for the LTS version, which includes NPM too. After downloading it, launch the installer and follow the steps on screen.
Installing on Linux
On Linux, installing Node.js varies according to your distribution.
The Node.js project publishes pre-compiled binaries for Linux, for both x64 (64-bit Intel-compatible CPU) and ARM (both 32-bit and 64-bit). However, these require manual installation.
While most Linux distributions do ship official packages with Node.js, they're often very outdated, and I do not recommend using them.
Installing using a package manager
NodeSource maintains "semi-official" packages for the most popular Linux distributions. While these are not maintained by the Node.js project or the OpenJS Foundation, a link to these packages is available on the official Node.js website, too, and they're arguably the most popular option for Linux users.
These packages are available in the following forms:
- DEB packages, which is the format supported by Debian, Ubuntu, and other Debian-based distributions, including Linux Mint and Raspberry Pi OS.
- RPM packages, which is the format supported by Red Hat Enterprise Linux, CentOS, Fedora, Amazon Linux, and distributions based on those.
- Snaps for all distributions that support snapd.
You can find the list of packages and installation instructions on GitHub: https://github.com/nodesource/distributions
Installing from the official binaries
As mentioned, the Node.js project publishes official binaries for Node.js for all architectures, but they come without an installer.
Nevertheless, using the binary tarball (a .tar.gz archive) can give you more control over the version(s) of Node.js that you run, as well as more flexibility.
To install Node.js using the official binary tarball, I recommend uncompressing it into a folder such as /usr/local/node-$NODE_VERSION-linux-x64 and then creating a symbolic link to that folder from /usr/local/node. Not only will this give you the flexibility to update Node.js by downloading a new tarball and changing the symbolic link, but it will also minimize the chances that another package you install from your distribution's repositories brings in a conflicting binary.
To start, set the version of Node.js you want to use in an environmental variable for the next commands. As of the time of writing, the latest LTS version available is 12.18.3, but check on https://nodejs.org first:
$ NODE_VERSION="v12.18.3"
Then, download and uncompress the binary tarball:
$ curl -LO http://nodejs.org/dist/$NODE_VERSION/node $NODE_   VERSION-linux-x64.tar.gz
$ tar xzf node-$NODE_VERSION-linux-x64.tar.gz
$ sudo cp -rp node-$NODE_VERSION-linux-x64 /usr/local/
$ sudo ln -s /usr/local/node-$NODE_VERSION-linux-x64 /usr/   local/node
After this, the Node.js binary is available at /usr/local/node/bin/node.
You can add /usr/local/node/bin to your $PATH to be able to invoke node directly. The instructions for doing this depend on the shell you use and on the location of your shell's profile file (for example .bash_profile or .zprofile). Normally, after identifying the correct file, you'd append the following line to it:
export PATH=$PATH:/usr/local/node/bin
Installing using NVM
For macOS and Linux (including WSL on Windows 10), an alternative way to install Node.js and NPM is to use NVM, or the Node Version Manager.
NVM is a set of scripts that allow Node.js to be installed and updated, multiple versions maintained, and even different versions of Node.js specified on a per-project basis.
Full reference to NVM and all its options can be found on the project's GitHub page: https://github.com/nvm-sh/nvm
Here are the commands to install NVM on a macOS, Linux, and WSL environment, selecting version 12:
$ curl -o- https://raw.githubusercontent.com/nvm-sh/nvm/   v0.35.3/install.sh | bash
$ nvm install 12
Verifying that Node.js and NPM are installed
Regardless of your platform and operating system, to test whether Node.js and NPM are installed correctly, you can open a terminal and run the following command:
$ node -v
v12.18.3
$ npm -v
6.14.5
You should see the versions of Node.js and NPM that you just installed, just like in my example above (your versions might be newer than mine).
Setting up Visual Studio Code
Let me begin this section by saying that this is fully optional, and you're welcome to use your favorite code editor instead.
However, while all editors are good, Visual Studio Code is probably the most convenient option for working with Svelte, thanks to having specific extensions for it that offer syntax highlighting and checking, autocompletion, and so on.
If you're not familiar with Visual Studio Code, it's a free and open source editor from Microsoft that runs on Windows, macOS, and Linux, and it is highly customizable thanks to its vast extension marketplace. Visual Studio Code is the most popular code editor according to the StackOverflow 2019 Developer Survey, and it's especially popular among developers working with JavaScript.
To start with Visual Studio Code, follow these steps:
- Download the installer for your platform from the official website: https://code.visualstudio.com. Then, install it by following the usual process for your operating system or distribution.
- After installing Visual Studio Code, install the free Svelte extension from the Visual Studio Marketplace: https://aka.ms/vscode-svelte. This extension provides syntax highlighting and autocompletion for Svelte components, as well as support for diagnostic messages, and it's strongly recommended for everyone working with Svelte.
- For debugging within the editor, it's useful to install the Debugger for Chrome extension from the Marketplace (similar extensions exist for Firefox and Edge, too):https://aka.ms/vscode-chrome-debugger.
- Lastly, another very useful extension is the NPM one, which is again free from the Visual Studio Marketplace: https://aka.ms/vscode-npm. This affords conveniences for using NPM commands directly within the editor, without using a terminal.
Note
If you are working on Windows 10 with Node.js installed on WSL, you might want to configure Visual Studio Code for using WSL, too. The editor should automatically detect the presence of WSL and recommend the extension to you, but full instructions (and gotchas) are available in the documentation: https://code.visualstudio.com/docs/remote/wsl
Launching the back-end service
As mentioned in the first chapter, just like in most other real-world situations, our demo application requires a back-end service. This provides REST APIs to access a persistent data store, as well as user authentication.
To keep us focused on working on our Svelte code base, I've built a small application to provide these back-end services. Its source code is available on GitHub (https://bit.ly/sveltebook, in the api-server folder) and it's distributed as a pre-compiled executable that you can run on your laptop and that works together with the app you're developing.
Running the pre-compiled binary
The simplest way to get the back-end service running is to download the pre-compiled binary from the GitHub project page, and is available for Windows, macOS, and Linux.
Go to https://bit.ly/sveltebook and look for Pre-compiled binaries links in the README.md file, and then download the one for your operating system and architecture. The file is an archive (tar.gz or zip) that contains the application you need to run.
For most users, launching the application requires just double-clicking on the executable. A terminal window should launch automatically, running a local server.
Note for macOS users
The pre-compiled binary is not signed with an Apple developer certificate, and Gatekeeper will refuse to run it in newer versions of macOS. If this happens to you, you will notice an error saying that the app is coming from an unidentified developer.
To run the application on macOS, you can either (temporarily) disable Gatekeeper and allow unsigned applications (refer to the Apple Support page: https://apple.co/2E3mVYP ) or run this command: xattr -rc path/to/application (where path/to/application is the location of the downloaded binary).
The back-end application stores data on your local disk, in a folder called data in the same location where you placed the downloaded binary.
To terminate the application, in most cases, you just need to close the terminal window.
Running with Docker
If you have Docker installed in your laptop, you can also launch the back-end service as a container.
This command should work for most users:
$ docker run --rm -p 4343:4343 \
    -v ~/data:/data \
    italypaleale/sveltebook
This command will launch the Docker container, exposing port 4343 on the local machine for our Svelte application to interact with. It also stores persistent data (for example, your journal entries) in the data folder inside your home directory.
To kill the back-end service, press Ctrl + C in the terminal window, or close the terminal.
Check whether the application is working
To test whether the back-end application is working correctly, open your web browser and visit the following link:
If everything is fine, you should see a welcome page:
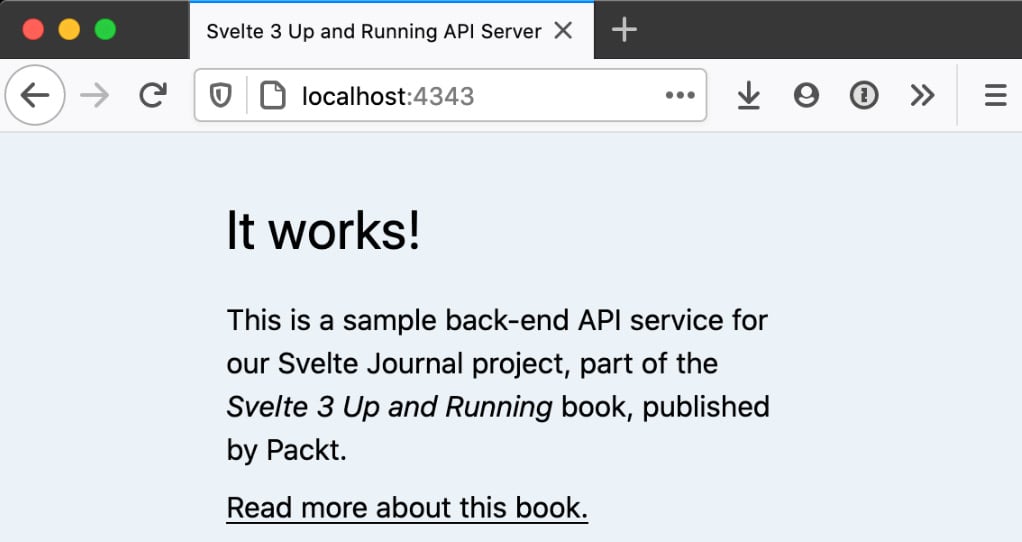
Figure 2.1 – Screenshot of the welcome page in the back-end server application
Scaffolding our project
Now that all the prerequisites are in place, we're ready to start coding:
- Create an empty folder where you want to put your application's code. In this book, we'll place the code in a folder called
svelte-pocinside our home directory. - Open this folder in Visual Studio Code, or your preferred editor.
- Because our Svelte application relies on Node.js and NPM, initialize the project by creating a
package.jsonfile.If you have the NPM extension installed in Visual Studio Code, you can launch the command palette with Ctrl + Shift + P (or Command + Shift + P on a Mac) and then write
> npm run initand press Return.Alternatively, using a terminal (tip: you can press Ctrl + `, or Command + ` on a Mac, to launch an integrated terminal in Visual Studio Code ; where ` is the backtick), run the following command:
npm init
In both cases, you will be asked to provide some details about your project. At this stage, it's probably safe to accept all defaults by keep pressing the Return key until done.
- Finally, we will need to create two folders inside our project:
(a)
src, which contains our application's source(b)
public, which will contain the compiled, bundled code:
Figure 2.2 – What our project looks like right now, with the package.json file and two empty folders
Using a bundler
Writing web applications with Svelte requires the use of a bundler, which merges all JavaScript code into a single file. Not only do they provide convenient features, such as code minification and tree shaking (removing unused code and dependencies), but they also compile Svelte components into executable code. As you will recall from the introduction, in fact, Svelte apps need to be compiled, and that's how Svelte helps to generate small and fast web applications.
The Svelte community is somehow split between two bundlers: Rollup, which also happens to have been originally created by the same Rich Harris who built Svelte, and Webpack. In this book, we're going to make an opinionated choice and use Webpack.
Webpack is arguably the most popular bundler for JavaScript applications. It comes with a host of advanced features (for example, support for code splitting) and a vast number of plugins. Because of its popularity, it's easy to find modules, plugins, documentation, and suchlike, and there's a vibrant community that can provide support. Lastly, using Webpack can allow easier integrations with existing systems. The downside is that Webpack's flexibility makes it a bit more complex, but this book's instructions can help you navigate that complexity.
Scaffolding your project with Webpack
In this section, we'll set up NPM as a bundler.
Installing dependencies from NPM
First, we need to install Webpack and other NPM modules. Use the following command:
$ npm install --save-dev \
    webpack@4 \
    webpack-cli@3 \
    webpack-dev-server@3 \
    svelte@3 \
    svelte-loader@2 \
    css-loader@3 \
    style-loader@1 \
    mini-css-extract-plugin@0.9 \
    dotenv-webpack@1 \
    cross-env@7
This command installs the preceding modules and adds them to the package.json file as devDependency, because they are required to build the web application but are not used at runtime. These modules are required only for the bundler, and after you're done scaffolding the project, you won't have to worry about them anymore.
Let's take a look at what they do:
webpack,webpack-cli, andwebpack-dev-serverare the three modules required to run Webpack and the built-in web server for development.svelteandsvelte-loaderare the Svelte framework and compiler, and the loader that enables Webpack to interpret Svelte files.css-loader,style-loader, andmini-css-extract-pluginare required to work with CSS styles.dotenv-webpackis a plugin that allows us to define environmental variables with adotenvfile, which we'll use for the sample app.- Lastly,
cross-envis a utility that allows us to write NPM scripts that work on shells across all operating systems.
Configuring NPM scripts
Next, let's add a set of scripts to our package.json file so as to automate running development and production builds. In that file, we will only change the scripts dictionary, replacing it with the following:
package.json (fragment)
"scripts": {
  "build": "cross-env NODE_ENV=production webpack",
  "dev": "webpack-dev-server --content-base public"
},
We'll explore these scripts and their purpose in the next section of this chapter.
Configuring Webpack
Lastly, we need to create a configuration file for Webpack. This is a fairly long document, so you can copy it from this book's code repository provided at the following link and paste its contents into webpack.config.js:
https://bit.ly/sveltebook-webpack
Let's examine the contents of the file.
After importing all the requisite modules, we define the prod variable, which is true if we're building the application for production, as determined from the NODE_ENV environmental variable:
const mode = process.env.NODE_ENV || 'development'
const prod = mode === 'production'
As we'll see in the next section, when building for production, we are enabling further optimizations, such as minification of the bundled JavaScript file. On the other hand, when building for development, we're enabling support for extra development tools, such as live reload and debugging.
The main part of the file is the configuration object for Webpack. This is a dictionary, and it's the exported symbol from the file:
module.exports = {
    entry: { /* ... */ },
    resolve: { /* ... */ },
    output: { /* ... */ },
    module: { /* ... */ },
    mode,
    plugins: [ /* ... */ ],
    devServer: { /* ... */ },
    devtool: prod ? false: 'source-map'
}
A lot of the content of the file is boilerplate code, but it's worth highlighting a few things:
- We define an entrypoint called
bundle, starting fromsrc/main.js. - In the
resolvedictionary, we are changing Webpack's defaults to better support Svelte modules downloaded from NPM, which often ship with uncompiled.sveltefiles. - In the
outputconfiguration, we are telling Webpack to place the files in thepublicfolder. Because the main entrypoint's name isbundle, the compiled JavaScript bundle will be located atpublic/bundle.js. - The
moduledictionary ensures that Webpack loads Svelte files (with the.svelteextension) and handles them correctly, as well as.cssfiles. - In the
pluginsobject we are loading thedotenvplugin, which we'll use later in the sample application to inject configuration values.
Webpack is highly customizable and features a lot of different options. It also comes with a large number of plugins. You can read more about configuring Webpack in the official documentation: https://webpack.js.org/guides/.
"Hello, Svelte!"
Now that we've scaffolded our project, we're ready to launch a "hello world" application!
This "hello world" application demonstrates that the Svelte project has been bootstrapped successfully, and that everything has been set up correctly.
Creating the App component
Let's start by creating our first Svelte component. Create the src/App.svelte file and paste the following content:
src/App.svelte
<h1>Hello, {name}!</h1>
<p>My first Svelte app</p>
<style>
p {
    color: #1d4585;
}
</style>
<script>
export let name = ''
</script>
Even before we get into the details of how Svelte components are written, which we'll do in the next chapter, you can already notice a few things.
To begin with, each Svelte component is placed in a file with the .svelte extension. Each file contains one, and only one, component.
The content of the Svelte component file looks like normal HTML pages:
- The layout is written using regular HTML tags.
- You can place CSS rules within a
<style></style>block. All CSS rules defined here are scoped to the component. That is, the preceding rule only applies toptags in the App component. - JavaScript code is again put in a familiar place, between
<script></script>tags.
In the first line, we're seeing for the first time the Svelte templating syntax: at runtime, {name} is bound to the value of the name variable.
The same name variable is also exported using the export statement, just like we'd do with ES2015 modules. The Svelte compiler looks for exported variables and makes them props (or properties), which can be set by outer components.
We'll cover components, the Svelte templating syntax, and props in much detail in the next chapters, but for now let's look at how we can initialize our App component.
The application's entrypoint
Svelte components can't be entrypoints for applications; only JavaScript files can be.
As you will recall, in the Webpack configurations, we defined the entrypoint as the src/main.js file. Let's create that:
src/main.js
import App from './App.svelte'
const app = new App({
    target: document.body,
    props: {
        name: 'Svelte'
    }
})
export default app
This short snippet imports the App component as a class. It instantiates the class, and finally exports the component as the application's code.
The constructor for the App class accepts a JavaScript object with a dictionary of options, including the following:
targetis the DOM element where the component should be rendered as a child; in our example, we want the application to be rendered in the page's<body>.- The
propsdictionary is an optional one that allows a value to be passed to the component's props. OurAppcomponent is exporting a prop calledname, and we're passing the string'Svelte'as its initial value.Note
In most cases, the app's entrypoint is the only place where Svelte components are manually instantiated with the
new Component()syntax.
Index file
Lastly, we need to pre-create the index file that will load our Svelte application. Paste the following content into the public/index.html file (note the use of the public directory!):
public/index.html
<!DOCTYPE html>
<html lang="en">
<head>
    <meta charset="utf-8">
    <meta http-equiv="X-UA-Compatible" content="IE=edge">
    <meta name="viewport" content="width=device-width,initial-      scale=1">
    <title>Svelte Journal</title>
    <link rel="stylesheet" href="/bundle.css">
</head>
<body>
    <script async defer src="/bundle.js"></script>
</body>
</html>
This index file is a pretty standard HTML5 boilerplate page, but it does reference the /bundle.css and /bundle.js files, which are generated by the bundler.
Running the application
At the end of the setup, your project should look like the following screenshot:
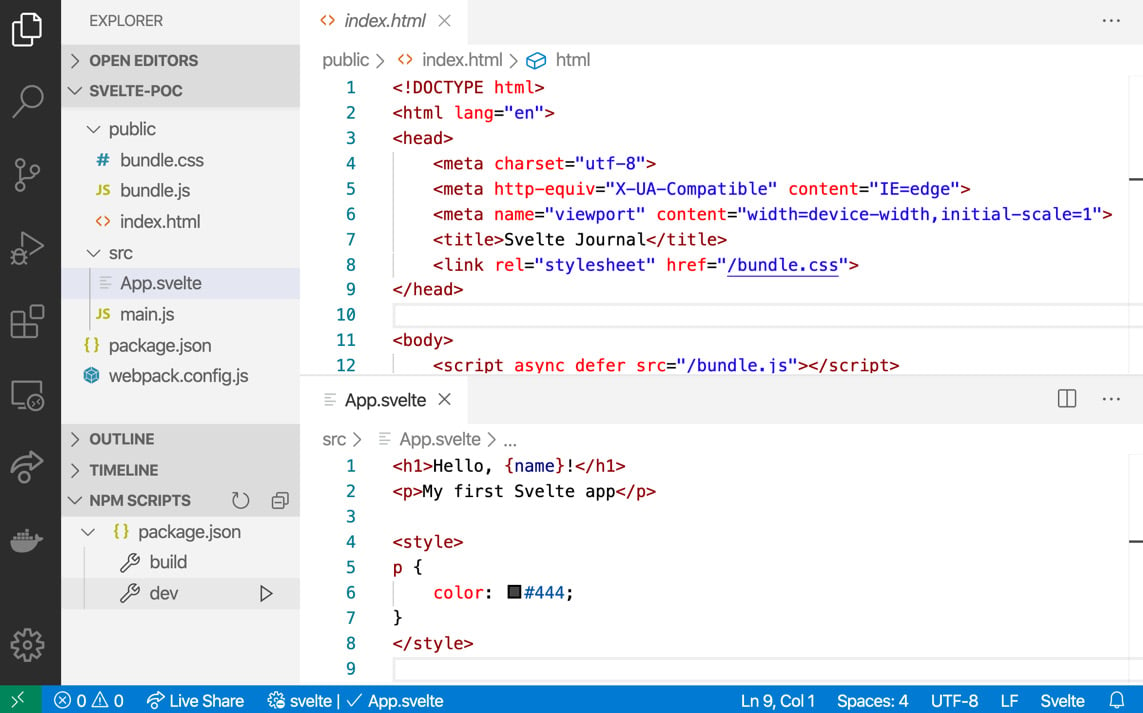
Figure 2.3 – The "Hello, Svelte!" app
We're now ready to launch the application, using the dev NPM script:
- Open a terminal and run the following command:
$ npm run dev
- If you're using Visual Studio Code, you can also launch NPM scripts from the NPM SCRIPTS drawer in the bottom-left corner (if you just created a new project and you don't see it yet, relaunch the editor). Click on dev to launch it, highlighted in the preceding screenshot.
The bundler will compile your app and launch a local server. To see your application running, open a web browser and visit the following link:
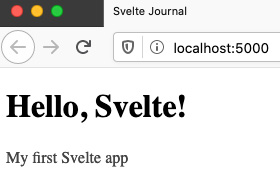
Figure 2.4 – Our "Hello, Svelte!" application running
The script you launched is watching for code changes, and bundlers include live-reloading. Try making a code change (for example, change the text in the App.svelte component), and then save the file. Your browser will immediately reload to show your updates!
To stop the bundler from running and watching for code changes, press Ctrl + C in the terminal window:
Warning message
Running the preceding command, as well as the one in the next section, you'll likely see an error similar to Failed to load ./.env in the terminal window. This is just a warning that you can ignore for now; we'll create the .env file in the next chapter.
Compiling for production
Lastly, let's look at how the application can be compiled for production.
Running npm run dev compiles your application in a way that is designed for development. For example, it includes live-reload capabilities, it outputs source maps, and it does not minify or otherwise optimize the code for production.
To generate a production-ready bundle, run the following command:
$ npm run build
This build will take a few seconds more, but will minify all your JavaScript code and run other optimizations, including tree-shaking when possible.
After building for production, you will find your compiled, bundled application in the public folder, ready to be deployed (don't worry, we'll cover deployment options later in the book):
$ ls public
bundle.css
bundle.js
index.html
Debugging Svelte applications
Lastly, let's look at how we can debug Svelte applications in a web browser. There are two tools worth highlighting, which can be complementary: using the Visual Studio Code debugger, and using the Svelte DevTools browser extension.
Using the Visual Studio Code debugger
Visual Studio Code contains a powerful debugger that works neatly with web browsers such as Chrome, Firefox, and Edge.
Earlier in the chapter, I recommended installing the free Debugger for Chrome extension from the Visual Studio Code Marketplace (link to the extension in the Visual Studio Marketplace: https://aka.ms/vscode-chrome-debugger). That, or the equivalent for Firefox or Edge, plus a small configuration file is all we need.
Create a configuration file called .vscode/launch.json (note the dot at the beginning of the path) and paste the following content:
.vscode/launch.json
{
    "version": "0.2.0",
    "configurations": [
        {
            "type": "chrome",
            "request": "launch",
            "name": "Launch Chrome against dev server",
            "url": "http://localhost:5000",
            "webRoot": "${workspaceFolder}"
        }
    ]
}
If you're familiar with the Visual Studio Code debugger, you'll notice that this is the standard, autogenerated file, with just the port changed in the URL.
In order to be able to set breakpoints in .svelte files, open the Visual Studio Code settings (File | Preferences, or Code | Preferences on macOS), search for debug.allowBreakpointsEverywhere, and then enable it.
After we've done this, we can use the full debugger, with support for breakpoints, data inspection, logpoints, and so on. To debug a Svelte application, perform the following steps:
- First of all, start the dev server in a terminal; this is the same command we've run before:
$ npm run dev
- Secondly, click the Run icon in the Visual Studio Code activity bar to bring up the debugger and then press the green RUN button:

Figure 2.5 – Clicking on the green RUN button to launch the debugger
Alternatively, you can use the F5 button as a keyboard shortcut.
- Chrome will be launched automatically and will be connected to the debugger in the editor.
Visual Studio Code comes with a very powerful debugger, with support for advanced features, too. The best way to learn how to use the debugger is to check out the official documentation:
https://code.visualstudio.com/docs/editor/debugging
Browser extension
In addition to the debugger inside Visual Studio Code, this community-provided extension for Chrome and Firefox can be useful to inspect and change the state of your Svelte components and troubleshoot issues:
https://github.com/RedHatter/svelte-devtools
After installing the extension, when you're browsing a Svelte application running in a dev server (for example, our project launched with npm run dev), you will find an extra Svelte tab at the end in your browser's Inspector (also known as Developer Tools):
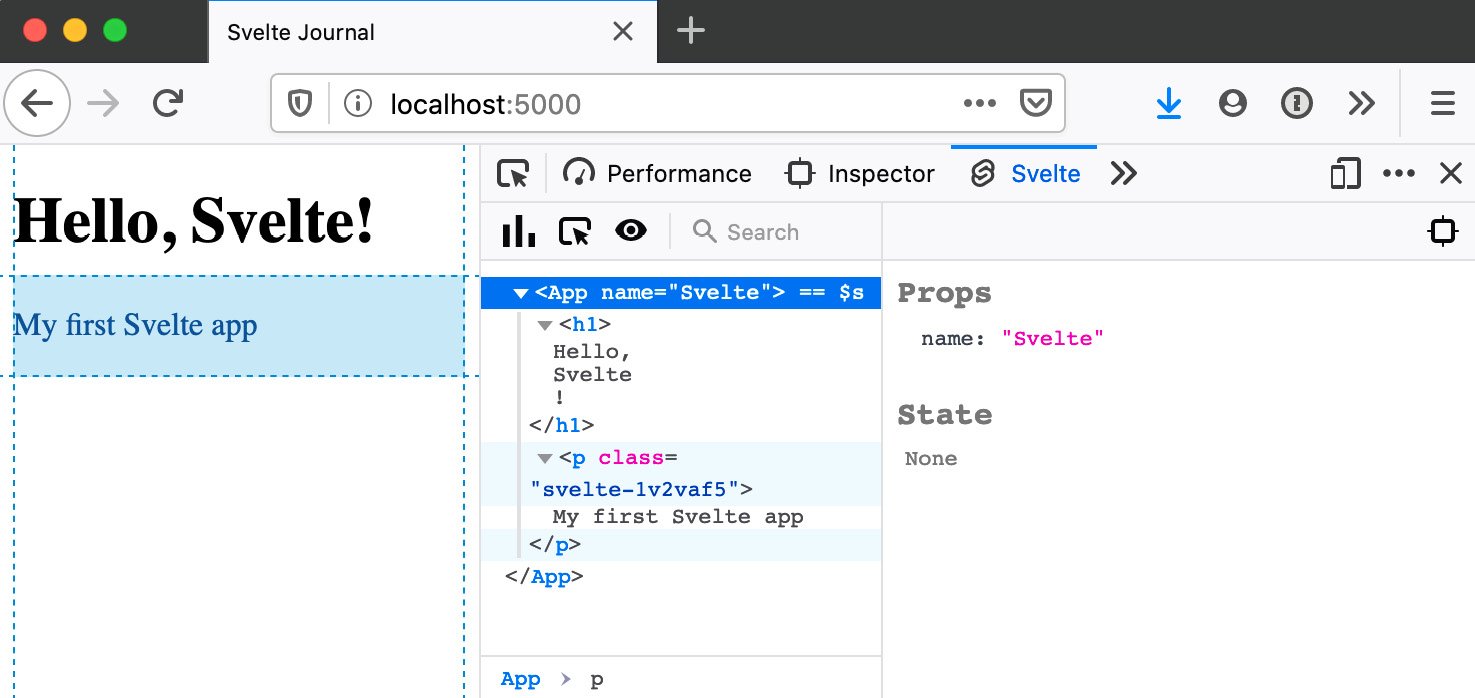
Figure 2.6 – The Svelte tab in the browser's developer tools
While not a full debugger, this extension shows the Svelte components that are currently rendered in the page, and their current state. You can change the values of props, for example, and see how the content changes.
Summary
In this second chapter, we've set up our development environment and scaffolded our project. We explored adding the Webpack bundler, and then we built our "hello world" application and got a first glimpse at how Svelte components are written. Lastly, we looked at debuggers and browser extensions to help us troubleshoot issues with our code.
In the next chapter, we'll dig deeper into this last topic; exploring the Svelte template syntax and other core features of the Svelte framework.