Navigating and Modeling in Blender
Blender is a powerful 3D modeling software. It has a massive community and is frequently updated with new features that greatly improve the software. Since its support of photo-based materials and its UI update in version 2.8, Blender has become a legitimate professional option for 3D artists. It can perform most of the operations in the 3D modeling pipeline, such as sculpting, modelling, UV unwrapping, rigging, and much more. Blender is a massive generalist software that goes beyond just modeling and rigging. It also provides multiple physics engines, a compositor for video editing, and even 2D animation tools. However, the most impressive aspect Blender has going for it is not its impressive capabilities but, rather, the fact that it gives us these amazing capabilities and still remains completely free.
In this chapter, we will take a look at Blender’s user interface (UI). We will learn how to navigate the different tabs that we will be using and the 3D viewport. Then, we will learn basic modeling techniques and hotkeys. Finally, we will take a look at specific tools used to check topology.
In this chapter, we will be learning the following subjects:
- Making sense of the Blender UI
- Navigating using the viewport
- What a 3D mesh is and how it can be manipulated
- Adding more vertices to enhance a mesh’s geometry
- Manipulating a mesh using modifiers
Technical requirements
In this book, we will be using a vanilla Blender release, version 3.2, with included add-ons. All examples shown will be compatible with version 3.3 LTS, which is the latest version of Blender released at the time of writing. The latest version of Blender can be downloaded for free from https://www.blender.org/download/.
An external mouse will also be required, and a keyboard with a number pad is strongly recommended.
Making sense of the Blender UI
If this is your first time booting up Blender, it can be overwhelming – so many tabs and gizmos feeding you information. Of course, because you can do so many things in Blender, that also means there are a lot of options. So, before diving straight into topology, let’s take a moment to look through the UI.
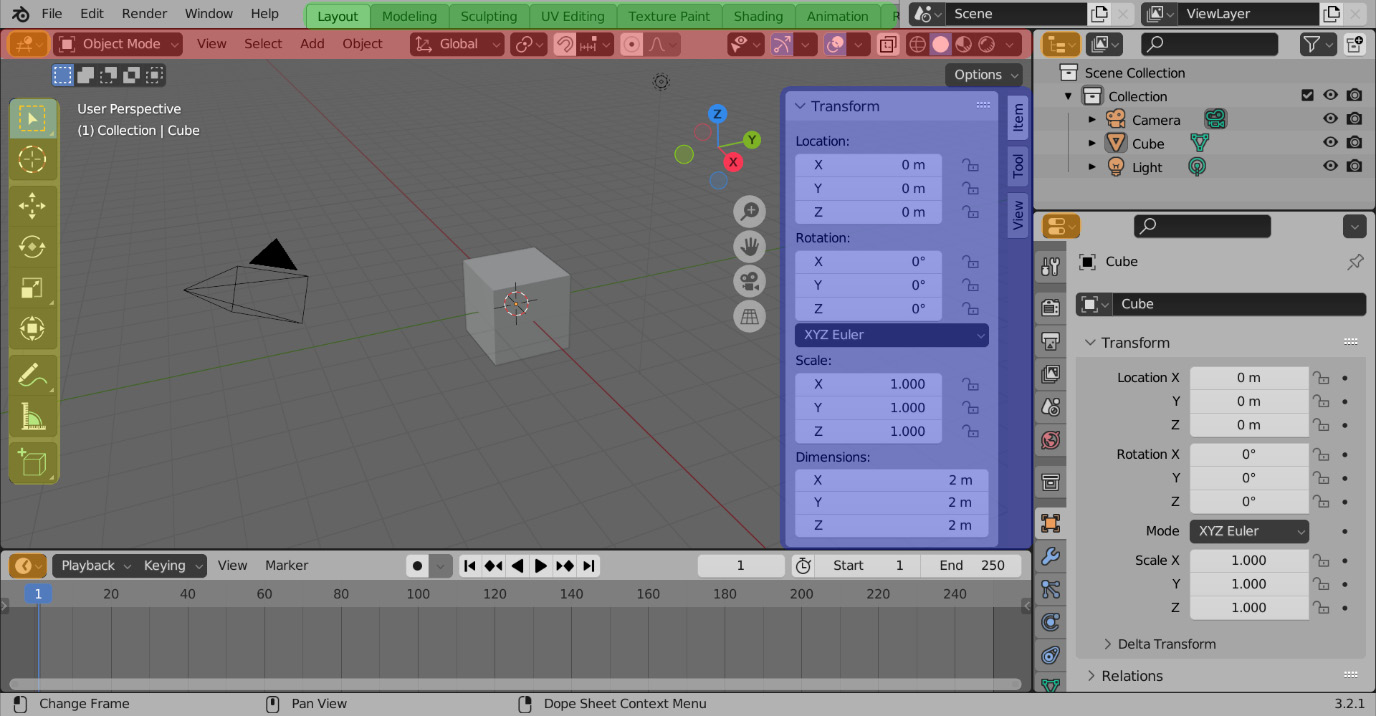
Figure 1.1 – The Blender UI
The Blender UI houses all of the different sections we will be using. The UI is broken up into five sections, the Header, Workspaces, Areas, the Toolbar, and the Sidebar. You can see these sections highlighted in Figure 1.1. Let us get a sense of what each of these areas contains:
- The Header, highlighted in red, contains object interaction mode, which determines how you want to affect an object, and the options for that mode. In the preceding figure, it is set to Object Mode.
- The Workspaces, highlighted in green, are preset tabs set up for a specific operation. In the preceding screenshot, we are in the Layout workspace.
- The Areas are where each of the individual editor types, highlighted in orange, are contained. Editor types are used to manage the many workflows of Blender.
- The Toolbar, highlighted in yellow, displays the tools for the object interaction mode that you have selected. Its visibility can be toggled by pressing T.
- The Sidebar, highlighted in blue, shows specific details about the object you have selected, such as its dimensions. It can be toggled by pressing N.
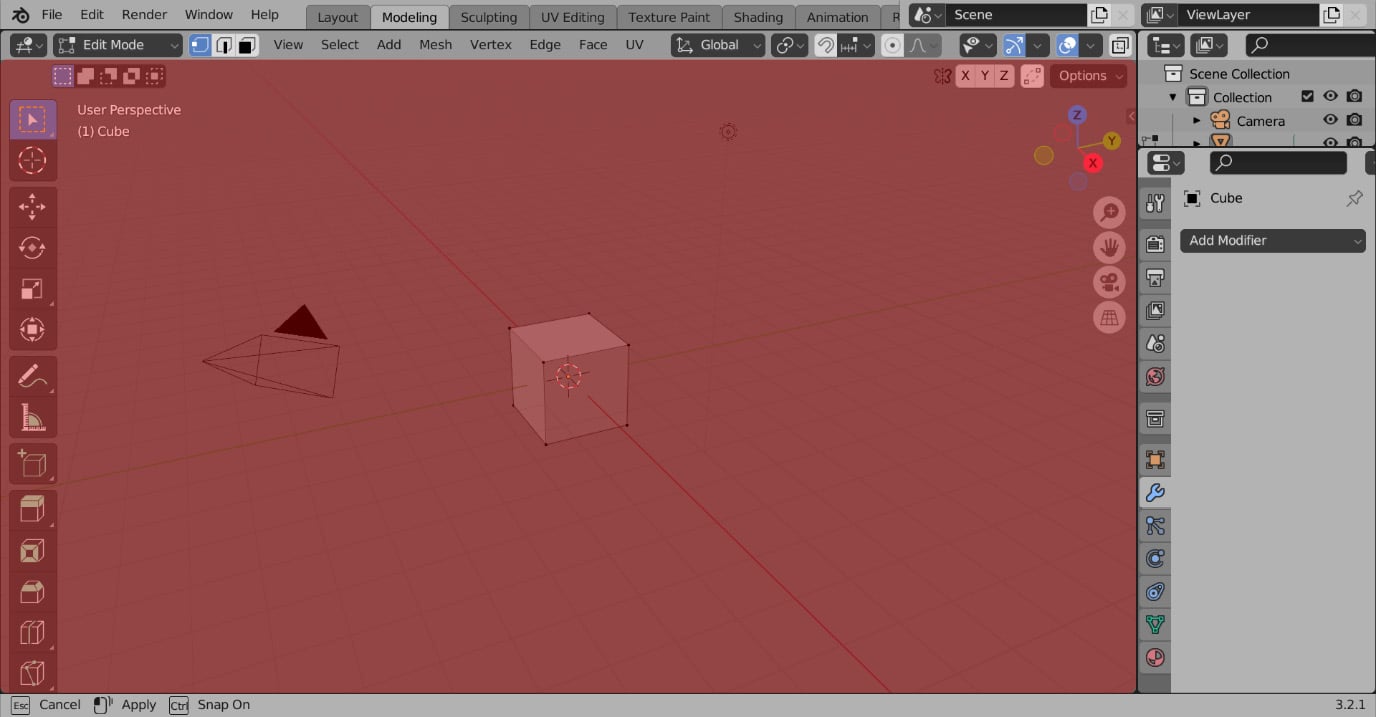
Figure 1.2 – The main region workspace
The workspace we will be working in the most will be the Modeling tab. The main region, highlighted in red in Figure 1.2, is the area that takes up the most screen space. The Modelling tab’s main region is the 3D Viewport by default. The viewport is the editor type that shows the 3D object. This is the area that allows you to move around in 3D space. These are highlighted in Figure 1.2.
Now that we know where the major parts of the Blender UI are, we can take a look at how to navigate in the 3D Viewport. This is the main area we will be using when looking at our models.
Navigating using the viewport
While modeling, we spend most of our time in the viewport, so getting comfortable with its navigation is important. You navigate the viewport using three main avenues of movement, orbiting, zooming, and panning. To orbit, simply press the middle mouse button (MMB), and you will rotate around a hidden pivot point. To zoom, use the scroll wheel to scroll forward to zoom in and scroll backward to zoom out. To pan, press Shift + the MMB and move the mouse in the direction you want to pan.
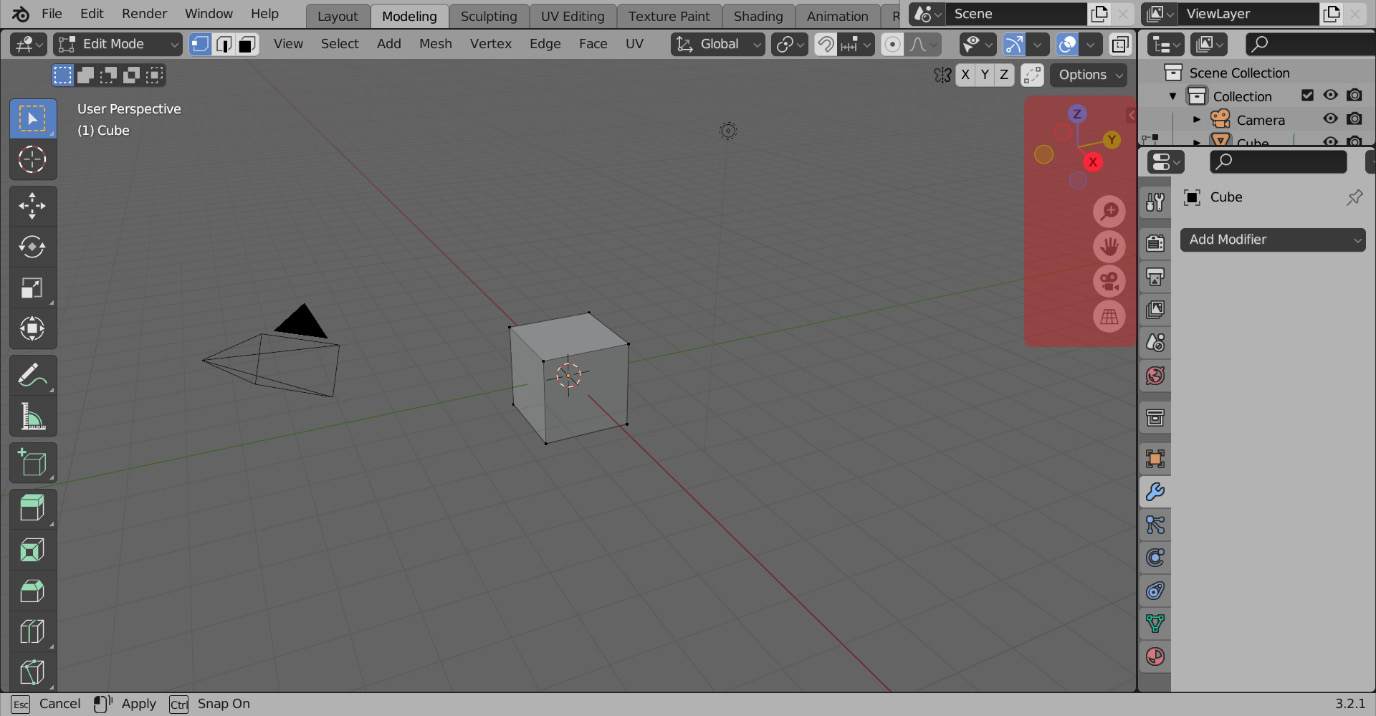
Figure 1.3 – Navigation gizmos
The top right of the viewport has a few helpful gizmos, as shown in Figure 1.3. These can all be used to control the viewport using just the mouse. The gizmo listing the X, Y, and Z positions in Figure 1.4 can be used to orbit by pressing the left mouse button (LMB) on the icon and moving the mouse.
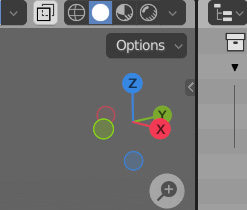
Figure 1.4 – The orbit gizmo
The magnifying glass icon below the orbiting gizmo in Figure 1.5 can be used to zoom by pressing the LMB on the icon and moving the mouse.

Figure 1.5 – The zoom gizmo
And finally, the hand icon in Figure 1.6 can be used to pan by pressing the LMB on the icon and moving the mouse.

Figure 1.6 – The pan gizmo
Now that we have some understanding of the viewport’s gizmos and the features of Blender’s UI, we can take a look at what we will be using these tools for.
What a 3D mesh is and how it can be manipulated
First, we will talk about what a 3D mesh actually is. A mesh constitutes one or more geometric points called vertices. These vertices can be connected by edges, and those edges can be connected with faces. A mesh is contained within an object. You can see all of these in Figure 1.7. An object contains one or more meshes and acts as a container for all of the data stored in the mesh.
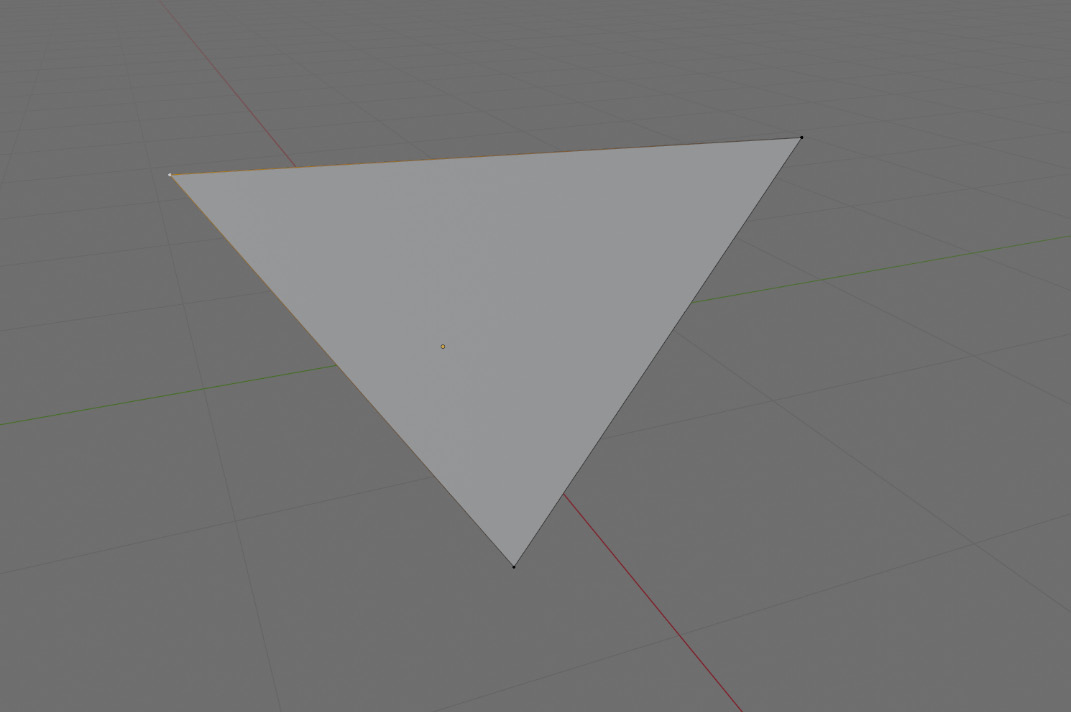
Figure 1.7 – Vertices, edges, and faces forming a triangle
To edit the mesh of an object directly, you need to have the object you want to edit selected in the object selection mode called Object Mode (see Figure 1.8). To select an object, follow these steps:
- Press the LMB on the object in the viewport.
- Then, switch the object selection mode to Edit Mode by pressing LMB on the icon at the top left and selecting it from the drop-down list.
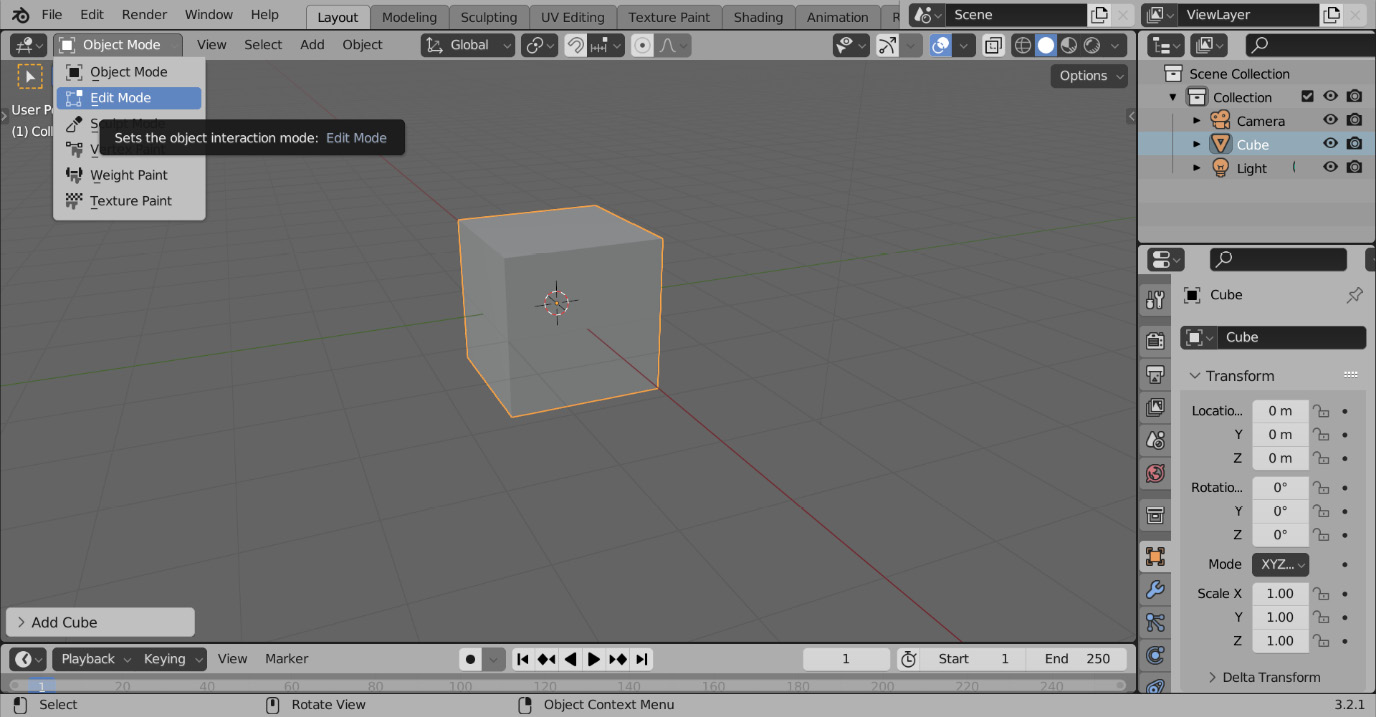
Figure 1.8 – The Object Interaction Mode tab
Alternatively, you can also press the Tab hotkey to switch to Edit Mode with the object selected.
Now that we are in Edit Mode, we can start to manipulate the mesh, starting with selection. Select modes are located in the top left of the header, as shown in Figure 1.9.
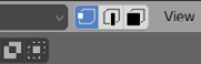
Figure 1.9 – Select modes – vertex, edge, and face from left to right
Select modes allow you to select a part of the mesh to change. The three buttons from left to right enable you to select a vertex, select an edge, and select a face respectively. You can enable these individually, or hold Shift and select multiple modes to enable.
To select a vertex, hover over the vertex you want to select and press the LMB. To select multiple vertices, hold Shift while selecting the other vertices. Selections have two types: selected and active. Selected vertices are a darker orange, while active vertices are highlighted in a brighter orange or white. Figure 1.9 shows two vertices selected, with one of them active.
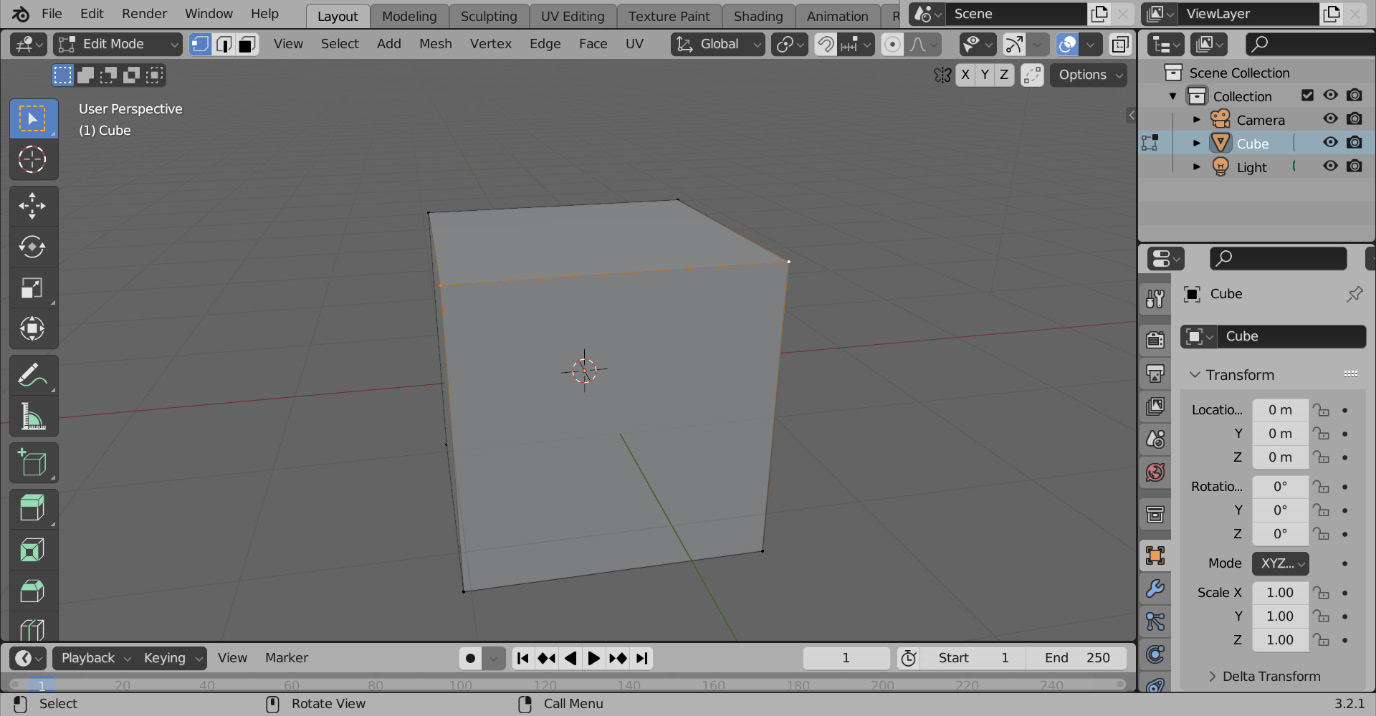
Figure 1.10 – The selected vertex on the left and the active vertex on the right
The active selection will always be the one that has its data displayed in the editor types and sidebar. You can press A to select everything and Alt + A to unselect everything.
Now that we know how to select different parts of the mesh, we can actually start doing operations
- To translate a mesh, just select the vertices, edges, or faces you want, and then press G and move your mouse to the desired location.
- It is equally easy to scale. Start by pressing S, and then move closer or farther from the point you are scaling from to change the scale.
- To rotate, press R and rotate your cursor around the point or rotation to change the rotation.
- To finalize any transform, simply press the LMB, and to cancel a transform, press the right mouse button (RMB).
- You can also lock all of these transforms along a specific axis. Just press X, Y, or Z after pressing the transform button and it will lock you into its respective axis.
In Figure 1.11, you can see the mesh being scaled along just the Z axis by pressing S and then Z.
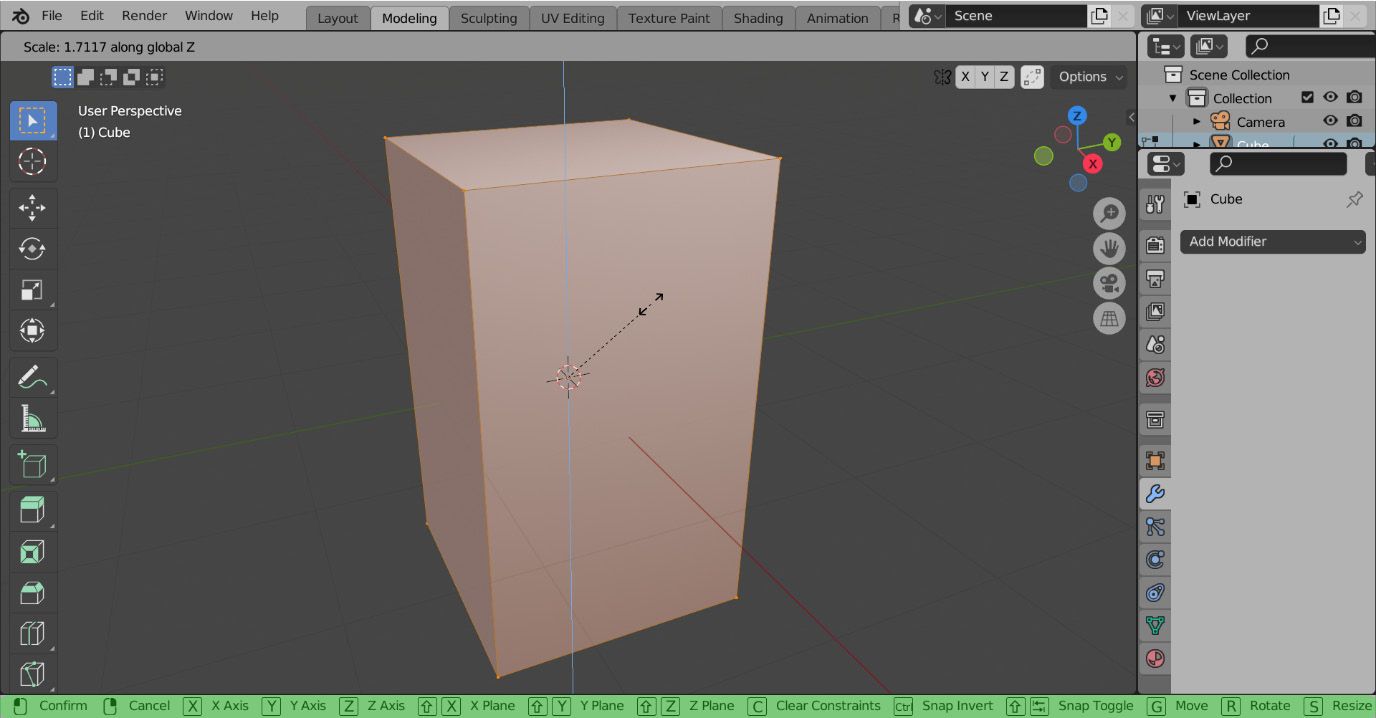
Figure 1.11 – Mesh scaling on the Z axis
Also, note that at the bottom of the screen, more transform options are listed, as highlighted in green in Figure 1.11. We will not be exploring these options within this book, but these can be helpful to know about when you start modeling on your own.
Now that we know how to move the mesh around, we can start adding some more geometry.
Adding more vertices to enhance a mesh’s geometry
There are a few ways to add more vertices to a mesh. The one used most frequently later on in this book is extrusion. You can extrude a selection of a mesh by pressing E and moving the mouse to the desired extrusion point.
Figure 1.12 shows one vertex being extruded, although you can extrude faces, edges, and a bigger selection as well.

Figure 1.12 – An extruded vertex
Another way to create more geometry is to duplicate a mesh. To duplicate a mesh, just select the parts you want to duplicate and press Shift + D. This is usually the method used to start a new section of geometry. Just like the transforms listed earlier, to finalize the action, press the LMB, and to cancel it, press the RMB. Be careful when doing these operations, as right-clicking will just reset the location of the operation and will not delete the new geometry. Figure 1.13 shows a face being duplicated.
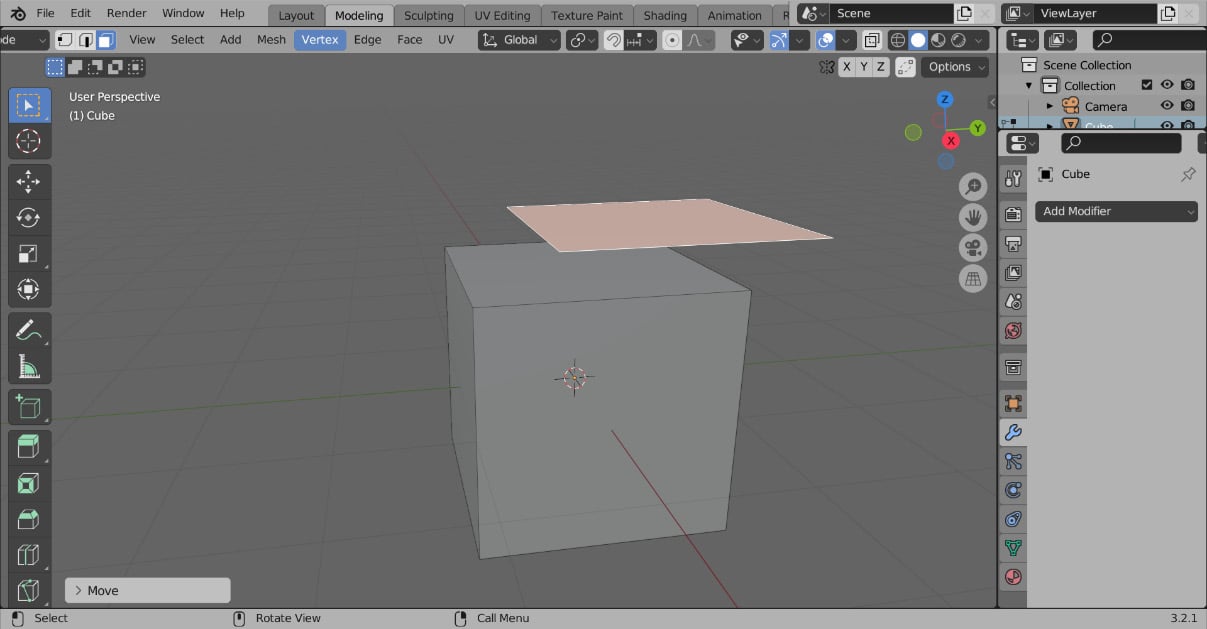
Figure 1.13 – A duplicated face
Once you have created a string of edges, as shown in Figure 1.14, you might want to create a face connecting them.
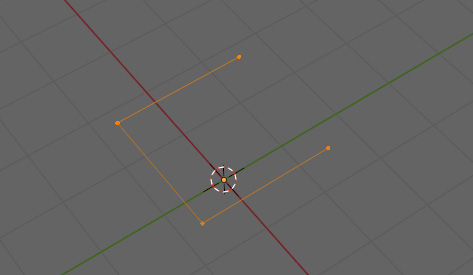
Figure 1.14 – Edges to make a face
To do this, you either need to select at least three vertices or two edges and press F. Figure 1.15 shows the face that was created.
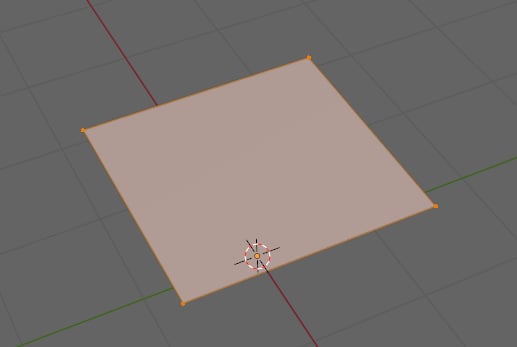
Figure 1.15 – A face made from the selected edges
We can also add geometry by subdividing the mesh. Subdividing the mesh divides the faces of a model into more small faces. To subdivide, select the faces that you want to subdivide and press the RMB. This will bring up the Vertex Context Menu options, as shown in Figure 1.16, with Subdivide at the top of the menu.
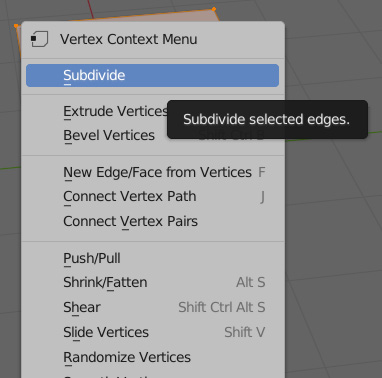
Figure 1.16 – Vertex Context Menu
After selecting Subdivide, your mesh will subdivide, and a new tab to control the subdivision will pop up in the bottom left. Both the mesh and the tab can be seen in Figure 1.17.
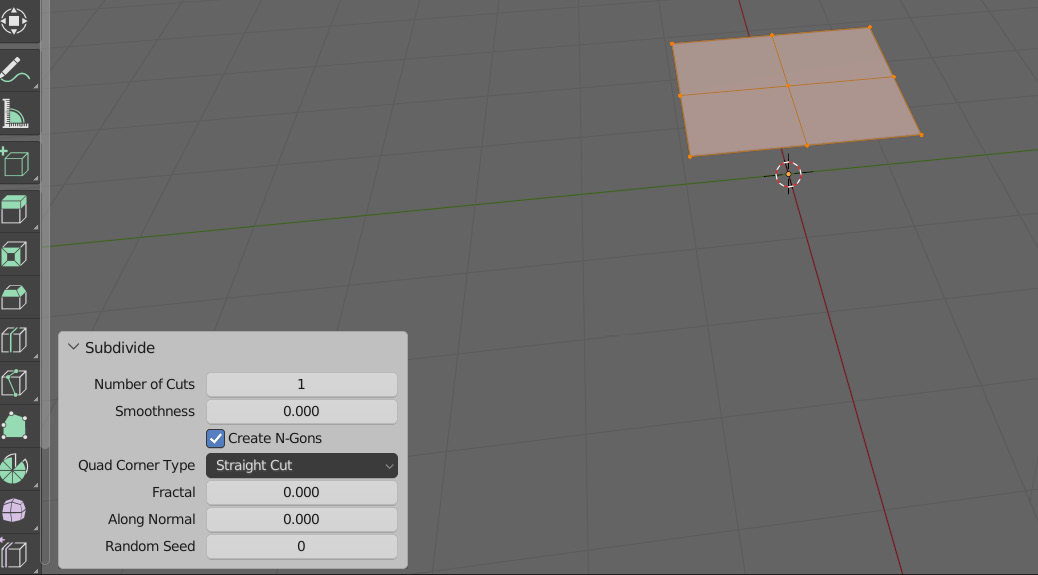
Figure 1.17 – The subdivided mesh and subdivision settings
You can also add any number of primitive objects to your scene. A primitive object is a basic shape such as a cube or sphere that you can add to your scene as a starting point for your model. To add a primitive in object mode, simply press Shift + A and hover your mouse over the mesh tab at the top, as shown in Figure 1.18.
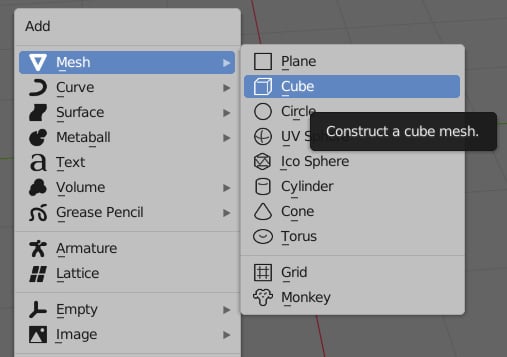
Figure 1.18 – The Add menu
Now that we know how to add geometry, we need to learn how to remove it as well. After selecting the desired areas for removal, press X. This will pull up a dropdown with a lot of options in the form of the Delete menu, as shown in Figure 1.19.
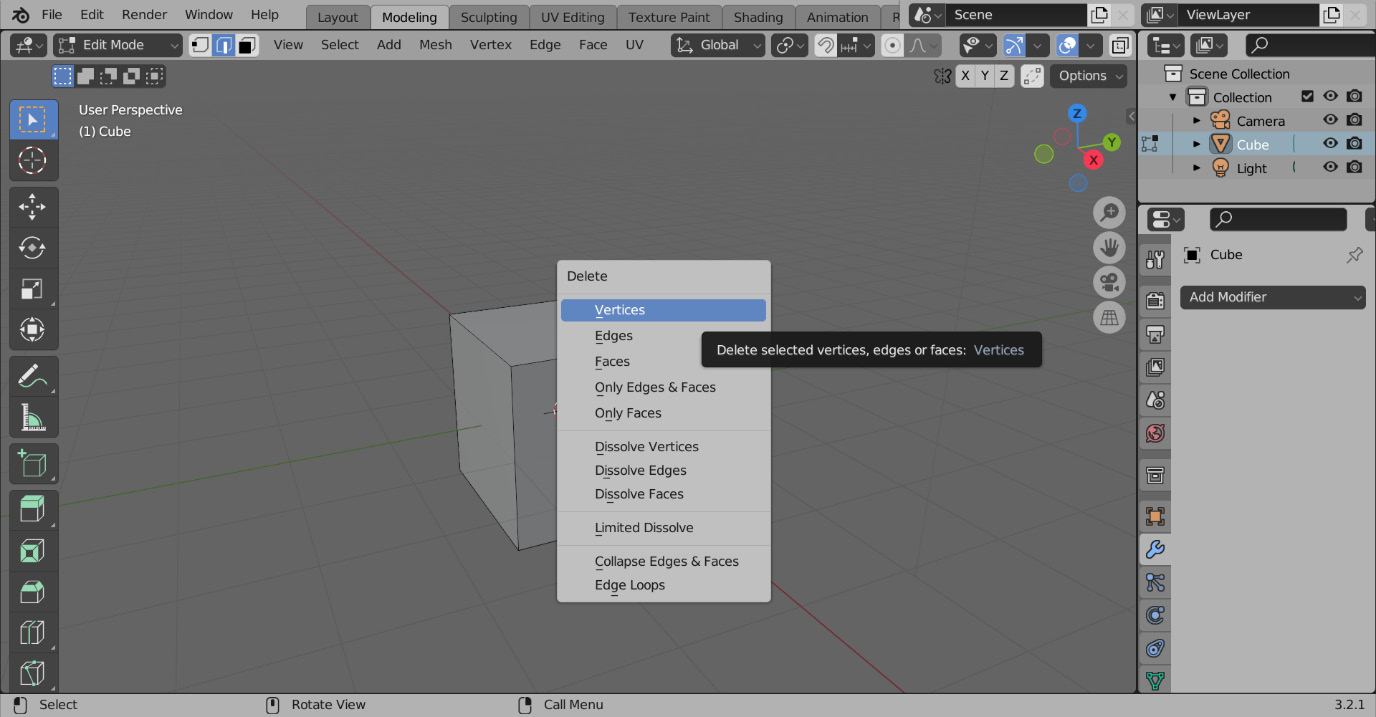
Figure 1.19 – The Delete menu
Let us understand the Delete menu in detail:
- Deleting Vertices will remove everything you have selected
- Deleting Edges will delete the edges you have selected and any faces connected to them
- Deleting Faces will delete faces and any edges that do not have any other faces connected to them to prevent floating edges
- Deleting Only Edges & Faces will delete faces and selected edges
- Deleting Only Faces will only delete faces without deleting any edges
- Dissolve will remove the selected geometry and create a face to prevent any holes
To undo a transform, press Ctrl + Z. To redo a transform that you undid, press Ctrl + Shift + Z.
In this section, we managed to add geometry while interacting directly with the mesh. There are also ways to change the mesh indirectly.
Manipulating a mesh using modifiers
Modeling operations are generally broken up into two general categories, destructive, and non-destructive. Their names are a bit misleading because you can both add and remove geometry by doing both types of operations. The difference is how they go about doing it. All of the modeling methods introduced so far have been destructive. Destructive modeling is when you perform an operation that cannot be tweaked or changed after finalizing the transform. The only way to undo a destructive transform is by using Ctrl + Z. Non-destructive transforms can be changed or completely removed without affecting the base mesh. These transforms affect the mesh indirectly, and are usually used outside of Edit Mode.
There are plenty of ways to affect the mesh indirectly by performing an operation on it outside of Edit Mode. One of the most common ways of doing this is through the Modifier Properties tab in the Properties Editor Type area. The Modifier Properties tab is used to manage modifiers. Modifiers are used to perform non-destructive operations on an object. The Modifier Properties tab can be seen in Figure 1.20.
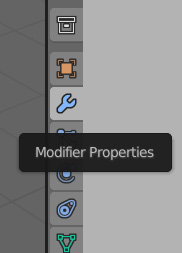
Figure 1.20 – The Modifier Properties tab
The Mirror modifier
An example of one of these modifiers is the Mirror modifier. The Mirror modifier mirrors the object it is put on around the X, Y, or Z axis. To use a modifier on an object, follow these steps:
- Make sure the object you want to add it to is selected.
- In the Modifier Properties tab, press Add Modifier and navigate to the desired modifier – in this case, the Mirror modifier, as shown in Figure 1.21.
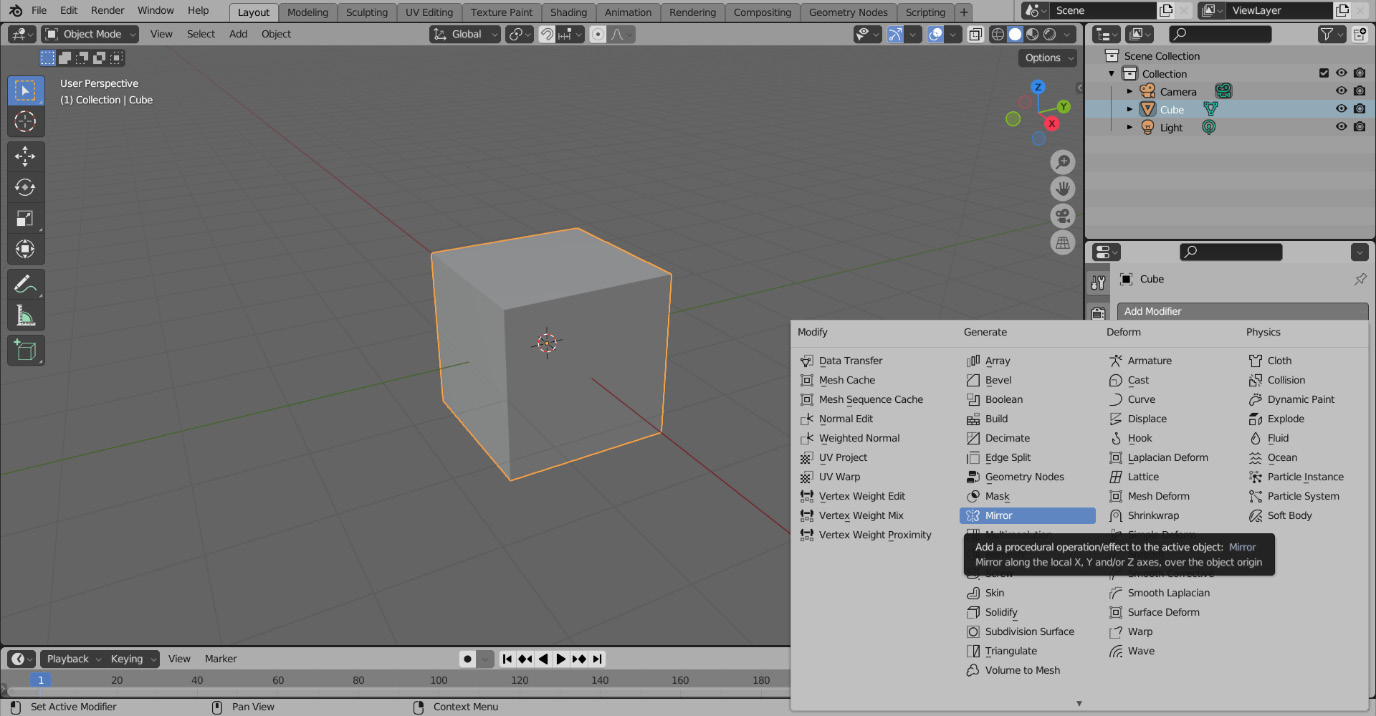
Figure 1.21 – The Mirror modifier in the Add Modifier tab
- Finish adding the modifier by selecting it, and your modifier will appear in the Modifier Properties tab, as displayed in Figure 1.22.

Figure 1.22 – The Mirror modifier
The Mirror modifier works by mirroring the mesh around an object’s origin. The object origin is the little orange dot you see in Object Mode that indicates the object’s orientation compared to the world’s origin. Figure 1.23 shows us a closer look at the origin.
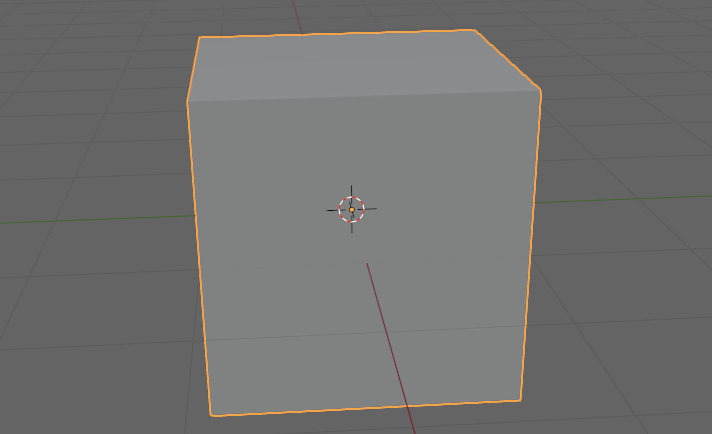
Figure 1.23 – The origin of an object
- Pressing N to open the side panel shows the transforms of the object.
- Translating the cube in Object Mode by pressing G and then the LMB to apply the translation will change these variables. This is captured in Figure 1.24.
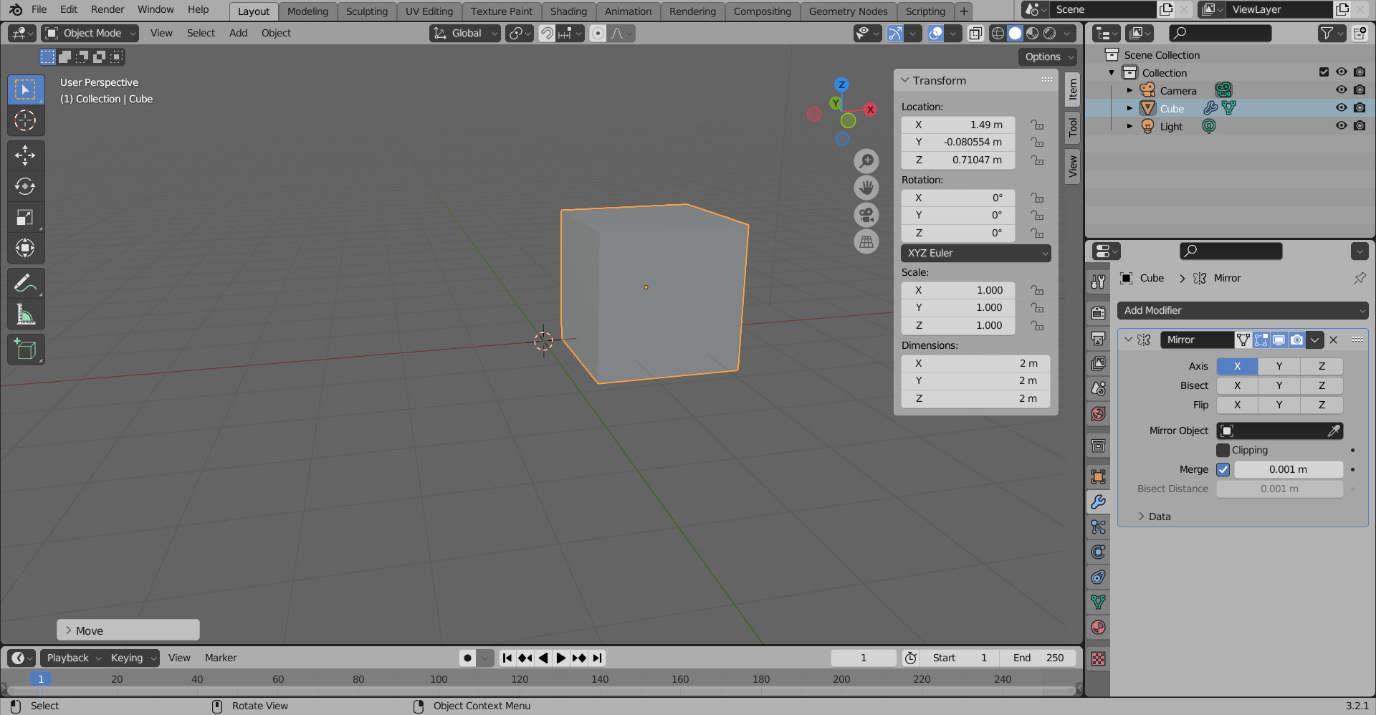
Figure 1.24 – The translated cube in Object Mode
The Mirror modifier will not be affected by a translation in Object Mode because translation in this mode also moves the origin, and the Mirror modifier mirrors around that.
- To see what the Mirror modifier is doing, we have to edit it in Edit Mode because the location of the vertices in this mode are all referenced to the origin of the object. If we translate the cube in Edit Mode, the result is shown in Figure 1.25.
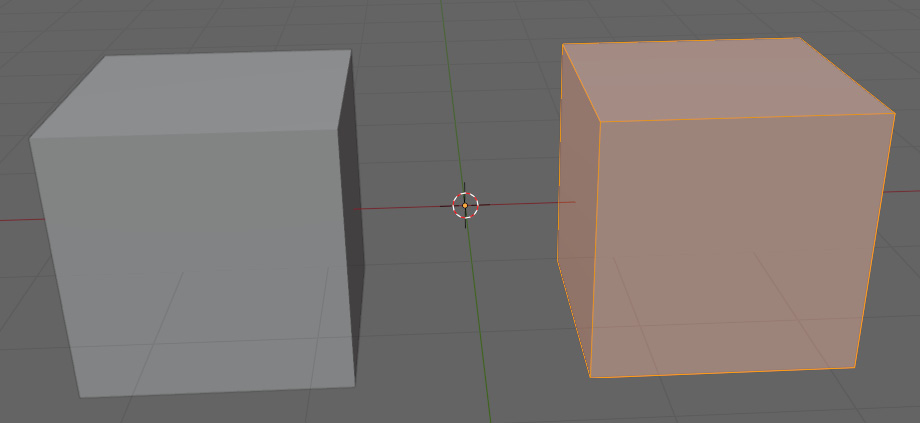
Figure 1.25 – The translating mesh in Edit Mode
Now we have a perfectly mirrored cube on either side of our origin. Next, we will look at how to connect the two mirrored halves. To connect the cubes together, follow these steps:
- Start by selecting the face facing the origin and deleting just the face. This is to ensure that we do not have any extra faces inside of the mesh.
- Next, on the Mirror modifier, make sure Clipping is turned on.
- Finally, select the ring of vertices closest to the origin and translate them to the middle, while locking it on the X axis by pressing G and then X. The result should look like Figure 1.26.
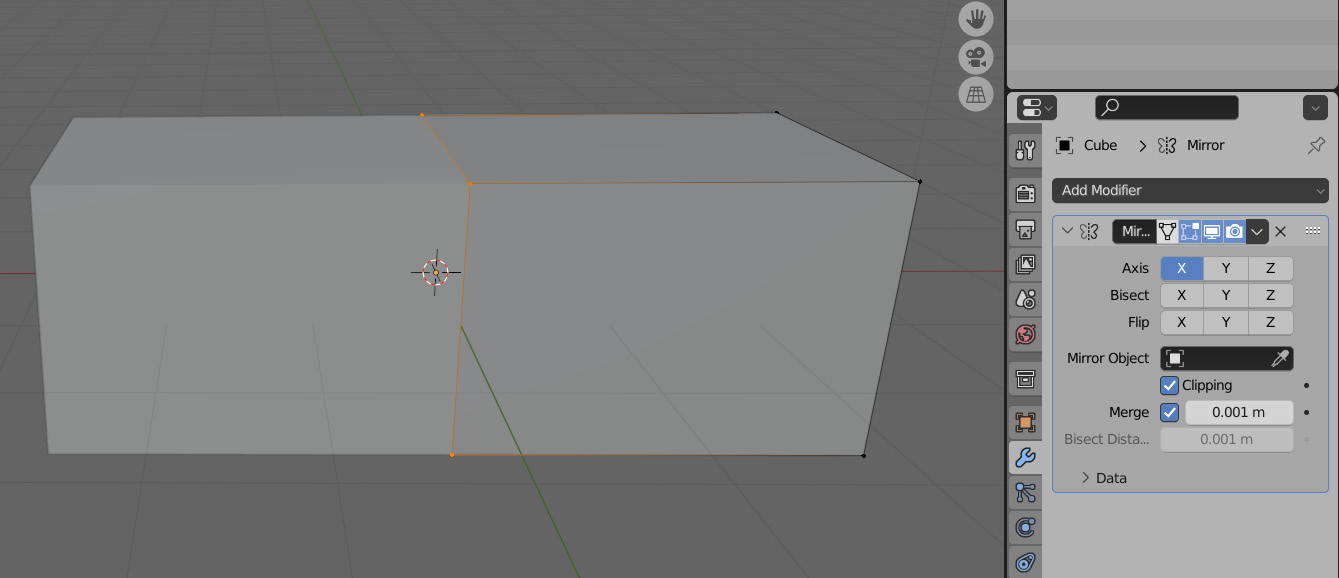
Figure 1.26 – Translating in Edit Mode with clipping enabled
The Subdivision Surface modifier
Another common modifier we are going to use is called the Subdivision Surface modifier, or SubD for short. The SubD modifier subdivides the mesh and also performs a smoothing operation on the subdivision. The levels of subdivisions can be adjusted for the viewport and the render can be adjusted separately. Modifiers can also be used destructively. You can apply them by pressing the arrow at the top right of the modifier, pointed out in Figure 1.27.

Figure 1.27 – Applying modifiers in the Modifier tab
Modifiers affect the mesh from the top of the modifier stack down. So, in this instance, the Mirror modifier is being calculated before the SubD modifier. It is usually best to apply modifiers from the top down to avoid any issues. You must be in Object Mode to apply modifiers. Figure 1.28 shows the mesh in Edit Mode before applying modifiers, and Figure 1.29 shows the mesh after applying them.
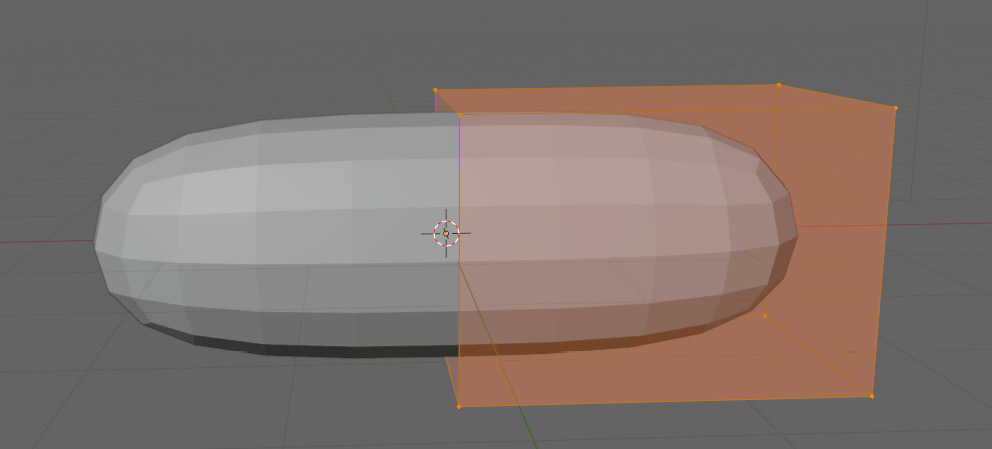
Figure 1.28 – The mesh in Edit Mode before applying the modifier
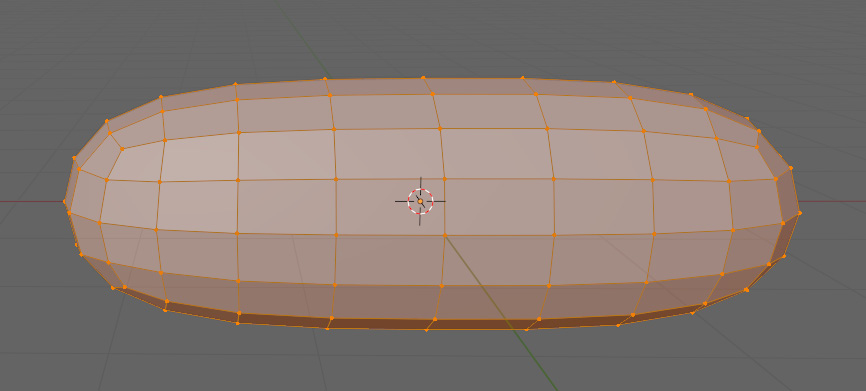
Figure 1.29 – The mesh in Edit Mode after applying the modifier
Before applying, the mesh does not change because it is non-destructive. After applying it, it becomes destructive and allows you to modify the mesh directly again. Now that we have an understanding of the Mirror modifier, the next modifier we will use will help us transfer the shape of one mesh to another.
The Shrinkwrap modifier
There are also modifiers that affect the position of the vertices non-destructively. An example would be the Shrinkwrap modifier. The Shrinkwrap modifier projects the vertices from one object onto another object. As an example, we are going to shrink-wrap a cube onto a sphere:
- Go into Object Mode and add a cube by pressing Shift + A.
- Hover over the mesh.
- Select the cube shown in Figure 1.30.
- Repeat 1 to 3, only this time, select the UV sphere.
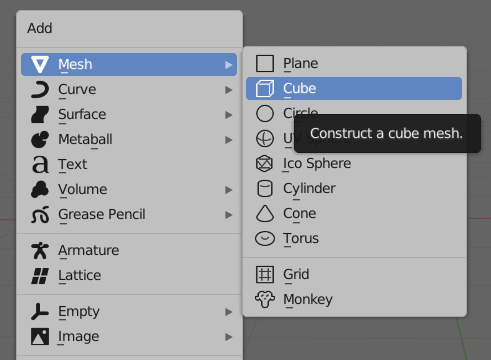
Figure 1.30 – Adding a primitive cube
After both objects have been added, it should look something like Figure 1.31.
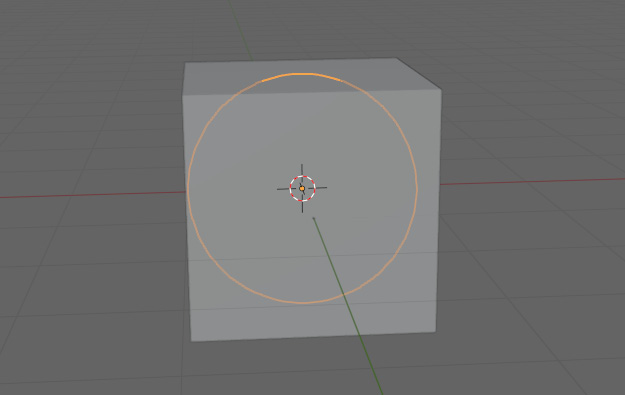
Figure 1.31 – The sphere and cube added on top of each other
- After this point, we can select the cube and add our Shrinkwrap modifier.
- Select the target option on the Shrinkwrap modifier and choose our sphere from the dropdown illustrated in Figure 1.32.
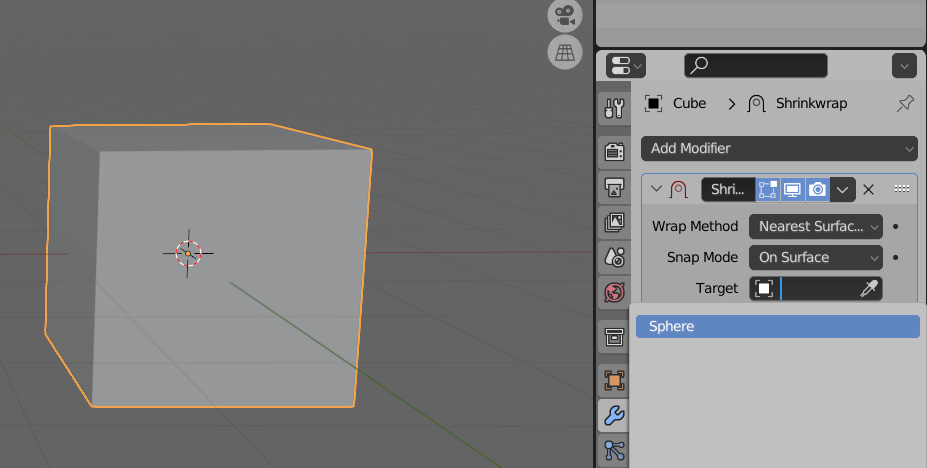
Figure 1.32 – The Object selection tab
As soon as this is done, the eight vertices of the cube will be cast onto the surface of the sphere. If we want the cube to conform to the sphere, we will have to give it more geometry to work with. That is where we can use the SubD modifier.
Remember, the modifier stack is calculated from the top down, and we want to add the extra geometry, so we need to put the SubD above the Shrinkwrap modifier.
This can be done by grabbing the top right of the modifier and dragging it above the other modifier. After that, just add another level of subdivision to the viewport, and it should look like Figure 1.33.
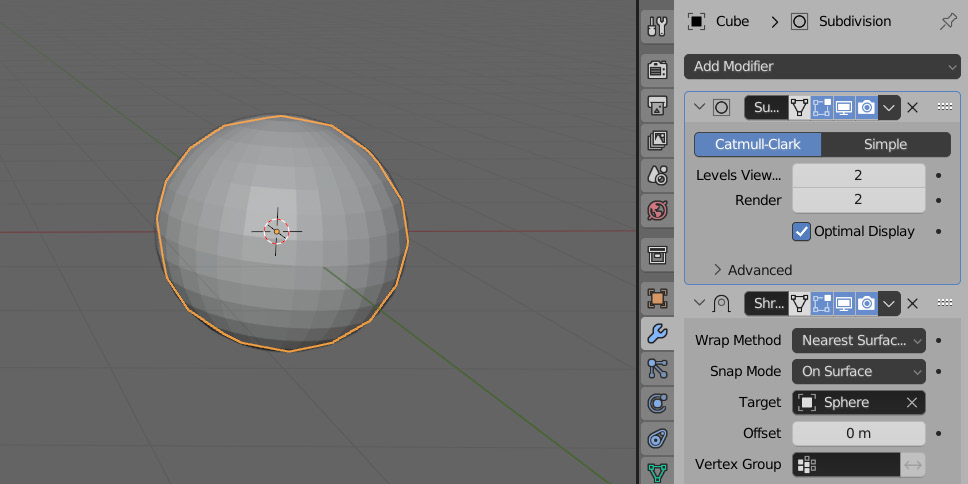
Figure 1.33 – The cube shrink-wrapped to the sphere
Summary
In this chapter, you learned about meshes, objects, transforms using hotkeys, the difference between destructive and non-destructive transforms, and modifiers.
Now that we know all about our mesh and how to manipulate it, we should be ready to hop into some real topology. In the next chapter, we will be using many of these transforming techniques to illustrate how the topology of a mesh is supposed to behave.