


Before we dive right into the concept of development, we first need to set up our development environment and set up Sparrow on our system. In this chapter, we will take a short look at what Sparrow actually is, set up Xcode and Sparrow for our needs, create a game template, and set up goals and expectations for the game we are going to develop.
Sparrow is a game framework that might feel familiar to those who already have some experience with ActionScript, the Flash API, and/or Starling. The familiarity to Starling is not a coincidence; the core development team of both Starling and Sparrow are the same. Starling could be considered the ActionScript version of Sparrow. We will delve into these aspects once we use the different features of Sparrow in detail.
Open Graphics Library for Embedded Systems (OpenGL ES) is a graphics renderer for mobile devices which is available on all kinds of devices ranging from iOS devices to Android devices and even consoles such as OUYA. OpenGL can be seen as the older and bigger brother of OpenGL ES. OpenGL itself is available for all desktop platforms such as Windows, Linux, Mac OS X, and next-generation consoles such as the PlayStation 4.
OpenGL and OpenGL ES are the kind of libraries that let us perform magic on the screen, be it drawing textures, or having some kind of geometrical shapes or particle effects on the screen.
Sparrow abstracts all the OpenGL components away from the developer. We don't have to worry about the inner workings of OpenGL at all. Sparrow fully concentrates on 2D rendering and puts it into a bunch of logically structured classes and methods. While the choice for performance-heavy graphics applications is usually C or C++ as far as programming language is concerned, Sparrow uses Objective-C to keep it familiar for Mac and iOS developers.
Sparrow is not only a 2D graphics engine, but it also provides the functionality to create animations on the screen—ranging from simple effects such as fading objects in and out to more sophisticated actions such as moving a ball from the left to the right of the screen with a bouncing animation. This mechanism is also referred to as tweening.
Apart from graphic-related features, Sparrow also gives us the means to load audio files and play music and sounds in our games.
When directly compared with other game frameworks, Sparrow does not impose a specific workflow on us. As a result, a few things need to be set up by hand, such as structuring all the needed assets for our game and managing our scenes.
From a hardware perspective, any Mac that can run the latest Mac OS X works just fine.
On the software side, we will need the latest version of Mac OS X and all the latest updates need to be installed. The minimum at the time of writing this book is OS X 10.8 Mountain Lion.
For the platforms we are going to target, we need at least a device with iOS 5.0 and Xcode 4.0 or higher. The latest version of Sparrow uses OpenGL ES 2.0 internally, which is only supported by iPhone 3GS or newer devices.
Setting up the Apple developer account and joining the iOS developer program is entirely optional for the purpose of this book, but it will become necessary if you would like to test the game on a physical device or publish it to the Apple App Store.
The iOS Simulator bundled with Apple Developer Tools is a great platform to test different functionalities. However, performance can be misleading in the simulator itself. Performance is a crucial factor in game development, so testing on a real device should be a priority.
Depending on the performance of your Mac, apps on the iOS simulator can run from terribly slow to quite fast. All in all, don't take the performance in the simulator as a reference to how well the game is going to perform on real devices.
For more information on the iOS developer program and Apple developer accounts, go to https://developer.apple.com/.
Xcode is the default integrated-development environment for developing everything related to Mac and iOS. Xcode is available for free and the latest version—at the time of writing this book—is 5.0.2.
The first step is to download Xcode from the Mac App Store. Click on the Mac App Store icon from the dock to open the Mac App Store.
Search Xcode using the search box and select the appropriate result.
The store page might look something like the following screenshot:

Click on the Install button right under the logo. (If Xcode is already installed, the caption of the button changes to Installed.) The download is around 2.6 GB, so it may take a while depending on the speed of your Internet connection.
It's always a good idea to keep the Xcode installation up to date as updates are frequent.
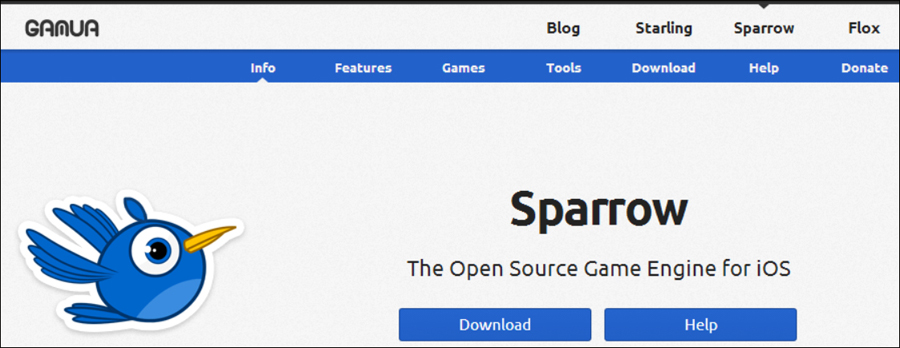
Now that Xcode is installed and ready to go, the next step is to get the latest stable version of Sparrow. Go to the official Sparrow homepage at http://sparrow-framework.org or http://gamua.com/sparrow/.
The latest Sparrow version—at the time of writing this book—is 2.0.1. The download page will look like the following screenshot:
Click on the big blue Download button and the download should start.
If you are familiar with the version control system Git, you can also get the latest version by cloning the Git repository. This section is meant for advanced users who have already worked with Git.
The Sparrow GitHub repository is located at https://github.com/Gamua/Sparrow-Framework/, where more information on the procedure can be found. Typically, Git commands are entered in the terminal:
git clone https://github.com/Gamua/Sparrow-Framework
This will take a while to download; the current progress is being shown in the terminal. After the download is complete, you will have the latest development version. Only use this version if you want to test a specific feature of Sparrow before its release or if you are feeling adventurous.
Never use this version for production code in games about to be released on Apple's App Store.
To get the latest stable version of Sparrow, check out the stable tag:
git checkout tags/v2.0.1
After the download has finished, extract the file to a location of your choice. We can use the unpacker that is included in Mac OS X by default, but any third-party unpacker should work as well. Let's take a look at the following screenshot to see what the Sparrow package has to offer:

The samples folder consists of three subfolders, and they are as follows:
barebone: This is a bare minimum project and a good start for creating your own games and will serve as the template for our game as welldemo: This is a sample application showcasing many of the features found within Sparrowscaffold: The scaffold template provides some base classes and more boilerplate code than thebareboneexample
Markdown files are, in essence, text files that can be rendered into HTML files. They are as follows:
BUILDING.md: This gives a quick start on how to use the libraryCHANGELOG.md: This gives a detailed list of items on what exactly changed between the versionsLICENSE.md: This is the license Sparrow usesREADME.md: This is a short introduction into what Sparrow is
Sparrow is a free and open source software, which means its source can be viewed and modified by anyone.
Like many other pieces of software in the Mac/iOS universe, Sparrow is licensed under an unmodified two-clause Simplified BSD license, which allows us to use Sparrow as long as the copyright notice, the list of conditions, and the disclaimer is distributed with the source or the application.
Note
What does this mean if we were to modify the source code?
The modified source code must have the same LICENSE.md file and the contents of this file are not allowed to change.
What does this mean if we were to develop a game with Sparrow and distribute the game on the Apple App Store?
The game needs to have the contents of LICENSE.md present in the game itself. Having the contents of the file in the options or credits screen is a valid solution.
There are two different ways to set up Sparrow on your machine. The first is probably the easiest way to set up Sparrow.
The second option is to use CocoaPods, a dependency management system for Objective-C. CocoaPods is probably the better way to go in the long run, especially when working with large-scale projects and more than one dependency. Setting up CocoaPods takes a bit longer than the first option and requires some knowledge on how to use the terminal.
While these options are not mutually exclusive, it's best to try out both and stick with the one that appeals the most.
To add Sparrow as a source tree reference, follow these steps:
Open Xcode.
Open the Xcode settings through Xcode at the top menu bar and then click on Preferences….
Navigate to Locations.
Click on the Source Trees tab.
Click on the plus (+) button to add a source tree item.
Enter
SPARROW_SRCin the Name tab.Enter
Sparrowin the Display Name tab. (Alternatively, using SPARROW_SRC as the display name works as well.)Add the absolute path to where we put the
sparrowfolder. Let's not forget thesrcsuffix.

Follow these steps to use the barebone project as a template:
Copy the
bareboneapplication from samples | barebone to a location of your choice.Open up the project in Xcode by double-clicking on
Barebone.xcodeproj.Click on the project name in the project navigator to make it editable.
Rename it to
PirateGame.Open the Product menu from the top menu bar.
Select Scheme and Manage Schemes.
Rename the Scheme name from Barebone to
PirateGame.Run the project in the iOS Simulator by hitting the play button. Make sure PirateGame is selected and not Sparrow.

We copied the barebone Sparrow template and used it as a template for our game. We renamed all project and scheme references and ran the template in order to see if everything went ok.
The indication for everything working as expected is when there are no errors while compiling the template and a red rectangle shows up on the screen.
CocoaPods is a dependency manager for Objective-C projects. It can handle Mac OS X and iOS dependencies alike and is similar to package managers of other systems. It can be compared to what Ruby's package manager RubyGems is to the Ruby platform or what NPM is to Node.js.
CocoaPods needs Ruby and RubyGems to run, which is nothing to worry about, as both come preinstalled on every Mac OS X machine.
Before we begin installing CocoaPods, we need to make sure that the command-line tools are installed.
To install command-line tools, follow these steps:
Open a terminal.
Enter
xcode-selectand press Enter to confirm.A dialog will pop up if the command-line tools are not installed yet. If a dialog does not pop up, the command-line tools are already installed and there is nothing to do here.
Click on the Install button to continue as shown in the following screenshot:

Before we can install CocoaPods, we need to have the latest version of the command-line tools.
If you want to trigger a reinstallation of the command-line tools regardless of whether they are already installed, this can be achieved by entering xcode-select --install.
Now that the command-line tools are installed, we can begin with the CocoaPods installation.
To install CocoaPods, follow these steps:
Open a terminal.
Enter
sudo gem update –systemand press Enter to confirm.Enter
sudo gem install cocoapods.Enter
pod setup. This may take a long time, so be patient.

As CocoaPods needs to be installed using the command line, our requirement is to have a terminal window opened.
In the second step, we are going to update RubyGems to the latest available version.
After that, we trigger the installation of CocoaPods. This also installs all dependencies. If there is a conflict, we get a prompt to deal with this conflict. If you are unsure about what to do, just press Enter in this case and the safest option will be chosen.
The last step is necessary in order to set up CocoaPods. It's recommended to run this command from time to time as it updates the local repository with all the latest specifications of libraries that can be used.
Now that CocoaPods is installed, we can go ahead and set up our Sparrow template.
Follow these steps to use the barebone project as a template:
Copy the
bareboneapplication from samples | barebone to a location of your choice.Open the Xcode project.
Click on the project name in the project navigator to make it editable.
Rename it to
PirateGame.Open the Product menu from the top menu bar.
Select Scheme and Manage Schemes.
Rename the Scheme name from Barebone to
PirateGame.Close Xcode.
platform :ios, '5.0'

pod 'Sparrow-Framework', '2.0.1'
Save the file as
Podfilein the recently copiedbarebonefolder on the same level as the Xcode project file. If you are using TextEdit (OS X default text editor), make sure to save the file in the plain format which can be done by changing Format to Make Plain Text in the menu. Also disable Smart Quotes by navigating to TextEdit | Preferences….Open a terminal.
Navigate to the copied
barebonefolder.Open
PirateGame.xcworkspacewith Xcode.Remove
Sparrow.xcodeprojfrom the project by right-clicking on it and selecting Delete.Run the project in the iOS Simulator by hitting the play button. If there are any errors, try to change the Build Settings in the configuration by changing recursive to non-recursive in User Header Search Paths.
We copied the barebone Sparrow template and used it as a template for our game. We renamed all project and scheme references.
We then needed to close Xcode, as CocoaPods will generate some files and we didn't want Xcode to interfere with the process.
In the next step, we had to define Podfile, which is the specification file for CocoaPods. This file tells CocoaPods which dependencies to fetch.
The specifications are written in Ruby, but they are easily understandable even to those who don't know the Ruby programming language.
The first statement sets the dependencies for the iOS platform. As mentioned earlier, CocoaPods can handle Mac OS and iOS dependencies even in the same project, so it makes sense for it to have a statement separating one from the other. As we are only targeting iOS, we don't need to worry about Mac OS dependencies and we leave that one out.
The second part of the Podfile in our example has all the dependencies we need in our project. As we only have one dependency—which is Sparrow—we only need to define that one.
A dependency is written in the following format:
pod 'name' 'version'
The repository with all dependencies and versions currently available can be found on GitHub at https://github.com/CocoaPods/Specs.
After our Podfile is written and saved, we need to get back to the terminal and let CocoaPods fetch our dependencies which is what pod install does. CocoaPods also generates a Pod folder which is where all dependencies are stored as well as an Xcode workspace.
From now on, instead of opening the project file, we need to open the workspace file as this is what CocoaPods updates and maintains.
If we were to open the project file and try to run the application, the application would fail to compile.
As the last step, we run our example. The indication that everything worked fine is when there are no errors while compiling the template and a red rectangle shows up on the screen.
To run the template on the actual device, follow these steps:
Open the Xcode settings through Xcode at the top menu bar and then click on Preferences….
Navigate to Accounts.
Click on the plus icon to add a new account.
Select Add Apple ID… from the menu.
Enter the required credentials and confirm by clicking on Add.
Connect your device to your Mac.
Open the Xcode organizer by going to Window | Organizer to check whether the device has been successfully detected.
Select the device from the menu by clicking on the application name and selecting the correct device.
Run the project by hitting the play button.
The Sparrow framework features documentation, also known as a docset, which can be integrated in order to get additional information on Sparrow classes and methods.
To add a docset for Xcode 5, a free application called Docs for Xcode is necessary and can be downloaded from the Mac App Store. More information on Docs for Xcode can be found at http://documancer.com/xcode/.
To add the Sparrow API documentation, just follow these easy steps:
Open Docs for Xcode (if you launch Docs for Xcode for the first time, grant it the access to the documentation folder).
Click on Add Feed.
Enter
http://doc.sparrow-framework.org/core/feed/docset.atomin the text field and confirm by clicking on Add.Restart Xcode (or open Xcode if Xcode was already closed).
Open a Sparrow project and open the inline documentation by pressing the Alt button and clicking on any class name or method.

Finding the right idea for a game can be quite tricky. As a rule of thumb, find something to be excited about and something you might want to play yourself. A good motivation is playing games and finding bits and pieces that you really like or that can be improved. One thing is for certain: do not clone. Don't make clones, make something original instead.
Tip
Finding game ideas
Probably the best way to find game ideas is during game jams, where you get to develop a game in a very short time frame. One of the more popular ones is Ludum Dare (http://www.ludumdare.com/compo/) and Global Game Jam (http://globalgamejam.org/). The first one is an online solo competition whereas at Global Game Jam you have to work in teams. What both game jams have in common is a theme that is provided and should be used by all entrants.
For a less competitive approach, you might also want to check the Twitter @PeterMolydeux, which is a parody account of Peter Molyneux, the creative mind behind Fable, Black & White, and Populous. There are tweets about completely crazy and/or funny game ideas, most of which would be very fun to play.
The kind of game we are developing is something a bit like an action game with role-playing game elements. The player is going to control a ship full of pirates who are waiting for ships to attack, seize, and scavenge.
After each mission, we'll get back to the pirate cove and buy better items such as cannonballs or hire a more experienced crew. Our game will be called "A Practical Survival Guide for Pirates". However, as the name is long, we'll just leave the game template name as "PirateGame".
It's always a good idea to have some kind of plan. While most of game development is iterative, it doesn't hurt to communicate the vision of the game.
The most important thing when developing is to remember the scope. It's very important to keep the scope as small as possible; in most situations, you still have to cut gameplay elements out in latter stages of the development cycle.
So saying we are going to create the next Angry Birds with more levels is probably as unrealistic as saying we're going to develop the next World of WarCraft just with more weapons and quests.
Let's put our goals and expectations into a list. The following is the list of goals we have for this book:
Finished game by the end of the book
Gained an understanding of development with Sparrow
Examples are relevant for game development and working with Sparrow
The following is the list of expectations we have out of this book:
Most independent games generally focus on a single mechanic and polish it to the maximum. Tiny Wings and Snapshot are good examples.
As with all software, there is always the danger of becoming a feature creep, which means adding all kinds of features during development without planning for it or balancing. In the end, the game might have all the features we want, but these features might be mutually exclusive and the game might not be fun.
So keeping in mind the scope and limitations, let's make a list with our features and gameplay elements for our game:
Attacking enemy ships
Collecting loot from enemy ships
Upgrading ship equipments
Hiring new crew members
Before we head into our first lines of code, we should take a moment and settle on code conventions for all code examples. The most used code guideline in the Objective-C world is the one made by Apple, which we are going to follow as closely as possible.
The most important conventions to remember are as follows:
The complete guideline for these conventions is available at https://developer.apple.com/library/mac/documentation/Cocoa/Conceptual/CodingGuidelines/CodingGuidelines.html.
Q1. What is the Sparrow Framework?
A game framework for 2D games
A 3D graphics engine
A scene graph library
Q2. What is CocoaPods?
Source control for Objective-C
An add-on library for Cocoa
A dependency manager for Objective-C packages
Q3. In order to develop games with Sparrow 2.x, we need at least iOS 5.0 SDK and preferably an iPhone 3GS or a more recent device.
True
False
We learned a lot in this chapter about setting up our development environment for Sparrow. Specifically, we covered how to set up Xcode, the Sparrow game framework, and creating our own game template.
We also touched on some general game development topics and learned about dependency management with CocoaPods.
Now that we have a game template set up, we're ready to learn about display objects and how to use them—which is the topic of the next chapter.
