


 Download code from GitHub
In this chapter, we will see how to build pages in Sitecore with the help of different rendering techniques using different Sitecore presentation components. You will learn the following recipes:
Creating a simple content page using template and layout
Creating a sidebar menu using view rendering and RenderingModel
Creating breadcrumb using the view and custom model
Creating carousel using view and controller renderings
Placing renderings dynamically using placeholders
Empowering the Experience Editor using placeholder settings
Restricting or swapping rendering controls on placeholders
If you are reading this book, you already know that Sitecore XP (Experience Platform) is not only an enterprise-level content management system (CMS) but also a web framework or web platform. Sitecore has robust and in-depth APIs to offer maximum flexibility to developers to implement custom solutions. It has many features designed to support enterprise-level requirements.
Sitecore provides extensive out-of-the-box components such as layout, device, placeholder, and some rendering controls, which play important role in designing and editing interfaces. We can also develop custom rendering components using Extensible Stylesheet Language Transformations (XSLT), ASP.NET Web Forms, and Model-View-Controller (MVC) frameworks to render content to the pages. All these frameworks currently exist in Sitecore, but MVC is now becoming widely used in Sitecore solutions and also provides better options compared to Web Forms and XSLT. Hence, we will prepare all the recipes using the MVC framework.
This chapter first serves recipes to create rendering components using model, view, and controller, and then explains how we can integrate them with Sitecore's out-of-the-box components. Looking into the depth of presentation components, you will learn extending these components in the next chapter.
Note
For this chapter, it's required that you create a Visual Studio solution. You can refer to Appendix A, Getting Started with Sitecore, which explains how you can set up Sitecore solutions. Make sure that you have added a reference of Sitecore.Kernel.dll and Sitecore.Mvc.dll files to the SitecoreCookbook project.
As a developer, you will first have to understand the architecture of how a web page works. To create web pages, you first need to create a data structure using data templates, based on which you can create content items. Layout is used to place content with some presentation logic on it. In this recipe, we will take a quick look at creating a simple content page showing the title, body, logo, and other details.
We will first create and define a data template for the Home item (that is, home page):
Log in to Sitecore. Open the Content Editor from Launch Pad. You will find a default
/sitecore/Content/Homeitem with theTitleandTextfields. Delete this item as we will create our own custom template for theHomeitem.In the
/sitecore/Templatesitem, create a new Template Folder item,Cookbook. In this, create aSite Roottemplate, leaving the base template set to the defaultStandard template, as shown in the following image:
In template builder, create different fields,
TitleandBody, as shown in the following image, and save the details:
We will now create a content page using this data template. Create a new content item,
Home, in the/sitecore/Contentpath using theSite Roottemplate that we created and fill in the appropriate information in these fields:
To show common details of websites, such as logo, copyright text, and some other information, create another
Site Configurationtemplate with fields such asCompany Name,Logo,CopyrightText, and so on.The
Site Configurationitem will be a non-visual item, so it should be created outside theHomeitem. Create a folder itemGlobalin/sitecore/Content, and in this, create a content item,Configurations, using the preceding template, and fill in the appropriate details.We will now create a layout from Visual Studio. From the
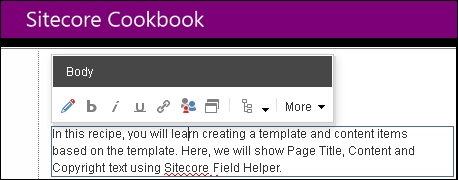
SitecoreCookbookproject, create an MVCmain.cshtmlview in the/Viewsfolder to render field values from the previously created items. For this, put the following code in the view file inside the<html/body>tag:<div id="header"> <a href="/"> @Html.Sitecore().Field("Logo", Sitecore.Context.Database.GetItem("/sitecore/Content/Global/Configurations")) </a> </div> <div id="contentarea"> <h1>@Html.Sitecore().Field("Title")</h1> @Html.Sitecore().Field("Body") </div> <div id="footer"> @Html.Sitecore().Field("Copyright Text", Sitecore.Context.Database.GetItem("/sitecore/Content/Global/Configurations")) </div>We will now register this view file as a layout in Sitecore. In the
/sitecore/layout/Layoutsitem, create a layout folder,Cookbook. In this, create a layout namedMain Layout. Set the path field of this layout to/Views/main.cshtml.Now we will assign the layout to the content items. Select the
Site Rootdata template. From the ribbon, select Standard Values in the Builder Options tab. This will create the__Standard Valuesitem for the template.Select the
__Standard Valuesitem. From the ribbon, select the Details button in the Layout group from the Presentation tab. It will open a Layout Details dialog. For a Default layout, click on the Edit button, which will open the Device Editor dialog. Here, in the Layout section, select Main Layout and select OK. See the following image, which represents both the dialogs:
From the Content Editor, select the
Homeitem. From the ribbon, click on the Preview button in the Publish group from the Publish tab. This will open your home page in preview mode, as shown in the following image, where you will findLogo,Title,Body, andCopyright Text.

Tip
Downloading the example code
You can download the example code files for this book from your account at http://www.packtpub.com. If you purchased this book elsewhere, you can visit http://www.packtpub.com/support and register to have the files e-mailed directly to you.
You can download the code files by following these steps:
Log in or register to our website using your e-mail address and password.
Hover the mouse pointer on the SUPPORT tab at the top.
Click on Code Downloads & Errata.
Enter the name of the book in the Search box.
Select the book for which you're looking to download the code files.
Choose from the drop-down menu where you purchased this book from.
Click on Code Download.
You can also download the code files by clicking on the Code Files button on the book's webpage at the Packt Publishing website. This page can be accessed by entering the book's name in the Search box. Please note that you need to be logged in to your Packt account.
Once the file is downloaded, please make sure that you unzip or extract the folder using the latest version of:
WinRAR / 7-Zip for Windows
Zipeg / iZip / UnRarX for Mac
7-Zip / PeaZip for Linux
Sitecore layouts are reusable ASP.NET Web Forms (.aspx) or MVC views (.cshtml) that you register with Sitecore. ASP.NET uses Web Forms or views to serve HTTP requests. Here, on requesting the Home item, Sitecore first reads the item and renders the physical file of the layout associated with the item.
In the view file, we used the Sitecore field helper, @Html.Sitecore().Field(<field name>), to render the Title and Body field values from the context item (in our case, Home). This helper method can also render a field of items other than the context item, which we used in order to render the Logo and Copyright Text fields of the Configurations item, @Html.Sitecore().Field(<field name>, Sitecore.Context.Database.GetItem(<ItemId or path of item>)).
Here, the Sitecore.Context.Database.GetItem() method provides the Sitecore.Data.Items.Item object, which has a collection of all the field values associated with the item.
Note
To learn more APIs, download Sitecore Presentation Component API Cookbook (https://goo.gl/fu99Vh). It provides APIs from Sitecore 6.4 or later with examples of Web Forms or Web controls, but they are still valid for Sitecore 8 or later with MVC as well.
Apart from the Content Editor, Sitecore also provides another tool, Experience Editor, to view pages in editing mode. From the ribbon, click on the Experience Editor button in the Publish tab to open an item in the Experience Editor. You can open it from Launch Pad as well. Here, you can change field values (for example, Body in the following image) rendered on the layout or view:
To disable content editing for an item field, you can pass additional parameters to the field helper, as shown in the following code:
@Html.Sitecore().Field("<field name>", new {DisableWebEdit=true})You can also customize its rendering behavior by extending the Sitecore helper class. You can learn this from https://goo.gl/ZHruKe and http://goo.gl/Kx8MQl.
In the previous recipe, you learned rendering simple field values in the layout itself. In this recipe, we will create a sidebar menu control using view rendering and RenderingModel and place them statically on layouts.
We will first create a template with some common fields required on all the content items of the site:
Create one
Common Fieldsdata template with the Title, Body, Show in Menu, Image, and Icon fields. From its standard values, set Title as$nameand tick the Show in Menu checkbox field. Also, from Layout Details, assign Main Layout to it, which we created in the previous recipe:
We will first create different subitems inside the
Homeitem so that we can have enough items to render menu control properly. Here,$nameentered in the Title field is a standard value token so that the name of the item will be stored in the Title field for newly created items. You can learn more about standard value tokens at http://goo.gl/qUE85h.Create a few templates, for example,
Product Section,Product Category,Product, and others. From their base template field, select theCommon Fieldstemplate so that these fields, along with layout details, can get inherited to all these templates.Create content items under the
Homeitem, following the/Home/<Product Section>/<Product Category>/<Product>hierarchy, and fill in their Title, Body, and other fields' values. For example, refer to the following image:
Now, we will create a menu control to show all items created on the same hierarchical level of the context item. From Visual Studio, create a
SideMenu.cshtmlview in the/Views/Navigationfolder and write the following code in it:@model RenderingModel <ol class="sidemenu"> @foreach (var item in Model.Item.Parent.Children.ToArray()) { if (@item["Show in Menu"] == "1") { <li> <a href="@Sitecore.Links.LinkManager.GetItemUrl(@item)"> @item["Title"] </a> </li> } } </ol>Now we will register this view in Sitecore. Select
/sitecore/layout/Renderings/, and create theCookbookfolder. In this, create a view renderingSide Menuand enter the view file path in the Path field, as shown in the following image:
In
Main Layoutormain.cshtmlthat we created in the previous recipe, place the following code in the appropriate place to render the menu on the page. Remember to update the item ID of theSide Menurendering in this code:<div id="sidemenu"> @Html.Sitecore().Rendering("{2383A57F-21FF-4A77-9E2A-C467F0CEDA57}") </div>Now, preview any product item; you will find that all the items at the same hierarchical levels will be displayed, as shown in the following image:

In the same way, you can also create top menu rendering. You can find its TopMenu.cshtml and SiteHelper.cs code files from the code bundle provided with this book.
Sometimes, we get a requirement to hide an item from the menu, which requires having a common field such as Show in Menu or Hide from Menu in all items under Home. So, here we created the Common Fields template with the most common fields and inherited it in other data templates rather than duplicating these fields in all templates.
Note
Use Template inheritance to reuse content definitions, which makes a developer's life easier while doing further changes in it. Read best practices for template inheritance at http://goo.gl/1ePTtF.
We generated a simple menu using a view rendering. A view accepts a view model, which can be defined in the @model directive to determine the type of the model. If you don't specify the directive, Sitecore by default passes its default model, Sitecore.Mvc.Presentation.RenderingModel, which passes the context item to the view. You can also pass custom models to views, which you will learn in the next recipe.
In step 6, we bound the view statically (hardcoded on layout), which is also called static binding, and Sitecore provides two approaches for this:
@Html.Sitecore().Rendering("{2383A57F-21FF-4A77-9E2A-C467F0CEDA57}")
@Html.Sitecore().ViewRendering("<view file relative path>")
In the first approach, Sitecore itself finds the view definition from the view rendering registered in step 5. In the second approach, we can directly write the path of the view file.
Here, we rendered the Side Menu view from its parent view Main Layout. Nested views can be very useful in reusing view renderings. For example, if you need to render a list of child items in different places, for example, news, events, products, and so on with the same interface, then you can achieve all this using a single view rendering!
In the previous recipe, you learned creating a simple menu using a view with the default RenderingModel. In this recipe, we will create breadcrumb using a view and custom model.
For this recipe, we will use the same layout and items created in the previous recipes.
We will first create two classes: a simple BreadcrumbItem and BreadcrumbList. Here, BreadcrumbList will contain a list of BreadcrumbItem objects.
In the
SitecoreCookbookproject, create aBreadcrumbItemclass in theModelsfolder. This class will contain properties useful to render breadcrumb items. We inherited this class fromSitecore.Data.Items.CustomItemto implement custom items:public class BreadcrumbItem : CustomItem { public BreadcrumbItem(Item item) : base(item) {Assert.IsNotNull(item, "item");} public string Title {get { return InnerItem["Title"]; }} public bool IsActive {get { return Sitecore.Context.Item.ID == InnerItem.ID;}} public string Url {get { return LinkManager.GetItemUrl(InnerItem); }} }In the
SitecoreCookbookproject, create a renderingBreadcrumbListmodel class in theModelsfolder, which will make a list of all the breadcrumb items. Make sure that it inherits theSitecore.Mvc.Presentation.RenderingModelclass so that Sitecore will automatically invoke itsInitialize()method when the view is invoked:public class BreadcrumbItemList : RenderingModel { public List<BreadcrumbItem> Breadcrumbs { get; set; } public override void Initialize(Rendering rendering) { Breadcrumbs = new List<BreadcrumbItem>(); List<Item> items = GetBreadcrumbItems(); foreach (Item item in items) { Breadcrumbs.Add(new BreadcrumbItem(item)); } Breadcrumbs.Add(new BreadcrumbItem(Sitecore.Context.Item)); } }Create the
GetBreadcrumbItems()method to collect a list of breadcrumb items as follows:private List<Sitecore.Data.Items.Item> GetBreadcrumbItems() { string homePath = Sitecore.Context.Site.StartPath; Item homeItem = Sitecore.Context.Database.GetItem(homePath); List<Item> items = Sitecore.Context.Item.Axes.GetAncestors() .SkipWhile(item => item.ID != homeItem.ID) .ToList(); return items; }We will now register this model in Sitecore. From the Content Editor, select the
/sitecore/layout/Modelsitem. Create aCookbookfolder, and create aBreadcrumbItemListmodel in it. Set the Model Type field value to the fully qualified type name of this class, as shown in the following image:
Now we will create a view to render breadcrumb items. In the
SitecoreCookbookproject, create aBreadcrumb.cshtmlview in the/Views/Navigationfolder. Set the createdBreadcrumbItemListmodel in the@modeldirective. Place the view content as follows:@model SitecoreCookbook.Models.BreadcrumbItemList <ol class="breadcrumb"> @foreach (var item in Model.Breadcrumbs) { <li> @if (@item.IsActive) { @item.Title } else { <a href="@item.Url"> @item.Title </a> } </li> } </ol>Register this view in Sitecore, and remember to assign the registered model to this view. So, when the view is invoked, Sitecore will initialize the mentioned model to collect the breadcrumb item list and pass it to the view:

In the same way as the previous recipe, place this
breadcrumbview rendering inMain Layoutso that it will get applied to all the items having this layout. Use the following code for this, and update the item ID of the view rendering in the code:<div id="breadcrumb"> @Html.Sitecore().Rendering("{764C9697-EA31-4409-8208-0CAECBD76500}") </div>Now, preview an item; you will find the breadcrumb on the site, as shown in the following image:

Here, we built breadcrumb using a custom RenderingModel. For this, we should either inherit the Sitecore.Mvc.Presentation.RenderingModel class or implement the Sitecore.Mvc.Presentation.IRenderingModel interface.
The Sitecore MVC framework gives a nice feature of invoking a model to pass data to the view without creating a controller. For this, in step 6, we mapped the model to our view rendering. In the next recipe, you will learn how to use controller rendering with the view.
If you are interested in knowing how Web control and sublayout works, you can find a working sample of breadcrumb and Side Menu from the code bundle provided with this book. As an alternative, you can also learn basic Web Forms components from https://goo.gl/nlX3Cp.
In the previous recipe, you learned how to use a custom model to pass data to the view using RenderingModel. In this recipe, we will create carousel using controller rendering and view rendering.
We will first create a template to generate carousel slides:
Create a
Carousel Slidetemplate, as shown in the following image. Set the Source property of theImagefield so that a user can pick carousel images directly from the source media folder. Do the same for theLink Itemfield.
Create some carousel slide content items with appropriate field values.
We want to show some selected carousel slides on our
Homepage, so we will add the tree list type carousel slides field to theSite Roottemplate so that we can select multiple carousel slide items, as shown in the following image:
We will now create a
CustomItemclass to represent carousel slide properties in the same way as the previous recipe. In theSitecoreCookbookproject, create aCarouselSlideclass in theModelsfolder and inherit it from theCustomItemclass. AddTitle,Image, andUrlproperties to it:public class CarouselSlide: CustomItem { public CarouselSlide(Item item) : base(item) { } public string Title{ get { return InnerItem["Title"]; } } public HtmlString Image { get { return new HtmlString(FieldRenderer.Render(InnerItem, "Image")); } } public string Url { get { Item linkItem = Sitecore.Context.Database.GetItem(InnerItem["Link Item"]); if (linkItem != null) return LinkManager.GetItemUrl(linkItem); return ""; } } }Now we will create a
Controllerclass, which will create a list ofCarouselSlideobjects. In theSitecoreCookbookproject, create aNavigationControllercontroller in theControllersfolder. Create theActionResultorViewResultCarousel()method that will return a list of carousel items to the view:public class NavigationController : Controller { public ActionResult Carousel() { List<CarouselSlide> slides = new List<CarouselSlide>(); MultilistField multilistField = Sitecore.Context.Item.Fields["Carousel Slides"]; if (multilistField != null) { Item[] carouselItems = multilistField.GetItems(); foreach (Item item in carouselItems) { slides.Add(new CarouselSlide(item)); } } return PartialView(slides); } }Now we will register this controller and action method in Sitecore. Select the
/sitecore/layout/Renderings/Cookbookitem. Create aCarouselcontroller rendering and set the Controller and Controller Action fields, as shown in the following image:
Now we will create a view to render the carousel slides. In the
SitecoreCookbookproject, create aCarousel.cshtmlview file in the/Views/Navigationfolder:@model IEnumerable<SitecoreCookbook.Models.CarouselSlide> <div class="carousel-inner" role="listbox"> @foreach (var item in Model) { <div> <a href="@item.Url" title="@item["Title"]"> @item.Image </a> </div> } </div>In the
Main Layoutfile, place this rendering using the following code. Remember to update the item ID of this controller rendering in the code.@Html.Sitecore().Rendering("{62104CCC-D747-4671-BB3B-CFF041F42A5A}")Preview the content item; it will show carousel images on the page. Making the carousel work fully, as shown in the following image, you may need to change HTML in the view and append style sheets, which you can get from the code bundle provided with this book:

We can render item fields using the field helper, but there is no item field available to render item URL. So, we need some custom properties to items, and that is possible by implementing custom items. A custom item is an item that has special properties and functionality that match the functionality and semantics of the item that it is associated with. Here in step 4, we created the CarouselSlide class by inheriting from the CustomItem class and also created different custom properties such as Url, Title, and Image.
Here, we also used the HtmlString (or MvcHtmlString) return type to get image, unlike Title, which has the string type. It's because we want to render HTML without encoding it what view engine does for string.
In step 4, we used the FieldRenderer.Render(<item>, <fieldName>) method to render the HTML image tag. We can also use item.Fields[].Value or item["<field>"] to get field value, but it will return raw value of the image field as shown in the following code:
<image mediaid=\"{E0A48978-2D1A-4431-8FED-BEDE851B3FD6}\" />In step 5 and 6, we created the NavigationController class with the Carousel() action method and registered them in Sitecore. The Carousel() method prepares a list of CarouselSlide objects and pass it to the Carousel partial view, which we created in step 7.
In step 8, we placed the NavigationController rendering to the layout, so when it's invoked, it returns a ViewResult with list of CarouselSlide objects as a model and the partial view will get rendered accordingly.
If you have noticed, we registered the controller only and bound to the item and done nothing with the view. It's because, MVC finds the view itself from /Views/{Controller}/{Action}.cshtml.
In the previous recipes, you learned placing components on a layout or view statically. You can empower the dynamic placement of components using a placeholder, which comes with lots of benefits that you will learn in this recipe.
We will first replace statically placed renderings with placeholders in Main Layout:
We will first decide places where we can put content dynamically or we need placeholders, for example, breadcrumb, side menu, and main content area.
From
Main Layout, remove the existing renderings from these places and add placeholders,breadcrumb,left-column, andmain-contentas follows:<div class="container"> <div id="breadcrumb"> @Html.Sitecore().Placeholder("breadcrumb") </div> <div id="sidemenu"> @Html.Sitecore().Placeholder("left-column") </div> <div id="contentarea"> <article> @Html.Sitecore().Placeholder("main-content") </article> </div> </div>We already have
breadcrumbandSide Menuview renderings; we will create a simple view rendering to show theTitle,Body, and other fields in the main content area. In theSitecoreCookbookproject, create aTitleAndBody.cshtmlview file in the/Views/Content/folder with the following content, and register this rendering:<h1>@Html.Sitecore().Field("Title")</h1> <div> @Html.Sitecore().Field("Body") </div>Now, we will place Breadcrumb, Side Menu, and Title and Body renderings in
breadcrumb,left-column, andmain-contentplaceholders accordingly. From the Content Editor, select Standard Values of theSite Roottemplate. From the ribbon, click on the Details button in the Layout group from the Presentation tab to open the Layout Details dialog. Click on the Edit button to open the Device Details dialog and select the Controls section. It will show an empty list, but once you add renderings on placeholders, they will be displayed, as shown in the following image:
To add renderings, click on the Add button from the Device Editor dialog. It will open the Select a Rendering dialog, where you can add renderings to particular placeholders, as shown in the following image:

Repeat steps 4 and 5 for all template standard values, where you want to add renderings. Now, preview different pages to see the power of placeholders; you will find the renderings are displayed on the pages!
Note
We could also have used the benefit of inheriting presentation details from base templates. In Sitecore 8 onward, if you don't find your renderings inherited, you can get a bug fix for it from https://goo.gl/OSMNkR.
A placeholder is a Sitecore component used within a layout, view, or sublayout, which allows the dynamic placement of components in it. It does not have any user interface, the same as the ASP.NET placeholder control. In Sitecore MVC, a placeholder can be created using the @Html.Sitecore().Placeholder("<placeholder name>") helper class. In Web Forms, you can use <sc:Placeholder runat="server" />.
It allows users to have design flexibility and minimize the number of layouts and renderings. For example, in this recipe, we can convert our layout from a two-column (side menu and content area) to a three-column layout, simply by adding a two-column view in the main-content placeholder. Thus, you can create any type of dynamic design just using a single layout.
When you have multiple components in a single placeholder, their order is managed by layout engine, considering the order they are added to the layout details. Their order can be changed using the Move Up and Move Down buttons in the Device Editor dialog, shown in step 4. You can remove or replace any control by clicking on the Remove or Change button.
You can also implement dynamic placeholders (https://goo.gl/6NIF3z).
Being a content owner, the Experience Editor provides a simpler user interface to change the page design. In this recipe, we will take a look at how to add components from the Experience Editor using Placeholder Settings.
In the previous recipe, we placed different components on different placeholders, for example, the Title and Body rendering on the main-content placeholder. We will place Carousel or any other rendering on the same placeholder from the Experience Editor.
As we want to place components on the main-content placeholder of the Home page from the Experience Editor, we will first create a placeholder setting for it:
From the Content Editor, select the
/sitecore/layout/Placeholder Settingsitem. Create a placeholder settingmain contentitem in it. In its Placeholder Key field, enter the name of the placeholder that we defined in theMain Layout, for example,main-content.Now open the
Homepage in the Experience Editor. Find the Title and Body rendering that is placed on themain-contentplaceholder, as shown in the following image. From the floating toolbar visible there, click on Go to parent component to reach its parent component, which is themain-contentplaceholder in our case. Now, you will find two Add here buttons in themain-contentplaceholder to place components before and after the Title and Body rendering:
Clicking on this button will open a Select a Rendering dialog, from which you can select a component to add to that place. Select the Carousel rendering to place it before the Title and Body rendering, save the changes, and see how your page has been changed!
There are two types of placeholder settings: global placeholder settings and data template specific placeholder settings.
In the preceding steps, we used the global placeholder setting as we specified a placeholder key in the placeholder setting. So, whenever Sitecore finds the main-content placeholder in any component of the requested page, it will allow us to manage components on that placeholder. In our case, it will be shown on all the pages of the website. So ideally, it's good practice to use the global placeholder setting for placeholders of the main layout of the site.
We can also set placeholder settings on the data template level. For example, we want to restrict the main-content placeholder setting only for Site Root or other selected templates. For this, we should follow these steps:
In the placeholder setting that we created, don't specify the Placeholder Key field (leave it blank) so that we can override it on the template level.
Select the standard values of the
Site Roottemplate. Open its Layout Details, and select the Select the Placeholder Settings tab in the Device Details dialog. Click on the Add button, which will open the Placeholder Setting dialog. Here, select the created placeholder setting, main content, and set themain-contentplaceholder name, as shown in the following image, and save the settings:
Now you will be wondering how Sitecore adds the components directly to Layout Details of the page. Open the Layout Details of Home item; you will find that the Carousel rendering we added from the Experience Editor got stored to FINAL LAYOUT, where SHARED LAYOUT is still the same as before, as shown in the following image. This is because of the Versioned Layouts feature we got from Sitecore 8. Read more about it at https://goo.gl/FXxHkP:

You can also remove any components by clicking on the Remove component. button found on the floating toolbar of the component, as shown in the following image:

Learn more about the Experience Editor at https://goo.gl/1ZFIpX.
While adding renderings from the Experience Editor, by default, it allows you to add all the renderings from the /sitecore/layout/Renderings folder. However, just imagine how difficult it would be for content owners to choose a logically valid and compatible rendering from the huge list.
In this recipe, you will learn how we can show a template-specific list of the allowed and placeholder-compatible renderings from the Experience Editor.
We have the main-content placeholder placed on all pages of the website. We want to restrict content authors to use Carousel, Highlight Featured Products, and Highlight News renderings only on the Home page. Similarly, for the Products landing page, we will restrict them to use Carousel and Highlight Featured Products renderings only. This recipe assumes that you have created the mentioned renderings.
Here, we will first override placeholder settings for the data template of the Home page:
From the Content Editor, select standard values of the
Site Roottemplate. Open the Placeholder Setting dialog from the Device Editor. Remove any placeholder settings, if any. Create a new setting.Set the Name to
Home Contentand the Placeholder Key field to ourmain-contentplaceholder key. In the Parent field, select themain contentplaceholder setting that we have already created. Here, select the required renderings from the Allowed Controls field:
Open the
Homepage in the Experience Editor. Add the renderings to it; you will find that only the preceding selected renderings will be available to pick, as shown in the following image:
In the same way, you can apply these settings to standard values on Product or any other template, as per your requirement.
Once you create this placeholder setting, you will find a new item created in the main content placeholder setting item, where you will find all the selected renderings in the Allowed Controls field:

You can also change placeholder settings from the Experience Editor by clicking on the highlighted button in the floating bar of the placeholder, as shown in the following image:

You learned how to place allowed controls on placeholders. Sitecore renderings have a Compatible Renderings field, as shown in the following image, where you can select compatible renderings to a particular rendering. So, while replacing any rendering from the Experience Editor, it will allow you to choose renderings from the selected compatible renderings only. For example, as shown in the following image, Sitecore will allow you to replace Carousel rendering with Banner rendering only. You can learn more about it at http://goo.gl/Tk5ybI:


