Home Programming Scala Programming Projects

Scala Programming Projects

By Mikael Valot , Nicolas Jorand
books-svg-icon Book
eBook $43.99 $29.99
Print $54.99
Subscription $15.99 $10 p/m for three months
$10 p/m for first 3 months. $15.99 p/m after that. Cancel Anytime!
What do you get with a Packt Subscription?
This book & 7000+ ebooks & video courses on 1000+ technologies
60+ curated reading lists for various learning paths
50+ new titles added every month on new and emerging tech
Early Access to eBooks as they are being written
Personalised content suggestions
Customised display settings for better reading experience
50+ new titles added every month on new and emerging tech
Playlists, Notes and Bookmarks to easily manage your learning
Mobile App with offline access
What do you get with a Packt Subscription?
This book & 6500+ ebooks & video courses on 1000+ technologies
60+ curated reading lists for various learning paths
50+ new titles added every month on new and emerging tech
Early Access to eBooks as they are being written
Personalised content suggestions
Customised display settings for better reading experience
50+ new titles added every month on new and emerging tech
Playlists, Notes and Bookmarks to easily manage your learning
Mobile App with offline access
What do you get with eBook + Subscription?
Download this book in EPUB and PDF formats, plus a monthly download credit
This book & 6500+ ebooks & video courses on 1000+ technologies
60+ curated reading lists for various learning paths
50+ new titles added every month on new and emerging tech
Early Access to eBooks as they are being written
Personalised content suggestions
Customised display settings for better reading experience
50+ new titles added every month on new and emerging tech
Playlists, Notes and Bookmarks to easily manage your learning
Mobile App with offline access
What do you get with a Packt Subscription?
This book & 6500+ ebooks & video courses on 1000+ technologies
60+ curated reading lists for various learning paths
50+ new titles added every month on new and emerging tech
Early Access to eBooks as they are being written
Personalised content suggestions
Customised display settings for better reading experience
50+ new titles added every month on new and emerging tech
Playlists, Notes and Bookmarks to easily manage your learning
Mobile App with offline access
What do you get with eBook?
Download this book in EPUB and PDF formats
Access this title in our online reader
DRM FREE - Read whenever, wherever and however you want
Online reader with customised display settings for better reading experience
What do you get with video?
Download this video in MP4 format
Access this title in our online reader
DRM FREE - Watch whenever, wherever and however you want
Online reader with customised display settings for better learning experience
What do you get with video?
Stream this video
Access this title in our online reader
DRM FREE - Watch whenever, wherever and however you want
Online reader with customised display settings for better learning experience
What do you get with Audiobook?
Download a zip folder consisting of audio files (in MP3 Format) along with supplementary PDF
What do you get with Exam Trainer?
Flashcards, Mock exams, Exam Tips, Practice Questions
Access these resources with our interactive certification platform
Mobile compatible-Practice whenever, wherever, however you want
BUY NOW $10 p/m for first 3 months. $15.99 p/m after that. Cancel Anytime!
eBook $43.99 $29.99
Print $54.99
Subscription $15.99 $10 p/m for three months
What do you get with a Packt Subscription?
This book & 7000+ ebooks & video courses on 1000+ technologies
60+ curated reading lists for various learning paths
50+ new titles added every month on new and emerging tech
Early Access to eBooks as they are being written
Personalised content suggestions
Customised display settings for better reading experience
50+ new titles added every month on new and emerging tech
Playlists, Notes and Bookmarks to easily manage your learning
Mobile App with offline access
What do you get with a Packt Subscription?
This book & 6500+ ebooks & video courses on 1000+ technologies
60+ curated reading lists for various learning paths
50+ new titles added every month on new and emerging tech
Early Access to eBooks as they are being written
Personalised content suggestions
Customised display settings for better reading experience
50+ new titles added every month on new and emerging tech
Playlists, Notes and Bookmarks to easily manage your learning
Mobile App with offline access
What do you get with eBook + Subscription?
Download this book in EPUB and PDF formats, plus a monthly download credit
This book & 6500+ ebooks & video courses on 1000+ technologies
60+ curated reading lists for various learning paths
50+ new titles added every month on new and emerging tech
Early Access to eBooks as they are being written
Personalised content suggestions
Customised display settings for better reading experience
50+ new titles added every month on new and emerging tech
Playlists, Notes and Bookmarks to easily manage your learning
Mobile App with offline access
What do you get with a Packt Subscription?
This book & 6500+ ebooks & video courses on 1000+ technologies
60+ curated reading lists for various learning paths
50+ new titles added every month on new and emerging tech
Early Access to eBooks as they are being written
Personalised content suggestions
Customised display settings for better reading experience
50+ new titles added every month on new and emerging tech
Playlists, Notes and Bookmarks to easily manage your learning
Mobile App with offline access
What do you get with eBook?
Download this book in EPUB and PDF formats
Access this title in our online reader
DRM FREE - Read whenever, wherever and however you want
Online reader with customised display settings for better reading experience
What do you get with video?
Download this video in MP4 format
Access this title in our online reader
DRM FREE - Watch whenever, wherever and however you want
Online reader with customised display settings for better learning experience
What do you get with video?
Stream this video
Access this title in our online reader
DRM FREE - Watch whenever, wherever and however you want
Online reader with customised display settings for better learning experience
What do you get with Audiobook?
Download a zip folder consisting of audio files (in MP3 Format) along with supplementary PDF
What do you get with Exam Trainer?
Flashcards, Mock exams, Exam Tips, Practice Questions
Access these resources with our interactive certification platform
Mobile compatible-Practice whenever, wherever, however you want
  1. Free Chapter
    Writing Your First Program
About this book
Scala Programming Projects is a comprehensive project-based introduction for those who are new to Scala. Complete with step-by-step instructions and easy-to-follow tutorials that demonstrate best practices when building applications, this Scala book will have you building real-world projects in no time. Starting with the fundamentals of software development, you’ll begin with simple projects, such as developing a financial independence calculator, and then advance to more complex projects, such as a building a shopping application and a Bitcoin transaction analyzer. You’ll explore a variety of Scala features, including its OOP and FP capabilities, and learn how to write concise, reactive, and concurrent applications in a type-safe manner. You’ll also understand how to use libraries such as Akka and Play. Furthermore, you’ll be able to integrate your Scala apps with Kafka, Spark, and Zeppelin, along with deploying applications on a cloud platform. By the end of the book, you’ll have a firm foundation in Java programming that’ll enable you to solve a variety of real-world problems, and you’ll have built impressive projects to add to your professional portfolio.
Publication date:
September 2018
Publisher
Packt
Pages
398
ISBN
9781788397643


Chapter 1. Writing Your First Program

In 2001, Martin Odersky started to design the Scala language – it took him three years to release the first public version. The name comes from Scalable language. This was chosen because Scala is designed to grow with the requirements of its users – you can use Scala for small scripts or for large enterprise applications.

Scala has been constantly evolving ever since, with a growing popularity. As a general purpose language, it is used in many different industries such as finance, telecoms, retail, and media. It is particularly compelling in distributed scalable systems and big data processing. Many leading open source software projects have been developed in Scala, such as Apache Spark, Apache Kafka, Finagle (by Twitter), and Akka. A large number of companies use Scala in production, such as Morgan Stanley, Barclays, Twitter, LinkedIn, The Guardian, and Sony.

Scala is not an extension of Java but is fully interoperable with it. You can call Java code from Scala, and you can call Scala code from Java. There is also a compiler to JavaScript, which we will explore later on in this book. You can, therefore, run Scala code in your browser.

Scala is a blend of object-oriented and functional programming paradigms, and it is statically typed. As such, it can serve as a bridge for people from an object-oriented or imperative background to move gradually to functional programming.

In this chapter, we will cover the following topics:

  • Setting up your environment
  • Using the basic features
  • Running the Scala Console
  • Using the Scala Console and Worksheet
  • Creating my first project
 

Setting up your environment


First things first, we need to set up our work environment. In this section, we will get all the tools and libraries, and then install and configure them on your computer.

Scala programs are compiled to Java bytecode, which is a kind of assembly language that can be executed using a Java Virtual Machine (JVM). You will, therefore, need to have a Java compiler and a JVM installed on your computer. The Java Development Kit (JDK) provides both components, alongside other tools.

You could develop in Scala using a simple text editor and compile your programs using the Scala Simple Build Tool (SBT). However, this would not be a pleasant nor productive experience. The majority of professional Scala developers use an Integrated Development Environment (IDE), which provides many helpful features such as syntax highlighting, autocompletion, code navigation, integration with SBT, and many more. The most widely used IDE for Scala is IntelliJ Idea from JetBrains, and this is the one we are going to install and use in this book. The other options are Scala IDE for Eclipse and ENSIME. ENSIME is an open source project that brings IDE-like features to popular text editors such as Emacs, Vim, Atom, Sublime, and VSC.

Installing the Java SDK

We are going to install the Oracle JDK, which includes a JVM and a Java compiler. On many Linux distributions, the open source OpenJDK is preinstalled. OpenJDK is fully compatible with the Oracle JDK, so if you already have it you do not need to install anything else to follow this book.

You might already have a Java SDK installed on your computer. We are going to check if this is the case. If you are using Windows, open a DOS Command Prompt. If you are using macOS or Linux, open a Terminal. After the prompt, type the following:

javac -version

If you have a JDK installed, the version of the installed compiler will be printed:

javac 1.8.0_112

If the version installed is greater than or equal to 1.8.0_112, you can skip the JDK installation. The version of Scala that we are going to use is compatible with JDK version 1.8 or 1.9.

If not, open the following URL, download the SDK for your platform, and follow the installation instructions given: http://www.oracle.com/technetwork/java/javase/downloads/jdk8-downloads-2133151.html.

Installing IntelliJ IDEA

Go to https://www.jetbrains.com/idea/download. Download the community edition for your platform. The ultimate edition offers more features, but we will not use them in this book.

The following are the steps to install IntelliJ IDEA:

  1. Run IntelliJ Idea.
  2. Select the Do not import settings option:
  1. Choose a UI theme. I personally prefer Dracula, since a dark background saves battery on a laptop and is more gentle on the eyes:

  1.  Create a desktop entry by checking the options given:

  1. In the Create Launcher Script dialog window, check the create a script... checkbox. It will let you open files in IntelliJ from the command line:
  1. Customize the plugins. For each component, click on Customize... or Disable All. We will not need most of the plugins. You can only select the following:
  • Build Tools: Disable All.
  • Version Controls: Only keep Git and GitHub.
  • Test Tools: Disable All.
  • Swing: Disable.
  • Android: Disable.
  • Other Tools: Disable All and keep Bytecode viewer, Terminal, and YAML.
  • Plugin Development: Disable.

You can see the aforementioned plugins in the following screenshot:

  1. Install the featured plugins—some additional plugins are proposed for you to install, such as the Scala plugin and a tool to learn the essential features of IntelliJ.
  1. Click on the Install button for Scala and for the IDE Features Trainer, as shown in the following screenshot, and then proceed by clicking on Start using IntelliJ IDEA:

Note

If you are already a Vim aficionado, you can install IdeaVim. Otherwise, I would recommend that you avoid it. I personally use it daily, but it took me some time to get used to it.

  1. Click onCreate NewProject | Scalasbt:
  1. Fill in the following details, as shown in the following screenshot:
  • Name: scala_fundamentals.
  • JDK: Click on New and then select the installation directory of the Oracle JDK.
  • sbt: Choose the version 1.0.4, checkSources.
  • Scala: Choose the latest version 2.12.x, for instance 2.12.4 (IntelliJ lists all the possible versions and will download the one you choose), and check Sources.
  • Click on Finish.

It is going to take some time depending on your internet connection's speed:

  1. You should see the following project structure:
 

Using the basic features


In this section, and in the rest of this book, we will highlight some key shortcuts in italics. I strongly encourage you to use and remember these shortcuts. They save a tremendous amount of time and will keep you focused on the task at hand. If you cannot remember a shortcut, you can use the mother of all shortcuts, Ctrl + Shift + A (Windows/Linux) or cmd + shift + A (macOS), and type the name of the action you are looking for.

If you are using IntelliJ for the first time, I find it useful to display all tool buttons. Go to the View menu, and check Toolbar and Tool buttons.

SBT synchronization

Now, let's have a look at our build configuration. SBT (short for Simple Build Tool) is the de facto build tool in the Scala community. Double-click on build.sbt:

name := 'scala_fundamentals"

version := "0.1"

scalaVersion := "2.12.4"

This file describes how SBT will compile, test, and deploy our project. For now, it is fairly simple.

One important thing to keep in mind is that IntelliJ manages its own set of files to define a project structure. They are located in the .idea directory of your project. Whenever you change build.sbt, IntelliJ has to interpret the changes and translate them.

For instance, If I change the Scala version to 2.12.3 and save (Ctrl + S or cmd + S), IntelliJ will propose to synchronize the changes or enable autoimport:

On a small project, it is ok to use autoimport, but on a large one, it can be a bit annoying. The synchronization can take time and it might kick off too often.

When you program in Scala using IntelliJ, you therefore have two ways of compiling your project:

  • SBT, in which case you would only use IntelliJ as an advanced text editor
  • IntelliJ

You could, in theory, mix and match: start building with SBT and continue with IntelliJ or the other way around. However, I strongly discourage you to do so, as you may get some unexpected compilation errors. When you want to switch to one tool or the other, it is best to clean all compiled files first.

We will further expand on SBT later in this book, but for now, we are only going to use IntelliJ's own build.

Build

The project has been created and ready to be built. The build process does the following:

  • Compiles the source files present at the source path and the test path
  • Copies any resource files needed in the output path
  • Reports any errors/warnings in the Message tool window

There are two ways to build the project:

  • If you want to build your project incrementally, go to Build | Build Project (Ctrl + F9 or cmd + F9)
  • If you want to delete all files and rebuild everything, go to Build | Rebuild All

As we do not have a source yet, the build is fast and no errors should appear in the Message tool window.


Running the Scala Console


In IntelliJ, you need to have a run configuration whenever you want to run something: a program, a unit test, an external tool. A run configuration sets up the classpath, arguments, and environment variables that you need to run your executable.

We need to create a run configuration the first time we want to run the Scala console:

  1. Go to Run | Edit Configurations. Click on the green + button, and select Scala Console. You should see the following screen:
  1. Make the following changes and click OK:
  • Name: Scala Console.
  • Check Single instance only box – we rarely need to have two consoles running at the same time.
  • In, Before launch, click on Build and then click the Remove button. This way, you will always be able to quickly run a console, even if your code does not compile.
  • Following that, click on OK.
  1.  On the top toolbar, you should see that IntelliJ created a new Scala Console run configuration:


  1. Click on the green arrow to run the console. You should see the following at the bottom of the screen, in the Run window. We can now type our first Scala expression after the Scala prompt:


Using the Scala Console and Worksheet


By now, all the necessary tools and libraries should be installed. Let's start to play with the basics of Scala by experimenting in different environments. The simplest way to try Scala is to use the Scala Console. Subsequently, we will introduce the Scala Worksheet, which allows you to keep all the instructions that are entered in a file.

Using the Scala Console

The Scala console, also called Scala REPL (short for Read-Eval-Print-Loop), allows you to execute bits of code without having to compile them beforehand. It is a very convenient tool to experiment with the language or when you want to explore the capabilities of a library.

In the console, type 1+1 after the scala> prompt and hit Ctrl + Enterorcmd + Enter:

scala> 1+1

The console displays the result of the evaluation, like so:

res0: Int = 2

What happened here? The REPL compiled, evaluated the expression 1+1, and automatically assigned it to a variable named res0. This variable is of type Int, and its value is 2.

Declaring variables

In Scala, a variable can be declared using val or var. A val is immutable, which means you can never change its value. A var is mutable. It is not mandatory to declare the type of the variable. If you do not declare it, Scala will infer it for you.

Let's define some immutable variables:

Note

In all the following code examples, you only need to type the code that is after the Scala Command Prompt, and hit Ctrl + Enter or cmd + return to evaluate. We show the result of the evaluation underneath the prompt, as it would appear on your screen.

scala> val x = 1 + 1
x: Int = 2

scala> val y: Int = 1 + 1
y: Int = 2

In both cases, the type of the variable is Int. The type of x was inferred by the compiler to be Int. The type of y was explicitly specified with : Int after the name of the variable.

We can define a mutable variable and modify it as follows:

scala> var x = 1
x: Int = 1

scala> x = 2
x: Int = 2

It is a good practice to use val in most situations. Whenever I see a val declared, I know that its content will never change subsequently. It helps to reason about a program, especially when multiple threads are running. You can share an immutable variable across multiple threads without fearing that one thread might see a different value at some point. Whenever you see a Scala program using var, it should make you raise an eyebrow: the programmer should have a good reason to use a mutable variable, and it should be documented.

If we attempt to modify a val, the compiler will raise an error message:

scala> val y = 1
y: Int = 1

scala> y = 2
<console>:12: error: reassignment to val
       y = 2
         ^

This is a good thing: the compiler helps us make sure that no piece of code can ever modify a val.

Types

We saw in the previous examples that Scala expressions have a type. For instance, the value1 is of type Int, and the expression 1+1 is also of type Int. A type is a classification of data and provides a finite or infinite set of values. An expression of a given type can take any of its provided values.

Here are a few examples of types available in Scala:

  • Int provides a finite set of values, which are all the integers between -231 and 231-1.
  • Boolean provides a finite set of two values: true and false.
  • Double provides a finite set of values: all the 64 bits and IEEE-754 floating point numbers.
  • String provides an infinite set of values: all the sequence of characters are of an arbitrary length. For instance, "Hello World" or "Scala is great !".

A type determines the operations that can be performed on the data. For instance, you can use the + operator with two expressions of type Int or String, but not with expressions of type Boolean:

scala> val str = "Hello" + "World"
str: String = HelloWorld

scala> val i = 1 + 1
i: Int = 2

scala> val b = true + false
<console>:11: error: type mismatch;
 found   : Boolean(false)

When we attempt to use an operation on a type that does not support it, the Scala compiler complains of a type mismatch error.

An important feature of Scala is that it is a statically typed language. This means that the type of a variable or expression is known at compile time. The compiler will also check that you do not call an operation or function that is not legal for this type. This helps tremendously to reduce the number of bugs that can occur at runtime (when running a program).

As we saw earlier, the type of an expression can be specified explicitly with : followed by the name of the type, or in many cases, it can be automatically inferred by the compiler.

If you are not used to working with statically typed languages, you might get frustrated to have to fight with the compiler to make it accept your code, but you will gradually get more accustomed to the kind of errors thrown at you and how to resolve them. You will soon find that the compiler is not an enemy that prevents you from running your code; it is acting more like a good friend that shows you what logical errors you have made and gives you some indication on how to resolve them.

People coming from dynamically typed languages such as Python, or people coming from not-as-strongly statically typed language such as Java or C++, are often astonished to see that a Scala program that compiles has a much higher probability of being correct on the first run.

Note

IntelliJ can automatically add the inferred type to your definitions. For instance, type val a = 3 in the Scala console, then move the cursor at the beginning of the a. You should see a light bulb icon. When you click on it, you will see a hint add type annotation to value definition. Click on it, and IntelliJ will add : Int after the a. Your definition will become val a: Int = 3.

Declaring and calling functions

A Scala function takes 0 to n parameters and returns a value. The type of each parameter must be declared. The type of the returned value is optional, as it is inferred by the Scala compiler when not specified. However, it is a good practice to always specify the return type, as it makes the code more readable:

scala> def presentation(name: String, age: Int): String = 
  "Hello, my name is " + name + ". I am " + age + " years old."
presentation: (name: String, age: Int)String

scala> presentation(name = "Bob", age = 25)
res1: String = Hello, my name is Bob. I am 25 years old.

scala> presentation(age = 25, name = "Bob")

res2: String = Hello, my name is Bob. I am 25 years old.

We can call a function by passing arguments in the right order, but we can also name the arguments and pass them in any order. It is a good practice to name the arguments when some of them have the same type, or when a function takes many arguments. It avoids passing the wrong argument and improves readability.

Side effects

A function or expression is said to have a side effect when it modifies some state or has some action in the outside world. For instance, printing a string to the console, writing to a file, and modifying a var, are all side effects.

In Scala, all expressions have a type. A statement which performs a side effect is of type Unit. The only value provided by the type Unit is ():

scala> val x = println("hello")
hello
x: Unit = ()

scala> def printName(name: String): Unit = println(name)
printName: (name: String)Unit

scala> val y = {
  var a = 1
  a = a+1
}
y: Unit = ()

scala> val z = ()
z: Unit = ()

A pure function is a function whose result depends only on its arguments, and that does not have any observable side effect. Scala allows you to mix side-effecting code with pure code, but it is a good practice to push side-effecting code to the boundaries of your application. We will talk about this later in more detail in the Ensuring referential transparency section in Chapter 3, Handling Errors.

Note

Good practice: When a function with no parameters has side effects, you should declare it and call it with empty brackets (). It informs users of your function that it has side effects. Conversely, a pure function with no parameters should not have empty brackets, and should not be called with empty brackets. IntelliJ helps you in keeping some consistency: it will display a warning if you call a parameterless function with (), or if you omit the () when you call a function declared with ().

Here is an example of a method call with a side effect where we have to use empty brackets, and an example of a pure function:

scala> def helloWorld(): Unit = println("Hello world")
helloWorld: ()Unit

scala> helloWorld()
Hello world

scala> def helloWorldPure: String = "Hello world"
helloWorldPure: String

scala> val x = helloWorldPure
x: String = Hello world

If...else expression

In Scala, if (condition) ifExpr else if ifExpr2 else elseExpr is an expression, and has a type. If all sub-expressions have a type A, the type of the if ... else expression will be A as well:

scala> def agePeriod(age: Int): String = {
  if (age >= 65)
    "elderly"
  else if (age >= 40 && age < 65)
    "middle aged"
  else if (age >= 18 && age < 40)
    "young adult"
  else
    "child"
}
agePeriod: (age: Int)String

 If sub-expressions have different types, the compiler will infer a common super-type, or widen the type if it is a numeric type:

scala> val ifElseWiden = if (true) 2: Int else 2.0: Double
ifElseWiden: Double = 2.0

scala> val ifElseSupertype = if (true) 2 else "2"
ifElseSupertype: Any = 2

In the first expression present in the preceding code, the first sub-expression is of type Int and the second is of type Double. The type of ifElseWiden is widened to be Double.

In the second expression, the type of ifElseSupertype is Any, which is the common super-type for Int and String.

An if without an else is equivalent to if (condition) ifExpr else (). It is better to always specify the else expression, otherwise, the type of the if/else expression might not be the one we expect:

scala> val ifWithoutElse = if (true) 2
ifWithoutElse: AnyVal = 2

scala> val ifWithoutElseExpanded = if (true) 2: Int else (): Unit
ifWithoutElseExpanded: AnyVal = 2

scala> def sideEffectingFunction(): Unit = if (true) println("hello world")
sideEffectingFunction: ()Unit

In the preceding code, the common super-type between Int and Unit is AnyVal. This can be a bit surprising. In most situations, you would want to avoid that. 

Class

We mentioned earlier that all Scala expressions have a type. A class is a sort of template that can create objects of a specific type. When we want to obtain a value of a certain type, we can instantiate a new object using new followed by the class name:

scala> class Robot
defined class Robot

scala> val nao = new Robot
nao: Robot = Robot@78318ac2

The instantiation of an object allocates a portion of heap memory in the JVM. In the preceding example, the value nao is actually a reference to the portion of heap memory that keeps the content of our new Robot object. You can observe that when the Scala console printed the variable nao, it outputted the name of the class, followed by @78318ac2. This hexadecimal number is, in fact, the memory address of where the object is stored in the heap.

The eq operator can be handy to check if two references are equal. If they are equal, this means that they point to the same portion of memory:

scala> val naoBis = nao
naoBis: Robot = Robot@78318ac2

scala> nao eq naoBis
res0: Boolean = true

scala> val johnny5 = new Robot
johnny5: Robot = Robot@6b64bf61

scala> nao eq johnny5
res1: Boolean = false

A class can have zero to many members. A member can be either:

  • An attribute, also called a field. It is a variable whose content is unique to each instance of the class.
  • A method. This is a function that can read and/or write the attributes of the instance. It can have additional parameters.

Here is a class that defines a few members:

scala> class Rectangle(width: Int, height: Int) {
  val area: Int = width * height
  def scale(factor: Int): Rectangle = new Rectangle(width * factor, height * factor)
}
defined class Rectangle

The attributes declared inside the brackets () are a bit special: they are constructor arguments, which means that their value must be specified when we instantiate a new object of the class. The other members must be defined inside the curly brackets {}. In our example, we defined four members:

  • Two attributes that are constructor arguments: width and height.
  • One attribute, area. Its value is defined when an instance is created by using the other attributes.
  • One method, scale, which uses the attributes to create a new instance of the class Rectangle.

You can call a member on an instance of a class by using the postfix notation myInstance.member. Let's create a few instances of our class and try to call the members:

scala> val square = new Rectangle(2, 2)
square: Rectangle = Rectangle@2af9a5ef

scala> square.area
res0: Int = 4

scala> val square2 = square.scale(2)
square2: Rectangle = Rectangle@8d29719

scala> square2.area
res1: Int = 16

scala> square.width
<console>:13: error: value width is not a member of Rectangle
       square.width

We can call the members area and scale, but not width. Why is that?

This is because, by default, constructor arguments are not accessible from the outside world. They are private to the instance and can only be accessed from the other members. If you want to make the constructor arguments accessible, you need to prefix them with val:

scala> class Rectangle(val width: Int, val height: Int) {
  val area: Int = width * height
  def scale(factor: Int): Rectangle = new Rectangle(width * factor, height * factor)
}
defined class Rectangle

scala> val rect = new Rectangle(3, 2)
rect: Rectangle = Rectangle@3dbb7bb

scala> rect.width
res3: Int = 3

scala> rect.height
res4: Int = 2

This time, we can get access to the constructor arguments. Note that you can declare attributes using var instead of val. This would make your attribute modifiable. However, in functional programming, we avoid mutating variables. A var attribute in a class is something that should be used cautiously in specific situations. An experienced Scala programmer would flag it immediately in a code review and its usage should be always justified in a code comment.

If you need to modify an attribute, it is better to return a new instance of the class with the modified attribute, as we did in the preceding Rectangle.scale method.

Note

You might worry that all these new objects will consume too much memory. Fortunately, the JVM has a mechanism known as the garbage collector. It automatically frees up the memory used by objects that are not referenced by any variable.

Using the worksheet

IntelliJ offers another handy tool to experiment with the language: the Scala worksheet.

Go to File | New | Scala Worksheet. Name it worksheet.sc. You can then enter some code on the left-hand side of the screen. A red/green indicator in the top right corner shows you if the code you are typing is valid or not. As soon as it compiles, the results appear on the right-hand side:


You will notice that nothing gets evaluated until your whole worksheet compiles.

Class inheritance

Scala classes are extensible. You can extend an existing class to inherit from all its members. If B extends A, we say that B is a subclass of A, a derivation of B, or a specialization of B. A is a superclass of B or a generalization of B.

Let's see how it works in an example. Type the following code in the worksheet:

class Shape(val x: Int, val y: Int) {
val isAtOrigin: Boolean = x == 0 && y == 0
}

class Rectangle(x: Int, y: Int, val width: Int, val height: Int)
extends Shape(x, y)

class Square(x: Int, y: Int, width: Int)
extends Rectangle(x, y, width, width)

class Circle(x: Int, y: Int, val radius: Int)
extends Shape(x, y)

val rect = new Rectangle(x = 0, y = 3, width = 3, height = 2)
rect.x
rect.y
rect.isAtOrigin
rect.width
rect.height

The classes Rectangle and Circle are subclasses of Shape. They inherit from all the members of Shape: x, y, and isAtOrigin. This means that when I instantiate a new Rectangle, I can call members declared in Rectangle, such as width and height, and I can also call members declared in Shape.

When declaring a subclass, you need to pass the constructor arguments of the superclass, as if you were instantiating it. As Shape declares two constructor parameters, x and y, we have to pass them in the declaration extends Shape(x, y). In this declaration, x and y are themselves the constructor arguments of Rectangle. We just passed these arguments up the chain.

Notice that in the subclasses, the constructor parameters x and y are declared without val. If we had declared them with val, they would have been promoted as publicly available attributes. The problem is that Shape also has x and y as public attributes. In this situation, the compiler would have raised a compilation error to highlight the conflict.

Subclass assignment

Consider two classes, A and B, with B extends A.

When you declare a variable of type A, you can assign it to an instance of B, with val a: A = new B.

On the other hand, if you declare a variable of type B, you cannot assign it to an instance of A.

Here is an example that uses the same Shape and Rectangle definitions that were described earlier:

val shape: Shape = new Rectangle(x = 0, y = 3, width = 3, height = 2)
val rectangle: Rectangle = new Shape(x = 0, y = 3)

The first line compiles because Rectangleis aShape.

The second line does not compile, because not all shapes are rectangles.

Overriding methods

When you derive a class, you can override the members of the superclass to provide a different implementation. Here is an example that you can retype in a new worksheet:

class Shape(val x: Int, val y: Int) {
def description: String = s"Shape at (" + x + "," + y + ")"
}

class Rectangle(x: Int, y: Int, val width: Int, val height: Int)
extends Shape(x, y) {
override def description: String = {
super.description + s" - Rectangle " + width + " * " + height
  }
}

val rect = new Rectangle(x = 0, y = 3, width = 3, height = 2)
rect.description

When you run the worksheet, it evaluates and prints the following description on the right-hand side:

res0: String = Shape at (0,3) - Rectangle 3 * 2

We defined a method description on the class Shape that returns a String. When we call rect.description, the method called is the one defined in the class Rectangle, because Rectangle overrides the method description with a different implementation.

The implementation of description in the class Rectangle refers to super.description. super is a keyword that lets you use the members of the superclass without taking into account any overriding. In our case, this was necessary so that we could use the super reference, otherwise, description would have called itself in an infinite loop!

On the other hand, the keyword this allows you to call the members of the same class. Change Rectangle to add the following methods:

class Rectangle(x: Int, y: Int, val width: Int, val height: Int)
extends Shape(x, y) {
override def description: String = {
super.description + s" - Rectangle " + width + " * " + height
  }

def descThis: String = this.description
def descSuper: String = super.description
}

val rect = new Rectangle(x = 0, y = 3, width = 3, height = 2)
rect.description
rect.descThis
rect.descSuper

When you evaluate the worksheet, it prints the following strings:

res0: String = Shape at (0,3) - Rectangle 3 * 2
res1: String = Shape at (0,3) - Rectangle 3 * 2
res2: String = Shape at (0,3)

The call to this.description used the definition of description, as declared in the class Rectangle, whereas the call to super.description used the definition of description, as declared in the class Shape.

Abstract class

An abstract class is a class that can have many abstract members. An abstract member defines only a signature for an attribute or a method, without providing any implementation. You cannot instantiate an abstract class: you must create a subclass that implements all the abstract members.

Replace the definition of Shape and Rectangle in the worksheet as follows:

abstract class Shape(val x: Int, val y: Int) {
val area: Double
def description: String
}

class Rectangle(x: Int, y: Int, val width: Int, val height: Int)
extends Shape(x, y) {

val area: Double = width * height

def description: String =
"Rectangle " + width + " * " + height
}

Our class Shape is now abstract. We cannot instantiate a Shape class directly anymore: we have to create an instance of Rectangle or any of the other subclasses of Shape. Shape defines two concrete members, x and y, and two abstract members, area and description. The subclass, Rectangle, implements the two abstract members.

Note

You can use the prefix override when implementing an abstract member, but it is not necessary. I recommend not adding it to keep the code less cluttered. Also, if you subsequently implement the abstract method in the superclass, the compiler will help you find all subclasses that had an implementation. It will not do this if they use override

Trait

A trait is similar to an abstract class: it can declare several abstract or concrete members and can be extended. It cannot be instantiated. The difference is that a given class can only extend one abstract class, however, it can mixin one to many traits. Also, a trait cannot have constructor arguments.

For instance, we can declare several traits, each declaring different abstract methods, and mixin them all in the Rectangle class:

trait Description {
def description: String
}

trait Coordinates extends Description {
def x: Int
def y: Int

def description: String =
"Coordinates (" + x + ", " + y + ")"
}

trait Area {
def area: Double
}

class Rectangle(val x: Int,
val y: Int,
val width: Int,
val height: Int)
extends Coordinates with Description with Area {

val area: Double = width * height

override def description: String =
super.description + " - Rectangle " + width + " * " + height
}

val rect = new Rectangle(x = 0, y = 3, width = 3, height = 2)
rect.description

The following string gets printed when evaluating rect.description:

res0: String = Coordinates (0, 3) - Rectangle 3 * 2

The class Rectangle mixes in the traits Coordinates, Description, and Area. We need to use the keyword extends before trait or class, and the keyword with for all subsequent traits.

Notice that the Coordinates trait also mixes the Description trait, and provides a default implementation. As we did when we had a Shape class, we override this implementation in Rectangle, and we can still call super.description to refer to the implementation of description in the trait Coordinates.

Another interesting point is that you can implement an abstract method with val – in trait Area, we defined def area: Double, and implemented it in Rectangle using val area: Double. It is a good practice to define abstract members with def. This way, the implementer of the trait can decide whether to define it by using a method or a variable.

Scala class hierarchy

All Scala types extend a built-in type called Any. This type is the root of the hierarchy of all Scala types. It has two direct subtypes:

  • AnyVal is the root class of all value types. These types are represented as primitive types in the JVM.
  • AnyRef is the root class of all object types. It is an alias for the class java.lang.Object.
  • A variable of type AnyVal directly contains the value, whereas a variable of type AnyRef contains the address of an object stored somewhere in memory.

The following diagram shows a partial view of this hierarchy:

When you define a new class, it indirectly extends AnyRef. This being an alias for java.lang.Object, your class inherits from all the default methods implemented in Object. Its most important methods are as follows:

  • def toString: String returns a string representation of an object. This method is called whenever you print an object using println. The default implementation returns the class's name followed by the address of the object in memory.
  • def equals(obj: Object): Boolean returns true if the object is equal to another object, and false otherwise. This method is called whenever you compare two objects using ==. The default implementation only compares the objects' references, and hence is equivalent to eq. Fortunately, most classes from the Java and Scala SDK override this method to provide a good comparison. For instance, the class java.lang.String overrides the equals method to compare the content of the strings, character by character. Therefore, when you compare two strings with ==, the result will be true if the strings are the same, even if they are stored in different places in memory.
  • def hashCode: Int is called whenever you put an object in Set or if you use it as a key in Map. The default implementation is based on the address of the object. You can override this method if you want to have a better distribution of the data in Set or Map, which can improve the performance of these collections. However, if you do so, you must make sure that hashCode is consistent with equals: if two objects are equal, their hashCodes must also be equal.

It would be very tedious to have to override these methods for all your classes. Fortunately, Scala offers a special construct called case class that will automatically override these methods for us.

Case class

In Scala, we define most data structures using case classes. case class has one to many immutable attributes and provides several built-in functions compared to a standard class.

Type the following into the worksheet:

case class Person(name: String, age: Int)
val mikaelNew = new Person("Mikael", 41)
// 'new' is optional
val mikael = Person("Mikael", 41)
// == compares values, not references
mikael == mikaelNew
// == is exactly the same as .equals
mikael.equals(mikaelNew)

val name = mikael.name

// a case class is immutable. The line below does not compile:
//mikael.name = "Nicolas"
// you need to create a new instance using copy
val nicolas = mikael.copy(name = "Nicolas")

In the preceding code, the text following // is a comment that explains the preceding statement.

When you declare a class as case class, the Scala compiler automatically generates a default constructor, an equals and hashCode method, a copy constructor, and an accessor for each attribute.

Here is a screenshot of the worksheet we have. You can see the results of the evaluations on the right-hand side:

Companion object

A class can have a companion object. It must be declared in the same file as the class, using the keyword object followed by the name of the class it is accompanying. A companion object is a singleton – there is only one instance of this object in the JVM. It has its own type and is not an instance of the accompanied class.

This object defines static functions or values that are closely related to the class it is accompanying. If you are familiar with Java, it replaces the keyword static: in Scala, all static members of a class are declared inside the companion object.

Some functions in the companion object have a special meaning. Functions named apply are constructors of the class. The name apply can be omitted when we call them:

case class City(name: String, urbanArea: Int)
object City {
  val London = City("London", 1738)
  val Lausanne = City("Lausanne", 41)
}

case class Person(firstName: String, lastName: String, city: City)
object Person {
  def apply(fullName: String, city: City): Person = {
    val splitted = fullName.split(" ")
    new Person(firstName = splitted(0), lastName = splitted(1), city = city)
  }
}

// Uses the default apply method
val m1 = Person("Mikael", "Valot", City.London)
// Call apply with fullName
val m2 = Person("Mikael Valot", City.London)
// We can omit 'apply'
val n = Person.apply("Nicolas Jorand", City.Lausanne)

In the preceding code, we defined a companion object for the class City, which defines some constants. The convention for constants is to have the first letter in uppercase.

The companion object for the class Person defines an additional apply function that acts as a constructor. Its implementation calls the method split(" "), which splits a string separated by spaces to produce an array of type string. It allows us to construct a Person instance using a single string where the first name and last name are separated by a space. We then demonstrated that we can either call the default apply function that comes with the case class, or the one we implemented.


Creating my first project


As you now know the basics of running code in the REPL and the worksheet, it is time to create your first 'Hello World' project. In this section, we are going to filter a list of people and print their name and age into the console.

Creating the project

Repeat the same recipe that you completed in the Installing IntelliJ section to create a new project. Here is a summary of the tasks you must complete:

  1. Run IntelliJ and select Create New Project
  2. Select Scala andsbt
  3. Input the name of the project, such asExamples
  4. If the selected directory doesn't exist, IntelliJ will ask you if you want to create it – select OK

As soon as you accept that you are going to create the directory, IntelliJ is going to download all the necessary dependencies and build the project structure. Be patient, as this could take a while, especially if you do not have a good internet connection.

Once everything is downloaded, you should have your IDE in the following state:

Notice the folder structure. The source code is under src/main/scala and the test code is under src/test/scala. If you have used Maven before, this structure should sound familiar.

Creating the Main object

Here we are! Let's create our first application. First, create the entry point for the program. If you are coming from Java, it would be equivalent to defining the public static void main(String[] args).

Right-click on the src/main/scala folder and select New | Scala Class. Give Main as the class name and Object as the Kind:

We have created our first object. This object is a singleton. There can be only one instance of it in the JVM. The equivalent in Java would be a static class with static methods.

We would like to use it as the main entry point of our program. Scala provides a convenient class named App that needs to be extended. Let's extend our Main object with that class:

object Main extends App {

}

The App superclass defines a static main method that will execute all the code defined inside your Main object. That's all – we created our first version, which does nothing!

We can now run the program in IntelliJ. Click on the small green triangle in the gutter of the object definition, as follows:

The program gets compiled and executed, as shown in the following screenshot:

It is not spectacular, but let's improve it. To get the right habits, we are going to use the TDD technique to proceed further.

Writing the first unit test

TDD is a very powerful technique to write efficient, modular, and safe programs. It is very simple, and there are only three rules to play this game:

  1. You are not allowed to write any production code unless it is to make a failing unit test pass.
  2. You are not allowed to write any more of a unit test than is sufficient to fail, and compilation failures are failures.
  3. You are not allowed to write any more production code than is sufficient to pass the one failing unit test.

Note

See the full article from Uncle Bob here: http://butunclebob.com/ArticleS.UncleBob.TheThreeRulesOfTdd.

There are multiple testing frameworks in Scala, but we chose ScalaTest (http://www.scalatest.org/) for its simplicity.

In order to add the ScalaTest library in the project, follow these steps:

  1. Edit the build.sbt file.
  2. Add a new repository resolver to search for Scala libraries.
  3. Add the ScalaTest library:
name := "Examples"
version := "0.1"
scalaVersion := "2.12.4"
resolvers += "Artima Maven Repository" at "http://repo.artima.com/releases"
libraryDependencies += "org.scalatest" %% "scalatest" % "3.0.4" % "test"

Note

Notice the information bar on the top of the screen. It tells you that your file has changed and asks for multiple choices. As this is a small project, you can select enable autoimport.

  1. Create the test class by right-clicking on the test/scala folder and clicking on create a new class. Name it MainSpec.

ScalaTest offers multiple ways to define your test – the full list can be found on the official website (http://www.scalatest.org/at_a_glance/WordSpec). We are going to use the WordSpec style since it is quite prescriptive, offers a hierarchical structure, and is commonly used on large Scala projects.

Your MainSpec should extend the WordSpec class and the Matchers class, like so:

class MainSpec extends WordSpec with Matchers {

}

Note

The class Matchers is providing the word should as a keyword to perform the comparison on a test.

WordSpec and Matchers are underlined in red, which means that the class is not resolved. To make it resolved, go with the cursor on the class and press Alt + Enter of your keyboard. If you are positioned on the WordSpec word, a popup should appear. This is normal, as there are several classes named WordSpec in different packages:

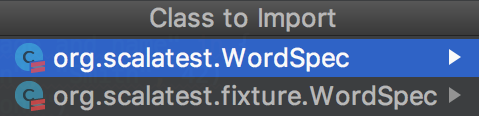
Select the first option and IntelliJ will automatically add the import on the top of your code. On the Matchers class, as soon as you type Alt + Enter, the import will be added directly.

The final code should be as follows:

import org.scalatest.{WordSpec, Matchers}

class MainSpec extends WordSpec with Matchers {

}

Our class skeleton is now ready for our first test. We would like to create the Person class and test its constructor.

Let's explain what we would like to test using simple sentences. Complete the test class with the following code:

class MainSpec extends WordSpec with Matchers {
  "A Person" should {
    "be instantiated with a age and name" in {
val john = Person(firstName = "John", lastName =  "Smith", 42)
      john.firstName should be("John")
      john.lastName should be("Smith")
      john.age should be(42)
    }
  }
}

IntelliJ is complaining that it cannot resolve the symbols Person, name, surname, and age. This is expected since the Person class does not exist. Let's create it in the folder src/main/scala. Right-click on the folder and create a new class named Person.

Transform it in the case of the class by adding the case keyword and defining the constructor with the name, surname, and age:

case class Person(firstName: String, lastName: String, age: Int)

If you go back to the MainSpec.scala file, you'll notice that the class is now compiled without any error and warning. The green tick (

) on the top-right of the code window confirms this.

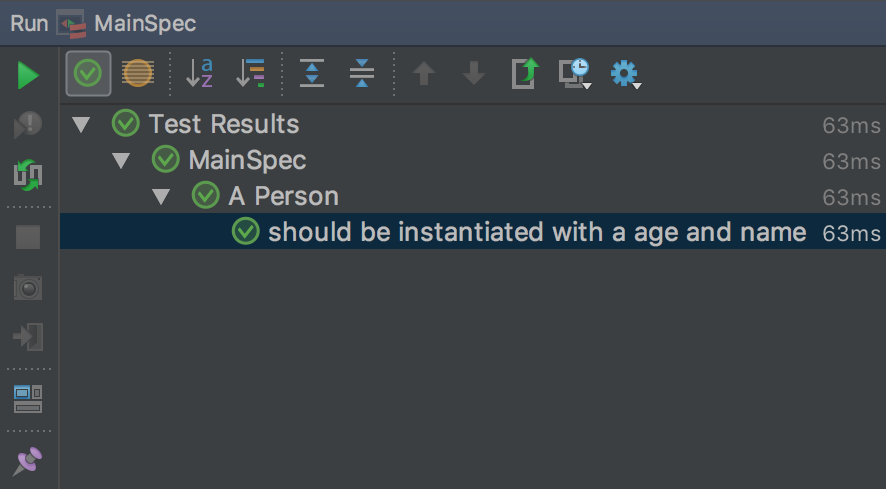
Run the test by right-clicking on the MainSpec.scala file and selecting Run 'MainSpec', or use the keyboard shortcut Ctrl + Shift + F10 or Ctrl + Shift + R:

The test contained in MainSpec runs and the results appear in the Run window:

Implementing another feature

Now, we would like to have a nice representation of the person by stating his/her name and age. The test should look like the following:

"Get a human readable representation of the person" in {
val paul = Person(firstName = "Paul", lastName = "Smith", age = 24)
  paul.description should be("Paul Smith is 24 years old")
}

Run the test again. We will get a compilation error:

This is expected as the function doesn't exist on the Person class. To implement it, add the expected implementation by setting the cursor on the description() error in the MainSpec.scala class, hitting Alt + Enter, and selecting the create method description. IntelliJ generates the method for you and sets the implementation to ???. Replace ??? with the expected code:

def description = s"$firstName $lastName is $age ${if (age <= 1) "year"                    else "years"} old"

By doing so, we defined a method that does not take any parameter and return a string representing Person. In order to simplify the code, we are using a string interpolation to build the string. To use string interpolation, you just have to prepend an s before the first quote. Inside the quote, you can use the wildcard $ so that we can use an external variable and use the bracket after the dollar sign to enter more code than just a variable name.

Execute the test and the result should be green:

The next step is to write a utility function that, given a list of people, returns only the adults.

For the tests, two cases are defined:

"The Person companion object" should {
val (akira, peter, nick) = (
Person(firstName = "Akira", lastName = "Sakura", age = 12),
Person(firstName = "Peter", lastName = "Müller", age = 34),
Person(firstName = "Nick", lastName = "Tagart", age = 52)
  )
"return a list of adult person" in {
val ref = List(akira, peter, nick)
    Person.filterAdult(ref) should be(List(peter, nick))
  }
"return an empty list if no adult in the list" in {
val ref = List(akira)
    Person.filterAdult(ref) should be(List.empty[Person])
  }
}

Here, we used a tuple to define three variables. This is a convenient way to define multiple variables. The scope of the variables is bounded by the enclosing curly brackets. Use IntelliJ to create the filterAdult function by using the Alt+ Enter shortcut. The IDE understands that the function should be in the Person companion object and generates it for you.

Note

If you didn't use the named parameters and would like to use them, IntelliJ can help you: hit Alt + Enter when the cursor is after the parenthesis and select "used named arguments ...".

We implement this method using the forcomprehensionScala feature:

object Person {
  def filterAdult(persons: List[Person]) : List[Person] = {
    for {
      person <- persons
      if (person.age >= 18)
    } yield (person)
  }
}

It is a good practice to define the return type of the method, especially when this method is exposed as a public API.

The for comprehension has been used only for demonstration purposes. We can simplify it using the filter method on List. filter is part of the Scala Collections API and is available for many kinds of collections:

def filterAdult(persons: List[Person]) : List[Person] = {
  persons.filter(_.age >= 18)
}

Implementing the Main method

Now that all our tests are green, we can implement the main method. The implementation becomes trivial as all the code is already in the test:

object Main extends App {
val persons = List(
Person(firstName = "Akira", lastName = "Sakura", age = 12),
Person(firstName = "Peter", lastName = "Müller", age = 34),
Person(firstName = "Nick", lastName = "Tagart", age = 52))

val adults = Person.filterAdult(persons)
val descriptions = adults.map(p => p.description).mkString("\n\t")
println(s"The adults are \n\t$descriptions")
}

The first thing is to define a list of Person, so that Person.filterAdult() is used to remove all the persons, not the adults. The adults variable is a list of Person, but I would like to transform this list of Person into a list of the description of the Person. To perform this operation, the map function of the collection is used. The map function transforms each element of the list by applying the function in the parameter.

The notation inside the map() function defines an anonymous function that takes p as the parameter. The body of the function is p.description. This notation is commonly used whenever a function takes another function as an argument.

Once we have a list of descriptions, we create a string with the mkString() function. It concatenates all the elements of the list using the special character \n\t, which are respectively the carriage return and the tab character.

Finally, we perform the side effect, which is the print on the console. To print in the console, the println alias is used. It is a syntactic sugar for System.out.println.


Summary


We have finished the first chapter, and you should now have the basics to start a project on your own. We covered the installation of an IDE to code in Scala with the basic usage of the dedicated build tool named SBT. Three ways to explore Scala have been demonstrated, including the REPL to test simple Scala features, the IntelliJ worksheet to play with a small environment, and lastly a real project.

To code our first project, we used ScalaTest and the TDD methodology so that we had good code quality from the beginning. 

In the next chapter, we will write a complete program. It is a financial application that allows its users to estimate when they can retire. We will keep using the TDD technique and will further explore the Scala language, its development kit, and their best practices. 

About the Authors
  • Mikael Valot

    Mikaël Valot is Principal Software Engineer at IHS Markit in London, UK. He is the lead developer of a strategic market risk solution for banking regulation. He has over 15 years of experience in the financial industry of the UK, Switzerland, and France. He has a Diplôme d'Ingénieur in Computing (equivalent to an M.Sc.) from Telecom Nancy, France. After years of working with Java, he started developing professionally with Scala in 2010, and never looked back. He was a speaker at Scala Exchange 2015. When he is not coding in Scala, Mikaël likes to dabble with Haskell, the Robotic Operating System, and deep learning. He strongly believes that functional programming with strong typing is the best way to write safe and scalable programs.

    Browse publications by this author
  • Nicolas Jorand

    Nicolas Jorand is a senior developer. He worked for the finance industry for about 15 years before switching to the energy industry. He is a freelancer enjoying a partial time at Romande Energy, a Swiss utility company providing exclusively green electricity. Nicolas is a full-stack developer, playing with microcontrollers, developing standard web user and 3D interfaces on Unity, developing software to animate a humanoid robot (Nao) and finally, working with Scala on integration and backend software. All these projects are done with the same leitmotif; "In the dev process, get the issues as early as possible."

    Browse publications by this author
Scala Programming Projects
Unlock this book and the full library FREE for 7 days
Start now