Download code from GitHub
Getting Started with QGIS 3
QGIS is free and open source software. It is a Geographical Information System (GIS). QGIS enables users to create, manipulate, and visualize spatial data. Spatial data is data associated to a location or a place, commonly defined in terms of vector (points, lines, or polygons) or raster (bitmap) data. The QGIS project began in 2002 as a way of importing and viewing data from PostGIS (also open source software that adds geographic support to PostgreSQL) enabled database. QGIS is arguably now the leading open source GIS software package.
QGIS 3 was a significant update in the QGIS series. If you are familiar with the QGIS project, you can inspect the changes in the visual changelog available at this website: https://www.qgis.org/en/site/forusers/visualchangelogs.html. The processing framework was rewritten and has improved the performance significantly. Now, QGIS 3 provides users access to Python 3. This means many of the plugins, that make QGIS so powerful, have been updated to be compatible with the new API. At the time of writing, QGIS 3 had been out for almost a year. QGIS 3.4 was released in October, 2018. It is scheduled to become the first Long Term Release (LTR) of the QGIS 3 series in early 2019.
This book is a quick start guide to QGIS; it uses the LTR 3.4 release as its foundation. It is recommended that you use this version while working through this book. The book has been written in such a way that you should be able to apply the foundational knowledge gained to future releases. However, QGIS is actively developed software and subject to change.
Topics covered in this introductory chapter include the following:
- Installing QGIS
- Toolbars and GUI
Installing QGIS
QGIS runs on most operating systems. It is even possible to install it on a Raspberry Pi! This is one of the reasons for the success of QGIS: it is supported on multiple platforms. The QGIS project provides ready-to-use packages as well as instructions to build from source code at http://download.qgis.org. In this quick start guide, we will cover how to install QGIS on two systems: Windows and Ubuntu.
Installing on Windows
There are two ways of installing QGIS on the Windows OS. Directly download the .exe file from http://download.qgis.org, or download it via the OSGeo4W installer. OSGeo4W is a small program that allows you not only to download and install QGIS, but also other OSGeo tools. We recommend that you use this installer for QGIS. You can download the 32-bit or the 64-bit OSGeo4W installers from http://osgeo4w.osgeo.org, or, you can download directly from http://download.osgeo.org/osgeo4w/osgeo4w-setup-x86.exe or http://download.osgeo.org/osgeo4w/osgeo4w-setup-x86_64.exe. Download the version that matches your operating system and keep it. In the future, whenever you want to change or update your system, just run it again.
OSGeo4W installer
In this section, we will look at the advanced installer and express installer options (which will install the latest release) using OSGeo4W as the installer.
Latest release
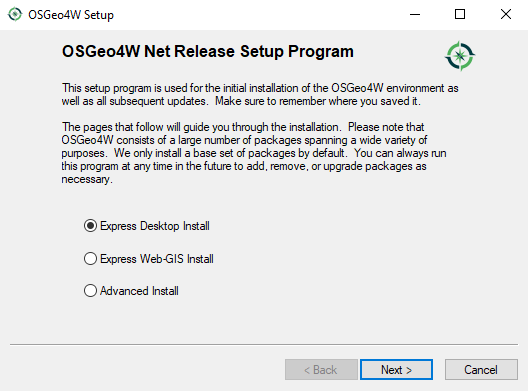
Once you have downloaded the installer that matches your system, double-click on the .exe file and step through the following installation screens. The simplest way, which installs the latest release, is to select Express Desktop Install. This may not install QGIS 3.4. If you wish to do this, then please see the following subsection, Advanced installer. The express installation option is shown in the following screenshot:
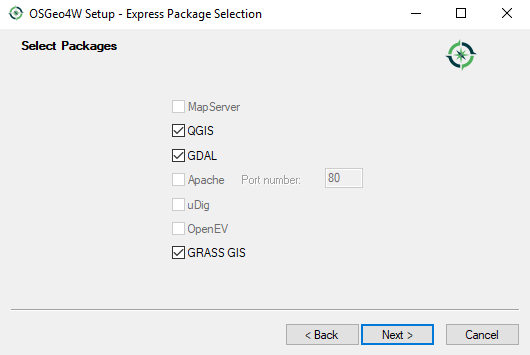
Select the checkboxes next to QGIS, GDAL, and GRASS GIS. GDAL is used for reading and writing geospatial data and GRASS GIS is open source GIS software that can be used in combination with QGIS. This is shown in the following screenshot:
Click Next and the downloading process will begin. Progress will be displayed as each component is downloaded and installed. Having these installed will provide you with many tools to perform geospatial analysis. After a short period of time, you should see OSGeo4W in your program menu, along with a subset of the software installed, including QGIS.
You can install multiple versions of QGIS. Sometimes, this may be necessary as plugins may not work with certain versions of the software. What if you want to choose a version? OSGeo4W allows this with the advanced installer.
Advanced installer
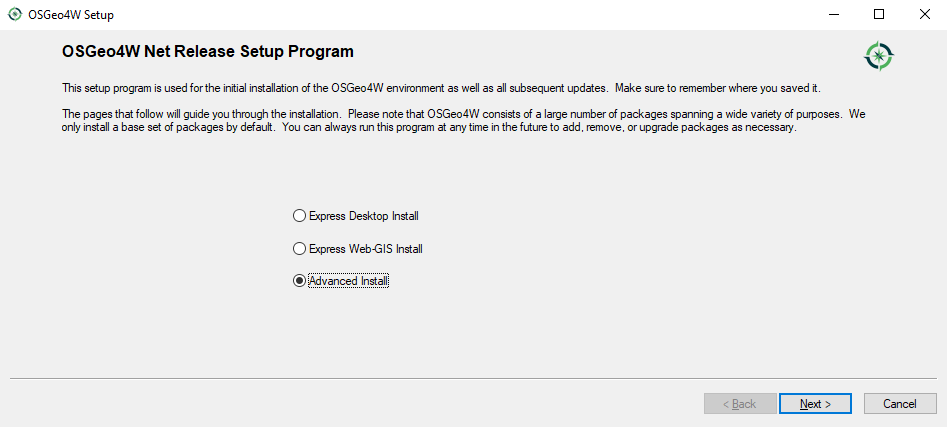
Run the OSGeo4W .exe file and select the radio button next to Advanced Install:
Step through the installation wizard. When you get to Select Packages, choose the version you require. In the following screenshot, I have selected 3.4:
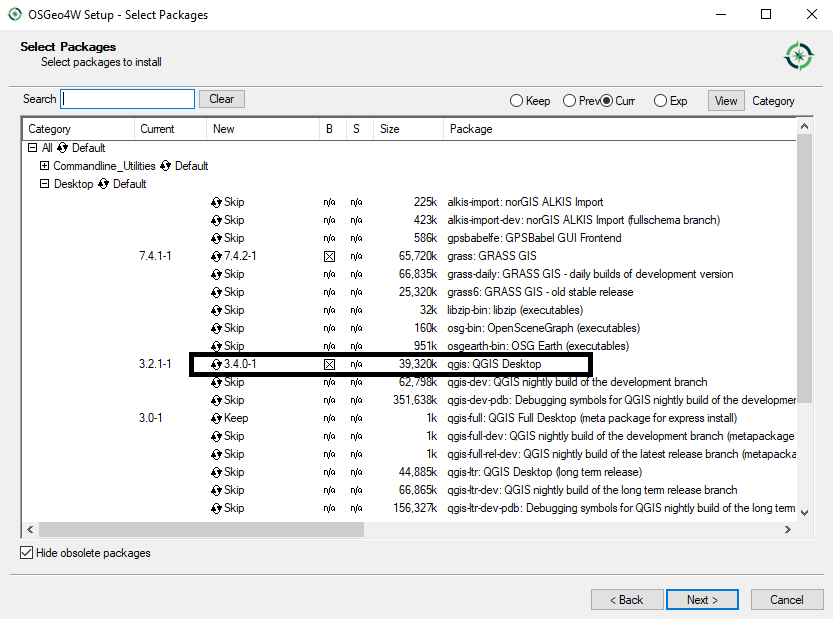
You can select other packages if required. Once you have chosen the software, click on Next and the installation will begin.
Updating via OSGeo4W
You can use the OSGeo4W installer to install new updates. It will uninstall the previous version. You may have older versions installed on your system (perhaps installed with the standalone installer). To uninstall, locate the installation directory of the older version and run the uninstall.exe file. This is shown in the following screenshot:

Step through the uninstallation wizard and, once uninstalled, you should get a similar message (depending on your version) to this:
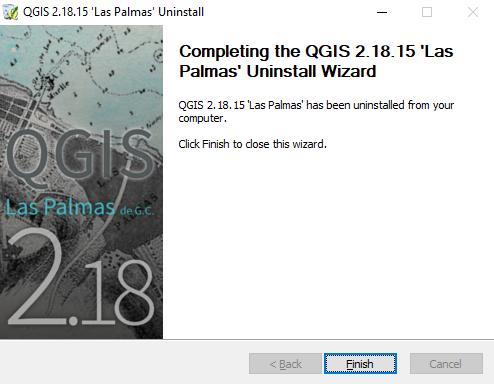
Click on Finish to exit.
Installing on Ubuntu
On Ubuntu, the QGIS project provides packages for the LTR, Latest Release (LR), and development versions (DEV). For this book, we recommend installing the LTR version. The LTR version is the current most stable version of the software.
To avoid conflicts that may occur due to incompatible packages, make sure that you only add one of the package source options. The specific lines that you have to add to the source list depend on your OS version. The following version is the latest release for Debian stretch:
deb     https://qgis.org/debian stretch main
deb-src https://qgis.org/debian stretch main
After choosing the repository, we will add the qgis.org repository's public key to our apt keyring. This will avoid the warnings that you might otherwise get when installing from a non-default repository. Run the following command in Terminal:
wget -O - https://qgis.org/downloads/qgis-2017.gpg.key | gpg --import
gpg --fingerprint CAEB3DC3BDF7FB45
gpg --export --armor CAEB3DC3BDF7FB45 | sudo apt-key add -
If necessary, you might need to make adjustments based on your system. For an updated list of supported Ubuntu versions, check out http://www.qgis.org/en/site/forusers/alldownloads.html#debian-ubuntu. By the time this book goes to print, the key information might have changed. Refer to http://www.qgis.org/en/site/forusers/alldownloads.htm for the latest updates.
Finally, to install QGIS, run the following commands. The first will fetch any updates to packages on your system; the second will install QGIS, the Python library, and the GRASS plugin:
sudo apt-get update
sudo apt-get install qgis python-qgis qgis-plugin-grass
This book has been written based on a QGIS installation on a Windows operating system. There may be slight visual changes between operating systems, especially the screenshots.
Using QGIS
Open QGIS from the installation location. If you followed the OSGeo4W installation on Windows, you should find it in under the OSGeo4W Shell folder in the Start menu. On loading, QGIS will appear similar to the following screenshot which I have annotated:
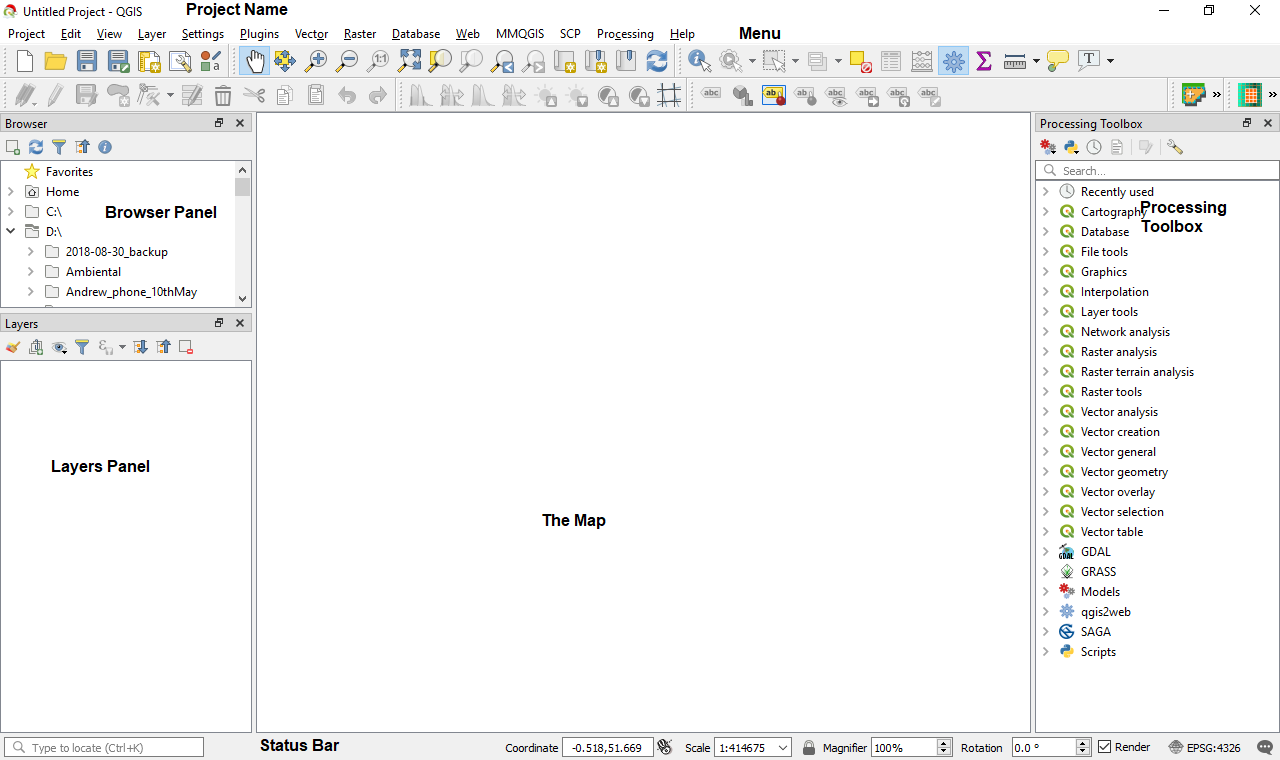
The biggest area is reserved for the map.
Toolbar and panel overview
In this section, we will look at the panels and toolbars in QGIS and how to turn them on and off.
Panels
All panels are dockable; this means you can move them around as needed. To the left of the map, there are the Layers and Browser panels and to the right is Processing Toolbox. The Browser panel allows you find data in folders on your computer. From the Browser panel, you can drag data into the map. The Layers panel shows the data and its drawing order. Right-clicking on a layer in the Layers panel opens a context menu that lets you interact with that layer. We will be working with the Layers panel throughout this book. At the bottom of the QGIS project, we can see Status Bar. Status Bar is useful for quickly finding out what projection you are working in or the scale of the map. Finally, at the top of QGIS there is the window title (as yet unnamed project), menu options, and toolbars.
Toolbars
A toolbar is the place where tools are found! You can customize the toolbars to suit your work. These settings can be found via Settings | Interface Customizaton. In the previous screenshot, the toolbars were docked under the menu. Many of the tools can also be found via the menus as well. Hover the mouse cursor over a tool to find out more about it. It is also possible to build your own tools in QGIS using plugins.
Customizing
If you right-click near where I have annotated Menu in the previous screenshot, you can access Panels and Toolbars. If you accidentally turn a panel or toolbar off, then this is the place to turn it back on. You can also find these options via the View menu:

In the next section, we will briefly look at some of the main toolbars.
The main toolbars
The map navigation toolbar is shown in the following screenshot:

These tools are all about moving around the map. Panning (the hand icon), zooming (magnifying glass), creating a new canvas view (fourth icon from the right), and bookmarking locations (third and second icons from the right) are all part of this toolbar. These tools should be similar to any map-based application. You can also use the scroll wheel on your mouse to zoom in and out of your map.
The attribute toolbar is all about interacting with data. It is shown in the following screenshots:

These tools allow you to identify the attributes of vector layers or values of raster layers (the blue i). Select and deselect features (third, fourth, and fifth icons from the left), then open the attribute table (the table icon), the field calculator (the abacus icon), measure tool (the ruler icon), and the text annotations button (the final icon on the bar). These tools are very commonly used and will become part of your standard interaction with GIS data in QGIS.
The project toolbar is about saving and creating new projects in QGIS. A project is what contains links to all your files, the order they are in, how they are styled, any print layout— basically everything about your project. It is shown in the following screenshot:

These tools allow you to create a new project (paper icon), open a project (folder icon), save project and save project as (disk icons), create and manage print layouts (two icons), and finally use the style manager. We will look at the print layout in more detail in Chapter 5, Creating Maps.
If you click on Project from the menu bar, you will see the same icons appearing. This is generally true for all the menus and corresponding toolbars. It is sometimes easier to keep frequently used toolbars, such as editing toolbars, open, and keep the other ones that are not so frequently used hidden to save on screen space.
We will look at other toolbars in more detail as we progress through this book.
Summary
We have introduced QGIS 3 in this chapter. We looked at the options for installing on both Windows and Ubuntu. Finally, we had a quick look at the QGIS interface and the nomenclature of its features.
In the next chapter, we will look at loading data and interacting with it in QGIS. We will describe what GIS is and how to save a project.