


 Download code from GitHub
In this chapter, we will cover how to install and configure Spark, either as a local instance, a multi-node cluster, or in a virtual environment. You will learn the following recipes:
- Installing Spark requirements
- Installing Spark from sources
- Installing Spark from binaries
- Configuring a local instance of Spark
- Configuring a multi-node instance of Spark
- Installing Jupyter
- Configuring a session in Jupyter
- Working with Cloudera Spark images
We cannot begin a book on Spark (well, on PySpark) without first specifying what Spark is. Spark is a powerful, flexible, open source, data processing and querying engine. It is extremely easy to use and provides the means to solve a huge variety of problems, ranging from processing unstructured, semi-structured, or structured data, through streaming, up to machine learning. With over 1,000 contributors from over 250 organizations (not to mention over 3,000 Spark Meetup community members worldwide), Spark is now one of the largest open source projects in the portfolio of the Apache Software Foundation.
The origins of Spark can be found in 2012 when it was first released; Matei Zacharia developed the first versions of the Spark processing engine at UC Berkeley as part of his PhD thesis. Since then, Spark has become extremely popular, and its popularity stems from a number of reasons:
- It is fast: It is estimated that Spark is 100 times faster than Hadoop when working purely in memory, and around 10 times faster when reading or writing data to a disk.
- It is flexible: You can leverage the power of Spark from a number of programming languages; Spark natively supports interfaces in Scala, Java, Python, and R.
- It is extendible: As Spark is an open source package, you can easily extend it by introducing your own classes or extending the existing ones.
- It is powerful: Many machine learning algorithms are already implemented in Spark so you do not need to add more tools to your stack—most of the data engineering and data science tasks can be accomplished while working in a single environment.
- It is familiar: Data scientists and data engineers, who are accustomed to using Python's
pandas, or R'sdata.framesordata.tables, should have a much gentler learning curve (although the differences between these data types exist). Moreover, if you know SQL, you can also use it to wrangle data in Spark! - It is scalable: Spark can run locally on your machine (with all the limitations such a solution entails). However, the same code that runs locally can be deployed to a cluster of thousands of machines with little-to-no changes.
For the remainder of this book, we will assume that you are working in a Unix-like environment such as Linux (throughout this book, we will use Ubuntu Server 16.04 LTS) or macOS (running macOS High Sierra); all the code provided has been tested in these two environments. For this chapter (and some other ones, too), an internet connection is also required as we will be downloading a bunch of binaries and sources from the internet.
Note
We will not be focusing on installing Spark in a Windows environment as it is not truly supported by the Spark developers. However, if you are inclined to try, you can follow some of the instructions you will find online, such as from the following link: http://bit.ly/2Ar75ld.
Knowing how to use the command line and how to set some environment variables on your system is useful, but not really required—we will guide you through the steps.
Spark requires a handful of environments to be present on your machine before you can install and use it. In this recipe, we will focus on getting your machine ready for Spark installation.
To execute this recipe, you will need a bash Terminal and an internet connection.
Also, before we start any work, you should clone the GitHub repository for this book. The repository contains all the codes (in the form of notebooks) and all the data you will need to follow the examples in this book. To clone the repository, go to http://bit.ly/2ArlBck, click on the Clone or download button, and copy the URL that shows up by clicking on the icon next to it:

Next, go to your Terminal and issue the following command:
git clone git@github.com:drabastomek/PySparkCookbook.git
If your git environment is set up properly, the whole GitHub repository should clone to your disk. No other prerequisites are required.
There are just truly two main requirements for installing PySpark: Java and Python. Additionally, you can also install Scala and R if you want to use those languages, and we will also check for Maven, which we will use to compile the Spark sources.
To do this, we will use the checkRequirements.sh script to check for all the requirements: the script is located in the Chapter01 folder from the GitHub repository.
The following code block shows the high-level portions of the script found in the Chapter01/checkRequirements.sh file. Note that some portions of the code were omitted here for brevity:
#!/bin/bash

# Shell script for checking the dependencies
#
# PySpark Cookbook
# Author: Tomasz Drabas, Denny Lee
# Version: 0.1
# Date: 12/2/2017

_java_required=1.8
_python_required=3.4
_r_required=3.1
_scala_required=2.11
_mvn_required=3.3.9

# parse command line arguments
_args_len="$#"
...

printHeader
checkJava
checkPython

if [ "${_check_R_req}" = "true" ]; then
 checkR
fi

if [ "${_check_Scala_req}" = "true" ]; then
 checkScala
fi

if [ "${_check_Maven_req}" = "true" ]; then
 checkMaven
fiFirst, we will specify all the required packages and their required minimum versions; looking at the preceding code, you can see that Spark 2.3.1 requires Java 1.8+ and Python 3.4 or higher (and we will always be checking for these two environments). Additionally, if you want to use R or Scala, the minimal requirements for these two packages are 3.1 and 2.11, respectively. Maven, as mentioned earlier, will be used to compile the Spark sources, and for doing that, Spark requires at least the 3.3.9 version of Maven.
Note
You can check the Spark requirements here: https://spark.apache.org/docs/latest/index.html You can check the requirements for building Spark here: https://spark.apache.org/docs/latest/building-spark.html.
Next, we parse the command-line arguments:
if [ "$_args_len" -ge 0 ]; then
  while [[ "$#" -gt 0 ]]
  do
   key="$1"
   case $key in
    -m|--Maven)
    _check_Maven_req="true"
    shift # past argument
    ;;
    -r|--R)
    _check_R_req="true"
    shift # past argument
    ;;
    -s|--Scala)
    _check_Scala_req="true"
    shift # past argument
    ;;
    *)
    shift # past argument
   esac
  done
fi
You, as a user, can specify whether you want to check additionally for R, Scala, and Maven dependencies. To do so, run the following code from your command line (the following code will check for all of them):
./checkRequirements.sh -s -m -r
The following is also a perfectly valid usage:
./checkRequirements.sh --Scala --Maven --R
Next, we call three functions: printHeader, checkJava, and checkPython. The printHeader function is nothing more than just a simple way for the script to state what it does and it really is not that interesting, so we will skip it here; it is, however, fairly self-explanatory, so you are welcome to peruse the relevant portions of the checkRequirements.sh script yourself.
Next, we will check whether Java is installed. First, we just print to the Terminal that we are performing checks on Java (this is common across all of our functions, so we will only mention it here):
function checkJava() {
 echo
 echo "##########################"
 echo
 echo "Checking Java"
 echo
Following this, we will check if the Java environment is installed on your machine:
if type -p java; then
 echo "Java executable found in PATH"
 _java=java
elif [[ -n "$JAVA_HOME" ]] && [[ -x "$JAVA_HOME/bin/java" ]]; then
 echo "Found Java executable in JAVA_HOME"
 _java="$JAVA_HOME/bin/java"
else
 echo "No Java found. Install Java version $_java_required or higher first or specify JAVA_HOME variable that will point to your Java binaries."
 exit
fi
First, we use the type command to check if the java command is available; the type -p command returns the location of the java binary if it exists. This also implies that the bin folder containing Java binaries has been added to the PATH.
Note
If you are certain you have the binaries installed (be it Java, Python, R, Scala, or Maven), you can jump to the Updating PATH section in this recipe to see how to let your computer know where these binaries live.
If this fails, we will revert to checking if the JAVA_HOME environment variable is set, and if it is, we will try to see if it contains the required java binary: [[ -x "$JAVA_HOME/bin/java" ]]. Should this fail, the program will print the message that no Java environment could be found and will exit (without checking for other required packages, like Python).
If, however, the Java binary is found, then we can check its version:
_java_version=$("$_java" -version 2>&1 | awk -F '"' '/version/ {print $2}')
echo "Java version: $_java_version (min.: $_java_required)"

if [[ "$_java_version" < "$_java_required" ]]; then
 echo "Java version required is $_java_required. Install the required version first."
 exit
fi
 echo
We first execute the java -version command in the Terminal, which would normally produce an output similar to the following screenshot:

We then pipe the previous output to awk to split (the -F switch) the rows at the quote '"' character (and will only use the first line of the output as we filter the rows down to those that contain /version/) and take the second (the $2) element as the version of the Java binaries installed on our machine. We will store it in the _java_version variable, which we also print to the screen using the echo command.
Note
If you do not know what awk is or how to use it, we recommend this book from Packt: http://bit.ly/2BtTcBV.
Finally, we check if the _java_version we just obtained is lower than _java_required. If this evaluates to true, we will stop the execution, instead telling you to install the required version of Java.
The logic implemented in the checkPython, checkR, checkScala, and checkMaven functions follows in a very similar way. The only differences are in what binary we call and in the way we check the versions:
- For Python, we run
"$_python" --version 2>&1 | awk -F ' ' '{print $2}', as checking the Python version (for Anaconda distribution) would print out the following to the screen:Python 3.5.2 :: Anaconda 2.4.1 (x86_64) - For R, we use
"$_r" --version 2>&1 | awk -F ' ' '/R version/ {print $3}', as checking the R's version would write (a lot) to the screen; we only use the line that starts withR version:R version 3.4.2 (2017-09-28) -- "Short Summer" - For Scala, we utilize
"$_scala" -version 2>&1 | awk -F ' ' '{print $5}', given that checking Scala's version prints the following:Scala code runner version 2.11.8 -- Copyright 2002-2016, LAMP/EPFL - For Maven, we check
"$_mvn" --version 2>&1 | awk -F ' ' '/Apache Maven/ {print $3}', as Maven prints out the following (and more!) when asked for its version:Apache Maven 3.5.2 (138edd61fd100ec658bfa2d307c43b76940a5d7d; 2017-10-18T00:58:13-07:00)
If you want to learn more, you should now be able to read the other functions with ease.
If any of your dependencies are not installed, you need to install them before continuing with the next recipe. It goes beyond the scope of this book to guide you step-by-step through the installation process of all of these, but here are some helpful links to show you how to do it.
Installing Java is pretty straightforward.
On macOS, go to https://www.java.com/en/download/mac_download.jsp and download the version appropriate for your system. Once downloaded, follow the instructions to install it on your machine. If you require more detailed instructions, check this link: http://bit.ly/2idEozX.
On Linux, check the following link http://bit.ly/2jGwuz1 for Linux Java installation instructions.
We have been using (and highly recommend) the Anaconda version of Python as it comes with the most commonly used packages included with the installer. It also comes built-in with the conda package management tool that makes installing other packages a breeze.
You can download Anaconda from http://www.continuum.io/downloads; select the appropriate version that will fulfill Spark's requirements. For macOS installation instructions, you can go to http://bit.ly/2zZPuUf and for a Linux installation manual check, you can go to http://bit.ly/2ASLUvg.
R is distributed via Comprehensive R Archive Network (CRAN). The macOS version can be downloaded from here, https://cran.r-project.org/bin/macosx/, whereas the Linux one is available here: https://cran.r-project.org/bin/linux/.
Download the version appropriate for your machine and follow the installation instructions on the screen. For the macOS version, you can choose to install just the R core packages without the GUI and everything else as Spark does not require those.
Installing Scala is even simpler.
Go to http://bit.ly/2Am757R and download the sbt-*.*.*.tgz archive (at the time of writing this book, the latest version is sbt-1.0.4.tgz). Next, in your Terminal, navigate to the folder you have just downloaded Scala to and issue the following commands:
tar -xvf sbt-1.0.4.tgz
sudo mv sbt-1.0.4/ /opt/scala/
That's it. Now, you can skip to the Updating PATH section in this recipe to update your PATH.
Maven's installation is quite similar to that of Scala. Go to https://maven.apache.org/download.cgi and download the apache-maven-*.*.*-bin.tar.gz archive. At the time of writing this book, the newest version was 3.5.2. Similarly to Scala, open the Terminal, navigate to the folder you have just downloaded the archive to, and type:
tar -xvf apache-maven-3.5.2-bin.tar.gz
sudo mv apache-maven-3.5.2-bin/ /opt/apache-maven/
Once again, that is it for what you need to do with regards to installing Maven. Check the next subsection for instructions on how to update your PATH.
Unix-like operating systems (Windows, too) use the concept of a PATH to search for binaries (or executables, in the case of Windows). The PATH is nothing more than a list of folders separated by the colon character ':' that tells the operating system where to look for binaries.
To add something to your PATH (and make it a permanent change), you need to edit either the .bash_profile (macOS) or .bashrc (Linux) files; these are located in the root folder for your user. Thus, to add both Scala and Maven binaries to the PATH, you can do the following (on macOS):
cp ~/.bash_profile ~/.bash_profile_old # make a copy just in case
echo export SCALA_HOME=/opt/scala >> ~/.bash_profile
echo export MAVEN_HOME=/opt/apache-maven >> ~/.bash_profile
echo PATH=$SCALA_HOME/bin:$MAVEN_HOME/bin:$PATH >> ~/.bash_profile
On Linux, the equivalent looks as follows:
cp ~/.bashrc ~/.bashrc_old # make a copy just in case
echo export SCALA_HOME=/opt/scala >> ~/.bashrc
echo export MAVEN_HOME=/opt/apache-maven >> ~/.bashrc
echo PATH=$SCALA_HOME/bin:$MAVEN_HOME/bin:$PATH >> ~/.bashrc
The preceding commands simply append to the end of either of the .bash_profile or .bashrc files using the redirection operator >>.
Once you execute the preceding commands, restart your Terminal, and:
echo $PATH
It should now include paths to both the Scala and Maven binaries.
Spark is distributed in two ways: either as precompiled binaries or as a source code that gives you the flexibility to choose, for example, whether you need support for Hive or not. In this recipe, we will focus on the latter.
To execute this recipe, you will need a bash Terminal and an internet connection. Also, to follow through with this recipe, you will have to have already checked and/or installed all the required environments we went through in the previous recipe. In addition, you need to have administrative privileges (via the sudo command) which will be necessary to move the compiled binaries to the destination folder.
Note
If you are not an administrator on your machine, you can call the script with the -ns (or --nosudo) parameter. The destination folder will then switch to your home directory and will create a spark folder within it. By default, the binaries will be moved to the /opt/spark folder and that's why you need administrative rights.
No other prerequisites are required.
There are five major steps we will undertake to install Spark from sources (check the highlighted portions of the code):
- Build
- Move to the final destination
- Create the necessary environmental variables
The skeleton for our code looks as follows (see the Chapter01/installFromSource.sh file):
#!/bin/bash
# Shell script for installing Spark from sources
#
# PySpark Cookbook
# Author: Tomasz Drabas, Denny Lee
# Version: 0.1
# Date: 12/2/2017
_spark_source="http://mirrors.ocf.berkeley.edu/apache/spark/spark-2.3.1/spark-2.3.1.tgz"
_spark_archive=$( echo "$_spark_source" | awk -F '/' '{print $NF}' )
_spark_dir=$( echo "${_spark_archive%.*}" )
_spark_destination="/opt/spark"
...
checkOS
printHeader
downloadThePackage
unpack
build
moveTheBinaries
setSparkEnvironmentVariables
cleanUp
First, we specify the location of Spark's source code. The _spark_archive contains the name of the archive; we use awk to extract the last element (here, it is specified by the $NF flag) from the _spark_source. The _spark_dir contains the name of the directory our archive will unpack into; in our current case, this will be spark-2.3.1. Finally, we specify our destination folder where we will be going to move the binaries to: it will either be /opt/spark (default) or your home directory if you use the -ns (or --nosudo) switch when calling the ./installFromSource.sh script.
Next, we check the OS name we are using:
function checkOS(){
 _uname_out="$(uname -s)"
 case "$_uname_out" in
   Linux*) _machine="Linux";;
   Darwin*) _machine="Mac";;
   *) _machine="UNKNOWN:${_uname_out}"
 esac
if [ "$_machine" = "UNKNOWN:${_uname_out}" ]; then
echo "Machine $_machine. Stopping."
exit
fi
}First, we get the short name of the operating system using the uname command; the -s switch returns a shortened version of the OS name. As mentioned earlier, we only focus on two operating systems: macOS and Linux, so if you try to run this script on Windows or any other system, it will stop. This portion of the code is necessary to set the _machine flag properly: macOS and Linux use different methods to download the Spark source codes and different bash profile files to set the environment variables.
Next, we print out the header (we will skip the code for this part here, but you are welcome to check the Chapter01/installFromSource.sh script). Following this, we download the necessary source codes:
function downloadThePackage() {
 ...
 if [ -d _temp ]; then
    sudo rm -rf _temp
 fi
mkdir _temp cd _temp
 if [ "$_machine" = "Mac" ]; then
    curl -O $_spark_source
 elif [ "$_machine" = "Linux"]; then
    wget $_spark_source
 else
    echo "System: $_machine not supported."
    exit
 fi
}
First, we check whether a _temp folder exists and, if it does, we delete it. Next, we recreate an empty _temp folder and download the sources into it; on macOS, we use the curl method while on Linux, we use wget to download the sources.
Note
Did you notice the ellipsis '...' character in our code? Whenever we use such a character, we omit some less relevant or purely informational portions of the code. They are still present, though, in the sources checked into the GitHub repository.
Once the sources land on our machine, we unpack them using the tar tool, tar -xf $_spark_archive. This happens inside the unpack function.
Finally, we can start building the sources into binaries:
function build(){
 ...
cd "$_spark_dir" ./dev/make-distribution.sh --name pyspark-cookbook -Phadoop-2.7 -Phive -Phive-thriftserver -Pyarn
}
We use the make-distribution.sh script (distributed with Spark) to create our own Spark distribution, named pyspark-cookbook. The previous command will build the Spark distribution for Hadoop 2.7 and with Hive support. We will also be able to deploy it over YARN. Underneath the hood, the make-distribution.sh script is using Maven to compile the sources.
Once the compilation finishes, we need to move the binaries to the _spark_destination folder:
function moveTheBinaries() { ...
if [ -d "$_spark_destination" ]; then
sudo rm -rf "$_spark_destination"
ficd .. sudo mv $_spark_dir/ $_spark_destination/
}
First, we check if the folder in the destination exists and, if it does, we remove it. Next, we simply move (mv) the $_spark_dir folder to its new home.
Note
This is when you will need to type in the password if you did not use the -ns (or --nosudo) flag when invoking the installFromSource.sh script.
One of the last steps is to add new environment variables to your bash profile file:
function setSparkEnvironmentVariables() {
 ...
if [ "$_machine" = "Mac" ]; then
_bash=~/.bash_profile
else
_bash=~/.bashrc
fi
_today=$( date +%Y-%m-%d ) # make a copy just in case
if ! [ -f "$_bash.spark_copy" ]; then
cp "$_bash" "$_bash.spark_copy"
fiecho >> $_bash echo "###################################################" >> $_bash echo "# SPARK environment variables" >> $_bash echo "#" >> $_bash echo "# Script: installFromSource.sh" >> $_bash echo "# Added on: $_today" >>$_bash echo >> $_bash
 echo "export SPARK_HOME=$_spark_destination" >> $_bash
 echo "export PYSPARK_SUBMIT_ARGS=\"--master local[4]\"" >> $_bash
 echo "export PYSPARK_PYTHON=$(type -p python)" >> $_bash
 echo "export PYSPARK_DRIVER_PYTHON=jupyter" >> $_bash
 echo "export PYSPARK_DRIVER_PYTHON_OPTS=\"notebook --NotebookApp.open_browser=False --NotebookApp.port=6661\"" >> $_bash

 echo "export PATH=$SPARK_HOME/bin:\$PATH" >> $_bash
}
First, we check what OS system we're on and select the appropriate bash profile file. We also grab the current date (the _today variable) so that we can include that information in our bash profile file, and create its safe copy (just in case, and if one does not already exist). Next, we start to append new lines to the bash profile file:
- We first set the
SPARK_HOMEvariable to the_spark_destination; this is either going to be the/opt/sparkor~/sparklocation. - The
PYSPARK_SUBMIT_ARGSvariable is used when you invokepyspark. It instructs Spark to use four cores of your CPU; changing it to--master local[*]will use all the available cores. - We specify the
PYSPARK_PYTHONvariable so, in case of multiple Python installations present on the machine,pysparkwill use the one that we checked for in the first recipe. - Setting the
PYSPARK_DRIVER_PYTHONtojupyterwill start a Jupyter session (instead of the PySpark interactive shell). - The
PYSPARK_DRIVER_PYTHON_OPSinstructs Jupyter to:- Start a
notebook - Do not open the browser by default: use the
--NotebookApp.open_browser=Falseflag - Change the default port (
8888) to6661(because we are big fans of not having things at default for safety reasons)
- Start a
Finally, we add the bin folder from SPARK_HOME to the PATH.
The last step is to cleanUp after ourselves; we simply remove the _temp folder with everything in it.
Now that we have installed Spark, let's test if everything works. First, in order to make all the environment variables accessible in the Terminal's session, we need to refresh the bash session: you can either close and reopen the Terminal, or execute the following command (on macOS):
source ~/.bash_profile
On Linux, execute the following command:
source ~/.bashrc
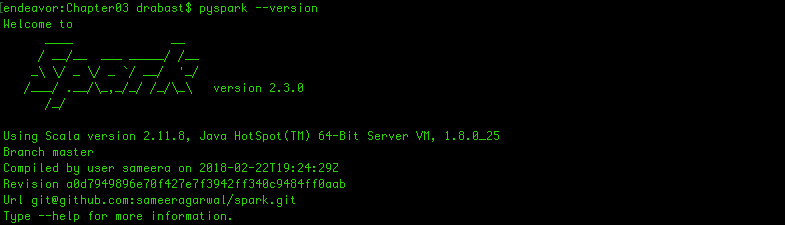
Next, you should be able to execute the following:
pyspark --version
If all goes well, you should see a response similar to the one shown in the following screenshot:
Instead of using the make-distribution.sh script from Spark, you can use Maven directly to compile the sources. For instance, if you wanted to build the default version of Spark, you could simply type (from the _spark_dir folder):
./build/mvn clean package
This would default to Hadoop 2.6. If your version of Hadoop was 2.7.2 and was deployed over YARN, you can do the following:
./build/mvn -Pyarn -Phadoop-2.7 -Dhadoop.version=2.7.2 -DskipTests clean package
You can also use Scala to build Spark:
./build/sbt package
- If you want to study more on how to build and/or enable certain features of Spark, check Spark's website: http://spark.apache.org/docs/latest/building-spark.html
Installing Spark from already precompiled binaries is even easier than doing the same from the sources. In this recipe, we will show you how to do this by downloading the binaries from the web or by using pip.
To execute this recipe, you will need a bash Terminal and an internet connection. Also, to follow through with this recipe, you will need to have already checked and/or installed all the required environments we went through in the Installing Spark requirements recipe. In addition, you need to have administrative privileges (via the sudo command), as these will be necessary to move the compiled binaries to the destination folder.
Note
If you are not an administrator on your machine, you can call the script with the -ns (or --nosudo) parameter. The destination folder will then switch to your home directory and will create a spark folder within it; by default, the binaries will be moved to the /opt/spark folder and that's why you need administrative rights.
No other prerequisites are required.
To install from the binaries, we only need four steps (see the following source code) as we do not need to compile the sources:
The skeleton for our code looks as follows (see the Chapter01/installFromBinary.sh file):
#!/bin/bash
# Shell script for installing Spark from binaries
#
# PySpark Cookbook
# Author: Tomasz Drabas, Denny Lee
# Version: 0.1
# Date: 12/2/2017
_spark_binary="http://mirrors.ocf.berkeley.edu/apache/spark/spark-2.3.1/spark-2.3.1-bin-hadoop2.7.tgz"
_spark_archive=$( echo "$_spark_binary" | awk -F '/' '{print $NF}' )
_spark_dir=$( echo "${_spark_archive%.*}" )
_spark_destination="/opt/spark"
...
checkOS
printHeader
downloadThePackage
unpack
moveTheBinaries
setSparkEnvironmentVariables
cleanUp
The code is exactly the same as with the previous recipe so we will not be repeating it here; the only major difference is that we do not have the build stage in this script, and the _spark_source variable is different.
As in the previous recipe, we start by specifying the location of Spark's source code, which is in _spark_source. The _spark_archive contains the name of the archive; we use awk to extract the last element. The _spark_dir contains the name of the directory our archive will unpack into; in our current case, this will be spark-2.3.1. Finally, we specify our destination folder where we will be moving the binaries to: it will either be /opt/spark (default) or your home directory if you use the -ns (or --nosudo) switch when calling the ./installFromBinary.sh script.
Next, we check the OS name. Depending on whether you work in a Linux or macOS environment, we will use different tools to download the archive from the internet (check the downloadThePackage function). Also, when setting up the environment variables, we will output to different bash profile files: the .bash_profile on macOS and the .bashrc on Linux (check the setEnvironmentVariables function).
Following the OS check, we download the package: on macOS, we use curl and on Linux, we use wget tools to attain this goal. Once the package is downloaded, we unpack it using the tar tool, and then move it to its destination folder. If you are running with sudo privileges (without the -ns or --nosudo parameters), the binaries will be moved to the /opt/spark folder; if not—they will end up in the ~/spark folder.
Finally, we add environment variables to the appropriate bash profile files: check the previous recipe for an explanation of what is being added and for what reason. Also, follow the steps at the end of the previous recipe to test if your environment is working properly.
Nowadays, there is an even simpler way to install PySpark on your machine, that is, by using pip.
Note
pip is Python's package manager. If you installed Python 2.7.9 or Python 3.4 from http://python.org, then pip is already present on your machine (the same goes for our recommended Python distribution—Anaconda). If you do not have pip, you can easily install it from here: https://pip.pypa.io/en/stable/installing/.
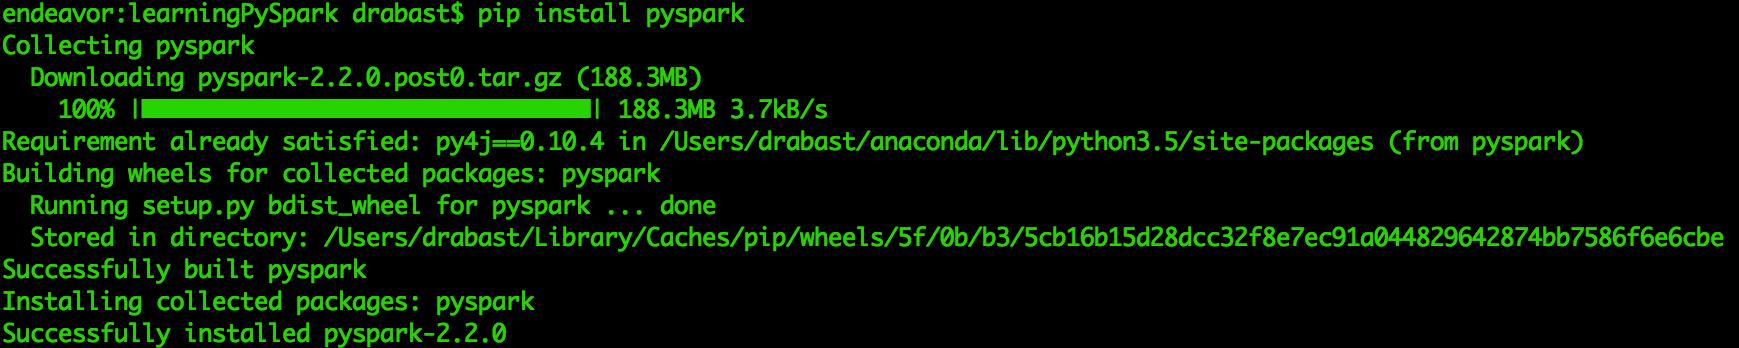
To install PySpark via pip, just issue the following command in the Terminal:
pip install pyspark
Or, if you use Python 3.4+, you may also try:
pip3 install pyspark
You should see the following screen in your Terminal:
There is actually not much you need to do to configure a local instance of Spark. The beauty of Spark is that all you need to do to get started is to follow either of the previous two recipes (installing from sources or from binaries) and you can begin using it. In this recipe, however, we will walk you through the most useful SparkSession configuration options.
In order to follow this recipe, a working Spark environment is required. This means that you will have to have gone through the previous three recipes and have successfully installed and tested your environment, or had a working Spark environment already set up.
No other prerequisites are necessary.
To configure your session, in a Spark version which is lower that version 2.0, you would normally have to create a SparkConf object, set all your options to the right values, and then build the SparkContext ( SqlContext if you wanted to use DataFrames, and HiveContext if you wanted access to Hive tables). Starting from Spark 2.0, you just need to create a SparkSession, just like in the following snippet:
spark = SparkSession.builder \
    .master("local[2]") \
    .appName("Your-app-name") \
    .config("spark.some.config.option", "some-value") \
.getOrCreate() To create a SparkSession, we will use the Builder class (accessed via the .builder property of the SparkSession class). You can specify some basic properties of the SparkSession here:
- The
.master(...)allows you to specify the driver node (in our preceding example, we would be running a local session with two cores)
- The
.appName(...)gives you means to specify a friendly name for your app
- The
.config(...)method allows you to refine your session's behavior further; the list of the most importantSparkSessionparameters is outlined in the following table - The
.getOrCreate()method returns either a newSparkSessionif one has not been created yet, or returns a pointer to an already existingSparkSession
The following table gives an example list of the most useful configuration parameters for a local instance of Spark:
Note
Some of these parameters are also applicable if you are working in a cluster environment with multiple worker nodes. In the next recipe, we will explain how to set up and administer a multi-node Spark cluster deployed over YARN.
There are some environment variables that also allow you to further fine-tune your Spark environment. Specifically, we are talking about thePYSPARK_DRIVER_PYTHON and PYSPARK_DRIVER_PYTHON_OPTS variables. We have already covered these in theInstalling Spark from sourcesrecipe.
- Check the full list of all available configuration options here: https://spark.apache.org/docs/latest/configuration.html
Setting up a multi-node Spark cluster requires quite a few more steps to get it ready. In this recipe, we will go step-by-step through the script that will help you with this process; the script needs to run on the driver node and all the executors to set up the environment.
In this recipe, we are solely focusing on a Linux environment (we are using Ubuntu Server 16.04 LTS). The following prerequisites are required before you can follow with the rest of the recipe:
- A clean installation of a Linux distribution; in our case, we have installed Ubuntu Server 16.04 LTS on each machine in our cluster of three Dell R710s.
- Each machine needs to be connected to the internet and accessible from your local machine. You will need the machines' IPs and their hostnames; on Linux, you can check the IP by issuing the
ifconfigcommand and reading theinet addr. To check your hostname, type atcat/etc/hostname.
- On each server, we added a user group called
hadoop. Following this, we have created a user calledhduserand added it to thehadoopgroup. Also, make sure that thehduserhassudorights. If you do not know how to do this, check the See also section of this recipe. - Make sure you have added the ability to reach your servers via SSH. If you cannot do this, run
sudo apt-get install openssh-server openssh-clienton each server to install the necessary environments. - If you want to read and write to Hadoop and Hive, you need to have these two environments installed and configured on your cluster. Check https://data-flair.training/blogs/install-hadoop-2-x-on-ubuntu/ for Hadoop installation and configuration and http://www.bogotobogo.com/Hadoop/BigData_hadoop_Hive_Install_On_Ubuntu_16_04.php for Hive.
Note
If you have these two environments set up, some of the steps from our script would be obsolete. However, we will present all of the steps as follows, assuming you only want the Spark environment.
No other prerequisites are required.
For the purpose of automating the deployment of the Spark environment in a cluster setup, you will also have to:
- Create a
hosts.txtfile. Each entry on the list is the IP address of one of the servers followed by two spaces and a hostname. Do not delete thedriver:norexecutors:lines. Also, note that we only allow one driver in our cluster (some clusters support redundant drivers). An example of the content of this file is as follows:
driver:
192.168.17.160  pathfinder
executors:
192.168.17.161  discovery1
192.168.17.162  discovery2
- On your local machine, add the IPs and hostnames to your
/etc/hostsfile so you can access the servers via hostnames instead of IPs (once again, we are assuming you are running a Unix-like system such as macOS or Linux). For example, the following command will addpathfinderto our/etc/hostsfile:sudo echo 192.168.1.160 pathfinder >> /etc/hosts. Repeat this for all machines from your server.
- Copy the
hosts.txtfile to each machine in your cluster; we assume the file will be placed in the root folder for thehduser. You can attain this easily with thescp hosts.txt hduser@<your-server-name>:~command, where<your-server-name>is the hostname of the machine. - To run the
installOnRemote.shscript (see theChapter01/installOnRemote.shfile) from your local machine, do the following:ssh -tq hduser@<your-server-name> "echo $(base64 -i installOnRemote.sh) | base64 -d | sudo bash". We will go through these steps in detail in theinstallOnRemote.shscript in the next section. - Follow the prompts on the screen to finalize the installation and configuration steps. Repeat step 4 for each machine in your cluster.
The installOnRemote.sh script for this recipe can be found in the Chapter01 folder in the GitHub repository: http://bit.ly/2ArlBck. Some portions of the script are very similar to the ones we have outlined in the previous recipes, so we will skip those; you can refer to previous recipes for more information (especially the Installing Spark requirements and the Installing Spark from binaries recipes).
The top-level structure of the script is as follows:
#!/bin/bash
# Shell script for installing Spark from binaries
# on remote servers
#
# PySpark Cookbook
# Author: Tomasz Drabas, Denny Lee
# Version: 0.1
# Date: 12/9/2017
_spark_binary="http://mirrors.ocf.berkeley.edu/apache/spark/spark-2.3.1/spark-2.3.1-bin-hadoop2.7.tgz"
_spark_archive=$( echo "$_spark_binary" | awk -F '/' '{print $NF}' )
_spark_dir=$( echo "${_spark_archive%.*}" )
_spark_destination="/opt/spark"
_java_destination="/usr/lib/jvm/java-8-oracle"

_python_binary="https://repo.continuum.io/archive/Anaconda3-5.0.1-Linux-x86_64.sh"
_python_archive=$( echo "$_python_binary" | awk -F '/' '{print $NF}' )
_python_destination="/opt/python"
_machine=$(cat /etc/hostname) _today=$( date +%Y-%m-%d )
_current_dir=$(pwd) # store current working directory
...
printHeader
readIPs
checkJava
installScala
installPython
updateHosts
configureSSH
downloadThePackage
unpack
moveTheBinaries
setSparkEnvironmentVariables
updateSparkConfig
cleanUp
We have highlighted the portions of the script that are more relevant to this recipe in bold font.
As with the previous recipes, we will first specify where we are going to download the Spark binaries from and create all the relevant global variables we are going to use later.
Next, we read in the hosts.txt file:
function readIPs() {
 input="./hosts.txt"
driver=0 executors=0 _executors="" IFS='' while read line do
 if [[ "$master" = "1" ]]; then
    _driverNode="$line"
    driver=0
 fi
if [[ "$slaves" = "1" ]]; then _executors=$_executors"$line\n" fi
 if [[ "$line" = "driver:" ]]; then
    driver=1
    executors=0
 fi
if [[ "$line" = "executors:" ]]; then
executors=1
driver=0
fi if [[ -z "${line}" ]]; then
continue
fi
done < "$input"
}We store the path to the file in the input variable. The driver and the executors variables are flags we use to skip the "driver:" and the "executors:" lines from the input file. The _executors empty string will store the list of executors, which are delimited by a newline"\n".
IFS stands for internal field separator. Whenever bash reads a line from a file, it will split it on that character. Here, we will set it to an empty character '' so that we preserve the double spaces between the IP address and the hostname.
Next, we start reading the file, line-by-line. Let's see how the logic works inside the loop; we'll start a bit out of order so that the logic is easier to understand:
- If the
linewe just read equals to"driver:"(theif [[ "$line" = "driver:" ]];conditional), we set thedriverflag to1so that when the nextlineis read, we store it as a_driverNode(this is done inside theif [[ "$driver" = "1" ]];conditional). Inside that conditional, we also reset theexecutorsflag to0. The latter is done in case you start with executors first, followed by a single driver in thehosts.txt. Once thelinewith the driver node information is read, we reset thedriverflag to0.
- On the other hand, if the
linewe just read equals to"executors:"(theif [[ "$line" = "executors:" ]];conditional), we set theexecutorsflag to1(and reset thedriverflag to0). This guarantees that the next line read will be appended to the_executorsstring, separated by the"\n"newline character (this happens inside theif [[ "$executors" = "1" ]];conditional). Note that we do not set theexecutorflag to0as we allow for more than one executor. - If we encounter an empty line—which we can check for in bash with the
if [[ -z "${line}" ]];conditional—we skip it.
You might notice that we use the "<" redirection pipe to read in the data (indicated here by the input variable).
Note
You can read more about the redirection pipes here: http://www.tldp.org/LDP/abs/html/io-redirection.html.
Since Spark requires Java and Scala to work, next we have to check if Java is installed, and we will install Scala (as it normally isn't present while Java might be). This is achieved with the following functions:
function checkJava() {
 if type -p java; then
    echo "Java executable found in PATH"
    _java=java
 elif [[ -n "$JAVA_HOME" ]] && [[ -x "$JAVA_HOME/bin/java" ]]; then
    echo "Found Java executable in JAVA_HOME"
    _java="$JAVA_HOME/bin/java"
 else
    echo "No Java found. Install Java version $_java_required or higher first or specify JAVA_HOME     variable that will point to your Java binaries."
    installJava
 fi
}
function installJava() {
sudo apt-get install python-software-properties
sudo add-apt-repository ppa:webupd8team/java
sudo apt-get update
sudo apt-get install oracle-java8-installer
}function installScala() {
sudo apt-get install scala
}
function installPython() {
curl -O "$_python_binary"
chmod 0755 ./"$_python_archive"
sudo bash ./"$_python_archive" -b -u -p "$_python_destination"
}The logic here doesn't differ much from what we presented in the Installing Spark requirements recipe. The only notable difference in the checkJava function is that if we do not find Java on the PATH variable or inside the JAVA_HOME folder, we do not exit but run installJava, instead.
There are many ways to install Java; we have already presented you with one of them earlier in this book—check the Installing Java section in the Installing Spark requirements recipe. Here, we used the built-in apt-get tool.
Note
The apt-get tool is a convenient, fast, and efficient utility for installing packages on your Linux machine. APT stands for Advanced Packaging Tool.
First, we install the python-software-properties. This set of tools provides an abstraction of the used apt repositories. It enables easy management of distribution as well as independent software vendor software sources. We need this as in the next line we add the add-apt-repository; we add a new repository as we want the Oracle Java distribution. The sudo apt-get update command refreshes the contents of the repositories and, in our current case, fetches all the packages available in ppa:webupd8team/java. Finally, we install the Java package: just follow the prompts on the screen. We will install Scala the same way.
Note
The default location where the package should install is /usr/lib/jvm/java-8-oracle. If this is not the case or you want to install it in a different folder, you will have to alter the _java_destination variable inside the script to reflect the new destination.
The advantage of using this tool is this: if there are already Java and Scala environments installed on a machine, using apt-get will either skip the installation (if the environment is up-to-date with the one available on the server) or ask you to update to the newest version.
We will also install the Anaconda distribution of Python (as mentioned many times previously, since we highly recommend this distribution). To achieve this goal, we must download the Anaconda3-5.0.1-Linux-x86_64.sh script first and then follow the prompts on the screen. The -b parameter to the script will not update the .bashrc file (we will do that later), the -u switch will update the Python environment in case /usr/local/python already exists, and -p will force the installation to that folder.
Having passed the required installation steps, we will now update the /etc/hosts files on the remote machines:
function updateHosts() {_hostsFile="/etc/hosts"
 # make a copy (if one already doesn't exist)
 if ! [ -f "/etc/hosts.old" ]; then
    sudo cp "$_hostsFile" /etc/hosts.old
 fi
t="###################################################\n" t=$t"#\n" t=$t"# IPs of the Spark cluster machines\n" t=$t"#\n" t=$t"# Script: installOnRemote.sh\n" t=$t"# Added on: $_today\n" t=$t"#\n" t=$t"$_driverNode\n" t=$t"$_executors\n"
sudo printf "$t" >> $_hostsFile
}
This is a simple function that, first, creates a copy of the /etc/hosts file, and then appends the IPs and hostnames of the machines in our cluster. Note that the format required by the /etc/hosts file is the same as in the hosts.txt file we use: per row, an IP address of the machine followed by two spaces followed by the hostname.
Note
We use two spaces for readability purposes—one space separating an IP and the hostname would also work.
Also, note that we do not use the echo command here, but printf; the reason behind this is that the printf command prints out a formatted version of the string, properly handling the newline "\n" characters.
Next, we configure the passwordless SSH sessions (check the following See also subsection) to aid communication between the driver node and the executors:
function configureSSH() {
    # check if driver node
    IFS=" "
    read -ra temp <<< "$_driverNode"
    _driver_machine=( ${temp[1]} )
    _all_machines="$_driver_machine\n"

    if [ "$_driver_machine" = "$_machine" ]; then
        # generate key pairs (passwordless)
        sudo -u hduser rm -f ~/.ssh/id_rsa
        sudo -u hduser ssh-keygen -t rsa -P "" -f ~/.ssh/id_rsa

        IFS="\n"
        read -ra temp <<< "$_executors"
        for executor in ${temp[@]}; do
            # skip if empty line
            if [[ -z "${executor}" ]]; then
                continue
            fi

            # split on space
            IFS=" "
            read -ra temp_inner <<< "$executor"
            echo
            echo "Trying to connect to ${temp_inner[1]}"

            cat ~/.ssh/id_rsa.pub | ssh "hduser"@"${temp_inner[1]}" 'mkdir -p .ssh && cat >> .ssh/authorized_keys'

            _all_machines=$_all_machines"${temp_inner[1]}\n"
        done
    fi

    echo "Finishing up the SSH configuration"
}
Inside this function, we first check if we are on the driver node, as defined in the hosts.txt file, as we only need to perform these tasks on the driver. The read -ra temp <<< "$_driverNode" command reads the _driverNode (in our case, it is 192.168.1.160 pathfinder), and splits it at the space character (remember what IFS stands for?). The -a switch instructs the read method to store the split _driverNode string in the temp array and the -r parameter makes sure that the backslash does not act as an escape character. We store the name of the driver in the _driver_machine variable and append it to the _all_machines string (we will use this later).
If we are executing this script on the driver machine, the first thing we must do is remove the old SSH key (using the rm function with the -f, force switch) and create a new one. The sudo -u hduser switch allows us to perform these actions as the hduser (instead of the root user).
Note
When we submit the script to run from our local machine, we start an SSH session as a root on the remote machine. You will see how this is done shortly, so take our word on that for now.
We will use the ssh-keygen method to create the SSH key pair. The -t switch allows us to select the encryption algorithm (we are using RSA encryption), the -P switch determines the password to use (we want this passwordless, so we choose ""), and the -f parameter specifies the filename for storing the keys.
Next, we loop through all the executors: we need to append the contents of ~/.ssh/id_rsa.pub to their ~/.ssh/authorized_keys files. We split the _executors at the "\n" character and loop through all of them. To deliver the contents of the id_rsa.pub file to the executors, we use the cat tool to print out the contents of the id_rsa.pub file and then pipe it to the ssh tool. The first parameter we pass to the ssh is the username and the hostname we want to connect to. Next, we pass the commands we want to execute on the remote machine. First, we attempt to create the .ssh folder if one does not exist. This is followed by outputting the id_rsa.pub file to .ssh/authorized_keys.
Following the SSH session's configurations on the cluster, we download the Spark binaries, unpack them, and move them to _spark_destination.
Note
We have outlined these steps in the Installing Spark from sources and Installing Spark from binaries sections, so we recommend that you check them out.
Finally, we need to set two Spark configuration files: the spark-env.sh and the slaves files:
function updateSparkConfig() {
    cd $_spark_destination/conf

    sudo -u hduser cp spark-env.sh.template spark-env.sh
    echo "export JAVA_HOME=$_java_destination" >> spark-env.sh
    echo "export SPARK_WORKER_CORES=12" >> spark-env.sh

    sudo -u hduser cp slaves.template slaves
    printf "$_all_machines" >> slaves
}
We need to append the JAVA_HOME variable to spark-env.sh so that Spark can find the necessary libraries. We must also specify the number of cores per worker to be 12; this goal is attained by setting the SPARK_WORKER_CORES variable.
Note
You might want to tune the SPARK_WORKER_CORES value to your needs. Check this spreadsheet for help: http://c2fo.io/img/apache-spark-config-cheatsheet/C2FO-Spark-Config-Cheatsheet.xlsx (which is available from here: http://c2fo.io/c2fo/spark/aws/emr/2016/07/06/apache-spark-config-cheatsheet/).
Next, we have to output the hostnames of all the machines in our cluster to the slaves file.
In order to execute the script on the remote machine, and since we need to run it in an elevated mode (as root using sudo), we need to encrypt the script before we send it over the wire. An example of how this is done is as follows (from macOS to remote Linux):
ssh -tq hduser@pathfinder "echo $(base64 -i installOnRemote.sh) | base64 -d | sudo bash"
Or from Linux to remote Linux:
ssh -tq hduser@pathfinder "echo $(base64 -w0 installOnRemote.sh) | base64 -d | sudo bash"
The preceding script uses the base64 encryption tool to encrypt the installOnRemote.sh script before pushing it over to the remote. Once on the remote, we once again use base64 to decrypt the script (the -d switch) and run it as root (via sudo). Note that in order to run this type of script, we also pass the -tq switch to the ssh tool; the -t option forces a pseudo Terminal allocation so that we can execute arbitrary screen-based scripts on the remote machine, and the -q option quiets all the messages but those from our script.
Assuming all goes well, once the script finishes executing on all your machines, Spark has been successfully installed and configured on your cluster. However, before you can use Spark, you need either to close the connection to your driver and SSH to it again, or type:
source ~/.bashrc
This is so that the newly created environment variables are available, and your PATH is updated.
To start your cluster, you can type:
start-all.sh
And all the machines in the cluster should be coming to life and be recognized by Spark.
In order to check if everything started properly, type:
jps
And it should return something similar to the following (in our case, we had three machines in our cluster):
40334 Master
41297 Worker
41058 Worker
Here's a list of useful links that might help you to go through with this recipe:
- If you do not know how to add a user group, check this link: https://www.techonthenet.com/linux/sysadmin/ubuntu/create_group_14_04.php
- To add a
sudouser, check this link: https://www.digitalocean.com/community/tutorials/how-to-add-and-delete-users-on-ubuntu-16-04 - Here are step-by-step manual instructions on how to install Spark: https://data-flair.training/blogs/install-apache-spark-multi-node-cluster/.
- Here is how to set a passwordless SSH communication between machines: https://www.tecmint.com/ssh-passwordless-login-using-ssh-keygen-in-5-easy-steps/
Jupyter provides a means to conveniently cooperate with your Spark environment. In this recipe, we will guide you in how to install Jupyter on your local machine.
We require a working installation of Spark. This means that you will have followed the steps outlined in the first, and either the second or third recipes. In addition, a working Python environment is also required.
No other prerequisites are required.
If you do not have pip installed on your machine, you will need to install it before proceeding.
- To do this, open your Terminal and type (on macOS):
curl -O https://bootstrap.pypa.io/get-pip.py
Or the following on Linux:
wget https://bootstrap.pypa.io/get-pip.py
- Next, type (applies to both operating systems):
python get-pip.py
This will install pip on your machine.
- All you have to do now is install Jupyter with the following command:
pip install jupyter
pip is a management tool for installing Python packages for PyPI, the Python Package Index. This service hosts a wide range of Python packages and is the easiest and quickest way to distribute your Python packages.
However, calling pip install does not only search for the packages on PyPI: in addition, VCS project URLs, local project directories, and local or remote source archives are also scanned.
Jupyter is one of the most popular interactive shells that supports developing code in a wide variety of environments: Python is not the only one that's supported.
Directly from http://jupyter.org:
"The Jupyter Notebook is an open-source web application that allows you to create and share documents that contain live code, equations, visualizations, and narrative text. Uses include: data cleaning and transformation, numerical simulation, statistical modeling, data visualization, machine learning, and much more."
Another way to install Jupyter, if you are using Anaconda distribution for Python, is to use its package management tool, the conda. Here's how:
conda install jupyter
Note that pip install will also work in Anaconda.
Now that you have Jupyter on your machine, and assuming you followed the steps of either the Installing Spark from sources or the Installing Spark from binaries recipes, you should be able to start using Jupyter to interact with PySpark.
To refresh your memory, as part of installing Spark scripts, we have appended two environment variables to the bash profile file: PYSPARK_DRIVER_PYTHON and PYSPARK_DRIVER_PYTHON_OPTS. Using these two environment variables, we set the former to use jupyter and the latter to start a notebook service.
If you now open your Terminal and type:
pyspark
When you open your browser and navigate to http://localhost:6661, you should see a window not that different from the one in the following screenshot:

- Check out https://pypi.python.org/pypi, as the number of really cool projects available for Python is mind-boggling
Working in Jupyter is great as it allows you to develop your code interactively, and document and share your notebooks with colleagues. The problem, however, with running Jupyter against a local Spark instance is that the SparkSession gets created automatically and by the time the notebook is running, you cannot change much in that session's configuration.
In this recipe, we will learn how to install Livy, a REST service to interact with Spark, and sparkmagic, a package that will allow us to configure sessions interactively as well:

Source: http://bit.ly/2iO3EwC
We assume that you either have installed Spark via binaries or compiled the sources as we have shown you in the previous recipes. In other words, by now, you should have a working Spark environment. You will also need Jupyter: if you do not have it, follow the steps from the previous recipe to install it.
No other prerequisites are required.
To install Livy and sparkmagic, we have created a script that will do this automatically with minimal interaction from you. You can find it in the Chapter01/installLivy.sh folder. You should be familiar with most of the functions that we're going to use here by now, so we will focus only on those that are different (highlighted in bold in the following code). Here is the high-level view of the script's structure:
#!/bin/bash

# Shell script for installing Spark from binaries
#
# PySpark Cookbook
# Author: Tomasz Drabas, Denny Lee
# Version: 0.1
# Date: 12/2/2017

_livy_binary="http://mirrors.ocf.berkeley.edu/apache/incubator/livy/0.4.0-incubating/livy-0.4.0-incubating-bin.zip"
_livy_archive=$( echo "$_livy_binary" | awk -F '/' '{print $NF}' )
_livy_dir=$( echo "${_livy_archive%.*}" )
_livy_destination="/opt/livy"
_hadoop_destination="/opt/hadoop"
...
checkOS
printHeader
createTempDir
downloadThePackage $( echo "${_livy_binary}" )
unpack $( echo "${_livy_archive}" )
moveTheBinaries $( echo "${_livy_dir}" ) $( echo "${_livy_destination}" )

# create log directory inside the folder
mkdir -p "$_livy_destination/logs"

checkHadoop
installJupyterKernels
setSparkEnvironmentVariables
cleanUpAs with all other scripts we have presented so far, we will begin by setting some global variables.
Livy requires some configuration files from Hadoop. Thus, as part of this script, we allow you to install Hadoop should it not be present on your machine. That is why we now allow you to pass arguments to the downloadThePackage, unpack, and moveTheBinaries functions.
Note
The changes to the functions are fairly self-explanatory, so for the sake of space, we will not be pasting the code here. You are more than welcome, though, to peruse the relevant portions of the installLivy.sh script.
Installing Livy drills down literally to downloading the package, unpacking it, and moving it to its final destination (in our case, this is /opt/livy).
Checking if Hadoop is installed is the next thing on our to-do list. To run Livy with local sessions, we require two environment variables: SPARK_HOME and HADOOP_CONF_DIR; the SPARK_HOME is definitely set but if you do not have Hadoop installed, you most likely will not have the latter environment variable set:
function checkHadoop() {
    if type -p hadoop; then
        echo "Hadoop executable found in PATH"
        _hadoop=hadoop
    elif [[ -n "$HADOOP_HOME" ]] && [[ -x "$HADOOP_HOME/bin/hadoop" ]]; then
        echo "Found Hadoop executable in HADOOP_HOME"
        _hadoop="$HADOOP_HOME/bin/hadoop"
    else
        echo "No Hadoop found. You should install Hadoop first. You can still continue but some functionality might not be available. "
        echo
        echo -n "Do you want to install the latest version of Hadoop? [y/n]: "
        read _install_hadoop

        case "$_install_hadoop" in
            y*) installHadoop ;;
            n*) echo "Will not install Hadoop" ;;
            *)  echo "Will not install Hadoop" ;;
        esac
    fi
}

function installHadoop() {
    _hadoop_binary="http://mirrors.ocf.berkeley.edu/apache/hadoop/common/hadoop-2.9.0/hadoop-2.9.0.tar.gz"
    _hadoop_archive=$( echo "$_hadoop_binary" | awk -F '/' '{print $NF}' )
    _hadoop_dir=$( echo "${_hadoop_archive%.*}" )
    _hadoop_dir=$( echo "${_hadoop_dir%.*}" )

    downloadThePackage $( echo "${_hadoop_binary}" )
    unpack $( echo "${_hadoop_archive}" )
    moveTheBinaries $( echo "${_hadoop_dir}" ) $( echo "${_hadoop_destination}" )
}
The checkHadoop function first checks if the hadoop binary is present on the PATH; if not, it will check if the HADOOP_HOME variable is set and, if it is, it will check if the hadoop binary can be found inside the $HADOOP_HOME/bin folder. If both attempts fail, the script will ask you if you want to install the latest version of Hadoop; the default answer is n but if you answer y, the installation will begin.
Once the installation finishes, we will begin installing the additional kernels for the Jupyter Notebooks.
Note
A kernel is a piece of software that translates the commands from the frontend notebook to the backend environment (like Python). For a list of available Jupyter kernels check out the following link: https://github.com/jupyter/jupyter/wiki/Jupyter-kernels. Here are some instructions on how to develop a kernel yourself: http://jupyter-client.readthedocs.io/en/latest/kernels.html.
Here's the function that handles the kernel's installation:
function installJupyterKernels() {
    # install the library
    pip install sparkmagic
    echo

    # ipywidgets should work properly
    jupyter nbextension enable --py --sys-prefix widgetsnbextension
    echo

    # install kernels
    # get the location of sparkmagic
    _sparkmagic_location=$(pip show sparkmagic | awk -F ':' '/Location/ {print $2}')

    _temp_dir=$(pwd) # store current working directory

    cd $_sparkmagic_location # move to the sparkmagic folder
    jupyter-kernelspec install sparkmagic/kernels/sparkkernel
    jupyter-kernelspec install sparkmagic/kernels/pysparkkernel
    jupyter-kernelspec install sparkmagic/kernels/pyspark3kernel

    echo

    # enable the ability to change clusters programmatically
    jupyter serverextension enable --py sparkmagic
    echo

    # install autowizwidget
    pip install autovizwidget

    cd $_temp_dir
}
First, we install the sparkmagic package for Python. Quoting directly from https://github.com/jupyter-incubator/sparkmagic:
"Sparkmagic is a set of tools for interactively working with remote Spark clusters through Livy, a Spark REST server, in Jupyter Notebooks. The Sparkmagic project includes a set of magics for interactively running Spark code in multiple languages, as well as some kernels that you can use to turn Jupyter into an integrated Spark environment."
The following command enables the Javascript extensions in Jupyter Notebooks so that ipywidgets can work properly; if you have an Anaconda distribution of Python, this package will be installed automatically.
Following this, we install the kernels. We need to switch to the folder where sparkmagic was installed into. The pip show <package> command displays all relevant information about the installed packages; from the output, we only extract the Location using awk.
To install the kernels, we use the jupyter-kernelspec install <kernel> command. For example, the command will install the sparkmagic kernel for the Scala API of Spark:
jupyter-kernelspec install sparkmagic/kernels/sparkkernel
Once all the kernels are installed, we enable Jupyter to use sparkmagic so that we can change clusters programmatically. Finally, we will install the autovizwidget, an auto-visualization library for pandas dataframes.
This concludes the Livy and sparkmagic installation part.
Now that we have everything in place, let's see what this can do.
First, start Jupyter (note that we do not use the pyspark command):
jupyter notebook
You should now be able to see the following options if you want to add a new notebook:

If you click on PySpark, it will open a notebook and connect to a kernel.
There are a number of available magics to interact with the notebooks; type %%help to list them all. Here's the list of the most important ones:
Magic | Example | Explanation |
|
| Outputs session information from Livy. |
|
| Delete all sessions running on the current Livy endpoint. The |
|
| Deletes the session specified by the |
|
| Arguably the most useful magic. Allows you to configure your session. Check http://bit.ly/2kSKlXr for the full list of available configuration parameters. |
|
| Executes an SQL query against the current |
|
| All the code in the notebook cell with this magic will be executed locally against the Python environment. |
Once you have configured your session, you will get information back from Livy about the active sessions that are currently running:

Let's try to create a simple data frame using the following code:
from pyspark.sql.types import *

# Generate our data
ListRDD = sc.parallelize([
    (123, 'Skye', 19, 'brown'),
    (223, 'Rachel', 22, 'green'),
    (333, 'Albert', 23, 'blue')
])

# The schema is encoded using StructType
schema = StructType([
    StructField("id", LongType(), True),
    StructField("name", StringType(), True),
    StructField("age", LongType(), True),
    StructField("eyeColor", StringType(), True)
])

# Apply the schema to the RDD and create DataFrame
drivers = spark.createDataFrame(ListRDD, schema)

# Creates a temporary view using the data frame
drivers.createOrReplaceTempView("drivers")
Once you execute the preceding code in a cell inside the notebook, only then will the SparkSession be created:

If you execute %%sql magic, you will get the following:

- Check the Livy REST API in case you want to submit jobs programmatically: https://livy.incubator.apache.org/docs/latest/rest-api.html. Also, for a list of configurable parameters available in
sparkmagic, go to: https://github.com/jupyter-incubator/sparkmagic/blob/master/examples/Pyspark%20Kernel.ipynb.
Cloudera is a company that was founded in 2008 by ex-employees of Google, Yahoo!, Oracle, and Facebook. It was an early adopter of open source technologies like Apache Hadoop when it was still fresh from the oven; as a matter of a fact, the author of Hadoop itself joined the company shortly thereafter. Today, Cloudera sells licenses for a broad array of open source products, mostly from the Apache Software Foundation, and also provides consulting services.
In this recipe, we will look at a free virtual image from Cloudera that we can use to learn how to use the newest technologies supported by the company.
To go through this recipe, you will need a working installation of a VirtualBox, a free virtualization tool from Oracle.
Note
Here are the instructions for installing VirtualBox:On Windows:https://www.htpcbeginner.com/install-virtualbox-on-windows/ On Linux:https://www.packtpub.com/books/content/installing-virtualbox-linuxOn Mac:https://www.youtube.com/watch?v=lEvM-No4eQo.
To run the VMs, you will need:
- A 64-bit host; Windows 10, macOS, and most of the Linux distributions are 64-bit systems
- A minimum 4 GB of RAM dedicated for the VM, thus a system with a minimum of 8 GB of RAM is required
No other prerequisites are required.
To begin with, in order to download the Cloudera QuickStart VM:
- Go to https://www.cloudera.com/downloads/quickstart_vms/5-12.html.
- Select VirtualBox as your platform from the dropdown on the right, and click on the
Get it nowbutton. - A window to register will show up; fill it in as appropriate and follow the instructions on the screen:

Note, that it is a 6 GB+ download, so it may take a while.
Note
On macOS, the image is automatically decompressed upon downloading. On Windows and Linux, you might need to unzip the archive first.
You should see a progress bar that is similar to this one:

Once imported, you should see a window like this:


There is really not much to configure: Cloudera QuickStart VM has everything you need to get going. As a matter of fact, this is a much simpler solution for Windows users than installing all the necessary environments. However, at the time of writing this book, it only comes with Spark 1.6.0:

Nothing, however, can stop you from upgrading to Spark 2.3.1 by following either the Installing Spark from sources or Installing Spark from binaries recipes we presented earlier in this book.


