


In the past few years, the Plone community has experienced some dramatic changes in the way Plone sites are being developed, deployed, and maintained:
Once upon a time, add-ons to Zope 2 were distributed as specialized Python packages (called Products); nowadays they are distributed as generic Python packages (called Eggs)
Originally, the Zope 2 application server was distributed as a single monolithic package; nowadays many parts of Zope 2 have been factored out into smaller packages, which comprise a portion of a larger set of reusable Zope packages (called the Zope Toolkit)
To make things more challenging, the Zope community has recently renamed various projects and has redefined the Zope ecosystem in the process:
The web framework formerly known as Zope 3 is now called Bluebream (http://bluebream.zope.org/)
The set of libraries formerly known as Zope 3 is now called the Zope Toolkit (http://docs.zope.org/zopetoolkit/)
While this influx of new technology alongside the old has presented a challenge for many, it represents a fundamental step in the forward direction for Plone:
With the adoption of Eggs, Plone joins the rest of the Python community in sharing a common packaging framework with a rich set of features, including the ability to specify version dependencies
With the adoption of the Zope Toolkit, Plone joins the rest of the Zope community in using the Zope Component Architecture to manage application complexity
Unfortunately, there is a price to pay for all of this progress—confusion. Many people are confused about the best way to develop, deploy, and maintain their Plone site. This is very much expected with a complex system like Plone, but is not ideal.
Note
Although not quite there yet, Plone is moving rapidly towards a better development, deployment, and maintenance story. Every day the situation improves, and there has never been a better time to start using Plone! The author truly believes in the Plone software and community, and hopes this book will inspire others to feel the same.
By presenting clear instructions and using best practices and techniques from the Python and Zope communities, this book aims to eliminate any remaining confusion.
In this chapter, you will learn:
Site administration essentials
What you need to get started
About the Plone installers
About Python software distributions
How to install Distribute—a framework for managing Python packages
How to install PIP—a more user friendly Python package installer
How to install Buildout—a tool for building software
More about Python software distributions
How to install a C compiler
How to install Subversion—a version control system
How to install Python with Buildout
Before we begin, let's put into perspective the effort we are about to undertake. Everything you learn in this book is intended to make you a better Plone site administrator.
In order to disseminate the subject matter, we will divide the site administrator's tasks into three categories:
Development
Deployment
Maintenance
Development usually begins with a buildout configuration file checked into a software repository. Initially, this buildout creates a software stack suitable for running the desired version of Plone.
Using this buildout, any developer can join the development team quickly and gain speed fairly easily. As the site administrator, you may be doing some, all, or none of the coding for your site, but you should still be familiar with the process.
Development tasks usually consist of:
Creation of a policy package: It is necessary for performing various site customizations. Policy in this context usually means: "applies project-specific customizations or features". See Chapter 5 of "Professional Plone Development", Martin Aspeli, Packt Publishing ( https://www.packtpub.com/Professional-Plone-web-applications-CMS/book) for more information.
Theme development: Traditionally, themes are implemented within a theme package that contains CSS and JavaScript files, images, and so on. More recently, you may see Deliverance or XDV-based themes being used (outside of Plone). See "Plone 3 Theming", Veda Williams, Packt Publishing ( https://www.packtpub.com/plone-3-theming-create-flexible-powerful-professional-templates/book) for more information.
Adding features: In addition to customizing Plone's default features, you may need to add new features as well. You can do this by installing existing add-ons or developing new features from scratch.
Writing tests: Unless you want to click through your site every time you make a code change to make sure that everything still works properly, you will want to write the tests—you will want to write lots of tests. In addition to the practical aspects of testing, good test coverage is a strong indicator of a job well done. See: http://plone.org/documentation/kb/testing for more information.
Eric S. Raymond (http://catb.org/~esr/), besides being a well-known open source advocate, is also well-known for this statement (http://www.catb.org/~esr/writings/cathedral-bazaar/cathedral-bazaar/ar01s04.html):
"Release early. Release often. And listen to your customers."
This sentiment is not lost on the professional Plone site administrator. The sooner you can deploy a basic set of features to staging, the happier your client or boss is going to be. Deployment steps usually consist of:
These are the tasks that no one wants to perform, but that everyone will blame you for not doing whenever they are not done. Fortunately, we can automate most of these:
Pack the database
Rotate logs
Back up the site
Monitor performance
The following diagram illustrates the typical workflow associated with these tasks:

In the diagram above, you will notice three workflow states—development, deployment, and maintenance. We describe the common transitions between each of these states as follows:
Development to deployment: During development, a project buildout is created. Not long after that, it may be deployed to staging for testing. It is not uncommon to deploy to staging many times before deploying to production.
Deployment to maintenance: Eventually, after development is complete, deployment to production occurs. Once you deploy to production, proper maintenance becomes critical.
Maintenance to development: After some time in production (with regularly-scheduled maintenance), more development may be required to fix bugs or add new features. Eventually, the development costs may outweigh the return on investment, at which point you are approaching the end of life.
Do not take this too literally; it is just meant to provide some perspective and a glimpse into the cyclical nature of Plone site administration.
Now let us bring the starting line into perspective, with a quote from Alice in Wonderland:
The White Rabbit put on his spectacles. "Where shall I begin, please your Majesty?" he asked. "Begin at the beginning", the King said gravely, "and go on till you come to the end: then stop."
Our story begins at the beginning, with your computer, operating system, a terminal window, text editor, and hardly anything else.
While we cannot cover every operating system, we will try to cover three of the most popular ones:
Tip
The previous operating systems are in no particular order!
While the author's desktop is Mac OS X, the techniques described in this book have been tested on Windows 7 and Ubuntu Linux 10.04 virtual machines running in parallel. We will assume you have only one OS, so feel free to skip the sections that are not applicable to you.
If you do not have one of these supported operating systems, a reasonable facsimile will probably do.
You will need a reasonably fast Internet connection, preferably cable, DSL, or any faster one to download the open source software discussed in this book.
You should have a text editor, and be familiar with how to use it. If you need a suggestion, try one of these:
Mac OS X: Textmate (http://macromates.com/,
$55 USD)Windows 7: Notepad++ (http://notepad-plus.sourceforge.net/uk/site.htm, free)
Ubuntu Linux: gedit (http://projects.gnome.org/gedit/, free, included with Ubuntu Linux)
If you are a programmer or a system administrator, you may be using Vi or Emacs already, and do not need the author's recommendation.
In this book, we will be building Plone sites from the ground up, starting with Python.
However, we would be remiss if we did not mention the Plone installers. If you need a trouble-free demo, or if you just want to download something that works, look no further than http://plone.org/products/plone. You will find installers for each of our targeted operating systems:

Many people use these in production with great success (especially the Unified Installer).
However, if you want to know how the installers work, or if you need more flexibility than the installers can provide, you should keep reading.
And now, we shall begin.
With the exception of Windows, most modern operating systems ship with some version of Python pre-installed.
Although this version may not be compatible with Plone 3.3, it is still useful to have around.
In case Python is not pre-installed, you should install Python 2.4 because that version works with Plone 3.3. We will get to that later in the chapter.
Mac OS X 10.6 is shipped with Python 2.6 pre-installed. Although this version will not work with Plone 3.3, we can use it to install the following:
Distribute
PIP
Buildout
But first, let us explore some basic Python usage.
To verify that Python works, open Finder | Applications | Utilities | Terminal.
Check the version: To check the version, type:
$ python -VRun the interpreter: To run the interactive Python interpreter, type:
$ pythonExit: To exit, press Ctrl + D.
You should see:
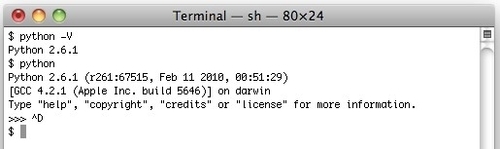
We have just demonstrated using Python 2.6 on Mac OS X.
Windows 7 does not come pre-installed with Python, but there is an installer available on http://python.org.
Since an installer for the latest version (in the 2.4.x series) is not available, and because it is difficult to compile the source on Windows, we will use the 2.4.4 version instead.
Using Internet Explorer (or any other web browser):
Navigate to http://www.python.org/download/releases/2.4.4/.
Scroll down to Windows.
Select python-2.4.4.msi (http://www.python.org/ftp/python/2.4.4/python-2.4.4.msi).
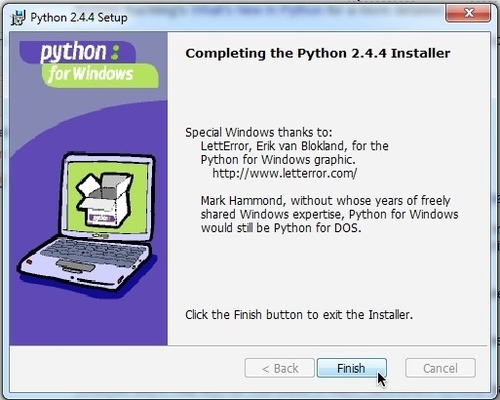
Windows will present a series of dialogues which you can answer based on the following suggestions:
Install for all users
Install to the default location
Install the default features
You should see:
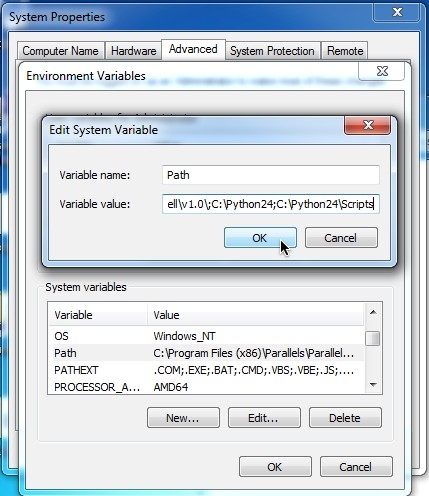
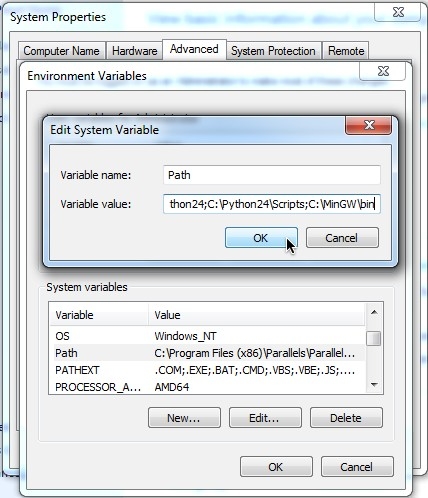
Now that Python is installed, we would like to be able to easily run the interactive Python interpreter from the Command Prompt. To accomplish this, perform the following steps:
Select Start | Computer | System properties | Advanced system settings | Environment Variables.
Under System variables, scroll down to Path.
Select Edit.
Add the following separated by a semicolon:
C:\Python24C:\Python24\Scripts
Click on Save.
You should see:
Now, let us test this.
To verify that Python works, open Start | All Programs | Accessories | Command Prompt.
Check the version: To check the version, type:
$ python -VRun the interpreter: To run the interactive Python interpreter, type:
$ pythonExit: To exit, press Ctrl + Z and hit Enter.
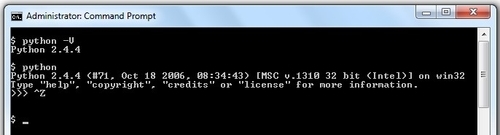
We have just finished demonstrating how to install and test Python 2.4 on Windows.
While we are here, let us take a minute to install some additional software that we will need later.
If you were to install and run Plone now, you may encounter the following error:
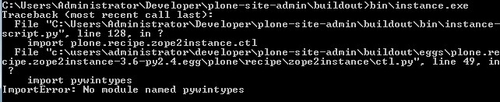
To avoid this error, install PyWin for Python 2.4:
Select
pywin32-214.win32-py2.4.exeto download the file.Run the installer.
The PyWin library provides access to the Windows programming API. Visit http://plone.org/documentation/kb/using-buildout-on-windows/ for more information.
Ubuntu Linux ships with Python 2.6 pre-installed.
All we need to do is test it.
To verify that Python works, open Applications | Accessories | Terminal.
Check the version: To check the version, type:
$ python -VRun the interpreter: To run the interactive Python interpreter, type:
$ pythonExit: To exit, press Ctrl + D.
You should see:

We have just finished demonstrating how to test Python 2.4 on Ubuntu Linux.
At this point, we have taken steps to explore Python on each of our targeted operating systems.
We will now move forward with that technology.
First, let us have a look at some background on Distribute. According to the Distribute website (http://packages.python.org/distribute/), Distribute is:
"… intended to replace Setuptools as the standard method for working with Python module distributions."
According to the setuptools website (http://peak.telecommunity.com/DevCenter/setuptools), setuptools is:
"… a collection of enhancements to the Python distutils (for Python 2.3.5 and up on most platforms; 64-bit platforms require a minimum of Python 2.4) that allow you to more easily build and distribute Python packages, especially ones that have dependencies on other packages."
Among other things, Distribute facilitates the easy installation of Python packages from the Python Package Index (PyPI) page on http://pypi.python.org.
The Distribute authors (also known as the Fellowship of the Packaging) enthusiastically recommend you choose Distribute over setuptools with this propaganda from their website (http://packages.python.org/distribute/):

In addition to fixing setuptools, the Fellowship of the Packaging plan to fix the core package management libraries in Python.
These two frameworks are built on top of the Distutils (http://docs.python.org/library/distutils.html) library, which is part of the Python core, and is distributed with Python.
In order to fix things properly, fixes must be applied at the Distutils level.
Fortunately, all the hard work done in Distutils, setuptools, and Distribute over the years will end up in a new library called Distutils 2.
If you are interested in the future of Python packaging, the following diagram (http://guide.python-distribute.org/introduction.html#current-state-of-packaging) may help explain the status quo:

This diagram suggests we use the Distribute add-on library until Distutils 2 is released as part of the core library (which is months away, as of May 2010).
And now we shall install Distribute.
While the curl program is recommended by the Distribute propaganda, it is not pre-installed with Mac OS X.
You can use Safari instead.
To download the Distribute installer using Safari:
Browse to http://python-distribute.org.
Click on distribute_setup.py.
Select File | Save as and save it as
distribute_setup.py.


The curl program does not ship with Windows, but you can use Internet Explorer instead.
To download the Distribute installer with Internet Explorer:
Browse to http://python-distribute.org.
Right-click on distribute_setup.py.


Ubuntu Linux does not come with the curl program pre-installed, but you can install it with:
$ sudo aptitude install curl
If you are prompted for a password, type your Ubuntu Linux account password.
To download the Distribute installer, open Applications | Accessories | Terminal and type:
$ curl –O http://python-distribute.org/distribute_setup.py

To verify that Distribute works, type:
$ sudo easy_install
You should see:

This means that Distribute is installed and working.
We have just finished demonstrating how to install and test Distribute on Ubuntu Linux.
Distribute comes with the easy_install program which you can use to install packages from the Python Package Index (http://pypi.python.org) with commands like:
$ easy_install package
Unfortunately, easy_install lacks critical features such as the ability to uninstall packages.
Fortunately, PIP (http://pip.openplans.org/) includes this feature, and more.
First, let us have a look at some background on PIP.
You do not have to install PIP if you do not want to; the choice is yours. You can continue to use easy_install if you like.
Note
According to the Distribute propaganda, PIP works with the current Distutils library and it will work with Distutils 2, whereas the future of easy_install is uncertain.
And now we shall install PIP.
To install PIP, open Finder | Applications | Utilities | Terminal and type:
$ sudo easy_install pip
You should see:

To verify that PIP works, type:
$ sudo pip
You should see:

We have just finished demonstrating how to install and test PIP on Ubuntu Linux.


First, let us have a look at some background on Buildout.
You do not have to use easy_install or PIP to install Buildout as we are about to do. Doing so will cause Buildout to be installed on your system Python's site-packages directory; the choice is yours.
The Zope community provides a bootstrap file for creating isolated Buildout environments outside site-packages: http://svn.zope.org/repos/main/zc.buildout/trunk/bootstrap/bootstrap.py.
If you download and execute this file, it will create a buildout in the current working directory.
We will use that method almost exclusively later, but for now, let us install Buildout globally (that is in the system Python's site-packages directory).
Also, let us try using PIP instead of easy_install this time (since we have just installed PIP).
To install Buildout using PIP, open Finder | Applications | Utilities | Terminal and type:
$ sudo pip install zc.buildout
Tip
Namespace packages
Note that the package name of Buildout is zc.buildout, which indicates it is a "namespace package". To read more about this topic, visit: http://docs.python.org/tutorial/modules.html#packages.
You should see:

If you are prompted for a password, type your Mac OS X account password.
To verify that Buildout works, type:
$ buildout
Assuming you are not in a directory with a buildout.cfg file, you should see:

We have just finished demonstrating how to install and test Buildout on Mac OS X.
To install Buildout, select Start | All Programs | Accessories | Command Prompt and type:
$ pip install zc.buildout
You should see:

To verify that Buildout works, type:

We have just finished demonstrating how to install and test Buildout on Windows.


At this point, we have Python 2.6 installed on both Ubuntu Linux and Mac OS X, and Python 2.4 installed on Windows. Since Plone 3.3 requires Python 2.4, we can now say we have fulfilled the Python requirement on Windows.

We say No for Mac OS X and Ubuntu Linux because we have the wrong Python version to run Plone 3.3. We say Almost for Windows because we have the right Python version, but no C compiler (which is required to compile Zope 2).
We have two ways to move ahead with Mac OS X and Ubuntu Linux to meet the Python 2.4 requirement:
Binary distributions are always a good option. They save time when they are available. Unfortunately, they are not always available.
In lieu of exploring binary distributions for Mac OS X and Ubuntu Linux, we will start preparing to compile Python from source.
Both Python and Zope 2 require a C compiler to build from source. So let us take a minute to explore the available options. Regardless of the packaging, each of the following software provides some version of the GNU Compiler Collection (GCC) and libraries (http://gcc.gnu.org/gcc-4.3/).
Before you can compile C code on Mac OS X, you must install XCode (http://developer.apple.com/technologies/tools/xcode.html).
Check your Mac OS X installation DVD or Apple Developer Connection (http://developer.apple.com/) for the latest version.

Before you can compile C code on Windows, you must install MinGW (or Microsoft's Visual Studio, but that approach is not covered in this book).
To download MinGW with Internet Explorer:
Browse to http://mingw.org.
Click on Downloads | View all files | Automated MinGW Installer | MinGW-5.1.6.exe.
Save the file.
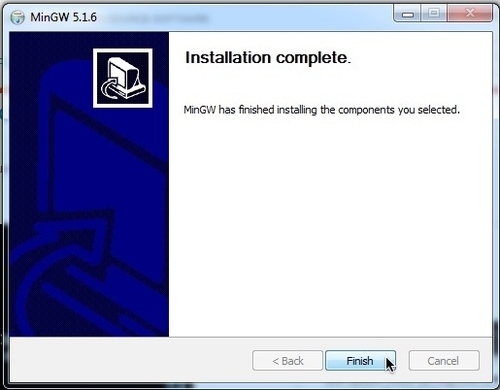
Run the installer.
Windows will present a series of dialogues you can answer based on the following suggestions:
Select the current package
Select g++ and check options in addition to the base tools
Select the default location
Now that a C compiler is installed, we would like to be able to easily run the gcc command from the Command Prompt. To accomplish this, perform the following steps:
Select Start | Computer System Properties | Advanced system settings | Environment Variables.
Under System variables, scroll down to Path.
Select Edit.
Add the following separated by a semicolon:
C:\MinGW\bin
Click on Save.
You should see:
To verify that your C compiler works, select Start | All Programs | Accessories | Command Prompt and type:
$ gcc
You should see:

We have just demonstrated how to install and test a C compiler on Windows.
Later, when you try to compile Zope 2, your Buildout may fail with a Visual Studio error like this:
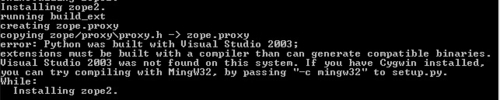
To avoid this error, you can configure Distribute to use MinGW's C compiler. Just create a file called C:\Python\Lib\Distutils\distutils.cfg, and include the following contents:
[build]
compiler=mingw32
Visit http://plone.org/documentation/kb/using-buildout-on-windows/ for more information.
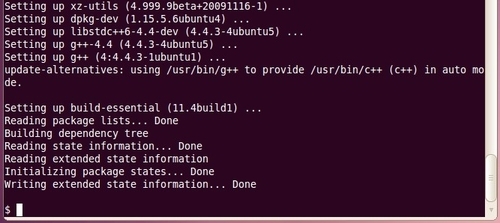
Before you can compile C code on Ubuntu Linux, you must install the build-essential package (http://packages.ubuntu.com/lucid/build-essential):
$ sudo aptitude install build-essential
You should see:


The Plone community maintains several Subversion (http://subversion.apache.org/) software repositories for core and add-on software development.
In addition, the community maintains a Trac (http://trac.edgewall.org/) instance for each repository to facilitate easy browsing.
Below, you will find links to each of the Plone community's Trac instances, one for each repository:
As such, we shall make sure each of our operating systems has a Subversion client available in case we need to access software from any of the repositories.
(In the next section, we will check out a Python buildout from the collective repository, developed by Plone core developer Florian Schulze.)

Windows 7 does not ship with Subversion pre-installed, but there is an installer available on http://collab.net.
Create an account here: http://www.open.collab.net/servlets/Join.
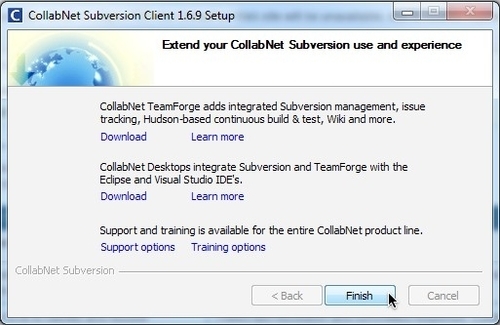
Browse to http://collab.net. Click on Downloads | Subversion | Windows | CollabNet Subversion Command-Line Client v1.6.9 (for Windows) | Download | Run.
Click on Next, accept the default installation location, and so on, and then wait for a few seconds.


We have now arrived at the pinnacle task for this chapter—installing Python with Buildout.
From now on, we will not provide any operating system-specific instructions, but you can expect the examples in the rest of this book to work on all supported operating systems, unless otherwise stipulated.
Remember, we are still trying to satisfy the requirement of Python 2.4 across all the three operating systems.
In the code bundle for this chapter, you will find a file called 01-background-python.cfg, which contains the following:
[buildout]
parts = python-buildout

[python-buildout]
recipe = infrae.subversion
location = src
urls = http://svn.plone.org/svn/collective/buildout/python/src/ python-buildout
(If you have not done so already, download the book examples from https://www.packtpub.com/plone-3-3-site-administration/book and unzip them into your home directory.)
Change directories to the extracted buildout directory and type:
$ buildout –c 01-background-python.cfg
You should see:
$ buildout -c 01-background-python.cfg
Got infrae.subversion 1.4.5.
Getting distribution for 'py'.
install_dir /Users/aclark/Developer/plone-site-admin/buildout/eggs/tmpbIk70j
Got py 1.3.0.
/Users/aclark/Developer/plone-site-admin/buildout/eggs/infrae.subversion-1.4.5-py2.6.egg/infrae/subversion/Common.py:4: DeprecationWarning: the sets module is deprecated
  from sets import Set            # For python 2.3 compatibility
Installing python-buildout.
Inside the buildout/src/python-buildout directory, there is a file called python24.cfg.
This is the buildout that will download and build Python 2.4 for us. All we need to do is run it:
$ buildout –c src/python-buildout/python24.cfg
Early on, you may encounter an error about a missing downloads directory:
While:
  Installing python-2.4-build.
Error: The directory:
'/Users/aclark/Developer/plone-site-admin/buildout/src/python-buildout/downloads'
to be used as a download cache doesn't exist.
If so, just create the directory and then re-run the buildout command.
You should see:
$ buildout -c src/python-buildout/python24.cfg
Unused options for buildout: 'base-parts'.
Updating opt.
opt: Running
…
Installing python-2.4-build.
python-2.4-build: Downloading http://www.python.org/ftp/python/2.4.6/Python-2.4.6.tar.bz2
python-2.4-build: Unpacking and configuring
python-2.4-build: Updating environment: CFLAGS=-arch x86_64
…
Installed /Users/aclark/Developer/plone-site-admin/buildout/src/python-buildout/python-2.4/lib/python2.4/site-packages/PIL-1.1.6-py2.4-macosx-10.6-i386.egg
Processing dependencies for PIL==1.1.6
Finished processing dependencies for PIL==1.1.6
Unused options for python-2.4-PIL: 'update-command'.
Installing python-2.4-test.
Unused options for python-2.4-test: 'update-script'.
$
To verify that Python works, type:
$ src/python-buildout/parts/opt/bin/python2.4
You should see:
$ src/python-buildout/parts/opt/bin/python2.4
Python 2.4.6 (#1, May  9 2010, 02:12:47)
[GCC 4.2.1 (Apple Inc. build 5659)] on darwin
Type "help", "copyright", "credits" or "license" for more information.
>>>
At this point, we have Python 2.4.6 installed on both Ubuntu Linux and Mac OS X, and Python 2.4.4 installed on Windows.
All of our targeted operating systems now have a version of Python capable of running Plone 3.3.
In addition, we have installed a C compiler and Subversion client.
Our computers are now ready to build Plone 3.3:

That is all for this chapter, great job! It's all downhill from here.
We have covered a lot in this chapter. To summarize, you have learned:
Why we are here: To eliminate confusion
What you need to get started: A computer and an operating system
To experiment with the Plone installers—they may be all you need
Using the system Python
Using Python installers
Installing Distribute, PIP, and Buildout
Installing a C compiler and Subversion client
Installing Python with Buildout
Remember that from now on we will not provide any instructions specific to the operating systems, but you can expect the examples in the rest of this book to work on all supported operating systems, unless otherwise stipulated.
