


You want to start using Drupal to power your website but have many existing web pages and need to migrate this content to Drupal. You would like to redirect the existing site URLs to the new URL paths that you create in Drupal so that visitors to your site will be able to easily find content on the new site via their browser's bookmarks. You want to retain the overall "look and feel" of your existing content in your new Drupal website. Is this possible? Can you do this easily?
This chapter will answer these questions for you and show you how to prep your new Drupal installation, so that you can import all of your existing website content into the new Drupal site structure. We'll begin by installing and configuring the modules you will need to get your migration process rolling.
We'll cover the following topics in this chapter:
Performance considerations and core Drupal modules that will be useful
Installing and configuring the Feeds and Feeds Tamper modules
Prepping your legacy data for migration
This chapter assumes that you have installed Drupal using the Standard install on either your localhost development environment or on a hosted web server. We're going to start from a core Drupal install using Drupal version 7.15, the latest Drupal version at the time of this book's writing. Let's get started.
First you should load your Drupal site's status report, and confirm that your core Drupal environment is working correctly and that you have the correct PHP configuration for your migration. In our local development version of Drupal 7.15, we can confirm that the site is running on a PHP 5.3.x application environment (in this case powered by MAMP) and has a PHP memory limit set relatively high at 512 MB.
This memory limit is reasonable for a development environment, though in a production server, you'll most likely want to run a memory limit from 96M to 128M. You can tweak the memory limit using a few methods.
In an application such as MAMP Pro, you can simply tweak your php.ini file by editing the loaded PHP template via the MAMP Pro interface. You can also add the following line of code to your Drupal site's setting.php file and then flush your Drupal cache:
ini_set('memory_limit', '96M');You should also be comfortable with accessing your MySQL database for your Drupal site by using phpMyAdmin or another type of MySQL tool. MAMP or MAMP Pro also provide an easy access to the phpMyAdmin interface by using the MAMP WebStart button in the MAMP interface. We'll be looking at tables in the Drupal site database, once we start running our imports. It's recommended that we run our migration process on a staging or development server before running the same migration on a production site.
Most of the Drupal core modules that we need will be installed automatically when we install our core Drupal 7.x site. The most important and crucial core modules are the following:
All of these should be enabled as they are required by Drupal core. Drupal 7.x core now includes the content construction kit concept and module as part of core. We do not need to install any additional modules at this point to be able to create content types. There may be other core modules you have or want to enable in your site. Go ahead and enable them now.
There are a number of Drupal contributed modules that we'll be using throughout the book, which we should install and configure now. Some of these modules are requirements and dependencies of the Feeds module that we'll be using for our migration processes in the first six chapters. The installation and configuration of each of these modules will be outlined in this section.
The Administration Menu module provides a helpful administration toolbar for the Drupal admin interface. By default core Drupal enables a core module called Toolbar. In this section we'll disable Toolbar, and then install and configure the Administration Menu module:
Go to your core modules admin screen and uncheck the Toolbar module to disable it. Then save your module configuration. This will remove the default black admin toolbar in the header of your site.

Download the latest 7.x stable version of the Administration Menu module from its project page at http://drupal.org/project/admin_menu/. The current version is 7.x-3.0-rc3.
Install this module, as you would do for any Drupal contributed module, to your
/sites/all/modules/contribdirectory.Enable the following modules in the Administration fieldset of your module's screen:
Administration Development tools
Administration menu
Administration menu Toolbar style

Refresh your module's page and you should now see the black Administration horizontal drop-down menu appear in your site's header area, as shown in the following screenshot:

The Chaos Tool Suite (CTools) module is a requirement of the Feeds, Feeds Tamper, and Views modules (all installed later in this chapter); so let's go ahead and install it now to get this requirement out of the way. To install CTools, follow these steps:
CTools can be downloaded from http://drupal.org/project/ctools. The latest version is 7.x-1.2.
Install it as you would any Drupal contributed module.
Once CTools is installed, load your module's admin screen and enable the Chaos Tools core module under the Chaos Tool Suite module fieldset.
The core module is the only one you'll need for now and the default installed configuration is fine. You do not need to make any additional configurations.
We won't be using the Views module extensively in this book or for our migration processes, but Views is an indispensable Drupal module and you'll most likely want to use it to create lists of content on your site. It's also required by the Feeds News module, so let's install it now:
Download the latest version of Views from http://drupal.org/project/views/. The latest version is 7.x-3.5.
Install it as you would any Drupal contributed module.
Once Views is installed, load your module's admin screen and enable the Views and Views UI modules and save your modules' configuration.
To access the Views administration interface once you enable the module, you can go to Structure | Views from your admin menu or go to
admin/structure/views.No additional configuration needs to take place now.
The Job Scheduler module is required by the Feeds and Feeds Tamper modules, so let's install it now:
Download the latest version of Job Scheduler from http://drupal.org/project/job_scheduler. This is an alpha version of the module at version 7.x-2.0-alpha3 at the time of this book's writing.
Install it as you would any Drupal contributed module.
Once installed, load your module's admin screen and enable the Job Scheduler and Job Scheduler Trigger modules.
The Job Scheduler module is basically an API that we're loading into our Drupal site that provides many helper functions for Drupal developers. We do not need to actually configure the module. Feeds and Feeds Tamper will both hook into the module on their own.
The Features module is a powerful Drupal module that allows you to package and save your Drupal configurations including content types and Feed importers into code. This means you can build a content type and then save your entire content type's configuration as a module. Then you can take this Features module and install it on another site. Then enable it and you'll have your entire content type on that other Drupal website. This module is extremely helpful if you have a development or staging site and you want to move a content type from the staging site to a production site without having to rebuild the type. You can just install and enable the module.
The Features module is also required by the Feeds News module, as Feeds News hooks into Features to create an example Feature module. So we'll install it for that purpose but we'll also be using the Features module extensively in Chapter 6, Packaging Content Types and Feeds Importers, when we will create features modules for our content type and Feeds importer configurations.
Download the latest version of Features from http://drupal.org/project/features. The latest version of the module is 7.x-1.0.
Install it as you would any Drupal contributed module.
Once installed, load your module's admin screen and enable the Features module.
The configuration screen for Features is located at Structure | Features via the admin menu or by going to
admin/structure/features.We will not be configuring or adding any Features in this chapter but we will be returning to this module in Chapter 6, Packaging Content Types and Feeds Importers.
We've completed installing our required modules. We can now move on to installing and configuring the Feeds and Feeds Tamper modules. These are the modules we'll be using to import our migrated content.
We're going to use the Feeds module to import our content. This module is extremely powerful and allows you to set up automated imports of content from multiple formats including CSV and OPML files; and RSS, XML, and ATOM feeds. The import process we will use in later chapters creates nodes and taxonomy terms in the target website. This is the method we're going to use to migrate our content. We'll be creating a Feeds module based importer that allows us to import data from a CSV file into nodes that are part of a content type in our site. These nodes will hold our individual imported content and act as our new web pages. We'll also import data to taxonomy vocabs on our site so we can use this data as tags.
Feeds support importing from large files that are full of thousands of rows of data and the import process can run in as quickly as two minutes. To get started using the Feeds module we need to install it first. Follow these steps to install:
Download the latest version of Feeds from http://drupal.org/project/feeds/. The latest version is 7.x-2.0-alpha5.
Install it as you would any Drupal contributed module.
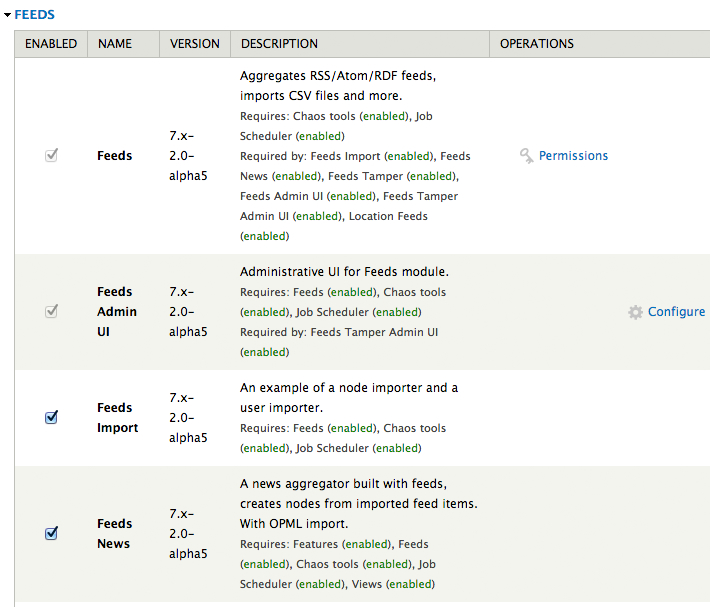
Once installed, enable the following modules via your module's admin screen:
Feeds
Feeds Admin UI
Feeds Import
Feeds News
I've included a screenshot of what your module's admin screen in the Feeds fieldset should look like:
Once enabled, click on the Configure link under the Operations column next to your Feeds Admin UI module. That will load the Feeds importers configuration screen from
admin/structure/feeds. You can also get to this screen by going to Structure | Feeds importers from your admin menu.The Feeds importers screen is the launch pad for creating, overriding, exporting or cloning an importer. We'll be doing this starting in Chapter 3, Creating a Feeds Importer.
Feeds loads with some default importers including the following:
Node import for importing data and content into nodes on your site
User import for importing users into your Drupal's user interface
Feed for importing from RSS or Atom feeds
OPML import for importing OPML files
The Feed importer is the only importer currently attached to a content type called Feed, on the site. In Chapter 3, Creating a Feeds Importer, we'll start configuring and using these importers and crafting our own content importer, but for now it's good to just view the defaults that the module ships with. You should see the following at this point:

The Feeds module has another configuration screen that we'll be using later to run the actual import process of our content. You can get to this screen by clicking on the Import link that shows in the page description at the top of the Feeds importers screen in the intro text area (see preceding screenshot). Clicking on Import will take you to the following screen at the following path,
/import:
The Import screen allows you to click on an import link and load the import administrative page. For example, loading the Node import at this point will load a page that then allows you to upload a CSV file and then click on the Import button to run the import. Again we'll be looking at this process in great detail starting in Chapter 3, Creating a Feeds Importer.
We've installed and enabled the Feeds module and taken a brief look at its default configuration screen. We're now ready to install another Feeds-based module that will hook into the Feeds module, called Feeds Tamper.
The Feeds Tamper module is a module that enhances the Feeds module by allowing you to add tamper plugins to your importer that you create in Feeds. Adding a tamper will allow you to treat and pre-process your imported data before it actually populates the Drupal database and your nodes. Tamper can be used to do things including but not limited to the following:
Add a required field filter to your import process
Decode and encode HTML entities
Strip HTML tags from the import
Explode and implode lists of data
Format numbers
Convert case
Convert boolean values
Find and replace data upon import
Trim and truncate data
This module will be helpful to use when we want to import multiple values into a Node Reference or Term Reference field in our content type. We can add a pipe in place of a comma for instance across our entire imported data.
To install the Feeds Tamper module follow these steps:
Download the latest version of Feeds Tamper from http://drupal.org/project/feeds_tamper. The latest version is 7.x-1.0-beta3.
Install it as you would any Drupal contributed module.
Once installed, enable the Feeds Tamper and Feeds Tamper Admin UI modules on your module's admin screen in the Feeds fieldset section.
Once enabled, you can access the Feeds Tamper configuration by first returning to your Feeds importers screen and then clicking on the Override link next to an importer.
Once the actual importer configuration screen loads, click on the Mapping link at the bottom of the navigation block in the left sidebar.
When the mapping screen loads, click on the Configure Feeds Tamper link:

This will launch the Tamper plugins screen, which will look similar to the following:

From this screen you can add your tamper plugins. We'll be doing this in Chapter 4, Feeds Tampers.
We now have all of our Feeds modules installed and enabled and we're ready to start building our content type to hold our imported data. Once we have our content type built, we can return to the Feeds module and use it to build our importer for our migration process.
In Chapter 7, Migration Using the Migrate Module, we'll use another module to run migrations of content, called the Migrate module. We'll look at Migrate in more detail later in the book but for now you can review its project page on Drupal.org at http://drupal.org/project/migrate/. The current version of this module is 7.x-2.4.
Like the Feeds module, Migrate provides an interface in Drupal to import your content. Migrate also has integration with the Drush module, so you can run migrate commands using Drush in the command-line prompt.
In this book we're going to import data and content to our site using CSV files. The Feeds module easily allows us the ability to upload a CSV file and import its content into Drupal nodes. So you're going to need a CSV file to use, for the examples in this book. I'm providing a default CSV example file in the code package that comes with the book but you can also use your own CSV. You will want to follow these requirements for creating and saving your CSV file for use in the examples:
Make sure you save your CSV file in UTF-8 encoding.
Make sure you add column headers in your CSV.
If you are adding multiple values to a cell, confirm that you have a consistent separation character. For example use commas to separate values. Otherwise use pipes.
Confirm you can open your CSV file in an application such as Microsoft Excel, and also in a text editor such as TextWrangler.
Confirm that you have named your column header titles using a consistent naming convention; for example, make sure you are using underscores instead of blank spaces in your column header titles. If you are importing a column of data, which contains a Google Map URL for example, name the title of that column as
google_map. Also it's good practice to confirm that all your column header titles are in lowercase.
We've now prepped our CSV file and we're ready to start building our Drupal content type that will hold this imported content and data.
We have successfully prepped our Drupal site for our migration. In this chapter, we installed a number of required modules including Views, Features, Job Scheduler, and CTools. We also installed and took a look at the base configurations of the Feeds and Feeds Tamper modules. We discussed an alternative to the Feeds module called Migrate and we also prepped our CSV file for the migration process.
In the next chapter we will build our content type and add custom fields to it that will eventually contain our migrated content and data. We will also discuss how best to handle migration of images and files.