


 Download code from GitHub
When you are about to create a C++ game using Unreal Engine, it means that you are going to create a big project. The two specific reasons for such a choice are: you are a core programmer and not familiar with the blueprints concept, or you want the game to run faster. Either way, you are about to get the right start here.
It's been said several times that C++-based games are quite a bit faster (10 times faster) than games made with blueprints. Although that was hearsay on the Unreal forums, the fact is that it is partly true. All games made with Unreal are equal in performance to those relying on the same technology and engine code base. However, when things get complex, it gets a little slower, and that speed difference is not as noticeable; it is something measured in milliseconds.
Starting a C++ project with Unreal is quite different, as it is not something that can be done inside the editor anymore. You'll need all the help of the IDE and, based on your platform, the setup will be different. My setup currently while writing this book is Windows 10, Unreal 4.10 and Visual Studio 2015. Apart from Google Documents, that's all that I need to create my data tables, and that's all that is needed!
By the end of this chapter, you will be able to:
Start a new Unreal Engine C++ project from scratch
Set the project and editor settings to match your needs
Map any input device to match your game design
Import and export assets in and out of the Unreal Editor
Migrate assets between the different Unreal projects
Retarget animations between the different skeletons
Add the required modules and header files to the project code
The game we are going to create during the course of this book is called Bellz; it's definitely a word without a meaning. Its name came from the Hell Bells, as we are planning to put some unique bells around the maps!
The game is built with C++. While it is a C++ project, about 5% consists of necessary blueprints and other different graphs!
Bellz is a third-person RPG, where you have a mission loaded from Excel tables, weapons to use with different attributes, and evil enemies to escape from or to hunt. It looks simple, and the fact is, it is, but it holds all the needed elements to create a visually appealing AAA game. So that we stay on the same page, this game will take you step by step through the processes of:
Starting a C++ project based on a blank template.
Creating a player controller.
Building enemies, behavior trees, and blackboards.
Creating animation graphs and retargeting different animations.
Loading game-required data from the design data tables.
Adding camera animations and cut scenes to the game.
Adding audio effects and visual effects to the game.
Creating and building appealing maps.
Optimizing the game as much as possible.
Debugging the game performance.
Packaging the game to players.
The following is a screenshot of the final game:

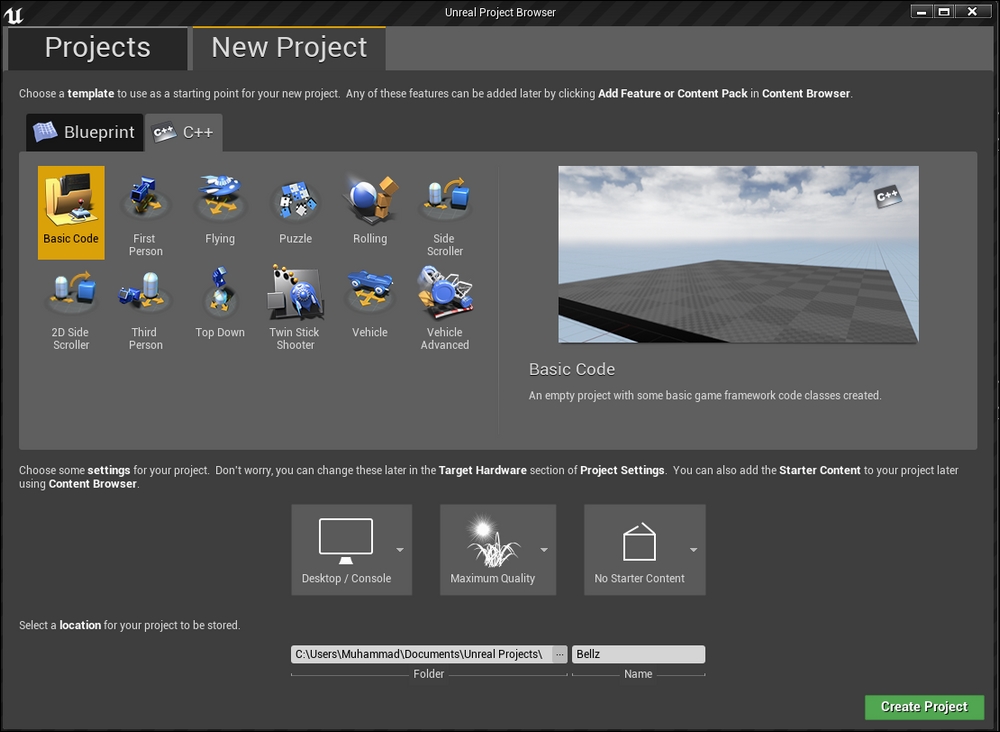
With the goals set, let's get started by launching the Unreal launcher. If you already have an Unreal Editor instance running, that is not a problem; just choose to make a new project from within the File menu and that will launch the proper screen of the launcher. Otherwise inside the launcher, just hit the Launch button of the editor version you want. After a few seconds of loading, the editor project selection window will appear. Do the following:
Switch to the New Project tab.
Under New Project, switch to the C++ subtab.
Choose a Basic Code project type.
Set the target to Desktop/Console as that's our target!
Set the quality to Maximum Quality.
Remove the starter content, it will not be useful at all.
Give your project a name, but make sure to remember that name, as a lot of the code will be using it. Mine is called
Bellz. I would say go ahead and name your project with the same name so you can easily follow along with the tutorial without any confusion or naming conflicts.Finally hit Create Project!
If that was your first time creating a code project (which I guess is the case for the book's target audience), the project will take quite a time, it is not going to appear within a second like the other blueprint-based projects.
A C++-based project needs to copy some header files, build a Visual Studio solution/project (or Xcode if you are running on Mac), add the necessary code to the project, build files, inputs, the engine, and so on, and then finally run the Visual Studio command-line tool to compile and launch the project editor.
Now that you have a basic project, shall we go ahead and learn more about the C++ game project structure?
Yes!
But why?
Well, an Unreal project could increase to a crazy size at some point, especially if you are going to source-control your project using Git or SVN. You have to be wary about the space, as some free hosting services put a limit on the file type and file size you are using within your repository.
By opening the game project folder you will have these files and folders; some new files and folders might appear in the future as long as we keep adding stuff to the project. This is what I had by the end of the project:

While the folder is full of subfolders and files, it makes much more sense to break it all down. If you understand how the project directory works, it will be easy to understand how the game director works, and how you can optimize the size of the project.
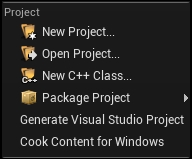
Binaries: This folder holds.dllfiles and executables that will be autogenerated during the compilation time.Build: A folder for all the necessary files to build the editor or the game itself.Config: A whole folder for the configuration files, basically a bunch of text files that hold a lot of the settings you set for the project and the game from within the project setting and the editor settings. You can do changes here, but it is not that easy to locate exactly what you want. However, it's a good place to search for the causes of problems.Content: TheContentfolder hosts all the assets, blueprints, maps, Marketplace assets and any other item you use to build your game. Any folder you create inside your editor to hold some assets will end up inside theContentfolder. Code files will not be included inside the content, in case your game is based on C++ not blueprints.Intermediate: The majority of the files underneath this folder are temporary files, all of them being generated while building the game or the engine, which means deleting this folder's content will not affect you, as all the content will be regenerated as soon as you build.Saved: TheSavedfolder contains lots of different saved files, some are backups that are saved every once in a while, some are autosaved copies of the assets, and other files are the save data of the game itself (saved using the save API).Source: This folder contains all the game code. Any C++ classes you are going to add in the future for the project will end up in this folder.PNGImage: The icon file for the project, which has the same name as the project; it is not necessary for it to represent the final build, but will be mainly used to visualize the project at the Unreal Launcher library section. Keep in mind that this image must be a square of 192 by 192 pixels. You can change it either by directly replacing it, or through the project settings.SQLFile: This is an.sdfformat file named with the project name; you don't have to worry that much about it, as Visual Studio will be generating a new one every time you open the solution.Visual Studio solution: The Visual Studio solution for the game code has the same name as the project. You can open it directly, or you can launch it from within the Unreal Editor itself through the File menu. Keep in mind that the project options section of the File menu is very dynamic. If you have a C++-based project (such as the one we are creating) the menu will always give you two main options, the first to refresh the Visual Studio project and the second to open the Visual Studio project.
But if you made a blueprint-based project, and at some point you wanted to convert it to a code file, you will find that the project options of the File menu display only one option for the Visual Studio, which is Generate Visual Studio Project.
Unreal Engine Project: An Unreal Engine project file that has the same name as the project and has the extension*.uproject. You can easily open the project using it, either by double-clicking on it or by browsing for it from the Unreal Launcher.
Now we have a project set and running. However, that's not enough for us to start adding code, assets, and logic for the game. A game project has tons and tons of settings and options, which will have been set to default values when you create a new project, and every time you make a new game or project, you have to set those settings to specific options that fit your needs and your goals.
Accessing the project settings is very easy as you only have to click on the Project Settings button at the end of the Edit menu button.
First things first, I like to always set the overall information about my project at an early stage, so I don't have to worry about it later. From the Description section of the project settings, you can set the company name, and its homepage; also you can assign the logo for the project to be displayed on the launcher and description of the project and its name.
The most important part for this C++-based project is to set the copyright notice. By defining a piece of text here, it will be automatically added to all your newly created C++ files. So you have a copyright added to your code… Just in case!

Another important option to set is the map to be used as the default map for the game and for the editor. I agree that we don't have maps set yet but once you have a map, you need to set it inside the Maps & Modes section; so you make sure that every time you run the editor, you don't have to reload the map you want.

Finally, I would like to set the targeted platforms. I already know that my game will be running on PCs and consoles, so there is no need to label my game as an Android or iOS game for example. Therefore, you can just uncheck the untargeted platforms from the Supported Platforms section.

To access the editor settings, from the Edit menu, just choose Editor Preferences. If you are using a Mac, you might find it in a different place, usually it is called Preferences or Editor Preferences and it is listed under the Unreal Editor menu.
There is not much that needs to be changed within the editor settings, as it is mostly about personal, preferred settings while working with the editor. I don't mind sharing the few changes I made for the editor of Bellz, but feel free to ignore them and apply your preferred settings, or don't apply any editor settings at all if you prefer to keep it that way.
Under the Loading & Saving section of the General settings, I managed to disable the autosave option for any asset type; that way I make sure that the editor saves only on my demand, and I'll not get too many unnecessary files, keeping my project size as small as possible. Also, disabling the source control (if you are not using it, or you are using another source control system) is a good way to go with a smaller project!

From the Play section of the Level Editor settings, make sure you enable Game Gets Mouse Control; this way I make sure that the game has the advantage of using the mouse over the editor.

And that's it. There are lots of changes I used to make to the editor, but there were mostly related to changing the colors to fit my experience and keeping the overall visual look of the objects the same between all the applications I was using. For example, changing the color of selected objects to match the selected objects in Maya viewport, so I keep things consistent. But those two options are the important ones that have an impact on my experience while working.
While the input setting relies on the project setting, I always like to discuss it as an individual topic. If you have come from an engine structuring background, you probably know that the inputs are an independent topic just like rendering, networking, and so on.
Any game built within Unreal Engine (or any game in general) must have the input class, which defines the whole input for the game. Fortunately, Unreal Engine has made this step easier, and has given you the chance not to worry about input handling. It does this for you at a lower level of the engine core, and gives you a nice and easy-to-use interface, where you can map some predefined input keys, buttons, and axes, and name them. You can then refer to these buttons by code using their respective names.
Unreal Engine supports a lot of input devices, which has made the input mapping list huge, and it is better to learn more about the supported devices in order to make this huge list easy to manipulate. The inputs that are supported are:
Gamepad: This contains the mapping for all the buttons and axes used by any gamepad type
Keyboard: This contains the mapping for all the keyboard keys
Mouse: This contains the mapping for all the mouse buttons and axes
Motion controllers: They contains the mapping for any motion device, such as Razer for example
Gesture: This contains the mapping for some gestures integration, which could be used with any touch device (mobile, touchpad, and so on)
Steam: This contains the mapping for the special buttons of the Steam controller; all other Steam controller buttons are accessible through the gamepad inputs
Xbox One: This contains the mapping for the special buttons of the Xbox One controller; all other Xbox One controller buttons are accessible through gamepad inputs
Android: This contains the mapping for the special buttons of Android devices (Back, Volume, Menu, and so on)
And that's how the list of inputs looks by default while every section is folded; unfolding those sections will give you an endless list of keys and buttons that you can map for your game and for different platforms and devices.

In order to use these inputs for your game, you have to select some keys and give them names; this is called the process of Binding Keys. But before diving into this process, you will have to understand the different types of binding within Unreal Engine.
Unreal Engine supports two main binding types; they are divided by the sensitivity of the input key/button. This means that the input button/key could fire a couple of events when it is pressed and/or released, or it will keep firing events as long as it is pressed. The two main types of bindings are:
Action mapping: Action mapping should represent a button or key press, and then within the code you can call some logic based on pressing that key
Axis mapping: Axis mapping should represent a value change of the pressure on the button, which usually works with the trigger buttons of a controller or the thumb sticks of the controller as well
Here are few more points to remember before we start the mapping process:
The game will be using the keyboard and mouse as PC inputs and will be using the controller/gamepad as the console input (you can still use the controller with PCs, though).
I highly recommend that you use the same names I used to map my keys; if you change any, you have to be aware that you have to change them within the code as well.
To add a new action mapping or axis mapping, you just need to hit the = sign next to the action and/or axis title. But if you want to add more buttons to the same action or axis, then you need to hit the + sign next to the action map itself.

Now you are ready to go. By opening the project settings from within the Edit menu, and then navigating to the Input options under the Engine section, you have access to the inputs mapping. You can now start mapping your key inputs.
Action mappings: This contains the following options:
Jump: Will be using either Spacebar or the controller lower face button to perform the jump on press
Attack: Will be using the LMB or the controller right trigger to perform attack.
ChangeWeapon: Will be shuffling between weapons on pressing the Tab button or the Gamepad Right Shoulder (the one above the trigger).
The end result of this action key mapping should eventually look something like this:

Axis mappings: This contains the following menu:
MoveForward: Will be using the keyboard's W or S or Up/Down arrow, or the controller Y axis of the left thumb stick, to move the player forward and backward. The value of 1 means forward and the value of 0-1 means backward.
MoveRight: Will be using the keyboard's A/D or the controller X axis of the left thumb stick to move the player right and left. The value of 1 means right and the value of 0-1 means left.
TurnRate: Will be using the keyboard arrows or the X axis of the right thumb stick of the controller to rotate the camera sideways.
Turn: Will rotate the camera sideways using the mouse.
LookUpRate: Will be using the Y axis of the right thumb stick of the controller to rotate the camera up and down.
LookUp: Will lookup using the mouse Y axis.
The end result of this axis key mapping should eventually be something like this:

Now you have successfully mapped the game inputs. Keep in mind that you might need to map more keys in the future, but those are the keys I needed for Bellz. If you need more you can keep adding and mapping keys based on your game design. Personally I found those inputs are enough for our current example.
If you still remember the project directory we mentioned earlier in this chapter, there was a config folder for the project. If you access this config folder, and you open the DefaultInput.ini file using any text editor, you will find the input mapping that you've already done at the end of the DefaultInput.ini file. This means those inputs are modifiable at any time because the shipped game will have a similar file eventually!
In some cases, you might have an asset within an Unreal project that you want to use within another project. And because Unreal content is converted into .uasset files, it is not that easy to just copy assets from the Content folder of a project into another Content folder of another project.
For this game, we are about to create the basic animations of the default Unreal Engine mannequin character, to be used by my character. Therefore, by opening any of the Unreal projects and by selecting the required animation files, you can just right-click on them and choose Migrate and then choose the new project you want to copy assets to.

That way, all the assets with the required dependencies will be copied to the new project. However, achieving it by just doing a window-level copying will not guarantee you move all the required files. In my case, when I was copy animations the editor found that I needed to copy the character mesh, skeleton, and the materials as well. Those have been selected automatically for me and set alongside the targeted animation files.

Finally, a typical OS window will pop up to ask you to choose the destination folder/project you want to migrate the assets and all its dependencies to.
Now as a single-person project (me or you, we are both working as individuals now), you can't make the entire game all by yourself. In other words, time, and the goal of this book, do not allow us to do that. Thus, that's the reason behind relying on some free assets, or you might like to get some of it outsourced. It is all up to you.
For Bellz, I used a mix of assets provided by Epic games; they are free to use and you can get them from the launcher. The assets are labeled with Infinity Blade (yeah, those assets are a free giveaway from Epic and the developer of the game), and they are really top-quality assets.
While those assets look perfect, not that many animations come with the packages so I used some of the free animations provided by Epic and asked a friend to make some other animations for me to use.
A good exercise here is to follow the migrate process we discussed earlier in this chapter in order to migrate some of the custom animations I've made in the book's project, and move them into your project.
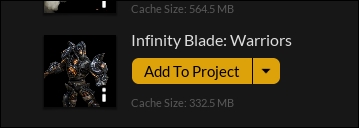
In order to get the packages installed, you have to download them first from the Marketplace section of your launcher, then you will find a button next to those packages that displays Add To Project. I've added warriors, enemies, weapons, and the grass environment to my project. Feel free to add them as well (I highly recommend them) or get your own assets.
There are three types of environment presented for free; you are free to pick the one you want. I just liked the grassy one. After making your decision about which to use of the free packages, all that you have to do is to hit the Add To Project button. Keep in mind, some of the Marketplace packages don't have the Add To Project button, and they have only a Create Project button; with those packages you'll need to create a whole new project in order to be able to use them or migrate some of their assets to your current project.
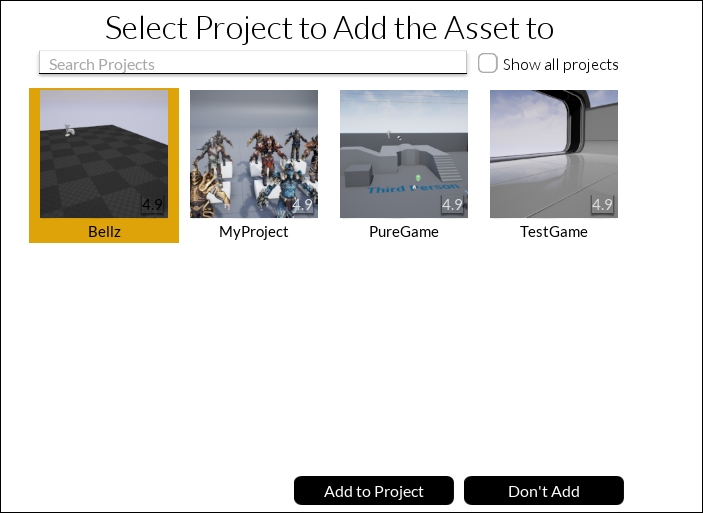
This will take you to a whole new section of the launcher, and you probably have never been there before. It displays all the valuable projects that could match this package. It is all about the engine version and the package version which usually have to match, and Epic might change this condition in the near future. Anyway, I made my choice as Bellz.
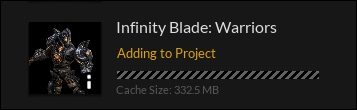
Now it will take some time to load and add the directories and the assets to your project. Go ahead and redo the process for the other packages you want to add to the project (the warriors, enemies, and weapons).
Keep in mind that, if you are using Windows, you don't have to relaunch the project. In a Windows version of the editor, once you add a package to the project through the launcher, you can locate them right away from within the editor. But if you are running Unreal on a Mac, you have to relaunch the editor in order to find the assets inside the project.
Feel free to take your time to check the characters, enemies, weapons, and the environments and all the animations provided by them. Also spend some time migrating any animations you want from the project sample that came with the book, and decide which assets you are going to use with your instance of Bellz, and delete any other unneeded assets, such as all other characters, enemies, and weapons. Those files are large, and will heavily increase your project size, so, it's a good idea to keep the project as clean as possible as we go.
When I was choosing my characters, I picked the bear as my main game enemy. The choice came as a result of several factors. First, I liked the two attack animations that the bear has, it is very strong and has great key poses. Second and most importantly, the bear has no idle, walk, or run animations, and it's a good opportunity to check some of the Unreal tricks of duplicating animations from a skeleton to another different skeleton. This is called animation retargeting.
By default, when you import an animation for the first time, you will be asked to either use an already made skeleton asset from within the project, or to import the asset skeleton and build a skeleton asset out of it. For several animations of the same character, you will keep reusing the skeleton asset, but once you import a different character it'll force Unreal to create its own skeleton structure asset.
Now, as you might have noticed, each enemy of the Infinity Blade assets has its own skeleton assets, and our main focus here is to somehow get an idle animation alongside the running and/or walking animation for the bear. As you noticed, the bear has only two animations!

Now if you check what the closest animal is in body structure and skeleton hierarchy to the bear (and included in the assets), you will find the wolf asset. This asset has all that we need and more, it is very similar to the bear, and it has walking and idle animations, alongside other attached animations. The goal now is to retarget and close the walk and idle animations of the wolf and use them with the bear. After we finish that, we will retarget the walk animation once more, and change its speed factor in order to make it look like a running animation (a run is just a fast walk, huh?!), and that will save us the time of creating animations or assets from scratch. It will even save us more time if we want to send the bear asset back to Maya or 3dsMax to add some more animations for it.

The retargeting process is very simple; you can consider it as the following steps:
Create an intermediate skeleton structure (called Set up Rig).
Define the Source character skeleton (the wolf), based on the intermediate skeleton.
Define the Target character skeleton (the bear), based on the intermediate skeleton.
Retarget the required animation from the source into the target.
While we have a plan, let's get started in retargeting the animation. By opening the wolf skeleton asset, you will be inside the Persona editor. At the top there is a button called Retarget Manager. Hit it!

That will open the retargeting window for you; it is very simple, you need to create the skeleton by hitting Add New Retarget Source and then start assigning the wolf bones to the correct slots of the intermediate skeleton. You don't have to fill them all, you just need the animated bones to be assigned. Keep in mind, at any time, if you need to assign more bones that are not shown on the intermediate skeleton, you can press the Show Advanced button in order to display more bone options to assign. Nevertheless, from my experience with this wolf skeleton asset, those basic bones are enough.
After assigning the bones you should end up with something like the following:

Now, let's do the same thing with the bare bones. Open its Persona, and start assigning the bones to an intermediate skeleton. There are two things you might notice here: the wolf has one more bone within the legs, and it fits its real bone structure. In addition, the wolf has a tail, while the bear skeleton has no tail. That will not affect us too much, but make sure not to assign something wrongly. Feel free to ignore those extra bones from the wolf.
After assigning the bones, you should end up with something like the following:

Now it is time to do the final step, which is retargeting (cloning) the animations themselves from the source to the target. By accessing the animation assets of the wolf (under the animations folder within the wolf folder), you can select any of the animations (let's start with the idle animation); right-click and, from Retarget Anim Assets, choose Duplicate Anim Assets and Retarget. That's enough to take you to the final step of retargeting.

The Select Skeleton window will show up. This window will already have the retargeting source skeleton selected and display its character. It requires you to select the target (which is the bear), by selecting the bear skeleton (the one we have already assigned to the intermediate skeleton) and hitting Select; that will copy the animation right away for you, and set it to the animation for the bear.

Now it's time to rename the animation to something which makes more sense. The new animation will still have the name of the wolf, but it has a thumbnail of a bear character, and it is only playable over the bear skeleton; thus you probably need to rename it bear.
Do retarget all the animations you want, but don't forget to rename them and move them to the bear folder, just to keep things organized.
After you are done duplicating/retargeting all the animations you want, I would recommend you duplicate the walking animation again for the bear, but this time name it run. After you have done the duplication, double-click on the animation asset. That will run Persona again, but this time it will be activating the Animation tab, not the Skeleton tab like before.
From the left side, there is a panel called Anim Asset Details. Make sure to set the Rate Scale under the Animation tab to 2.0, which will change the speed of this animation asset. By having it run fast, it really looks like a real run. Now we have managed to get lots of animations working and running for the bear, without the need to do a single animation frame!

You went through the process of starting a big game from the ground. You learned how to select a base C++ code project, which is not based on any other premade code, and totally understood the project structure, which folders are important, and which folders you can simply ignore.
You also learned about how and where to find the project settings and the editor preferences, and you got an idea about what type of settings you can find there, and how to adjust some of them to fit your needs.
All games have inputs, and now you know where you need to map those inputs for your game. You are not only aware of how to set up game inputs, but also you know all the input types and the limits of supported input devices with Unreal Engine.
All games have assets, and now you have learned how to be tricky while working: how to integrate packages from the Marketplace, or move assets between different projects without any trouble by just migrating them, not only copying them.
Animations are essential, but sometimes we have to retarget animations in order to fix some problems we have or to fasten the process. You now know all the needed steps and skills to be able to retarget any animation into any skeleton.
Now with all of that fresh in your mind, I highly recommend you dive into the next chapter right away. Let's start writing code and building our player controller from the ground up.