


Ext JS is a great cross-browser RIA (Rich Internet Application) framework used to build very rich and user-friendly frontend interfaces. When you explore the examples that come within the Ext JS SDK, you can see examples of how to use some components, such as Grid, Tree, Form, and Chart. There are also examples of how to use the MVC (Model-View-Controller) architecture. But most of these examples are standalone versions and it can be a little tricky when we try to put all of them together into a single application. Also, when we are developing an application, there are a few things that we can do to reuse a great part of the source code, making the code easy to maintain.
In this book, we are going to dive into the Sencha Ext JS world and explore real case examples, and we will also build a complete application from scratch from the prototype phase until the deployment in production.
In this chapter, we will learn about the application we are going to develop and we will also learn how to organize the files of the application that is going to be built throughout the chapters of this book. This chapter will also present the mockup of the application and how to start organizing the screens (which is a very important step and some developers forget to do it). In this chapter, we will cover:
Installation of the required software
Presenting the application and its capabilities
Creating mockups of each screen
Creating the structure of the app using MVC
Creating the loading page
The application that we are going to develop has a very simple architecture. We are going to use Ext JS on the frontend, which is going to communicate with a server-side module, which will then communicate with a database as shown in the following diagram:

The server-side module will be developed using PHP. Do not worry if you do not know PHP. We are going to use a very basic code and we are going to focus on the programming logic that needs to be implemented on the server side. This way you can apply the same logic using any other programming language such as Java, Asp .NET, Ruby, Python, or any other one that has support to exchange data in JSON or XML format as this is the communication format used by Ext JS.
And for the database we will use MySQL. We will also use the Sakila sample schema, which is perfect to demonstrate how to work with CRUD (Create, Read, Update, and Delete/Destroy) operations on a database table and also use more complex operations, such as views and stored procedures (we will learn how to handle all this information with Ext JS).
After we have finished implementing the application, we will customize the theme, and because of this we will need to install Ruby and the Sass and Compass gems. Also, we will need to install Sencha Command to customize the theme and also make the production build. To have Sencha Command working properly, we will also need to have the Java SDK installed and configured.
To deploy the application, we need a web server. If you do not have any web server installed on your computer yet, do not worry. In this book we will use Xampp as the default web server.
We will also need a browser to run our application in. The recommended ones are Firefox (with Firebug) or Google Chrome.
So to summarize all the tools and software we need to have installed prior starting the fun, here is a list with the links where you can download them and find installation instructions:
A browser with a debugger tool:
Firefox with Firebug: https://www.mozilla.org/firefox/ and http://getfirebug.com/
Google Chrome: www.google.com/chrome
A web server:
A database:
MySQL Workbench: http://dev.mysql.com/downloads/tools/workbench/
MySQL Sakila sample database: http://dev.mysql.com/doc/index-other.html and http://dev.mysql.com/doc/sakila/en/index.html
Sencha Command and required tools
Sencha Command: http://dev.mysql.com/doc/sakila/en/index.html
Sass: http://sass-lang.com/
Compass: http://compass-style.org/
Java JDK: http://www.oracle.com/technetwork/java/javase/downloads/index.html
Java environment variables: http://docs.oracle.com/javase/tutorial/essential/environment/paths.html
And of course Ext JS: http://www.sencha.com/products/extjs/; we will use Ext JS 4.2 in this book.
The application that we are going to develop throughout this book is very common to other web systems that you are probably used to implementing. We will implement a Video Manager Store (that is why the use of the Sakila sample database). Some of the features of the application are the security management (able to manage users and their permissions within the application), manage Actors, Films, Inventory, and Rental Information.
Ext JS will help us to achieve our goal. Ext JS provides beautiful components, which make the final user's eye shine when looking at a beautiful application with components that are intuitive and user friendly, and for us developers it provides a complete architecture, the possibility to reuse components (and decrease our work), and a very complete data package that makes easier to make connections to the server side and send and retrieve information.
We will divide the application in modules, and each module will be responsible for some features of the application. In each chapter of this book, we will implement one of the modules.
The application is composed of:
A splash screen (so the user does not need to see a blank screen while the application is still launching)
A login screen
A main screen
User control management
MySQL table management (for categories and combobox values)
Content management control
An e-mail client module
For each of the modules and screens mentioned above, we will create mockups so we can plan how the application will work (for example, will it have a menu, will we open the menu items in a window or center of the screen or use a tab panel?).
When we first load the application, it can take some time until the application has everything that is required loaded prior its execution. If we do not do anything, the user will see a blank page, which is a little bit boring.
Our application will have a splash screen so the user does not need to see a blank page while the application is still loading the required files and classes prior its initialization.

After the application is fully loaded, the first screen the user will see is the Login screen. The user will be able to enter the UserName and Password. There is also a multilingual combobox where the user can choose the language of the system. Then, we have the Cancel and Submit buttons:

The general idea of the application is to have a main screen that will be organized using the border layout. In the center region, we will have a tab panel, and each tab will represent a screen of the application (each screen will have its own layout); only the first tab item will not be closable (the Home tab). On the north region we will have a header with the name of the application (Video Store Manager), the multi lingual combobox (in case the user wants to change the current language of the application), and a Logout button. On the south region we will have the footer with a copyright message (or it can be the name of the company or developer that implemented the project). And on the east region we will have a dynamic menu (we will have user control management). The menu will be implemented using accordion panels (for each module) and in each panel we will use a tree to list the menu options of each module.
The main screen will look something like the following mockup:

If we try to translate into the previous mockup everything that we explained in the beginning of this topic, we will see the following diagram with the layout regions that we will use in the main screen:

In user control management, the user will have access to create new users, new groups, and assign new roles to users. The user will be able to control the system permissions (which user can see which modules in the system).

Every system has options that fit into the Categories category, such as film categories, film language, combobox options, and so on. For these tables, we need to provide all CRUD options and also filter options. The screens from this module will be very similar to the Edit table data option from MySQL Workbench.

The user will be able to edit the data in the rows of the grid.

In this module the user will be able to see and edit the core information from the system. As most of the database tables we will be handling in this module have relationship with other tables, the editing of the information will be more complex involving master-detail information. Usually, we will present the information to the user in a Grid panel and the editing of the information will be made in a Form panel that is inside a window.
It is also very important to remember that most of the screens from a module will have similar capabilities, and as we are going to build an application with a lot of screens, it is important to design the system to be able to reuse as much code as possible With this you can easily maintain and add features and capabilities to the system.

When you click on New or Edit, a new window will open to edit the information as shown in the following screenshot:

In this module we will design an e-mail client built with Ext JS. This is important because it demonstrates that we can build anything with Ext JS, not only CRUD screens. In this module we will implement on the client-side part of an e-mail client, meaning only the screens. We will not implement the sending/receiving e-mail code (which would be the server-side code).

Let's get started and get our hands on the code. The first thing we are going to do is to create the application using the MVC structure. Sencha Command (Sencha Cmd) provides us the capability of creating the application automatically. And creating the application with Sencha Cmd is helpful because it already creates the structure of the application according to the MVC architecture, and it also provides all the files we need to build the application for production and customizing the theme (we will learn how to do it later on this book).
MVC stands for Model-View-Controller. It is a software architecture pattern that separates the representation of the information from the user's interaction with it. The Model represents the application data, the View represents the output of the representation of the data (Form, Grid, Chart), and the Controller mediates the input converting it to commands for the Model or View.
Ext JS uses MVCS, which is a Model-View-Controller-Store pattern. The Model is a representation of the data we want to manipulate in our application, a representation of a table from the database. The Views are all the components and screens we create to manage the information of a Model. As Ext JS is event-driven, all the Views fire events when the user interacts with them, and the Controller will capture these events and will do something, redirecting the command to the Model (or Store) or the View. The Store in Ext JS is very similar to the DAO (Data Access Object) pattern used on the server side.
For a quick example, let's say we have a WidgetA which is a Grid panel that displays all the records from a table A. This table is represented by ModelA. StoreA is responsible for retrieving the information (collection of ModelA from the server). When the user clicks on a record from WidgetA, a window will be opened (called WidgetB) displaying information from a table B (represented by ModelB). And of course, StoreB will be responsible for retrieving the collection of ModelB from the server. In this case, we will have ControllerA to capture the click event from WidgetA and do all the required logic to display WidgetB and load all the ModelB information. If we try to put this in a quick reference diagram, it would be something like the following diagram:

We are going to create the application inside the htdocs folder of the xampp directory and our application will be named masteringExtjs.
Before we start, let's take a look how the htdocs folder looks like.

We have the Xampp files inside it and the Ext JS 4.2 folder.
The next step is to use the Sencha Cmd to create the application for us. To do so, we need to open the terminal application that comes with the operating system we use. For Linux and Mac OS users, it is the terminal application, and for Windows users, the command prompt application.
Here are the steps we are going to execute: first we need to change the current directory to Ext JS directory (htdocs/ext-4.2.0.663 directory in this case), and then we will use the following command:
sencha generate app Packt ../masteringextjs

The sencha generate app command will create the masteringextjs directory inside the htdocs folder with necessary file structure required by the MVC architecture. Packt is the name of the namespace of our application, meaning that every class we create is going to start with Packt, as for example: Packt.model.Actor, Pack.view.Login, and so on. And the last argument passed to the command is the directory where the application will be created. In this case it is inside a folder named masteringextjs, which is located inside the htdocs folder.
After the command finishes its execution, we will have something like the following:

But why do we need to create a project structure like this one? This is the structure used by Ext JS MVC applications.
Note
For more information about the sencha generate app command, please consult: http://docs.sencha.com/extjs/4.2.0/#!/guide/command_app.
Let's see what each folder does.
First, we have the app folder. This is where we will create all the code for our application. Inside the app folder we can find the following folders as well: controller, model, store, and view. We can also find the app.js file. Let's talk about each one:
In the
modelfolder we will create all files that represent a Model, which is an Ext JS class that represents a set of fields, meaning an Object that our application manages (Actor, Country, Film). It is similar to a class on the server side with only the attributes of the class plus getter and setter methods used to represent a table from the database.In the
storefolder we will create all the store classes, which is a cache of a collection of Models. They are very similar to DAO (Data Access Object); classes used on server-side languages to perform CRUD operations on the database. And as Ext JS does not communicate directly with databases, the store classes are used to communicate with the server side or a local storage used with a proxy (Proxies are used by Stores to handle the loading and saving of the Model data).In the
viewfolder we will create all view classes, also known as the UI Components (User Interface Components), such as the Grid panel, the Tree panel, the Menu, the Form panel, the Window, and so on. In these classes we will only code what the user will see on the screen; we will not handle the events fired by a component (the Grid panel, the Tree panel, the Menu, the Form panel, the Window are subclasses of theComponentclass).And finally, in the
controllerfolder we will handle all the events fired by the components (events fired because of the life cycle of the component or because of some interaction of the user with a component). We always need to remember that Ext JS is event driven, and on theControllerclasses we will control these events and update any Model, View, or Store (if needed).
We also have the app.js file. This is the entry point of the application. We will talk more about it in a few paragraphs.
Then, going back to the masteringextjs directory, we have a few more files and directories:
app.json: This is a configuration file used by Sencha Cmd. If we open it, we will see only aJSONobject with the name of the application (Packt).bootstrap.cssandbootstrap.js: Both files are also created by Sencha Cmd and should not be edited. The CSS file contains the import of the theme used by the application (which is the blue classic theme) and the JS file contains some require directives, the customxtypeattributes and other meta-driven class system features.build.xml: Sencha Cmd uses Apache Ant (http://ant.apache.org/), which is a Java tool used to build Java projects. Ant uses a configuration file namedbuild.xml, which contains all the required configurations and commands to build a project. Sencha Cmd uses Ant as engine to build an Ext JS application in the background (while we simply need to use a command). This is the reason why we need to have the Java SDK installed to use some of the Sencha Cmd features.index.html: This is the index file of our project. This is the file that will be rendered by the browser when we execute our application. Inside this file we will find the import of the bootstrap CSS and JS file, along with the import of the Ext JS framework file (ext/ext-dev.jsand theapp/app.jsfile).ext: Inside this folder we can find all the Ext JS framework files (ext-all,ext-all-debug,ext-dev) and also its source code.overrides: When we create the application it is empty. But inside this folder we should create any Ext JS overrides that we need to create for our project.packages: Inside this folder we can find all the packages managed by Sencha Cmd. A theme is a package. For more information about packages, please go to http://docs.sencha.com/extjs/4.2.0/#!/guide/command_packages.resources: Inside this folder, we will place all the CSS files we need to create for our application (with custom styles, CSS for icon images, and so on), and also all the static files (images).sass: Inside this folder we can find some Sass files used to create themes.
Let's start with the hands-on now!
First, we need to edit the app.js file. This is how the file looks like:
Ext.application({
    name: 'Packt',

    views: [
        'Main',
        'Viewport'
    ],

    controllers: [
        'Main'
    ],

    autoCreateViewport: true
});
We are going to change it so that it looks like the following:
Ext.application({ // #1

    name: 'Packt', // #2

    launch: function() { // #3
         console.log('launch');   // #4
    }
});
On first line of the previous code we have the Ext.application declaration (#1). This means that our application will have a single page and the parent container of the app will be the Viewport. The Viewport is a specialized container representing the viewable application area that is rendered inside the body tag of the HTML page (<body></body>). It also manages the application's size inside the browser and manages the window resizing.
Inside Ext.application we can also declare models, views, stores, and controllers used by the application. We will add this information to this file as we create new classes for our project.
We need to declare the name of the application which will be the namespace (#2).
We can also create a launch function inside Ext.application (#3). This function will be called after all the application's controllers are initialized and this means that the application is completely loaded. So this function is a good place to instantiate our main view. For now, we will only add console.log (#4), which just prints on the browser's JavaScript interpreter console to verify if the application was loaded successfully.
Note
Do we need to use Ext.onReady when using Ext.application?
The answer is no. We only need to use one of the options. According to the Ext JS API documentation, Ext.application loads the Ext.app.Application class and starts it up with the given configuration after the page is ready and Ext.onReady adds a new listener to be executed when all required scripts are fully loaded. And if we take a look at the source code for Ext.application we have:
Ext.application = function(config) {
    Ext.require('Ext.app.Application');
    Ext.onReady(function() {
        new Ext.app.Application(config);
    });
};
This means that Ext.application is already calling Ext.onReady, so we do not need to do it twice. So use Ext.onReady when you have a few components to be displayed and they are not in the MVC architecture (similar to the jQuery $(document).ready() function) and use Ext.application when you are developing an Ext JS MVC application.
To execute this application on the browser, we can access http://localhost/masteringextjs, and we will get the following output:

Now we need to start building the application.
When working with large Ext JS applications, it is normal to have a small delay when loading the application. This happens because Ext JS is loading all the required classes to have the application up and running and meanwhile, all the users see is a blank screen, which can be annoying for them. A very common solution to this problem is to have a loading page, also known as a splash screen.
So let's add a splash screen to our application that looks like the following:

First we need to understand how this splash screen will work. At the moment the user loads the application and the loading screen will be displayed. The application will show the splash screen while it loads all the required classes and code so the application can be used.
We already know that the application calls the launch function when it is ready to be used. So we know that we will need to remove the splash screen from the launch method. The question now is where inside Ext.application can we call the splash screen? The answer is inside the init function. The init function is called when the application boots so it gives some time for all required code to be loaded and after that the launch function is called.
Now that we know how the splash screen will work, let's implement it.
Inside Ext.application, we will implement a function called init:
init: function() {
     splashscreen = Ext.getBody().mask('Loading application', 'splashscreen');
},
All we need to do is apply a mask into the HTML body of the application (Ext.getBody()), and that is why we are calling the mask method passing the loading message ("Loading Application") and applying a CSS, which will be loading gif and is already part of the Ext JS CSS ("splashscreen"). The mask method will return Ext.dom.Element, which we will need to manipulate later (remove the mask from the HTML body) and for this reason, we need to keep a reference to Ext.dom.Element and we will store this reference inside an attribute of Ext.application:
splashscreen: {},With the code of the init method only, we will have a loading screen as the following:

If this is all you need that is ok. But let's go a little bit further and customize the loading screen adding a logo image so it can look like the first image of this topic, which is our final output.
First, we need to create a CSS file which will contain all the CSS for our application. We will name it app.css and we will also create it inside a resources folder:

Inside resources we will also create an images folder with the Packt logo image.
We also must not forget to add the new CSS file into index.html:
<link rel="stylesheet" href="resources/css/app.css">
And the app.css file will look like the following:
.x-mask.splashscreen {
    background-color: white;
    opacity: 1;
}

.x-mask-msg.splashscreen,
.x-mask-msg.splashscreen div {
    font-size: 16px;
    font-weight: bold;
    padding: 30px 5px 5px 5px;
    border: none;
    background-color: transparent;
    background-position: top center;
}

.x-message-box .x-window-body .x-box-inner {
    min-height: 110px !important;
}

.x-splash-icon {
    background-image: url('../images/packt-logo.png') !important;
    margin-top: -30px;
    margin-bottom: 15px;
    height: 100px;
}
Now let's go back to the app.js file and continue to add some code to the init function.
If we add the following code after the code we already have:
splashscreen.addCls('splashscreen');We will be adding a new CSS style to the loading DIV tag. Note that the following styles from our app.css file will be applied: .x-mask.splashscreen and .x-mask-msg.splashscreen div. This will make the background white instead of gray and it is also going to change the font of the "Loading Application" message.
This is how the generated HTML will be:

Now we will add the following code in the init function:
Ext.DomHelper.insertFirst(Ext.query('.x-mask-msg')[0], {
     cls: 'x-splash-icon'
});
The previous code will search for the first DIV tag that contains the .x-mask-msg class (Ext.query('.x-mask-msg')[0]) and will add a new DIV tag as child with the class x-splash-icon that will be responsible for adding the logo image above the loading message.
And this is how the generated HTML will be:

After we execute the previous code, we will have an output exactly as the image we showed at the beginning of this topic.
Now we already have the splash screen being displayed. We need to work on the launch function to remove the splash screen after all the code the application needs is loaded, otherwise the loading message will be there indefinitely!
To remove the splash screen the only code we need to add to the launch function is the following one, which is removing the mask from the HTML body:
Ext.getBody().unmask();
However, removing the mask abruptly is not nice because the user cannot even see the loading message. Instead of only removing the mask, let's give the user 2 seconds to see the loading message after the application is ready:
var task = new Ext.util.DelayedTask(function() { // #1
     Ext.getBody().unmask(); // #2
});

task.delay(2000); // #3
To do so, we are going to use the DelayedTask class (#1), which is a class that provides a chance of a function to be executed after the given timeout in milliseconds (#3). So in the case of the task, we are removing the mask from the HTML body (#2) after two seconds of timeout (2,000 milliseconds).
If we test the output right now, it works, but it is still not nice for the user. It would be even better if we can add an animation to the masking. So we will add a fade out animation (which animates the opacity of an element from opaque to transparent) and after the animation we will remove the masking (inside the Ext.util.DelayedTask function).
splashscreen.fadeOut({
duration: 1000,
remove:true
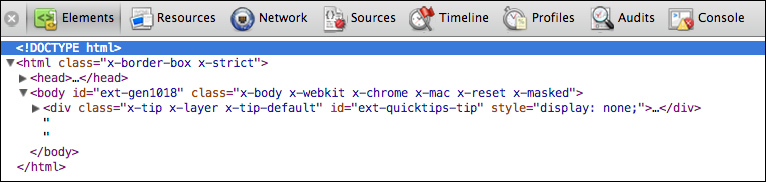
});After we execute this code, notice that the loading message is still being displayed. We need to analyze the generated HTML to find out why.
Before we call the fadeOut function, the following screenshot is the HTML of the loading message:

After we call the fadeout function, the HTML will be the following:

Only the first DIV tag with the class splashscreen was faded out. We need to also fade out the DIV tag with class x-mask-msg splashscreen that contains the logo and the loading message.
splashscreen.next().fadeOut({
    duration: 1000,
    remove:true
});
The output will be a pleasant animation that is shown to the user. Also note that the splashscreen DIV tag is removed from the generated HTML:
After the loading mask is removed, we need to display the initial component of our application. We will be showing a login screen that we will implement in the next chapter. For now, we will add a console message (#1) just to know where we need to call the initial component. The complete code for the launch function will be the following:
launch: function() {
    var task = new Ext.util.DelayedTask(function() {

        splashscreen.fadeOut({
            duration: 1000,
            remove:true
        });

        splashscreen.next().fadeOut({
            duration: 1000,
            remove:true
        });

        console.log('launch'); // #1
    });

    task.delay(2000);
}
Note
Note that all the code we used to display the loading message mask and remove it is part of the Ext.dom.Element class. This class encapsulates a DOM (Document Object Model) element where we can manage using the class's methods. This class is part of the Ext Core library, which is part of the foundation of Ext JS framework.
In this chapter, we have covered the details in high level about the application we will implement throughout the chapters of this book. We have also covered all the requirements to create the development environment for this application. We learned how to create the initial structure of an Ext JS MVC application.
And we also learned, through examples, how to create a splash screen (also known as the loading screen) manipulating DOM using the Ext.dom.Element class. We learned the difference between using Ext.onReady and Ext.application and also the difference between the init and launch methods from Ext.application. We left the app.js file ready to display its first screen, which will be a login screen, which we will learn how to implement in the next chapter.
