


 Download code from GitHub
Getting Started with Keras
Keras is an open source neural network library written in Python. This book will help you to experiment with deep neural networks as simply as possible. Its principal author and maintainer is François Chollet, a Google engineer. In 2017, Google's TensorFlow team decided to support Keras in TensorFlow's main library. Keras contains several implementations of commonly used neural network blocks, such as levels, objectives, activation functions, optimizers, and a set of tools to facilitate work with image and text data. In this chapter, an overview of the Keras environment will be addressed.
The following topics are covered:
- Introduction to Keras
- Keras backend options
- Installation
- Model fitting in Keras
At the end of the chapter, the reader will learn how to work with the keras library, and how to install and configure Keras. We will also discover the basic concepts of the Keras architecture. We will learn how Keras uses TensorFlow as its tensor manipulation library. We will also understand the different type of Keras models, sequential and functional APIs, and learn how to implement Keras layers.
Introduction to Keras
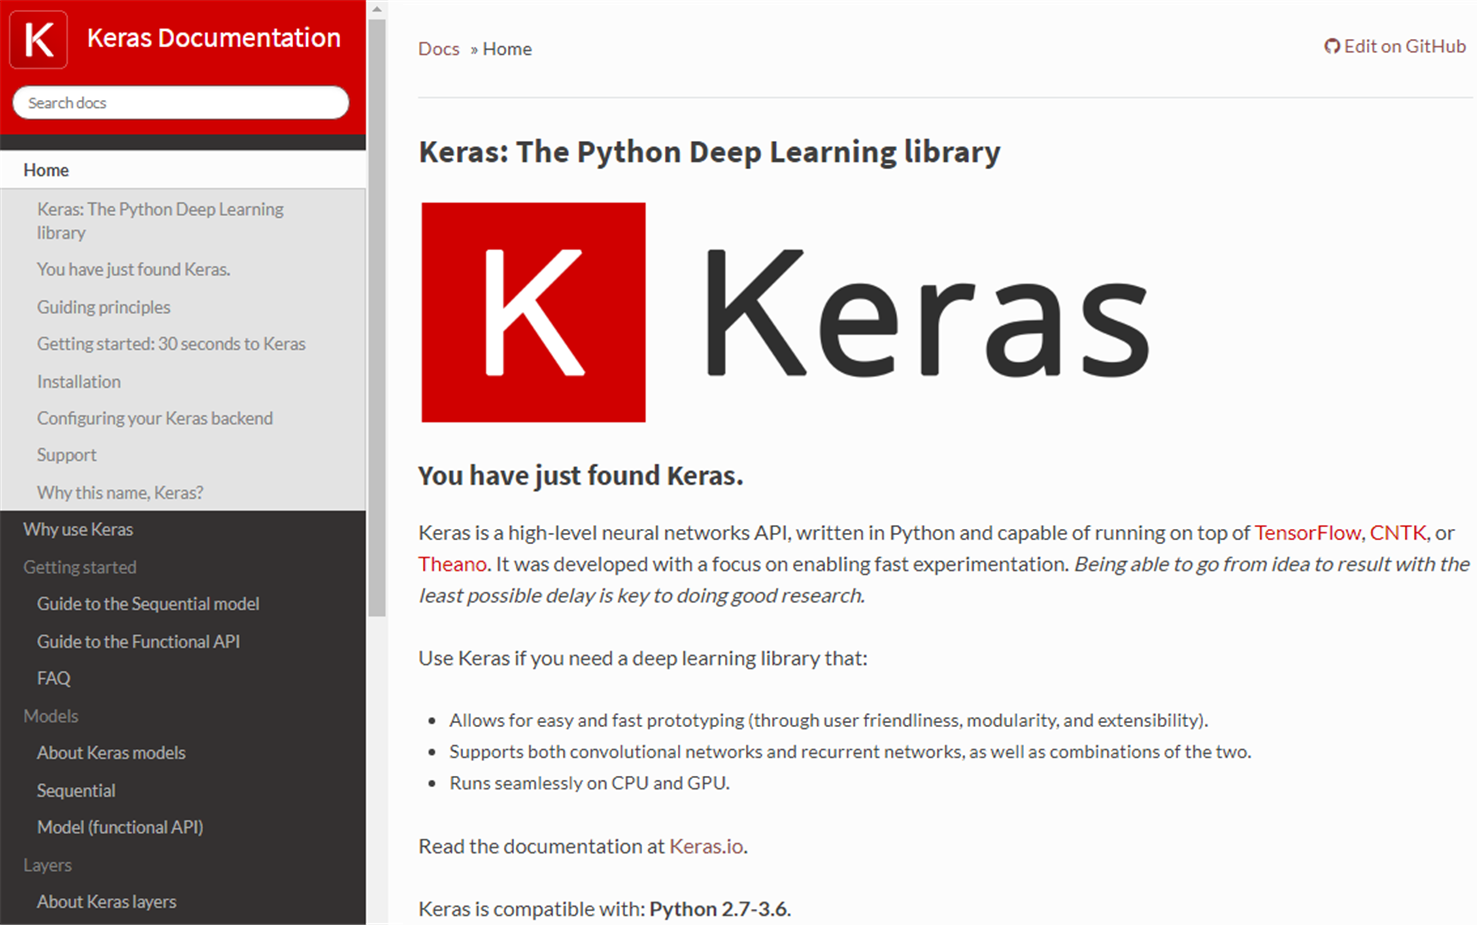
Keras is a Python library that provides a simple and clean way to create a range of deep learning models. Keras code was released under the MIT license. Keras has been structured based on austerity and simplicity, and it provides a programming model without ornaments that maximizes readability. It allows expressing neural networks in a very modular way, considering a model like a sequence or a single graph. This is a good approximation, because the components of a deep learning model are discrete elements that can be arbitrarily combined. The new components are easily aggregated and modifiable within the framework designed for engineers, to quickly test and explore new ideas. Last but not least, using the Python programming language provides constructs that allow clear programming on both a small and large scale. In the following screenshot, we can see the Keras official home page (https://keras.io/):
Ease of use is the strongpoint of Keras. During the design phase, the user has been the focus of attention of the developers, producing a product that reduces the user's work via simple and consistent APIs. In this way, the number of actions necessary to solve common use cases is reduced. In addition, the results are returned in a clear manner, making the identification of possible errors very simple.
In Keras, a model is represented by a sequence of autonomous and completely configurable modules that can be connected with the lowest possible number of restrictions. Everything in Keras is a module—neural layers, cost functions, optimizers, initialization schemes, activation functions, and regularization schemes. These independent modules can be combined to create new, more complex models.
All modules available in Keras are simple to add, and so are new classes and functions in a programming language. In addition, the modules are already available, and are accompanied by numerous examples that explain their practical use. But Keras is not limited to the availability of the built-in modules. The user will be able to easily create new modules, making Keras an easily extensible environment.
The keras library bases its technology on the levels that are used to manage input and output. An application in Keras can be implemented through the following four simple steps:
- Prepare input and output data.
- Create the first level to manage the input data.
- Set up intermediate levels to perform the analysis.
- Create the output level to manage the targets.
Keras works as a specific high-level API for neural networks. It can act as a user interface and can extend the functionality of other deep learning framework backends on which it runs. Thanks to this feature, Keras has become a wrapper for migration between frameworks. Not only can algorithms and models of neural networks for deep learning be exchanged, but also networks and preliminary weights.
Wrapper libraries consist of a thin layer of code that translates a library's existing interface into a compatible interface.
On the other hand, since Keras is autonomous, it can be used without having to interact with the backend framework on which it is running. Keras has its own chart data structures for defining computational charts; it is not based on the data structures of the underlying backend framework. This way, you will not have to learn how to program the backend framework.
Keras is easy to learn and use. Using Keras is like working with Lego blocks, you just have to put in sequence a series of compatible modules. It was created so that people can quickly perform the experimental phase of the model using a highly modular and extensible framework. Keras focuses on defining levels for the neural network. You do not have to deal with tensors, but it's easy to write with less code.
Keras backend options
Keras is a model-level library that provides high-level blocks for the development of deep learning models. Keras developers have focused their efforts on creating high-level models by neglecting low-level operations such as tensor products, convolutions, and so on. These operations have been entrusted to specialized and well-optimized tensor manipulation libraries that already exist, thus acting as a backend engine for Keras. Several backend engines can be connected perfectly to Keras. Actually, Keras has three backend implementations available—TensorFlow, Theano, and Microsoft Cognitive Toolkit (CNTK).
TensorFlow
TensorFlow is an open source software library for numerical calculation based on graph modeling (data flow graphs). A graph is defined as an abstract pipeline of mathematical operations operating on tensors, and are also known as multidimensional arrays. Each graph consists of nodes and arcs, wherein the nodes are operations on the data, and the arcs represent the tensors that pass through the various operations.
You can find the updated version of the library and all the documentation supplied at the following link: (http://www.tensorflow.org).
TensorFlow is the most commonly used library in the field of machine learning and neural networks. It has numerous APIs, including the lowest level, that is, TensorFlow Core, allows complete control over programming. These APIs are those typically used in the field of machine learning, since they make it possible to check in detail all the elements of the model being implemented. The highest level APIs are available and built from TensorFlow Core. In some cases, they can make some operations such as repetitive and predefined tasks faster and simpler, but generally preclude the possibility of going into detail, and in the implementation of a neural network it is often necessary to have a more precise control over operations. However, they can still be useful for the development of standard machine learning models.
TensorFlow provides interfaces for different languages, including Python and C or C ++, with full support, and Go or Java in Beta. It also supports parallel computing on GPUs or CPUs, and distributed computation allows execution even on mobile devices.
A TensorFlow program is typically structured in the following two distinct phases:
- Construction: In this phase, the various operations of the graph that will be performed on the input tensors are defined.
- Execution: In this phase, the operations defined in the previous phase are evaluated so as to retrieve the numerical output. The execution of operations is managed through the session object of TensorFlow.
The fundamental unit in TensorFlow is the tensor. A tensor consists of a set of primitive type values modeled as a multidimensional array. In TensorFlow, almost all the functions contained in the API take tensors as inputs and always output tensors. Each tensor contained in the graph has a unique name that can be specified by the user, or otherwise automatically assigned.
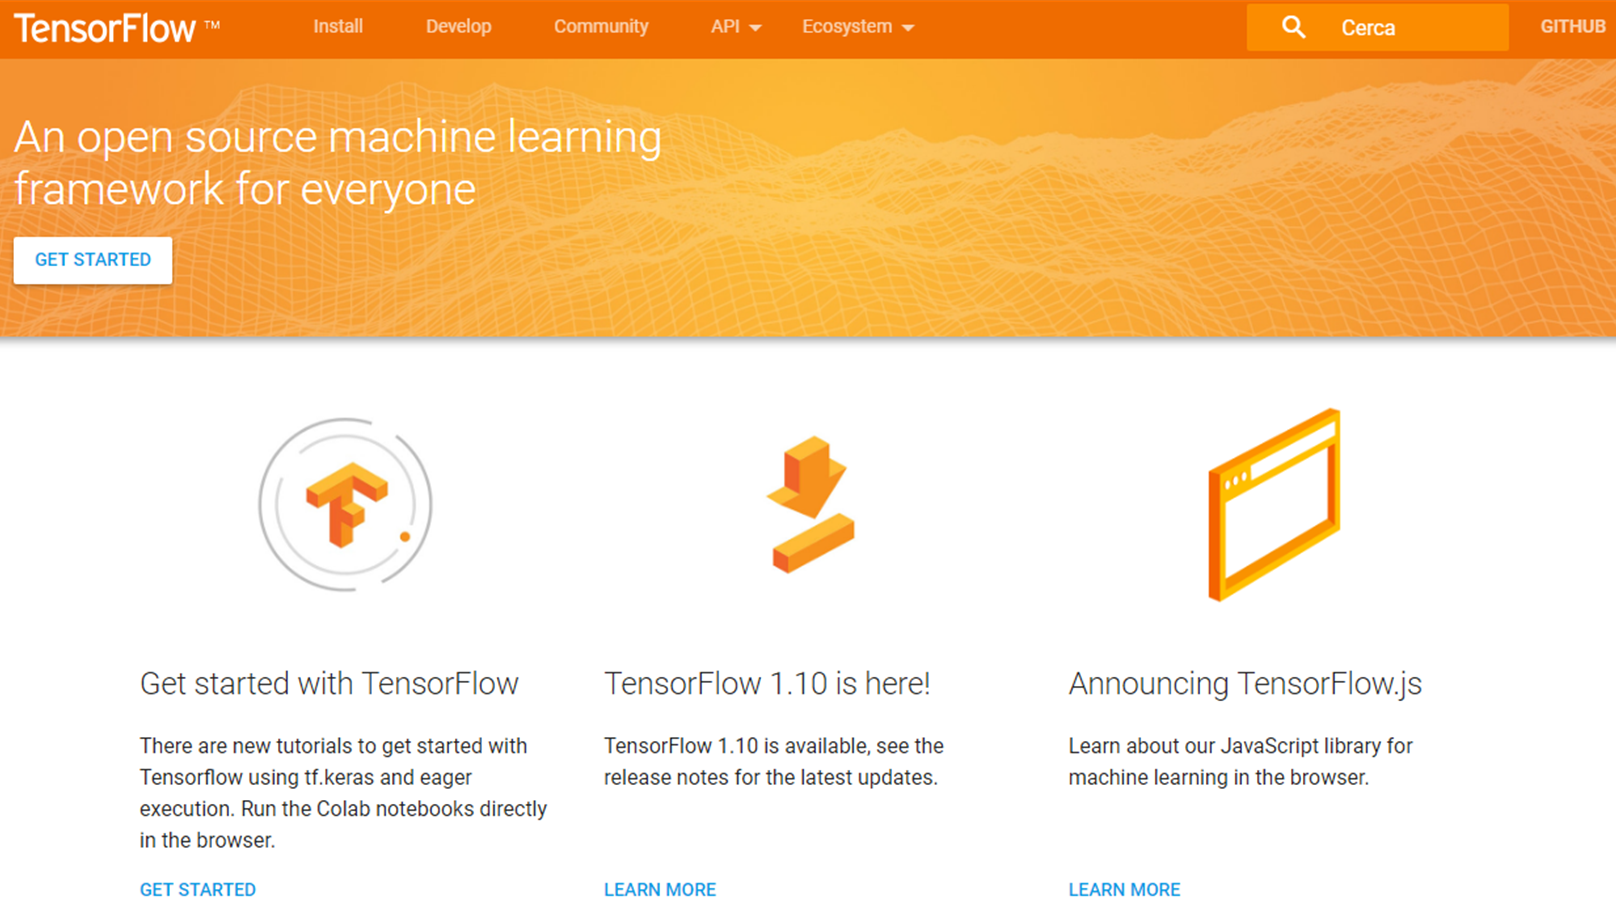
For more information on tensors and any other resources related to TensorFlow, you can refer to the official site of the framework, as shown in the following screenshot:
The default behavior in TensorFlow is to allocate all the components (tensors and operations) in the GPU memory (if it has been installed with computational support on a GPU). However, you can manually specify where to allocate each tensor and operation. It is recommended to minimize switches between the CPU and GPU as these slow down execution.
TensorFlow also allows you to define scopes for variables through which a namespace mechanism is managed; they facilitate the definition of complex models. Scopes are also very important for sharing variables between multiple graphs.
TensorFlow provides the following two options for reading input data:
- Manual: Observations are manually read and organized in batches, and then passed to the model. It is a simple mechanism to use, but it can become very slow because the data must be continually copied from the Python environment to the TensorFlow environment.
- Integrated: All operations to read data and organize them in batches of observations are implemented within the graph. It is a less intuitive mechanism to use, but presents a large increase in performance, since all data always remains in the TensorFlow environment.
All basic operations for neural networks are implemented in TensorFlow as graph nodes. The framework automatically manages everything needed to implement the forward and backward pass, including the automatic calculation of derivatives.
Among the main operations available for the construction of neural networks models, we find the following:
- Convolutions
- Sum of the bias
- Fully connected levels
- Activation functions
- Pooling
- Prediction functions
Finally, there is a suite of tools for graphic display that is fully integrated into TensorFlow called TensorBoard. It allows visualizing the computational graph of the model and many other statistics useful for the analysis of the training process.
Theano
Theano is an open source library of numerical computation for the Python programming language developed by a group of machine learning experts at the University of Montreal. In Theano, calculations are expressed using a syntax that is similar to NumPy's, and is compiled to perform efficiently on both CPU and GPU architectures.
You can find the updated version of the library and all the documentation supplied at the following link: http://deeplearning.net/software/theano.
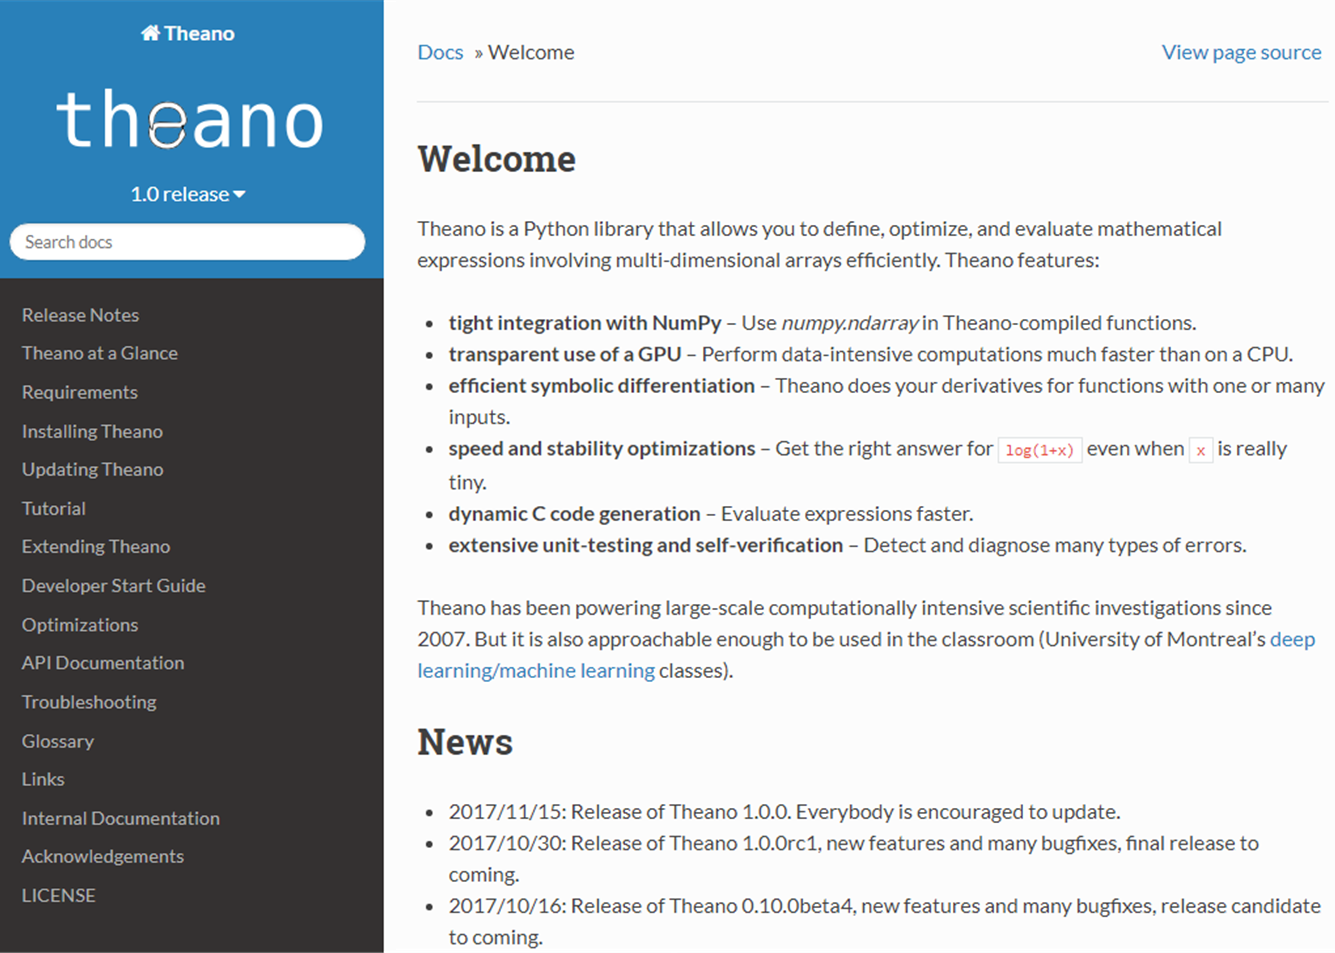
It is named after a Greek mathematician, Theano of Crotone. Theano is a compiler for mathematical expressions written in Python. It allows defining, optimizing, and evaluating mathematical expressions, in particular those with multidimensional arrays. Using Theano, it is possible to achieve comparable speeds with C or C ++ applications for problems with large amounts of data. Theano combines aspects of a computer algebra system with aspects of an optimizing compiler. These characteristics are useful when complex mathematical expressions are evaluated repeatedly, and the evaluation speed is crucial. In the following screenshot, we can see the official home page of Theano:
It combines the convenience of the NumPy syntax with the speed of an optimized machine language. The user composes mathematical expressions in a high-level description that mimics the syntax and semantics of NumPy, even though it is statically typed. These expressions allow Theano to provide symbolic differentiation. Before performing the calculation, Theano optimizes the choice of expressions, translates them into C ++ (or CUDA for GPU), and automatically compiles them into dynamically loaded Python modules. The machine learning algorithms implemented with Theano are particularly fast.
CNTK
The CNTK is an open source toolkit for commercial-grade applications that is distributed in deep learning. CNTK implements neural networks as a series of computational steps via a directed graph. CNTK is a command-line program that can do simple and deep neural network analyses. CNTK was originally developed as an internal Microsoft tool.
You can find the updated version of the library and all the documentation supplied at the following link: https://github.com/Microsoft/CNTK.
Using CNTK, the most common machine learning models are easily achievable and can be combined. CNTK is available as a library in Python, C#, or C++ environments, or it can be used as a standalone machine learning tool through its own model description language. In addition, CNTK model evaluation functionality can be used from Java programs. CNTK supports 64-bit Linux or 64-bit Windows operating systems. To install CNTK, you can either choose precompiled binary packages, or compile the toolkit from the source provided in GitHub. In the following screenshot, we can see the official home page of CNTK:

In the Tutorials section, there is a collection of code samples, recipes, and tutorials on the various ways you can use the toolkit with scenarios for images, text, and speech data.
Installation
Previously, we have already said that Keras is written in Python, so in order for it to work, it is necessary to have a previously installed version of Python (Keras is compatible with Python 2.7-3.6). Platforms that support Python development environments can support Keras as well. Furthermore, before installing Keras, it is necessary to provide for the installation of the backend engine, and some optional dependencies useful for the implementation of machine learning models.
Optional dependencies
Some useful optional dependencies are listed in the following list:
- NumPy: This is an open source library of the Python programming language, which adds support for multidimensional and large vectors, and even matrices with high-level mathematical functions to work with.
- SciPy: This is an open source library of mathematical algorithms and tools. It contains modules for optimization, linear algebra, integration, special functions, fast fourier transform (FFT), signal and image processing, ordinary differential equation (ODT) solvers, and other common tools in science and engineering.
- Scikit-learn: This is an open source machine learning library for the Python programming language. It contains classification, regression, clustering algorithms, support vector machines, logistic regression, bayesian classifier, k-means, and DBSCAN, and is designed to work with the NumPy and SciPy libraries.
- cuDNN: This is a GPU accelerated library of primitives for deep neural networks. cuDNN provides highly tuned implementations for standard routines, such as forward and backward convolution, pooling, normalization, and activation layers.
- HDF5: This is a data model, library, and file format for storing and managing data. It supports an unlimited variety of datatypes, and is designed to be flexible and efficient.
- H5py: This is a Python interface to the HDF5 binary data format.
- Graphviz: This is an open source program used to draw graphs described in the DOT language. It provides libraries for applications using the tools provided. Graphviz is free software licensed under the Common Public License (CPL).
- Pydot: This is a Python interface for Graphviz and the DOT language.
We can now proceed with the installation of every single library or install all the dependencies with a single line of code. Alternatively, you can install the Anaconda Python module, which will automatically install these libraries and a lot of other libraries that are needed for scientific computing.
Installing the backend engine
After installing the dependencies, it is necessary to select the backend engine and proceed with its installation. Keras developers recommend the TensorFlow backend. This is the one set by default.
Links to installation instructions for all the available backends are listed in the following list:
- TensorFlow installation instructions: https://www.tensorflow.org/install/
- Theano installation instructions: http://deeplearning.net/software/theano/install.html#install
- CNTK installation instructions: https://docs.microsoft.com/en-us/cognitive-toolkit/setup-cntk-on-your-machine
In all cases, we can use the pip command to install the correct packages.
Keras installation and configuration
At this point, the environment is ready for Keras installation. If all the dependencies and the backend engine have been correctly installed, we can proceed. Actually, the work that remains to be done is very simple and immediate.
There are two ways to install Keras as follows:
The first step involves the use of the Python Package Index (PyPI).
This is a repository of software for the Python programming language. PyPI helps you find and install software developed and shared by the Python community. This is the recommended option.
After installing the PyPI package, simply type the following command:
$ sudo pip install keras
If you are using a virtualenv, you may want to avoid using sudo:
$ pip install keras
Alternatively, we can install Keras from the GitHub source. To do this, we first need to clone Keras using git:
$ git clone https://github.com/keras-team/keras.git
Then, add cd to the keras folder and run the install command:
cd keras
sudo python setup.py install
We have the Keras environment available to implement our deep learning models. Let us look at some more information about the configuration. As we have already mentioned, Keras uses TensorFlow as the default backend. If we want to use the other two options, Theano and CNTK, we must modify the Keras configuration file. This is a file with the .json extension, and is named keras.json..
The file's position depends on the operating system that is in use in our PC:
$ HOME/.keras/keras.json
We can use the following command for Unix-like OSes:
%USERPROFILE%/.Keras/keras.json
And, for Windows OS, the contents of the configuration file are of the following type:
{
   "image_data_format": "channels_last",
    "epsilon": 1e-07,
    "floatx": "float32",
    "backend": "tensorflow"
}
The parameters have the following meaning:
- image_data_format: String, either channels_last or channels_first. It specifies which data format convention Keras will follow.
- epsilon: Float, a numeric fuzzing constant used to avoid dividing by zero in some operations.
- floatx: String, float16, float32, or float64. Default float precision.
- backend: String, tensorflow, theano, or cntk.
Switching from one backend to another is very fast. Simply change the field backend to theano, tensorflow, or cntk, and Keras will use the new configuration the next time you run any Keras code.
Model fitting in Keras
We have just installed and configured our Keras environment, and we can now focus on the implementation of our model based on deep neural networks. When developing a deep learning application, we follow a general pipeline characterized by the following steps:
- Collecting the data: Everything starts from the data, no doubt about it, but one might wonder where so much data comes from. In practice, it is collected through lengthy procedures that may, for example, derive from measurement campaigns or face-to-face interviews. In all cases, the data is collected in a database so that it can then be analyzed to derive knowledge.
If we do not have specific requirements, to save time and effort we can use publicly available data. In this regard, a large collection of data is available in the UCI Machine Learning Repository at the following link: https://archive.ics.uci.edu/ml/index.php.
- Preparing the data: We have collected the data; now we have to prepare it for the next step. Once we have this data, we must make sure it is in a format usable by the algorithm we want to use. To do this, you may need to do some formatting. Recall that some algorithms need data in an integer format, whereas others require data in the form of strings. Finally, others need to be in a special format. We will get to this later, but the specific formatting is usually simple compared to data collection.
The following diagram shows the deep learning process workflow:
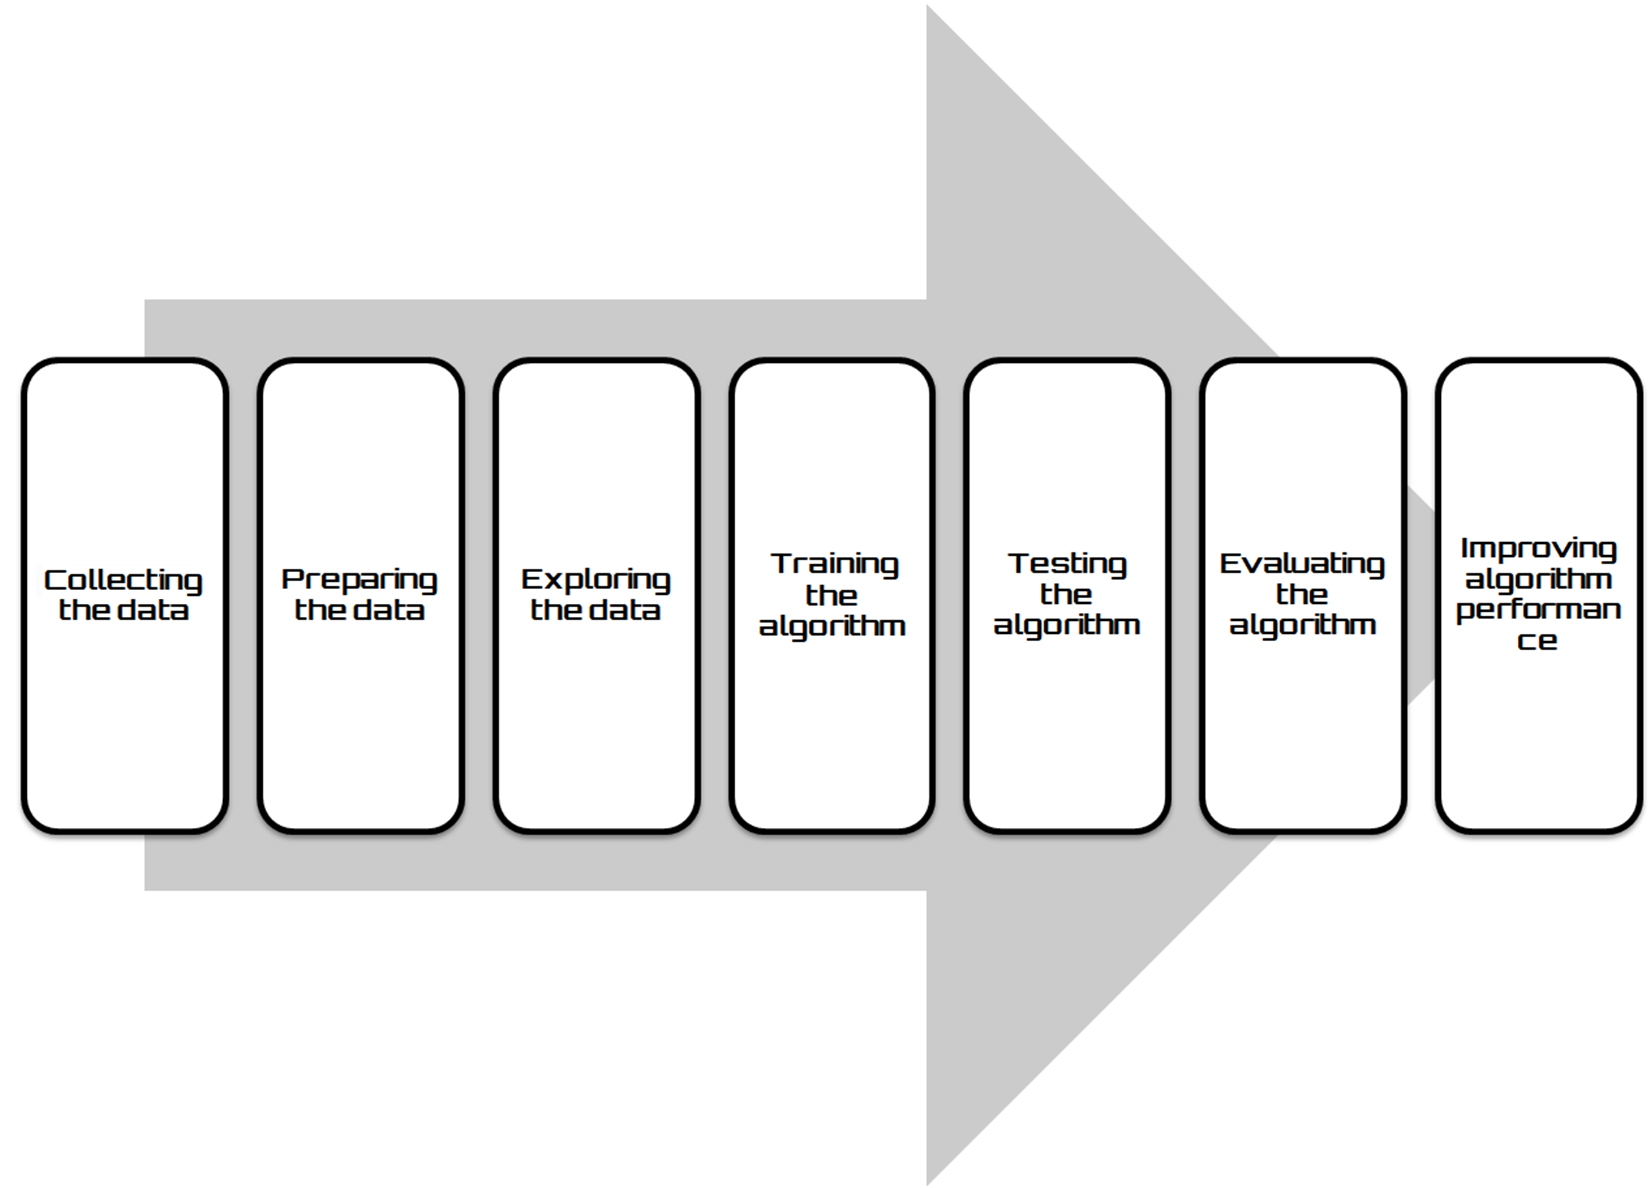
- Exploring the data: At this point, we can look at data to verify that it is actually working and we do not have a bunch of empty values. In this step, through the use of plots, we can recognize patterns or whether there are some data points that are vastly different from the rest of the set. Plotting data in one, two, or three dimensions can also help.
- Training the algorithm: Now, let's get serious. In this step, the deep learning begins to work with the definition of the model and the next training round. The model starts to extract knowledge from large amounts of data that we had available. For unsupervised learning, there's no training step because you don't have a target value.
- Testing the algorithm: In this step, we use the information learned in the previous step to see if the model actually works. The evaluation of an algorithm verifies how well the model approximates the real system. In the case of supervised learning, we have some known values that we can use to evaluate the algorithm. In unsupervised learning, we may need to use some other metrics to evaluate success. In both cases, if we are not satisfied, we can return to the previous steps, change some things, and retry the test.
- Evaluating the algorithm: We have reached the point where we can apply what has been done so far. We can assess the approximation ability of the model by applying it to real data. The model, preventively trained and tested, is then valued in this phase.
- Improving algorithm performance: Finally, we can focus on the finishing steps. We've verified that the model works, we have evaluated the performance, and now we are ready to analyze the whole process to identify any possible room for improvement.
In Keras, there are two ways to define a model—sequential, and functional API. The sequential model lets you create layer-by-layer models for most problems. Limits are dictated by the inability to create models that share levels or that have multiple inputs or outputs. Alternatively, the functional API allows you to create models with greater flexibility. We can easily define models in which the levels are connected in different ways and not just from the previous level to the next. In fact, we can link a layer to any other level, thus creating complex networks.
The Keras sequential model architecture
Keras is structured according to the object-oriented programming methodology. Therefore, the creation of a model is very simple: select the basic architecture and then add the layers necessary to create the desired model. As just mentioned, the sequential model lets you create a layer-by-layer model as a linear stack of layers. However, it is not possible to create models that share levels or that have multiple inputs or outputs.
A sequential model is created by passing a list of layer instances to the constructor. To create a model, we should follow these steps:
1. Import the sequential class from keras.models
2. Stack layers using the .add() method
3. Configure the learning process using the compile() method
4. Import the data
5. Train the model on the train dataset using the .fit() method
The first step is solved by importing the classes that we will use later for the construction of the model. An example of an import is shown in the following command:
from keras.models import Sequential
from keras.layers import Dense, Activation
Three layer classes have been imported: Sequential, Dense, and Activation. Then, we instantiate an object from the Keras.model.Sequential class:
model = Sequential()
All information about your network, such as weights, layers, and operations will be stored in this object.
After instantiating our object, we will move on to adding layers using the add() method:
model.add(Dense(32, activation='relu', input_dim=100))
model.add(Dense(1, activation='sigmoid'))
We have added two Dense layers, which is the basic feedforward fully connected layer.
All operations of a layer can be passed as arguments to the Dense object, as follows:
- Number of hidden units
- Activation function
- Bias
- Weight/bias initialization
- Weight/bias regularization
- Activation regularization
You can create any level in the network using the following command:
model.add (layer_name)
This method will preserve the order of the levels you add. There are lots of layers implemented in Keras. When you add a layer to your model, a gradient operation will be created in the background and it will take care of computing the backward gradient automatically. Before training a model, you need to configure the learning process, which is done via the compile() method; we can see it in the following code block:
model.compile(optimizer='rmsprop',
              loss='binary_crossentropy',
              metrics=['accuracy'])
The three arguments that are passed are as follows:
- An optimizer
- A loss function
- A list of metrics
At this point, we have set the model architecture and before proceeding to the training we have to import the data.
In this case, we generate simple dummy data by performing a random sampling using numpy:
import numpy as np
data = np.random.random((1000, 100))
labels = np.random.randint(2, size=(1000, 1))
To train a model, the fit () method is used, as seen in the following code block:
model.fit(data, labels, epochs=10, batch_size=32)
In this way, we have trained the model, iterating on the data in groups of 32 samples. With these few lines of code, we have already built our first network in Keras. This is a simple example of binary classification that uses a single entry model with two classes.
In Keras, to summarize a model, it is possible to use the summary() function. The summary is returned in text format and includes the following information:
- The layers and their order in the model
- The output shape of each layer
- The number of parameters (weights) in each layer
- The total number of parameters (weights) in the model
To print a summary of the model, we simply type the following command:
model.summary()
In the following screenshot, the results are shown:
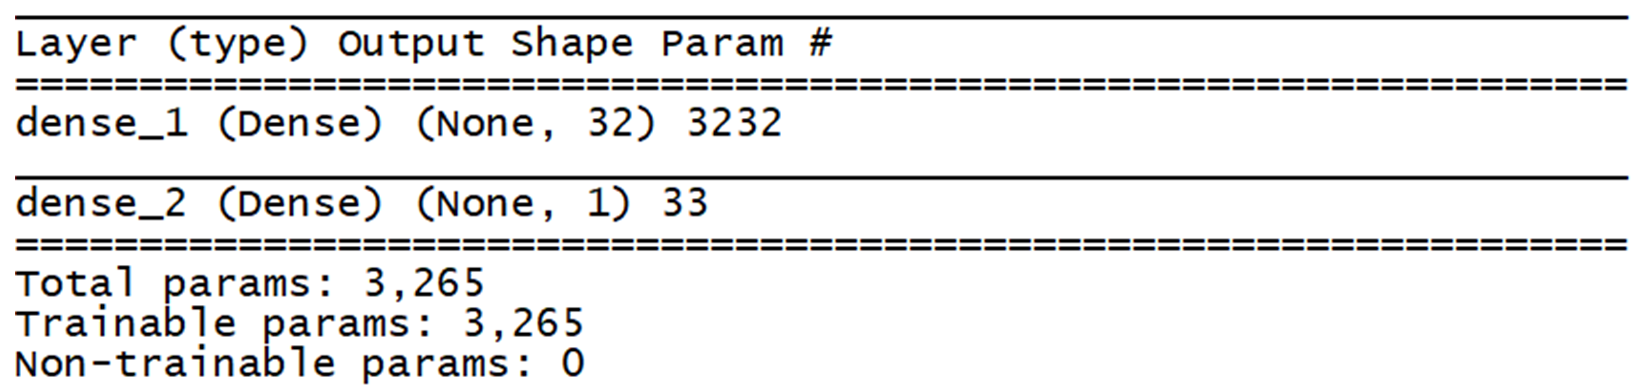
Here, we can clearly see the output shape and number of weights in each layer.
Keras functional API model architecture
The functional API is much better when you want to do something that diverges from the basic idea of having an input, a succession of levels, and an output, for example, models with multiple inputs, multiple outputs, or a more complex internal structure, such as using the output of a given layer as an input to multiple layers or, on the contrary, combining the output of different layers to use them together as an input of another level.
In fact, as already said, the functional API allows you to create models with greater flexibility. We can easily define models in which the levels are connected in different ways and not just from the previous level to the next. In fact, we can link a layer to any other level, thus creating complex networks.
To understand the difference between the two models that Keras offers, we will use a simple example. This is a densely connected network of the type already seen in The Keras sequential model architecture section. In a densely connected network, every input is connected to every output by a weight, which is generally followed by a non-linear activation function. Again, we recommend it for its simplicity. The first step is solved by importing the classes that we will use later for the construction of the model. We will run the example using the following steps:
We will begin by importing the required libraries using the following code block:
from keras.layers import Input, Dense
from keras.models import Model
Three layer classes have been imported: Input, Dense, and Model.
Then, we have to instantiate a Keras Tensor. In fact, in this case we must define an autonomous input level that specifies the shape of the input data (tensor). The input layer accepts a shape argument, which is a tuple indicating the dimensionality of the input data:
InputTensor = Input(shape=(100,))
This returns a tensor.
Now, we can define the layers using the following code block:
H1 = Dense(10, activation='relu')(InputTensor)
The first dense layer is created, which connects the input layer output (InputTensor) as the input to the dense layer, (x). It is this way of connecting layers (layers by layer) that gives the functional API its flexibility. A layer instance is callable on a tensor, and returns a tensor.
Let's move on to the next layer:
H2 = Dense(20, activation='relu')(H1)
So, a second dense layer is created, that connects the Dense layer output, (x), as the input to the other dense layer, (H2).
Let's move on to the final layer creation:
Output = Dense(1, activation='softmax')(H2)
Finally, a third dense layer is created that connects the Dense layer output, (H2), as the input to the other dense layer, (Output).
Now, we can create a model that includes the Input layer and three Dense layers:
model = Model(inputs=InputTensor, outputs= Output)
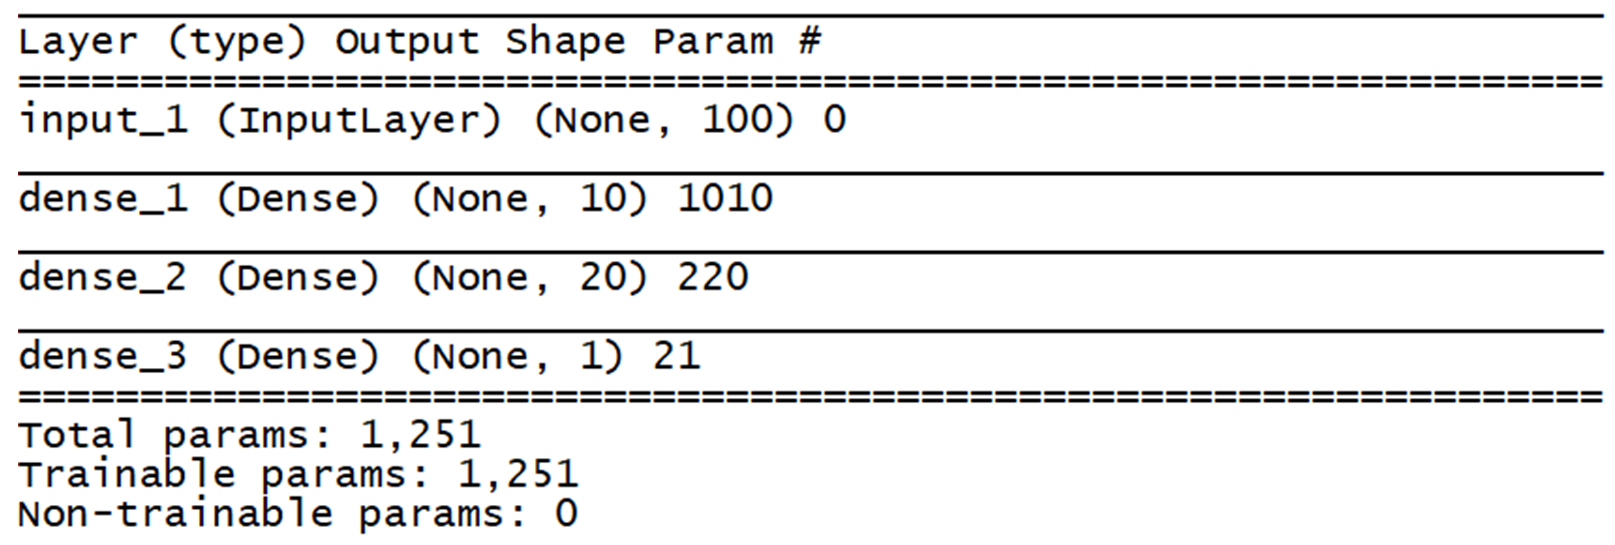
The model created has 100 inputs, two hidden layers with 10 and 20 neurons, and an output layer with one output.
To print a summary of the model, simply type the following command:
model.summary()
In the following screenshot, we can see the results:
All these terms will become clearer in the following chapters.
Summary
In this chapter, an overview of the Keras environment has been explored. We have learned how to install and configure Keras and how to work with the keras library, and have discovered the basic concepts of the Keras architecture. We have also seen how Keras uses TensorFlow as its tensor manipulation library, how we can switch the Keras backend from TensorFlow, which is the default option, to Theano and CNTK, and other available frameworks. Finally, we have understood the different types of Keras model, and we discussed model classes used with sequential layers and those used with functional API layers.
In the next chapter, you will learn the different types of regression techniques and how to apply regression methods to your data, and will understand how the regression algorithm works. We will understand the basic concepts that multiple linear regression methods use to fit equations to data using Keras layers. We will also learn how to evaluate the model's performance, and learn how to tune a model to improve its performance.

