


 Download code from GitHub
In this chapter, we will cover the following recipes:
- Configuring Kali Linux
- Configuring the Xfce environment
- Configuring the Mate environment
- Configuring the LXDE environment
- Configuring the e17 environment
- Configuring the KDE environment
- Prepping up with custom tools
- Pentesting VPN's ike-scan
- Setting up proxychains
- Going on a hunt with Routerhunter
Kali was first introduced in 2012 with a completely new architecture. This Debian-based distro was released with over 300 tools specialized for penetration testing and digital forensics. It is maintained and funded by Offensive Security Ltd with core developers being Mati Aharoni, Devon Kearns, and Raphael Hertzog.
Kali 2.0 came into the picture in 2016 with tons of new updates and new desktop environments such as KDE, Mate, LXDE, e17, and Xfce builds.
While Kali is already pre-equipped with hundreds of amazing tools and utilities to help penetration testers around the globe to perform their job efficiently, in this chapter, we will primarily cover some custom tweaks that can be used to have an even better pentesting experience for the users.
We will use the official Kali Linux ISO provided by Offensive Security to install and configure different desktop environments such as Mate, e17, Xfce, LXDE, and KDE desktops.
To start with this recipe we will use the 64-bit Kali Linux ISO listed on the Offensive Security website:
https://www.kali.org/downloads/
Note
For users looking to configure Kali in a virtual machine such as VMware, VirtualBox, and so on, a pre-built image of the Linux can be downloaded from https://www.offensive-security.com/kali-linux-vmware-virtualbox-image-download/.
We will use the virtual image in this chapter and customize it with some additional tools.
You can configure Kali with the help of the given steps:
- Double-click on the VirtualBox image, it should open with VirtualBox:
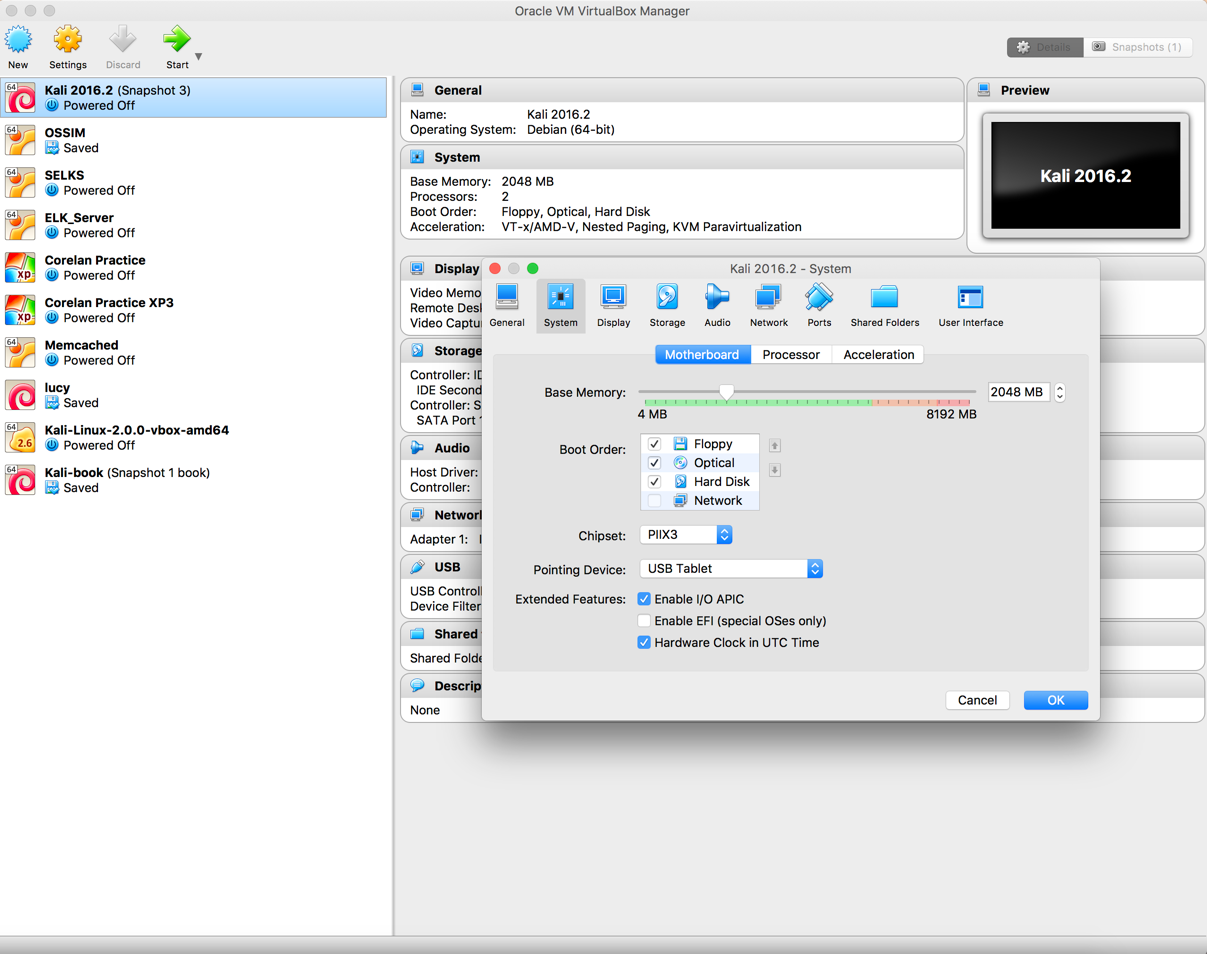
- Click
Import:

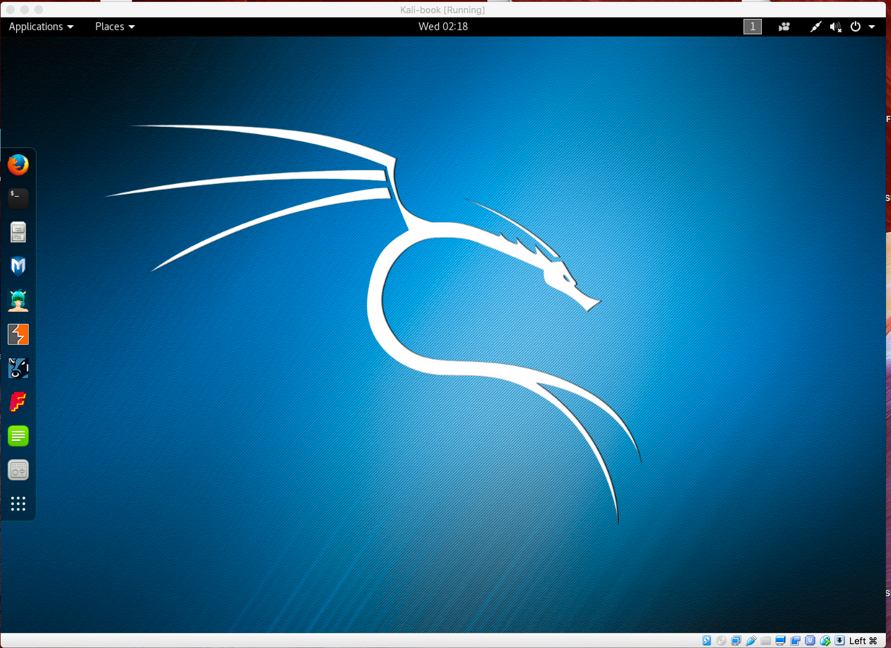
- Start the machine and enter the password as
toor:
- Now, Kali is started and by default is configured with the GNOME desktop environment:
Xfce is a free, fast, and lightweight desktop environment for Unix and Unix-like platforms. It was started by Olivier Fourdan in 1996. The name Xfce originally stood for XForms Common Environment, but since that time Xfce has been rewritten twice and no longer uses the XForms toolkit.
To configure the Xfce environment follow the given steps:
- We start by using the following command to install Xfce along with all plugins and goodies:
        apt-get install kali-defaults kali-root desktop-base xfce4
        xfce4-places-plugin xfce4-goodies
The following screenshot shows the preceding command:

- Type
Ywhen it asks for confirmation on additional space requirements. - Select
Okon the dialogue box that appears.
- We select
lightdmas our default desktop manager and press the Enter key. - When the installation is complete we open a Terminal window and type the following command:
update-alternatives --config x-session-manager
The following screenshot shows the output of the preceding command:
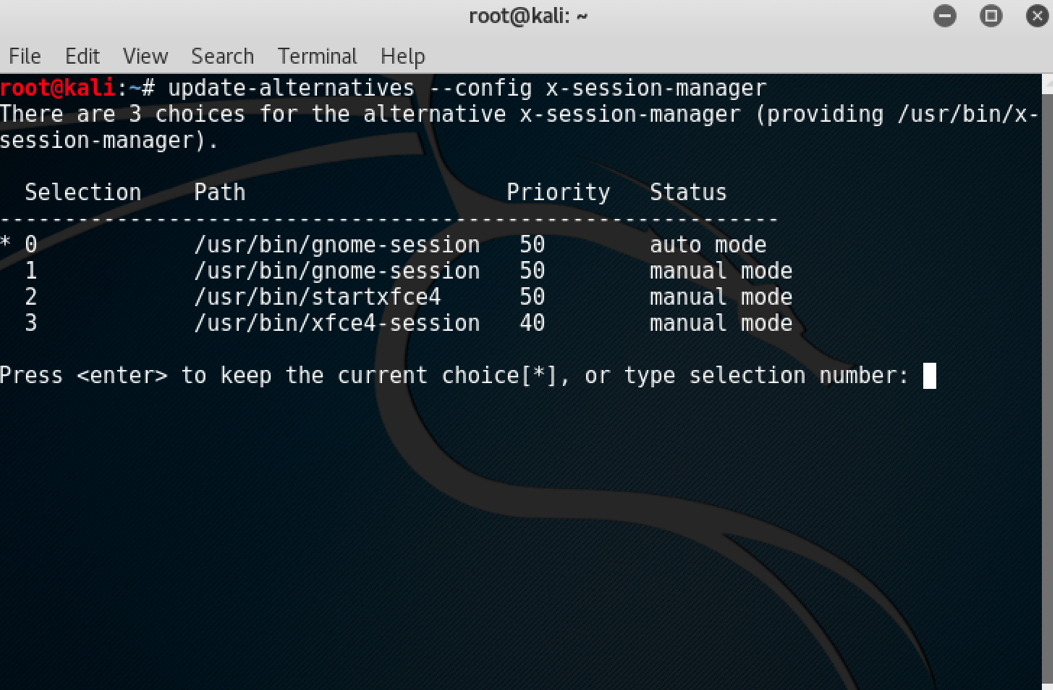
- Choose the option
xfce4-session(in our case3) and press the Enter key.
- Log out and log in again or you can restart the machine and we will see the Xfce environment:
The Mate desktop environment was built in continuation of GNOME 2. It was first released in 2011.
To configure the Mate environment follow the given steps:
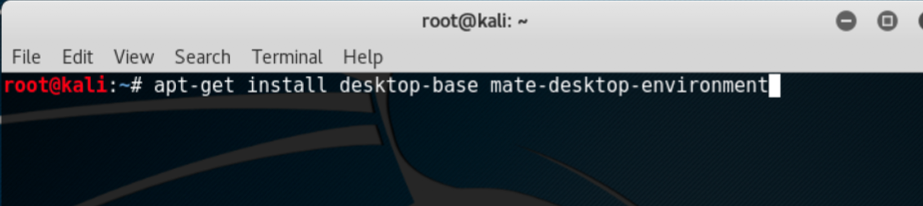
- We start by using the following command to install the Mate environment:
apt-get install desktop-base mate-desktop-environment
The following screenshot shows the preceding command:
- Type
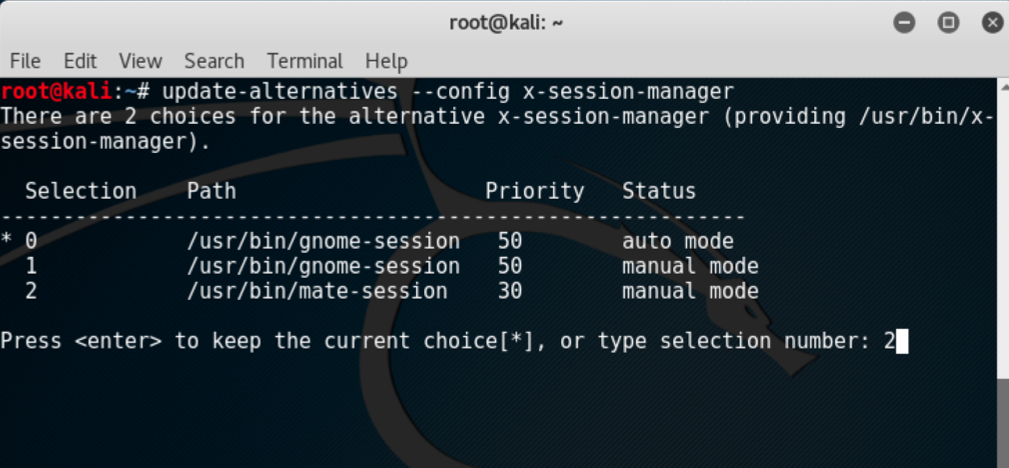
Ywhen it asks for confirmation on additional space requirements. - When installation is complete we will use the following command to set Mate as our default environment:
update-alternatives --config x-session-manager- Choose the option
mate-session(in our case2) and press the Enter key:
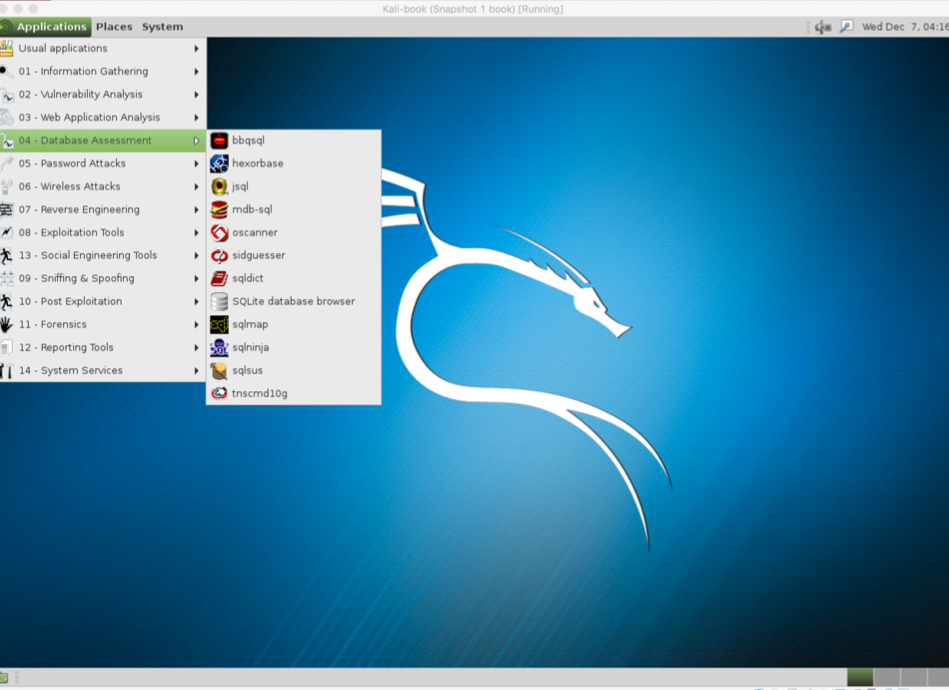
- Log out and log in again or restart and we will see the Mate environment:
LXDE is a free open source environment written in C using GTK+ toolkit for Unix and other POSIX platforms. Lightweight X11 Desktop Environment (LXDE) is the default environment for many operating systems such as Knoppix, Raspbian, Lubuntu, and so on.
To configure the LXDE environment follow the given steps:
- We start by using the following command to install LXDE:
apt-get install lxde-core lxde- Type
Ywhen it asks for confirmation on additional space requirements. - When the installation is complete we open a Terminal window and type the following command:
update-alternatives --config x-session-managerThe following screenshot shows the output for the preceding command:
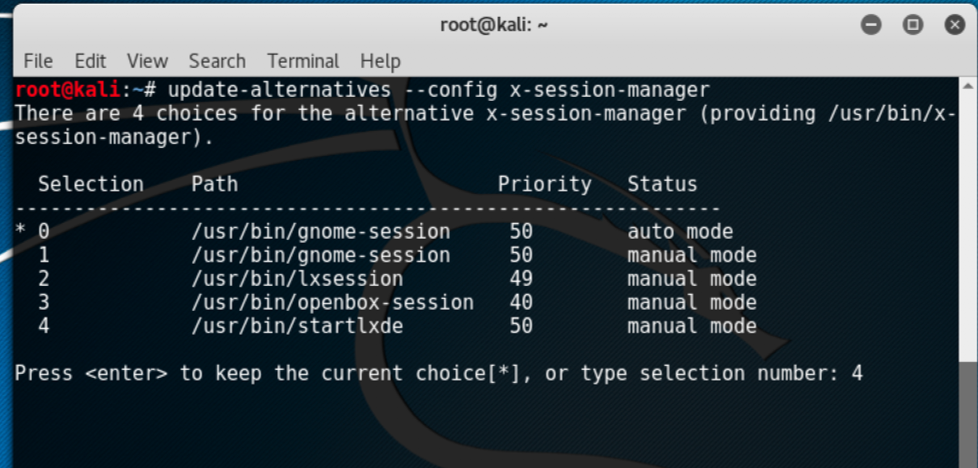
- Choose the option
lxsession(in our case4) and press Enter.
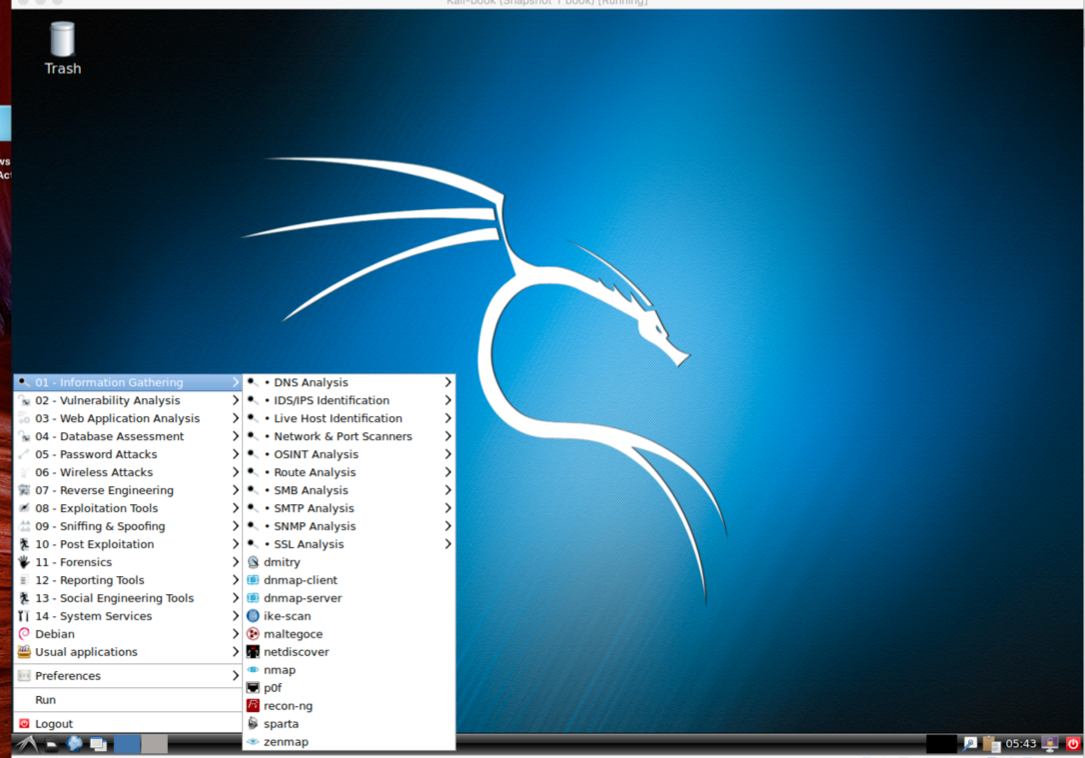
- Log out and log in again and we will see the LXDE environment:
Enlightenment, or otherwise known as E, is a window manager for the X Windows system. It was first released in 1997. It has lots of features such as engage, virtual desktop, tiling, and so on.
Due to compatibility issues and dependencies hassle it is better to set up the Kali environment as a different machine. This ISO image (Kali 64-bit e17) is already available on the official website of Kali Linux and can be downloaded from the following URL:
KDE is an international community for free software. The plasma desktop is one of the most popular projects of KDE; it comes as a default desktop environment for a lot of Linux distributions. It was founded in 1996 by Matthias Ettrich.
To configure the KDE environment follow the given steps:
- We use the following command to install KDE:
        apt-get install kali-defaults kali-root-login desktop-base
        kde-plasma-desktop
The following screenshot shows the output for the preceding command:

- Type
Ywhen it asks for confirmation on additional space requirements. - Click
OKon both the windows that pop up. - When the installation is complete we open a Terminal window and type the following command:
update-alternatives --config x-session-manager
The following screenshot shows the output for the preceding command:
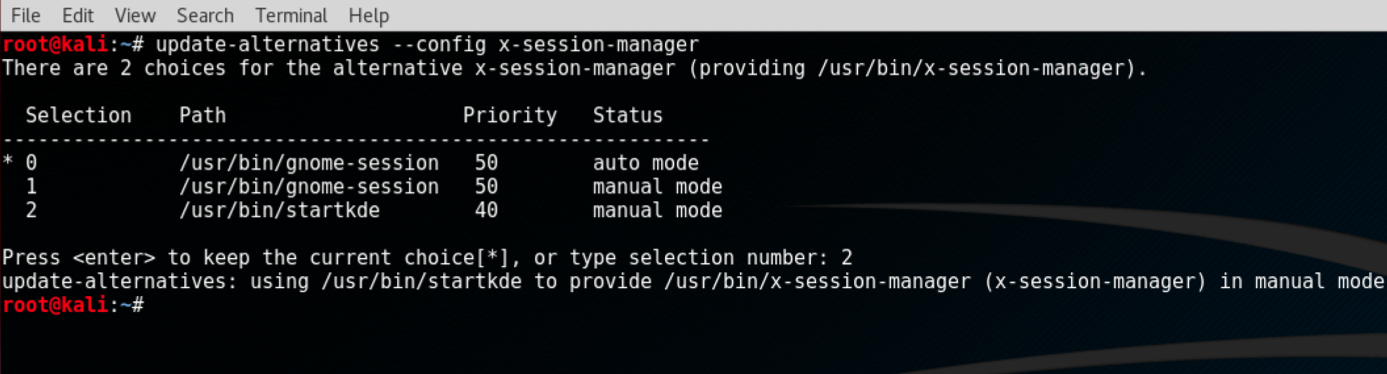
- Choose the option KDE session (in our case
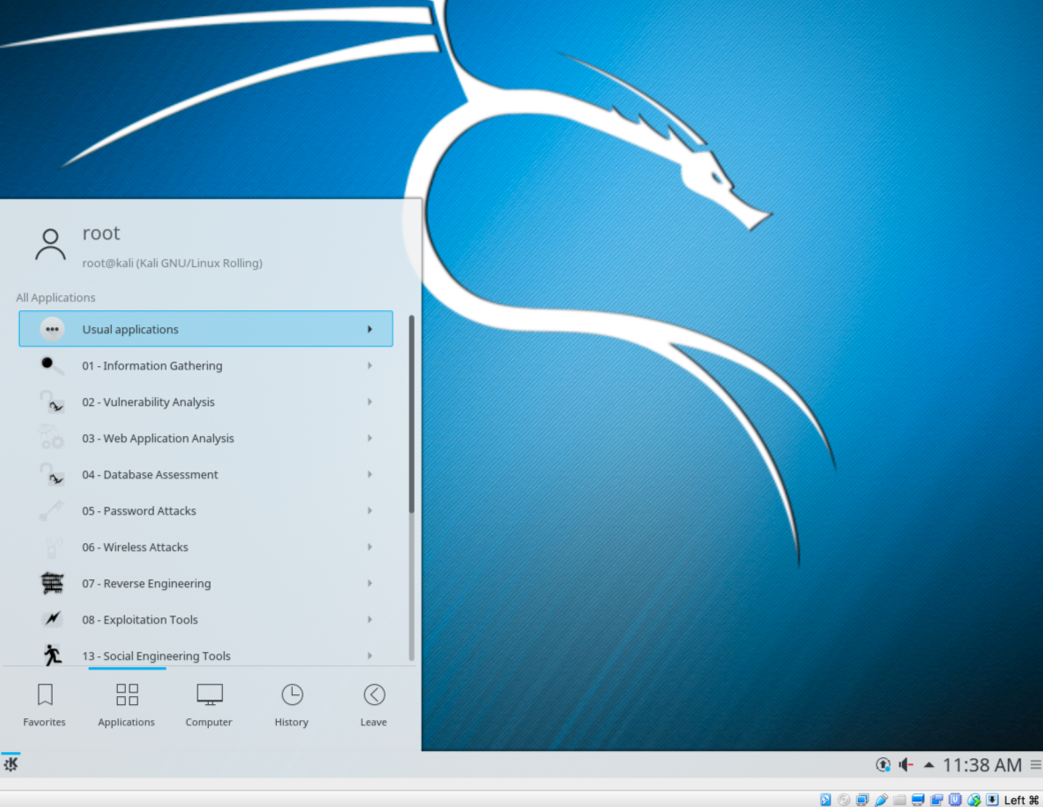
2) and press Enter. - Log out and log in again and we will see the KDE environment:
Note
Kali already has provided prebuilt images of different desktop environments. These can be downloaded from here: https://www.kali.org/downloads/.
These tools you will install are open source available on GitHub. They are much faster and contain collections of different tweaks that people have included over a period of time during their own pentesting experience.
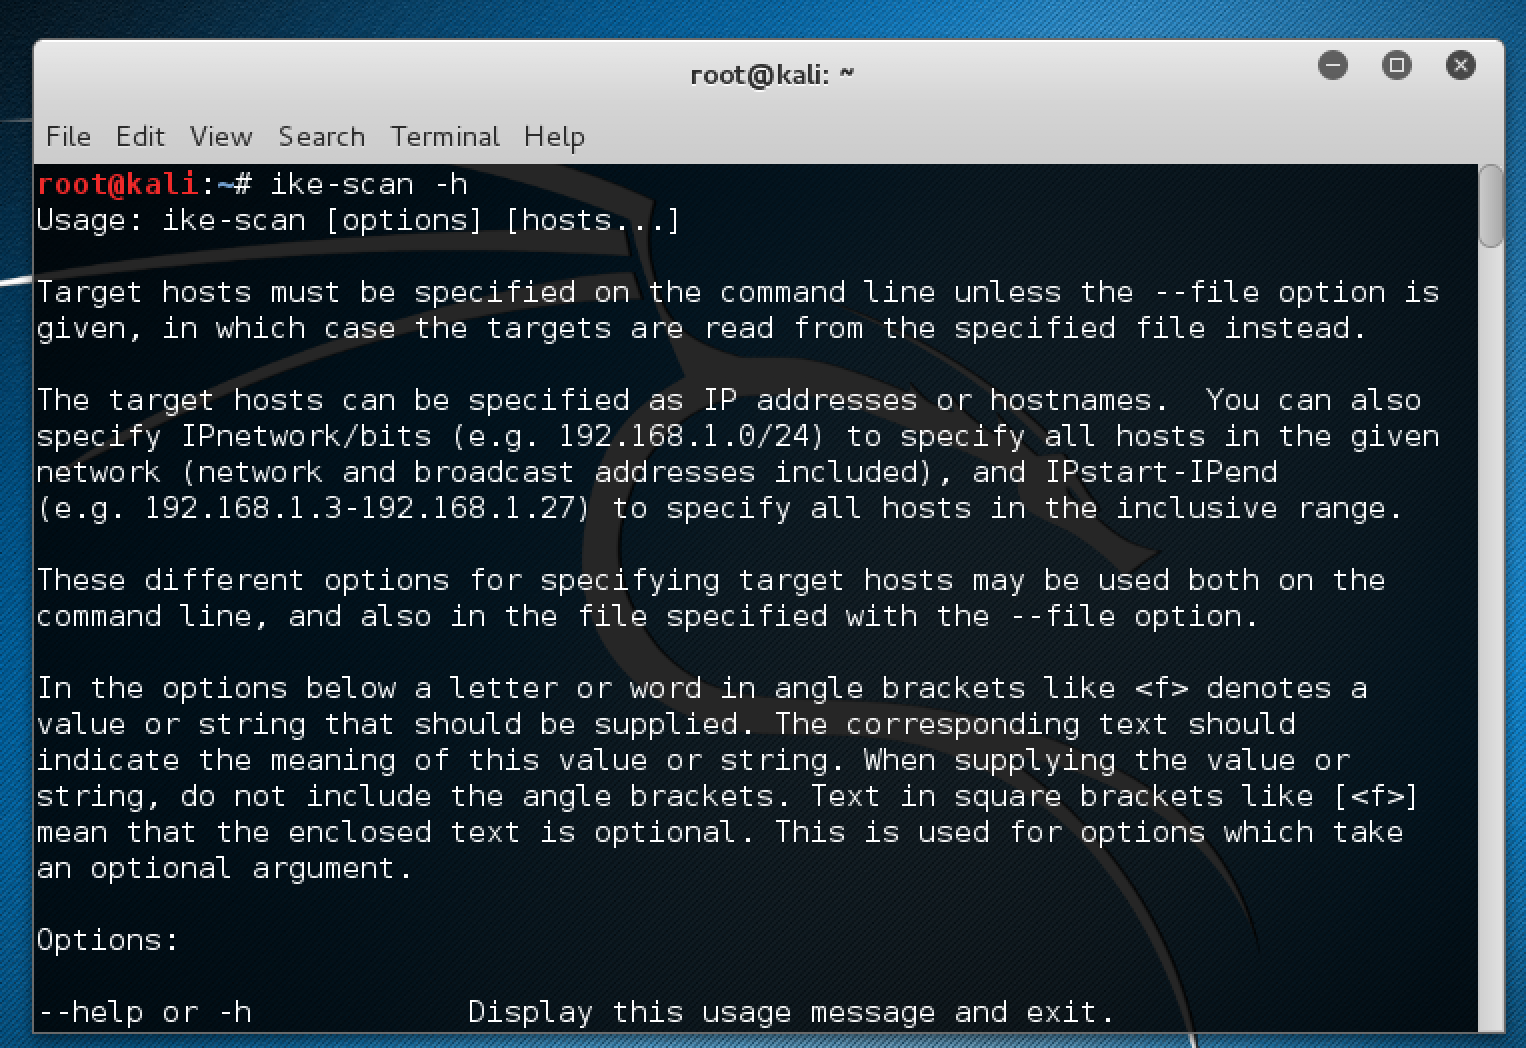
Here is a list of some tools that you will need before we dive deeper into penetration testing. Not to worry, you will be learning their usage with some real-life examples in the next few chapters. However, if you still wish to learn basics in an early stage it can simply be done with simple commands:
toolname -helptoolname -h
Some of the tools are listed in the following sections.
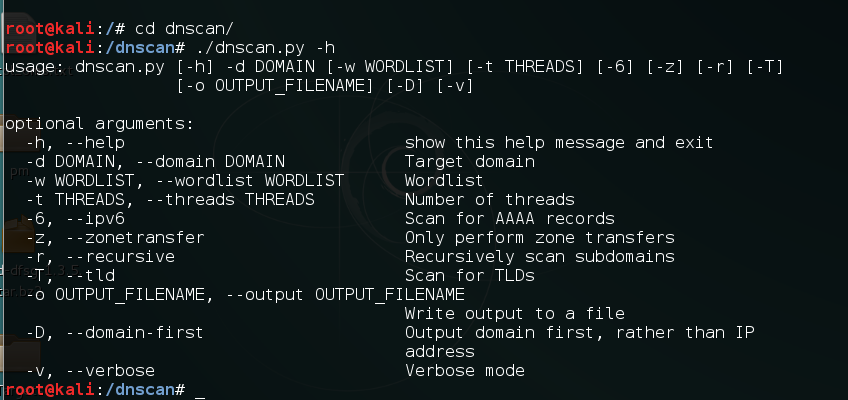
Dnscan is a Python tool that uses a wordlist to resolve valid subdomains. To learn about Dnscan follow the given steps:
- We will use a simple command to clone the git repository:
git clone https://github.com/rbsec/dnscan.gitThe following screenshot shows the preceding command:

- You can also download and save it from https://github.com/rbsec/dnscan.
- Next we browse into the directory where we downloaded Dnscan.
- Run Dnscan by using the following command:
./dnscan.py -hThe following screenshot shows the output for the preceding command:
Next we will install subbrute. It is amazingly fast and provides an extra layer of anonymity as it uses public resolvers to brute force the subdomains:
- The command here is again simple:
git clone https://github.com/TheRook/subbrute.gitThe following screenshot shows the preceding command:
- Or you can download and save it from https://github.com/TheRook/subbrute.
- Once the installation is complete we will need a wordlist for it to run for which we can download dnspop's list. This list can be used in the previous recipe too: https://github.com/bitquark/dnspop/tree/master/results.
- Once both are set up we browse into the subbrute's directory and run it using the following command:
./subbrute.py- To run it against a domain with our wordlist we use the following command:
./subbrute.py -s /path/to/wordlist hostname.comOur next tool in the line is dirsearch. As the name suggests it is a simple command-line tool that can be used to brute force the directories. It is much faster than the traditional DIRB:
- The command to install is:
git clone https://github.com/maurosoria/dirsearch.git- Or you can download and save it from https://github.com/maurosoria/dirsearch. The following screenshot shows the preceding command:
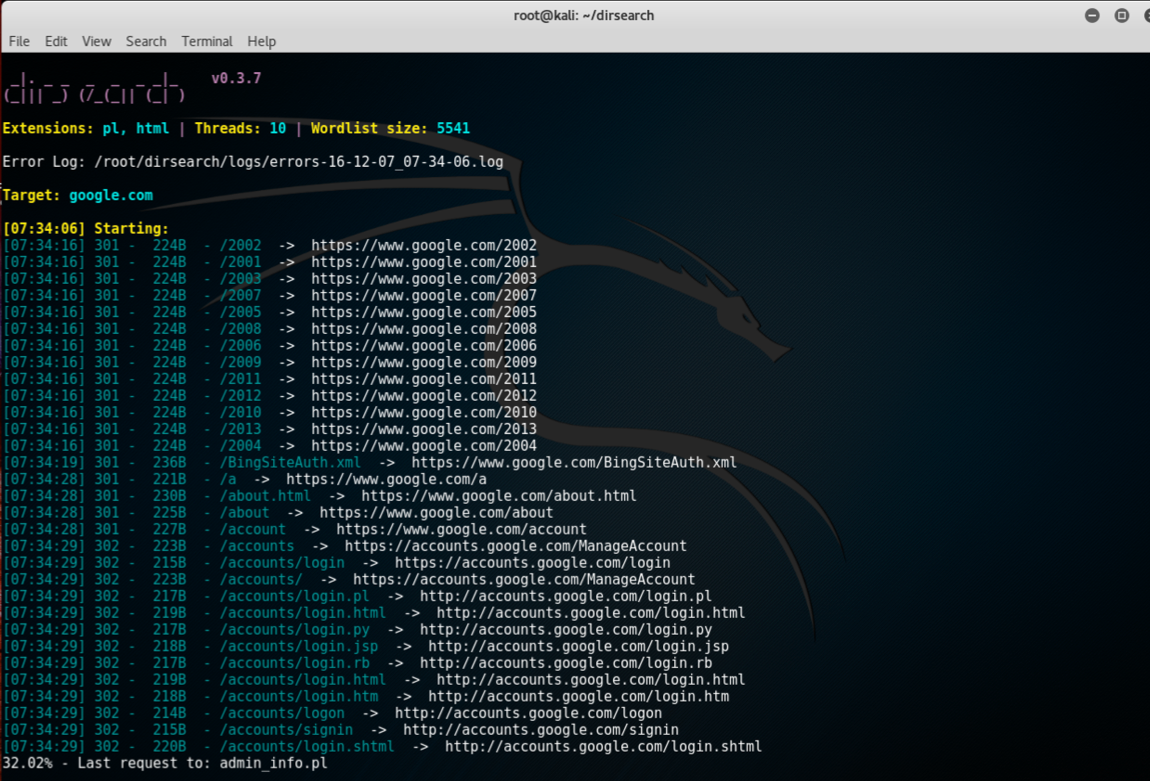
- Once the cloning is complete browse to the directory and run the tool by using the following:
./dirsearch.py -u hostname.com -e aspx,phpThe following screenshot shows the output for the preceding command:
Often during a pentest we may encounter VPN endpoints. However, finding vulnerabilities in those endpoints and exploiting them is not a well known method. VPN endpoints use Internet Key Exchange (IKE) protocol to set up a security association between multiple clients to establish a VPN tunnel.
IKE has two phases, phase 1 is responsible for setting up and establishing secure authenticated communication channel, and phase 2 encrypts and transports data.
Our focus of interest here would be phase 1; it uses two methods of exchanging keys:
- Main mode
- Aggressive mode
We will hunt for aggressive mode enabled VPN endpoints using PSK authentication.
For this recipe we will use the tools ike-scan and ikeprobe. First we install ike-scan by cloning the git repository:
git clone https://github.com/royhills/ike-scan.gitOr you can use the following URL to download it from https://github.com/royhills/ike-scan.
To configure ike-scan follow the given steps:
- Browse to the directory where
ike-scanis installed. - Install
autoconfby running the following command:
apt-get install autoconf- Run
autoreconf --installto generate a.configurefile. - Run
./configure. - Run
maketo build the project. - Run
make checkto verify the building stage. - Run
make installto installike-scan. - To scan a host for an aggressive mode handshake, use the following commands:
ike-scan x.x.x.x -M -AThe following screenshot shows the output for the preceding command:
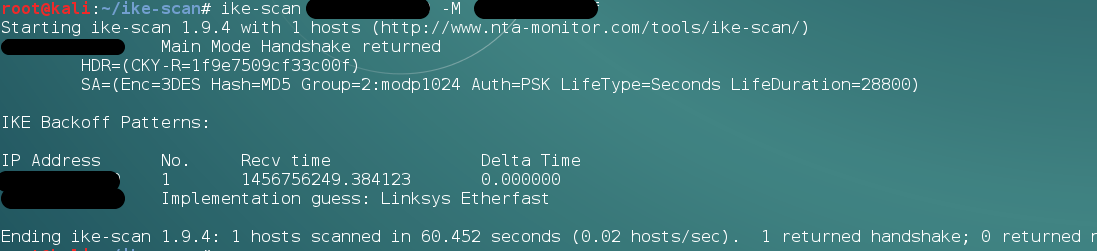
- Sometimes we will see the response after providing a valid group name like (vpn):
ike-scan x.x.x.x -M -A id=vpnThe following screenshot shows the example of the preceding command:
Note
We can even brute force the groupnames using the following script:https://github.com/SpiderLabs/groupenum.https://github.com/SpiderLabs/groupenum
The command:./dt_group_enum.sh x.x.x.x groupnames.dic
To learn how to crack the PSK follow the given steps:
- Adding a
-Pflag in theike-scancommand it will show a response with the captured hash. - To save the hash we provide a filename along with the
-Pflag. - Next we can use the
psk-crackwith the following command:
psk-crack -b 5 /path/to/pskkey- Where
-bis brute force mode and length is5. - To use a dictionary based attack we use the following command:
psk-crack -d /path/to/dictionary /path/to/pskkey
The following screenshot shows the output for the preceding command:

In aggressive mode the authentication hash is transmitted as a response to the packet of the VPN client that tries to establish a connection Tunnel (IPSEC). This hash is not encrypted and hence it allows us to capture the hash and perform a brute force attack against it to recover our PSK.
This is not possible in main mode as it uses an encrypted hash along with a six way handshake, whereas aggressive mode uses only three way.
Sometimes we need to remain untraceable while performing a pentest activity. Proxychains helps us by allowing us to use an intermediary system whose IP can be left in the logs of the system without the worry of it tracing back to us.
Proxychains is a tool that allows any application to follow connection via proxy such as SOCKS5, Tor, and so on.
Proxychains is already installed in Kali. However, we need a list of proxies into its configuration file that we want to use:
- To do that we open the config file of proxychains in a text editor with this command:
leafpad /etc/proxychains.confThe following screenshot shows the output for the preceding command:
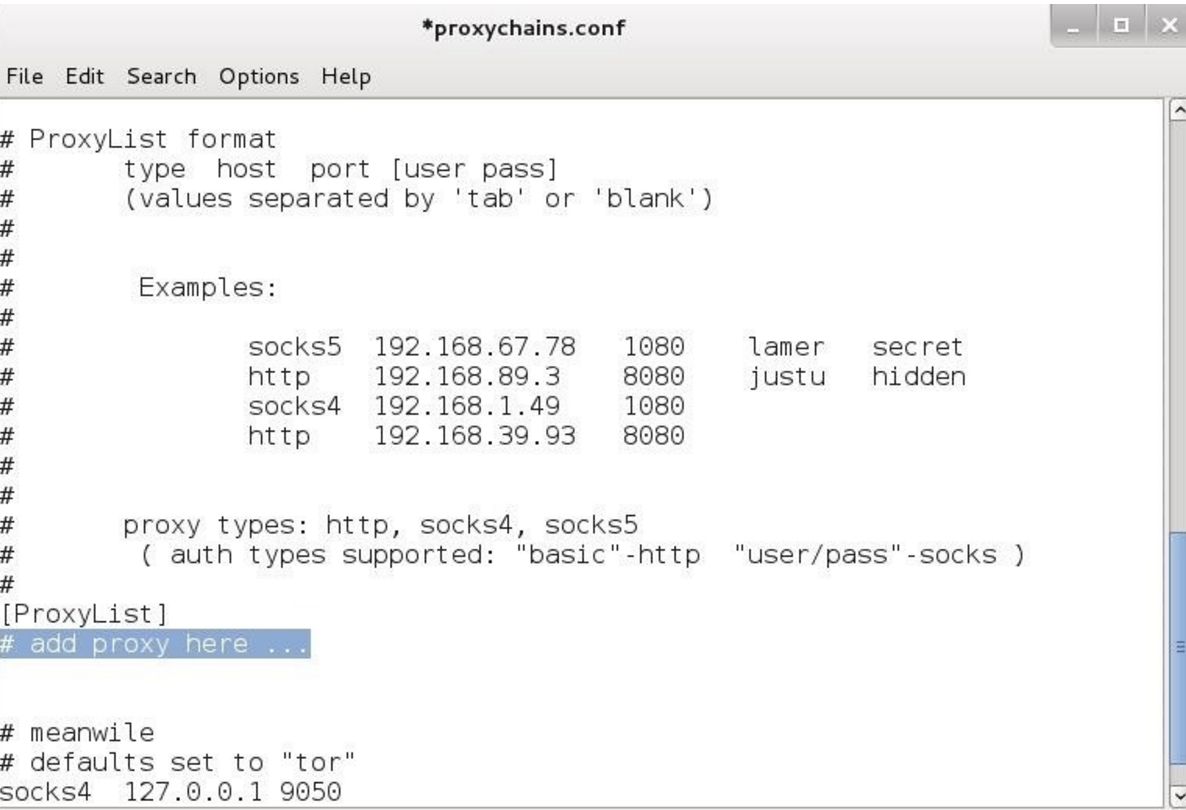
We can add all the proxies we want in the preceding highlighted area and then save.
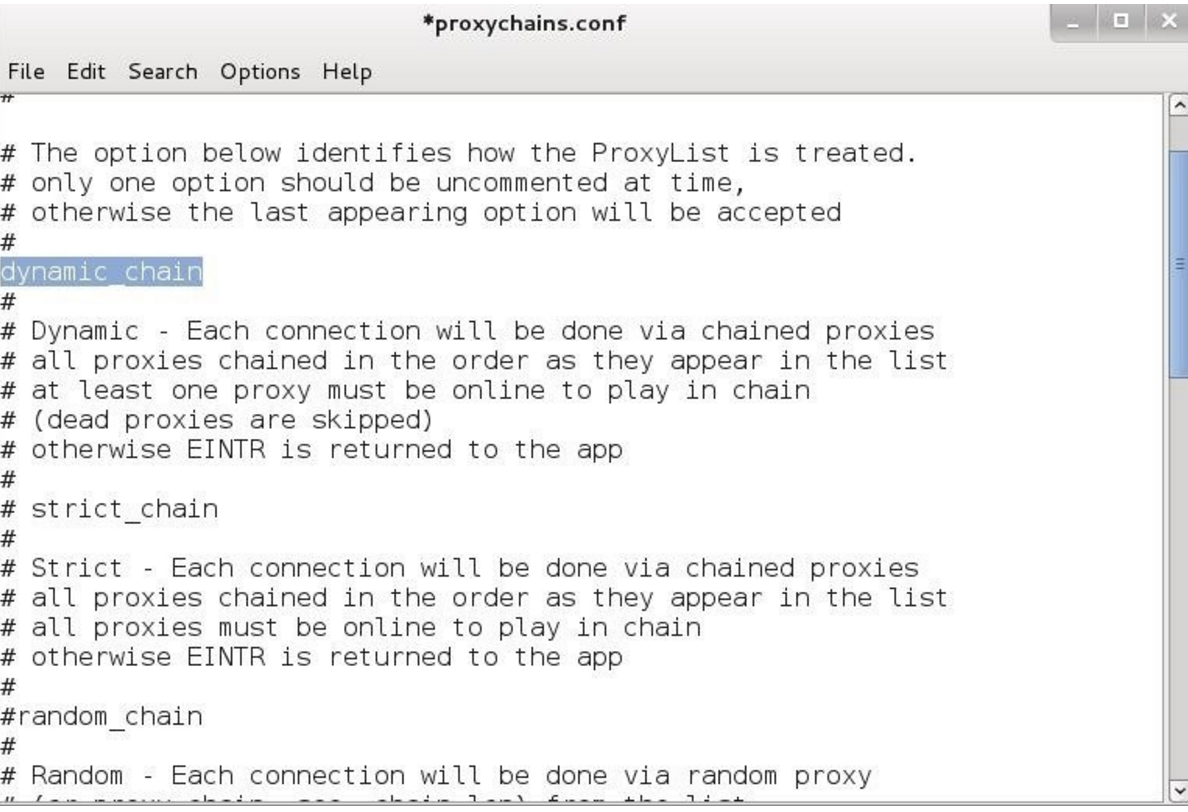
Proxychains also allows us to use dynamic chain or random chain while connecting to proxy servers.
- In the config file uncomment the dynamic_chain or random_chain:
To learn about tor follow the given steps:
- To use proxychains with tor we first need to install tor using the following command:
apt-get install tor- Once it is installed we run tor by typing
torin the Terminal. - We then open another Terminal and type the following command to use an application via proxychains:
proxychains toolname -argumentsThe following screenshot shows the example of the preceding commands:

Routerhunter is a tool used to find vulnerable routers on a network and perform various attacks on it to exploit the DNSChanger vulnerability. This vulnerability allows an attacker to change the DNS server of the router hence directing all the traffic to desired websites.
For this recipe, you will again need to clone a git repository.
We will use the following command:
git clone https://github.com/jh00nbr/RouterHunterBR.gitTo execute RouterHunterBR.php follow the given steps:
- Once the file is cloned, enter the directory.
- Run the following command:
php RouterHunterBR.php -hThe following screenshot shows the output of the preceding command:
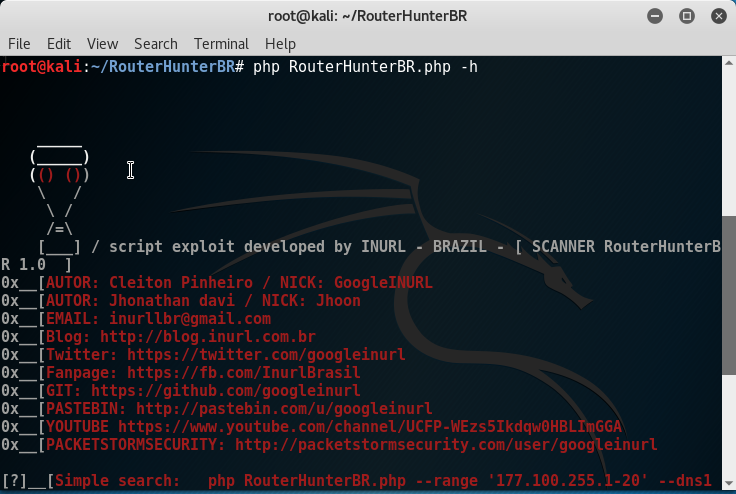
- We can provide Routerhunter an IP range, DNS server IP's, and so on.


