


 Download code from GitHub
In this chapter, we will start with a high-level view of JIRA, going through each of the components that make up the overall application. We will then examine the various deployment options, system requirements for JIRA 7, and platforms/software that are supported. Finally, we will get our hands dirty by installing our very own JIRA 7 from scratch with the newly improved installation wizard. In the end, we will also cover some post-installation steps, such as setting up SSL to secure our new instance.
By the end of this chapter, you will have learned about the following:
The different product offerings from the new JIRA 7 family
The overall architecture of JIRA
The basic hardware and software requirements to deploy and run JIRA
Platforms and applications supported by JIRA
Installing JIRA and all of the required software
Post-installation configuration options to customize your JIRA
Starting with JIRA 7, JIRA is split into three different products, and the term JIRA now refers to the common platform that all these products are built on. The three products that make up the new JIRA family are the following:
JIRA Core: This is similar to the classic JIRA, with all the field customizations and workflow capabilities. This is perfect for general-purpose task management.
JIRA Software: This is JIRA Core with agile capabilities (previously known as JIRA Agile). This is well suited for software development teams that want to use agile methodologies, such as Scrum and Kanban.
JIRA Service Desk: This is JIRA Core with service desk capabilities. This is designed for running JIRA as a support ticketing system, with a simplified user interface for the end users, and a focus on customer satisfaction with SLA goals.
As you can see, JIRA Core is at the center, providing all the base functionalities such as user interface customization, workflows, and e-mail notifications, while JIRA Software and JIRA Service Desk add specialized features on top of it.
In this book, we will mostly focus on JIRA Software. However, since JIRA Core provides many of the common features, most of the knowledge is also applicable to JIRA Core, and features that are only available to JIRA Software will be highlighted. For this reason, the term JIRA will be used to cover both JIRA Core and JIRA Software, unless a distinction is required. We will also cover JIRA Service Desk in Chapter 11, JIRA Service Desk.
Installing JIRA is simple and straightforward. However, it is important for you to understand the components that make up the overall architecture of JIRA and the installation options available. This will help you make an informed decision and be better prepared for future maintenance and troubleshooting.
Atlassian provides a comprehensive overview of the JIRA architecture at https://developer.atlassian.com/jiradev/jira-platform/jira-architecture/jira-technical-overview. However, for the day-to-day administration and usage of JIRA, we do not need to get into details; the information provided can be overwhelming at first glance. For this reason, we have summarized a high-level overview, which highlights the most important components in the architecture, as shown in the following figure:

JIRA is a web application, so there is no need for users to install anything on their machines. All they need is a web browser that is compatible with JIRA. The following table summarizes the browser requirements for JIRA:
|
Browsers |
Compatibility |
|
Internet Explorer |
10.0, 11.0 |
|
Mozilla Firefox |
Latest stable versions |
|
Safari |
Latest stable versions on Mac OSX |
|
Google Chrome |
Latest stable versions |
|
Mobile |
Mobile Safari Mobile Chrome |
The application services layer contains all the functions and services provided by JIRA. These services include various business functions, such as workflow and notification, which will be discussed in depth in Chapter 6, Workflows and Business Processes and Chapter 7, E-mails and Notifications, respectively. Other services such as REST/Web Service provide integration points to other applications The OSGi service provides the base add-on framework to extend JIRA's functionalities.
The data storage layer stores persistent data in several places within JIRA. Most business data, such as projects and issues, are stored in a relational database. Content such as uploaded attachments and search indexes are stored in the file system in the JIRA_HOME directory, which we will talk about in the next section. The underlying relational database used is transparent to users, and you can migrate from one database to another with ease, as referenced at https://confluence.atlassian.com/display/JIRA/Switching+Databases.
The JIRA installation directory is where you install JIRA. It contains all the executable and configuration files of the application. JIRA neither modifies the contents of the files in this directory during runtime, nor does it store any data files inside the directory. The directory is used primarily for execution. For the remainder of the book, we will refer to this directory as JIRA_INSTALL.
The JIRA home directory contains key data and configuration files specific to each JIRA instance, such as JIRA's database connectivity details. As we will see later in this chapter, setting the path to this directory is part of the installation process.
There is a one-to-one relationship between JIRA and this directory. This means each JIRA instance must (and can) have only one home directory, and each directory can serve only one JIRA instance. In the old days, this directory was sometimes called the data directory. It has now been standardized as the JIRA Home. It is for this reason that, for the rest of the book, we will refer to this directory as JIRA_HOME.
The JIRA_HOME directory can be created anywhere on your system or even on a shared drive. It is recommended to use a fast disk drive with low network latency to get the best performance from JIRA.
This separation of data and application makes tasks such as maintenance and future upgrades an easier process. Within JIRA_HOME, there are several subdirectories that contain vital data, as shown in the following table:
|
Directory |
Description |
|
data |
This directory contains data that is not stored in the database, for example, uploaded attachment files. |
|
export |
This directory contains the automated backup archives created by JIRA. This is different from a manual export executed by a user; manual exports require the user to specify where to store the archive. |
|
import |
This directory contains the backups that can be imported. JIRA will only load backup files from this directory. |
|
log |
This directory contains JIRA log files, useful to track down errors. Some of the key log files include:
|
|
plugins |
This directory is where installed add-ons are stored. In the previous versions of JIRA, add-ons were installed by copying add-on files to this directory manually; however, in JIRA 7, you will no longer need to do this, unless specifically instructed to do so. Add-ons will be discussed further in later chapters. |
|
caches |
This directory contains cache data that JIRA uses to improve its performance at runtime. For example, search indexes are stored in this directory. |
|
tmp |
This directory contains temporary files created at runtime, such as file uploads. |
When JIRA is running, the JIRA_HOME directory is locked. When JIRA shuts down, it is unlocked. This locking mechanism prevents multiple JIRA instances from reading/writing to the same JIRA_HOME directory and causing data corruption.
JIRA locks the JIRA_HOME directory by writing a temporary file called jira-home.lock into the root of the directory. During the shutdown, this file will be removed. However, sometimes JIRA may fail to remove this file, such as during an ungraceful shutdown. In this case, you can manually remove this locked file to unlock the directory so that you can start up JIRA again.
Just like any other software application, a set of base requirements needs to be met before you can install and run JIRA. Therefore, it is important for you to be familiar with these requirements so that you can plan out your deployment successfully. Note that these requirements are for a behind-the-firewall deployment, also known as the JIRA Server. Atlassian also offers a Cloud-based alternative called JIRA Cloud, available at https://www.atlassian.com/software#cloud-products.
The cloud version of JIRA is similar to the behind-the-firewall JIRA deployment in most areas, and it is perfect for organizations that do not want to have the overhead of the initial setup and just want to get up-and-running quickly. One major limitation of JIRA Cloud is that you cannot use many of the third-party add-ons available. If you want to have all the power and flexibility of the JIRA Server and worry-free server management, you may consider managed hosting for JIRA offered by third-party vendors.
For evaluation purposes, where there will only be a small number of users, JIRA will run happily on any server that has a 1.5 GHz processor and 1 GB to 2 GB of RAM. As your JIRA usage grows, a typical server will have a quad core 2 GHz CPU and 4 GB of RAM dedicated to the JIRA application.
For production deployment, as in most applications, it is recommended that you run JIRA on its own dedicated server. There are many factors that you should consider when deciding the extent of the resources to allocate to JIRA; keep in mind how JIRA will scale and grow. When deciding on your hardware needs, you should consider the following:
The number of active users in the system
The number of issues and projects in the system
The number of configuration items such as custom fields and workflows
The number of concurrent users, especially during peak hours
It can be difficult at times to estimate these figures. As a reference, a server running with over 2.0 GHz of dual/quad CPU and 2 GB of RAM will be sufficient for most instances with around 200 active users. If you start to get into thousands of active users, you will need to have at least 8 GB of RAM allocated to JIRA (JVM).
Officially, JIRA only supports x86 hardware and 64-bit derivatives of it. When running JIRA on a 64-bit system, you will be able to allocate more than 4 GB of memory to JIRA, the limit if you are using a 32-bit system. If you are planning to deploy a large instance, it is recommended that you use a 64-bit system.
JIRA has four requirements when it comes to software. It needs a supported operating system and a Java environment. It also needs an application server to host and serve its contents and a database to store all of its data. In the following sections, we will discuss each of these requirements and the options that you have to install and run JIRA. You can find the latest information online at https://confluence.atlassian.com/adminjiraserver071/supported-platforms-802592168.html.
JIRA supports most of the major operating systems, so the choice of which operating system to run JIRA on becomes a matter of expertise, comfort, and in most cases the existing organization's IT infrastructure and requirements.
The operating systems supported by Atlassian are Windows and Linux. There is a JIRA distribution for Mac OSX, but it is not officially supported. With both Windows and Linux, Atlassian provides an executable installer wizard package, which bundles all the necessary components to simplify the installation process (only available for standalone distribution).
There are minimal differences when it comes to installing, configuring, and maintaining JIRA on different operating systems. If you do not have any preferences and would like to keep the initial cost down, Linux is a good choice.
JIRA is a Java-based web application, so it needs to have a Java environment installed. This can be a Java Development Kit (JDK) or a Java Runtime Environment (JRE). The executable installer that comes with Windows or Linux contains the necessary files and will install and configure the JRE for you. However, if you want to use archive distributions, you will need to make sure that you have the required Java environment installed and configured.
JIRA 7 requires Java 8. If you run JIRA on an unsupported Java version, including its patch version, you may run into unexpected errors. The following table shows the supported Java versions for JIRA:
|
Java platforms |
Support status |
|
Oracle JDK/JRE |
Java 8 (1.8) |
JIRA stores all its data in a relational database. While you can run JIRA with HyperSQL Database (HSQLDB), the in-memory database that comes bundled with JIRA, it is prone to data corruption. You should only use this to set up a new instance quickly for evaluation purposes, where no important data will be stored. For this reason, it is important that you use a proper database such as MySQL for production systems.
Most relational databases available on the market today are supported by JIRA, and there are no differences when you install and configure JIRA. Just like operating systems, your choice of database will come down to your IT staff's expertise, experience, and established corporate standards. If you run Windows as your operating system, then you might probably want to go with the Microsoft SQL Server. On the other hand, if you run Linux, then you should consider Oracle (if you already have a license), MySQL, or PostgreSQL.
The following table summarizes the databases that are currently supported by JIRA. It is worth mentioning that both MySQL and PostgreSQL are open source products, so they are excellent options if you are looking to minimize your initial investments.
|
Database |
Support status |
|
MySQL |
MySQL 5.1 and newer This requires the latest JDBC driver |
|
PostgreSQL |
PostgreSQL 9.0 and newer This requires the latest PostgreSQL driver |
|
Microsoft SQL Server |
SQL Server 2008 and newer This requires latest JTDS driver |
|
Oracle |
Oracle 12C This requires the latest Oracle driver |
|
HSQLDB |
This is bundled with the standalone distribution, for evaluation only |
Take a special note of the driver requirement on each database, as some drivers that come bundled with the database vendor (for example, the SQL Server) are not supported.
JIRA 7 officially only supports Apache Tomcat as the application server. While it is possible to deploy JIRA into other application servers, you will be doing this at your own risk, and it is not recommended.
The following table shows the versions of Tomcat supported by JIRA 7:
|
Application server |
Support status |
|
Apache Tomcat |
Tomcat 8.0.17 and newer By default, JIRA 7 ships with 8.0.17, so it is recommended that you use that version or newer. |
JIRA comes in two flavors: an executable installer and a ZIP archive. The executable installer provides a wizard-driven interface that will walk you through the entire installation process. It even comes with a Java installer to save you some time. The ZIP archive flavor contains everything except for a Java installer, which means you will have to install Java yourself. You will also need to perform some post-installation steps manually, such as installing JIRA as a service. However, you do get the advantage of learning what really goes on under the hood.
Now that you have a good understanding of the overall architecture of JIRA, the basic system requirements, and the various installation options, we are ready to deploy our own JIRA instances.
In the following exercise, we will be installing and configuring a fresh JIRA instance for a small production team. We will perform our installation on a Windows platform with a MySQL database server. If you are planning to use a different platform or database, refer to the vendor documentation on installing the required software for your platform.
In this exercise, you will do the following:
Install a fresh instance of JIRA Software
Connect JIRA to a MySQL database
We will continue to use this JIRA instance in our subsequent chapters and exercises as we build our help desk implementation.
For our deployment, we will use the following:
JIRA standalone distribution 7.1.8
MySQL 5.7.13
Microsoft Windows 7
Since we will be using the installer package with Java bundled, you can skip this section. However, if you are using the ZIP archive or WAR distribution, you need to make sure that you have Java installed on your system.
JIRA 7 requires JRE version 8 (1.8) or a newer run. You can verify the version of Java you have by running the following command in a Command Prompt:
java -version
The preceding command tells us which version of Java is running on your system, as shown in the following screenshot:
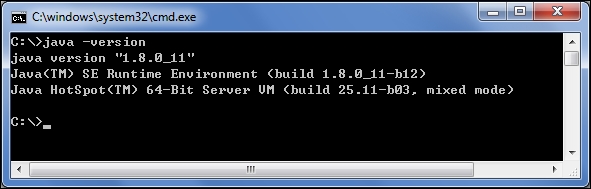
If you do not see a similar output, then chances are you do not have Java installed. You will need to perform the following steps to set up your Java environment. We will start by installing JDK on your system:
Download the latest JDK from http://www.oracle.com/technetwork/java/javase/downloads/index.html.
Double-click on the downloaded installation file to start the installation wizard.
Select where you would like to install Java, or you can simply accept the default values. The location where you install JDK will be referred to as
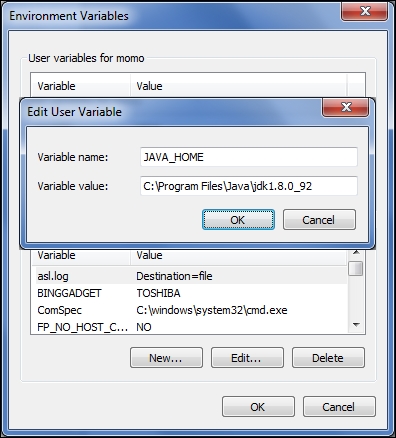
JAVA_HOMEfor the rest of this book.Create a new environment variable named
JAVA_HOMEwith the value set to the full path of the location where you installed Java. You can do this as follows:Open the System Properties window by holding down your Windows key and pressing the Pause key on your keyboard.
Select the Advanced system settings option.
Click on the Environment Variable button from the new popup.
Edit the
PATHenvironment variable and append the following to the end of its current value:;%JAVA_HOME%\bin
Test the installation by typing the following command in a new Command Prompt:
java -version
This will display the version of Java installed, if everything is done correctly. In Windows, you have to start a new Command Prompt after you have added the environment variable to see the change.
The next step is to prepare an enterprise database for your JIRA installation. JIRA requires a fresh database. If, during the installation process, JIRA detects that the target database already contains any data, it will not proceed. If you already have a database system installed, then you may skip this section.
To install MySQL, simply perform the following steps:
Download MySQL from http://dev.mysql.com/downloads, select MySQL Community Server, and then select the MSI installer for Windows.
Double-click on the downloaded installation file to start the installation wizard.
Click on Install MySQL Products on the welcome screen.
Read and accept the license agreement and click on the Next button.
Select the Server only option on the next screen. If you are an experienced database administrator, you can choose to customize your installation. Otherwise, just accept the default values for all subsequent screens.
Configure the MySQL root user password. The username will be
root. Do not lose this password, as we will be using it in the next section.Complete the configuration wizard by accepting the default values.
Now that you have MySQL installed, you need to first create a user for JIRA to connect MySQL with, and then create a fresh database for JIRA to store all its data:
Start the MySQL Command Line Client by navigating to Start | All Programs | MySQL | MySQL Server 5.7 | MySQL 5.7 Command Line Client.
Enter the MySQL root user password you set during installation.
Use the following command to create a database:
create database jiradb character set utf8;Here, we are creating a database called
jiradb. You can name the database anything you like. As you will see later in this chapter, this name will be referenced when you connect JIRA to MySQL. We have also set the database to use UTF-8 character encoding, as this is a requirement for JIRA. Using the following command, you need to ensure that the database uses the InnoDB storage engine to avoid data corruption:grant all on jiradb.* to 'jirauser'@'localhost' identified by 'jirauserpassword';We are doing several things here. First, we create a user called
jirauserand assign the passwordjirauserpasswordto him. You should change the username and password to something else.We have also granted all the privileges to the user for the
jiradbdatabase that we just created so that the user can perform database operations, such as create/drop tables and insert/delete data. If you have named your database something other thanjiradb, then make sure that you change the command so that it uses the name of your database.This allows you to control the fact that only authorized users (specified in the preceding command) are able to access the JIRA database to ensure data security and integrity.
To verify your setup, exit the current interactive session by issuing the following command:
quit;Start a new interactive session with your newly created user:
mysql -u jirauser -pYou will be prompted for a password, which you have set up in the preceding command as
jirauser.Use the following command:
show databases;This will list all the databases that are currently accessible by the logged-in user. You should see
jiradbamong the list of databases.Examine the
jiradbdatabase by issuing the following commands:use jiradb; show tables;
The first command connects you to the
jiradbdatabase, so all of your subsequent commands will be executed against the correct database.The second command lists all the tables that exist in the
jiradbdatabase. Right now, the list should be empty, since no tables have been created for JIRA; but don't worry, as soon as we connect to JIRA, all the tables will automatically be created.
With the Java environment and database prepared, you can now move on to install JIRA. Normally, there are only two steps:
Download and install the JIRA application.
Run through the JIRA setup wizard.
The first step is to download the latest stable release of JIRA. You can download Atlassian JIRA from http://www.atlassian.com/software/jira/download.
The Atlassian website will detect the operating system you are using and automatically suggest an installation package for you to download. If you intend to install JIRA on a different operating system from the one you are currently on, make sure that you select the correct operating system package.
As mentioned earlier, with Windows there is a Windows installer package and a self-extracting ZIP package. For the purpose of this exercise, we will use the installer package (Windows 64-bit Installer):
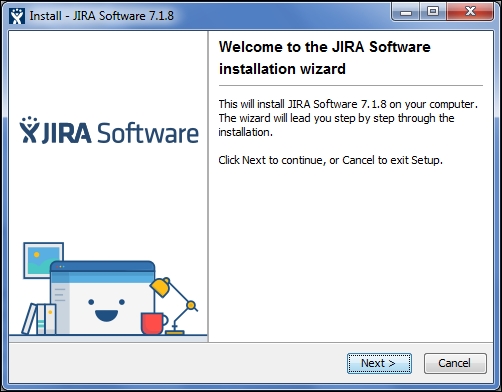
Double-click on the downloaded installation file to start the installation wizard and click on the Next button to continue.
Select the Custom Install option and click on the Next button to continue. Using the custom installation will let us decide where to install JIRA and will also provide many configuration options.

Select the directory where JIRA will be installed. This will become the
JIRA_INSTALLdirectory. Click on the Next button to continue.
Select where JIRA will store its data files, such as attachments and log files. This will become the
JIRA_HOMEdirectory. Click on the Next button to continue.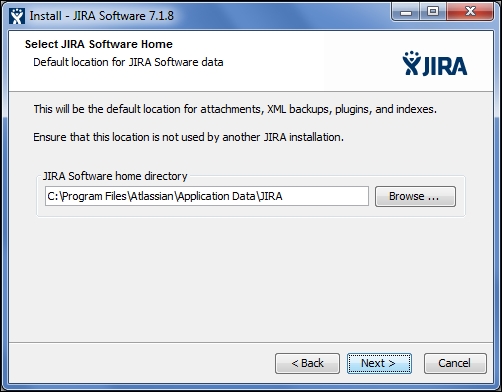
Select where you would like to create shortcuts to the start menu and click on the Next button to continue.
In the Configure TCP Ports step, we need to select the port on which JIRA will be listening for incoming connections. By default, JIRA will run on port
8080. If8080is already taken by another application or if you want JIRA to run on a different port such as port80, select the Set custom value for HTTP and Control ports option and specify the port numbers you want to use. Click on the Next button to continue.
Select whether you would like JIRA to run as a service. If you enable this option, JIRA will be installed as a system service and can be configured to start automatically with the server; see the Starting and stopping JIRA section for more details.
For the last step, review all the installation options and click on the Install button to start the installation.

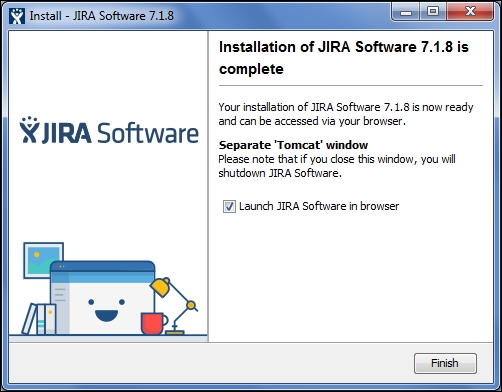
Once the installation is complete, check the Launch JIRA Software in browser option and click on Finish. This will close the installation wizard and open up your web browser to access JIRA. This might take a few minutes to load as JIRA starts up for the first time.
JIRA does not come bundled with the MySQL database driver, so we have to install it manually. You can download the required driver from http://dev.mysql.com/downloads/connector/j/. Once downloaded, you can install the driver by copying the driver JAR file into the JIRA_INSTALL/lib directory. After that, you need to restart JIRA. If you have installed JIRA as a Windows service in step 9, refer to the Starting and stopping JIRA section.
JIRA comes with an easy-to-use setup wizard that will walk you through the installation and configuration process in six simple steps. You will be able to configure the database connections, default language, and much more. You can access the wizard by opening http://localhost:<port number> in your browser, where the <port number> is the number you have assigned to JIRA in step 6 of the installation.
In the first step of the wizard, we need to select how we want JIRA to be set up. Since we are installing JIRA for production use, we will select the I'll set it up myself option.

For the second step, we will need to select the database we want to use. This is where we configure JIRA to use the MySQL database we have created earlier in this chapter. If you select the Built In option, JIRA will use its bundled in-memory database, which is good for evaluation purposes. If you want to use a proper database, such as in our case, you should select the My Own Database option.

After you have selected the My Own Database option, the wizard will expand for you to provide the database connection details. If you do not have the necessary database driver installed, JIRA will prompt you for it, as shown in the preceding screenshot.
Once you have filled in the details for your database, it is a good idea to first click on the Test Connection button to verify that JIRA is able to connect to the database. If everything is set up correctly, JIRA will report a success message. You should be able to move onto the next step by clicking on the Next button. This may take a few minutes, as JIRA will now create all the necessary database objects. Once this is done, you will be taken to step 3 of the wizard.
In the third step, you will need to provide some basic details about this JIRA instance. Once you have filled in the required fields, click on Next to move on to step 4 of the wizard.

In the fourth step, we need to provide a license key for JIRA. If you have already obtained a license from Atlassian, you can paste it into the Your License Key text box. If you do not have a license, you can generate an evaluation license by clicking on the generate a JIRA trial license link. The evaluation license will grant you access to JIRA's full set of features for one month. After the evaluation period ends, you will lose the ability to create new issues, but you can still access your data.

In the fifth step, you will be setting up the administrator account for JIRA. It is important that you keep the account details somewhere safe and do not lose the password. Since JIRA only stores the hashed value of the password instead of the actual password itself, you will not be able to retrieve it. Fill in the administrator account details and click on Next to move on to the sixth step.

Tip
This account is important and it can help you troubleshoot and fix problems later on. Do not lose it!
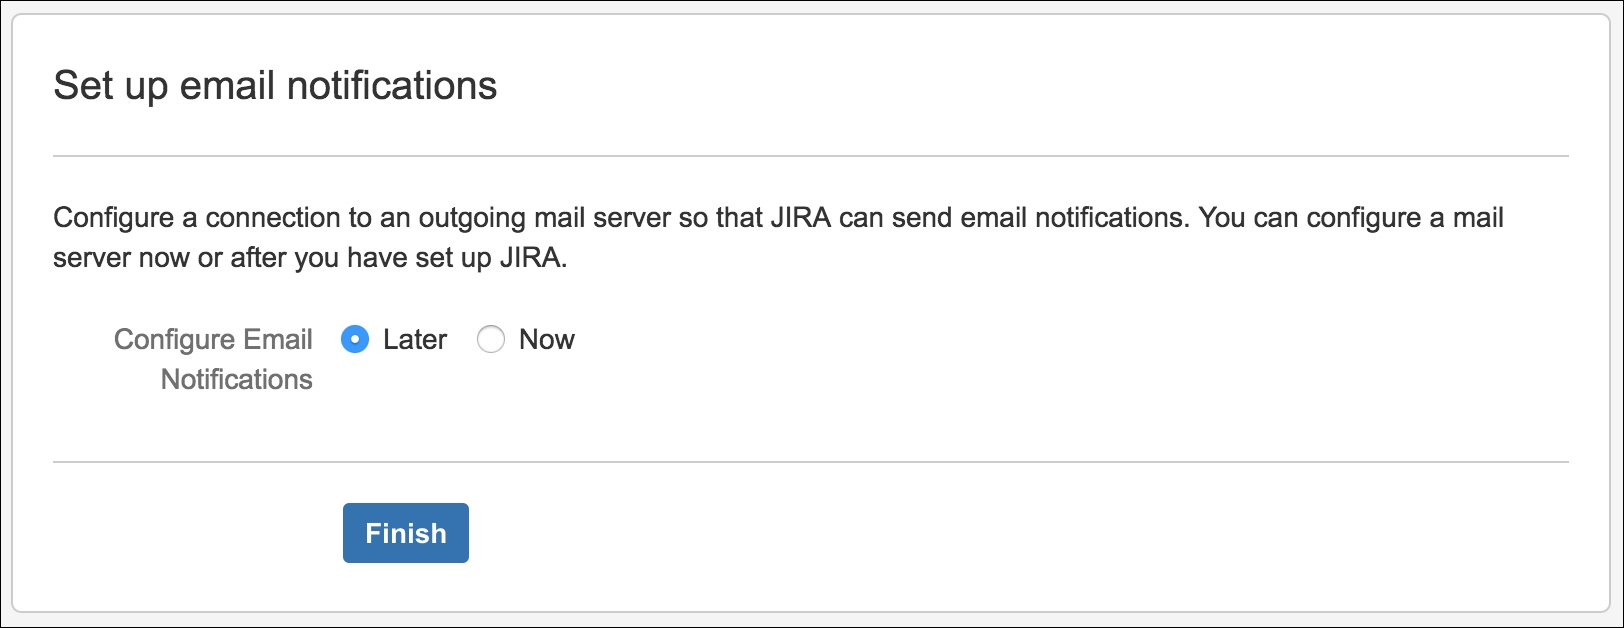
In the sixth step, you can set up your e-mail server details. JIRA will use the information configured here to send out notification e-mails. Notification is a very powerful feature in JIRA and one of the primary methods by which, JIRA communicates with users. If you do not have your e-mail server information handy, you can skip this step now by selecting the Later option and clicking on Finish. You can configure your e-mail server settings later, as you will see in Chapter 7, E-mails and Notifications.
Congratulations! You have successfully completed your JIRA setup. JIRA will then ask you to configure your new account, such as the default language and profile picture. Follow the onscreen prompts to set up your account, and once you are done, you should be presented with the JIRA dashboard, as shown in the following screenshot:

Since JIRA is installed as a Windows service, you can start, stop, and restart it via the Windows services console by navigating to Start | Control Panel | Administrative Tools | Services. In the services console, look for Atlassian JIRA, and you will be able to stop and start the application, as shown in the following screenshot:

The post-installation configuration steps are optional, depending on your needs and environment. If you set up JIRA for evaluation purposes, you probably do not need to perform any of the following steps, but it is always a good practice to be familiar with these as a reference.
The default memory setting for JIRA is usually sufficient for a small to medium-sized deployment. As JIRA's adoption rate increases, you will find that the amount of memory allocated by default is no longer enough. If JIRA is running as a Windows service, as we described in this chapter, you can increase the memory as follows:
Find the JIRA Windows service name. You can do this by going to the Windows services console and double-clicking on the Atlassian JIRA service. The service name will be the part after //RS// in the Path to executable field, for example,
JIRA150215215627.Open a new Command Prompt and change the current working directory to the
JIRA_INSTALL/bindirectory.Run the following command by substituting the actual service name for JIRA:
tomcat7w //ES//<JIRA Windows service name>Select the Java tab, update the Initial memory pool and Maximum memory pool sizes, and click on OK.

Restart JIRA to apply the change.
If you are not running JIRA as a Windows service, you need to open the setenv.bat file (for Windows) or the setenv.sh (for Linux) file in the JIRA_INSTALL/bin directory. Then, locate the following lines:
set JVM_MINIMUM_MEMORY="384m"
set JVM_MAXIMUM_MEMORY="768m"
Change the value for the two parameters and restart JIRA. Normally, 4 GB (4096m) of memory is enough to support a fairly large instance of JIRA used by hundreds of users.
As part of the installation process, the installation wizard prompted us to decide which port JIRA should listen to for incoming connections. If you have accepted the default value, it is port 8080. You can change the port setting by locating and opening the server.xml file in a text editor in the JIRA_INSTALL/conf directory. Let's examine the relevant contents of this file:
<Server port="8005" shutdown="SHUTDOWN">
This line specifies the port for the command to shutdown JIRA/Tomcat. By default, it is port 8005. If you already have an application that is running on that port (usually another Tomcat instance), you need to change this to a different port:
<Connector port="8080" protocol="HTTP/1.1">
This line specifies which port JIRA/Tomcat will be running on. By default, it is port 8080. If you already have an application that is running on that port, or if the port is unavailable for some reason, you need to change it to another available port:
<Context path="/jira" docBase="${catalina.home}/atlassian-jira" reloadable="false" useHttpOnly="true">
This line allows you to specify the context that JIRA will be running under. By default, the value is empty, which means JIRA will be accessible from http://hostname:portnumber. If you decide to specify a context, the URL will be http://hostname:portnumber/context. In our example here, JIRA will be accessible from http://localhost:8080/jira.
By default, JIRA runs with a standard, non-encrypted HTTP protocol. This is acceptable if you are running JIRA in a secured environment, such as an internal network. However, if you plan to open up access to JIRA over the Internet, you will need to tighten up the security by encrypting sensitive data, such as usernames and passwords that are being sent, by enabling HTTPS (HTTP over SSL).
For a standalone installation, you will need to perform the following tasks:
Obtain and install a certificate.
Enable HTTPS on your application server (Tomcat).
Redirect traffic to HTTPS.
First, you need to get a digital certificate. This can be obtained from a certification authority, such as VeriSign (CA certificate), or a self-signed certificate generated by you. A CA certificate will not only encrypt data for you, but also identify your copy of JIRA to the users. A self-signed certificate is useful when you do not have a valid CA certificate and you are only interested in setting up HTTPS for encryption. Since a self-signed certificate is not signed by a certification authority, it is unable to identify your site to the public and users will be prompted with a warning that the site is untrusted when they first visit it. However, for evaluation purposes, a self-signed certificate will suffice until you can get a proper CA certificate.
For the purpose of this exercise, we will create a self-signed certificate to illustrate the complete process. If you have a CA certificate, you can skip the following steps.
Java comes with a handy tool for certificate management, called keytool, which can be found in the JIRA_HOME\jre\bin directory if you are using the installer package. If you are using your own Java installation, then you can find it in JAVA_HOME\bin.
To generate a self-signed certificate, run the following commands from a Command Prompt:
keytool -genkey -alias tomcat -keyalg RSA
keytool -export -alias tomcat -file file.cer
This will create a keystore (if one does not already exist) and export the self-signed certificate (file.cer). When you run the first command, you will be asked to set the password for the keystore and Tomcat. You need to use the same password for both. The default password is changeit. You can specify a different password of your choice, but you then have to let JIRA/Tomcat know, as we will see later.
Now that you have your certificate ready, you need to import it into your trust store for Tomcat to use. Again, you will use the keytool application in Java:
    keytool -import -alias tomcat -file file.cer
JIRA_HOME\jre\lib\security\cacerts
This will import the certificate into your trust store, which can be used by JIRA/Tomcat to set up HTTPS.
To enable HTTPS on Tomcat, open the server.xml file in a text editor from the JIRA_INSTALL/conf directory. Locate the following configuration snippet:
<Connector port="8443" maxHttpHeaderSize="8192" SSLEnabled="true"
maxThreads="150" minSpareThreads="25" maxSpareThreads="75"
enableLookups="false" disableUploadTimeout="true"
acceptCount="100" scheme="https" secure="true"
clientAuth="false" sslProtocol="TLS"     useBodyEncodingForURI="true"/>
This enables HTTPS for JIRA/Tomcat on port 8443. If you have selected a different password for your keystore, you will have to add the following line to the end of the preceding snippet before the closing tag:
keystorePass="<password value>"
The last step is to set up JIRA so that it automatically redirects from a non-HTTP request to an HTTPS request. Find and open the web.xml file in the JIRA_INSTALL/atlassian-jira/WEB-INF directory. Then, add the following snippet to the end of the file before the closing </web-app> tag:
<security-constraint>
  <web-resource-collection>
    <web-resource-name>all-except-attachments</web-resource-name>
    <url-pattern>*.js</url-pattern>
    <url-pattern>*.jsp</url-pattern>
    <url-pattern>*.jspa</url-pattern>
    <url-pattern>*.css</url-pattern>
    <url-pattern>/browse/*</url-pattern>
  </web-resource-collection>
  <user-data-constraint>
    <transport-guarantee>CONFIDENTIAL</transport-guarantee>
  </user-data-constraint>
</security-constraint>
Now, when you access JIRA with a normal HTTP URL, such as http://localhost:8080/jira, you will be automatically redirected to its HTTPS equivalent, https://localhost:8443/jira.
JIRA is a powerful yet simple application as reflected in its straightforward installation procedures. You have a wide variety of options to choose how you would like to install and configure your copy. You can mix-and-match different aspects, such as operating systems and databases, to best suit your requirements. The best part is that you can have a setup that consists entirely of open source software, which will bring down the cost and provide you with a reliable infrastructure at the same time.
In the next chapter, we will start to explore various aspects of JIRA. The following chapters, starting with projects, will talk about key concepts in any JIRA installation.


