Getting Started with Jenkins
In this chapter, we will discuss how to install and configure Jenkins, and what new features or UI improvements are available from Jenkins 2 and later. We will cover the following recipes:
- Installing Jenkins 2 on Windows
- Installing Jenkins 2 on CentOS
- Installing Jenkins 2 on Azure
- Installing Jenkins as a service in Windows
- Installing plugins in Jenkins
- Uploading plugins in Jenkins
- Configuring proxy in Jenkins
- Configuring global settings in Jenkins
- Configuring JENKINS_HOME
- Understanding JENKINS_HOME directory
- Using different ports for Jenkins
- Configuring JAVA_HOME in Jenkins
- Configuring Git in Jenkins
- Configuring ANT_HOME in Jenkins
- Configuring MAVEN_HOME in Jenkins
- Configuring GRADLE_HOME in Jenkins
- Creating a Freestyle job for an Ant project
- Creating a Maven job for a Maven project
Introduction
Jenkins is an open source automation server that is widely used by many organizations to implement popular DevOps practices, such as Continuous Integration and Continuous Delivery. Jenkins is feature-rich and is vastly extendable through plugins. Further, Jenkins and its plugins improve rapidly. There is a new minor version of Jenkins released weekly, mostly with improvements, occasionally with bugs. The community manages core stability via the use of a long-term support release of Jenkins, which is mature and less feature-rich when compared to the latest version. For a stable system in a complex environment, you need to monitor, clean up storage, back up, keep control of your Jenkins scripts, and consistently clean and polish. This chapter has recipes for the most common tasks. Proper maintenance lowers the risk of failures, such as:
- New plugins causing exceptions: There are a lot of good plugins being written with rapid version changes. In this situation, it is easy for you to accidentally add new versions of plugins with new defects. There have been a number of occasions during upgrades when suddenly the plugin does not work. To combat the risk of plugin exceptions, consider using a test Jenkins instance before releasing to a critical system.
- Storage overflowing with artifacts: If you keep a build history that includes artifacts such as WAR files, large sets of JAR files, or other types of binaries and source code, then your storage space will be consumed at a surprising rate. Storage costs have decreased tremendously, but storage usage equates to longer backup times and more communication from slave to master. To minimize the risk of disk overflowing, you will need to consider your backup and restore policy and the associated build retention policy expressed in the advanced options of jobs.
- Script spaghetti: As jobs are written by various development teams, the location and style of the included scripts vary. This makes it difficult for you to keep track. Consider using well-defined locations for your scripts and a scripts repository managed through a plugin.
- Resource depletion: As memory is consumed, or the number of intense jobs increases, then Jenkins slows down. Proper monitoring and quick reactions
reduce impact. - A general lack of consistency between jobs due to organic growth: Jenkins is easy to install and use. The ability to seamlessly turn on plugins is addictive. The pace of adoption of Jenkins within an organization can be breathtaking. Without a consistent policy, your teams will introduce lots of plugins and also lots of ways of performing the same work. Conventions improve consistency and readability of jobs and thus decrease maintenance.
The Jenkins community is working hard on your behalf. If you see an issue, please report it back.
To add community bug reports or modify wiki pages, you will need to create an account at: https://wiki.jenkins-ci.org/display/JENKINS/Issue+Tracking.
Installing Jenkins 2 on Windows
Let's install Jenkins 2 on a Windows operating system. It can be a physical machine, virtual machine available on Cloud.
Getting ready
To carry out this recipe, you need to download Jenkins.
For a business unit, it is advisable to have the following requirements:
- Java 8
- 4 GB + RAM
- 500 GB+ free disk space
How to do it...
Let's install Jenkins now by following these steps:
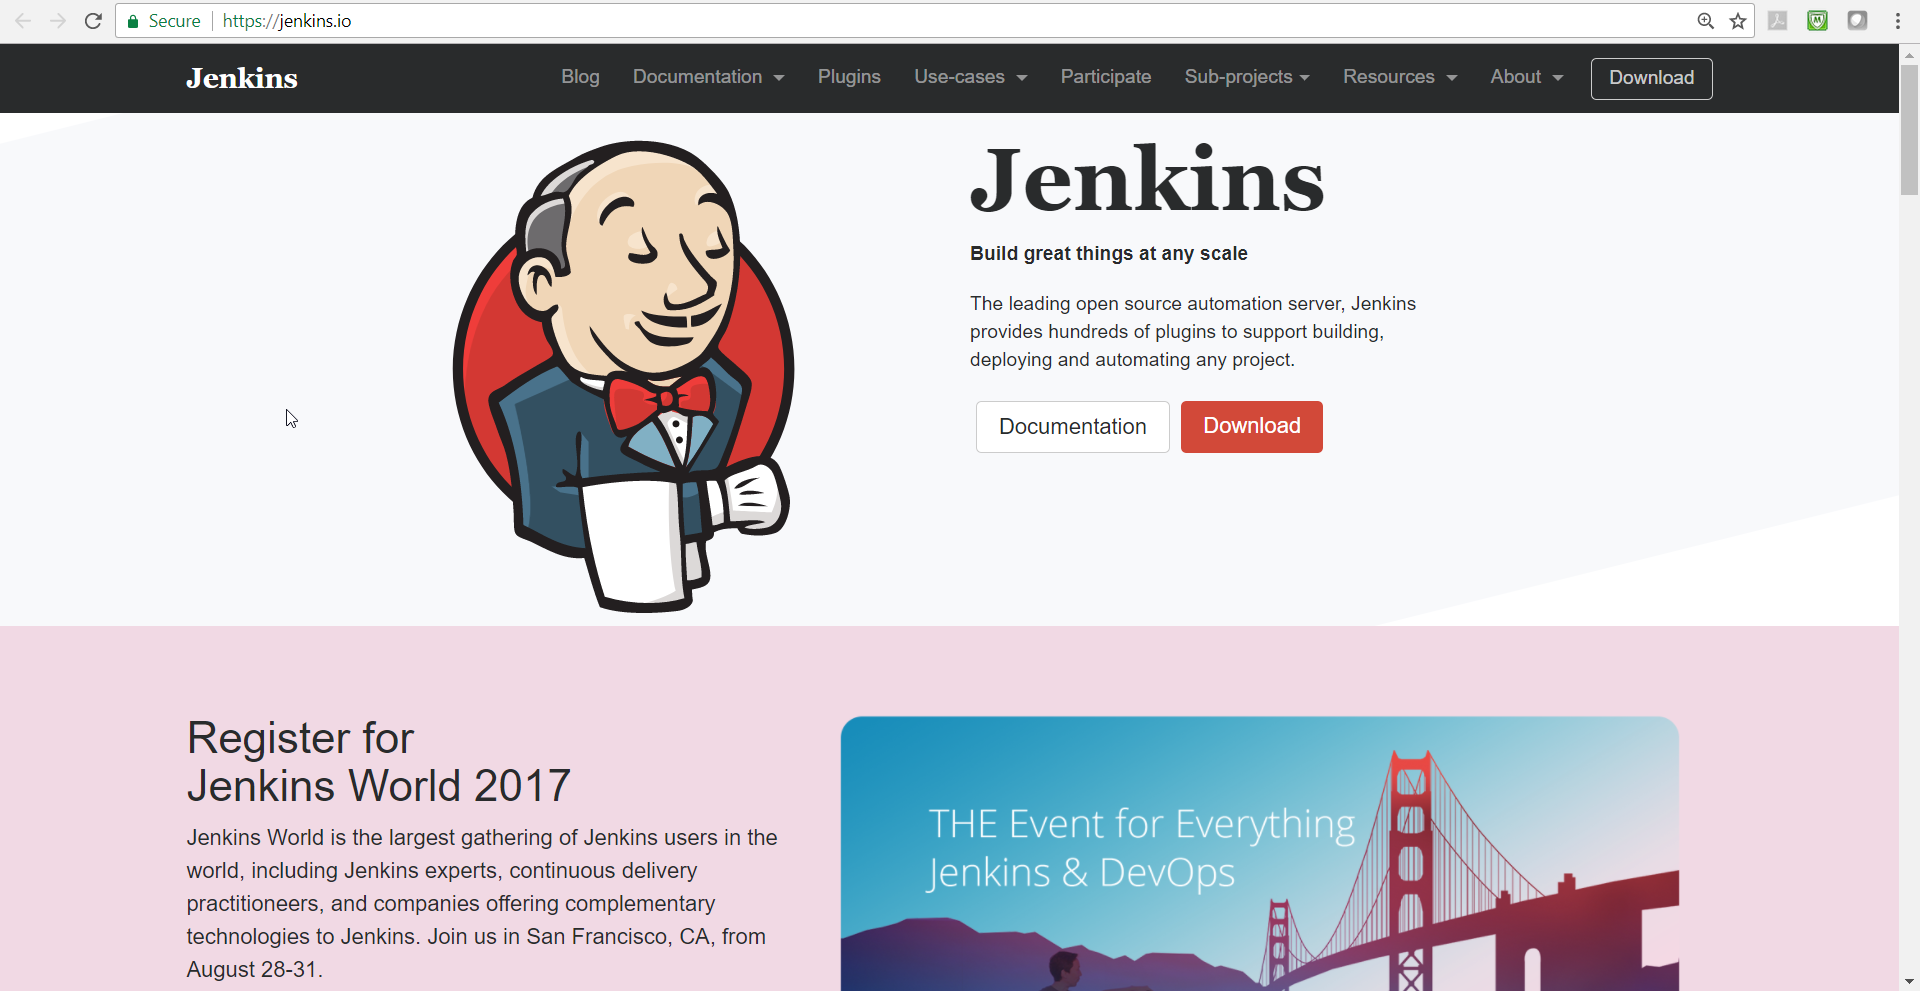
- Go to https://jenkins.io.
- Click on Download, as shown in the following screenshot:
- Download the latest Windows package from Jenkins, available at: http://mirrors.jenkins.io/windows/latest.
- Click on the package and follow the step-by-step instructions to install it.
Installing Jenkins 2 on CentOS
Let's look at the steps required to install Jenkins on CentOS.
Getting ready
For a business unit, it is advisable to have the following requirements:
- Java 8
- 4 GB+ RAM
- 500 GB+ free disk space
Jenkins requires Java. To install Java, execute:
sudo yum install java
How to do it...
- Jenkins' stable and recent versions are available in a YUM repository.
- Add the Jenkins repository to the yum repos:
sudo wget -O /etc/yum.repos.d/jenkins.repo http://pkg.jenkins-ci.org/redhat/jenkins.repo
- For the stable version, execute:
sudo wget -O /etc/yum.repos.d/jenkins.repo http://pkg.jenkins-ci.org/redhat-stable/jenkins.repo
- Import the following key:
sudo rpm --import https://jenkins-ci.org/redhat/jenkins-ci.org.key
- Install Jenkins by executing the following command:
sudo yum install jenkins
There's more...
- To start the Jenkins service, execute:
sudo service jenkins start
- To stop the Jenkins service, execute:
sudo service jenkins stop
- To restart the Jenkins service, execute:
sudo service jenkins restart
Installing Jenkins 2 on Azure
Microsoft Azure is one of the most popular cloud service providers in recent times. Let's try to install Jenkins on Azure.
Getting ready
You need to have a Microsoft Azure subscription for Jenkins installation on Azure. A free trial for one month is also available:
- Go to https://jenkins.io.</span>
- Click on Download.
How to do it...
Let's see how to install Jenkins on Azure:
- Click on the Deploy to Azure link on the Jenkins download page:
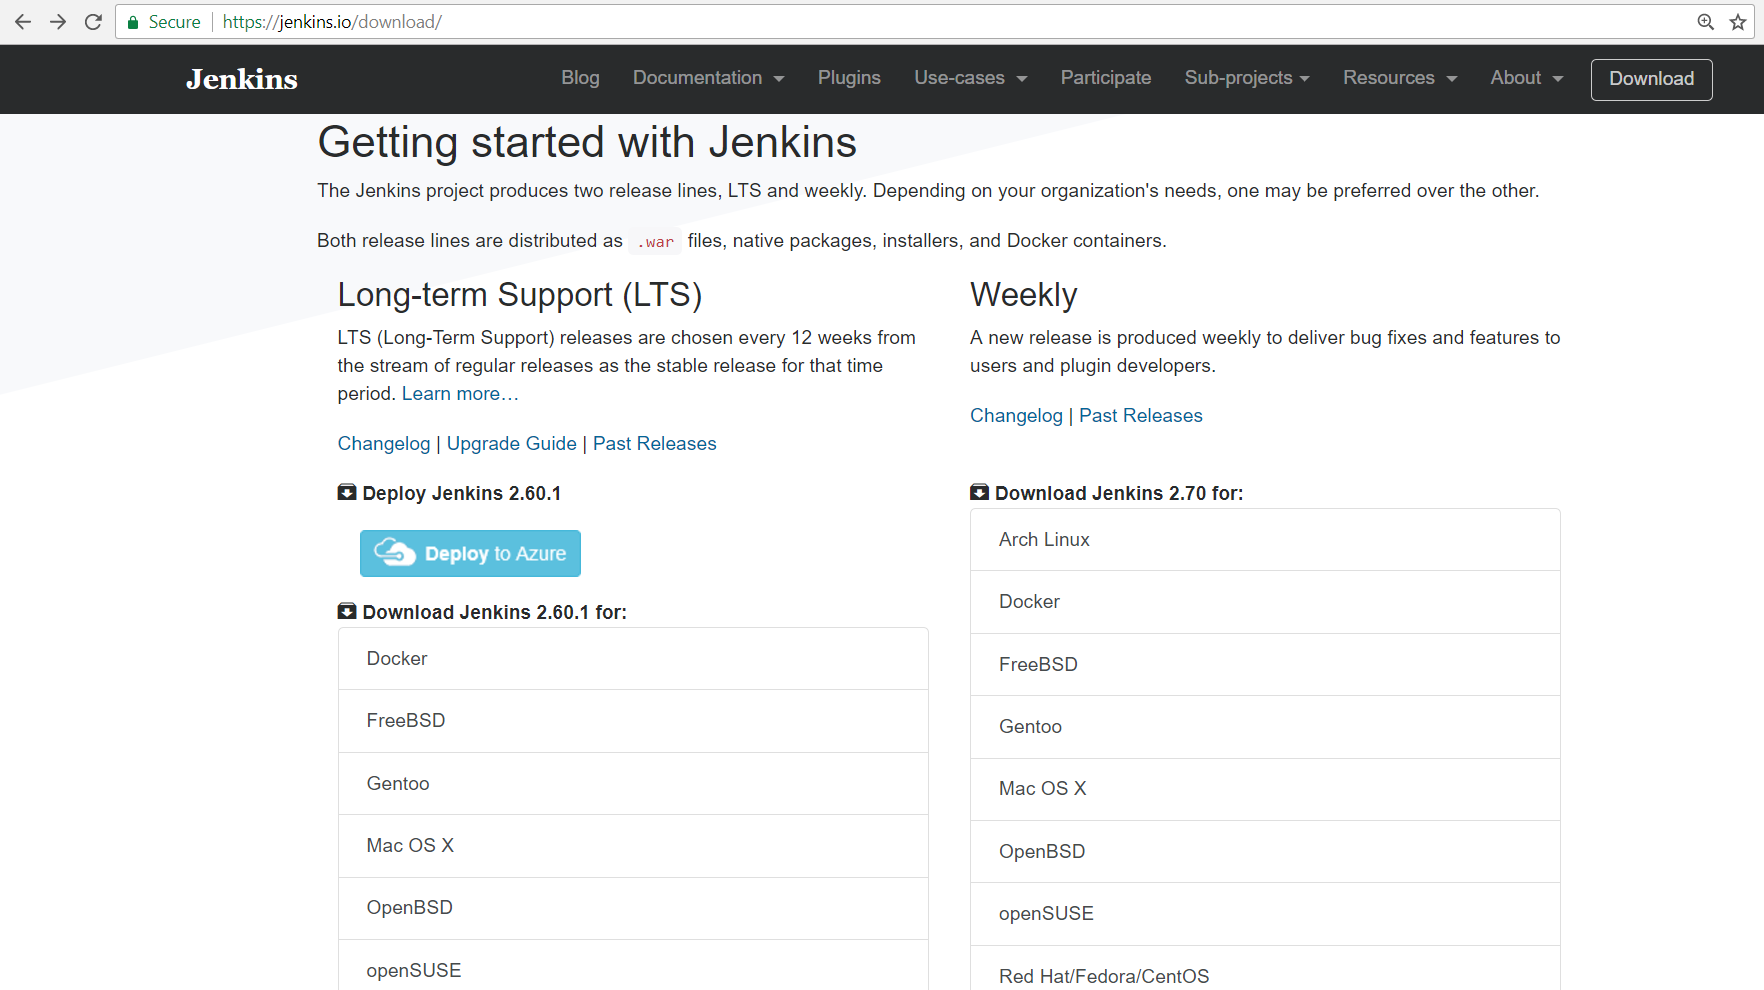
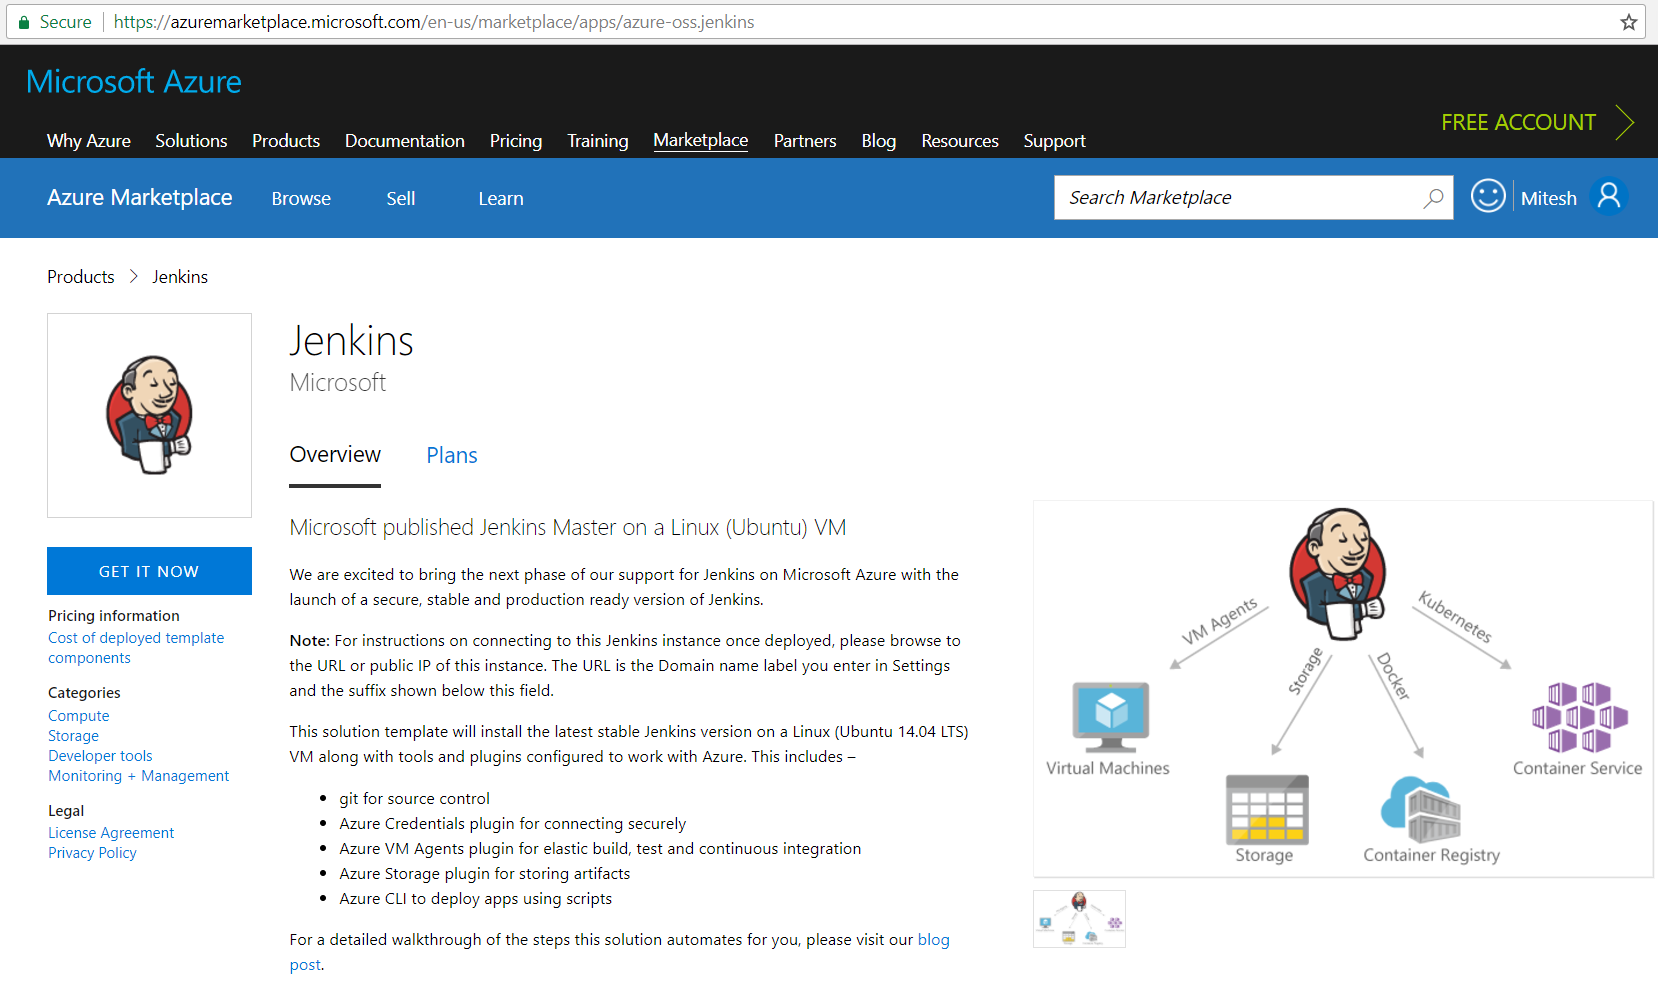
- It will redirect you to Azure Marketplace.
- Verify the Pricing plans and categories involved in it on the same page.
- Click on GET IT NOW. These steps are demonstrated in the following screenshot:
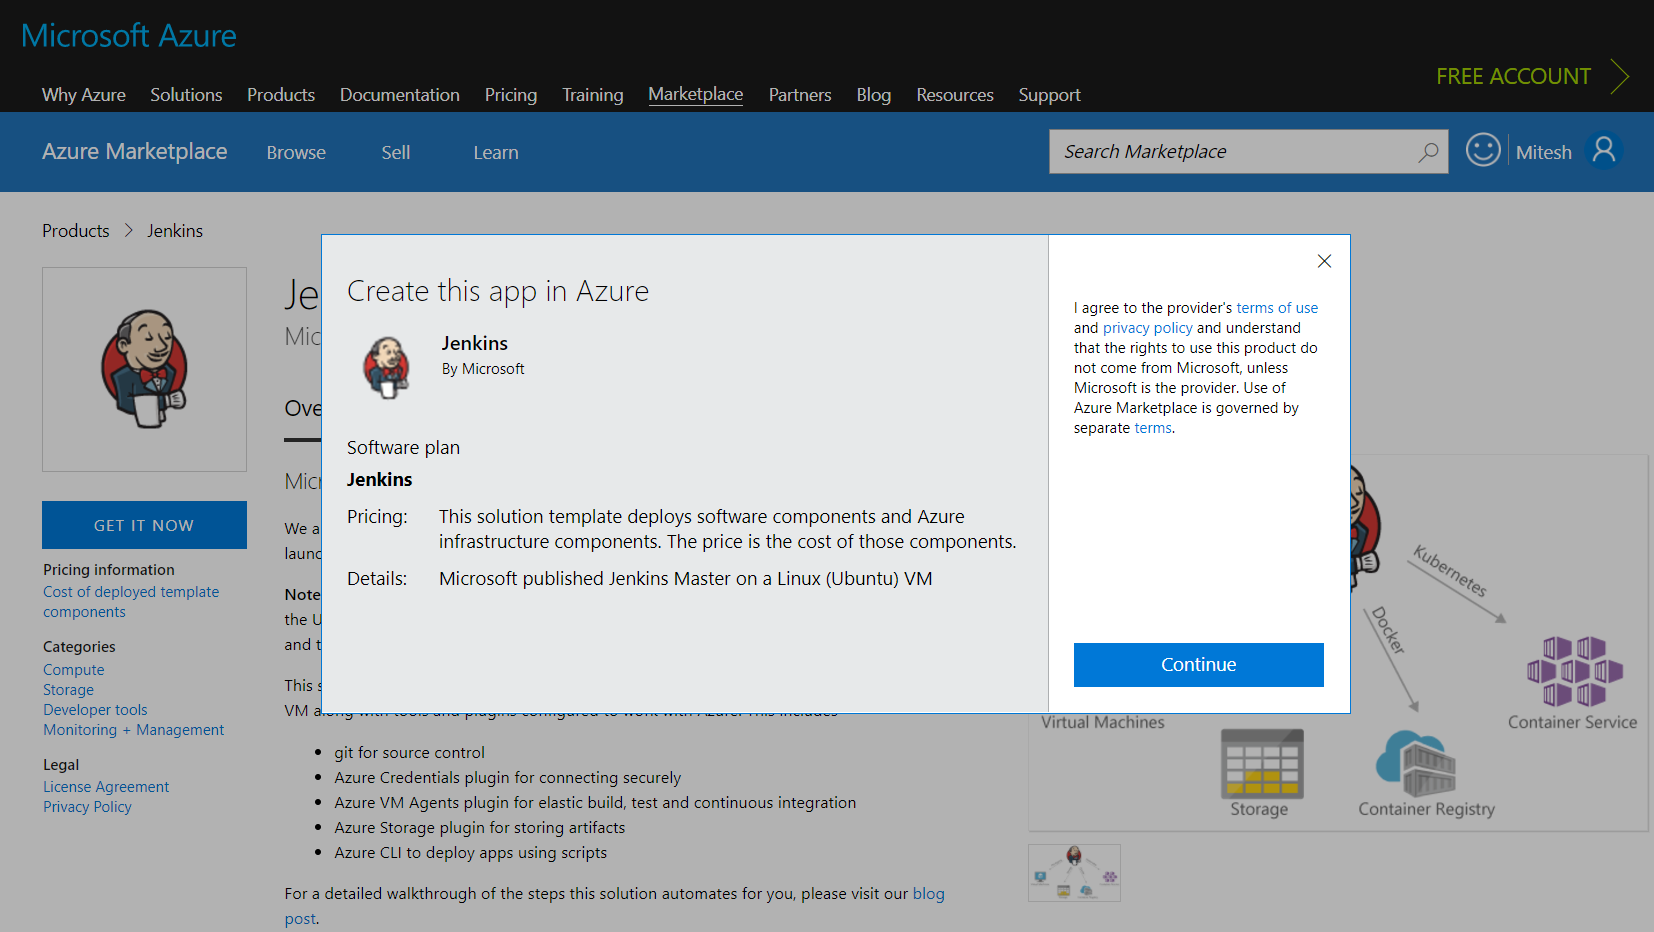
- In the Create this app in Azure tab, click on Continue:
- If you already have the Azure subscription, then login with the username and password.
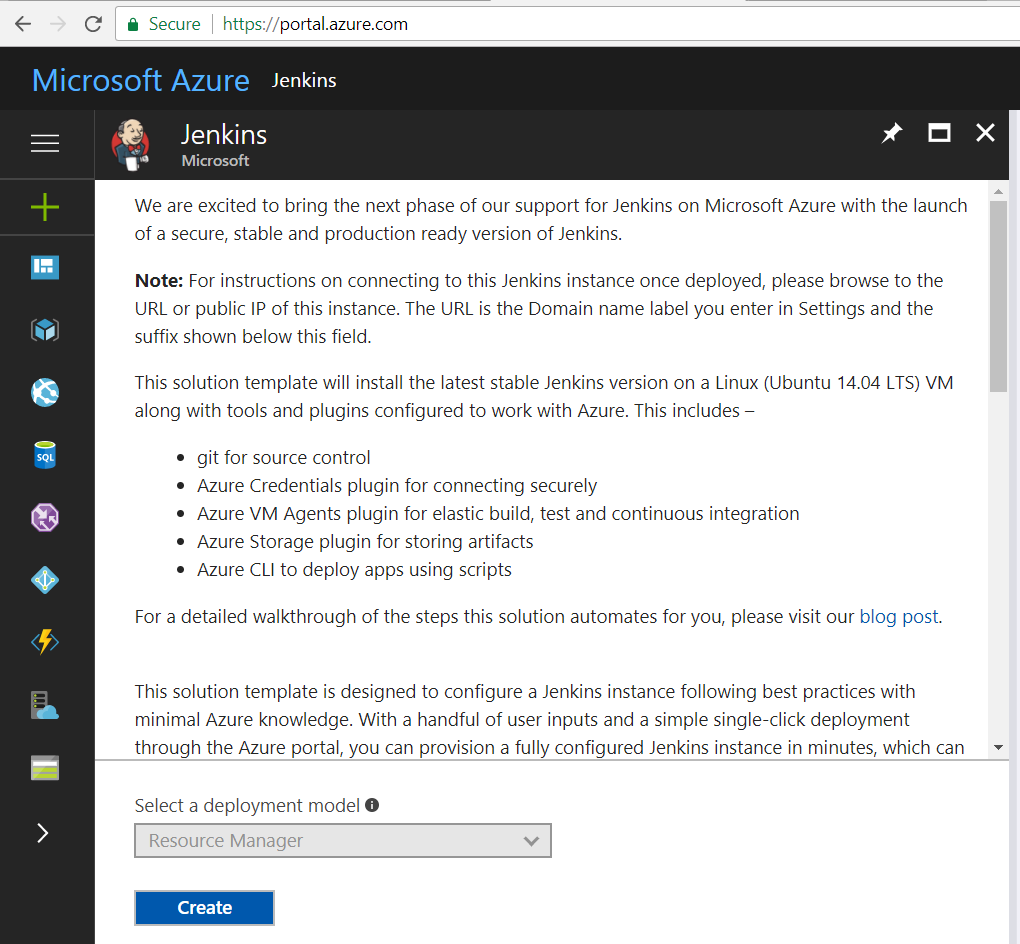
- Deployment model is already selected.
- Click on Create:
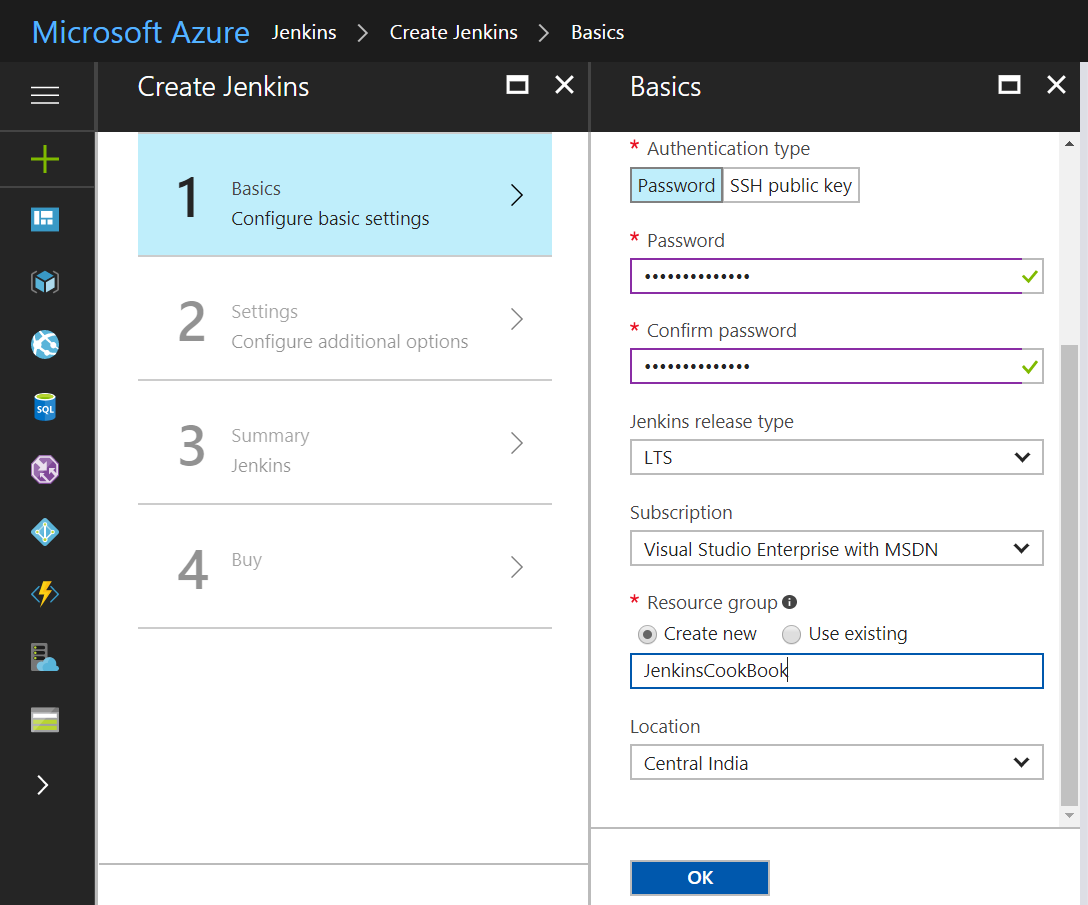
- Provide Password, Jenkins release type, and Subscription details, as demonstrated in this next screenshot:
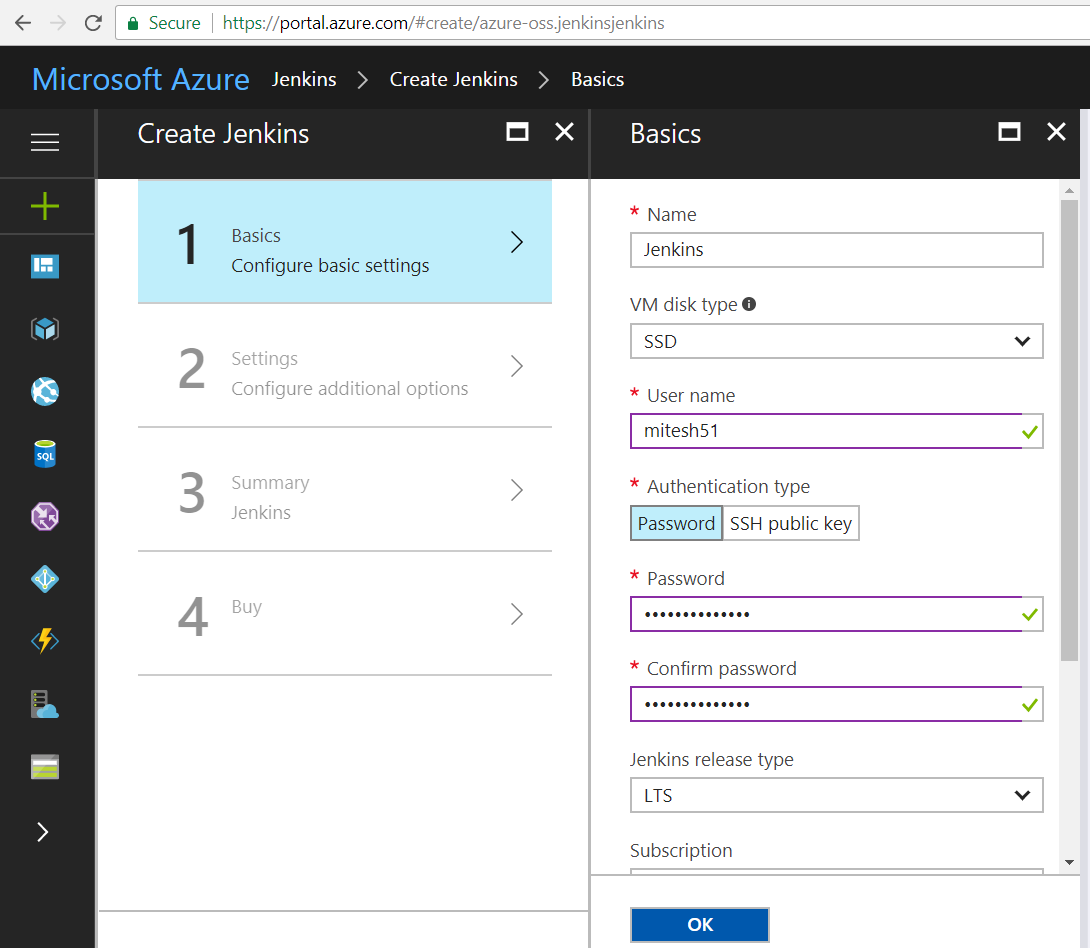
- Select Create new and provide Resource group name.
- Select the Location as per your preference.
- Click on OK:
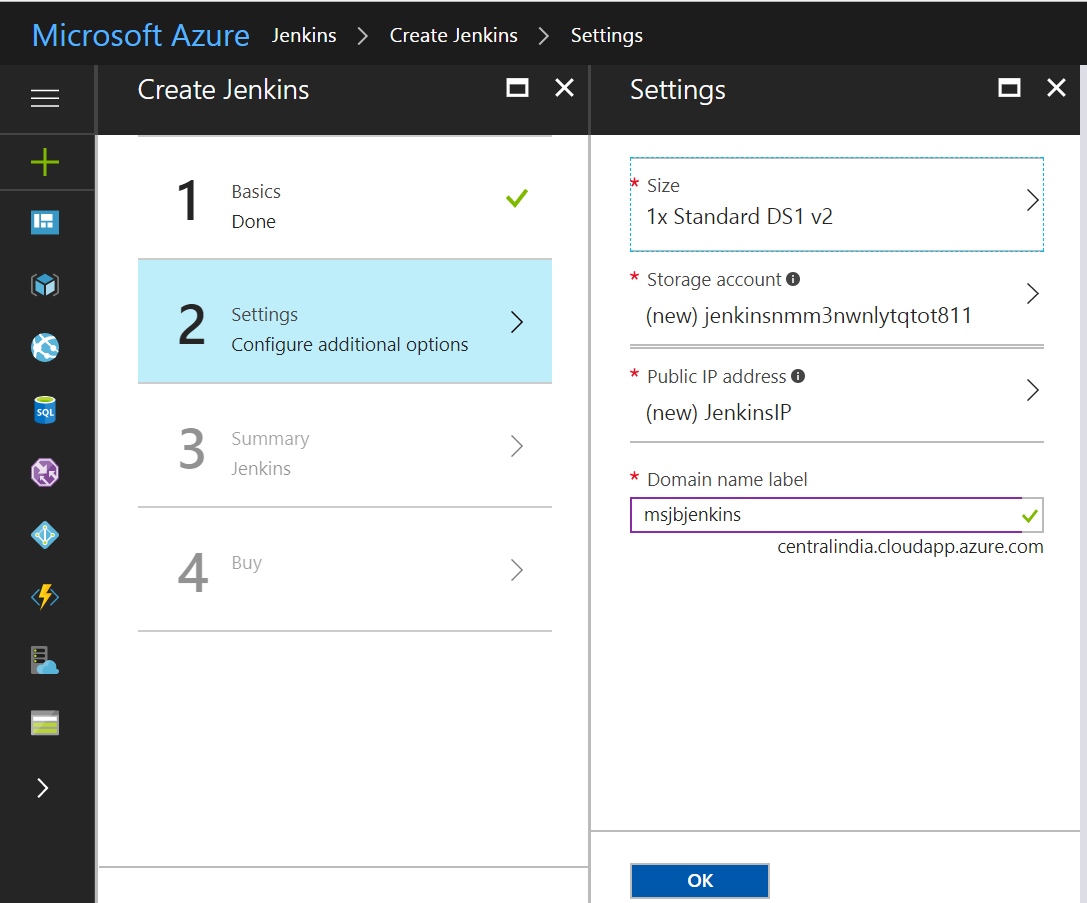
- Select the Size based on the requirement.
- Provide a unique Domain name label.
- Click OK:
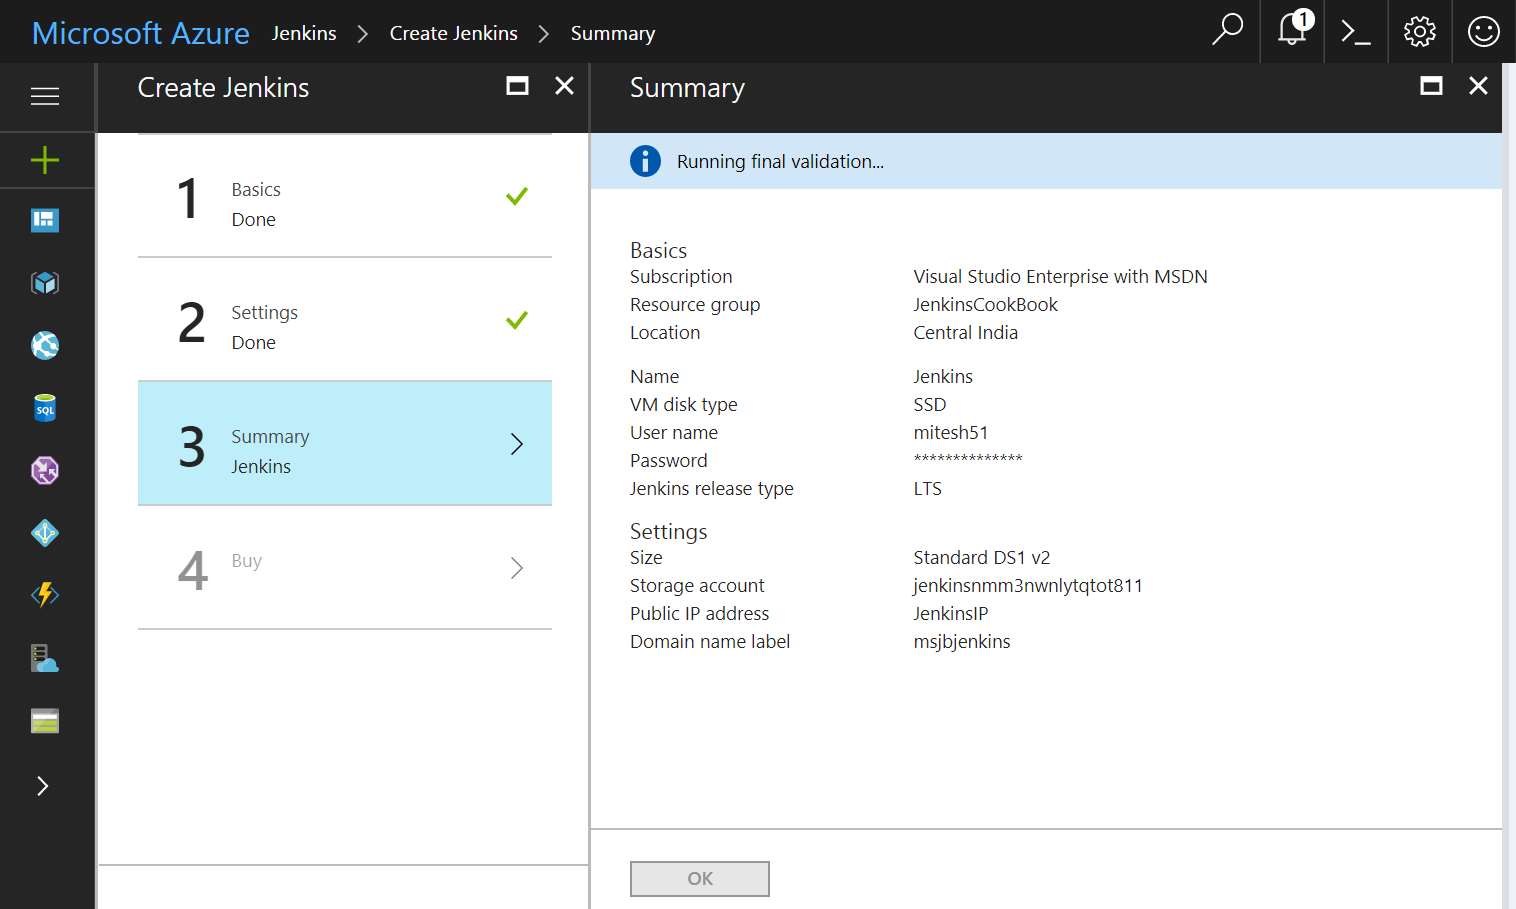
- Review the selection.
- Automated validation will be executed based on your selection.
- Click on OK:
- Review the Template link available before clicking on the Purchase button:
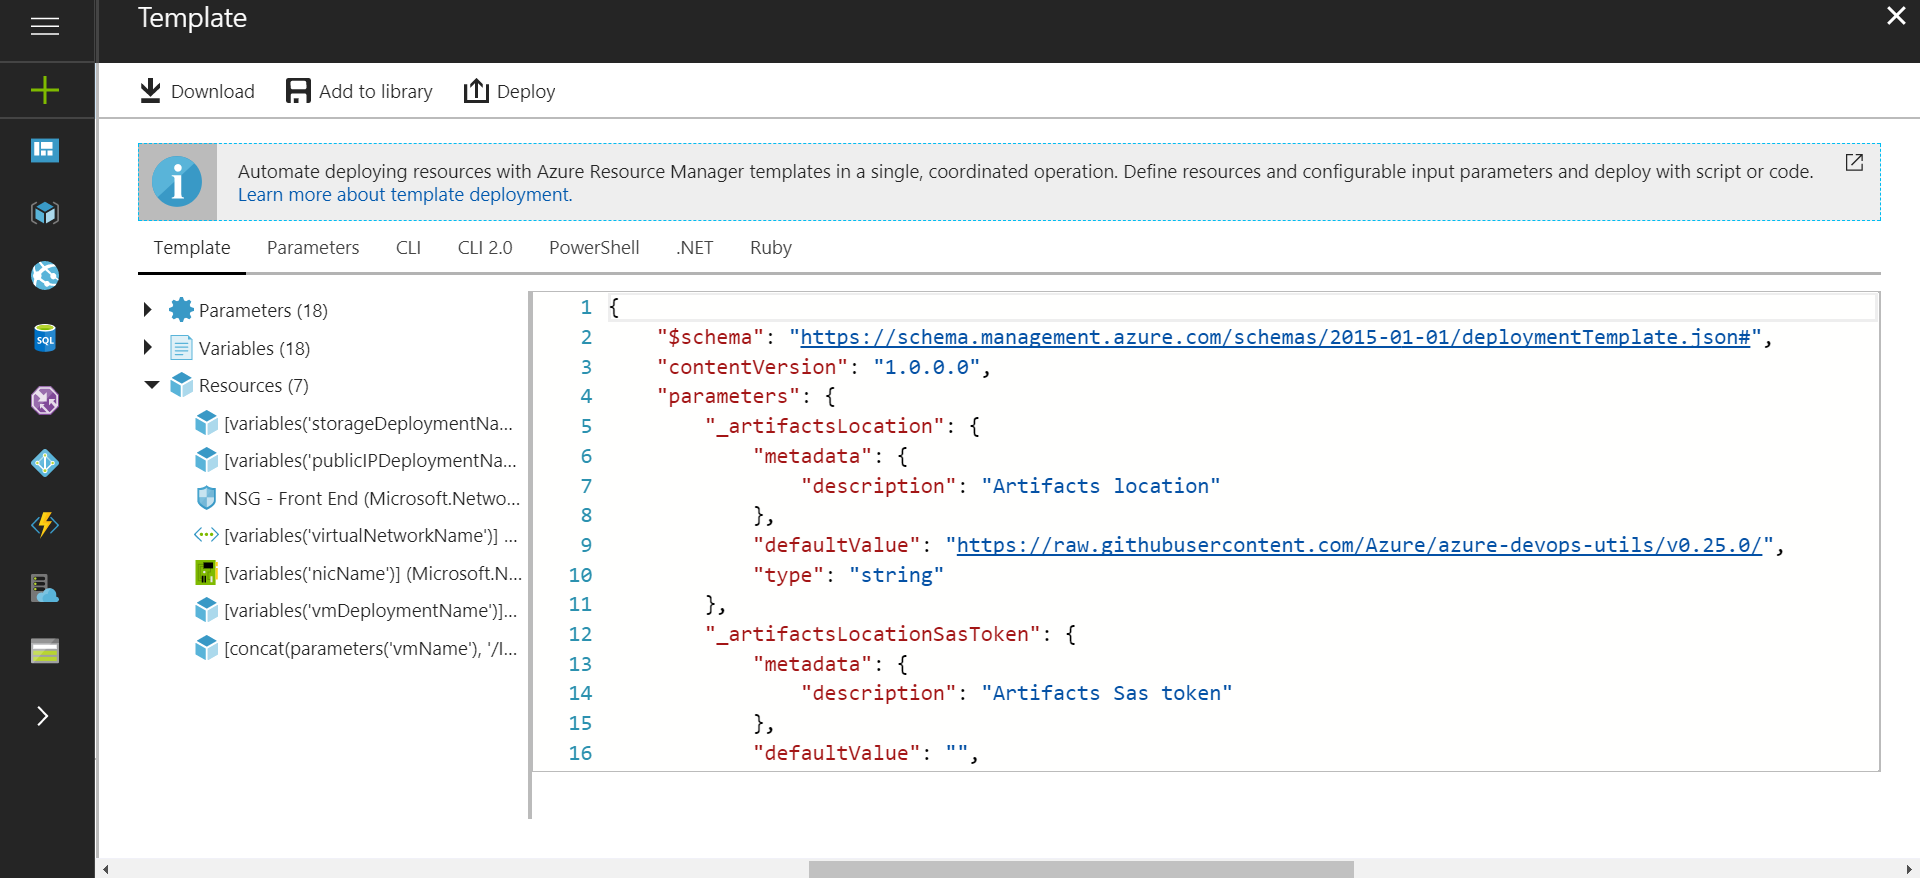
- Once ready, click on Purchase:

- In the Azure portal, click on the Resource groups you have created. Review the resources that are being created one by one. Review the deployments in the Overview section.
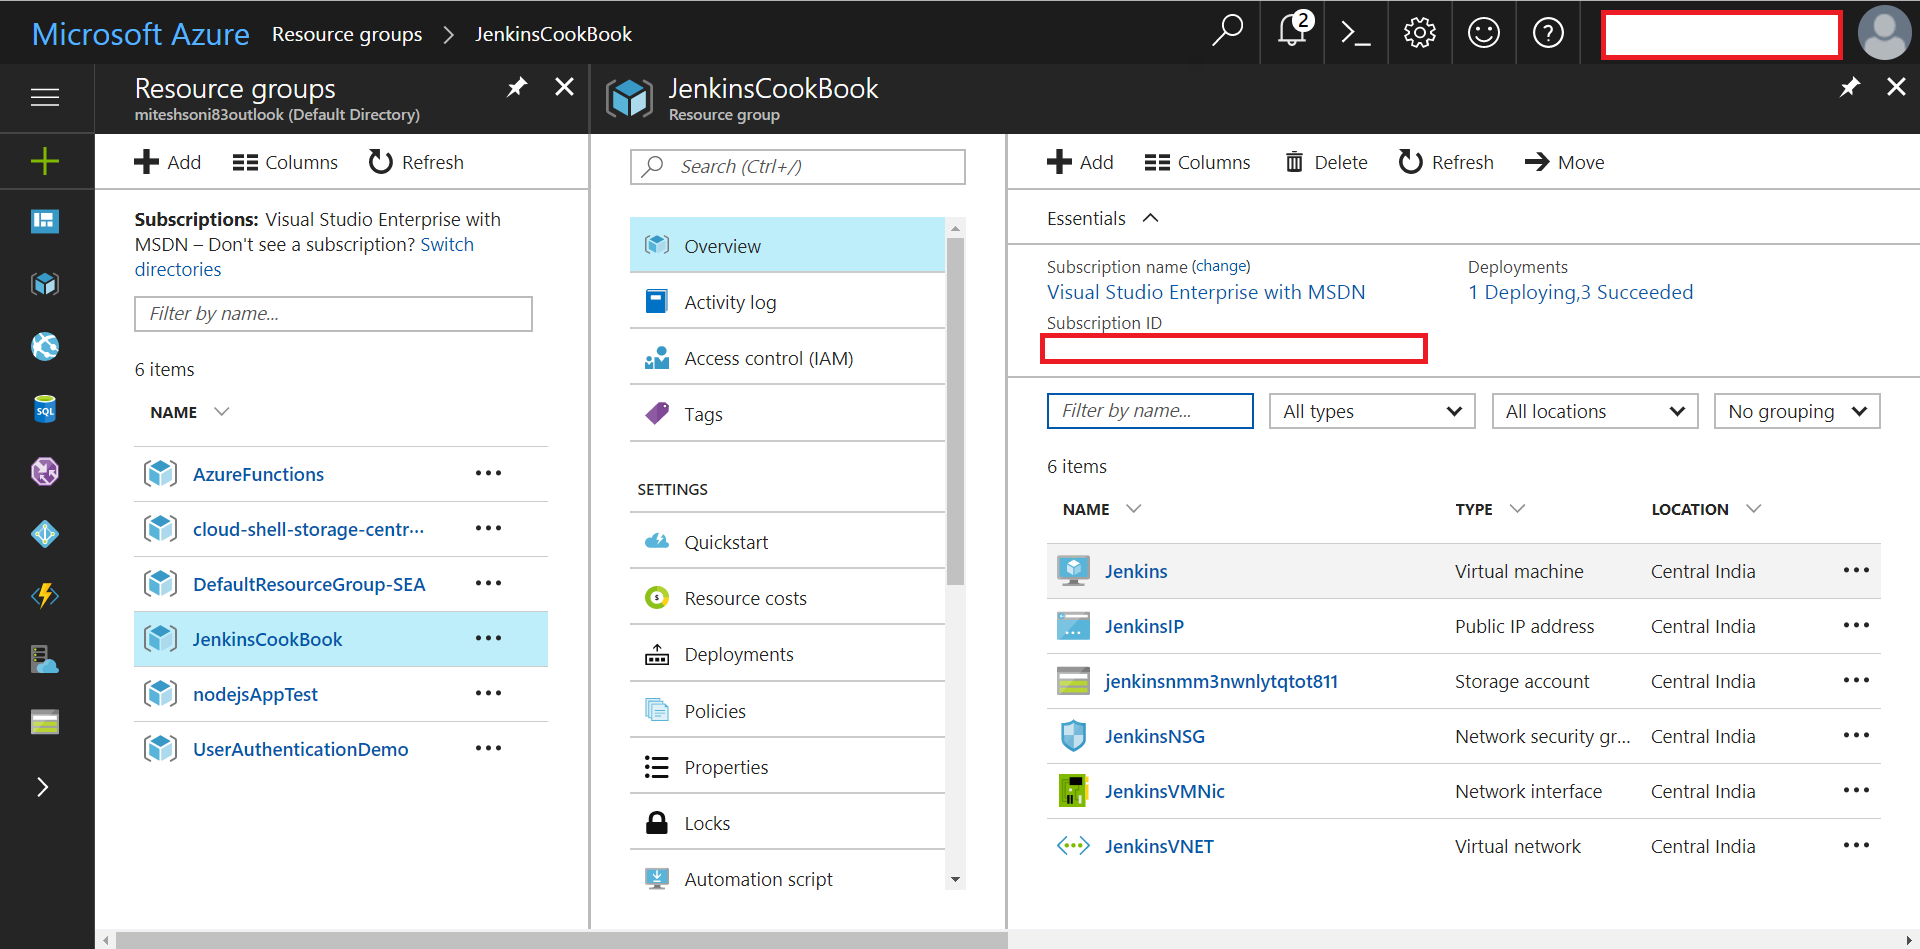
- Click on the JenkinsIP and visit the domain name associated with it:
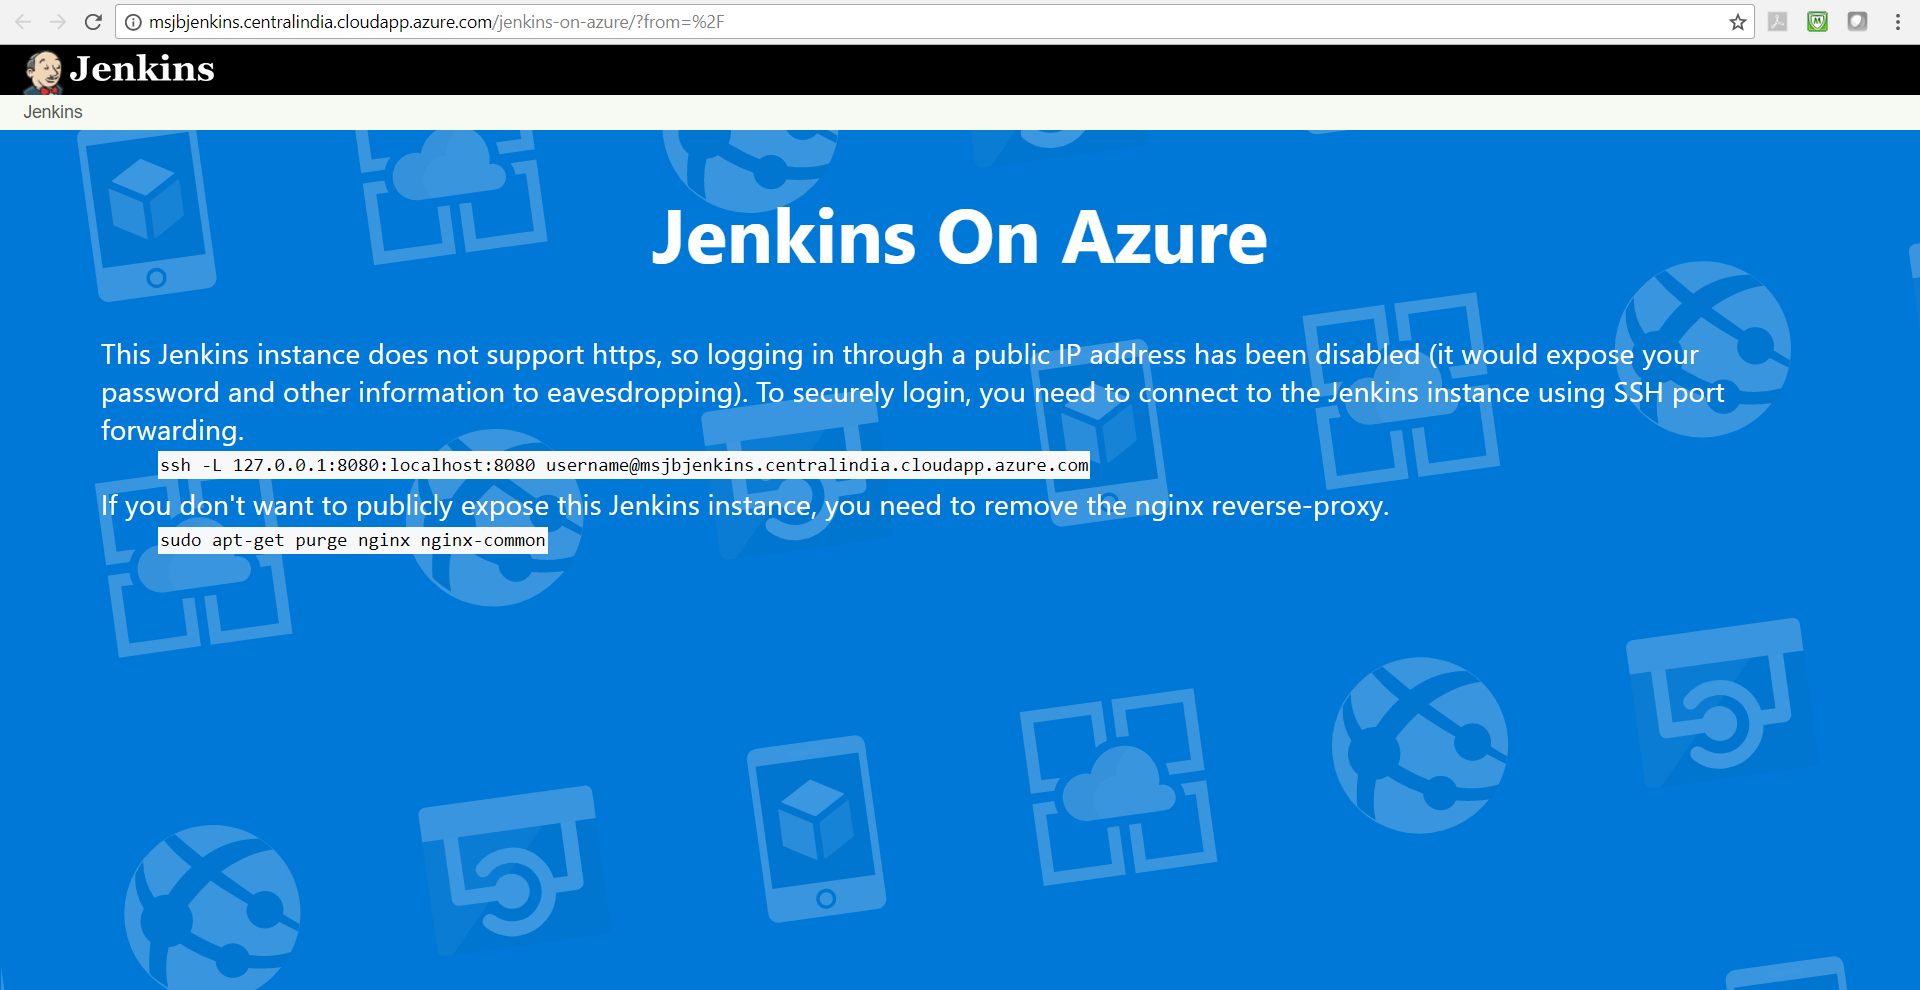
- Download PuTTY or any other ssh client so we can connect to the URL mentioned in the Jenkins page.
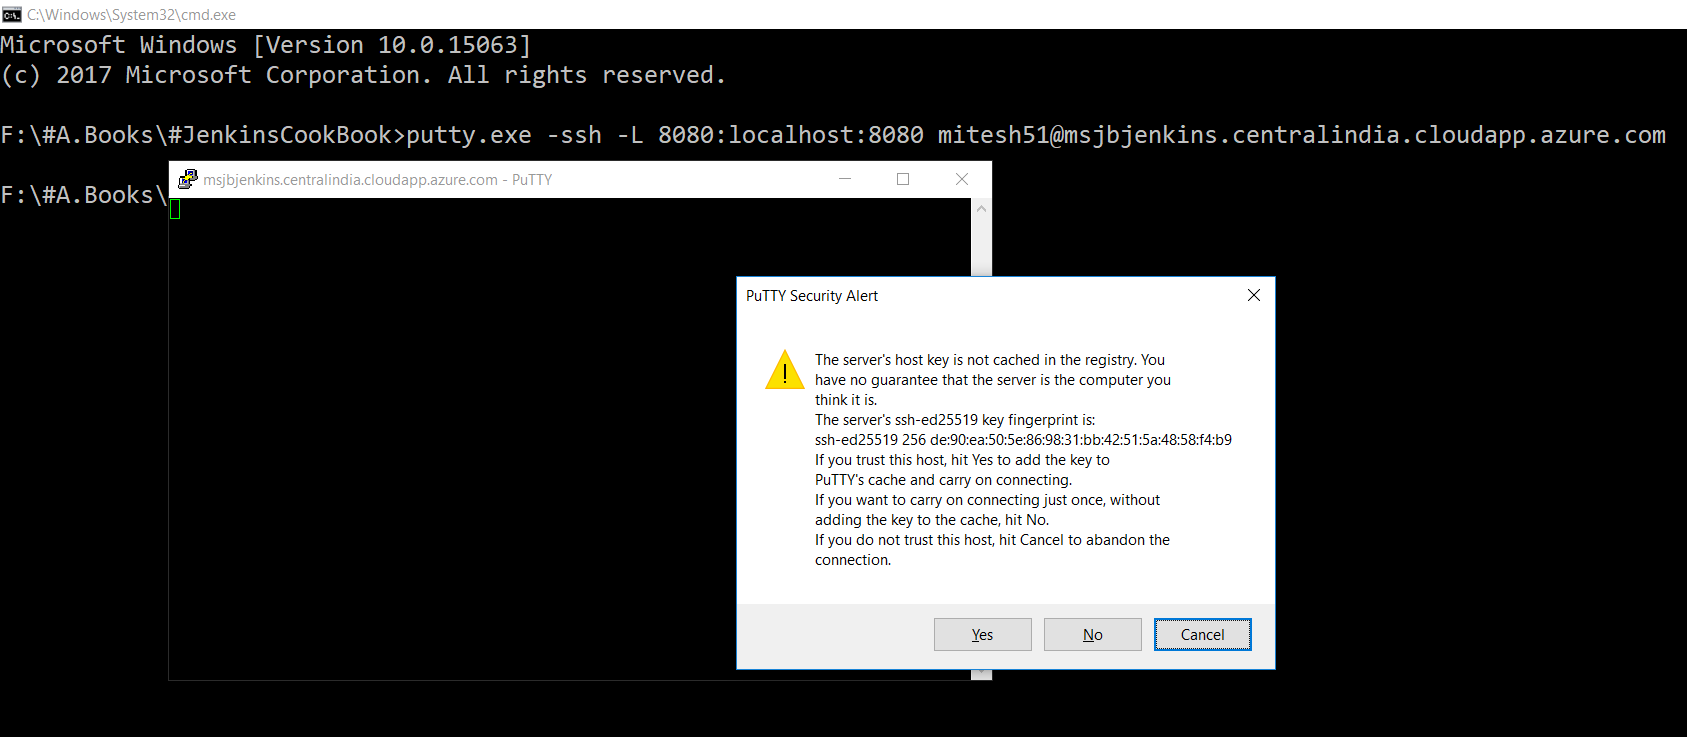
- Go to the location where putty.exe is available.
- Execute the command given on the Jenkins page in command prompt.
- Select Yes in PuTTY Security Alert:
- Open the browser and navigate to the URL, http://localhost:8080.
- It will ask for the Administrator password:
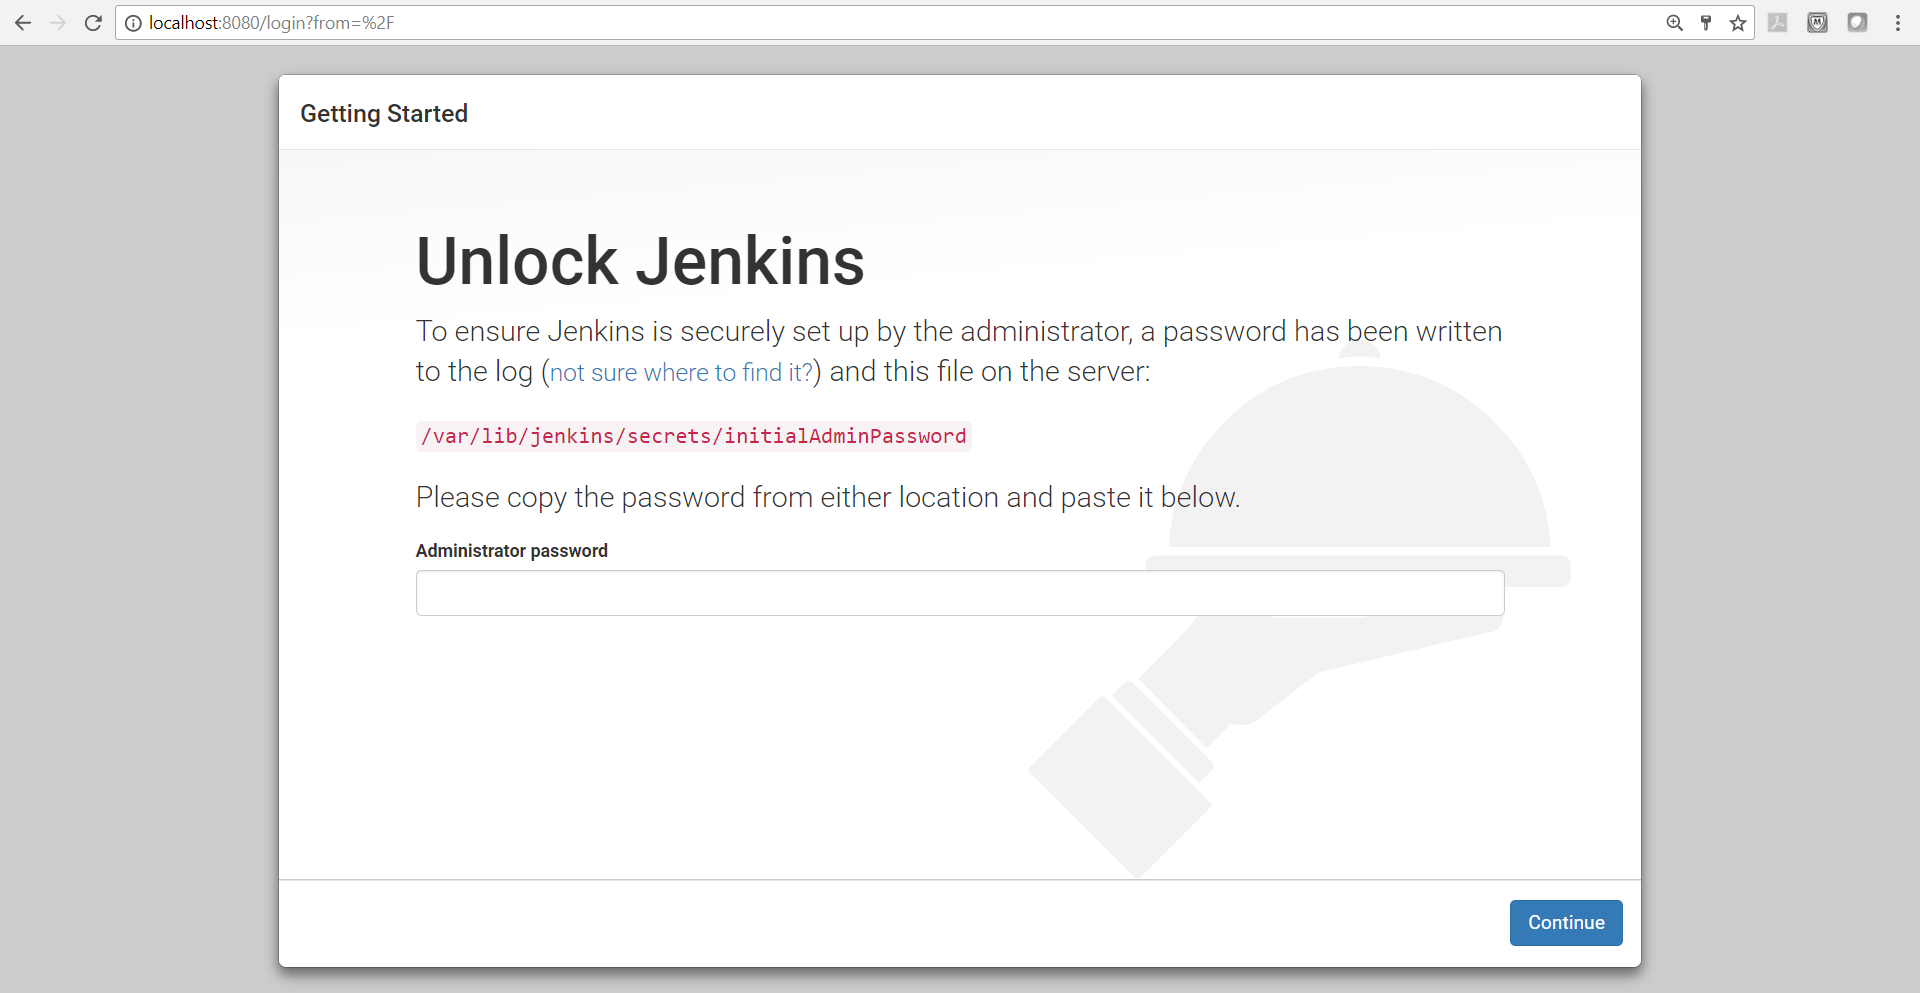
- In the PuTTY window, execute the cat command to get details of the file mentioned for the Administrator password.
- Replace that password in the Administrator password box and click on Continue:

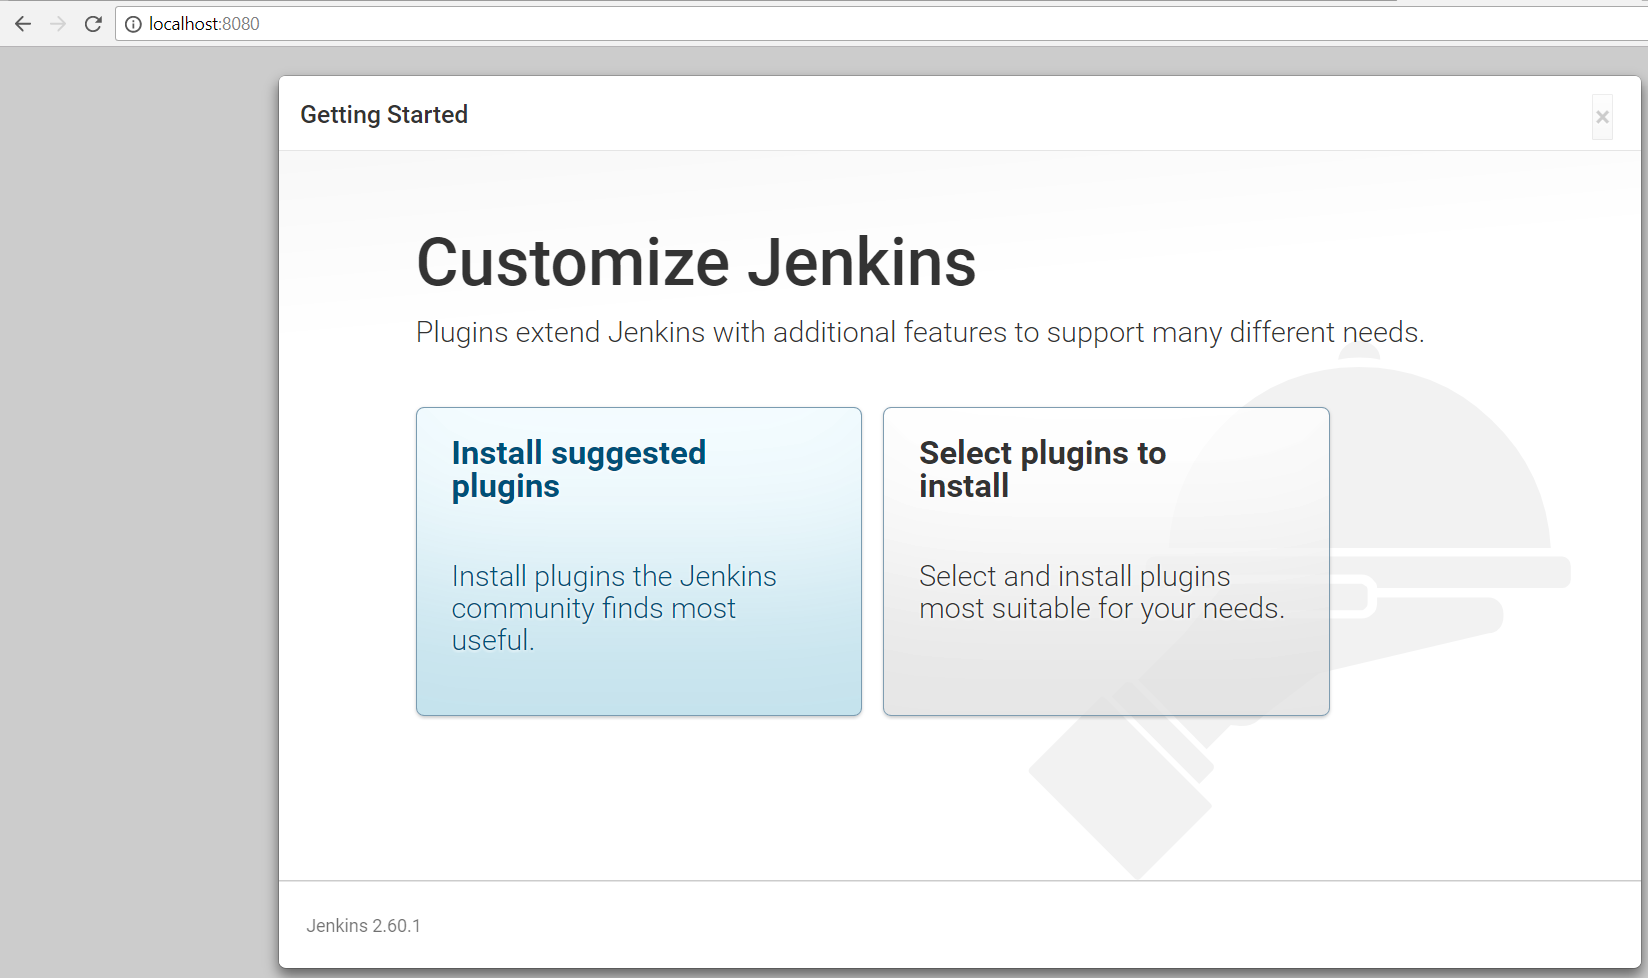
- Click on Install suggested plugins:
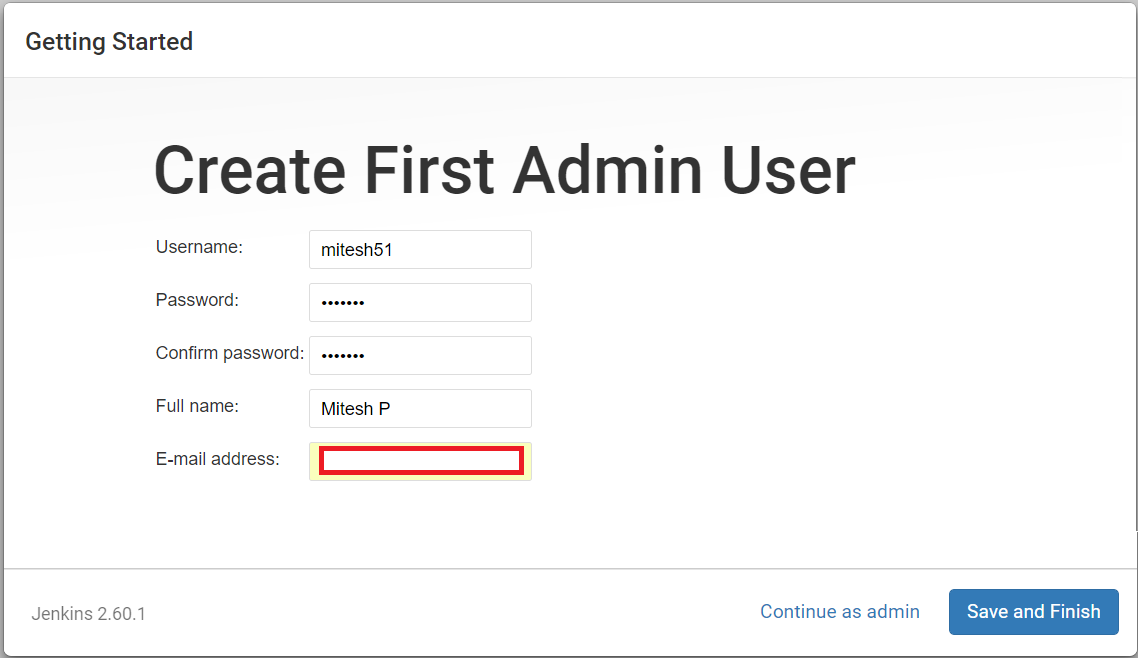
- Once all plugins are installed successfully, Create First Admin User. Click Save and Finish, as demonstrated in this next screenshot:
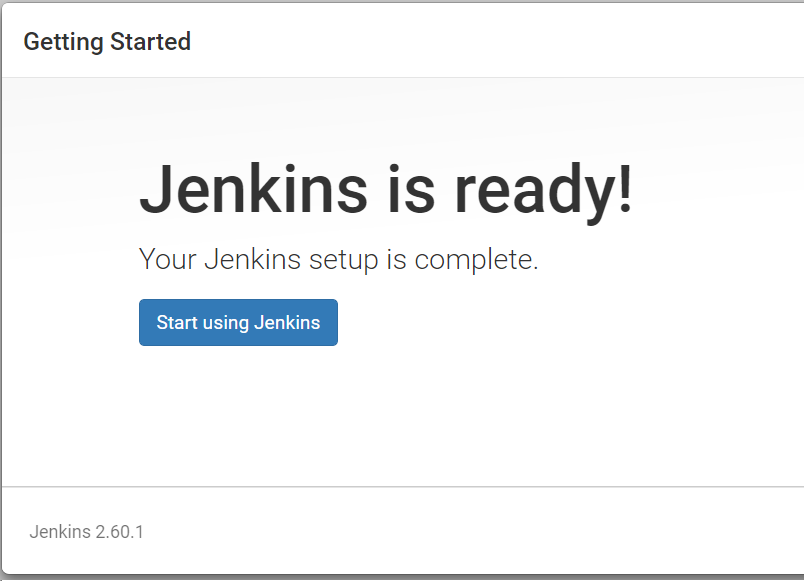
- Now, the Jenkins setup is completed. Click on Start using Jenkins:
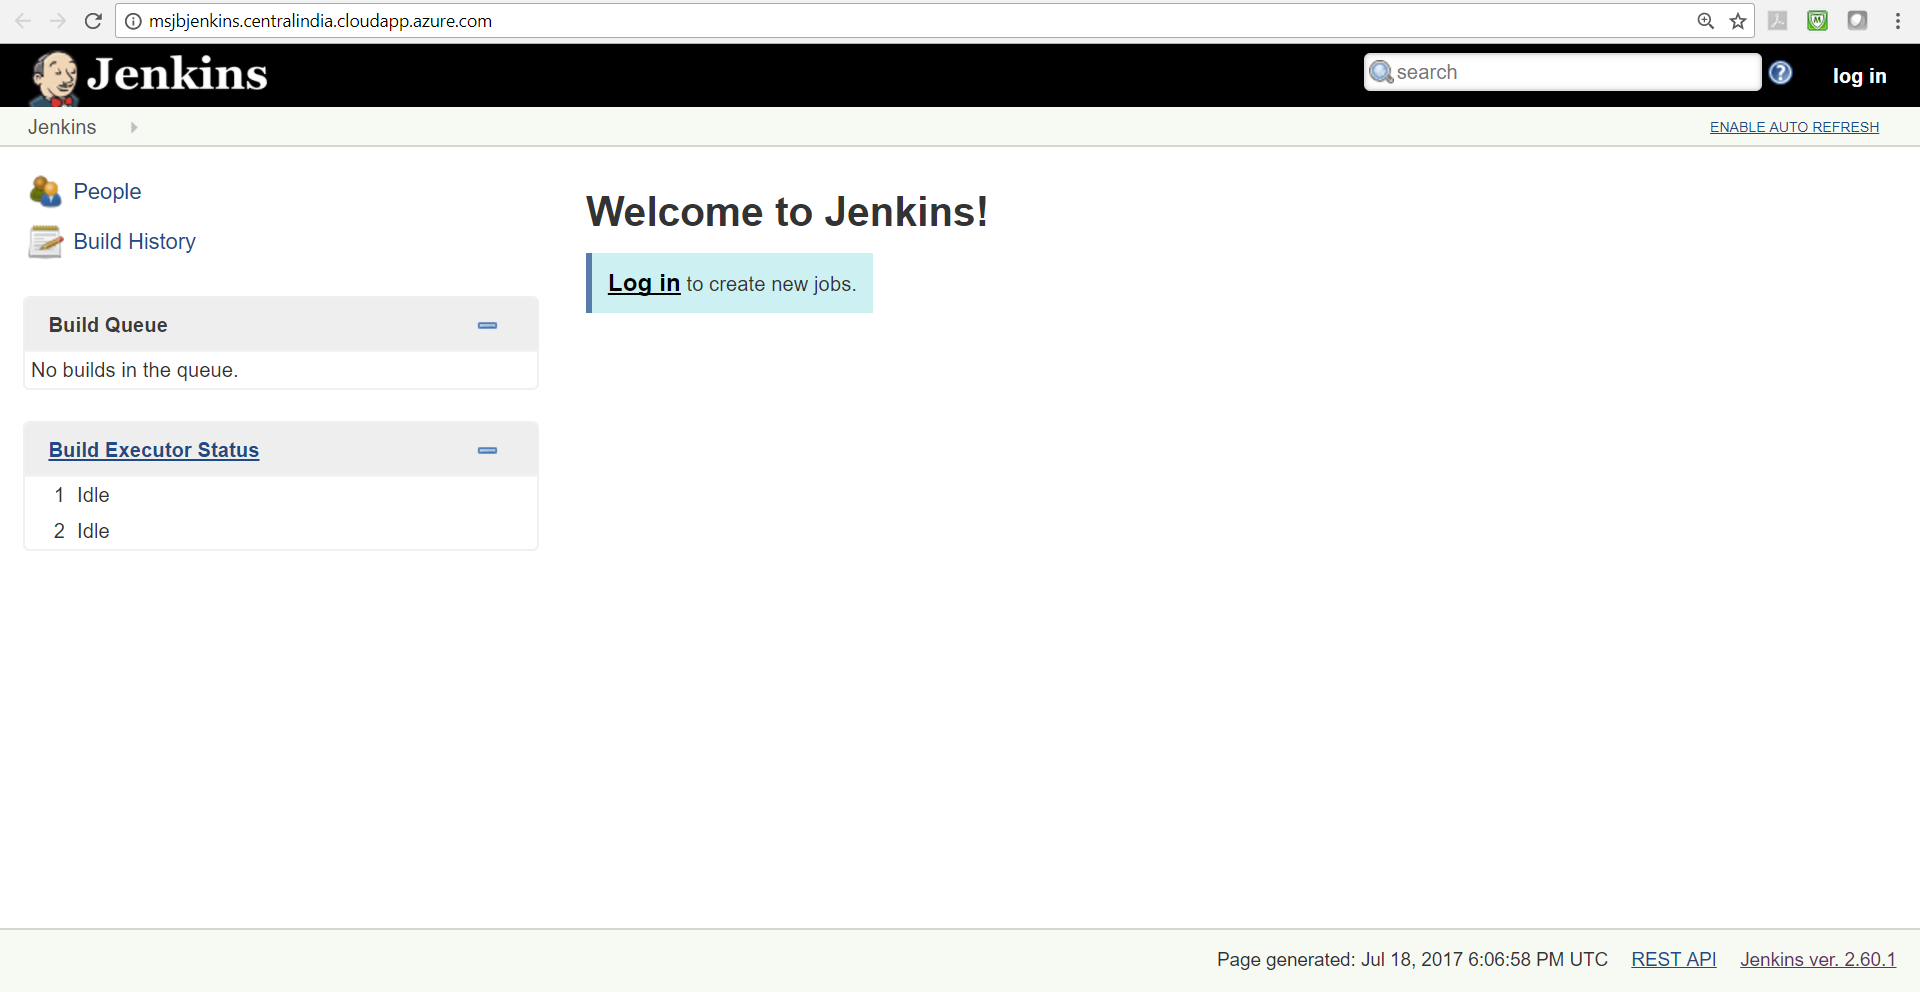
- Finally, we are at the dashboard screen:
How it works...
Behind the scene, the template creates all the resources that are required to host Jenkins, including virtual network, network security group, virtual machine, and so on, based on the best practices; and then Jenkins is installed and configured in a secured environment in Microsoft Azure.
Installing Jenkins as a Service in Windows
Installing Jenkins as a Windows service allows you to start Jenkins as soon as the machine starts, and regardless of who is interactively using Jenkins.
Getting ready
Install and configure Jenkins on Windows.
How to do it...
Follow these steps to install Jenkins as a service in Windows:
- Go to the Jenkins dashboard.
- Click on Manage Jenkins.
- Click on Install as Windows Service, as shown in the following diagram:

- Keep Installation Directory as the default and click on Install:

- Once Windows as a Service installation is successfully completed, click on Yes:
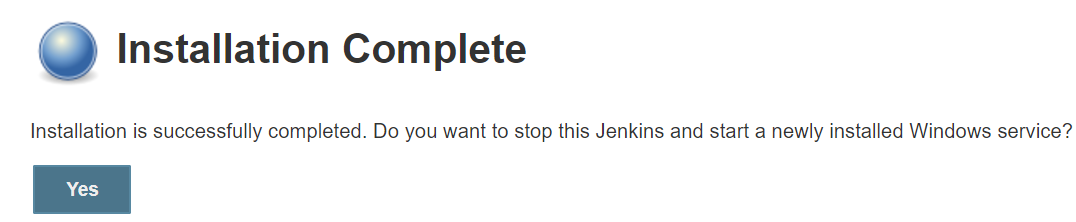
- Now Jenkins will be available as a service in the Windows system.
How it works...
Go to Control Panel and search for Services.
Click on Services (Local) to view:
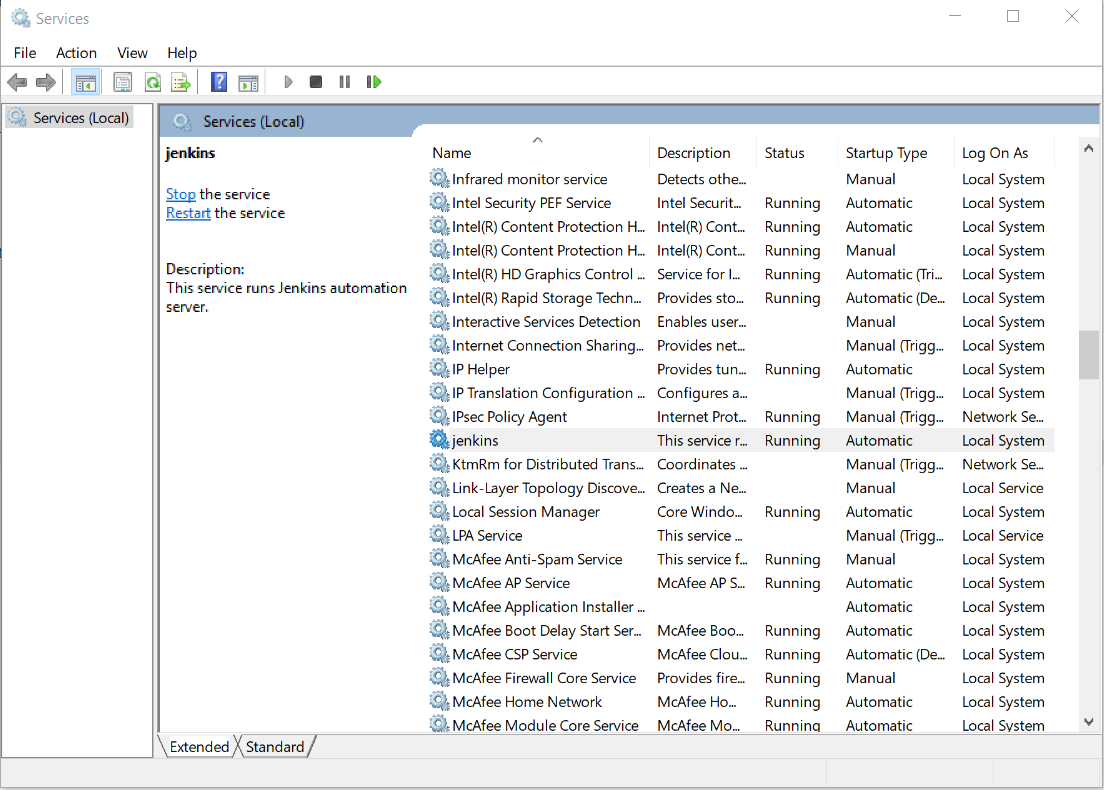
Once the Jenkins service is available, you can right-click on it and start, stop, or restart services based on your requirements.
Installing plugins in Jenkins
Jenkins is an open source automation server that is widely used and extensible due to more than 400+ plugins. Plugins make Jenkins' integration with other tools very easy. You can create your own plugins also.
Getting ready
There are various categories of plugins available, such as Source Code Management, Slave launchers and controllers, Build triggers, Build tools, Build notifies, Build reports, Other Post-build Actions, External site/tool integrations, UI plugins, Authentication and user management, Android development, iOS development, .NET development, Ruby development, Library plugins, and so on.
How to do it...
- Go to the Jenkins dashboard. Click on Manage Jenkins and then Manage Plugins:

- Go to Available tab and select any plugin to install. Click on Install without restart:

- Verify the successful plugin installation, as demonstrated in this next screenshot:

If installation is pending with restart, then restart Jenkins.
How it works...
Once the plugin is installed, a specific block is added in a build job or in the relevant section in Manage Jenkins.
You only need to provide some parameters and credentials for integration of external tools or services with Jenkins.
There's more...
Jenkins defines interfaces or abstract classes that model a facet of a build system. Interfaces or abstract classes define agreement on what needs to be implemented; and Jenkins uses plugins to extend those implementations.
See also
- Visit the Plugin tutorial, https://wiki.jenkins.io/display/JENKINS/Plugin+tutorial for more details.
Uploading plugins in Jenkins
There will be instances where you have all the plugins downloaded from https://updates.jenkins-ci.org/download/plugins/, or you may create your own plugin and you want to utilize that in Jenkins. This recipe will explain how to upload these plugins in Jenkins.
Getting ready
Download the required plugin https://updates.jenkins-ci.org/download/plugins/ or create a plugin using the Plugin tutorial, https://wiki.jenkins.io/display/JENKINS/Plugin+tutorial.
How to do it...
For this recipe, we will download a plugin and upload it from the Jenkins dashboard:
- Download the copyartifact/ plugin (.hpi) file:

- Download the latest version to your system:

- Go to the Jenkins dashboard.
- Click on Manage Jenkins.
- Click on Manage plugins.
- Go to the Advanced tab. Click on Choose File in the Upload Plugin section:

- Click on Upload.
How it works...
Once a plugin is uploaded successfully, we can utilize extensibility provided by the plugin that is uploaded into Jenkins.
Configuring proxy in Jenkins
Jenkins is often installed in organizations behind the proxy server. In such scenarios, it is important to configure a proxy in the Jenkins dashboard so plugin updates can be installed successfully.
Getting ready
Get all the details related to the server name, port number, and credentials that are allowed to access the proxy server.
How to do it...
- Go to the Jenkins dashboard.
- Click on Manage Jenkins.
- Click on Manage plugins.
- Go to the Advanced tab.
- Provide Server, Port, User name, Password, and No Proxy Host:

- Click on Submit.
Configuring global settings in Jenkins
Configure system is the place where initial settings can be done, and it is useful. You can configure SMTP server details, SonarQube server details, environment variables, and so on.
Getting ready
To configure global settings and paths, we need to go to Configure System in the Jenkins dashboard.
How to do it...
- Go to the Jenkins dashboard.
- Click on Manage Jenkins.
- Click on Configure System.
- Verify the Home directory available:

- In the Configure System page, we can define Environment variables too so that it can be used during the execution of build jobs.
- For example, we can configure the ANDROID SDK path in Environment variables in order to set Continuous Integration for Android Apps.

- Another important configuration available on the same page is Jenkins Location. You can specify the HTTP address of the Jenkins installation, as Jenkins cannot reliably detect such a Jenkins URL from within itself:

There's more...
There are some important configurations that you need to do here in the Configure System section, such as SCM Polling, E-mail Notification, Extended E-mail Notification, Git plugin, Disk usage, Quality Gates - SonarQube, Build Pipeline Plugin, Copyartifact: Upstream build that triggered this job, Audit Trail, SonarQube servers, and so on.
Configuring JENKINS_HOME
The .jenkins is the main directory that contains all the details for Jenkins installation files, configurations, plugins, build job configuration, and so on.
Getting ready
It is important to keep the .jenkins directory at a location where a good amount of free space is available. By default, Jenkins creates .jenkins (or JENKINS_HOME) at a specific location considering the operating systems.
For example, in Windows it is available at C:\Users\<USER_NAME>\.jenkins.
How to do it...
- In Windows, to change to JENKINS_HOME, go to the Control Panel | All Control Panel Items | System.
- Click on Advanced System Settings.
- Click on Environment Variables.
- Create a new variable JENKINS_HOME and give the path:

- In Ubuntu, go to /etc/default/Jenkins.
- Change the JENKINS_HOME location:

- Once changes are done, save the changes.
How it works...
Once JENKINS_HOME is changed, you need to restart Jenkins. The next time Jenkins starts, it will take JENKINS_HOME as the location that you have configured.
There's more...
The following table describes the default location of JENKINS_HOME in different operating systems:
|
Operating system |
$JENKINS_HOME location |
|
Windows |
C:\Program Files (x86)\jenkins or C:\Users\<USER>\.jenkins |
|
Mac OSX |
Macintosh HD/Users/Shared/Jenkins |
|
Ubuntu/Debian |
/var/lib/jenkins |
|
Red Hat/CentOS/Fedora |
/var/lib/jenkins |
|
OpenSUSE |
/var/lib/jenkins |
|
FreeBSD |
/usr/local/etc/jenkins |
|
OpenBSD |
/usr/local/etc/jenkins |
Understanding JENKINS_HOME directory
In this recipe, we will discuss the directories available in the JENKINS_HOME directory.
Getting ready
Locate the JENKINS_HOME directory from the Environment Variables, or go to the default locations where JENKINS_HOME is available in different operating systems.
How to do it...
- You have many files and directories in the JENKINS_HOME directory. We will give brief information on some important files and directories:

- The following are some important files and directories in the JENKINS_HOME directory:
|
config.xml |
Jenkins root configuration file |
|
fingerprints |
It stores fingerprint records, if any |
|
plugins |
It is a root directory for all Jenkins plugins |
|
jobs |
It is a root directory for all Jenkins jobs |
|
logs |
It stores all log files |
|
secrets |
It is a root directory for the secret + key for credential decryption |
|
users |
It stores all user-related details in Jenkins |
|
war |
It stores all details related to the JENKINS_WAR file |
|
workspace |
It stores all the files and artifacts related to different build jobs, and it moves content to jobs directory when archiving elements. |
See also
In the JENKINS_HOME directory, open config.xml in any of the text editors and review the options available in the file.
Using different ports for Jenkins
By default, Jenkins runs on port number 8080.
Getting ready
There are scenarios where Tomcat is running on 8080, or any other application is running on 8080 port. In such cases, to avoid port conflicts you need to change the Jenkins port.
How to do it...
Let's change a port on which Jenkins runs:
- If you run Jenkins using the command line, then you can execute a command such as java -jar -httpPort=9999 jenkins.war to change the existing port from 8080 to 9999.
- Another way to change the port while Jenkins is installed using the Windows package is as follows:
-
- Go to the Program Files/Jenkins directory where you installed Jenkins
- Open the Jenkins.xml in the editor
- Find "--httpPort=8080" and replace the port 8080 with the new port number
How it works...
First, you installed a virtual image of Ubuntu, changed the password so that it is harder for others to log in, and updated the guest OS for security patches.
Configuring JAVA_HOME in Jenkins
Jenkins is an open source automation server that can be used to configure Continuous Integration for projects written in many programming languages. Let's consider the case of an application that is Java-based.
We need to tell Jenkins where Java is installed.
Getting ready
Download the required Java version based on the requirements of an application, or install automatically.
How to do it...
- Open the Jenkins dashboard.
- Go to Manage Jenkins.
- Go to Global Tool Configuration to configure tools, their locations, and automatic installers.
- Go to the JDK section.
- Give the Name and tick the Install automatically option; provide details for the Oracle account to download JDK successfully.
- You can give a logical name such as JDK 1.7 or JDK 1.8 to identify the correct version while configuring a build job.
- You can add multiple JDKs based on the version, so if different applications require different JDKs then the scenario can be managed easily by adding JDK in Jenkins:

How it works...
When you create a build job in Jenkins and configure it, you need to specify the Java version that will be used by the build execution. You can use existing Java available on the system as well if you don't want to install automatically.
In the general section of the build job, we can select a JDK from the list. This list contains all the JDKs that we have configured in the Global Tool Configuration.
Configuring Git in Jenkins
Jenkins can be integrated with many source code repositories, and Git is one of them. Let's consider the case of an application that is Java-based and the source code is stored in Git, Gitlab, and/or GitHub.
We need to tell Jenkins where Git is installed in the local system.
Getting ready
Download the required Git version based on the operating system, or install automatically.
How to do it...
- Open the Jenkins dashboard.
- Go to Manage Jenkins.
- Go to Global Tool Configuration to configure the tools, their locations, and automatic installers.
- Go to the Git section.
- Give the Name and click on Install Automatically, or provide a path to Git.
- You can add multiple Gits based on the version or for the specific agent. You need to give a meaningful name so it can be identified easily while configuring the build job:

How it works...
When you create a build job in Jenkins and configure it, you need to specify the Git version that will be used by the build execution. You can use existing Git installation available on the system as well if you don't want to install automatically.
In the Source Code Management section, select the appropriate Git that is configured in Global Tool Configuration from the list.
Go to the Git executable configuration to change the Git installable.
Configuring ANT_HOME in Jenkins
Jenkins is an open source automation server that can be using to configure Continuous Integration for projects written in many programming languages. Let's consider the case of an application that is Java-based, and which has Ant as a build tool.
We need to tell Jenkins where the Ant installable directory is available.
Getting ready
Download the required Ant version or install automatically.
How to do it...
- Open the Jenkins dashboard.
- Go to Manage Jenkins.
- Go to Global Tool Configuration to configure the tools, their locations, and automatic installers.
- Go to the Ant section.
- Give the Name and click on Install Automatically, or give the path to an existing location where the Ant installation is available.
- You can give a logical name such as ANT 1.10.1 or ANT 1.9.1 to identify the correct version while configuring a build job.
- You can add multiple Ants based on the version in Jenkins:

How it works...
When you create a build job in Jenkins and configure it, you need to specify the Ant version that will be used by the build execution. You can use existing Ant installation available on the system as well if you don't want to install automatically.
Configuring MAVEN_HOME in Jenkins
Jenkins is an open source automation server that can be using to configure Continuous Integration for rojects written in many programming languages. Let's consider the case of an application that is Java-based and, which has Maven as a build tool.
We need to tell Jenkins where the Maven installable directory is available.
Getting ready
Download the required Maven version or install automatically.
How to do it...
- Open the Jenkins dashboard.
- Go to Manage Jenkins.
- Go to Global Tool Configuration to configure the tools, their locations, and automatic installers.
- Go to the Maven section.
- Give the Name and click on Install Automatically, or give the path to the existing location where the Maven installation is available.
- You can give a logical name such as Maven 3.5.0 or Maven 3.4.0 to identify the correct version while configuring a build job:

- You can add multiple Mavens based on the version in Jenkins.
How it works...
When you create a build job in Jenkins and configure it, you need to specify the Maven version that will be used by the build execution. You can use existing Maven installation available on the system as well if you don't want to install automatically.
Configuring GRADLE_HOME in Jenkins
Jenkins is an open source automation server that can be using to configure Continuous Integration for projects written in many programming languages. Let's consider the case of an application that is Android-based, and which has Gradle as a build tool.
We need to tell Jenkins where the Gradle installable directory is available.
Getting ready
Download the required Gradle version or install automatically.
How to do it...
- Open the Jenkins dashboard.
- Go to Manage Jenkins.
- Go to Global Tool Configuration to configure the tools, their locations, and automatic installers.
- Go to the Gradle section.
- Give the Name and click on Install Automatically,
or give the path to the existing location where the Gradle installation is available. - You can give a logical name such as Gradle 4.0.1 or Gradle 4.0.0 to identify the correct version while configuring a build job:

- You can add multiple Gradles based on the version in Jenkins.
How it works...
When you create a build job in Jenkins and configure it, you need to specify the Gradle version that will be used by the build execution. You can use existing Gradle installation available on the system as well if you don't want to install automatically.
Creating a Freestyle job for Ant Project
A build job is a basic execution unit in Jenkins. We can perform many actions using build jobs. We can execute commands, send notifications, configure Continuous Integration, and so on.
Getting ready
You will need to configure tools based on the application, such as Ant, Gradle, Java, Git, and so on.
How to do it...
- Open the Jenkins dashboard.
- Click on New Item.
- Enter an item name.
- Select a template Freestyle project.
- Click on OK:

- Go to the Source Code Management section and select Git.
- Provide the Repository URL.
- Provide Credentials, as demonstrated in the next screenshot:

- In the Build section, click on the Add build step and select Invoke Ant.
- Select the Ant name based on our Global Tool Configuration.
- Provide Targets. In Ant, we can give a target based on the targets defined in the build.xml file:

- Click on Save.
How it works...
When you go to the Build Job page and click on Build now, it will execute the build based on the configuration.
Creating a Maven Job for Maven Project
A build job is a basic execution unit in Jenkins. We can perform many actions using build jobs. We can execute commands, send notifications, configure Continuous Integration, and so on.
Getting ready
You will need to configure the tools based on the application, such as Maven, Java, Git, and so on.
How to do it...
- Open the Jenkins dashboard.
- Click on New Item.
- Enter an item name.
- Select a template Maven project.
- Click on OK:

- Go to the Source Code Management section and select Git.
- Provide the Repository URL.
- Provide Credentials.
- In the Build section, the Root POM name will be already available.
- Maven has its own set of goals and we can execute any one of those goals based on requirements. These steps are demonstrated in this next screenshot:

- Click on Save.
How it works...
When you go to the Build Job page and click on Build now, it will execute the build based on the configuration.