Welcome to Instant Brainshark. Today's fast-paced business environment has led to the emergence of more efficient presentation platforms. Brainshark's cloud-based storage and audio capabilities allow the acceleration of your sales cycle never before, integrating smoothly into your existing processes. The emergence of smartphones has led to an additional platform for viewing presentations online. Brainshark's mobile application allows your staff, co-workers, or clients to view presentations on-the-go, at their own convenience. This book will cover the knowledge required to use Brainshark as a presentation platform, as well as best practices to ensure an optimal amount of sales conversions.
The first part of the book will aid you in getting started with Brainshark. As you proceed further, the book will cover the details on how to get the most out of the presentation software the various situations described.
We will first look into the basics of using Brainshark by exploring the fundamentals. By learning how to create your first presentation, you can easily move onto the more advanced sections, illustrating how to add, edit, and delete various types of content your presentation.
An example of a Brainshark presentation
Through this recipe, we will be able to start our first presentation, with content design tips to enhance your sales cycle using Brainshark's audio annotation system. To start, you should ideally prepare some file(s) in one of the valid formats, depending on the type of presentation you're seeking to create:
Narrated slideshow presentations represent the core functionality of Brainshark. By importing your existing slideshows, you may add audio annotations, enhancing your audience's experience. We will cover more on these presentations in future recipes.
Valid formats include:
.ppt/.pptx: Microsoft PowerPoint slideshows.odp: Open Office presentation format
Photo albums allow you to share image content in a presentable manner over the Internet. Whether you wish to showcase vacation photos to your friends or family, or even promote the sale of your product via images, photo albums are a great way to deliver your content.
Valid formats include:
.jpg/.jpeg: JPEG image file.gif: GIF image file.png: PNG image file.bmp: Bitmap image file
You may also choose to upload existing video files to play on Brainshark. This may be ideal for when you wish to internally link a video from an existing Brainshark presentation or show off a product in real time.
Valid formats include:
.avi: AVI video file.flv: Flash video file.mov: QuickTime movie file.wmv: Windows movie file.rm: RealMedia file
Podcasts are a great way to get a hold of your busy audience, in this fast-paced world. Brainshark is a great place to upload, edit, and send audio files to those on-the-go are unable to watch an actual presentation.
Valid formats include:
.
mp3: MP3 audio format
In addition to narrated slideshow presentations, narrated documents allow you to present in a more formal fashion. Given the flexibility to upload Microsoft Word documents and even Excel spreadsheets, you now have a larger range of materials to distribute at your next showcase.
Its valid formats include:
.ppt/.pptx: Microsoft PowerPoint slideshows.doc/.docx: Microsoft Word documents.xls/.xlsx: Microsoft Excel spreadsheets.odp: Open Office presentation format.odt: Open Office document format.ods: Open Office spreadsheet format.pdf: Portable document format.txt: Text file
We will now explore how to create our first presentation. The steps are as follows:
Go to http://my.brainshark.com.
Press the SIGN UP FOR FREE link in the top-right corner of the screen, going through the registration process and logging in.

Upload your media by pressing the Upload Content button. This can be found on the right-hand side of the screen or the navigation bar.

Select your presentation type (that is, PowerPoint, document, video, photo album, or podcast) and press the Upload button.

Fill out the presentation information while your file is being uploaded. Be sure to change the title to something readable; and ensure that all the relevant fields are filled out. Further details on how to properly categorize or tag your presentations may be found in the Helping people find your presentations recipe.
Now, we take advantage of Brainshark's unique and powerful audio annotation feature. You can either add audio via a computer microphone or over the phone using the given phone number and presentation code.
Brainshark's presentation system allows you to upload and share media online to clients, co-workers, and peers. Its audio annotation system links recorded input from your microphone or phone to sound files that are stored on Brainshark's servers. Then, it is played as the presentation progresses.
This section will show a step-by-step process on how to delete and print presentations after creation.
Note that this process applies to all Brainshark presentations made from this point on.
Note
Deleted presentations cannot be recovered. Please ensure that you know you wish to delete the presentation before performing the following steps.
Press the My Content button on the navigation bar.

Select the presentation you wish to delete or print.
Press the Edit Presentation link on the action panel, located on the right-hand side of the screen.

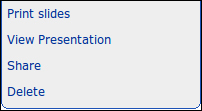
Under the left panel, you will find the Print slides and Delete options.

In this recipe, we'll be looking at how to take full advantage of Brainshark's narrated slideshow functionality by following best practices in the presentation design. This will be covered using a list of tips, followed by why these best practices in industry. Lastly, we will look into ways to aesthetically improve existing and future presentations.
The following are best practices that may be used in your own presentations:
You should follow Guy Kawasaki's 10/20/30 rule. There shouldn't be more than 10 slides/page, an average presentation should last for roughly 20 minutes, and the font size shouldn't be smaller than 30.
If it makes sense, try to customize the layout of your information from the boring, default point form in order to communicate the message in a better way.

Include figures instead of statistics when illustrating data, such as a graph or table.
Keep your audience in mind at all times. Do not clutter your presentation with facts that will not interest them.
Modify your existing presentations to be Brainshark-friendly, matching slide animations and audio cues properly. There are more tips on how to do this properly in the Synchronizing slide animations to audio recipe.
When applicable, present the initial sale as a gift rather than a purchase. For instance, "The First Month Is On Us!" as opposed to "Try Us Free For 30 Days".
If various slides/pages overlap in material or are related, aim to condense them into one. This will retain the focus of your audience by reducing scope.
If your product has already been tested, aim to include social proof (quotes, references, or statistics based on past customers' usage; typically include real names and occupational positions for reinforced integrity) from past customers.

Sell benefits to pain points (the pain that your audience is experiencing your product can help solve), not features. For instance, instead of stating "You can File Your Taxes With Our Software", say "Tired of Filing Your Taxes After an Exhausting Workday? Our Software Does It So You Don't have to!".
Where content exclusively describes benefits, include a call-to-action (some button or text meant to prompt a user to click it, leading to a sales conversion) link to purchase on every slide/page.
If there are multiple products/plans, make sure to recommend only one to your audience (but have the others available for those who want them).
Except for the call-to-action links, aim to minimize website links wherever possible.
Whenever possible, try to emphasize how/where the product is made, if it can be used your advantage. For instance, emphasizing that your manufacturing process is environment-friendly to green customers or that your product was made in Canada for a Canadian audience will aid in sales conversions.
This section will show why the steps illustrated in the preceding How to do it section are important:
The 10/20/30 rule ensures that you keep the presentation concise and informative, forcing information constraints. In addition, the 30 font-size rule ensures that all members of your audiences the visual display of content.
Sometimes, boring and default layouts can be changed to communicate the topic at hand in a better way. For instance, when information is strictly , a flowchart might present the content in a better manner.

Statistics are best communicated through visualizations. Figures such as tables and graphs allow audiences to parse information faster and with better comprehension of the issues at hand.

Remember that you should always be selling a product to a particular audience. For instance, if you are selling software to two different audience groups but find that their pain points are different, you should ideally split the presentation into two; one for each group.
Keep in mind that you will not be presenting personally, so ensure that any audio and visual cues present are properly explained to the audience.
When presented as a gift, the audience views the initial sale as a window of opportunity instead of a purchase. People are wired to jump at opportunities, leading to impulse purchasing and higher sales.
There is no need to reiterate information from slide-to-slide. If there is related material across different slides, readers may need to look back at the previous slides to understand the current one.
Social proof has been proven to be much more effective than self-promotion. Knowing that a user of a similar demographic used the product successfully aids confidence in the buying decision.
Pain points communicate much easier to buyers than features. Knowing what a product can do is not as powerful as knowing what a product can do to solve their problems.
By consistently reminding the audience about the call-to-action, you will keep them engaged throughout the sales process. In addition, this ensures that the user does not have to go backwards in the presentation to go through the call-to-action prompt.
People are often indecisive and do not know what is best for them. By recommending a product to begin with, you eliminate this problem, leading to faster decision-making on impulse and sales.
Your focus is to sell the product, not distract the audience by directing them away from the presentation. By adding miscellaneous links throughout the presentation, people may leave the slideshow to view them, staying on those sites as a result.
If people realize that the product aligns with their own personal interests, they will be more willing to support it through a purchase.
This section will cover details regarding the basic aesthetic appeal tips:
Outside images, do not use more than three main colors per presentation.
Select your animations wisely. Many are tacky and unnecessary.
Avoid sharp colors.
Avoid dark backgrounds and distracting objects.
Ensure that there is sufficient contrast in the text color against the background.
There shouldn't be more than three font sizes per presentation.
Any charts, graphs, or tables used must be simple enough for your audience to interpret. On Brainshark, viewers have no one to turn to for their questions in real-time.
Any call-to-action buttons should aim to have significant contrast and depth differences in comparison to the background for emphasis.
Ensure that you use sans-serif fonts for readability. Examples include Arial, Calibri, Verdana, or Gill Sans MT.

Font to the left is a typical serif font whereas the one to the right is considered sans-serif.
Apply the 6/6 rule. There shouldn't be more than 6 words per point and 6 points slide.
Avoid using clipart.
Podcasts are now a widely popular way to broadcast information for listeners on-the-go. Given the ability to simply download and listen later, today's society has become adjusted to the convenience that such a medium brings. The following recipe will look into the best practices revolving around podcast design.

An example of a Brainshark podcast
This section will cover best practices alongside podcast recording. are as follows:
Ensure that you have a script or outline on-hand during recording.
Your audience will want something out of the podcast. Identify what they want and strip off any extraneous details.
In addition to step 2, you may find better conversions in reducing the size of your audience and focusing on a niche audience's pain-points.

If you notice that your audio quality is not up to par, it may be worth identifying the cause, whether it is a noisy recording environment or amateur equipment.
Include a downloadable transcript for your audience to ensure that they can trace back to your words in case of audibility issues. We will further discuss how to add attachments in the Adding attachments recipe.
Podcast recordings should be kept under 15 minutes.
This section will show why the steps illustrated in the preceding How to do it section are important.
A podcast does not necessarily have to be done in one take. However, having a script or outline in front of you will lower the amount of takes required as it reduces the potential for mistakes. This will allow you to save time in recording and use it towards selling your product instead.
Unlike a slideshow/document, your listeners do not have the option to easily skip irrelevant portions of a podcast. Thus, it is important to align the podcast's message with the needs of your audience.
By splitting up your audience and addressing their individual pain points through different podcasts, you create a more effective message for all of them.
Audio quality is an instant indicator of podcast professionalism. Ensuring that your message is clear removes audibility issues and improves conversions over time.
Unlike a slideshow/document, it is much more difficult for your audience to repeat a section of a podcast to figure out what was said. Having a downloadable transcript ensures that they can look up what was not heard in case a part of the podcast was either inaudible or missed. For more information on how to attach a downloadable transcript, refer to the Adding attachments recipe.
The general rule of thumb for podcasts is not to exceed 15 minutes. If you cannot sell your product or portray your message within that span, aim to cut down unnecessary or irrelevant information and try again.
The only thing more important than designing an effective presentation is getting it out there. This recipe looks into the best practices for search engine optimization and presentation information.

The Brainshark search page
This section will look into how to fill out your presentation information to optimize search rankings:
First and foremost, aim to include a title that matches what your audience would use on a search engine. For instance, if you were selling Internet marketing software for small businesses, you could include
Top 10 Ways to Promote Your Productas the title, as it would be a reasonable search query on search engines such as Google, Yahoo! Search, or Bing. Most importantly, keep this short (at 50 characters or ) as Brainshark uses the title in various places for search rank (the rankwhich your page shows up on a search engine results page) purposes.
Include a brief description (keep this at 100 characters or ) of the slideshow. This will show up in search results when keywords that are bound to the slideshow link to the webpage. Try to keep this at a maximum of two sentences.

Select up to 3 categories that will help represent your presentation. Make sure that they accurately portray your presentation type as incorrect categories can hurt your search ranking if your page is backlinked (when your page is linked from an external source like a blog or magazine website) from a website under different categories.

Select tags for your presentation. Note that these will have a negligible effect on search engine results. Tags are primarily for Brainshark's internal search and will help people search for your presentation from within the website. Thus, there are few restrictions around how these should be designed.

Search engines such as Google, Yahoo! Search, and Bing deploy spiders, computer programs designed to visit web pages (also known as crawling), and retrieve relevant information for searchers. For instance, a spider may go onto a ski resort website in order to retrieve specific keywords such as the location of the resort, the category of the website (recreation, in this case), and its name. All of this information gets indexed and used to decide the ranking of a search result when a user searches something on the web. This ranking can be positively affected by relevance between the search terms and the indexed keywords or even negatively affected by irrelevance instead. Thus, it is important to ensure that all tags or categories selected previously relate to the presentation at hand. In addition, long descriptions and titles can lead to more specific search keywords, leading to a lesser search ranking.
There's no doubt that alongside search rankings, a little bit of marketing can go a long way. By adding compelling presentation titles, one is able to improve clickthrough rates and sell the product at a much faster pace. This section will delve into this concept briefly.
Titles of Brainshark presentations have the strongest effect on search engines and Brainshark's internal search capability. Thus, it is important to master the art of presentation title design in order to increase clickthroughs and sales conversions. To do this, you'll need to find out what keeps your audience awake at night. What are their pain points and what are they most likely to search up on the Internet to solve them?
Survey your existing customers to find out what pain points you help to solve the most with your product.
In "Pain Killer Marketing", the authors Henry DeVries and Chris Stielhl found that 12 to 15 personal interviews lead to approximately 80 percent of the available pain points for their respective market. More importantly, you should aim to:
Meet their expectations by ensuring that the presentation title matches the content presented. Otherwise, you may find people leaving your presentation a lot sooner than expected.
In addition to meeting expectations, ensure that they can get the information they need as succinctly as possible. If your title is "Top 10 Ways To Get More Customers", your audience should be able to immediately jump to the 10 points and begin reading.
Don't forget to include your product and link it to the presentation description. For instance, assuming we used the previous title and your product was able to get more customers, feel free to include a call-to-action for your product.
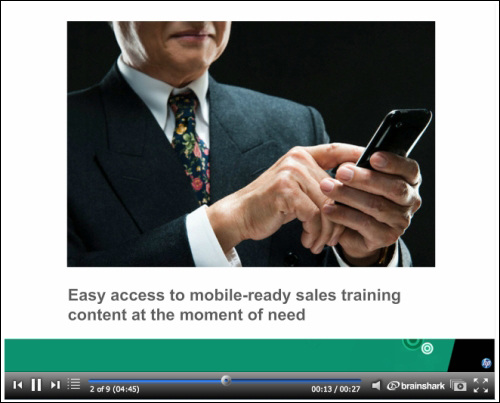
With the evolution of cellular devices, people are more accessible via their smartphones than ever before. The ability to design mobile-friendly presentations to ensure that your mobile users are not lost is a great way to keep yourself ahead of the competition. This recipe will cover the best practices in mobile presentation design. We note that these tips are geared towards creating presentations for mobile devices which is distinctively different the methods explained previously for desktop presentations.
A screenshot of the Brainshark mobile application
To get started with designing mobile-friendly presentations, you'll need to install the Brainshark mobile application in order to allow for self-testing. This may be done using iTunes, if you have an iPhone or related iOS device or the Google Play Store if you have an Android phone.
Other supported devices that may view presentations via the website include:
BlackBerry
WebOS
Windows Mobile
Android below 4.03
iOS below 4.0
You should test your presentation on both the web browser and the native application to maximize compatibility across platforms.
We now explore the best practices in designing mobile-friendly presentations. The steps are as follows:
Note that cell phones can be as little as 1/10th a desktop monitor. Thus, design your presentations around this to ensure that your font size is large enough to meet the baseline requirements of mobile devices.
obile presentations for on-the-go audiences. Thus, ensure that your information is concise, delivering on what is required. There's no sense in expanding beyond what's required, especially if it hurts readability in the process.
Try dividing information into more slides rather than placing it all in one.
Use graphics wherever possible to communicate your ideas. Text is often too small for many cell phone users to bother reading. People are visual learners and can often recall images better than facts learned through words.
Follow the aesthetic tips in the Increasing sales with Brainshark slideshows/documents recipe as readability matters much more when the device size is smaller.
Test your presentation with as many mobile devices as possible to ensure maximum sales enablement across platforms. If possible, test with a BlackBerry first, as its keypad interface forces its screen size to be the smallest amongst mobile devices.
Here is a quick reference for comparing the Brainshark mobile app with the mobile web browser version to help illustrate their differences:
|
Feature |
Mobile Web Browser Version |
Brainshark Mobile App |
|---|---|---|
|
Animations |
√ |
√ |
|
Video |
√ |
√ |
|
Presentation Security |
√ |
√ |
|
Guestbook Support |
v |
√ |
|
Player Controls (Pause / Fast-forward, etc.) |
√ |
√ |
|
Basic Reporting (View Dates, Device Type) |
√ | |
|
Enhanced Reporting (View Duration, etc.) |
√ | |
|
Table of Contents |
√ | |
|
Downloadable Attachments |
√ |
√ |
|
Input to Interactions (Questions, Polls, etc.) |
√ | |
|
Question Branching |
√ | |
|
Question Feedback |
√ | |
|
Multiple Attempts |
√ | |
|
Answer Randomization |
√ | |
|
SCORM/AICC Compliance |
√ | |
|
Rapid Learning Course Support |
√ | |
|
Completion Criteria |
√ |
We note that although the mobile web browser version of Brainshark has fewer features and is slower on smartphones, it is also available on many more phones. This is because only devices with newer versions of Android and iOS may download and utilize the native Brainshark app. Thus, it is important to minimize the amount of native-only features that your presentation requires to ensure that all viewers can get the best experience.
Occasionally, slide animations do not perfectly align with the audio recorded. This recipe will briefly look into how to re-sync audio to ensure appropriate performances.
This section will show a step-by-step process on how to sync slide animations with Brainshark:
Press the My Content button on the navigation bar.

Press the Edit Presentation link on the action panel, located on the right-hand side.

Under Manage Audio, select Record audio.

Select whether or not you'd like to record using microphone or phone.
Click on the Record button and then click on the Next On-click Animation button to trigger the next animation. The counter underneath the button will indicate the of animations left in the slide.

Don't forget to add a pause at the end of your audio to ensure a smooth transition into the next slide.
Brainshark presentations are designed to play for fixed amounts of time, without user input. As such, it's important to realize that your recorded audio represents the slides' lifetime during the presentation. Ensuring you sync your voice with animations and include pauses will lead to more comprehensible presentations for your audience and better engagement, allowing better sales over time.
Sometimes, you may find that a slide does not actually need audio. This may be true in cases where you wish to quickly display a graphic or document that requires no commentary.
The following steps will illustrate how to remove audio from your slides:
Note
Deleted audio cannot be retrieved through Brainshark's support channels or otherwise. Please make sure that you are positive about deleting audio when you follow the given steps.
In the left panel, select Manage slides.

Click on the Audio button on the slide that should have its audio deleted.

Select Delete in the dropdown that pops up.

Another Brainshark's strengths comes from its ability to easily integrate existing slides into presentations, leading to faster, automatic conversions. This section will cover how to add additional PowerPoint slides to your presentation.
Adding content slides require the same type of files as creating your first presentation. Thus, please go to the Getting Ready section of the Creating your first presentation recipe as a reference for the files required. The following section will cover adding video, document, and photo slides.
Often, you may want to combine multiple PowerPoint presentations together in an organization fashion using Brainshark. This section will illustrate the steps to perform this:
over over the Add Slides link in the What Can I Do Now? menu and select the PowerPoint Slide option.

Select a file to append to the presentation by clicking on the Choose File button.

Select between Append to existing slides and Replace existing slides. The Append to existing slides will place all slides from your uploaded PowerPoint at the end of the presentation. The Replace the existing slides starting at choice, however, will require you to select a slide in your Brainshark presentation. This slide and all slides after it will be replaced by the contents of the PowerPoint presentation you choose to upload.

Select the Next button and the Brainshark conversion process will take place.
Once the Brainshark conversion process is complete, it allows you optionally to record audio to go along with the new presentation. Alternatively, you can select the Skip audio generation link at the bottom to move on to the next step.

You will be presented with the presentation properties page. Similar to before, you can select Manage slides to edit, delete, and add audio to your newly added slides.

Note that you are immediately transferred to the presentation slides page. The slide you have added has now been appended to the end of the presentation and you are free to modify it a regular slide. Using the arrow buttons to the left, you can re-order the slides to your liking. In order to increase the duration of the slide, add audio that lasts longer than 10 seconds. Once you are done with your changes, press the Apply button to change your presentation.
The steps for editing multiple slides are as follows:
Under the Things you can do menu, select Manage slides.

You will be brought to a page with all the slides in your presentation. Note that you are given the ability to delete or add audio to each individual slide without leaving the page. This essentially means that you are able to delete or add audio to multiple slides at once. Note, however, that clicking on Edit requires you to go to an dialog, reversing your previous changes.

Once you have finished deleting or adding audio to your various slides, click on the Apply button to apply your changes while staying on the same page. Click on the Save button instead to apply your changes and go back to the presentation menu.
One of Brainshark's premiere features is the ability to include Web URL slides for dynamic content. This section will cover how to fully utilize URL slide functionality.
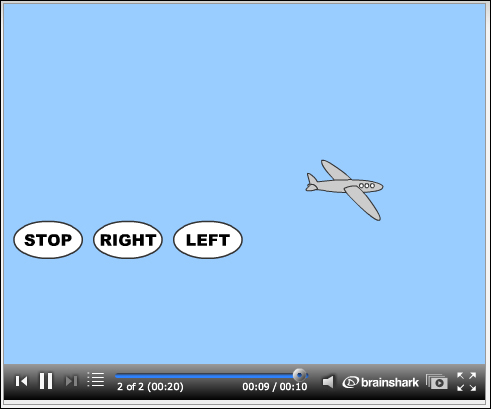
An example of a Shockwave Flash (SWF) URL slide with an airplane animation
The steps to add URL slides are as follows:
Hover over the Add Slides link in the What Can I Do Now? menu and select the URL Slide option.
Ensure that your website link is working and available to the public. Take the URL of the link and place it in the Web URL textbox. Make sure to include the protocol in front of the URL (http://) and assign it a title.

Press the Save button.
Test your presentation. If you have scrollbar(s) on the webpage and wish to get rid of them, ensure that the dimensions of your webpage are less than or equal to 480 pixels of width and 360 pixels of height.
Web URL slides allow you to edit the contents of your presentations fly by changing your website instead of all your presentations. An example of this is if you have seven presentations all referencing the same pricing information; rather than editing all seven presentations when your pricing changes, you can use web slides and link them to your website. Then, you only need to change the information on your website to update the respective presentations.
This recipe will briefly look into the process of adding question to slides. The following is an example:

An example of a question slide, with the total audience results to the right side
The steps are as follows:
Under the Things you can do menu, select Add a question.

Select your question category between either a poll or survey.
If your question is a poll, you can select between either multiple choice or true/false questionnaire types.
Otherwise, if your question is a survey, select between the following choices:
Multiple choice (choose one only)
Multiple choice (choose one or more)
True/False
Rankings
Ratings
Likert scale
These survey types will be furthered explained in the following How it works… section.
The variations of polls are fairly self-explanatory. Thus, we will now delve into the various ways to frame a survey.
Surveys are more complex as they have many more formats to choose from.
Multiple Choice (Choose one only): It is similar to the poll multiple choice format.
Multiple Choice (Choose one or more): It is similar to the previous format but allows for more than one option to be selected. An example for when to use this is when you are asking for a price range on a new product, that is:
"What would you be comfortable paying for our new product?"
$10.00/month
$25.00/month
$40.00/month with 24/7 support
True/False: It is similar to the poll true/false format.
Rankings: It allows you to order what the customers truly want. An example for when to use this is when you are asking for the ranking of a list of features that your customer wants. is:
"How would you rank the following features in our product?"
More Affordable Pricing
Friendlier Customer Service
Better Quality
Ratings: It allow your users to rate your options from a scale of 1 to 7 (1 being the highest). This allows you to gauge user interest in various parts of your presentation. is:
"How would you rate this presentation in the following categories?"
Did the introduction relate well to the presentation?
Did the structure flow well through the presentation?
Was it convincing enough to make you want to purchase our product?
Likert Scale: It is fairly similar to the Ratings format as mentioned previously but is considered the standard for questionnaire type problems. Rather than using a scale of 1 to 7, the Likert Scale uses a predefined scale from 1 (defaults to Strongly Disagree) to 5 (defaults to Strongly Agree). Using the previous example with modified wording:
"How would you rate this presentation in the following categories?"
The introduction related well to the presentation
The structure flowed well through the presentation
The presentation was convincing enough to make me want to purchase the product
Question slides may seem only slightly useful at first. You may be wondering how gauging feedback can help you with your products. Additionally, you may be wondering how to properly design a questionnaire. We will explore these topics next.
By gauging what exactly your customers want, you can improve your product for them and other customers in the industry over time. Customer satisfaction easily converts to revenue retention through loyalty and may even mean additional customer acquisition through referrals. In addition, market trends tend to change without companies noticing . The simplest way to identify these shifts is to communicate with the customers that experience them. By implementing the changes required, you could be helping out some of your shyer customers as well.
Some of the best practices to follow for questionnaire design are as given:
Follow the previously mentioned steps to ensure that you are using the correct format across all questions.
Determine your goal before adding question slides. Then, design your questions and answers as a way to attain the information required to meet your goals.
Whenever possible, keep your questions and answers as brief as possible. Keep in mind that only a portion of your audience will take the time to read your question slide. Minimize friction.
Ensure that questions are ordered in a structural manner. Jumping back and forth between topics can be confusing, leading to inaccurate results.
Test your questionnaire amongst peers to ensure that all questions and answers are clear to the audience.
Often, you may wish to add files to your presentation in order to share content with your audience. Examples of attachments include reports, short audio or video clips, and podcast transcripts. We will cover how to add attachments in this section.
Ensure that your attachment is NOT one of the following files:
.com: COM files; used for issuing commands to the operating system.exe: Executable files; used prevalently.bat: DOS batch files; very similar to COM files.vbs: Visual Basic script.js: JavaScript
The preceding file types are restricted due to security threats. Also note that the file size of any uploaded attachments must be less than 500 megabytes.
The steps for adding attachments are as follows:
Under the Things you can do menu within the presentation page, click on the Add link.

Either upload a file from your own computer by pressing the Choose File button or provide a Web URL to the file. Then be sure to provide a relevant title to represent the file.

Press the Save button to include the attachment with your presentation.
The preceding steps essentially attach your file to the presentation via the attachment tab. It is essential to allocate a relevant title that is referenced in the presentation so that your viewers can find it easily. There are also various other methods for presenting an attached file, illustrated in the following section.
Although the default attachment mode allows your users to download your content without issue, Brainshark has multiple attachment modes to allow different templates for presenting your content. This section will explore these various modes.
The steps for using other attachment modes are as follows:
Click on the Attachments tab above your presentation preferences.

Click on the Edit button for the attachment you wish to edit:

Select one or more of the following checkboxes to customize when your attachment will be prompted as shown in the following screenshot:

Show link on attachments tab will display the attachment throughout the presentation for the audience's convenience.
Show link with slide will only display the attachment on a given slide of your choosing. You can also choose to automatically launch the attachment either before or after the slide's audio is complete. Lastly, you can choose to pause the slide in order to give your audience a chance to download the attachment.
Auto-Launch when presentation is closed may be an option of interest when you wish to have the users download the attachment immediately after the presentation has concluded. An example of a use case is attaching notes involving your next presentation and launching the download after your current one is done.
The steps for deleting attachments are as follows:
Click on the Attachments tab above your presentation preferences.

Click on the Delete button for all attachments that you wish to get rid of and confirm with the pop-up dialog that you truly wish to delete the attachment.

Note that deleted attachments are not actually removed from the presentation until you press either Save, which will bring you back to the Presentation properties menu, or Apply, which will keep you on the same page.
Brainshark's ability to embed content is as simple as copying a snippet of code to your webpage. ote that you can embed your presentation on multiple pages. This means that you can change the presentation Brainshark in order to alter the content on all of the said pages.
The following steps will demonstrate how to embed your Brainshark presentation into webpages as a HTML snippet.
To embed your content, go to your presentation properties and click on the Embed button next to the Current Address textbox.

Note that, there are two options from here. Either select the Links tab in order to get a presentation link for sharing purposes or select the Embed Code tab to get an HTML snippet for embedding purposes.
paste either the link or the HTML snippet to a webpage. Be sure to test the snippet on multiple browsers and devices so that you are sure that the content is embedded properly. If you find issues during this process, be sure to contact the Brainshark support line to report the bug.
Embedding Brainshark content has multiple purposes. For instance, if you use a presentation or document on multiple websites, having the ability to edit the presentation there without having to edit each individual website allows you to streamline changes. In addition, Brainshark's audio annotation system is not something that is easily achieved on a plain website—having the ability to embed the content allows you to fully engage your audience in Brainshark's premiere platform.
We will now explore other ways of embedding Brainshark presentations into existing documents or webpages.
QR codes (Quick Response codes) are used by mobile devices for quick links. By embedding your content using the previous steps, you are using hyperlinks work better for desktop browsers.

Mobile devices with camera functionality can now take advantage of capturing QR codes that link directly to websites. Each presentation has a unique QR code image you can save onto printed documents, posters, or even other presentations.

In order to keep in touch with your clients, you may be keeping an e-mail list for subscribers that are interested in your product. This section will investigate how to fully utilize your list through Brainshark's e-mailing functionality.
The following steps will demonstrate how to use Brainshark's e-mailing functionality:
Under the Things you can do menu, click on the Share link.
Fill in the fields according, e-mail addresses with commas. The Send me a copy option will send you an e-mail preview of your message and Notify me when this is viewed option will send you an e-mail once your recipients have received the content.
Once you are finished filling the fields, click on the Send button to issue the e-mail invitations.
Note that all e-mails sent out by Brainshark must comply with the CAN-SPAM act. equirements include:
You cannot send false or materially misleading information through either the body or subject
If you send e-mail without going through Brainshark, you must ensure include an opt-out or unsubscribe link
By complying CAN-SPAM, you ensure that you are not blocked by spambots over time and can better cater to the standards that your customers are already accustomed to.
In today's data-driven society, leveraging the power of social media can instant gains in sales enablement, leading to higher clickthroughs, conversions, and revenue. This section will cover how to share your content with the world.
The following steps will demonstrate how to share your Brainshark presentations on various social media networks including Facebook, Twitter, and LinkedIn:
Under the Things you can do menu, click on the Share link.

Brainshark allows you to share presentations with over hundred social widgets and networks. Feel free to browse the options by clicking one of the options:

Go through the sharing process for the social widget or network you have chosen and confirm that it has been posted. If not, be sure to contact the Brainshark support line to report the bug.
Since its creation in 2005, YouTube has exploded in growth, now generating billions of views on a daily basis. As a result, it has become one of the world's largest social media sites and a great place to advertise your product and gain users over time. We will explore how to publish your content to YouTube in this section.
We will now investigate how to publish a Brainshark presentation directly to YouTube:
On the presentation menu, click on the Publish To YouTube link.

Prior to officially publishing your content, take some time to read over YouTube's restrictions and Brainshark's control over your content. This way, you can avoid unnecessary surprises.
Grant access to YouTube to allow your video to be uploaded.
Once the review process is over, you should find the video uploaded to your YouTube account.
Brainshark will go through your YouTube account in order to upload the presentation. By converting each of the slides and audio into video format, it issues a video file that mimics the original. Thus, the video that ends up being uploaded is a separate entity from the Brainshark presentation. This means that changing the presentation means re-uploading it to YouTube.