


Installing Windows Server 2016
In this first chapter, we will cover the installation of Windows Server and Nano Server, and migration to Windows Server 2016 from previous versions. We will start by determining the important installation requirements of Windows Server 2016, including which versions and Windows Server editions to install and what hardware is essential for a solid and reliable infrastructure. One important part is installing and configuring a special version of Windows Server without a GUI, Windows Server Core. We will see how to configure the installation of Windows Server 2016 using various options and tools.
Essential to Windows Server administration is the ability to perform server management remotely and use automation tools to reduce management errors and save time. We will then move on to the installation and configuration of Nano Server and the tools we need to build Nano Server images and configure Nano Server workloads. Finally, we will learn how to perform upgrades from previous versions and how to activate Window Server installations.
In this chapter, we will cover the following topics:
- Installing Windows Server 2016
- Installing and configuring Nano Server
- Upgrading and migrating servers and workloads
Technical requirements
You will need a version of Windows Server 2016. This can be a retail version, a volume-licensed version, or an evaluation version with which you can experiment. I suggest you set up your own lab, preferably in a sandboxed environment. You can set up your lab either in Hyper-V or in Microsoft Azure. Additionally, Hyper-V is available on Windows 10, or you can use any other virtualization platform to build your own lab: VMware, Amazon Web Services, VirtualBox, and so on. Be aware that Microsoft Azure does not support some Windows Server roles and features, including the following:
- Dynamic Host Configuration Protocol (DHCP) Server
- Hyper-V (at the time of writing, Hyper-V's role in Azure is supported in all v3 virtual machines, such as Ev3 and Dv3 virtual machines)
- Rights Management Services
- Windows Deployment Services
In upgrade scenarios, you will need Windows Server 2012 or an older version. Trial operating system versions are available at https://www.microsoft.com/en-us/evalcenter/.
Sometimes, when you click on Windows Server 2016 under the Products menu, only a list of Windows Server 2012 products is displayed. This might be a temporary glitch. To display the Windows Server 2016 version, click on the plus sign next to any Windows Server 2012 version and expand the entry. After an automatic refresh, the list will show the Windows Server 2016 versions that are available for evaluation and download. There are three options available: Azure, ISO, and Virtual Lab. Choose whichever suits you best.
Installing Windows Server 2016
Windows Server 2016 is available in many different variants, but before choosing the appropriate version for your specific workloads and needs, you must be sure that your current or future hardware will be able to support it.
The following system requirements are minimum hardware requirements that are common to all Windows Server 2016 installation options and editions. The actual minimum hardware requirements are estimated and may vary depending on the planned roles and features. Obviously, for production environments and optimum server performance, you should plan to install Windows Server 2016 on hardware that exceeds these requirements.
Minimum system hardware requirements
Your system should have at least the following specifications:
- Processor:
- 4 GHz 64-bit processor.
- Support for Second Level Address Translation (SLAT) or nested paging. SLAT is a processor technology that is used in virtual-to-physical memory address translation. Both AMD and Intel support SLAT. AMD's implementation is called Rapid Virtualization Indexing (RVI) and Intel's implementation is called Extended Page Tables (EPT).
- Support for Data Execution Prevention (DEP) and No-Execute (NX). DEP/NX is a processor feature that allows you to mark memory pages as either executable or non-executable. It also allows a processor to help prevent the execution of malicious data being placed into your memory. Note that a 32-bit processor is not supported.
- RAM: 512 MB, although the desirable minimum memory for a server with a GUI is 2 GB.
- Disk/Storage: 32 GB of disk space and a PCI Express storage adapter. Older architectures (such as PATA, ATA, IDE, or EIDE) are not supported.
- Network: PCI Express-compliant Gigabit Ethernet adapter that supports Pre-boot Execution Environment (PXE).
Optional requirements
The following are optional requirements for Windows Server installation; they are convenient to have but not are required:
- Optical drive: DVD drive, if you are installing Windows Server 2016 from a disk
- Video: SVGA 1024x768 video resolution
- Input devices: Keyboard and mouse
- Internet: Recommended
- Other: UEFI firmware and a Trusted Platform Module (TPM) chip
The optional requirements are exactly that, options, and are not necessarily needed to install Windows Server 2016 because the server administration should be performed almost exclusively remotely. Specific features may require additional hardware, such as BitLocker Drive Encryption, which requires a TPM chip. If you plan to use BitLocker, then hardware-based TPM chip must adhere to version 2.0 of the TPM specification. Additionally, it needs to support the SHA-256 encryption and the EK certificate.
Both Windows Server 2016 editions support a maximum of 24 TB of RAM, 12 TB of RAM per generation 2 VM (1 TB of RAM per generation 1 VM), 64 of 64-bit sockets, 512 physical (host) logical processors, and 240 virtual processors per VM.
Windows Server 2016 editions
Windows Server 2016 is available in two main editions and a few minor standalone editions. The two main editions are as follows:
- Datacenter Edition: This edition has the complete set of features and roles and is most appropriate for environments in need of unlimited virtualization or highly-virtualized, enterprise-scale workloads.
- Standard Edition: This edition is mostly appropriate for physical installations or non-virtualized, low-density environments. It supports Hyper-V as well but the number of virtualized workloads is limited compared to the Datacenter Edition.
The features that are exclusive to the Datacenter Edition include shielded virtual machines, Software-Defined Networking (SDN), networking stacks, Storage Spaces Direct, and Storage Replica. The Standard Edition includes rights to two Operating System Environments (OSEs, or virtual machines) or Hyper-V Containers, whereas the Datacenter Edition includes unlimited OSEs and Hyper-V Containers. OSE is a Microsoft term that represents a Windows instance running either as a physical or a virtual installation. The Standard Edition therefore grants you the right to run a physical server OSE instance in addition to a virtual instance.
If a physical OSE is used exclusively to host and manage virtual OSEs, you can use two virtual OSEs in addition to the physical OSE. At first, the Standard Edition OSE limit might not look very attractive, but the price is an important factor to consider as well; currently, Datacenter Edition price is approximately six to seven times higher than Standard Edition. Unless you will run more than twelve to fourteen virtual machines, having a single Datacenter license might not be a good decision because you could spend less money buying Standard Edition licenses instead. Of course, licensing and money are not the only variables here. Should you decide to buy Standard licenses, you have to consider expense of buying the same amount of additional server hardware.
If you choose the Datacenter version, a high-end server with hardware characteristics powerful enough to run fourteen virtual machines might be more expensive than buying seven low- or mid-end servers suitable to host Standard versions of Windows Server. With in increased number of servers, the administrative burden increases as well.
The Datacenter and Standard Editions require every user or device that accesses a server to have a Client Access License (CAL). The following table gives you a comparison of the features of Windows Server 2016 editions:
| Feature | Datacenter | Standard |
| Windows Server Core functionality | Yes | Yes |
| OSEs/Hyper-V Containers | Unlimited | Two (supports two OSEs or instances) |
| Windows Server Containers | Unlimited | Unlimited |
| Host Guardian Hyper-V Service | Yes | Yes |
| Nano Server | Yes | Yes |
| Storage features, including Storage Spaces Direct and Storage Replica | Yes | No |
| Shielded virtual machines | Yes | No |
| Networking stack | Yes | No |
| Software-Defined Networking | Yes | No |
Minor or standalone Windows Server 2016 Editions include the following:
- Essentials: Ideal for small businesses with up to 25 users and 50 devices. No CALs are required. Be aware that the Essentials edition does not support more users and devices once it's at its user or device limit.
- Microsoft Hyper-V Server 2016: A free edition that contains only Windows Hypervisor, the same technology as is in the Hyper-V role on Windows Server 2016. Like Server Core, it has no graphical interface.
- Windows Storage Server 2016: A dedicated file and print server in both Standard and Workgroup editions. This is available only with a purchase of dedicated hardware as part of an Original Equipment Manufacturer (OEM) offering.
- Windows Server 2016 Multipoint Premium Server: Available only through Volume Licensing for academic customers.
Installing Windows Server 2016
There are several different ways of installing Windows Server 2016, each of which are suitable for different scenarios. In this section, we will explain a clean installation, while upgrades and migrations will be described later.
The term clean installation describes how to install Windows Server 2016 either on new hardware or a virtual machine, or on old hardware or a virtual machine without retaining the old operating system.
Whether you install Windows Server 2016 on a physical server or as a virtual machine, the process is the same. The only difference is in how you supply the installation files. To install an operating system on a virtual machine in Hyper-V, you would provide a Windows Server 2016 ISO file. This can be used to burn a DVD or to make a bootable USB drive.
The Windows USB/DVD Download Tool web page has necessary information about the tool, installation instructions, software prerequisites and a download link:
https://www.microsoft.com/en-us/download/windows-usb-dvd-download-tool.
To go directly to the download page, where you can download multiple language versions of the tool, visit https://www.microsoft.com/en-us/download/details.aspx?id=56485.
If you have optical media available, you can use a DVD drive as an installation source either on a virtual machine or on bare metal:
- After starting the Windows Server 2016 setup process, you are presented with pull-down menus that you can use to choose which language, time zone, currency format, and keyboard layout to use. You can change all these options after setup process is finished. However, depending on the installation file used, you might not be able to choose a different language.
- Click Next and a simplistic setup window will appear. The Repair Your Computer option brings up recovery options, in which the System Image Recovery and Command Prompt options are available.
- After you click Install now, Windows Setup will ask you to enter a product key and activate an installation. The product key you enter will determine which Windows Server version is used in the setup process.
- If you do not have your product key, choose I don't have a product key and the operating system selection window will appear, as can be seen in the following screenshot:

There are four choices available. There are two Windows Server 2016 versions, Datacenter and Standard, each of which is presented in two different configurations: with a GUI (Desktop Experience) or without it (Server Core). Unless you have a specific reason to install GUI elements, you should always choose to install the Server Core version.
In earlier Windows Server releases (in Windows Server 2012 and Windows Server 2012 R2 for example), you could choose either Desktop Experience or Server Core version and remove or install a GUI easily after installation. Windows Server 2016 releases do not support installing or uninstalling a GUI anymore. If you change your mind about which version you want to choose, you should do a clean installation:
- On the next screen, after you accept the license terms, Windows Setup will ask you which type of installation you require: upgrade or custom. For now, we will choose custom install, as we will explain the upgrade option later in this chapter.
You should choose custom install in the following situations:- You are performing a clean install, where an operating system is not present
- An operating system is installed and you want to retain it, so that you can use multi-booting
- You are unable to upgrade from an existing operating system
- You want to delete all existing data and operating systems and perform a clean install
- The custom installation option also allows you to make changes to drives, partitions, and load drivers:
- Refresh will rescan hardware after you have provided a new driver
- Delete enables you to delete existing partitions or ones that you created during the setup process
- Format performs formatting of partition using NTFS file system, erasing all data
- New creates a new partition, and Extend allows you to make partitions larger, if disk space adjacent to partition is unoccupied
- If you have bought a new disk, it is not necessary to use these commands and prepare a disk. Windows Setup will do this for you. If you need to prepare the disk in a specific way, the diskpart.exe command executed in Command Prompt, will enable you to do so.
- Load driver lets you load device drivers if Windows Setup doesn't recognize the installation disk and you need to enable the storage controller to choose the installation destination. The following screenshot shows Windows Setup options that appear if only one installation drive is available. You can also see the commands mentioned earlier that will help you manage the storage:

- To open Command Prompt during setup, press Shift + F10. Here, you can use diskpart.exe to make advanced changes to disks and partitions, or use other commands that may help you to install and troubleshoot Windows Setup.
- In the next step, the Windows installation begins. Once Windows Setup copies the necessary files, system restarts.
- On the Customize settings screen, Windows Setup prompts you for the built-in administrator password. Enter this to sign in and the installation is complete.
Installing Windows Server 2016 roles and features
To enable Windows Server 2016 to perform a specific duty or to enhance it to support a particular task, you need to install server roles and features:
- Server roles is a collection of services that are usually installed together to enable the Windows Server to perform a certain function. Examples of server roles include DNS Server, DHCP Server, or Active Directory Domain Services. A Windows Server computer can perform one or more roles at the same time, depending on the installation environment and the number of users it supports.
Smaller companies or organizations often have servers that perform many functions or roles, while larger companies or enterprises might have multiple servers configured with one dedicated role only. These dedicated servers are likely to be used more heavily, serving a larger number of users, devices, or requests. - Features are services or additional programs that enhance a server's or a role's capabilities. They do not necessarily need a role as a prerequisite for installation or to perform a function. Examples of features include BitLocker Drive Encryption, Containers, and Network Load Balancing.
You can add, remove, and configure roles and features either locally, using Server Manager or Windows PowerShell, or remotely, using Server Manager, Windows PowerShell, remote server, or Remote Server Administration Tools (RSAT). You can install or uninstall roles and features on a physical computer, virtual machine, or on an offline virtual hard disk (VHD).
Installing roles and features using the Server Manager
To install roles and features, follow these instructions:
- Start Server Manager and select Manage and Add Roles and Features in the upper-right corner:

- The Add Roles and Features Wizard starts with Before you begin page. This contains initial information and helpful advice. If you want to skip this page in the future, tick Skip this page by default checkbox.
- On the Select installation type page, select which installation type you want to perform, Role-based or feature-based installation or Remote Desktop Services installation:

- The Server Selection tab gives you the option either to select a server or to select a virtual hard disk on which to install roles and features. The Server Pool contains a list of servers that have been added using Add Servers button in Server Manager. You can choose either local server or any of the discovered and listed servers in the Server Pool list. That way, you can install roles and features on a local server or on any remote server using the wizard on a local server. Although you cannot perform installations on multiple servers at once, you can do that easily using PowerShell:

- After selecting the server and hitting Next, the Server Roles page appears. On this page, you can select one or more server roles to install:

Some roles, such as the Files and Storage Services role, have role Services, which provide additional role functionalities and enhancements:

A window will appear if a role has any dependencies that also need to be installed.
The next page is the Features page, which allows you to select one or more features to install, along with any dependencies they may have:

If the roles that you have selected support additional services, you will be able to select them on the Role Services page:

For example, Remote Access role selected in the previous screenshot has three individually selectable components, or Role Services: DirectAccess and VPN (RAS), Routing, and Web Application Proxy.
Each of the selected roles and features might have their own configuration page. After performing eventual configuration tasks and entering required information, the Confirm installation selections button appears.
If the server requires a restart after installation, select this option, but ensure that the users are aware of possible interruptions in operations. The Export configuration settings button saves the steps performed by Add Roles and Features Wizard in an XML template file, which can be used later to perform identical installations using PowerShell.
If the Windows Server 2016 source files are incomplete or missing, the Specify an alternate source path option will tell the wizard the location of the Install.wim file that contains the required source files:

After clicking Install, you can close the wizard window without disturbing the installation. You can track its progress by clicking on the Notifications flag at the top of the Server Manager window:

If the roles or features that you have installed require post-installation steps or additional configuration steps, the Notification flag will give you the relevant information and links.
Uninstalling roles and features is straightforward and simple. In Server Manager, under Manage menu, select Remove Roles and Features. This will start the wizard. Select the target server of the virtual hard disk, deselect the roles and feature that are no longer needed, and click Remove on the last screen. You can restart the server automatically as well.
Installing roles and features using Windows PowerShell
To install server roles and features on more than one server at the same time, or to script role and feature installations in more complex scenarios, using Server Manager is not practical, nor does it provide the desired functionality, such as managing multiple servers at once. This is where Windows PowerShell excels, controlling server with either GUI or Server Core version. PowerShell is a task-based command shell and scripting language developed by Microsoft for the purpose of configuration management and task automation. It is based on the .NET Framework, is open source, and can be installed on Windows, macOS, and Linux platforms.
To install server roles and features using Windows PowerShell, you need to run a PowerShell session with elevated user rights, unless you are installing them on a remote server.
To list roles and features that are available locally on a server, type Get-WindowsFeature or Get-WindowsFeature -computerName <computer_name>, where <computer_name> represents the name of the remote computer you are connecting to. The roles are listed first, followed by the features. In PowerShell terminology, the term role is not used, only features; cmdlets do not differentiate between the two. The following screenshot shows the output of the Windows PowerShell Get-WindowsFeature command:

To install a server role or a feature type, enter the following command:
Install-WindowsFeature -Name <feature_name> -computerName <computer_name>
To install multiple roles and features, separate values using a comma. The management tools needed to manage installed roles and features will be also installed, and your computer will restart if required once the command completes. The following PowerShell command will install the DNS role and XPS Viewer onto a computer using FQDN SRV1.MCSAGUIDE.LOCAL:
Install-WindowsFeature -Name DNS,XPS-Viewer -ComputerName srv1.mcsacertguide.local -IncludeManagementTools -Restart
To verify the installation, run the Get-WindowsFeature command or open Server Manager. On the All Servers page, right-click on a server and select Add Roles and Features.
If needed, list all currently installed features using Windows PowerShell on a target server with the Get-WindowsFeature command. To uninstall or remove roles and features, type the following command:
Uninstall-WindowsFeature -Name <feature_name> -computerName <computer_name> -Restart.
The -Restart switch is not mandatory, but will initiate a computer restart if this is necessary to complete the removal process.
Installing and configuring Windows Server Core
Windows Server with a GUI is a fully-fledged server installation that is capable of supporting highly scalable, enterprise-grade workloads, but it also comes with a significant overhead and a burden: a GUI. Since servers are mostly managed remotely, especially in larger environments, having a GUI doesn't make much sense. The supporting files increase installation size, which makes patching and updating more complex and makes the server more vulnerable.
The solution to this problem was to introduce Server Core, which offered a significantly smaller footprint without the files that are required to support a GUI. Although some of the roles and features are not supported in Server Core, having a more secure server with less frequent updates is appealing. A typical Windows Server 2016 Datacenter installation with several roles installed can occupy between 5 and 10 GB of disk space. The Server Core installation, by contrast, could take up around 2 to 5 GB, while the Nano Server installation occupies around 200-500 MB.
Windows Server Core is the version of Windows Server 2016 that does not use graphical elements. Although this might sound like a disadvantage, it is actually quite the opposite.
User interface elements require additional files and hard disk space, they have more components, and they need updating more frequently. A web browser, for example, is not available in a Server Core installation, so all potential problems related to web browsers are eliminated. Overall, Server Core has a smaller number of files, it occupies less space, it needs less patching and updating, and it has a smaller security vulnerability footprint than its fancier graphical interface counterpart.
Setting up Windows Server Core uses same steps as setting up Windows Server with Desktop Experience, except that it is much faster, due to its smaller size.
When you start installing Windows Server 2016, as discussed previously, you can choose between Standard or Datacenter versions and whether or not you want a GUI. When you install Windows Server version 1709 and later, you have two options: Windows Server Standard or Windows Server Datacenter, as shown in the following screenshot:

All the other installation steps are identical to those described in Installing Windows Server 2016 section.
As there is no user interface in Server Core to interact with, you can manage a server using Windows PowerShell for local administration. Alternatively, you can use different tools for administering a server remotely, such as Server Manager, RSAT, Windows Admin Center, or Windows PowerShell.
Server Core supports the following server roles:
- Active Directory Certificate Services
- Active Directory Domain Services
- Active Directory Federation Services
- Active Directory Lightweight Directory Services (AD LDS)
- Active Directory Rights Management Server
- Device Health Attestation
- DHCP Server
- DNS Server
- File Services
- Host Guardian Services
- Hyper-V
- Network Controller
- Print and Document Services
- Routing and Remote Access Server
- Volume Activation Services
- Web Server
- Windows Server Essentials Experience
- Windows Server Update Services
Server Core supports the following features:
- .NET Framework 3.5 (includes .NET 2.0 and 3.0)
- .NET Framework 4.6
- ASP.NET 4.6
- TCP Port Sharing
- Background Intelligent Transfer Service (BITS)
- BitLocker Drive Encryption
- BranchCache
- Containers
- Failover clustering
- Group Policy Management
- IP Address Management (IPAM) server
- Directory Service Integration
- Routing service
- Network Load Balancing
- Telnet Client
- Windows Defender features
- Windows PowerShell
- Windows Server Backup
- WINS Server
Besides GUI elements and files, Server Core lacks the following features:
- Fax services
- Network Policy and Authentication Server
- Windows Deployment Services
- Remote Desktop Services roles (Connection Broker, Virtualization Host, Licensing)
- BITS
- Remote assistance
- Hyper-V Tools
- Many RSAT, RDS, and WDS features
- SMTP Server
- TFTP Client
- Biometric Framework
- Windows TIFF Filter
- Wireless networking
- XPS Viewer
- Accessibility tools
- No audio support
- No OOBE (out-of-box experience)
For a complete list of roles and features that are supported and those that are not, consult following resources:
- Roles, Role Services, and Features included in Windows Server - Server Core: https://docs.microsoft.com/en-us/windows-server/administration/server-core/server-core-roles-and-services
- Roles, Role Services, and Features not in Windows Server - Server Core: https://docs.microsoft.com/en-us/windows-server/administration/server-core/server-core-removed-roles
Although it is more secure, Server Core might not be the first option for some organizations. In Windows Server 2012 and Windows Server 2012 R2, you were able to shift between installing Server Core and a server with a GUI. In Windows Server 2016, this is no longer possible. Additionally, applications and services that previously relied on the GUI or other missing roles and features might not work with Server Core and might need further testing before servers are released in production.
Managing Windows Server installations
When Server Core starts, you will see the following screenshot. As there is no GUI, here in the console window is where you perform local management of a server:

Typically, Server Core is managed remotely, but it has tools that are built for managing a server locally as well. You can manage Windows Server Core using Server Manager, Windows PowerShell, a remote server, or RSAT.
The typical first steps you need to take to configure and manage Server Core usually involve the following:
- Establishing connectivity—setting IP address, subnet mask, and default gateway
- Configuring the firewall
- Activating the server
- Configuring the name resolution
- Joining a domain
- Enabling PowerShell remoting and remote access
After Server Core has been installed, the first task is to change the administrator password.
Windows PowerShell is one of the most common management tools for local management, and especially for remote management. Understandably, these commands also work with other server versions, not just with Server Core. To start a PowerShell session, type powershell at a command prompt.
The Get-NetIPConfiguration command retrieves the current network configuration, including network interfaces, IP addresses, and DNS servers. The Get-NetIPAddress command displays the current IP address configuration, including IPv4, IPv6, and IP addresses with which these addresses are associated.
The following command shows the IP configuration information for all configured network interfaces on a computer, including loopback interfaces, virtual interfaces, and disconnected interfaces:
Get-NetIPConfiguration -all
The following command gathers configuration information for specific network interface:
Get-NetIPConfiguration -InterfaceIndex 9
The Get-NetIPInterface command shows information about an IP interface, while the Set-NetIPInterface command can be used to modify an IP interface.
To configure a server with a static IP address, use the New-NetIPAddress command. This sets a static IP address, a subnet mask, and a default gateway to an interface with an index value of 7:
New-NetIPaddress -InterfaceIndex 7 -IPAddress 192.168.10.20 -PrefixLength 24 -DefaultGateway 192.168.10.1
To configure a DNS client server address with values of 192.168.10.2 and 192.168.10.3, type the following command:
Set-DNSClientServerAddress –InterfaceIndex 7 -ServerAddresses 192.168.10.2, 192.168.10.3
To join a computer to a workgroup or a domain, use the Add-Computer cmdlet:
Add-Computer -ComputerName "SRVCORE" -LocalCredential "SRVCORE\AdminLocal" -DomainName "MCSACERTGUIDE.LOCAL" -Credential MCSACERTGUIDE.LOCAL\AdminDomain -Restart -Force
This command adds the SRVCORE computer to the MCSACERTGUIDE.LOCAL domain and uses the LocalCredential parameter to supply a user account that has permission to connect to the SRVCORE computer. The -Credential parameter specifies a user account that has permission to join computers to the domain, while the -Restart parameter restarts a computer after a join operation completes. Finally, the -Force parameter suppresses any user confirmation messages.
To activate a server, simply use the slmgr.vbs -ipk <product_key> command, followed by the slmgr.vbs -ato command. If the activation is successful, no additional messages are displayed. The -ipk option installs the product key supplied in <product_key>, replacing any existing product keys. The -ato option performs operating system activation.
Instead of using PowerShell, Server Core and a server with a GUI can be managed via command-line commands.
The commands shown in the following tables are the most commonly used commands for specific task groups.
Configuration and installation commands are displayed in the following table:
| Task | Command |
| Set the local administrative password | net user administrator * |
| Join a computer to a domain | netdom join %computername% /domain:<domain> /userd:<domain\username> /passwordd:* |
| Remove a computer from a domain | netdom remove <computername> |
| Add a user to the local administrators group | net localgroup Administrators /add <domain\username> |
| Remove a user from the local administrators group | net localgroup Administrators /delete <domain\username> |
| Add a user to the local computer | net user <domain\username> * /add |
| Add a group to the local computer | net localgroup <group name> /add |
| Change to a static IP address | netsh interface ipv4 set address name <ID from interface list> source=static address=<preferred IP address> gateway=<gateway address> |
| Set a static DNS address | netsh interface ipv4 add dnsserver name=<name or ID of the network interface card> address=<IP address of the primary DNS server> index=1 |
| Enter a product key | slmgr.vbs –ipk <product key> |
| Activate the server | slmgr.vbs -ato |
Frequent commands used to display and configure networking, addressing, and IPSEC configuration are listed in the next table:
| Task | Command |
| Display or modify IPSEC configuration | netsh ipsec |
| Display or modify IP to physical address translation | arp |
| Display or configure the local routing table | route |
| View or configure DNS server settings | nslookup |
| Display protocol statistics and current TCP/IP network connections | netstat |
| Display protocol statistics and current TCP/IP connections using NetBIOS over TCP/IP (NBT) | nbtstat |
| Display hops for network connections | pathping |
| Trace hops for network connections | tracert |
A table of useful and frequently used commands to manage services and processes can be found here:
| Task | Command |
| List the running services | sc query or net start |
| Start a service | sc start <service name> or net start <service name> |
| Stop a service | sc stop <service name> or net stop <service name> |
| Retrieve a list of running applications and associated processes | tasklist |
| Start Task Manager | taskmgr |
Essential disk and file system commands are listed in the next table:
| Task | Command |
| Manage disk partitions | diskpart |
| Manage volume mount points | mountvol |
| Defragment a volume | defrag |
| Convert a volume to the NTFS file system | convert <volume letter> /FS:NTFS |
| Compact a file | compact |
| Take ownership of a file or folder | icacls |
Windows Server Core and a server with a GUI can be managed using the Server Configuration Tool by typing in the sconfig.cmd command. The following screen shows the Server Configuration menu after executing the sconfig.cmd command:

The Server Configuration Tool allows you to perform initial server configuration, such as setting the IP address of a network adapter and information about DNS servers, setting the date and time, activating Windows, and enabling a remote desktop or configuring remote management. Additionally, it allows you to join a server to a workgroup or a domain, change a computer's name, add local administrators, configure Windows update settings, and manage telemetry settings.
The purpose of the Server Configuration Tool is to provide a quick way to configure a server. Following this, a server will be managed using Server Manager, PowerShell remoting, or other scripting and remote management tools that offer more complex management functionality. It is also handy for administrators who are not well versed in Windows PowerShell.
Another common way to manage servers is to use the Server Manager. This is a management console that enables centralized management of both local and remote servers in a secure and a convenient way, without the need to configure Remote Desktop Protocol (RDP) ports. The Server Manager is already a functional part of Windows Server 2016. To be able to manage current and older server versions, certain software components are required. The following table shows Windows Server operating systems prior to Windows Server 2016 and corresponding software components that are required to be able to manage them through Server Manager:
| Operating system | Required software components |
| Windows Server 2012 R2 or Windows Server 2012 |
|
| Windows Server 2008 R2 |
|
| Windows Server 2008 |
|
Server Manager is also a part of RSAT for Windows 10. The Windows Server operating system RSAT, supports depends on a server operating system the RSAT is installed on. Consult the following table to find out which version of Server Manager is compatible with which operating system:
| Target operating system | |||
| Source operating system of the Server Manager that RSAT is installed on | Windows Server 2016 | Windows Server 2012 R2 | Windows Server 2012 |
| Windows 10 or Windows Server 2016 | Compatible | Compatible | Compatible |
| Windows 8.1 or Windows Server 2012 R2 | Not Compatible | Compatible | Compatible |
| Windows 8 or Windows Server 2012 | Not Compatible | Not Compatible | Compatible |
To be able to manage remote servers using the Server Manager, you first need to add them to the list of managed servers. Under the Manage menu, select Add Servers:

An Add Servers window will open. The left part of the window contains three tabs that will help you add new servers. If the computers you want to add to the list are members of a domain, choose the corresponding domain under Location to search for them. The Operating System option allows you to narrow the search to a particular operating system version, while Name (CN) allows you to enter a name or part of a name to filter the search even further:

Clicking Find Now performs the search and the results pane will show the results. Selecting one or more computers and clicking on the arrow between the panes puts selected servers on a list of servers that will be added to the Server Manager:

Once the servers are on the All Servers list, you can see basic information about them, including server name, IPv4 address, manageability status, time and date of the last update refresh, and activation information. Right-clicking on a server shows you the context menu available for that server. Configuring and managing multiple servers, as well as Server Core installations, is much easier from a centralized location. You can carry out several different actions, including monitoring server performance, establishing a remote desktop connection, rebooting a server, or starting the Add Roles and Features Wizard.
Installing and configuring Nano Server
Nano Server is a small footprint server designed for remote administration that targets data center and private cloud deployments. It was designed to have a significantly smaller installation than regular Windows Server operating systems, with a higher speed of deployment and a higher level of security and manageability.
Similar reasoning from a previous section, where we discussed Windows Server Core, can be applied to Nano Server. What if we could have an even smaller server that could be deployed faster and have even shorter servicing times? Nano Server was introduced in 2016, at the same time as Windows Server 2016. It seemed that it would be widely embraced, but the reality was quite different. Although Nano Server had a lot of potential, its small number of elements meant it was less popular than anticipated. The resemblance to Server Core was too close, and while developers needed a smaller server, administrators and IT professionals asked for better hardware and software support, which in turn defeated the purpose of Nano Server:
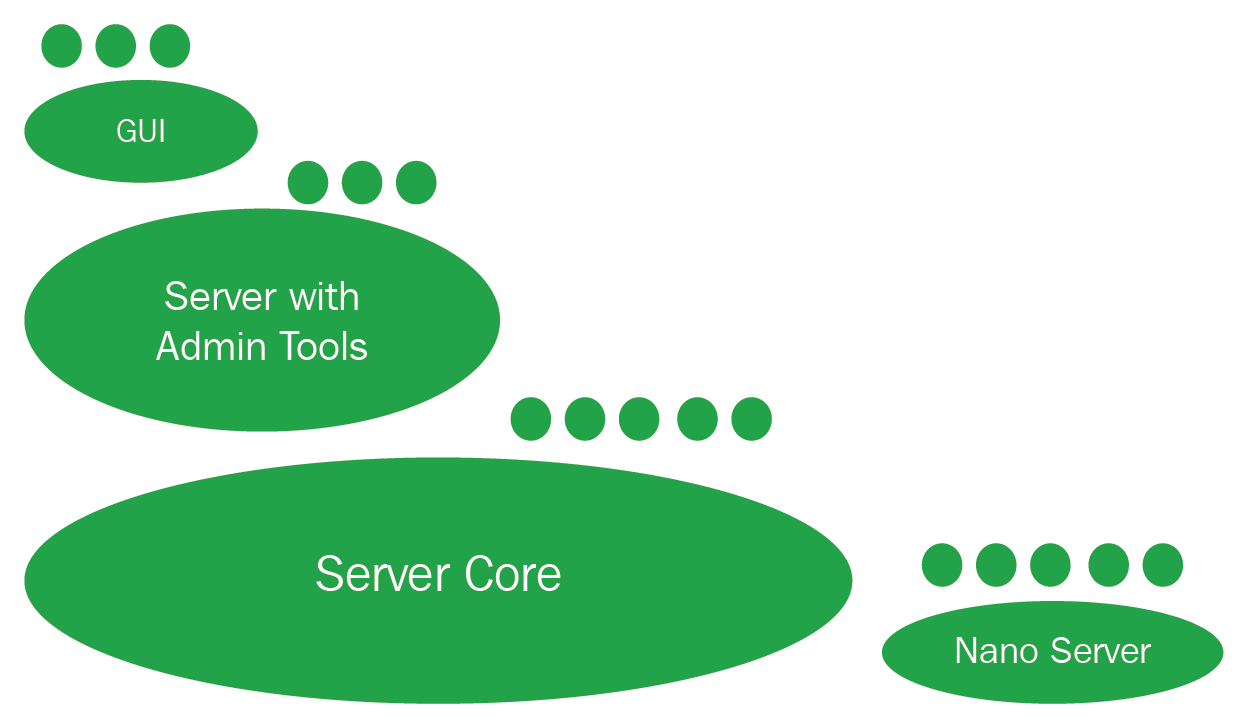
The graphic shows various Windows Server components and their relative sizes, such as the GUI, Server Core, and Nano Server, with its significantly smaller size compared to the Windows Server edition with a GUI.
Two years after Nano Server was introduced, the Windows Server engineering team revealed that support for some of the workloads would be removed from Nano Server and that it would now serve primarily as a container image, while Server Core would be the recommended server version for infrastructure deployment. Microsoft has since shifted their focus more to containers, and Nano Server is not going away anytime soon. The Nano Server is still on the list of topics that are tested in Windows Server 2016 exams, so we will cover the basics in this chapter.
You're most likely to use Nano Server as DNS server, a web or Internet Information Services (IIS) server, or as a host for a custom-built application. Nano Server supports only 64-bit workloads and does not support several services, which is no surprise due to its small size. There is no support for the following:
- Active Directory domain controller role
- Group Policy
- NIC teaming, except Switch-Embedded Teaming (SET)
- System Center Data Protection Manager or System Center Configuration Manager
- Local log on capability
- NIC Teaming
- Internet Proxy
This list is not definitive and we encourage you to check the Nano Server documentation for the most recent information.
Follow the link for the official Microsoft documentation on Nano Server in Windows Server 2016: https://docs.microsoft.com/en-us/windows-server/get-started/getting-started-with-nano-server.
Recently, Microsoft announced that from Windows Server version 1709, Nano Server will be available only as a container base OS image. This means that you will only be able to run Nano Server as a container in a container host. You will not be able to install it on a physical server, as many roles will be removed, such as Hyper-V support and driver support.
Deploying Nano Server
After downloading and extracting Windows Server 2016 ISO image, navigate to the folder containing the installation files. You will notice that the NanoServer folder contains several files, including the NanoServer.wim image; the NanoServerImageGenerator folder, which contains scripts that are used to build Nano Server images; and the Packages folder, which contains files that enhance the Nano Server installation with roles and features such as DNS, IIS, and failover clustering.
On the Nano Server Image Builder Download page, https://www.microsoft.com/en-us/download/details.aspx?id=54065, download Nano Server Image Builder, which will assist you in building the Nano Server image file. Nano Server Image Builder is a graphical interface tool for creating Nano Server images, bootable USB drives, and ISO files. Nano Server Image Builder can also automate your installation of Nano Server and create reusable PowerShell scripts. It is supported on Windows 10, Windows 8.1, Windows Server 2012 R2, and Windows Server 2016.
Nano Server Image Builder requires the Windows Assessment and Deployment Kit (ADK), which can be installed and downloaded from the following page: https://docs.microsoft.com/en-us/windows-hardware/get-started/adk-install.
Before starting Nano Server Image Builder, you must install two components from the Windows ADK: Deployment Tools and Windows Preinstallation Environment (Windows PE).
To create a new Nano Server image, we will outline the procedure, along with additional explanation of the steps:
- After starting Nano Server Image Builder, two scenario options are available to select, Create a new Nano Server image and Create bootable USB media. You will need to know the name of the server or servers to which you will be deploying an image. You will also need to have source installation files that will be used to create the Nano Server image and any required drivers ready. The Select scenario screen looks as follows:

- In the first steps of the wizard, select a location for the Windows Server media source, either in a local folder or on a shared network. Accept the license agreement and choose the deployment type, either to a virtual machine image or a physical machine image:

- In the Nano Server image output file name option, ensure that you choose either VHD or VHDX, as this will determine the generation of a virtual machine that is created by the wizard, either Generation one or Generation two.
- Next, you can choose whether the Nano Server edition is Datacenter or Standard. You can also add components that will be included in the image:

You can also add any drivers that you need to support planned workloads, join Nano Server to a domain, and set up network configurations such as PowerShell remoting, Window Remote Management, VLAN IDs, network address, subnet, gateway addresses, and more.
- At the end, an advanced dialog prompts you either to create a Nano Server image or to choose advanced settings including debugging methods, remote options, servicing packages, or embedding additional files or scripts in the image.
Nano Server Image Builder is a graphical tool and wizard that creates a Nano Server image file. It is, however, limited with regard to automating tasks, speeding up deployments, and creating multiple images. This is why Microsoft included Nano Server Image Generator, a PowerShell module located in the NanoServer folder, in Windows Server 2016 ISO file.
Three PowerShell cmdlets are available:
- New-NanoServerImage: Creates a Nano Server installation image
- Edit-NanoServerImage: Modifies a Nano Server installation image
- Get-NanoServerImage: Gets available packages for a Nano Server installation image
Upgrading and migrating servers and workloads
In most cases, Windows Server 2016 will be deployed in environments that are already in production, meaning existing Windows Server editions prior to Windows Server 2016 will most likely already be on the hardware. Obviously, you will eventually need to perform a bare metal installation of Windows Server 2016 on some computers. It is also possible that you will need to change to a different Windows Server 2016 edition on an existing Windows Server 2016 installation, too. The two main approaches to install Windows Server 2016 are as follows:
- Migration: Migration is the preferred method for installing Windows Server 2016 and involves two computers. The first computer already runs a version of Windows Server, from which roles are moved. The second computer has a freshly installed Windows Server version, to which roles are moved.
- Upgrade: While migration involves two computers, upgrading only involves one computer. If you have a Windows Server machine configured and running but you want to keep the existing hardware, configuration, and installed applications, you should choose to do an upgrade instead of a migration. This process involves copying newer installation files to an existing, usually older, Windows Server installation version. This limits available upgrade options. Not every combination of older and newer Windows Server versions is supported, so you have to take supported upgrade paths into consideration.
The following table lists supported upgrade paths from older Windows Server versions to Windows Server 2016 version:
| Upgrade from version | Upgrade to version |
| Windows Server 2012 Standard | Windows Server 2016 Standard or Datacenter |
| Windows Server 2012 Datacenter | Windows Server 2016 Datacenter |
| Windows Server 2012 R2 Standard | Windows Server 2016 Standard or Datacenter |
| Windows Server 2012 R2 Datacenter | Windows Server 2016 Datacenter |
| Hyper-V Server 2012 R2 | Hyper-V Server 2016 (using the Cluster OS Rolling Upgrade feature) |
| Windows Server 2012 R2 Essentials | Windows Server 2016 Essentials |
| Windows Storage Server 2012 Standard | Windows Storage Server 2016 Standard |
| Windows Storage Server 2012 Workgroup | Windows Storage Server 2016 Workgroup |
| Windows Storage Server 2012 R2 Standard | Windows Storage Server 2016 Standard |
| Windows Storage Server 2012 R2 Workgroup | Windows Storage Server 2016 Workgroup |
Transitioning to a newer Windows Server 2016 operating system is also not possible the following circumstances:
- Upgrading from Windows Server with a GUI to Windows Server Core edition. However, in prior versions, transitioning from Windows Server 2012 (or R2) Core edition to Windows Server 2012 (or R2) with a GUI is possible. After transitioning, you can proceed to upgrade.
- Upgrading from Windows Server Core edition to Windows Server with a GUI. Like in the previous scenario, prior to upgrading, transitioning from Windows Server 2012 (or R2) with a GUI to Windows Server 2012 (or R2) Core edition is possible, following which, upgrading is possible.
- Upgrading from one language to another, for example from an Italian edition of Windows Server 2012 to a Swedish version of Windows Server 2016.
- Upgrading from a licensed version of Windows Server to an evaluation version of an operating system.
- Upgrading from a 32-bit to a 64-bit architecture.
Converting from an evaluation version of a Windows Server operating system to a licensed Windows Server 2016 version is possible. To check whether the operating system is an evaluation version, open System and Security and then click on System in the Control Panel. View Details will show you the license information. Alternatively, from an Command Prompt, type slmgr.vbs /dlv or DISM /online /Get-CurrentEdition to check the edition information. After that, type DISM /online /Set-Edition:<edition ID> /ProductKey:XXXXX-XXXXX-XXXXX-XXXXX-XXXXX /AcceptEula to convert an evaluation version of an operating system to a retail version.
License conversion
Converting a release of an operating system to a different release of the same version is called a license conversion.
The following table shows license conversion paths:
| Convert from | Convert to |
| Windows Server 2016 Standard | Windows Server 2016 Datacenter |
| Windows Server 2016 Essentials | Windows Server 2016 Standard |
| Windows Server 2016 Standard (evaluation) | Windows Server 2016 Standard (retail)Windows Server 2016 Datacenter (retail) |
Automatic Virtual Machine Activation (AVMA)
AVMA has existed since Windows Server 2012. It is a feature that automatically activates virtual machines on Windows Server 2016 Hyper-V hosts if the host operating system is activated. The activation works even in disconnected systems. During activation, special AVMA activation keys must be used to activate virtual machines.
The following AVMA keys can be used for Windows Server 2016:
| Edition | AVMA key |
| Datacenter | TMJ3Y-NTRTM-FJYXT-T22BY-CWG3J |
| Standard | C3RCX-M6NRP-6CXC9-TW2F2-4RHYD |
| Essentials | B4YNW-62DX9-W8V6M-82649-MHBKQ |
Key Management Services (KMS) activation
KMS activation uses a client-server model for client or server operating system activation. The KMS service can reside on a client or operating system; it does not have to be a dedicated server. The KMS service can coexist with other services without operational issues.
A computer that has the KMS service installed is called the KMS server or the KMS host, while computers that connect to a KMS host to perform an activation are called KMS clients. Only KMS clients that reside on the same network as the KMS host can connect to that KMS host and perform an activation.
You can install the KMS host on a virtual or physical computer running any of the following operating systems: Windows 10, Windows Server 2016, Windows Server 2012 R2, Windows 8.1, or Windows Server 2012. If the KMS service is installed on a client operating system, only client operating systems can be activated, so a KMS host installed on Windows 10 or Windows 8.1 cannot activate Windows Server editions. A single KMS host can support an unlimited number of KMS clients and it is recommended that you have at least two KMS hosts in a larger environment in case one activation server becomes unavailable.
A KMS host activates KMS clients based on a minimum number of activation requests, or the threshold level. The KMS clients are activated in bulk. The threshold level for server operating systems and Microsoft Office volume editions is five, while the threshold level for client operating systems is 25. The threshold levels also apply to the period in which clients submit requests for activation. This period is 30 days and is applicable to the 50 most recent contacts.
Summary
In this chapter, we learned about the requirements for and installation methods of various different Windows Server 2016 editions. We then learned to how install Windows Server 2016 features and roles using Server Manager and Windows PowerShell. Next, we explored the install and configure of Windows Server Core and learned how to manage Windows Server installations using various tools. We have also seen how to install and configure Nano Server, a lightweight and compact Windows Server edition. Finally, we showed how to upgrade and migrate servers and workloads, and the differences between migration and upgrading, as well as operating system activation.
In the next chapter you will learn about creating, managing, and maintaining Windows images for deployment, planning for virtualization, and assessing hardware and software environment using Microsoft Assessment and Planning Toolkit.
Questions
To enhance your studies and to check your knowledge and understanding, please answer the following questions:
- You purchased the following hardware:
| Computer | Characteristics |
| SRV1 | 3 GHz 64-bit CPU, SLAT, DEP, 512 MB RAM |
| SRV2 | 5 GHz, 32-bit CPU, SLAT, DEP, 512 GB RAM |
| SRV3 | 6 GHz, 32-bit CPU, DEP, 512 GB RAM |
| SRV4 | 4 GHz, 64-bit CPU, SLAT, DEP, 128 GB RAM |
Which computer or computers are capable of running the Hyper-V role? Choose all applicable answers.
-
- SRV1
- SRV2
- SRV3
- SRV4
- Which of the following features are exclusive to Windows Server 2016 Datacenter Edition?
- Virtual machine disk and state encryption
- Software-Defined Networking
- Host Guardian Hyper-V Service
- Windows Server Containers
- Storage Spaces Direct
- To which destinations does Server Manager support installing roles and fatures?
- WIM files
- VHD files
- Server pools
- ISO files
- Which Windows PowerShell command installs a Windows Server 2016 role?
- Set-WindowsFeature
- Get-WindowsFeature
- Install-WindowsFeature
- Get-MsolRole
- Which two commands do you need to use to activate Windows Server Core using a product key?
- slmgr.vbs -dli
- slmgr.vbs -ato
- slmgr.vbs -dlv
- slmgr.vbs -dti
- slmgr.vbs -ipk
- Which two commands will join a server to a domain?
- Set-MsolDomain
- netdom
- Join-Path
- Add-Computer
- You want to check whether the version of Windows Server is an evaluation version. If it is an evaluation version, you want to convert it to a retail version. Which commands should you use?
- slmgr.vbs
- sc query
- sconfig.cmd
- dism.exe
- You need to install a server operating system that supports the following features:
- Active Directory Domain Controller
- DNS
- DHCP
- Group Policy
Which Windows Server 2016 Editions should you choose?
-
- Windows Server 2016 Standard
- Windows Server 2016 Datacenter
- Windows Server Core
- Nano Server
- You have purchased 100 new servers. You plan to install and activate Windows Server 2016 Standard and Microsoft Office 2016 Volume Edition on a group of 20 servers, every week. You plan to use KMS for server activation. You notice that the servers fail to activate the Windows Server operating system and Microsoft Office. What should you do? Choose all the correct answers:
- Activate Microsoft Office 2016 using a product key
- Use Windows Server 2016 Datacenter instead of Windows Server 2016 Standard
- Activate servers in groups of 25
- Install Windows Server and activate servers every two weeks
- Activate computers in groups of 5
- You want to change the existing Windows Server 2016 Standard installation to the Windows Server 2016 Datacenter Edition. What should you do?
- Migration
- Upgrading
- License conversion
- Bare metal installation
Further reading
To enhance your studies, consult these online resources for additional content:
- Getting started with Windows Server 2016: https://docs.microsoft.com/en-us/windows-server/get-started/server-basics
- Windows Server Installation and Upgrade: https://docs.microsoft.com/en-us/windows-server/get-started/installation-and-upgrade
- Install Nano Server: https://docs.microsoft.com/en-us/windows-server/get-started/getting-started-with-nano-server
- Install Server Core: https://docs.microsoft.com/en-us/windows-server/get-started/getting-started-with-server-core
- Install Server with Desktop Experience: https://docs.microsoft.com/en-us/windows-server/get-started/getting-started-with-server-with-desktop-experience

