


 Download code from GitHub
The Essentials of IBM Watson
IBM Watson Analytics brings smart data analysis and visualization, guided data discovery, automated predictive analytics, and cognitive capabilities to you as a service.
Through the process of making a project, this book attempts to help developers and business users alike learn the various computing and analytical capabilities of IBM Watson Analytics.
This book looks at each and every capability of the IBM Watson Analytics platform, such as speeding up predictive analytics for better business insights, building tailored interactions for an improved customer experience, identifying trends, investigating potential issues, and so on, thereby allowing readers to start building projects in their business context using Watson Analytics.
By the end of this book, you should be ready to use Watson Analytics to make better data-driven decisions, as well as visualize and communicate any analysis of your data that you might gain using Watson Analytics.
In this first chapter, we will try to define the latest version of IBM Watson Analytics and look at the various objectives of the tool. In addition, this chapter will provide an overview of Watson's interface, as well its major components, to offer a refresher on some basic tasks, such as adding data, exploring data, and creating a prediction.
This chapter will cover the following topics:
- Definition and objectives
- Exploring the Watson interface
- A refresher of the basic tasks
Definition and objectives
Here's an interesting factoid—IBM Watson was named after IBM's first CEO and industrialist Thomas J. Watson (who has been credited with developing IBM's management style and corporate culture), and was specifically developed to answer questions on the quiz show Jeopardy!
IBM Watson has been described as a computer system that is based on cognitive computing and that, conceptually, can deliver answers to your questions.
Now the term cognitive also has an interesting definition. It is defined as being concerned with the act or process of knowing, or perceiving, which, as you can imagine, is enormously valuable to any business.
Cognitive algorithms have the ability to create insights and make evidence-based decisions in ambiguous circumstances, based upon as much data as possible.
IBM Watson is exciting because it attempts (in much the same way as a human would) to review the provided raw data and reason out an answer. In fact, Watson yields more of a hypothesis than an answer (based upon both the data and other dependencies or circumstances).
The concept of answering with a best-suited answer rather than simply providing a calculated response is an important mind shift that opens organizations up to processing all types and formats of data to produce new and valuable insights as a return on their data investment. These insights aren't typically exposed by using only mainstream, noncognitive approaches.
Another Watson plus is that while consuming data, Watson converts unstructured data into structured data, which then allows that data to be available for those traditional downstream, noncognitive, more mainstream analytical and reporting tools and solutions.
The techniques applied by IBM Watson allow the possibility of using not just the original questions but also subsequent questions to find the right answers, possibly inferred by assembling multiple fragments of raw data and artifacts from multiple sources via machine learning algorithms. Watson provides this expertise to everyone, with the goal of addressing an entirely new class of problems and solutions that will fundamentally change the relationship of people, business, and computers.
This is the objective of IBM Watson, and is most likely one of the objectives of you, the reader of this book.
With any luck, as you work through the following chapters and gain a level of comfort in using IBM Watson Analytics, you will begin to think about and approach problems and opportunities in a new way.
In the following sections of this chapter, we will review the fundamentals of the IBM Watson interface, as well as some of the basic tasks you'll need to be familiar with in order to successfully work through the case study examples given in the following chapters.
Let's go!
IBM Cloud prerequisites
IBM Watson lives in the cloud (the IBM Cloud). The cloud environment makes it relatively easy to get started as there are actually very few prerequisites that you need to access IBM Watson Analytics (and the IBM Cloud platform overall). In fact, all you really need to get yourself up and running is an up-to-date web browser (most will work quite adequately) and your willingness to discover and learn.
The following are the official browser minimum requirements (as of the time of writing):
- Chrome: Latest version for your operating system
- Firefox: Latest regular and ESR versions for your operating system
- Internet Explorer: Version 11
- Edge: Latest version for Windows
- Safari: Latest version for Mac
Exploring the Watson interface
With any new endeavor, one would be wise to take some time before actually bringing or attempting any project work (so, at the startup stage) in order to focus on becoming comfortable, or at least somewhat familiar, with the tool or technology's fundamentals.
In this chapter, as we look at IBM Watson, obtaining this understanding starts first with procuring access to IBM Watson Analytics and, as a next step, the IBM Cloud platform.
First, a little bit on the IBM Cloud. The IBM Cloud is a platform offering a rich assortment of infrastructure, cognitive, software, and services (and a lot of documentation and examples) with the aim of jump starting and otherwise accelerating the pace of business.
The IBM Cloud platform is where you can access the full power of the IBM Watson platform, where you can build new and exciting applications, using prebuilt services and APIs.
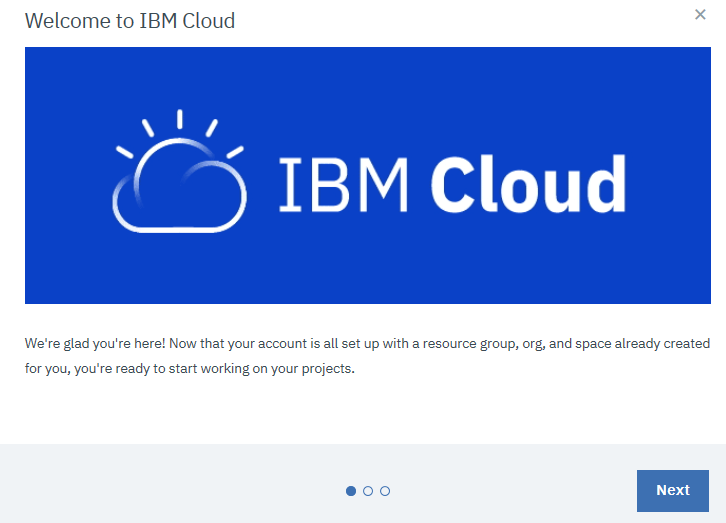
Once you obtain your access, you will have the opportunity to click through a number of welcome, how-to, and helpful hint tutorials. The introductory window is shown in the following screenshot:
The reader should take note that the official product documentation refers to the IBM Cloud user interface as the Cloud Console, where all of your cloud resources, as well as components (including IBM Watson), can be accessed and managed.
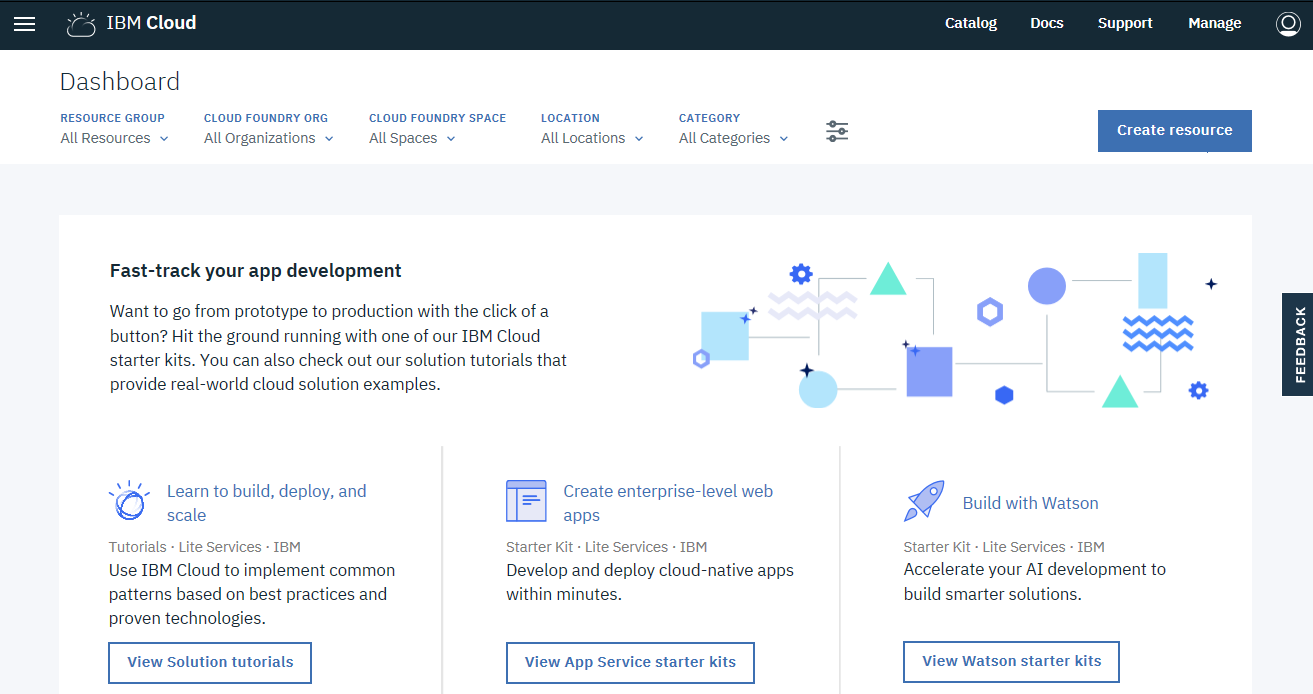
After you log in, your dashboard will contain many links to various resources and functionalities based upon your account type. The following screenshot shows the IBM Cloud main or start page (sometimes even called the welcome page), which is referred to as the IBM Cloud Dashboard:
We won't take the time here to go through these wonderful IBM Cloud platform tutorial videos (but you definitely should review as many of them as possible); instead, we will talk a bit about the basic components of the IBM Cloud Console and then quickly-jump into the IBM Watson Analytics interface.
The menu bar
The menu bar (located across the top of the dashboard) is sometimes referred to as the title bar. The following is a screenshot showing the IBM Cloud menu bar:

In the following sections, we will look at the icons and options in the menu bar, starting from the top left side.
Menu icon
The menu icon is the first image on the left of the menu bar (Hint: it looks like a stack of three lines). Clicking on this icon will display a vertical list of the available menu selections on the platform. The following screenshot shows the menu selection list:

IBM Cloud
As we move to the right along the title bar, the next option is the IBM Cloud menu selection. Clicking on this option will always return you—send you back—to the start or main page.
Catalog
The Catalog menu selection sends you to the Catalog IBM Cloud page (shown in the following screenshot), where you can (based upon a selected filter type) do things such as manage your cloud infrastructure and access other IBM Cloud platform features:

Docs
Clicking the Docs menu item takes you to the Docs or Documentation Entry page (shown in the following screenshot). Here is where you can perform actions such as Search documentation, Get started by deploying your first app, or follow a specific IBM Cloud help thread that you are interested in:

Support
Clicking on the Support menu item displays a drop-down selection list (shown in the following screenshot) with various options for obtaining the best type or level of support based upon your particular needs. The support options included are as follows:
- What's New
- Access to the (IBM Cloud) Support Center
- The ability to enter or Add (a) Ticket (a ticket is your request for information or support assistance)
- View Tickets (that is, all of your current and prior tickets)
- Status, where you have the ability to investigate issues reported by the entire IBM Cloud user community:

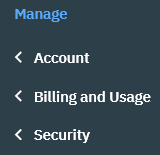
Manage
Clicking on the Manage menu option displays the various areas in which you have the ability to manage your IBM Cloud's Account, Billing and Usage, and Security:
Profile – avatar
Clicking on the Profile menu option displays access to view, update, and upgrade options for your IBM Cloud account. In addition, this is where you can officially log out of the IBM Cloud environment:

Online glossary, let's chat, and feedback
Another great resource for someone who is new to the IBM Cloud is the online glossary of terms, referred to as the IBM Cloud Glossary, which can be found at:
https://console.bluemix.net/docs/overview/glossary/index.html#glossr
In addition, on most pages within the IBM Cloud environment, you will see the following icon:

This is the Let's Chat icon which, by clicking, connects you within a few hours to a question and answer dialog with one or more IBM Cloud Support Experts. It is not a real-time chat session, but it is pretty efficient. Don't be afraid to give it a try, they are very helpful.
IBM is committed to growing and evolving the IBM Cloud platform and is keen on hearing your opinion. One testimonial to this commitment is the presence of the FEEDBACK label, which is visible on most of the pages within the IBM Cloud. Clicking on FEEDBACK presents you with the option to easily provide both specific or (more) general comments and suggestions, or, if you are having a problem, from here you can also enter a support ticket.
What about Watson?
Back to our menu icon. If you scroll down, you can click on Watson, which will send you to the IBM Watson main page, shown as follows:

The format of this page is similar in format to the IBM Cloud console main page, as there are helpful Get Started panels (sometimes called tiles) offering options across the top part of the page. These are links to Starter Kits, and beneath these most popular kits (Build a chatbot, Extract insights, and Convert audio into text) are the links to View all Starter Kits and Browse all Watson services.
If you scroll further down the page, you will find access to Watson Studio, as well other useful links such as SDKs, The Watson Blog, GitHub, and so on.
Accessing the IBM Watson platform through the IBM Cloud platform is the approach you will use for building advanced apps using Watson services, APIs, and SDKs, but you can use Watson Analytics for advanced projects by accessing the Watson Analytics interface directly.
You can find this Watson entry point at: https://watson.analytics.ibmcloud.com (and access it with your same valid IBM user ID).
The Watson dashboard
Like the IBM Cloud dashboard, the Watson dashboard is organized with a title or menu bar across the top of the page, (see following sections) which I call the quick start information bar. Beneath that, you'll find the Search/Add/Filter/Sort bar, followed by an open space where content panels will appear (more about these later, also know that these are sometimes called tiles or informational titles).
Let's review each of these areas, starting at the top.
Menu bar
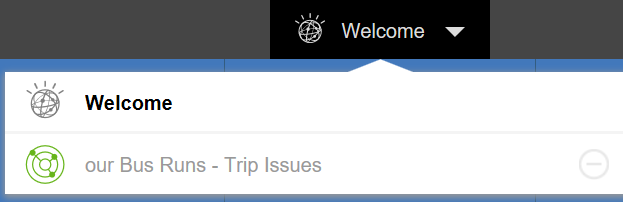
The Watson Analytics menu bar shows the Watson name in the far left. In the center of the bar there is a drop-down list that allows you to quickly jump between open Watson pages. This is kind of such as clicking on open applications on your desktop:

For example, in the following example, we see Welcome and our Bus Runs - Trip Issues in the list. Clicking on either entry jumps to that view:
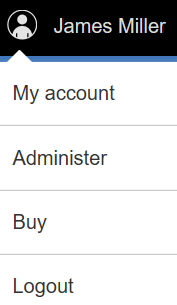
The logged in user name (the name of the logged in user) is always displayed to the right of the quick jump list. This is where you can manage your Watson Analytics account, perform Watson Administrative work, or log out:
Next, on the menu bar, you'll find access to the product documentation, helpful hints that have been documented by IBM and the Watson user community, as well as access to the ever-growing (now including you!) Watson community.
Finally, on the far right of the Watson menu bar, there is the Collections icon, where one can access all Watson Assets that you have created as well as those that have been shared with you.
Quick start information bar
Under the Watson Analytics menu bar is the Quick Start Information bar. It consists of larger icons used to organize and provide quick access to selected functionalities. These functionalities currently include: Explore, Predict, Assemble, Social Media, and Refine (all of which we will use throughout the chapters of this book):

Search, add, filter, and sort
Here, you will find the features that allow you to (wildcard) search for, sort, and otherwise filter the content panels/tiles that currently exist within your Watson Analytics account.
In the center, perhaps most importantly, is the Add icon. This allows you to create new Watson assets or add more data to your Watson account. The following screenshot shows the Search bar:

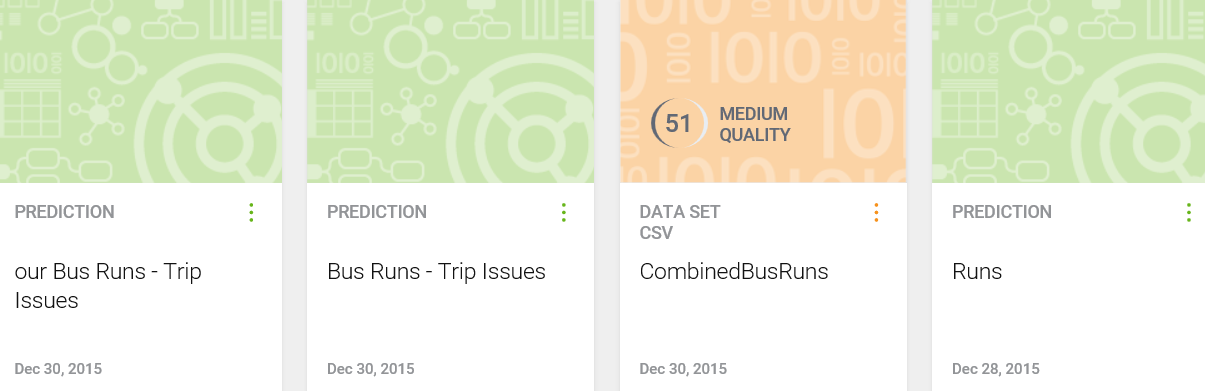
Content panel area
And finally, all of the Watson Analytics assets you either previously created or have been granted access to will show up here as individual content panels/tiles that you can click on to access and edit/update:
Now that we have gone through our quick interface investigation, let's go over some of the more basic (but absolutely critical) Watson tasks. Throughout the rest of the chapter, we'll review the areas of Watson that involve Explore, Predict, Assemble, Social Media, Refine, Save, and Add (ing data).
Basic tasks refresher
In this section, we will look into the basic tasks of IBM Watson.
The first step
Before you can do anything with Watson, you need to set up an account (and for general discovery, you can use the free version!) and log in. You can get started with IBM Watson by going directly to: https://watson.analytics.ibmcloud.com (as of this writing) and (or course!) using user your IBM ID to sign-in (or sign-up if you're a new user).
Not too much more to add here on this topic, as logging in is pretty much self-explanatory.
Explore
Typically, one would start by adding data—some project-focused new data—to IBM Watson, but for now, as we are just reviewing the basics of the Watson interface, we'll mention that IBM Watson offers a pretty extensive library of sample data, which is always available to you to use in your efforts to gain an understanding of how the basic functions and features of the tool work.
So, with those thoughts in mind we'll move right along, starting here with a discussion on Explore, which is, starting from left to right, the first IBM Watson feature available on the start-up bar.
IBM Watson Explore is designed to allow you to effortlessly integrate the use of visualizations in an effort to gain an understanding of the data you are interested in, so that you can notice patterns and relationships within that data. These can then have major impacts on the business or problem you are solving for.
Watson Analytics makes it easy to jump right in and get going with the process of data exploration without requiring a lot of setup or data preparation.
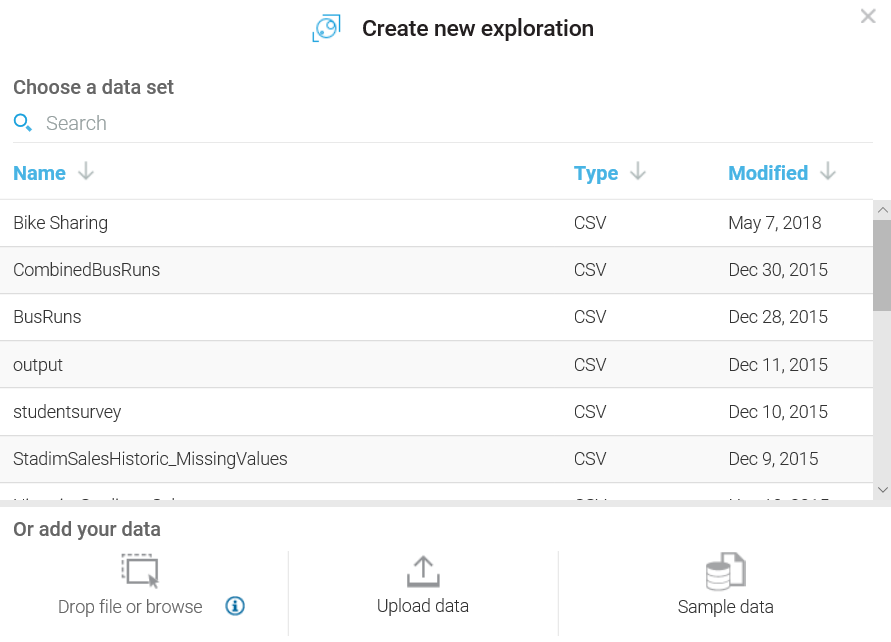
After clicking Explore, the Create new exploration dialog (shown in the following screenshot) offers you a list of existing datasets (if you've already added any to Watson) to begin exploring as well as the ability to add your data by browsing to a file or selecting Twitter as the data's source, and finally, you can also explore the Sample data offered by Watson:
Watson prompts
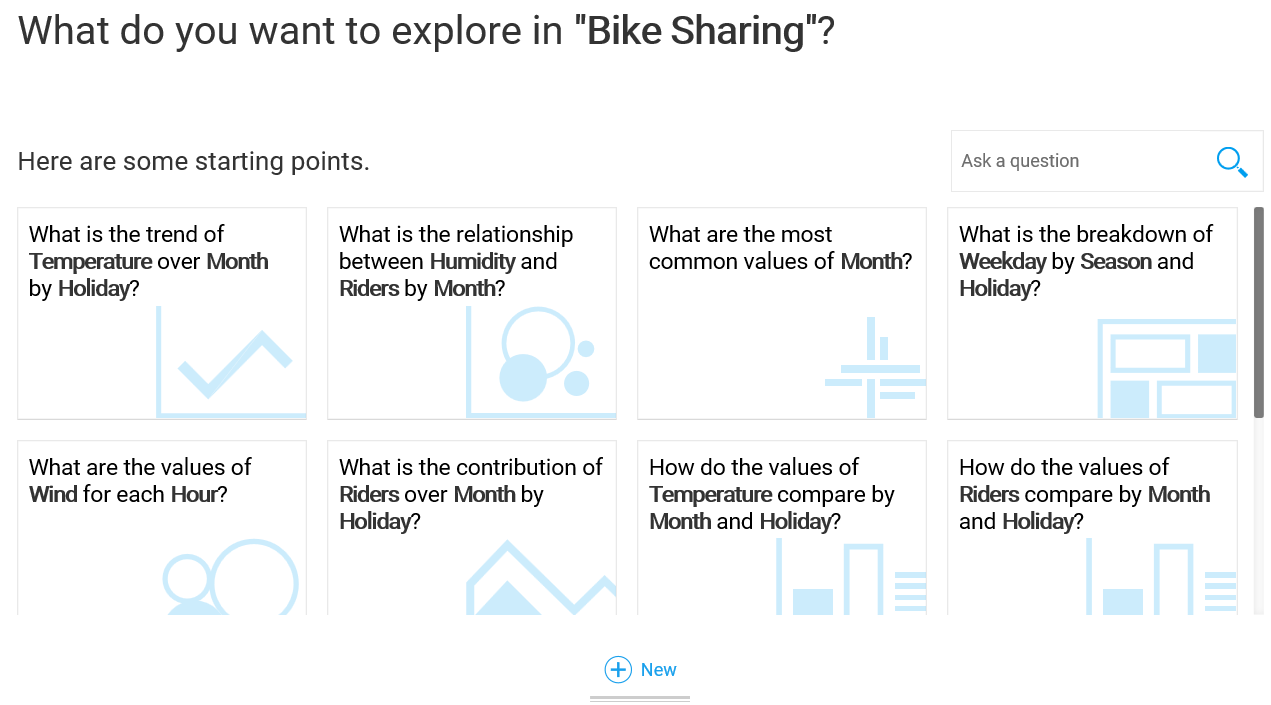
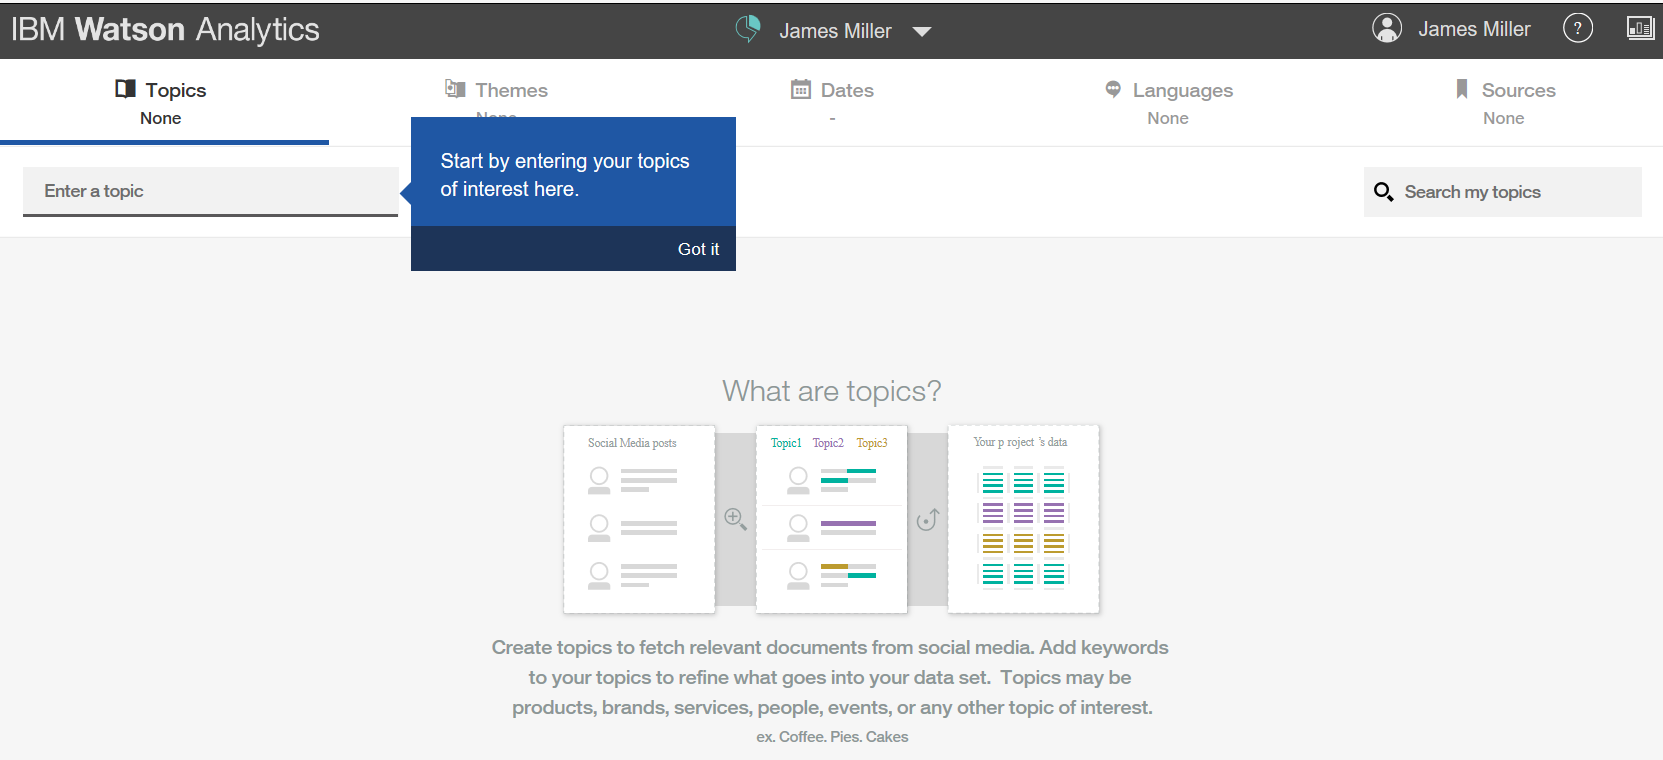
What's exciting is what happens after you select a dataset. IBM Watson asks you: What do you want to explore in your selected dataset? and also prompts you with suggested starting points based on the data you selected.
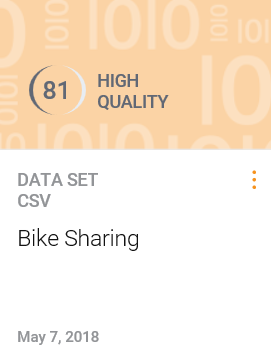
In the following example, we have selected a dataset named Bike Sharing:
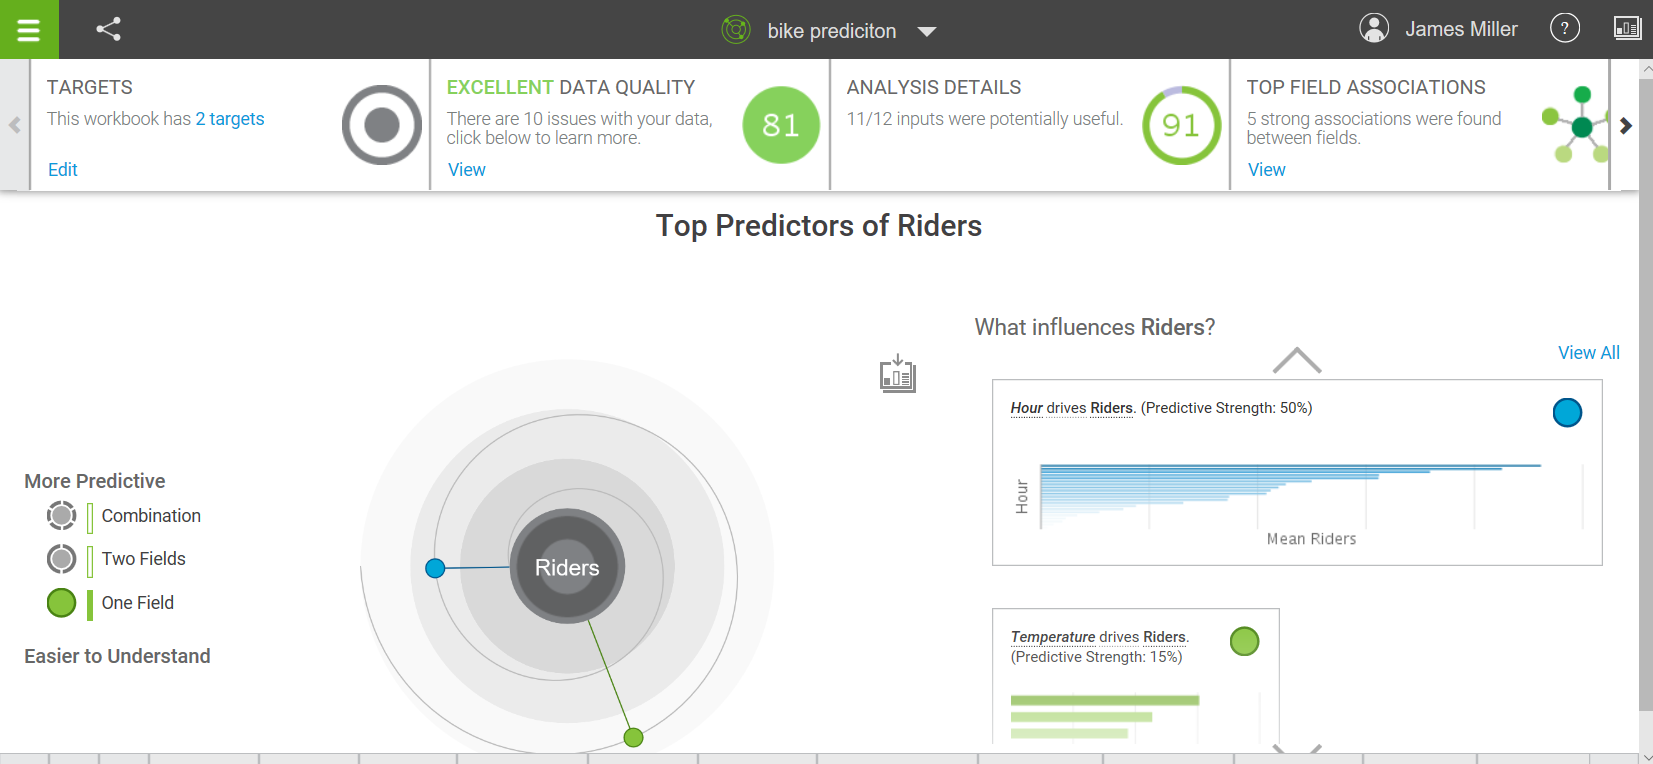
Predict
The IBM Watson Predict feature delivers highly interpretable insights that are based on internal Watson complex modeling. In the Predict capability, Watson Analytics uses sophisticated algorithms to quickly and efficiently deliver its predictions based on the data you provide.
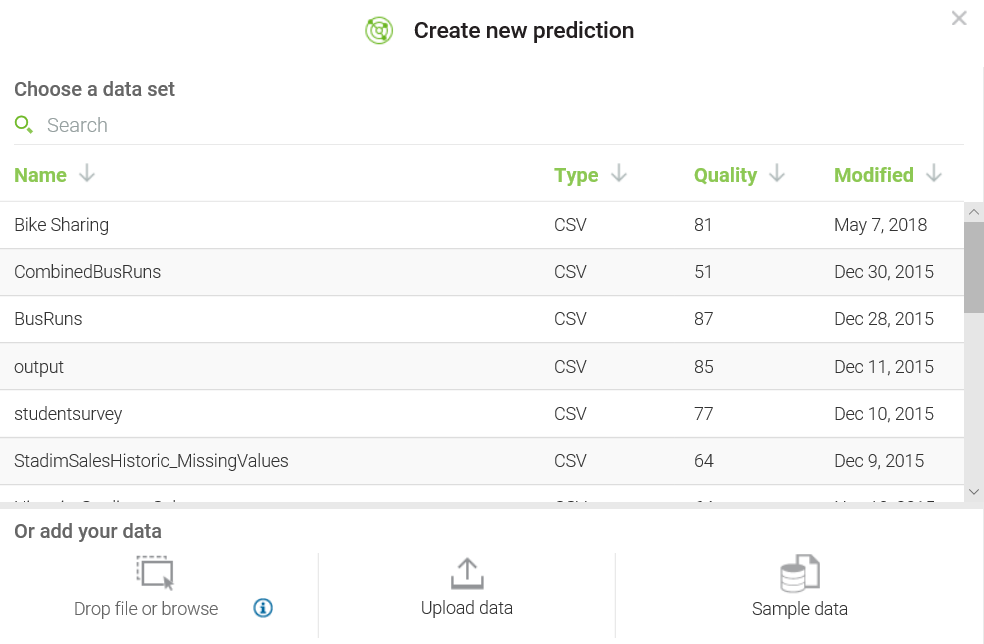
Just like the previously-mentioned Explore capability, once you click on Predict, IBM Watson provides you with the Create new prediction dialog (shown in the following screenshot), which displays a list of existing datasets that you can select as the source for your new Watson prediction, as well as the option to upload/add new data (or utilize the provided sample data):
IBM Watson Predict automatically identifies the data that you are analyzing and includes visual as well as textual understandings that are generated from your selected data.
Watson couldn't make it much easier! The basic steps for using Predict are simply:
- Add (or select) some data
- Click Predict (to tell Watson to create the prediction)
- View the results!
Creating your prediction (after selecting the data source) starts with the Create a new Analysis dialog (a bit of a misnomer; are we creating a new analysis or prediction?) where you provide a name and target:

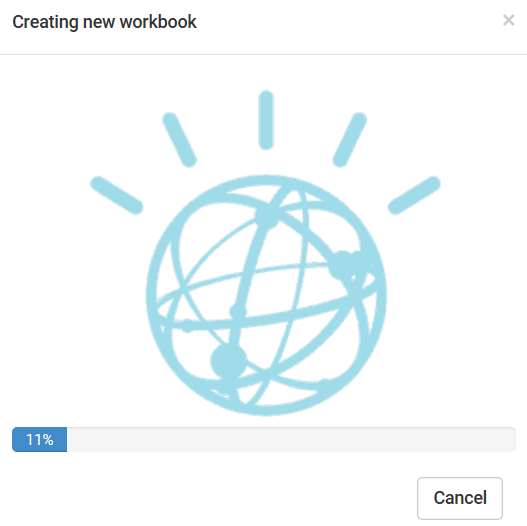
Next, you click Create and let Watson do its work:
And then (momentarily), we have our prediction:
Assemble
Another fundamental feature of IBM Watson is Assemble. Simply put, you can use this to group the results generated from using Explore and Predict.
Clicking on Assemble, you will see a dialog with a familiar format:
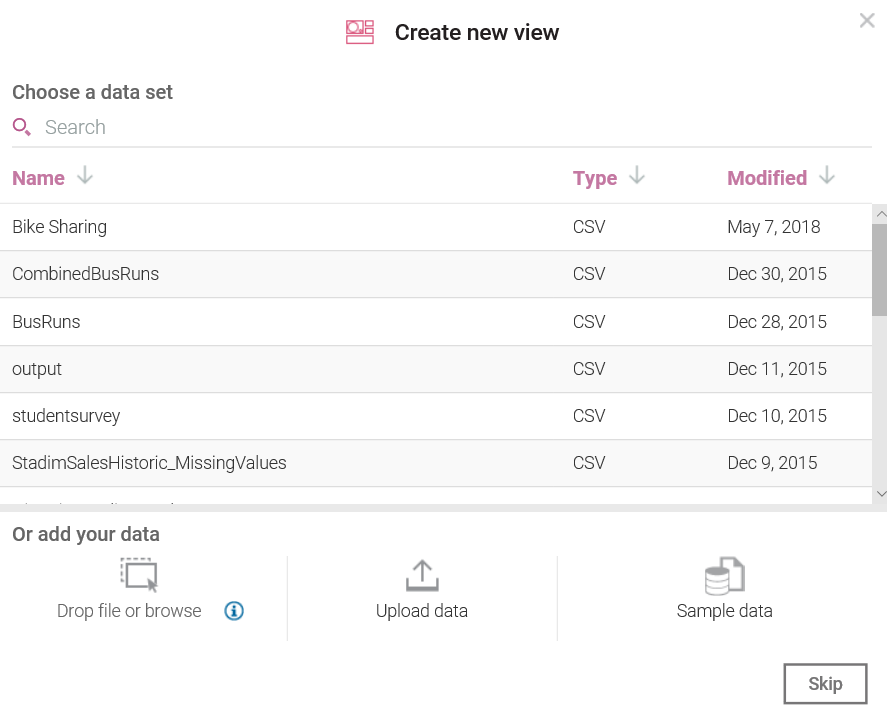
Again, you have the option to select an existing dataset or add your new data (you also have another misnomer, Create a new view even though you clicked on Assemble). You also have the option of clicking on Skip, but for now, we see that the next page is where you do the assembling by entering a name and selecting a Watson template:
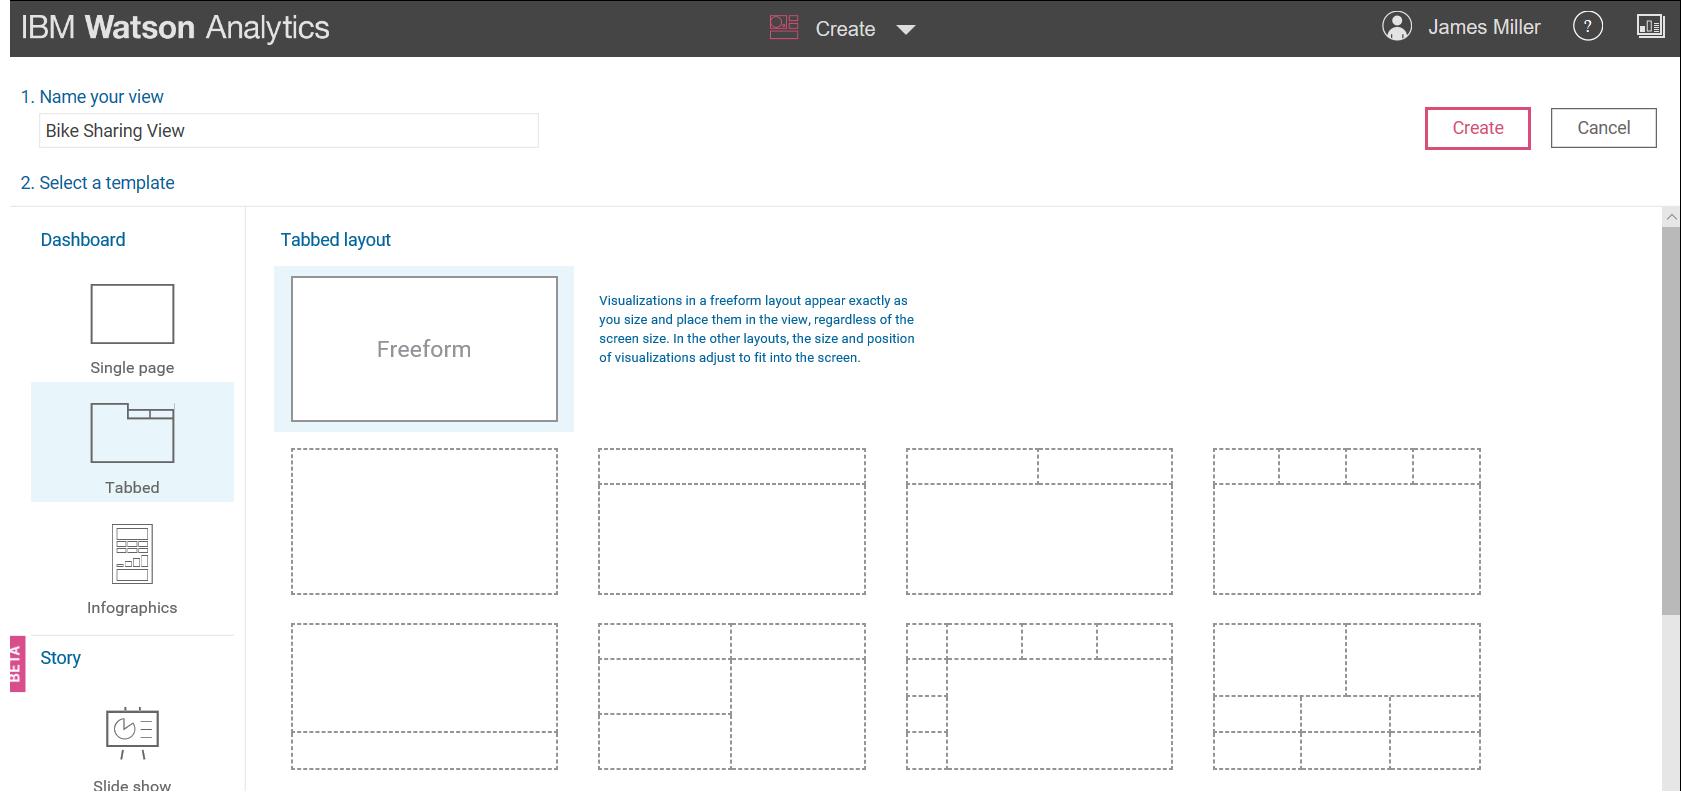
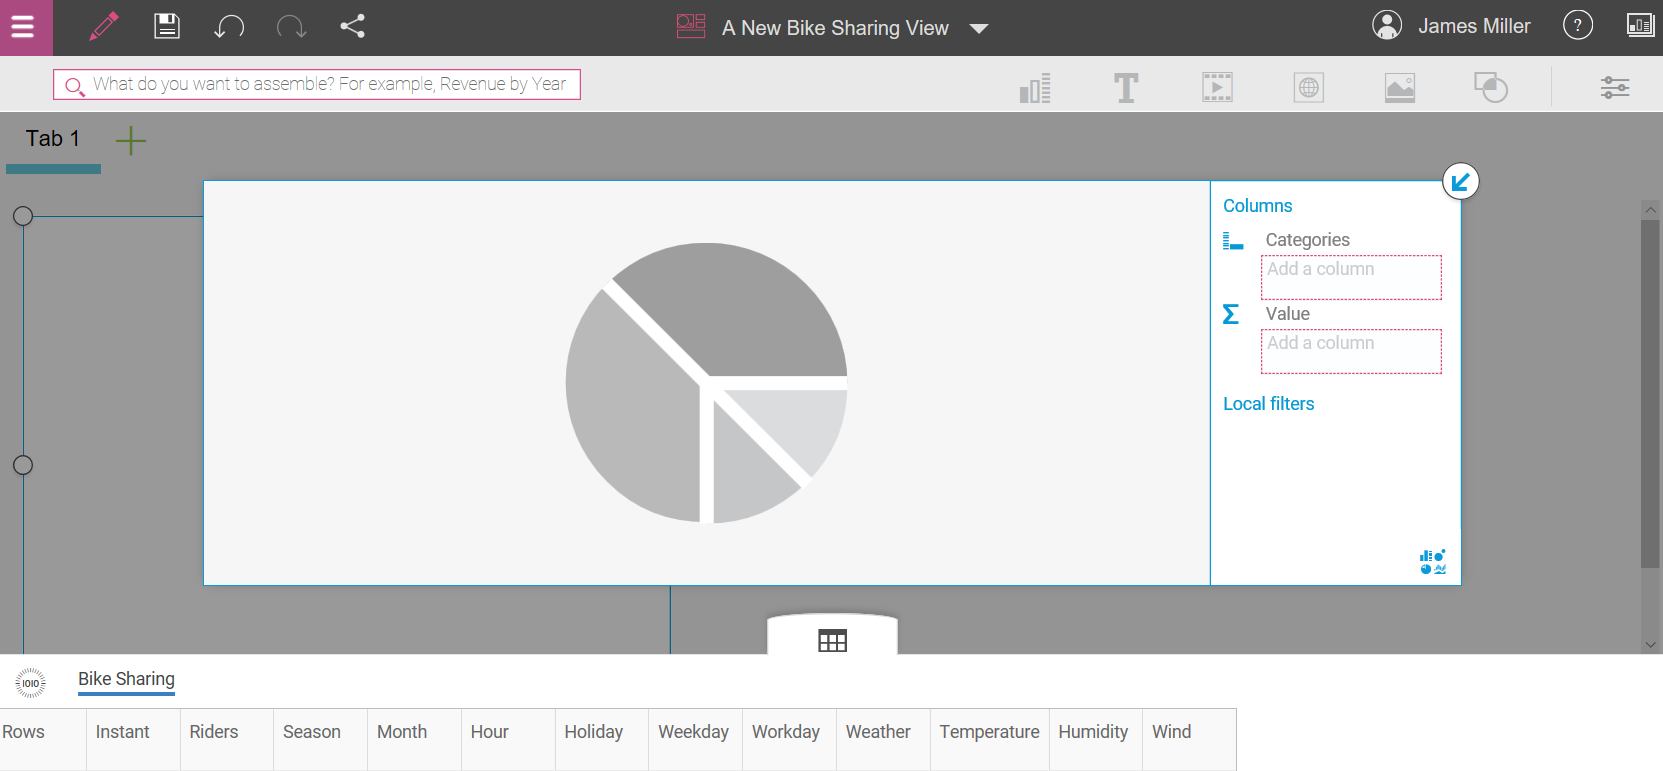
Once you select a template (templates are the way you can easily organize your artifacts) and click Create you can then build your Assembly (or view) by dragging and dropping various data points into your favorite visualizations (more on this later!):
Social media
Newer to IBM Watson are the built-in Social Media capabilities. Now, you can discover insights based upon data gathered by IBM Watson from key words and hashtags you choose. This data can be from Twitter, forums, reviews, Facebook pages, video descriptions, comments, blogs, and other news sources. Exploring and analyzing social media trends is now a fundamental task using IBM Watson.
Clicking on Social Media presents the Create a new social media project dialog (shown as follows) that steps you through the process of creating a real, IBM Watson-based, social media (SM) project:
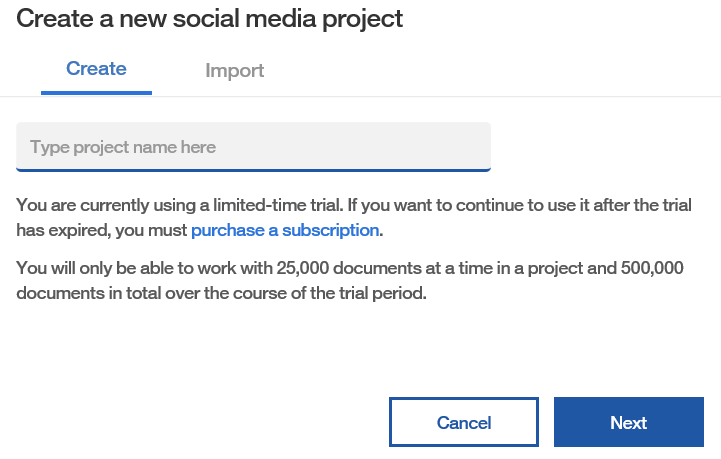
Once you have typed a name for your (SM) project, you can click Next to go to the page shown in the following screenshot, where you can define the details for your project:
Refine
It's always all about the data, right? That is because having a thorough understanding of your data can actually make or break the outcome of a project.
Perhaps of all the out of the box features that IBM Watson delivers, the most important may just be Refine. Refine means just that—to hone, enhance, polish, improve or even perfect—the data you are planning to use in your IBM Watson project.
But why would you modify your data? Well, there are various reasons you may want to consider (or possibly need to) modify the data you are using. For example:
- You might want to enrich the data by adding calculations. Let's consider patient data that includes the physical characteristics of each patient, such has sex, height, weight, age, and so on. If you are interested in how various physical characterizes effect life expectancies, you may want to add a calculation that determines the patient's individual body mass index (BMI), which is calculated using height and weight. This ensures a consistent way of calculating BMI and also saves time by eliminating the need to perform the calculation within each analysis or prediction.
- Very often you may want to focus on a particular subset of your data. This can be accomplished by setting up a data filter (for that particular area of your business).
- More commonly, an exercise to make your data more readable is to rename columns or change a data type.
- Based upon your requirements or interest in the data, you may want to modify the default aggregations.
- Finally, you might want to create hierarchies and groups within your data.
Saving the original
As a rule, a proven practice when making any sort of change to your data file is to preserve the original state of the data. Not to worry, IBM Watson saves you the time and effort of backing up, saving, and then maintaining version control, since whenever you use Refine, a new and separate dataset is created automatically for you that is related to your original dataset.
Note: The changes that you make using Refine are saved as a separate version of the original dataset and are automatically available in Predict, Explore, and Assemble. If you modify the data in an exploration, the changed data is available only in that exploration.
In addition to using Refine to make your data more usable, you can also use Refine to learn more about your data. Once you are on the Refine page, you can click on the data metrics icon (it is the little bar graph on the left of the page), shown as follows:
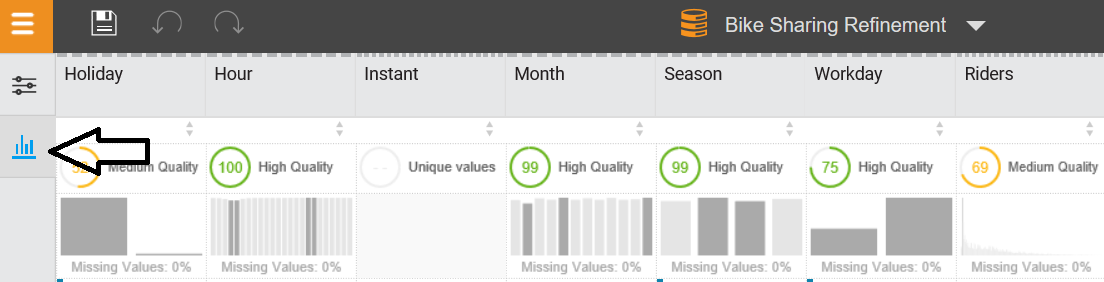
When you view the data metrics for your selected dataset, you will see the following information for each column of your data:
- The quality score for each column, which indicates a column's potential readiness for use in a prediction
- The percentage of data that is missing
- Distribution graphs of the data (in numeric columns)
Getting started with Refine is easy; once you click on Refine, a familiarly-formatted Refine data set dialog is presented (shown in the following screenshot), where you can select an existing dataset, add a new dataset, or take advantage of Watson's sample data:
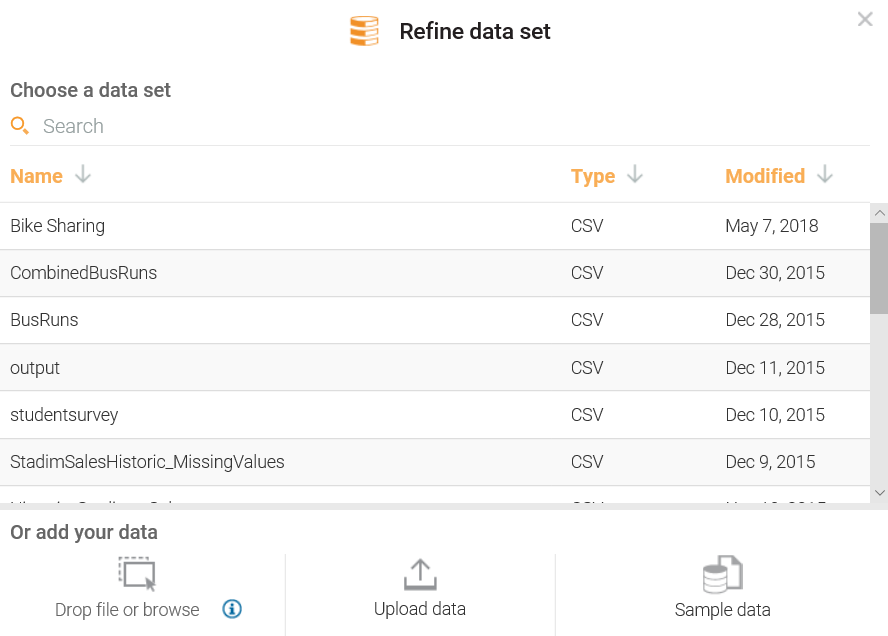
After selecting (or uploading) a dataset, the data is displayed in the Refine page (shown in the following screenshot), where you can explore your data's metrics and perform the appropriate refinements based upon your requirements:
Now that we've done the high-level, quick review of most of the fundamental features of the IBM Watson interface, and before we jump into our first IBM Watson project, let's move on to the final section of this chapter, where we will walk through the steps required to add some new data to IBM Watson as well as do some exploring and refining of that data.
Add – some data
You can add new data to IBM Watson easily. There is no need for extensive Extract Transform Load (ETL) scripting. The data can be contained in a cloud-based or on-premises database or simply uploaded to IBM Watson as a simple text file.
The following steps can be followed to add data to Watson.
It goes without saying that the initial step is determine the source of the data that you want to use. We'll focus a lot more on this task in later chapters of this book, but for now, let's assume we have isolated a text file containing data we want to use in an IBM Watson project. So the steps are:
- From the IBM Watson main page, click on Add, where you will have the option to Create something new or add your data:
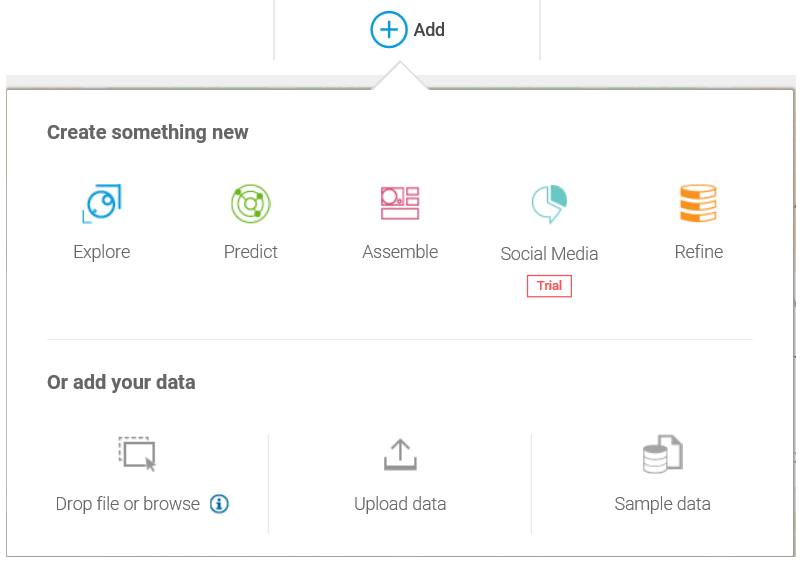
- Once again, a similarly formatted decision dialog allows you to Create something new and Or add your data.
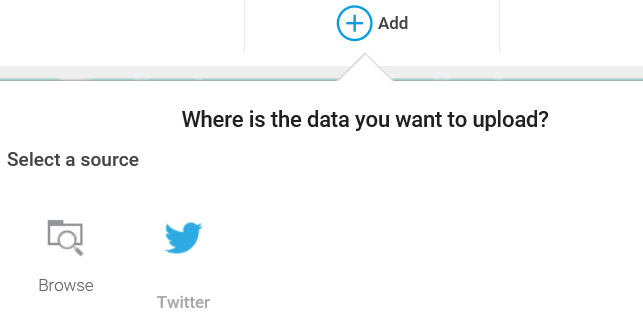
- In this example, we'll click on Upload data. Watson will then display the following Where is the data you want to upload? dialog, where you can click on Browse (you'll notice that Twitter is also offered as a data source, but for now we can ignore that option):
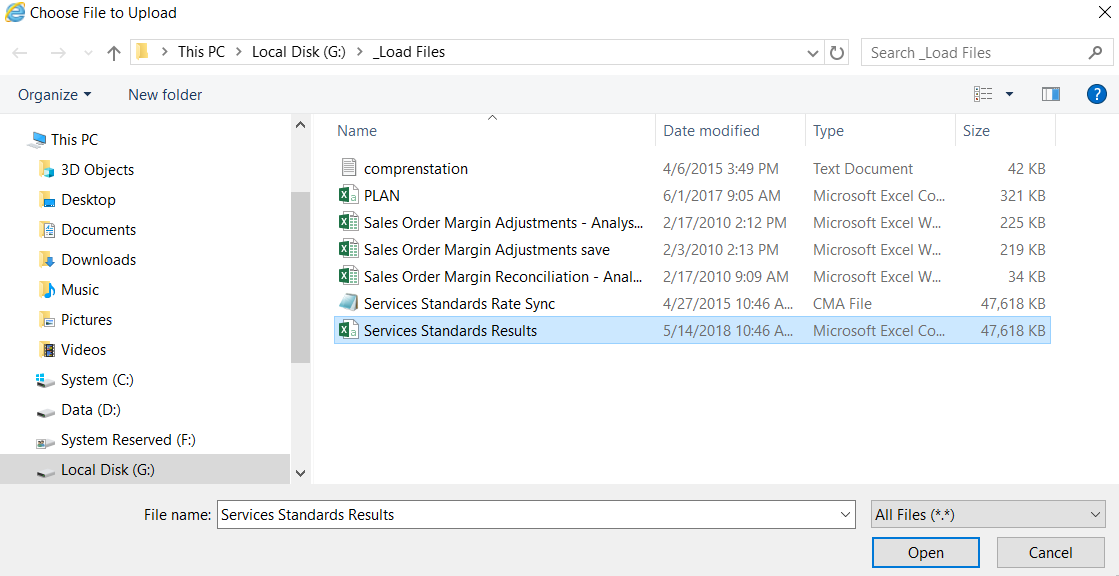
- After selecting Browse, you can navigate using a common file search dialog to the location of the data file that you want to upload to Watson. In the following screenshot, we have found our file named Services Standards Results.csv and clicked on it to select it:
- Once you select your file and click the button labeled Open, Watson will create an informational tile for your data file and begin transferring... the data:
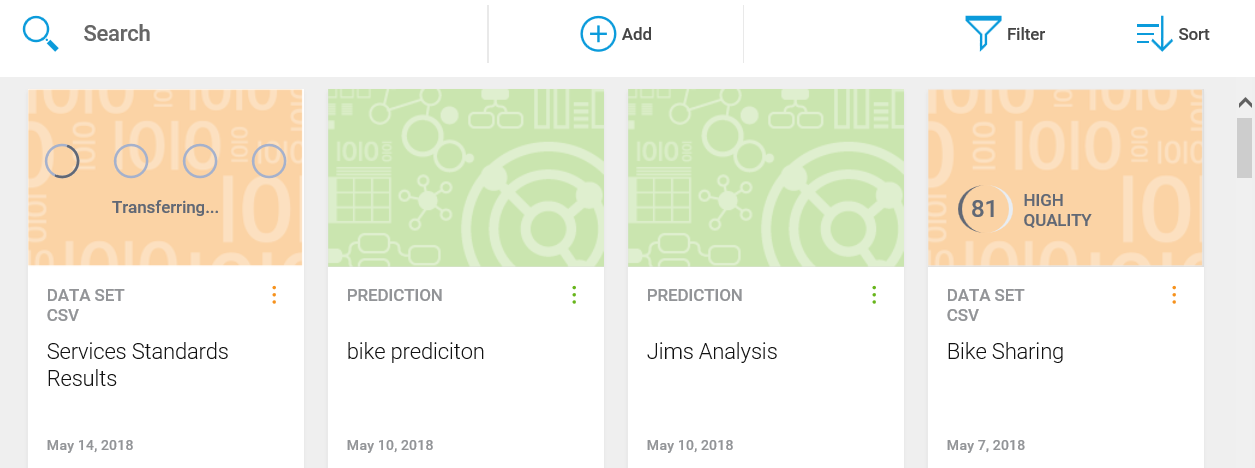
So, as you see, even without a programming or scripting expert's help, you can add data to your IBM Watson space, since Watson practically does that work for you!
Refine
One of the more important IBM Watson tasks is Refine (which we mentioned earlier in this chapter). Here will walk through the basics, using some Watson sample data:
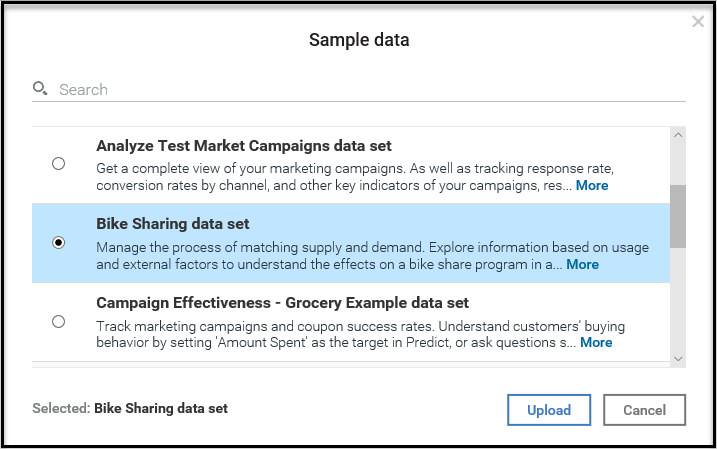
- From the Quick-start bar, click on Refine. From the Refine data set dialog, you then can scroll down and select Sample data; at this point you will see the Sample data dialog, which is displayed as follows:
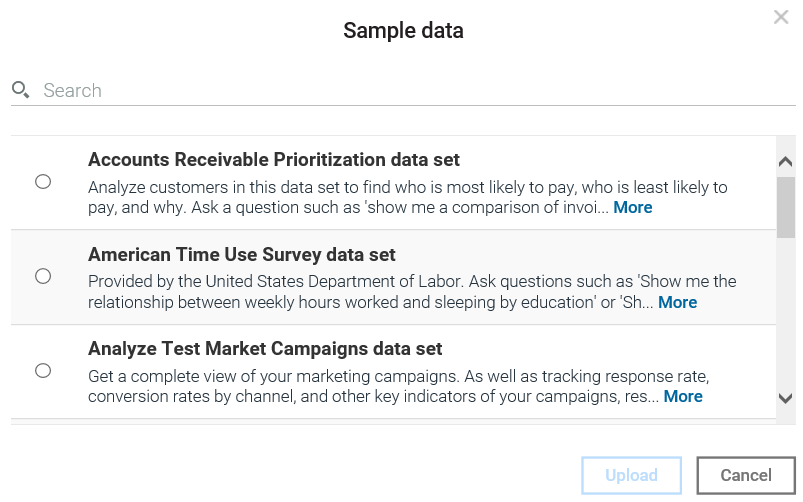
- IBM Watson provides a nice list of sample data, each worth spending a bit of your time exploring and experimenting with. For now, let's pick Bike Sharing data set and then click on Upload:
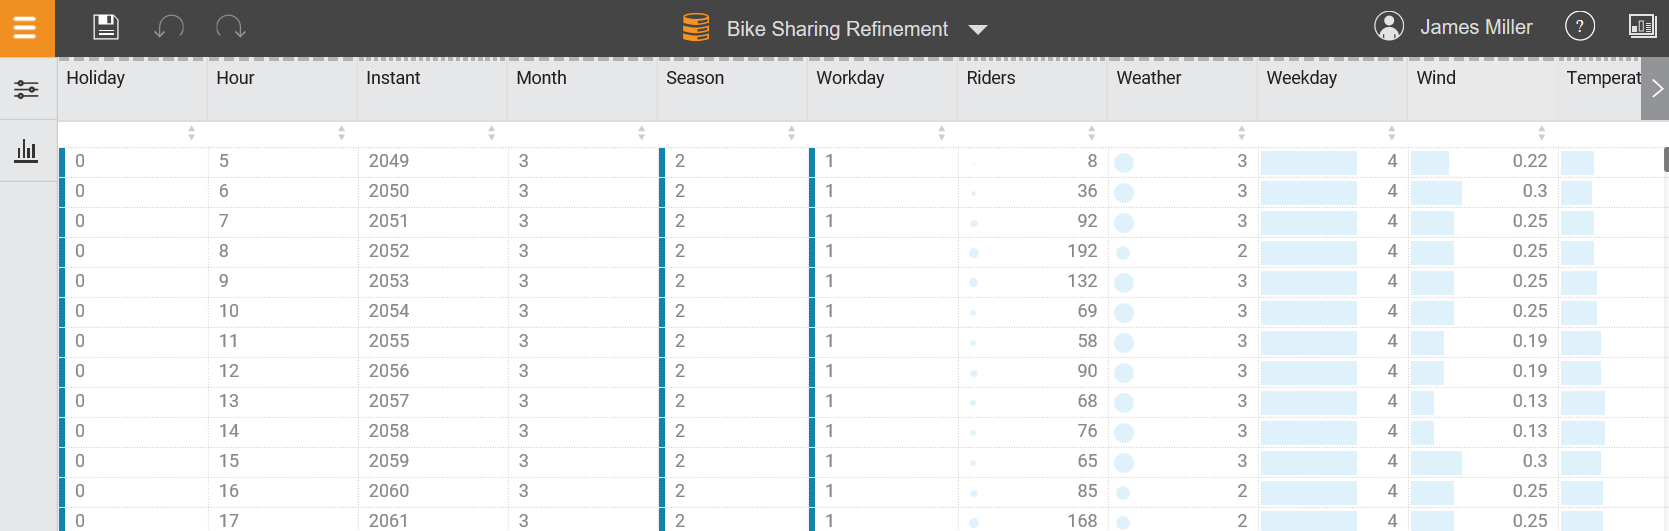
- Now that we have our data loaded and available, you can select it from the Refine data set list, which automatically loads it into the Refine page (which looks a lot like an Excel worksheet):

There are many tasks you can perform using Refine, such as:
- General housekeeping: Such as renaming columns, changing data types, or creating a subset of the data by filtering out irrelevant records
- Summarization: By altering the default aggregations
- Enrichment: By adding calculated fields, hierarchies and groups
- Review the metrics of the data, such as a quality score by data field or column
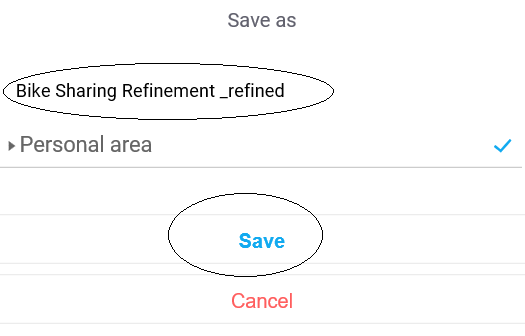
For now, let's assume we've made some of the previously-mentioned refinements to our data and want to save it as a new file. To do that, you simply click on the SAVE icon (looks such as a tiny diskette in the upper left of the page), enter an appropriate name for the new file, and click Save (on the Save as popup shown as follows):
Summary
In this chapter, we started by defining the latest version of the IBM Watson Analytics platform and discussed the various objectives of the tool. In preparation for the projects reviewed in the upcoming chapters, we explored the Watson interface as well as the IBM Cloud console.
Finally, we reviewed some fundamental startup tasks (such as adding a new dataset, accessing Watson sample data, and refining an existing dataset) to ensure we are ready to proceed with our first Watson project!
In the next chapter, we will start with our first IBM Watson project use case.