Download code from GitHub
When starting with Go, one of the most common things you'll hear being said is that it's a systems language.
Indeed, one of the earlier descriptions of Go, by the Go team itself, was that the language was built to be a modern systems language. It was constructed to combine the speed and power of languages, such as C with the syntactical elegance and thrift of modern interpreted languages, such as Python. You can see that goal realized when you look at just a few snippets of Go code.
From the Go FAQ on why Go was created:
"Go was born out of frustration with existing languages and environments for systems programming."
Perhaps the largest part of present-day Systems programming is designing backend servers. Obviously, the Web comprises a huge, but not exclusive, percentage of that world.
Go hasn't been considered a web language until recently. Unsurprisingly, it took a few years of developers dabbling, experimenting, and finally embracing the language to start taking it to new avenues.
While Go is web-ready out of the box, it lacks a lot of the critical frameworks and tools people so often take for granted with web development now. As the community around Go grew, the scaffolding began to manifest in a lot of new and exciting ways. Combined with existing ancillary tools, Go is now a wholly viable option for end-to-end web development. But back to that primary question: Why Go? To be fair, it's not right for every web project, but any application that can benefit from high-performance, secure web-serving out of the box with the added benefits of a beautiful concurrency model would make for a good candidate.
In this book, we're going to explore those aspects and others to outline what can make Go the right language for your web architecture and applications.
We're not going to deal with a lot of the low-level aspects of the Go language. For example, we assume you're familiar with variable and constant declaration. We assume you understand control structures.
In this chapter we will cover the following topics:
- Installing Go
- Structuring a project
- Importing packages
- Introducing the net package
- Hello, Web
The most critical first step is, of course, making sure that Go is available and ready to start our first web server.
Note
While one of Go's biggest selling points is its cross-platform support (both building and using locally while targeting other operating systems), your life will be much easier on a Nix compatible platform.
If you're on Windows, don't fear. Natively, you may run into incompatible packages, firewall issues when running using go run command and some other quirks, but 95% of the Go ecosystem will be available to you. You can also, very easily, run a virtual machine, and in fact that is a great way to simulate a potential production environment.
In-depth installation instructions are available at https://golang.org/doc/install, but we'll talk about a few quirky points here before moving on.
For OS X and Windows, Go is provided as a part of a binary installation package. For any Linux platform with a package manager, things can be pretty easy.
On both OS X and Linux, you'll need to add a couple of lines to your path—the GOPATH and PATH. First, you'll want to find the location of your Go binary's installation. This varies from distribution to distribution. Once you've found that, you can configure the PATH and GOPATH, as follows:
export PATH=$PATH:/usr/local/go/bin
export GOPATH="/usr/share/go"
While the path to be used is not defined rigidly, some convention has coalesced around starting at a subdirectory directly under your user's home directory, such as $HOME/go or ~Home/go. As long as this location is set perpetually and doesn't change, you won't run into issues with conflicts or missing packages.
You can test the impact of these changes by running the go env command. If you see any issues with this, it means that your directories are not correct.
Note that this may not prevent Go from running—depending on whether the GOBIN directory is properly set—but will prevent you from installing packages globally across your system.
To test the installation, you can grab any Go package by a go get command and create a Go file somewhere. As a quick example, first get a package at random, we'll use a package from the Gorilla framework, as we'll use this quite a bit throughout this book.
go get github.com/gorilla/mux
If this runs without any issue, Go is finding your GOPATH correctly. To make sure that Go is able to access your downloaded packages, draw up a very quick package that will attempt to utilize Gorilla's mux package and run it to verify whether the packages are found.
package main

import (
  "fmt"
  "github.com/gorilla/mux"
  "net/http"
)

func TestHandler(w http.ResponseWriter, r *http.Request) {

}

func main() {
  router := mux.NewRouter()
  router.HandleFunc("/test", TestHandler)
  http.Handle("/", router)
  fmt.Println("Everything is set up!")
}
Run go run test.go in the command line. It won't do much, but it will deliver the good news as shown in the following screenshot:

When you're first getting started and mostly playing around, there's no real problem with setting your application lazily.
For example, to get started as quickly as possible, you can create a simple hello.go file anywhere you like and compile without issue.
But when you get into environments that require multiple or distinct packages (more on that shortly) or have more explicit cross-platform requirements, it makes sense to design your project in a way that will facilitate the use of the go build tool.
The value of setting up your code in this manner lies in the way that the go build tool works. If you have local (to your project) packages, the build tool will look in the src directory first and then your GOPATH. When you're building for other platforms, go build will utilize the local bin folder to organize the binaries.
When building packages that are intended for mass use, you may also find that either starting your application under your GOPATH directory and then symbolically linking it to another directory, or doing the opposite, will allow you to develop without the need to subsequently go get your own code.
As with any language, being a part of the Go community means perpetual consideration of the way others create their code. Particularly if you're going to work in open source repositories, you'll want to generate your code the way that others do, in order to reduce the amount of friction when people get or include your code.
One incredibly helpful piece of tooling that the Go team has included is go fmt. fmt here, of course, means format and that's exactly what this tool does, it automatically formats your code according to the designed conventions.
By enforcing style conventions, the Go team has helped to mitigate one of the most common and pervasive debates that exist among a lot of other languages.
While the language communities tend to drive coding conventions, there are always little idiosyncrasies in the way individuals write programs. Let's use one of the most common examples around—where to put the opening bracket.
Some programmers like it on the same line as the statement:
for (int i = 0; i < 100; i++) {
  // do something
}
While others prefer it on the subsequent line:
for (int i = 0; i < 100; i++)
{
  // do something
}
These types of minor differences spark major, near-religious debates. The Gofmt tool helps alleviate this by allowing you to yield to Go's directive.
Now, Go bypasses this obvious source of contention at the compiler, by formatting your code similar to the latter example discussed earlier. The compiler will complain and all you'll get is a fatal error. But the other style choices have some flexibility, which are enforced when you use the tool to format.
Here, for example, is a piece of code in Go before go fmt:
func Double(n int) int {

  if (n == 0) {
    return 0
  } else {
    return n * 2
  }
}
Arbitrary whitespace can be the bane of a team's existence when it comes to sharing and reading code, particularly when every team member is not on the same IDE.
By running go fmt, we clean this up, thereby translating our whitespace according to Go's conventions:
func Double(n int) int {
  if n == 0 {
    return 0
  } else {
    return n * 2
  }
}
Long story short: always run go fmt before shipping or pushing your code.
Code conventions
As with any language, being a part of the Go community means perpetual consideration of the way others create their code. Particularly if you're going to work in open source repositories, you'll want to generate your code the way that others do, in order to reduce the amount of friction when people get or include your code.
One incredibly helpful piece of tooling that the Go team has included is go fmt. fmt here, of course, means format and that's exactly what this tool does, it automatically formats your code according to the designed conventions.
By enforcing style conventions, the Go team has helped to mitigate one of the most common and pervasive debates that exist among a lot of other languages.
While the language communities tend to drive coding conventions, there are always little idiosyncrasies in the way individuals write programs. Let's use one of the most common examples around—where to put the opening bracket.
Some programmers like it on the same line as the statement:
for (int i = 0; i < 100; i++) {
  // do something
}
While others prefer it on the subsequent line:
for (int i = 0; i < 100; i++)
{
  // do something
}
These types of minor differences spark major, near-religious debates. The Gofmt tool helps alleviate this by allowing you to yield to Go's directive.
Now, Go bypasses this obvious source of contention at the compiler, by formatting your code similar to the latter example discussed earlier. The compiler will complain and all you'll get is a fatal error. But the other style choices have some flexibility, which are enforced when you use the tool to format.
Here, for example, is a piece of code in Go before go fmt:
func Double(n int) int {

  if (n == 0) {
    return 0
  } else {
    return n * 2
  }
}
Arbitrary whitespace can be the bane of a team's existence when it comes to sharing and reading code, particularly when every team member is not on the same IDE.
By running go fmt, we clean this up, thereby translating our whitespace according to Go's conventions:
func Double(n int) int {
  if n == 0 {
    return 0
  } else {
    return n * 2
  }
}
Long story short: always run go fmt before shipping or pushing your code.
Beyond the absolute and the most trivial application—one that cannot even produce a Hello World output—you must have some imported package in a Go application.
To say Hello World, for example, we'd need some sort of a way to generate an output. Unlike in many other languages, even the core language library is accessible by a namespaced package. In Go, namespaces are handled by a repository endpoint URL, which is github.com/nkozyra/gotest, which can be opened directly on GitHub (or any other public location) for the review.
The go get tool easily handles packages hosted at the repositories, such as GitHub, Bitbucket, and Google Code (as well as a few others). You can also host your own projects, ideally a git project, elsewhere, although it might introduce some dependencies and sources for errors, which you'd probably like to avoid.
But what about the private repos? While go get is a wonderful tool, you'll find yourself looking at an error without some additional configuration, SSH agent forwarding, and so on.
You can work around this in a couple of ways, but one very simple method is to clone the repository locally, using your version control software directly.
You may have paused when you read about the way namespaces are defined and imported in a Go application. What happens if you're using version 1 of the application but would like to bring in version 2? In most cases, this has to be explicitly defined in the path of the import. For example:
import (
  "github.com/foo/foo-v1"
)
versus:
import (
  "github.com/foo/foo-v2"
)
As you might imagine, this can be a particularly sticky aspect of the way Go handles the remote packages.
Unlike a lot of other package managers, go get is decentralized—that is, nobody maintains a canonical reference library of packages and versions. This can sometimes be a sore spot for new developers.
For the most part, packages are always imported via the go get command, which reads the master branch of the remote repository. This means that maintaining multiple versions of a package at the same endpoint is, for the most part, impossible.
It's the utilization of the URL endpoints as namespaces that allows the decentralization, but it's also what provides a lack of internal support for versioning.
Your best bet as a developer is to treat every package as the most up-to-date version when you perform a go get command. If you need a newer version, you can always follow whatever pattern the author has decided on, such as the preceding example.
As a creator of your own packages, make sure that you also adhere to this philosophy. Keeping your master branch HEAD as the most up-to-date will make sure your that the code fits with the conventions of other Go authors.
Handling private repositories
The go get tool easily handles packages hosted at the repositories, such as GitHub, Bitbucket, and Google Code (as well as a few others). You can also host your own projects, ideally a git project, elsewhere, although it might introduce some dependencies and sources for errors, which you'd probably like to avoid.
But what about the private repos? While go get is a wonderful tool, you'll find yourself looking at an error without some additional configuration, SSH agent forwarding, and so on.
You can work around this in a couple of ways, but one very simple method is to clone the repository locally, using your version control software directly.
You may have paused when you read about the way namespaces are defined and imported in a Go application. What happens if you're using version 1 of the application but would like to bring in version 2? In most cases, this has to be explicitly defined in the path of the import. For example:
import (
  "github.com/foo/foo-v1"
)
versus:
import (
  "github.com/foo/foo-v2"
)
As you might imagine, this can be a particularly sticky aspect of the way Go handles the remote packages.
Unlike a lot of other package managers, go get is decentralized—that is, nobody maintains a canonical reference library of packages and versions. This can sometimes be a sore spot for new developers.
For the most part, packages are always imported via the go get command, which reads the master branch of the remote repository. This means that maintaining multiple versions of a package at the same endpoint is, for the most part, impossible.
It's the utilization of the URL endpoints as namespaces that allows the decentralization, but it's also what provides a lack of internal support for versioning.
Your best bet as a developer is to treat every package as the most up-to-date version when you perform a go get command. If you need a newer version, you can always follow whatever pattern the author has decided on, such as the preceding example.
As a creator of your own packages, make sure that you also adhere to this philosophy. Keeping your master branch HEAD as the most up-to-date will make sure your that the code fits with the conventions of other Go authors.
Dealing with versioning
You may have paused when you read about the way namespaces are defined and imported in a Go application. What happens if you're using version 1 of the application but would like to bring in version 2? In most cases, this has to be explicitly defined in the path of the import. For example:
import (
  "github.com/foo/foo-v1"
)
versus:
import (
  "github.com/foo/foo-v2"
)
As you might imagine, this can be a particularly sticky aspect of the way Go handles the remote packages.
Unlike a lot of other package managers, go get is decentralized—that is, nobody maintains a canonical reference library of packages and versions. This can sometimes be a sore spot for new developers.
For the most part, packages are always imported via the go get command, which reads the master branch of the remote repository. This means that maintaining multiple versions of a package at the same endpoint is, for the most part, impossible.
It's the utilization of the URL endpoints as namespaces that allows the decentralization, but it's also what provides a lack of internal support for versioning.
Your best bet as a developer is to treat every package as the most up-to-date version when you perform a go get command. If you need a newer version, you can always follow whatever pattern the author has decided on, such as the preceding example.
As a creator of your own packages, make sure that you also adhere to this philosophy. Keeping your master branch HEAD as the most up-to-date will make sure your that the code fits with the conventions of other Go authors.
At the heart of all network communications in Go is the aptly-named net package, which contains subpackages not only for the very relevant HTTP operations, but also for other TCP/UDP servers, DNS, and IP tools.
In short, everything you need to create a robust server environment.
Of course, what we care about for the purpose of this book lies primarily in the net/http package, but we'll look at a few other functions that utilize the rest of the package, such as a TCP connection, as well as WebSockets.
Let's quickly take a look at just performing that Hello World (or Web, in this case) example we have been talking about.
The following application serves as a static file at the location /static, and a dynamic response at the location /dynamic:
package main
import (
"fmt"
"net/http"
"time"
)
const (
Port = ":8080"
)
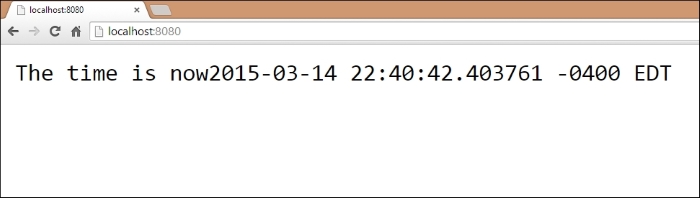
func serveDynamic(w http.ResponseWriter, r *http.Request) {
response := "The time is now " + time.Now().String()
fmt.Fprintln(w,response)
}Just as fmt.Println will produce desired content at the console level, Fprintln allows you to direct output to any writer. We'll talk a bit more about the writers in Chapter 2, Serving and Routing, but they represent a fundamental, flexible interface that is utilized in many Go applications, not just for the Web:
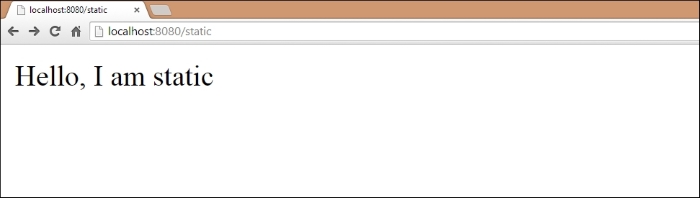
func serveStatic(w http.ResponseWriter, r *http.Request) {
  http.ServeFile(w, r, "static.html")
}
Our serveStatic method just serves one file, but it's trivial to allow it to serve any file directly and use Go as an old-school web server that serves only static content:
func main() {
  http.HandleFunc("/static",serveStatic)
  http.HandleFunc("/",serveDynamic)
  http.ListenAndServe(Port,nil)
}
Feel free to choose the available port of your choice—higher ports will make it easier to bypass the built-in security functionality, particularly in Nix systems.
If we take the preceding example and visit the respective URLs—in this case the root at / and a static page at /static, we should see the intended output as shown:
At the root, / , the output is as follows:
At /static, the output is as follows:
As you can see, producing a very simple output for the Web is, well, very simple in Go. The built-in package allows us to create a basic, yet inordinately fast site in Go with just a few lines of code using native packages.
This may not be very exciting, but before we can run, we must walk. Producing the preceding output introduces a few key concepts.
First, we've seen how net/http directs requests using a URI or URL endpoint to helper functions, which must implement the http.ResponseWriter and http.Request methods. If they do not implement it, we get a very clear error on that end.
The following is an example that attempts to implement it in this manner:
func serveError() {
  fmt.Println("There's no way I'll work!")
}

func main() {
  http.HandleFunc("/static", serveStatic)
  http.HandleFunc("/", serveDynamic)
  http.HandleFunc("/error",serveError)
  http.ListenAndServe(Port, nil)
}
The following screenshot shows the resulting error you'll get from Go:
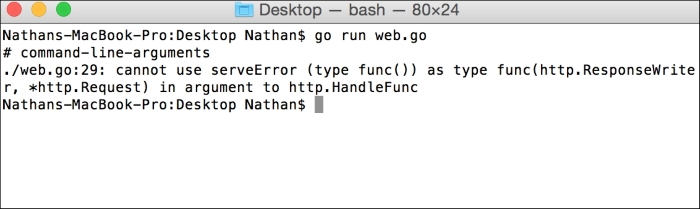
You can see that serveError does not include the required parameters and thus results in a compilation error.
This chapter serves as an introduction to the most basic concepts of Go and producing for the Web in Go, but these points are critical foundational elements for being productive in the language and in the community.
We've looked at coding conventions and package design and organization, and we've produced our first program—the all-too-familiar Hello, World application—and accessed it via our localhost.
Obviously, we're a long way from a real, mature application for the Web, but the building blocks are essential to getting there.
In Chapter 2, Serving and Routing, we'll look at how to direct different requests to different application logic using the built-in routing functionality in Go's net/http package, as well as a couple of third party router packages.
The cornerstone of the Web as a commercial entity—the piece on which marketing and branding has relied on nearly exclusively—is the URL. While we're not yet looking at the top-level domain handling, we need to take up the reins of our URL and its paths (or endpoints).
In this chapter, we'll do just this by introducing multiple routes and corresponding handlers. First, we'll do this with a simple flat file serving and then we'll introduce complex mixers to do the routing with more flexibility by implementing a library that utilizes regular expressions in its routes.
By the end of this chapter, you should be able to create a site on localhost that can be accessed by any number of paths and return content relative to the requested path.
In this chapter, we will cover the following topics:
- Serving files directly
- Basic routing
- Using more complex routing with Gorilla
- Redirecting requests
- Serving basic errors
In the preceding chapter, we utilized the fmt.Fprintln function to output some generic Hello, World messaging in the browser.
This obviously has limited utility. In the earliest days of the Web and web servers, the entirety of the Web was served by directing requests to corresponding static files. In other words, if a user requested home.html, the web server would look for a file called home.html and return it to the user.
This might seem quaint today, as a vast majority of the Web is now served in some dynamic fashion, with content often being determined via database IDs, which allows for pages to be generated and regenerated without someone modifying the individual files.
Let's take a look at the simplest way in which we can serve files in a way similar to those olden days of the Web as shown:
package main

import (
  "net/http"
)

const (
  PORT = ":8080"
)

func main() {

  http.ListenAndServe(PORT, http.FileServer(http.Dir("/var/www")))
}
Pretty simple, huh? Any requests made to the site will attempt to find a corresponding file in our local /var/www directory. But while this has a more practical use compared to the example in Chapter 1, Introducing and Setting Up Go, it's still pretty limited. Let's take a look at expanding our options a bit.
In Chapter 1, Introducing and Setting Up, we produced a very basic URL endpoint that allowed static file serving.
The following are the simple routes we produced for that example:
func main() {
  http.HandleFunc("/static",serveStatic)
  http.HandleFunc("/",serveDynamic)
  http.ListenAndServe(Port,nil)
}
In review, you can see two endpoints, /static and /, which either serve a single static file or generate output to the http.ResponseWriter.
We can have any number of routers sitting side by side. However, consider a scenario where we have a basic website with about, contact, and staff pages, with each residing in /var/www/about/index.html, /var/www/contact.html, and /var/www/staff/home.html. While it's an intentionally obtuse example, it demonstrates the limitations of Go's built-in and unmodified routing system. We cannot route all requests to the same directory locally, we need something that provides more malleable URLs.
In the previous session, we looked at basic routing but that can only take us so far, we have to explicitly define our endpoints and then assign them to handlers. What happens if we have a wildcard or a variable in our URL? This is an absolutely essential part of the Web and any serious web server.
To invoke a very simple example, consider hosting a blog with unique identifiers for each blog entry. This could be a numeric ID representing a database ID entry or a text-based globally unique identifier, such as my-first-block-entry.
Note
In the preceding example, we want to route a URL like /pages/1 to a filename called 1.html. Alternately, in a database-based scenario, we'd want to use /pages/1 or /pages/hello-world to map to a database entry with a GUID of 1 or hello-world, respectively. To do this we either need to include an exhaustive list of possible endpoints, which is extremely wasteful, or implement wildcards, ideally through regular expressions.
In either case, we'd like to be able to utilize the value from the URL directly within our application. This is simple with URL parameters from GET or POST. We can extract those simply, but they aren't particularly elegant in terms of clean, hierarchical or descriptive URLs that are often necessary for search engine optimization purposes.
The built-in net/http routing system is, perhaps by design, relatively simple. To get anything more complicated out of the values in any given request, we either need to extend the routing capabilities or use a package that has done this.
In the few years that Go has been publicly available and the community has been growing, a number of web frameworks have popped up. We'll talk about these in a little more depth as we continue the book, but one in particular is well-received and very useful: the Gorilla web toolkit.
As the name implies, Gorilla is less of a framework and more of a set of very useful tools that are generally bundled in frameworks. Specifically, Gorilla contains:
gorilla/context: This is a package for creating a globally-accessible variable from the request. It's useful for sharing a value from the URL without repeating the code to access it across your application.gorilla/rpc: This implements RPC-JSON, which is a system for remote code services and communication without implementing specific protocols. This relies on the JSON format to define the intentions of any request.gorilla/schema: This is a package that allows simple packing of form variables into astruct, which is an otherwise cumbersome process.gorilla/securecookie: This, unsurprisingly, implements authenticated and encrypted cookies for your application.gorilla/sessions: Similar to cookies, this provides unique, long-term, and repeatable data stores by utilizing a file-based and/or cookie-based session system.gorilla/mux: This is intended to create flexible routes that allow regular expressions to dictate available variables for routers.- The last package is the one we're most interested in here, and it comes with a related package called
gorilla/reverse, which essentially allows you to reverse the process of creating regular expression-based muxes. We will cover that topic in detail in the later section.
Note
You can grab individual Gorilla packages by their GitHub location with a go get. For example, to get the mux package, going to github.com/gorilla/mux will suffice and bring the package into your GOPATH. For the locations of the other packages (they're fairly self-explanatory), visit http://www.gorillatoolkit.org/
Let's dive-in and take a look at how to create a route that's flexible and uses a regular expression to pass a parameter to our handler:
package main

import (
  "github.com/gorilla/mux"
  "net/http"
)

const (
  PORT = ":8080"
)
This should look familiar to our last code with the exception of the Gorilla package import:
func pageHandler(w http.ResponseWriter, r *http.Request) {
  vars := mux.Vars(r)
  pageID := vars["id"]
  fileName := "files/" + pageID + ".html"
  http.ServeFile(w,r,fileName)
}
Here, we've created a route handler to accept the response. The thing to be noted here is the use of mux.Vars, which is a method that will look for query string variables from the http.Request and parse them into a map. The values will then be accessible by referencing the result by key, in this case id, which we'll cover in the next section.
func main() {
  rtr := mux.NewRouter()
  rtr.HandleFunc("/pages/{id:[0-9]+}",pageHandler)
  http.Handle("/",rtr)
  http.ListenAndServe(PORT,nil)
}
Here, we can see a (very basic) regular expression in the handler. We're assigning any number of digits after /pages/ to a parameter named id in {id:[0-9]+}; this is the value we pluck out in pageHandler.
A simpler version that shows how this can be used to delineate separate pages can be seen by adding a couple of dummy endpoints:
func main() {
rtr := mux.NewRouter()
rtr.HandleFunc("/pages/{id:[0-9]+}", pageHandler)
rtr.HandleFunc("/homepage", pageHandler)
rtr.HandleFunc("/contact", pageHandler)
http.Handle("/", rtr)
http.ListenAndServe(PORT, nil)
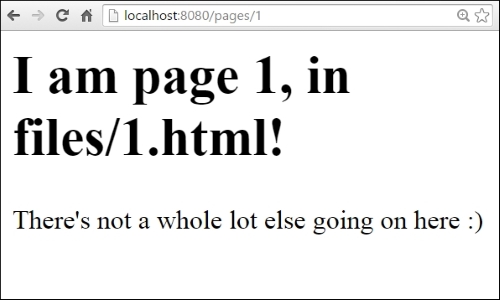
}When we visit a URL that matches this pattern, our pageHandler attempts to find the page in the files/ subdirectory and returns that file directly.
A response to /pages/1 would look like this:
At this point, you might already be asking, but what if we don't have the requested page? Or, what happens if we've moved that location? This brings us to two important mechanisms in web serving—returning error responses and, as part of that, potentially redirecting requests that have moved or have other interesting properties that need to be reported back to the end users.
Before we look at simple and incredibly common errors like 404s, let's address the idea of redirecting requests, something that's very common. Although not always for reasons that are evident or tangible for the average user.
So we might we want to redirect requests to another request? Well there are quite a few reasons, as defined by the HTTP specification that could lead us to implement automatic redirects on any given request. Here are a few of them with their corresponding HTTP status codes:
- A non-canonical address may need to be redirected to the canonical one for SEO purposes or for changes in site architecture. This is handled by 301 Moved Permanently or 302 Found.
- Redirecting after a successful or unsuccessful
POST. This helps us to prevent re-POSTing of the same form data accidentally. Typically, this is defined by 307 Temporary Redirect. - The page is not necessarily missing, but it now lives in another location. This is handled by the status code 301 Moved Permanently.
Executing any one of these is incredibly simple in basic Go with net/http, but as you might expect, it is facilitated and improved with more robust frameworks, such as Gorilla.
At this point, it makes some sense to talk a bit about errors. In all likelihood, you may have already encountered one as you played with our basic flat file serving server, particularly if you went beyond two or three pages.
Our example code includes four example HTML files for flat serving, numbered 1.html, 2.html, and so on. What happens when you hit the /pages/5 endpoint, though? Luckily, the http package will automatically handle the file not found errors, just like most common web servers.
Also, similar to most common web servers, the error page itself is small, bland, and nondescript. In the following section, you can see the 404 page not found status response we get from Go:
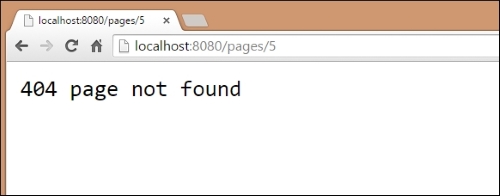
As mentioned, it's a very basic and nondescript page. Often, that's a good thing—error pages that contain more information or flair than necessary can have a negative impact.
Consider this error—the 404—as an example. If we include references to images and stylesheets that exist on the same server, what happens if those assets are also missing?
In short, you can very quickly end up with recursive errors—each 404 page calls an image and stylesheet that triggers 404 responses and the cycle repeats. Even if the web server is smart enough to stop this, and many are, it will produce a nightmare scenario in the logs, rendering them so full of noise that they become useless.
Let's look at some code that we can use to implement a catch-all 404 page for any missing files in our /files directory:
package main

import (
  "github.com/gorilla/mux"
  "net/http"
  "os"
)

const (
  PORT = ":8080"
)

func pageHandler(w http.ResponseWriter, r *http.Request) {
  vars := mux.Vars(r)
  pageID := vars["id"]
  fileName := "files/" + pageID + ".html"_,
  err := os.Stat(fileName)
    if err != nil {
      fileName = "files/404.html"
    }

  http.ServeFile(w,r,fileName)
}
Here, you can see that we first attempt to check the file with os.Stat (and its potential error) and output our own 404 response:
func main() {
  rtr := mux.NewRouter()
  rtr.HandleFunc("/pages/{id:[0-9]+}",pageHandler)
  http.Handle("/",rtr)
  http.ListenAndServe(PORT,nil)
}
Now if we take a look at the 404.html page, we will see that we've created a custom HTML file that produces something that is a little more user-friendly than the default Go Page Not Found message that we were invoking previously.
Let's take a look at what this looks like, but remember that it can look any way you'd like:
<!DOCTYPE html>
<html>
<head>
<title>Page not found!</title>
<style type="text/css">
body {
  font-family: Helvetica, Arial;
  background-color: #cceeff;
  color: #333;
  text-align: center;
}
</style>
<link rel="stylesheet" type="text/css" media="screen" href="http://code.ionicframework.com/ionicons/2.0.1/css/ionicons.min.css"></link>
</head>

<body>
<h1><i class="ion-android-warning"></i> 404, Page not found!</h1>
<div>Look, we feel terrible about this, but at least we're offering a non-basic 404 page</div>
</body>

</html>
Also, note that while we keep the 404.html file in the same directory as the rest of our files, this is solely for the purposes of simplicity.
In reality, and in most production environments with custom error pages, we'd much rather have it exist in its own directory, which is ideally outside the publicly available part of our web site. After all, you can now access the error page in a way that is not actually an error by visiting http://localhost:8080/pages/404. This returns the error message, but the reality is that in this case the file was found, and we're simply returning it.
Let's take a look at our new, prettier 404 page by accessing http://localhost/pages/5, which specifies a static file that does not exist in our filesystem:
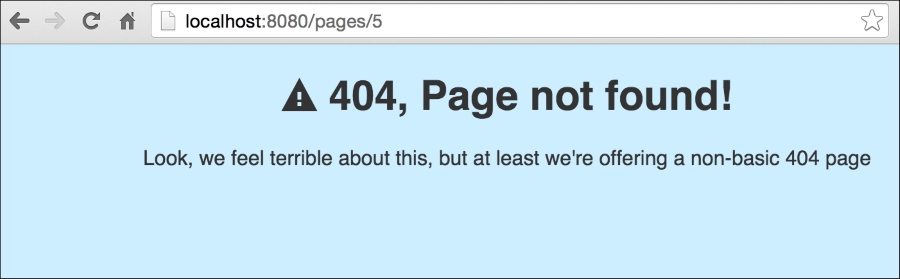
By showing a more user-friendly error message, we can provide more useful actions for users who encounter them. Consider some of the other common errors that might benefit from more expressive error pages.
We can now produce not only the basic routes from the net/http package but more complicated ones using the Gorilla toolkit. By utilizing Gorilla, we can now create regular expressions and implement pattern-based routing and allow much more flexibility to our routing patterns.
With this increased flexibility, we also have to be mindful of errors now, so we've looked at handling error-based redirects and messages, including a custom 404, Page not found message to produce more customized error messages.
Now that we have the basics down for creating endpoints, routes, and handlers; we need to start doing some non-trivial data serving.
In Chapter 3, Connecting to Data, we'll start getting dynamic information from databases, so we can manage data in a smarter and more reliable fashion. By connecting to a couple of different, commonly-used databases, we'll be able to build robust, dynamic, and scalable web applications.
In the previous chapter, we explored how to take URLs and translate them to different pages in our web application. In doing so, we built URLs that were dynamic and resulted in dynamic responses from our (very simple) net/http handlers.
By implementing an extended mux router from the Gorilla toolkit, we expanded the capabilities of the built-in router by allowing regular expressions, which gives our application a lot more flexibility.
This is something that's endemic to some of the most popular web servers. For example, both Apache and Nginx provide methods to utilize regular expressions in routes and staying at par with common solutions should be our minimal baseline for functionality.
But this is just an admittedly important stepping stone to build a robust web application with a lot of varied functionality. To go any further, we need to look at bringing in data.
Our examples in the previous chapter relied on hardcoded content grabbed from static files—this is obviously archaic and doesn't scale. Anyone who has worked in the pre-CGI early days of the Web could regale you with tales of site updates requiring total retooling of static files or explain the anachronism that was Server-Side Includes.
But luckily, the Web became largely dynamic in the late 1990s and databases began to rule the world. While APIs, microservices and NoSQL have in some places replaced that architecture, it still remains the bread and butter of the way the Web works today.
So without further ado, let's get some dynamic data.
In this chapter, we will cover the following topics:
- Connecting to a database
- Using GUID for prettier URLs
- Handling 404s
When it comes to accessing databases, Go's SQL interface provides a very simple and reliable way to connect to various database servers that have drivers.
At this point, most of the big names are covered—MySQL, Postgres, SQLite, MSSQL, and quite a few more have well-maintained drivers that utilize the database/sql interface provided by Go.
The best thing about the way Go handles this through a standardized SQL interface is that you won't have to learn custom Go libraries to interact with your database. This doesn't preclude needing to know the nuances of the database's SQL implementation or other functionality, but it does eliminate one potential area of confusion.
Before you go too much farther, you'll want to make sure that you have a library and a driver for your database of choice installed via go get command.
The Go project maintains a Wiki of all of the current SQLDrivers and is a good starting reference point when looking for an adapter at https://github.com/golang/go/wiki/SQLDrivers
MySQL can be downloaded from https://www.mysql.com/ and although there are a few drivers listed by Google, we recommend the Go-MySQL-Driver. Though you won't go wrong with the recommended alternatives from the Go project, the Go-MySQL-Driver is very clean and well-tested. You can get it at https://github.com/go-sql-driver/mysql/For Postgres, grab a binary or package manager command from http://www.postgresql.org/. The Postgres driver of choice here is pq, which can be installed via go get at github.com/lib/pq
You can choose to design any application you wish, but for these examples we'll look at a very simple blog concept.
Our goal here is to have as few blog entries in our database as possible, to be able to call those directly from our database by GUID and display an error if the particular requested blog entry does not exist.
To do this, we'll create a MySQL database that contains our pages. These will have an internal, automatically incrementing numeric ID, a textual globally unique identifier, or GUID, and some metadata around the blog entry itself.
To start simply, we'll create a title page_title, body text page_content and a Unix timestamp page_date. You can feel free to use one of MySQL's built-in date fields; using an integer field to store a timestamp is just a matter of preference and can allow for some more elaborate comparisons in your queries.
The following is the SQL in your MySQL console (or GUI application) to create the database cms and the requisite table pages:
CREATE TABLE `pages` (
  `id` int(11) unsigned NOT NULL AUTO_INCREMENT,
  `page_guid` varchar(256) NOT NULL DEFAULT '',
  `page_title` varchar(256) DEFAULT NULL,
  `page_content` mediumtext,
  `page_date` timestamp NOT NULL DEFAULT CURRENT_TIMESTAMP ON UPDATE CURRENT_TIMESTAMP,
  PRIMARY KEY (`id`),
  UNIQUE KEY `page_guid` (`page_guid`)
) ENGINE=InnoDB AUTO_INCREMENT=2 DEFAULT CHARSET=latin1;
Note
As mentioned, you can execute this query through any number of interfaces. To connect to MySQL, select your database and try these queries, you can follow the command line documentation at http://dev.mysql.com/doc/refman/5.7/en/connecting.html.
Note the UNIQUE KEY on page_guid. This is pretty important, as if we happen to allow duplicate GUIDs, well, we have a problem. The idea of a globally unique key is that it cannot exist elsewhere, and since we'll rely on it for URL resolution, we want to make sure that there's only one entry per GUID.
As you can probably tell, this is a very basic content type of blog database. We have an auto-incrementing ID value, a title, a date and the page's content, and not a whole lot else going on.
While it's not a lot, it's enough to demonstrate dynamic pages in Go utilizing a database interface.
Just to make sure there's some data in the pages table, add the following query to fill this in a bit:
INSERT INTO `pages` (`id`, `page_guid`, `page_title`, `page_content`, `page_date`) VALUES (NULL, 'hello-world', 'Hello, World', 'I\'m so glad you found this page! It\'s been sitting patiently on the Internet for some time, just waiting for a visitor.', CURRENT_TIMESTAMP);
This will give us something to start with.
Now that we have our structure and some dummy data, let's take a look at how we can connect to MySQL, retrieve the data, and serve it dynamically based on URL requests and Gorilla's mux patterns.
To get started, let's create a shell of what we'll need to connect:
package main

import (
  "database/sql"
  "fmt"
  _ "github.com/go-sql-driver/mysql"
  "log"
)
We're importing the MySQL driver package for what's known as side effects. By this, it's generally meant that the package is complementary to another and provides various interfaces that do not need to be referenced specifically.
You can note this through the underscore _ syntax that precedes the packages import. You're likely already familiar with this as a quick-and-dirty way to ignore the instantiation of a returned value from a method. For example x, _ := something()allows you to ignore the second returned value.
It's also often used when a developer plans to use a library, but hasn't yet. By prepending the package this way, it allows the import declaration to stay without causing a compiler error. While this is frowned upon, the use of the underscore—or blank identifier—in the preceding method, for side effects, is fairly common and often acceptable.
As always, though, this all depends on how and why you're using the identifier:
const (
  DBHost  = "127.0.0.1"
  DBPort  = ":3306"
  DBUser  = "root"
  DBPass  = "password!"
  DBDbase = "cms"
)
Make sure to replace these values with whatever happens to be relevant to your installation, of course:
var database *sql.DB
By keeping our database connection reference as a global variable, we can avoid a lot of duplicate code. For the sake of clarity, we'll define it fairly high up in the code. There's nothing preventing you from making this a constant instead, but we've left it mutable for any necessary future flexibility, such as adding multiple databases to a single application:
type Page struct {
  Title   string
  Content string
  Date    string
}
This struct, of course, matches our database schema rather closely, with Title, Content and Date representing the non-ID values in our table. As we'll see a bit later in this chapter (and more in the next), describing our data in a nicely-designed struct helps parlay the templating functions of Go. And on that note, make sure your struct fields are exportable or public by keeping them propercased. Any lowercased fields will not be exportable and therefore not available to templates. We will talk more on that later:
func main() {
  dbConn := fmt.Sprintf("%s:%s@tcp(%s)/%s", DBUser, DBPass, DBHost, DBDbase)
  db, err := sql.Open("mysql", dbConn)
  if err != nil {
    log.Println("Couldn't connect!")
    log.Println(err.Error)
  }
  database = db
}
As we mentioned earlier, this is largely scaffolding. All we want to do here is ensure that we're able to connect to our database. If you get an error, check your connection and the log entry output after Couldn't connect.
If, hopefully, you were able to connect with this script, we can move on to creating a generic route and outputting the relevant data from that particular request's GUID from our database.
To do this we need to reimplement Gorilla, create a single route, and then implement a handler that generates some very simple output that matches what we have in the database.
Let's take a look at the modifications and additions we'll need to make to allow this to happen:
package main

import (
  "database/sql"
  "fmt"
  _ "github.com/go-sql-driver/mysql"
  "github.com/gorilla/mux"
  "log"
  "net/http"
)
The big change here is that we're bringing Gorilla and net/http back into the project. We'll obviously need these to serve pages:
const (
  DBHost  = "127.0.0.1"
  DBPort  = ":3306"
  DBUser  = "root"
  DBPass  = "password!"
  DBDbase = "cms"
  PORT    = ":8080"
)
We've added a PORT constant, which refers to our HTTP server port.
Note that if your host is localhost/127.0.0.1, it's not necessary to specify a DBPort, but we've kept this line in the constants section. We don't use the host here in our MySQL connection:
var database *sql.DB

type Page struct {
  Title   string
  Content string
  Date    string
}

func ServePage(w http.ResponseWriter, r *http.Request) {
  vars := mux.Vars(r)
  pageID := vars["id"]
  thisPage := Page{}
  fmt.Println(pageID)
  err := database.QueryRow("SELECT page_title,page_content,page_date FROM pages WHERE id=?", pageID).Scan(&thisPage.Title, &thisPage.Content, &thisPage.Date)
  if err != nil {

    log.Println("Couldn't get page: +pageID")
    log.Println(err.Error)
  }
  html := `<html><head><title>` + thisPage.Title + `</title></head><body><h1>` + thisPage.Title + `</h1><div>` + thisPage.Content + `</div></body></html>`
  fmt.Fprintln(w, html)
}
ServePage is the function that takes an id from mux.Vars and queries our database for the blog entry ID. There's some nuance in the way we make a query that is worth noting; the simplest way to eliminate SQL injection vulnerabilities is to use prepared statements, such as Query, QueryRow, or Prepare. Utilizing any of these and including a variadic of variables to be injected into the prepared statement removes the inherent risk of constructing a query by hand.
The Scan method then takes the results of a query and translates them to a struct; you'll want to make sure the struct matches the order and number of requested fields in the query. In this case, we're mapping page_title, page_content and page_date to a Page struct's Title, Content and Date:
func main() {
  dbConn := fmt.Sprintf("%s:%s@/%s", DBUser, DBPass, DBDbase)
  fmt.Println(dbConn)
  db, err := sql.Open("mysql", dbConn)
  if err != nil {
    log.Println("Couldn't connect to"+DBDbase)
    log.Println(err.Error)
  }
  database = db

  routes := mux.NewRouter()
  routes.HandleFunc("/page/{id:[0-9]+}", ServePage)
  http.Handle("/", routes)
  http.ListenAndServe(PORT, nil)

}
Note our regular expression here: it's just numeric, with one or more digits comprising what will be the id variable accessible from our handler.
Remember that we talked about using the built-in GUID? We'll get to that in a moment, but for now let's look at the output of local
host:8080/page/1:
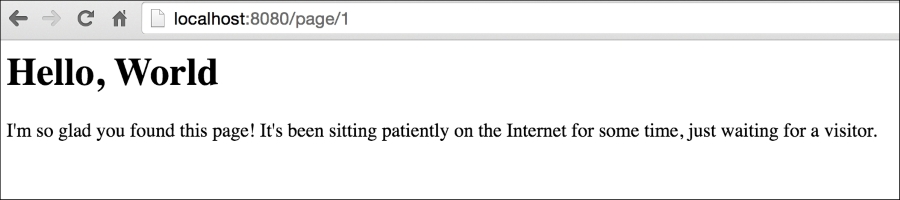
In the preceding example, we can see the blog entry that we had in our database. This is good, but obviously lacking in quite a few ways.
Earlier in this chapter we talked about using the GUID to act as the URL identifier for all requests. Instead, we started by yielding to the numeric, thus automatically incrementing column in the table. That was for the sake of simplicity, but switching this to the alphanumeric GUID is trivial.
All we'll need to do is to switch our regular expression and change our resulting SQL query in our ServePage handler.
If we only change our regular expression, our last URL's page will still work:
routes.HandleFunc("/page/{id:[0-9a-zA\\-]+}", ServePage)The page will of course still pass through to our handler. To remove any ambiguity, let's assign a guid variable to the route:
routes.HandleFunc("/page/{guid:[0-9a-zA\\-]+}", ServePage)After that, we change our resulting call and SQL:
func ServePage(w http.ResponseWriter, r *http.Request) {
vars := mux.Vars(r)
pageGUID := vars["guid"]
thisPage := Page{}
fmt.Println(pageGUID)
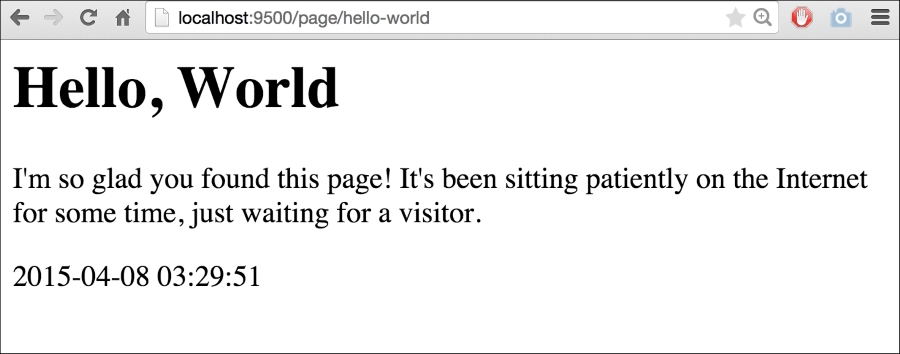
err := database.QueryRow("SELECT page_title,page_content,page_date FROM pages WHERE page_guid=?", pageGUID).Scan(&thisPage.Title, &thisPage.Content, &thisPage.Date)After doing this, accessing our page by the /pages/hello-world URL will result in the same page content we got by accessing it through /pages/1. The only real advantage is cosmetic, it creates a prettier URL that is more human-readable and potentially more useful for search engines:

A very obvious problem with our preceding code is that it does not handle a scenario wherein an invalid ID (or GUID) is requested.
As it is, a request to, say, /page/999 will just result in a blank page for the user and in the background a Couldn't get page! message, as shown in the following screenshot:

Resolving this is pretty simple by passing proper errors. Now, in the previous chapter we explored custom 404 pages and you can certainly implement one of those here, but the easiest way is to just return an HTTP status code when a post cannot be found and allow the browser to handle the presentation.
In our preceding code, we have an error handler that doesn't do much except return the issue to our log file. Let's make that more specific:
  err := database.QueryRow("SELECT page_title,page_content,page_date FROM pages WHERE page_guid=?", pageGUID).Scan(&thisPage.Title, &thisPage.Content, &thisPage.Date)
  if err != nil {
    http.Error(w, http.StatusText(404), http.StatusNotFound)
    log.Println("Couldn't get page!")
  }
You will see the output in the following screenshot. Again, it would be trivial to replace this with a custom 404 page, but for now we want to make sure we're addressing the invalid requests by validating them against our database:

Providing good error messages helps improve usability for both developers and other users. In addition, it can be beneficial for SEO, so it makes sense to use HTTP status codes as defined in HTTP standards.
In this chapter, we've taken the leap from simply showing content to showing content that's maintained in a sustainable and maintainable way using a database. While this allows us to display dynamic data easily, it's just a core step toward a fully-functional application.
We've looked at creating a database and then retrieving the data from it to inject into route while keeping our query parameters sanitized to prevent SQL injections.
We also accounted for potential bad requests with invalid GUIDs, by returning 404 Not Found statuses for any requested GUID that does not exist in our database. We also looked at requesting data by ID as well as the alphanumeric GUID.
This is just the start of our application, though.
In Chapter 4, Using Templates, we'll take the data that we've grabbed from MySQL (and Postgres) and apply some of Go's template language to them to give us more frontend flexibility.
By the end of that chapter, we will have an application that allows for creation and deletion of pages directly from our application.
In Chapter 2, Serving and Routing, we explored how to take URLs and translate them to different pages in our web application. In doing so, we built URLs that were dynamic and resulted in dynamic responses from our (very simple) net/http handlers.
We've presented our data as real HTML, but we specifically hard-coded our HTML directly into our Go source. This is not ideal for production-level environments for a number of reasons.
Luckily, Go comes equipped with a robust but sometimes tricky template engine for both text templates, as well as HTML templates.
Unlike a lot of other template languages that eschew logic as a part of the presentation side, Go's template packages enable you to utilize some logic constructs, such as loops, variables, and function declarations in a template. This allows you to offset some of your logic to the template, which means that it's possible to write your application, but you need to allow the template side to provide some extensibility to your product without rewriting the source.
We say some logic constructs because Go templates are sold as logic-less. We will discuss more on this topic later.
In this chapter, we'll explore ways to not only present your data but also explore some of the more advanced possibilities in this chapter. By the end, we will be able to parlay our templates into advancing the separation of presentation and source code.
We will cover the following topics:
- Introducing templates, context, and visibility
- HTML templates and text templates
- Displaying variables and security
- Using logic and control structures
It's worth noting very early that while we're talking about taking our HTML part out of the source code, it's possible to use templates inside our Go application. Indeed, there's nothing wrong with declaring a template as shown:
tpl, err := template.New("mine").Parse(`<h1>{{.Title}}</h1>`)If we do this, however, we'll need to restart our application every time the template needs to change. This doesn't have to be the case if we use file-based templates; instead we can make changes to the presentation (and some logic) without restarting.
The first thing we need to do to move from in-application HTML strings to file-based templates is create a template file. Let's briefly look at an example template that somewhat approximates to what we'll end up with later in this chapter:
<!DOCTYPE html>
<html>
<head>
<title>{{.Title}}</title>
</head>
<body>
  <h1>{{.Title}}</h1>

  <div>{{.Date}}</div>

  {{.Content}}
</body>
</html>
Very straightforward, right? Variables are clearly expressed by a name within double curly brackets. So what's with all of the periods/dots? Not unlike a few other similarly-styled templating systems (Mustache, Angular, and so on), the dot signifies scope or context.
The easiest way to demonstrate this is in areas where the variables might otherwise overlap. Imagine that we have a page with a title of Blog Entries and we then list all of our published blog articles. We have a page title but we also have individual entry titles. Our template might look something similar to this:
{{.Title}}
{{range .Blogs}}
  <li><a href="{{.Link}}">{{.Title}}</a></li>
{{end}}
The dot here specifies the specific scope of, in this case, a loop through the range template operator syntax. This allows the template parser to correctly utilize {{.Title}} as a blog's title versus the page's title.
This is all noteworthy because the very first templates we'll be creating will utilize general scope variables, which are prefixed with the dot notation.
In our first example of displaying the values from our blog from our database to the Web, we produced a hardcoded string of HTML and injected our values directly.
Following are the two lines that we used in Chapter 3, Connecting to Data:
  html := `<html><head><title>` + thisPage.Title + `</title></head><body><h1>` + thisPage.Title + `</h1><div>` + thisPage.Content + `</div></body></html>
  fmt.Fprintln(w, html)
It shouldn't be hard to realize why this isn't a sustainable system for outputting our content to the Web. The best way to do this is to translate this into a template, so we can separate our presentation from our application.
To do this as succinctly as possible, let's modify the method that called the preceding code, ServePage, to utilize a template instead of hardcoded HTML.
So we'll remove the HTML we placed earlier and instead reference a file that will encapsulate what we want to display. From your root directory, create a templates subdirectory and blog.html within it.
The following is the very basic HTML we included, feel free to add some flair:
<html>
<head>
<title>{{.Title}}</title>
</head>
<body>
  <h1>{{.Title}}</h1>
  <p>
    {{.Content}}
  </p>
  <div>{{.Date}}</div>
</body>
</html>
Back in our application, inside the ServePage handler, we'll change our output code slightly to leave an explicit string and instead parse and execute the HTML template we just created:
func ServePage(w http.ResponseWriter, r *http.Request) {
  vars := mux.Vars(r)
  pageGUID := vars["guid"]
  thisPage := Page{}
  fmt.Println(pageGUID)
  err := database.QueryRow("SELECT page_title,page_content,page_date FROM pages WHERE page_guid=?", pageGUID).Scan(&thisPage.Title, &thisPage.Content, &thisPage.Date)
  if err != nil {
    http.Error(w, http.StatusText(404), http.StatusNotFound)
    log.Println("Couldn't get page!")
    return
  }
  // html := <html>...</html>

  t, _ := template.ParseFiles("templates/blog.html")
  t.Execute(w, thisPage)
}
If, somehow, you failed to create the file or it is otherwise not accessible, the application will panic when it attempts to execute. You can also get panicked if you're referencing struct values that don't exist—we'll need to handle errors a bit better.
The benefits of moving away from a static string should be evident, but we now have the foundation for a much more extensible presentation layer.
If we visit http://localhost:9500/page/hello-world we'll see something similar to this:
To demonstrate this, let's create a new blog entry by adding this SQL command to your MySQL command line:
INSERT INTO `pages` (`id`, `page_guid`, `page_title`, page_content`, `page_date`)
VALUES:
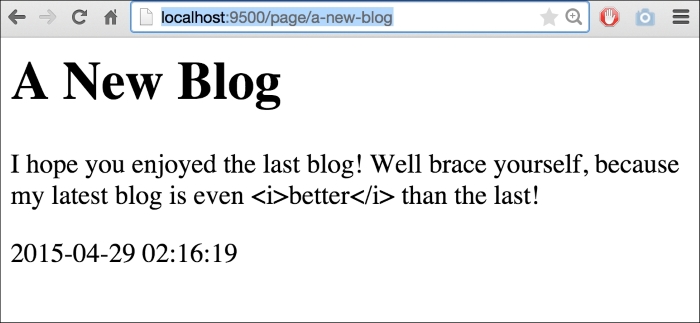
(2, 'a-new-blog', 'A New Blog', 'I hope you enjoyed the last blog! Well brace yourself, because my latest blog is even <i>better</i> than the last!', '2015-04-29 02:16:19');
Another thrilling piece of content, for sure. Note, however that we have some embedded HTML in this when we attempt to italicize the word better.
Debates about how formatting should be stored notwithstanding, this allows us to take a look at how Go's templates handle this by default. If we visit http://localhost:9500/page/a-new-blog we'll see something similar to this:
As you can see, Go automatically sanitizes our data for output. There are a lot of very, very wise reasons to do this, which is why it's the default behavior. The biggest one, of course, is to avoid XSS and code-injection attack vectors from untrusted sources of input, such as the general users of the site and so on.
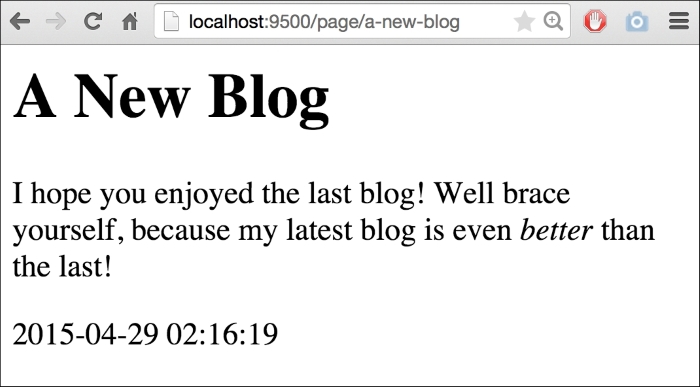
But ostensibly we are creating this content and should be considered trusted. So in order to validate this as trusted HTML, we need to change the type of template.HTML:
type Page struct {
  Title   string
  Content template.HTML
  Date   string
}
If you attempt to simply scan the resulting SQL string value into a template.HTML you'll find the following error:
sql: Scan error on column index 1: unsupported driver -> Scan pair: []uint8 -> *template.HTML
The easiest way to work around this is to retain the string value in RawContent and assign it back to Content:
type Page struct {
  Title    string
  RawContent string
  Content    template.HTML
  Date    string
}
  err := database.QueryRow("SELECT page_title,page_content,page_date FROM pages WHERE page_guid=?", pageGUID).Scan(&thisPage.Title, &thisPage.RawContent, &thisPage.Date)
  thisPage.Content = template.HTML(thisPage.RawContent)
If we go run this again, we'll see our HTML as trusted:
Earlier in this chapter we looked at how we can use a range in our templates just as we would directly in our code. Take a look at the following code:
{{range .Blogs}}
  <li><a href="{{.Link}}">{{.Title}}</a></li>
{{end}}
You may recall that we said that Go's templates are without any logic, but this depends on how you define logic and whether shared logic lies exclusively in the application, the template, or a little of both. It's a minor point, but because Go's templates offer a lot of flexibility; it's the one worth thinking about.
Having a range feature in the preceding template, by itself, opens up a lot of possibilities for a new presentation of our blog. We can now show a list of blogs or break our blog up into paragraphs and allow each to exist as a separate entity. This can be used to allow relationships between comments and paragraphs, which have started to pop up as a feature in some publication systems in recent years.
But for now, let's use this opportunity to create a list of blogs in a new index page. To do this, we'll need to add a route. Since we have /page we could go with /pages, but since this will be an index, let's go with / and /home:
  routes := mux.NewRouter()
  routes.HandleFunc("/page/{guid:[0-9a-zA\\-]+}", ServePage)
  routes.HandleFunc("/", RedirIndex)
  routes.HandleFunc("/home", ServeIndex)
  http.Handle("/", routes)
We'll use RedirIndex to automatically redirect to our /home endpoint as a canonical home page.
Serving a simple 301 or Permanently Moved redirect requires very little code in our method, as shown:
func RedirIndex(w http.ResponseWriter, r *http.Request) {
  http.Redirect(w, r, "/home", 301)
}
This is enough to take any requests from / and bring the user to /home automatically. Now, let's look at looping through our blogs on our index page in the ServeIndex HTTP handler:
func ServeIndex(w http.ResponseWriter, r *http.Request) {
  var Pages = []Page{}
  pages, err := database.Query("SELECT page_title,page_content,page_date FROM pages ORDER BY ? DESC", "page_date")
  if err != nil {
    fmt.Fprintln(w, err.Error)
  }
  defer pages.Close()
  for pages.Next() {
    thisPage := Page{}
    pages.Scan(&thisPage.Title, &thisPage.RawContent, &thisPage.Date)
    thisPage.Content = template.HTML(thisPage.RawContent)
    Pages = append(Pages, thisPage)
  }
  t, _ := template.ParseFiles("templates/index.html")
  t.Execute(w, Pages)
}
And here's templates/index.html:
<h1>Homepage</h1>

{{range .}}
  <div><a href="!">{{.Title}}</a></div>
  <div>{{.Content}}</div>
  <div>{{.Date}}</div>
{{end}}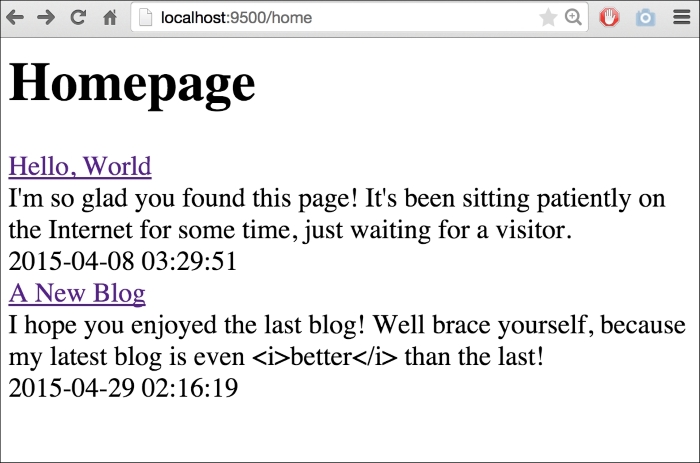
We've highlighted an issue with our Page struct here—we have no way to get the reference to the page's GUID. So, we need to modify our struct to include that as the exportable Page.GUID variable:
type Page struct {
  Title  string
  Content  template.HTML
  RawContent  string
  Date  string
  GUID   string
}
Now, we can link our listings on our index page to their respective blog entries as shown:
  var Pages = []Page{}
  pages, err := database.Query("SELECT page_title,page_content,page_date,page_guid FROM pages ORDER BY ? DESC", "page_date")
  if err != nil {
    fmt.Fprintln(w, err.Error)
  }
  defer pages.Close()
  for pages.Next() {
    thisPage := Page{}
    pages.Scan(&thisPage.Title, &thisPage.Content, &thisPage.Date, &thisPage.GUID)
    Pages = append(Pages, thisPage)
  }
And we can update our HTML part with the following code:
<h1>Homepage</h1>

{{range .}}
  <div><a href="/page/{{.GUID}}">{{.Title}}</a></div>
  <div>{{.Content}}</div>
  <div>{{.Date}}</div>
{{end}}
But this is just the start of the power of the templates. What if we had a much longer piece of content and wanted to truncate its description?
We can create a new field within our Page struct and truncate that. But that's a little clunky; it requires the field to always exist within a struct, whether populated with data or not. It's much more efficient to expose methods to the template itself.
So let's do that.
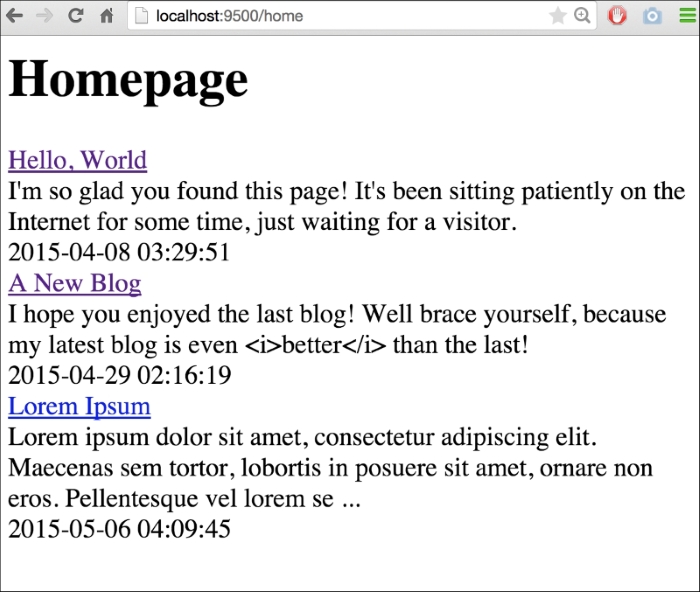
First, create yet another blog entry, this time with a larger content value. Choose whatever you like or select the INSERT command as shown:
INSERT INTO `pages` (`id`, `page_guid`, `page_title`, `page_content`, `page_date`)
VALUES:
(3, 'lorem-ipsum', 'Lorem Ipsum', 'Lorem ipsum dolor sit amet, consectetur adipiscing elit. Maecenas sem tortor, lobortis in posuere sit amet, ornare non eros. Pellentesque vel lorem sed nisl dapibus fringilla. In pretium...', '2015-05-06 04:09:45');
Now, we need to represent our truncation as a method for the type Page. Let's create that method to return a string that represents the shortened text.
The cool thing here is that we can essentially share a method between the application and the template:
func (p Page) TruncatedText() string {
  chars := 0
  for i, _ := range p.Content {
    chars++
    if chars > 150 {
      return p.Content[:i] + ` ...`
    }
  }
  return p.Content
}
This code will loop through the length of content and if the number of characters exceeds 150, it will return the slice up to that number in the index. If it doesn't ever exceed that number, TruncatedText will return the content as a whole.
Calling this in the template is simple, except that you might be expected to need a traditional function syntax call, such as TruncatedText(). Instead, it's referenced just as any variable within the scope:
<h1>Homepage</h1>

{{range .}}
  <div><a href="/page/{{.GUID}}">{{.Title}}</a></div>
  <div>{{.TruncatedText}}</div>
  <div>{{.Date}}</div>
{{end}}
By calling .TruncatedText, we essentially process the value inline through that method. The resulting page reflects our existing blogs and not the truncated ones and our new blog entry with truncated text and ellipsis appended:
I'm sure you can imagine how being able to reference embedded methods directly in your templates can open up a world of presentation possibilities.
We've just scratched the surface of what Go's templates can do and we'll explore further topics as we continue, but this chapter has hopefully introduced the core concepts necessary to start utilizing templates directly.
We've looked at simple variables, as well as implementing methods within the application, within the templates themselves. We've also explored how to bypass injection protection for trusted content.
In the next chapter, we'll integrate a backend API for accessing information in a RESTful way to read and manipulate our underlying data. This will allow us to do some more interesting and dynamic things on our templates with Ajax.
In Chapter 2, Serving and Routing, we explored how to route URLs to the different pages in our web application. In doing so, we built URLs that were dynamic and resulted in dynamic responses from our (very simple) net/http handlers.
We've just scratched the surface of what Go's templates can do, and we'll also explore further topics as we continue, but in this chapter we have tried to introduce the core concepts that are necessary to start utilizing the templates directly.
We've looked at simple variables as well as the implementing methods within the application using the templates themselves. We've also explored how to bypass injection protection for trusted content.
The presentation side of web development is important, but it's also the least engrained aspect. Almost any framework will present its own extension of built-in Go templating and routing syntaxes. What really takes our application to the next level is building and integrating an API for both general data access, as well as allowing our presentation layer to be more dynamically driven.
In this chapter, we'll develop a backend API for accessing information in a RESTful way and to read and manipulate our underlying data. This will allow us to do some more interesting and dynamic things in our templates with Ajax.
In this chapter, we will cover the following topics:
- Setting up the basic API endpoint
- RESTful architecture and best practices
- Creating our first API endpoint
- Implementing security
- Creating data with POST
- Modifying data with PUT
First, we'll set up a basic API endpoint for both pages and individual blog entries.
We'll create a Gorilla endpoint route for a GET request that will return information about our pages and an additional one that accepts a GUID, which matches alphanumeric characters and hyphens:
routes := mux.NewRouter()
routes.HandleFunc("/api/pages", APIPage).
  Methods("GET").
  Schemes("https")
routes.HandleFunc("/api/pages/{guid:[0-9a-zA\\-]+}", APIPage).
  Methods("GET").
  Schemes("https")
routes.HandleFunc("/page/{guid:[0-9a-zA\\-]+}", ServePage)
http.Handle("/", routes)
http.ListenAndServe(PORT, nil)
Note here that we're capturing the GUID again, this time for our /api/pages/* endpoint, which will mirror the functionality of the web-side counterpart, returning all meta data associated with a single page.
func APIPage(w http.ResponseWriter, r *http.Request) {
vars := mux.Vars(r)
pageGUID := vars["guid"]
thisPage := Page{}
fmt.Println(pageGUID)
err := database.QueryRow("SELECT page_title,page_content,page_date FROM pages WHERE page_guid=?", pageGUID).Scan(&thisPage.Title, &thisPage.RawContent, &thisPage.Date)
thisPage.Content = template.HTML(thisPage.RawContent)
if err != nil {
  http.Error(w, http.StatusText(404), http.StatusNotFound)
  log.Println(err)
  return
}
APIOutput, err := json.Marshal(thisPage)
    fmt.Println(APIOutput)
if err != nil {
  http.Error(w, err.Error(), http.StatusInternalServerError)
  return
}
w.Header().Set("Content-Type", "application/json")
fmt.Fprintln(w, thisPage)
}
The preceding code represents the simplest GET-based request, which returns a single record from our /pages
endpoint. Let's take a look at REST now, and see how we'll structure and implement other verbs and data manipulations from the API.
In the world of web API design, there has been an array of iterative, and sometimes competing, efforts to find a standard system and format to deliver information across multiple environments.
In recent years, the web development community at large seems to have—at least temporarily—settled on REST as the de facto approach. REST came after a few years of SOAP dominance and introduced a simpler method for sharing data.
REST APIs aren't bound to a format and are typically cacheable and delivered via HTTP or HTTPS.
The biggest takeaway to start with is an adherence to HTTP verbs; those initially specified for the Web are honored in their original intent. For example, HTTP verbs, such as DELETE and PATCH fell into years of disuse despite being very explicit about their purpose. REST has been the primary impetus for the use of the right method for the right purpose. Prior to REST, it was not uncommon to see GET and POST requests being used interchangeably to do myriad things that were otherwise built into the design of HTTP.
In REST, we follow a
Create-Read-Update-Delete (CRUD)-like approach to retrieve or modify data. POST is used majorly to create, PUT is used as an update (though it can also be used to create), the familiar GET is used to read and DELETE is used to delete, is well, just that.
Perhaps even more important is the fact that a RESTful API should be stateless. By that we mean that each request should exist on its own, without the server necessarily having any knowledge about prior or potential future requests. This means that the idea of a session would technically violate this ethos, as we'd be storing some sense of state on the server itself. Some people disagree; we'll look at this in detail later on.
One final note is on API URL structure, because the method is baked into the request itself as part of the header, we don't need to explicitly express that in our request.
In other words, we don't need something, such as /api/blogs/delete/1. Instead, we can simply make our request with the DELETE method to api/blogs/1.
There is no rigid format of the URL structure and you may quickly discover that some actions lack HTTP-specific verbs that make sense, but in short there are a few things we should aim for:
- The resources are expressed cleanly in the URL
- We properly utilize HTTP verbs
- We return appropriate responses based on the type of request
Our goal in this chapter is to hit the preceding three points with our API.
If there is a fourth point, it would say that we maintain backwards compatibility with our APIs. As you examine the URL structure here, you might wonder how versions are handled. This tends to vary from organization to organization, but a good policy is to keep the most recent URL canonical and deprecate to explicit version URLs.
For example, even though our comments will be accessible at /api/comments, the older versions will be found at /api/v2.0/comments, where 2 obviously represents our API, as it existed in version 2.0.
Note
Despite being relatively simple and well-defined in nature, REST is an oft-argued subject with enough ambiguity to start, most often for the better, a lot of debate. Remember that REST is not a standard; for example, the W3C has not and likely will not ever weigh in on what REST is and isn't. If you haven't already, you'll begin to develop some very strong opinions on what you feel is properly RESTful.
Given that we want to access data from the client-side as well as from server to server, we'll need to start making some of that accessible via an API.
The most reasonable thing for us to do is a simple read, since we don't yet have methods to create data outside of direct SQL queries. We did that at the beginning of the chapter with our APIPage method, routed through a /api/pages/{UUID} endpoint.
This is great for GET requests, where we're not manipulating data, but if we need to create or modify data, we'll need to utilize other HTTP verbs and REST methods. To do this effectively, it's time to investigate some authentication and security in our API.
When you think about creating data with an API like the one we've just designed, what's the first concern that comes to your mind? If it was security, then good for you. Accessing data is not always without a security risk, but it's when we allow for modification of data that we need to really start thinking about security.
In our case, read data is totally benign. If someone can access all of our blog entries via a GET request, who cares? Well, we may have a blog on embargo or accidentally exposed sensitive data on some resource.
Either way, security should always be a concern, even with a small personal project like a blogging platform, similar to the one we're building.
There are two big ways of separating these concerns:
- Are the requests to our APIs secure and private?
- Are we controlling access to data?
Lets tackle Step 2 first. If we want to allow users to create or delete information, we need to give them specific access to that.
There are a few ways to do this:
We can provide API tokens that will allow short-lived request windows, which can be validated by a shared secret. This is the essence of Oauth; it relies on a shared secret to validate cryptographically encoded requests. Without the shared secret, the request and its token will never match, and an API request can then be rejected.
The cond method is a simple API key, which leads us back to point number 1 in the preceding list.
If we allow cleartext API keys, then we might as well not have security at all. If our requests can be sniffed off the wire without much effort, there's little point in even requiring an API key.
So this means that no matter which method we choose, our servers should provide an API over HTTPS. Luckily, Go provides a very easy way to utilize either HTTP or HTTPS via Transport Layer Security (TLS); TLS is the successor of SSL. As a web developer, you must already be familiar with SSL and also be aware of its history of security issues, most recently its susceptibility to the POODLE vulnerability, which was exposed in 2014.
To allow either method, we need to have a user registration model so that we can have new users and they can have some sort of credentials to modify data. To invoke a TLS server, we'll need a secure certificate. Since this is a small project for experimentation, we won't worry too much about a real certificate with a high level of trust. Instead, we'll just generate our own.
Creating a self-signed certificate varies by OS and is beyond the scope of this book, so let's just look at the method for OS X.
A self-signed certificate doesn't have a lot of security value, obviously, but it allows us to test things without needing to spend money or time verifying server ownership. You'll obviously need to do those things for any certificate that you expect to be taken seriously.
To create a quick set of certificates in OS X, go to your terminal and enter the following three commands:
openssl genrsa -out key.pem
openssl req -new -key key.pem -out cert.pem
openssl req -x509 -days 365 -key key.pem -in cert.pem -out certificate.pem
In this example, I generated the certificates using an OpenSSL on Ubuntu.
Note
Note: OpenSSL comes preinstalled on OS X and most Linux distributions. If you're on the latter, give the preceding commands a shot before hunting for Linux-specific instructions. If you're on Windows, particularly newer versions such as 8, you can do this in a number of ways, but the most accessible way might be through the MakeCert tool, provided by Microsoft through MSDN.
Read more about MakeCert at https://msdn.microsoft.com/en-us/library/bfsktky3%28v=vs.110%29.aspx.
Once you have the certificate files, place them somewhere in your filesystem that is not within your accessible application directory/directories.
To switch from HTTP to TLS, we can use the references to these certificate files; beyond that it's mostly the same in our code. Lets first add the certificates to our code.
Earlier, we started our server by listening through this line:
http.ListenAndServe(PORT, nil)
Now, we'll need to expand things a bit. First, let's load our certificate:
  certificates, err := tls.LoadX509KeyPair("cert.pem", "key.pem")
  tlsConf := tls.Config{Certificates: []tls.Certificate{certificates}}
tls.Listen("tcp", PORT, &tlsConf)Now that we have a security certificate in place, we can switch to TLS for our API calls for both GET and other requests. Let's do that now. Note that you can retain HTTP for the rest of our endpoints or switch them at this point as well.
Note
Note: It's largely becoming a common practice to go the HTTPS-only way and it's probably the best way to future-proof your app. This doesn't solely apply to APIs or areas where explicit and sensitive information is otherwise sent in cleartext, with privacy on the forefront; major providers and services are stressing on the value of HTTPS everywhere.
Lets add a simple section for anonymous comments on our blog:
<div id="comments">
  <form action="/api/comments" method="POST">
    <input type="hidden" name="guid" value="{{Guid}}" />
    <div>
      <input type="text" name="name" placeholder="Your Name" />
    </div>
    <div>
      <input type="email" name="email" placeholder="Your Email" />
    </div>
    <div>
      <textarea name="comments" placeholder="Your Com-ments"></textarea>
    </div>
    <div>
      <input type="submit" value="Add Comments" />
    </div>
  </form>
</div>
This will allow any user to add anonymous comments to our site on any of our blog items, as shown in the following screenshot:
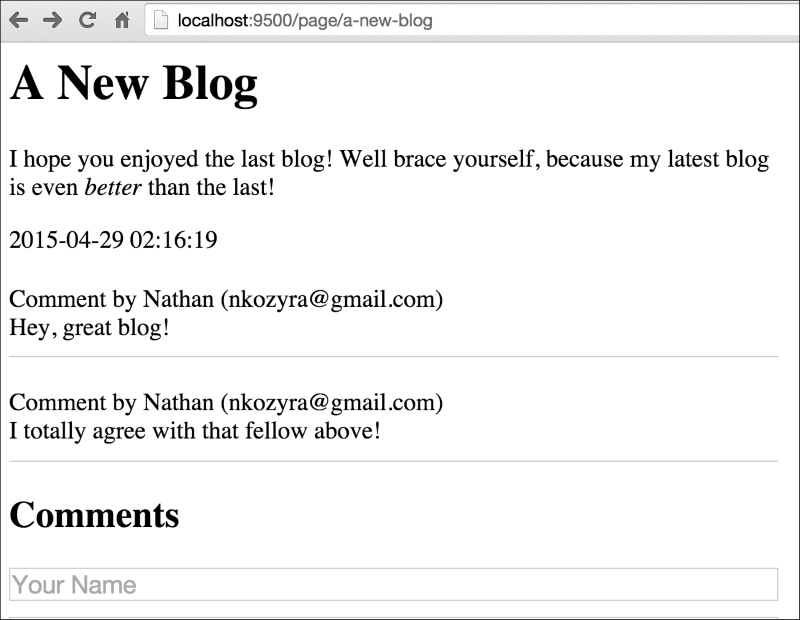
But what about all the security? For now, we just want to create an open comment section, one that anyone can post to with their valid, well-stated thoughts as well as their spammy prescription deals. We'll worry about locking that down shortly; for now we just want to demonstrate a side-by-side API and frontend integration.
We'll obviously need a comments table in our database, so make sure you create that before implementing any of the API:
CREATE TABLE `comments` (
`id` int(11) unsigned NOT NULL AUTO_INCREMENT,
`page_id` int(11) NOT NULL,
`comment_guid` varchar(256) DEFAULT NULL,
`comment_name` varchar(64) DEFAULT NULL,
`comment_email` varchar(128) DEFAULT NULL,
`comment_text` mediumtext,
`comment_date` timestamp NULL DEFAULT NULL,
PRIMARY KEY (`id`),
KEY `page_id` (`page_id`)
) ENGINE=InnoDB DEFAULT CHARSET=latin1;
With the table in place, let's take our form and POST it to our API endpoint. To create a general purpose and a flexible JSON response, you can add a JSONResponse struct that consists of essentially a hash-map, as shown:
type JSONResponse struct {
  Fields map[string]string
}
Then we'll need an API endpoint to create comments, so let's add that to our routes under main():
func APICommentPost(w http.ResponseWriter, r *http.Request) {
  var commentAdded bool
  err := r.ParseForm()
  if err != nil {
    log.Println(err.Error)
  }
  name := r.FormValue("name")
  email := r.FormValue("email")
  comments := r.FormValue("comments")

  res, err := database.Exec("INSERT INTO comments SET comment_name=?, comment_email=?, comment_text=?", name, email, comments)

  if err != nil {
    log.Println(err.Error)
  }

  id, err := res.LastInsertId()
  if err != nil {
    commentAdded = false
  } else {
    commentAdded = true
  }
  commentAddedBool := strconv.FormatBool(commentAdded)
  var resp JSONResponse
  resp.Fields["id"] = string(id)
  resp.Fields["added"] =  commentAddedBool
  jsonResp, _ := json.Marshal(resp)
  w.Header().Set("Content-Type", "application/json")
  fmt.Fprintln(w, jsonResp)
}
There are a couple of interesting things about the preceding code:
First, note that we're using commentAdded as a string and not a bool. We're doing this largely because the json marshaller does not handle booleans elegantly and also because casting directly to a string from a boolean is not possible. We also utilize strconv and its FormatBool to handle this translation.
You might also note that for this example, we're POSTing the form directly to the API endpoint. While an effective way to demonstrate that data makes it into the database, utilizing it in practice might force some RESTful antipatterns, such as enabling a redirect URL to return to the calling page.
A better way to approach this is through the client by utilizing an Ajax call through a common library or through XMLHttpRequest natively.
Note
Note: While internal functions/method names are largely a matter of preference, we recommend keeping all methods distinct by resource type and request method. The actual convention used here is irrelevant, but as a matter of traversing the code, something such as APICommentPost, APICommentGet, APICommentPut, and APICommentDelete gives you a nice hierarchical way of organizing the methods for better readability.
Given the preceding client-side and server-side code, we can see how this will appear to a user hitting our second blog entry:
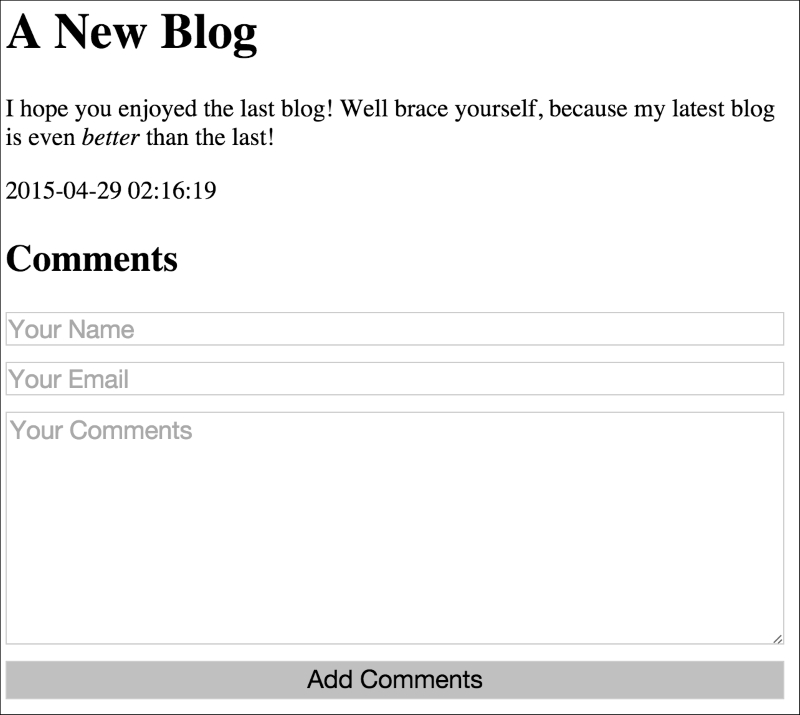
As mentioned, actually adding your comments here will send the form directly to the API endpoint, where it will silently succeed (hopefully).
Depending on whom you ask, PUT and POST can be used interchangeably for the creation of records. Some people believe that both can be used for updating the records and most believe that both can be used for the creation of records given a set of variables. In lieu of getting into a somewhat confusing and often political debate, we've separated the two as follows:
- Creation of new records:
POST - Updating existing records, idempotently:
PUT
Given these guidelines, we'll utilize the PUT verb when we wish to make updates to resources. We'll allow comments to be edited by anyone as nothing more than a proof of concept to use the REST PUT verb.
In Chapter 6, Session and Cookies, we'll lock this down a bit more, but we also want to be able to demonstrate the editing of content through a RESTful API; so this will represent an incomplete stub for what will eventually be more secure and complete.
As with the creation of new comments, there is no security restriction in place here. Anyone can create a comment and anyone can edit it. It's the wild west of blog software, at least at this point.
First, we'll want to be able to see our submitted comments. To do so, we need to make minor modifications to our Page struct and the creation of a Comment struct to match our database structure:
type Comment struct {
  Id    int
  Name   string
  Email  string
  CommentText string
}

type Page struct {
  Id         int
  Title      string
  RawContent string
  Content    template.HTML
  Date       string
  Comments   []Comment
  Session    Session
  GUID       string
}
Since all the previously posted comments went into the database without any real fanfare, there was no record of the actual comments on the blog post page. To remedy that, we'll add a simple query of Comments and scan them using the .Scan method into an array of Comment struct.
First, we'll add the query to ServePage:
func ServePage(w http.ResponseWriter, r *http.Request) {
  vars := mux.Vars(r)
  pageGUID := vars["guid"]
  thisPage := Page{}
  fmt.Println(pageGUID)
  err := database.QueryRow("SELECT id,page_title,page_content,page_date FROM pages WHERE page_guid=?", pageGUID).Scan(&thisPage.Id, &thisPage.Title, &thisPage.RawContent, &thisPage.Date)
  thisPage.Content = template.HTML(thisPage.RawContent)
  if err != nil {
    http.Error(w, http.StatusText(404), http.StatusNotFound)
    log.Println(err)
    return
  }

  comments, err := database.Query("SELECT id, comment_name as Name, comment_email, comment_text FROM comments WHERE page_id=?", thisPage.Id)
  if err != nil {
    log.Println(err)
  }
  for comments.Next() {
    var comment Comment
    comments.Scan(&comment.Id, &comment.Name, &comment.Email, &comment.CommentText)
    thisPage.Comments = append(thisPage.Comments, comment)
  }

  t, _ := template.ParseFiles("templates/blog.html")
  t.Execute(w, thisPage)
}
Now that we have
Comments packed into our Page struct, we can display the Comments on the page itself:

Since we're allowing anyone to edit, we'll have to create a form for each item, which will allow modifications. In general, HTML forms allow either GET or POST requests, so our hand is forced to utilize XMLHttpRequest to send this request. For the sake of brevity, we'll utilize jQuery and its ajax() method.
First, for our template's range for comments:
{{range .Comments}}
  <div class="comment">
    <div>Comment by {{.Name}} ({{.Email}})</div>
    {{.CommentText}}

    <div class="comment_edit">
    <h2>Edit</h2>
    <form onsubmit="return putComment(this);">
      <input type="hidden" class="edit_id" value="{{.Id}}" />
      <input type="text" name="name" class="edit_name" placeholder="Your Name" value="{{.Name}}" />
     <input type="text" name="email" class="edit_email" placeholder="Your Email" value="{{.Email}}" />
      <textarea class="edit_comments" name="comments">{{.CommentText}}</textarea>
      <input type="submit" value="Edit" />
    </form>
    </div>
  </div>
{{end}}
And then for our JavaScript to process the form using PUT:
<script>
    function putComment(el) {
        var id = $(el).find('.edit_id');
        var name = $(el).find('.edit_name').val();
        var email = $(el).find('.edit_email').val();
        var text = $(el).find('.edit_comments').val();
        $.ajax({
            url: '/api/comments/' + id,
            type: 'PUT',
            succes: function(res) {
                alert('Comment Updated!');
            }
        });
        return false;
    }
</script>
To handle this call with the PUT verb, we'll need an update route and function. Lets add them now:
  routes.HandleFunc("/api/comments", APICommentPost).
    Methods("POST")
  routes.HandleFunc("/api/comments/{id:[\\w\\d\\-]+}", APICommentPut).
    Methods("PUT")
This enables a route, so now we just need to add the corresponding function, which will look fairly similar to our POST/Create method:
func APICommentPut(w http.ResponseWriter, r *http.Request) {
  err := r.ParseForm()
  if err != nil {
  log.Println(err.Error)
  }
  vars := mux.Vars(r)
  id := vars["id"]
  fmt.Println(id)
  name := r.FormValue("name")
  email := r.FormValue("email")
  comments := r.FormValue("comments")
  res, err := database.Exec("UPDATE comments SET comment_name=?, comment_email=?, comment_text=? WHERE comment_id=?", name, email, comments, id)
  fmt.Println(res)
  if err != nil {
    log.Println(err.Error)
  }

  var resp JSONResponse

  jsonResp, _ := json.Marshal(resp)
  w.Header().Set("Content-Type", "application/json")
  fmt.Fprintln(w, jsonResp)
}
In short, this takes our form and transforms it into an update to the data based on the comment's internal ID. As mentioned, it's not entirely different from our POST route method, and just like that method it doesn't return any data.
In this chapter, we've gone from exclusively server-generated HTML presentations to dynamic presentations that utilize an API. We've examined the basics of REST and implemented a RESTful interface for our blogging application.
While this can use a lot more client-side polish, we have GET/POST/PUT requests that are functional and allow us to create, retrieve, and update comments for our blog posts.
In Chapter 6, Session and Cookies, we'll examine user authentication, sessions, and cookies, and how we can take the building blocks we've laid in this chapter and apply some very important security parameters to it. We had an open-ended creation and updates of comments in this chapter; we'll restrict that to unique users in the next.
In doing all of this, we'll turn our proof-of-concept comment management into something that can be used in production practically.
Our application is beginning to get a little more real now; in the previous chapter, we added some APIs and client-side interfaces to them.
In our application's current state, we've added /api/comments, /api/comments/[id], /api/pages, and /api/pages/[id], thus making it possible for us to get and update our data in JSON format and making the application better suited for Ajax and client-side access.
Though we can now add comments and edit them directly through our API, there is absolutely no restriction on who can perform these actions. In this chapter, we'll look at the ways to limit access to certain assets, establishing identities, and securely authenticating when we have them.
By the end, we should be able to enable users to register and log in and utilize sessions, cookies, and flash messages to keep user state in our application in a secure way.
The most common, fundamental, and simplest way to create persistent memory across a user's session is by utilizing cookies.
Cookies provide a way to share state information across requests, URL endpoints, and even domains, and they have been used (and abused) in every possible way.
Most often, they're used to keep a track of identity. When a user logs into a service, successive requests can access some aspects of the previous request (without duplicating a lookup or the login module) by utilizing the session information stored in a cookie.
If you're familiar with cookies in any other language's implementation, the basic struct will look familiar. Even so, the following relevant attributes are fairly lockstep with the way a cookie is presented to the client:
type Cookie struct {
  Name       string
  Value      string
  Path       string
  Domain     string
  Expires    time.Time
  RawExpires string
  MaxAge   int
  Secure   bool
  HttpOnly bool
  Raw      string
  Unparsed []string
}
That's a lot of attributes for a very basic struct, so let's focus on the important ones.
The Name attribute is simply a key for the cookie. The Value attribute represents its contents and Expires is a Time value for the moment when the cookie should be flushed by a browser or another headless recipient. This is all you need in order to set a valid cookie that lasts in Go.
Beyond the basics, you may find setting a Path, Domain, and HttpOnly useful, if you want to lock down the accessibility of the cookie.
When a user with a valid session and/or cookie attempts to access restricted data, we need to get that from the user's browser.
A session itself is just that—a single session on the site. It doesn't naturally persist indefinitely, so we need to leave a breadcrumb, but we also want to leave one that's relatively secure.
For example, we would never want to leave critical user information in the cookie, such as name, address, email, and so on.
However, any time we have some identifying information, we leave some vector for misdeed—in this case we'll likely leave a session identifier that represents our session ID. The vector in this case allows someone, who obtains this cookie, to log in as one of our users and change information, find billing details, and so on.
These types of physical attack vectors are well outside the scope of this (and most) application and to a large degree, it's a concession that if someone loses access to their physical machine, they can also have their account compromised.
What we want to do here is ensure that we're not transmitting personal or sensitive information over clear text or without a secure connection. We'll cover setting up TLS in Chapter 9, Security, so here we want to focus on limiting the amount of information we store in our cookies.
In the previous chapter, we allowed non-authorized requests to create new comments by hitting our REST API via a POST. Anyone who's been on the Internet for a while knows a few truisms, such as:
- The comments section is often the most toxic part of any blog or news post
- Step 1 is true, even when users have to authenticate in non-anonymous ways
Now, let's lock down the comments section to ensure that users have registered themselves and are logged in.
We won't go deep into the authentication's security aspects now, as we'll be going deeper with that in Chapter 9, Security.
First, let's add a users table in our database:
CREATE TABLE `users` (
  `id` int(11) unsigned NOT NULL AUTO_INCREMENT,
  `user_name` varchar(32) NOT NULL DEFAULT '',
  `user_guid` varchar(256) NOT NULL DEFAULT '',
  `user_email` varchar(128) NOT NULL DEFAULT '',
  `user_password` varchar(128) NOT NULL DEFAULT '',
  `user_salt` varchar(128) NOT NULL DEFAULT '',
  `user_joined_timestamp` timestamp NULL DEFAULT NULL,
  PRIMARY KEY (`id`)
) ENGINE=InnoDB DEFAULT CHARSET=latin1;
We could surely go a lot deeper with user information, but this is enough to get us started. As mentioned, we won't go too deep into security, so we'll just generate a hash for the password now and not worry about the salt.
Finally, to enable sessions and users in the app, we'll make some changes to our structs:
type Page struct {
  Id         int
  Title      string
  RawContent string
  Content    template.HTML
  Date       string
  Comments   []Comment
  Session    Session
}

type User struct {
  Id   int
  Name string
}

type Session struct {
  Id              string
  Authenticated   bool
  Unauthenticated bool
  User            User
}
And here are the two stub handlers for registration and logging in. Again, we're not putting our full effort into fleshing these out into something robust, we just want to open the door a bit.
In addition to storing the users themselves, we'll also want some way of persistent memory for accessing our cookie data. In other words, when a user's browser session ends and they come back, we'll validate and reconcile their cookie value against values in our database.
Use this SQL to create the sessions table:
CREATE TABLE `sessions` (
  `id` int(11) unsigned NOT NULL AUTO_INCREMENT,
  `session_id` varchar(256) NOT NULL DEFAULT '',
  `user_id` int(11) DEFAULT NULL,
  `session_start` timestamp NOT NULL DEFAULT CURRENT_TIMESTAMP ON UPDATE CURRENT_TIMESTAMP,
  `session_update` timestamp NOT NULL DEFAULT '0000-00-00 00:00:00',
  `session_active` tinyint(1) NOT NULL,
  PRIMARY KEY (`id`),
  UNIQUE KEY `session_id` (`session_id`)
) ENGINE=InnoDB DEFAULT CHARSET=latin1;
The most important values are the user_id, session_id, and the timestamps for updating and starting. We can use the latter two to decide if a session is actually valid after a certain period. This is a good security practice, just because a user has a valid cookie doesn't necessarily mean that they should remain authenticated, particularly if you're not using a secure connection.
To be able to allow users to create accounts themselves, we'll need a form for both registering and logging in. Now, most systems similar to this do some multi-factor authentication to allow a user backup system for retrieval as well as validation that the user is real and unique. We'll get there, but for now let's keep it as simple as possible.
We'll set up the following endpoints to allow a user to POST both the register and login forms:
  routes.HandleFunc("/register", RegisterPOST).
    Methods("POST").
    Schemes("https")
  routes.HandleFunc("/login", LoginPOST).
    Methods("POST").
    Schemes("https")
Keep in mind that these are presently set to the HTTPS scheme. If you're not using that, remove that part of the HandleFunc register.
Since we're only showing these following views to unauthenticated users, we can put them on our blog.html template and wrap them in {{if .Session.Unauthenticated}} … {{end}} template snippets. We defined .Unauthenticated and .Authenticated in the application under the Session struct, as shown in the following example:
{{if .Session.Unauthenticated}}<form action="/register" method="POST">
  <div><input type="text" name="user_name" placeholder="User name" /></div>
  <div><input type="email" name="user_email" placeholder="Your email" /></div>
  <div><input type="password" name="user_password" placeholder="Password" /></div>
  <div><input type="password" name="user_password2" placeholder="Password (repeat)" /></div>
  <div><input type="submit" value="Register" /></div>
</form>{{end}}
And our /register endpoint:
func RegisterPOST(w http.ResponseWriter, r *http.Request) {
  err := r.ParseForm()
  if err != nil {
    log.Fatal(err.Error)
  }
  name := r.FormValue("user_name")
  email := r.FormValue("user_email")
  pass := r.FormValue("user_password")
  pageGUID := r.FormValue("referrer")
  // pass2 := r.FormValue("user_password2")
  gure := regexp.MustCompile("[^A-Za-z0-9]+")
  guid := gure.ReplaceAllString(name, "")
  password := weakPasswordHash(pass)

  res, err := database.Exec("INSERT INTO users SET user_name=?, user_guid=?, user_email=?, user_password=?", name, guid, email, password)
  fmt.Println(res)
  if err != nil {
    fmt.Fprintln(w, err.Error)
  } else {
    http.Redirect(w, r, "/page/"+pageGUID, 301)
  }
}
Note that this fails inelegantly for a number of reasons. If the passwords do not match, we don't check and report to the user. If the user already exists, we don't tell them the reason for a registration failure. We'll get to that, but now our main intent is producing a session.
For reference, here's our weakPasswordHash function, which is only intended to generate a hash for testing:
func weakPasswordHash(password string) []byte {
  hash := sha1.New()
  io.WriteString(hash, password)
  return hash.Sum(nil)
}A user may be already registered; in which case, we'll also want to provide a login mechanism on the same page. This can obviously be subject to better design considerations, but we just want to make them both available:
<form action="/login" method="POST">
  <div><input type="text" name="user_name" placeholder="User name" /></div>
  <div><input type="password" name="user_password" placeholder="Password" /></div>
  <div><input type="submit" value="Log in" /></div>
</form>
And then we'll need receiving endpoints for each POSTed form. We're not going to do a lot of validation here either, but we're not in a position to validate a session.
Creating users
In the previous chapter, we allowed non-authorized requests to create new comments by hitting our REST API via a POST. Anyone who's been on the Internet for a while knows a few truisms, such as:
- The comments section is often the most toxic part of any blog or news post
- Step 1 is true, even when users have to authenticate in non-anonymous ways
Now, let's lock down the comments section to ensure that users have registered themselves and are logged in.
We won't go deep into the authentication's security aspects now, as we'll be going deeper with that in Chapter 9, Security.
First, let's add a users table in our database:
CREATE TABLE `users` (
  `id` int(11) unsigned NOT NULL AUTO_INCREMENT,
  `user_name` varchar(32) NOT NULL DEFAULT '',
  `user_guid` varchar(256) NOT NULL DEFAULT '',
  `user_email` varchar(128) NOT NULL DEFAULT '',
  `user_password` varchar(128) NOT NULL DEFAULT '',
  `user_salt` varchar(128) NOT NULL DEFAULT '',
  `user_joined_timestamp` timestamp NULL DEFAULT NULL,
  PRIMARY KEY (`id`)
) ENGINE=InnoDB DEFAULT CHARSET=latin1;
We could surely go a lot deeper with user information, but this is enough to get us started. As mentioned, we won't go too deep into security, so we'll just generate a hash for the password now and not worry about the salt.
Finally, to enable sessions and users in the app, we'll make some changes to our structs:
type Page struct {
  Id         int
  Title      string
  RawContent string
  Content    template.HTML
  Date       string
  Comments   []Comment
  Session    Session
}

type User struct {
  Id   int
  Name string
}

type Session struct {
  Id              string
  Authenticated   bool
  Unauthenticated bool
  User            User
}
And here are the two stub handlers for registration and logging in. Again, we're not putting our full effort into fleshing these out into something robust, we just want to open the door a bit.
In addition to storing the users themselves, we'll also want some way of persistent memory for accessing our cookie data. In other words, when a user's browser session ends and they come back, we'll validate and reconcile their cookie value against values in our database.
Use this SQL to create the sessions table:
CREATE TABLE `sessions` (
  `id` int(11) unsigned NOT NULL AUTO_INCREMENT,
  `session_id` varchar(256) NOT NULL DEFAULT '',
  `user_id` int(11) DEFAULT NULL,
  `session_start` timestamp NOT NULL DEFAULT CURRENT_TIMESTAMP ON UPDATE CURRENT_TIMESTAMP,
  `session_update` timestamp NOT NULL DEFAULT '0000-00-00 00:00:00',
  `session_active` tinyint(1) NOT NULL,
  PRIMARY KEY (`id`),
  UNIQUE KEY `session_id` (`session_id`)
) ENGINE=InnoDB DEFAULT CHARSET=latin1;
The most important values are the user_id, session_id, and the timestamps for updating and starting. We can use the latter two to decide if a session is actually valid after a certain period. This is a good security practice, just because a user has a valid cookie doesn't necessarily mean that they should remain authenticated, particularly if you're not using a secure connection.
To be able to allow users to create accounts themselves, we'll need a form for both registering and logging in. Now, most systems similar to this do some multi-factor authentication to allow a user backup system for retrieval as well as validation that the user is real and unique. We'll get there, but for now let's keep it as simple as possible.
We'll set up the following endpoints to allow a user to POST both the register and login forms:
  routes.HandleFunc("/register", RegisterPOST).
    Methods("POST").
    Schemes("https")
  routes.HandleFunc("/login", LoginPOST).
    Methods("POST").
    Schemes("https")
Keep in mind that these are presently set to the HTTPS scheme. If you're not using that, remove that part of the HandleFunc register.
Since we're only showing these following views to unauthenticated users, we can put them on our blog.html template and wrap them in {{if .Session.Unauthenticated}} … {{end}} template snippets. We defined .Unauthenticated and .Authenticated in the application under the Session struct, as shown in the following example:
{{if .Session.Unauthenticated}}<form action="/register" method="POST">
  <div><input type="text" name="user_name" placeholder="User name" /></div>
  <div><input type="email" name="user_email" placeholder="Your email" /></div>
  <div><input type="password" name="user_password" placeholder="Password" /></div>
  <div><input type="password" name="user_password2" placeholder="Password (repeat)" /></div>
  <div><input type="submit" value="Register" /></div>
</form>{{end}}
And our /register endpoint:
func RegisterPOST(w http.ResponseWriter, r *http.Request) {
  err := r.ParseForm()
  if err != nil {
    log.Fatal(err.Error)
  }
  name := r.FormValue("user_name")
  email := r.FormValue("user_email")
  pass := r.FormValue("user_password")
  pageGUID := r.FormValue("referrer")
  // pass2 := r.FormValue("user_password2")
  gure := regexp.MustCompile("[^A-Za-z0-9]+")
  guid := gure.ReplaceAllString(name, "")
  password := weakPasswordHash(pass)

  res, err := database.Exec("INSERT INTO users SET user_name=?, user_guid=?, user_email=?, user_password=?", name, guid, email, password)
  fmt.Println(res)
  if err != nil {
    fmt.Fprintln(w, err.Error)
  } else {
    http.Redirect(w, r, "/page/"+pageGUID, 301)
  }
}
Note that this fails inelegantly for a number of reasons. If the passwords do not match, we don't check and report to the user. If the user already exists, we don't tell them the reason for a registration failure. We'll get to that, but now our main intent is producing a session.
For reference, here's our weakPasswordHash function, which is only intended to generate a hash for testing:
func weakPasswordHash(password string) []byte {
  hash := sha1.New()
  io.WriteString(hash, password)
  return hash.Sum(nil)
}A user may be already registered; in which case, we'll also want to provide a login mechanism on the same page. This can obviously be subject to better design considerations, but we just want to make them both available:
<form action="/login" method="POST">
  <div><input type="text" name="user_name" placeholder="User name" /></div>
  <div><input type="password" name="user_password" placeholder="Password" /></div>
  <div><input type="submit" value="Log in" /></div>
</form>
And then we'll need receiving endpoints for each POSTed form. We're not going to do a lot of validation here either, but we're not in a position to validate a session.
Enabling sessions
In addition to storing the users themselves, we'll also want some way of persistent memory for accessing our cookie data. In other words, when a user's browser session ends and they come back, we'll validate and reconcile their cookie value against values in our database.
Use this SQL to create the sessions table:
CREATE TABLE `sessions` (
  `id` int(11) unsigned NOT NULL AUTO_INCREMENT,
  `session_id` varchar(256) NOT NULL DEFAULT '',
  `user_id` int(11) DEFAULT NULL,
  `session_start` timestamp NOT NULL DEFAULT CURRENT_TIMESTAMP ON UPDATE CURRENT_TIMESTAMP,
  `session_update` timestamp NOT NULL DEFAULT '0000-00-00 00:00:00',
  `session_active` tinyint(1) NOT NULL,
  PRIMARY KEY (`id`),
  UNIQUE KEY `session_id` (`session_id`)
) ENGINE=InnoDB DEFAULT CHARSET=latin1;
The most important values are the user_id, session_id, and the timestamps for updating and starting. We can use the latter two to decide if a session is actually valid after a certain period. This is a good security practice, just because a user has a valid cookie doesn't necessarily mean that they should remain authenticated, particularly if you're not using a secure connection.
To be able to allow users to create accounts themselves, we'll need a form for both registering and logging in. Now, most systems similar to this do some multi-factor authentication to allow a user backup system for retrieval as well as validation that the user is real and unique. We'll get there, but for now let's keep it as simple as possible.
We'll set up the following endpoints to allow a user to POST both the register and login forms:
  routes.HandleFunc("/register", RegisterPOST).
    Methods("POST").
    Schemes("https")
  routes.HandleFunc("/login", LoginPOST).
    Methods("POST").
    Schemes("https")
Keep in mind that these are presently set to the HTTPS scheme. If you're not using that, remove that part of the HandleFunc register.
Since we're only showing these following views to unauthenticated users, we can put them on our blog.html template and wrap them in {{if .Session.Unauthenticated}} … {{end}} template snippets. We defined .Unauthenticated and .Authenticated in the application under the Session struct, as shown in the following example:
{{if .Session.Unauthenticated}}<form action="/register" method="POST">
  <div><input type="text" name="user_name" placeholder="User name" /></div>
  <div><input type="email" name="user_email" placeholder="Your email" /></div>
  <div><input type="password" name="user_password" placeholder="Password" /></div>
  <div><input type="password" name="user_password2" placeholder="Password (repeat)" /></div>
  <div><input type="submit" value="Register" /></div>
</form>{{end}}
And our /register endpoint:
func RegisterPOST(w http.ResponseWriter, r *http.Request) {
  err := r.ParseForm()
  if err != nil {
    log.Fatal(err.Error)
  }
  name := r.FormValue("user_name")
  email := r.FormValue("user_email")
  pass := r.FormValue("user_password")
  pageGUID := r.FormValue("referrer")
  // pass2 := r.FormValue("user_password2")
  gure := regexp.MustCompile("[^A-Za-z0-9]+")
  guid := gure.ReplaceAllString(name, "")
  password := weakPasswordHash(pass)

  res, err := database.Exec("INSERT INTO users SET user_name=?, user_guid=?, user_email=?, user_password=?", name, guid, email, password)
  fmt.Println(res)
  if err != nil {
    fmt.Fprintln(w, err.Error)
  } else {
    http.Redirect(w, r, "/page/"+pageGUID, 301)
  }
}
Note that this fails inelegantly for a number of reasons. If the passwords do not match, we don't check and report to the user. If the user already exists, we don't tell them the reason for a registration failure. We'll get to that, but now our main intent is producing a session.
For reference, here's our weakPasswordHash function, which is only intended to generate a hash for testing:
func weakPasswordHash(password string) []byte {
  hash := sha1.New()
  io.WriteString(hash, password)
  return hash.Sum(nil)
}A user may be already registered; in which case, we'll also want to provide a login mechanism on the same page. This can obviously be subject to better design considerations, but we just want to make them both available:
<form action="/login" method="POST">
  <div><input type="text" name="user_name" placeholder="User name" /></div>
  <div><input type="password" name="user_password" placeholder="Password" /></div>
  <div><input type="submit" value="Log in" /></div>
</form>
And then we'll need receiving endpoints for each POSTed form. We're not going to do a lot of validation here either, but we're not in a position to validate a session.
Letting users register
To be able to allow users to create accounts themselves, we'll need a form for both registering and logging in. Now, most systems similar to this do some multi-factor authentication to allow a user backup system for retrieval as well as validation that the user is real and unique. We'll get there, but for now let's keep it as simple as possible.
We'll set up the following endpoints to allow a user to POST both the register and login forms:
  routes.HandleFunc("/register", RegisterPOST).
    Methods("POST").
    Schemes("https")
  routes.HandleFunc("/login", LoginPOST).
    Methods("POST").
    Schemes("https")
Keep in mind that these are presently set to the HTTPS scheme. If you're not using that, remove that part of the HandleFunc register.
Since we're only showing these following views to unauthenticated users, we can put them on our blog.html template and wrap them in {{if .Session.Unauthenticated}} … {{end}} template snippets. We defined .Unauthenticated and .Authenticated in the application under the Session struct, as shown in the following example:
{{if .Session.Unauthenticated}}<form action="/register" method="POST">
  <div><input type="text" name="user_name" placeholder="User name" /></div>
  <div><input type="email" name="user_email" placeholder="Your email" /></div>
  <div><input type="password" name="user_password" placeholder="Password" /></div>
  <div><input type="password" name="user_password2" placeholder="Password (repeat)" /></div>
  <div><input type="submit" value="Register" /></div>
</form>{{end}}
And our /register endpoint:
func RegisterPOST(w http.ResponseWriter, r *http.Request) {
  err := r.ParseForm()
  if err != nil {
    log.Fatal(err.Error)
  }
  name := r.FormValue("user_name")
  email := r.FormValue("user_email")
  pass := r.FormValue("user_password")
  pageGUID := r.FormValue("referrer")
  // pass2 := r.FormValue("user_password2")
  gure := regexp.MustCompile("[^A-Za-z0-9]+")
  guid := gure.ReplaceAllString(name, "")
  password := weakPasswordHash(pass)

  res, err := database.Exec("INSERT INTO users SET user_name=?, user_guid=?, user_email=?, user_password=?", name, guid, email, password)
  fmt.Println(res)
  if err != nil {
    fmt.Fprintln(w, err.Error)
  } else {
    http.Redirect(w, r, "/page/"+pageGUID, 301)
  }
}
Note that this fails inelegantly for a number of reasons. If the passwords do not match, we don't check and report to the user. If the user already exists, we don't tell them the reason for a registration failure. We'll get to that, but now our main intent is producing a session.
For reference, here's our weakPasswordHash function, which is only intended to generate a hash for testing:
func weakPasswordHash(password string) []byte {
  hash := sha1.New()
  io.WriteString(hash, password)
  return hash.Sum(nil)
}A user may be already registered; in which case, we'll also want to provide a login mechanism on the same page. This can obviously be subject to better design considerations, but we just want to make them both available:
<form action="/login" method="POST">
  <div><input type="text" name="user_name" placeholder="User name" /></div>
  <div><input type="password" name="user_password" placeholder="Password" /></div>
  <div><input type="submit" value="Log in" /></div>
</form>
And then we'll need receiving endpoints for each POSTed form. We're not going to do a lot of validation here either, but we're not in a position to validate a session.
Letting users log in
A user may be already registered; in which case, we'll also want to provide a login mechanism on the same page. This can obviously be subject to better design considerations, but we just want to make them both available:
<form action="/login" method="POST">
  <div><input type="text" name="user_name" placeholder="User name" /></div>
  <div><input type="password" name="user_password" placeholder="Password" /></div>
  <div><input type="submit" value="Log in" /></div>
</form>
And then we'll need receiving endpoints for each POSTed form. We're not going to do a lot of validation here either, but we're not in a position to validate a session.
One of the most common ways of authenticating a user and saving their state on the Web is through sessions. You may recall that we mentioned in the last chapter that REST is stateless, the primary reason for that is because HTTP itself is stateless.
If you think about it, to establish a consistent state with HTTP, you need to include a cookie or a URL parameter or something that is not built into the protocol itself.
Sessions are created with unique identifiers that are usually not entirely random but unique enough to avoid conflicts for most logical and plausible scenarios. This is not absolute, of course, and there are plenty of (historical) examples of session token hijacking that are not related to sniffing.
Session support as a standalone process does not exist in Go core. Given that we have a storage system on the server side, this is somewhat irrelevant. If we create a safe process for generation of server keys, we can store them in secure cookies.
But generating session tokens is not completely trivial. We can do this using a set of available cryptographic methods, but with session hijacking as a very prevalent way of getting into systems without authorization, that may be a point of insecurity in our application.
Since we're already using the Gorilla toolkit, the good news is that we don't have to reinvent the wheel, there's a robust session system in place.
Not only do we have access to a server-side session, but we get a very convenient tool for one-time messages within a session. These work somewhat similar to a message queue in the manner that once data goes into them, the flash message is no longer valid when that data is retrieved.
To utilize the Gorilla sessions, we first need to invoke a cookie store, which will hold all the variables that we want to keep associated with a user. You can test this out pretty easily by the following code:
package main

import (
  "fmt"
  "github.com/gorilla/sessions"
  "log"
  "net/http"
)

func cookieHandler(w http.ResponseWriter, r *http.Request) {
  var cookieStore = sessions.NewCookieStore([]byte("ideally, some random piece of entropy"))
  session, _ := cookieStore.Get(r, "mystore")
  if value, exists := session.Values["hello"]; exists {
    fmt.Fprintln(w, value)
  } else {
    session.Values["hello"] = "(world)"
    session.Save(r, w)
    fmt.Fprintln(w, "We just set the value!")
  }
}

func main() {
  http.HandleFunc("/test", cookieHandler)
  log.Fatal(http.ListenAndServe(":8080", nil))
}
The first time you hit your URL and endpoint, you'll see We just set the value!, as shown in the following screenshot:

In the second request, you should see (world), as shown in the following screenshot:

A couple of notes here. First, you must set cookies before sending anything else through your io.Writer (in this case the ResponseWriter w). If you flip these lines:
    session.Save(r, w)
    fmt.Fprintln(w, "We just set the value!")
You can see this in action. You'll never get the value set to your cookie store.
So now, let's apply it to our application. We will want to initiate a session store before any requests to /login or /register.
We'll initialize a global sessionStore:
var database *sql.DB
var sessionStore = sessions.NewCookieStore([]byte("our-social-network-application"))
Feel free to group these, as well, in a var (). Next, we'll want to create four simple functions that will get an active session, update a current one, generate a session ID, and evaluate an existing cookie. These will allow us to check if a user is logged in by a cookie's session ID and enable persistent logins.
First, the getSessionUID function, which will return a user's ID if a session already exists:
func getSessionUID(sid string) int {
  user := User{}
  err := database.QueryRow("SELECT user_id FROM sessions WHERE session_id=?", sid).Scan(user.Id)
  if err != nil {
    fmt.Println(err.Error)
    return 0
  }
  return user.Id
}
Next, the update function, which will be called with every front-facing request, thus enabling a timestamp update or inclusion of a user ID if a new log in is attempted:
func updateSession(sid string, uid int) {
  const timeFmt = "2006-01-02T15:04:05.999999999"
  tstamp := time.Now().Format(timeFmt)
  _, err := database.Exec("INSERT INTO sessions SET session_id=?, user_id=?, session_update=? ON DUPLICATE KEY UPDATE user_id=?, session_update=?", sid, uid, tstamp, uid, tstamp)
  if err != nil {
    fmt.Println(err.Error)
  }
}
An important part is the ability to generate a strongly-random byte array (cast to string) that will allow unique identifiers. We do that with the following generateSessionId() function:
func generateSessionId() string {
  sid := make([]byte, 24)
  _, err := io.ReadFull(rand.Reader, sid)
  if err != nil {
    log.Fatal("Could not generate session id")
  }
  return base64.URLEncoding.EncodeToString(sid)
}
And finally, we have the function that will be called with every request to check for a cookie's session or create one if it doesn't exist.
func validateSession(w http.ResponseWriter, r *http.Request) {
  session, _ := sessionStore.Get(r, "app-session")
  if sid, valid := session.Values["sid"]; valid {
    currentUID := getSessionUID(sid.(string))
    updateSession(sid.(string), currentUID)
    UserSession.Id = string(currentUID)
  } else {
    newSID := generateSessionId()
    session.Values["sid"] = newSID
    session.Save(r, w)
    UserSession.Id = newSID
    updateSession(newSID, 0)
  }
  fmt.Println(session.ID)
}
This is predicated on having a global Session struct, in this case defined as:
var UserSession Session
This leaves us with just one piece—to call validateSession() on our ServePage() method and LoginPost() method and then validate the passwords on the latter and update our session on a successful login attempt:
func LoginPOST(w http.ResponseWriter, r *http.Request) {
  validateSession(w, r)
In our previously defined check against the form values, if a valid user is found, we'll update the session directly:
  u := User{}
  name := r.FormValue("user_name")
  pass := r.FormValue("user_password")
  password := weakPasswordHash(pass)
  err := database.QueryRow("SELECT user_id, user_name FROM users WHERE user_name=? and user_password=?", name, password).Scan(&u.Id, &u.Name)
  if err != nil {
    fmt.Fprintln(w, err.Error)
    u.Id = 0
    u.Name = ""
  } else {
    updateSession(UserSession.Id, u.Id)
    fmt.Fprintln(w, u.Name)
}As mentioned earlier in this chapter, Gorilla sessions offer a simple system to utilize a single-use and cookie-based data transfer between requests.
The idea behind a flash message is not all that different than an in-browser/server message queue. It's most frequently utilized in a process such as this:
- A form is POSTed
- The data is processed
- A header redirect is initiated
- The resulting page needs some access to information about the
POSTprocess (success, error)
At the end of this process, the message should be removed so that the message is not duplicated erroneously at some other point. Gorilla makes this incredibly easy, and we'll look at that shortly, but it makes sense to show a quick example of how this can be accomplished in native Go.
To start, we'll create a simple HTTP server that includes a starting point handler called startHandler:
package main

import (
  "fmt"
  "html/template"
  "log"
  "net/http"
  "time"
)

var (
  templates = template.Must(template.ParseGlob("templates/*"))
  port      = ":8080"
)

func startHandler(w http.ResponseWriter, r *http.Request) {
  err := templates.ExecuteTemplate(w, "ch6-flash.html", nil)
  if err != nil {
    log.Fatal("Template ch6-flash missing")
  }
}
We're not doing anything special here, just rendering our form:
func middleHandler(w http.ResponseWriter, r *http.Request) {
  cookieValue := r.PostFormValue("message")
  cookie := http.Cookie{Name: "message", Value: "message:" + cookieValue, Expires: time.Now().Add(60 * time.Second), HttpOnly: true}
  http.SetCookie(w, &cookie)
  http.Redirect(w, r, "/finish", 301)
}
Our middleHandler demonstrates creating cookies through a Cookie struct, as described earlier in this chapter. There's nothing important to note here except the fact that you may want to extend the expiration out a bit, just to ensure that there's no way a cookie could expire (naturally) between requests:
func finishHandler(w http.ResponseWriter, r *http.Request) {
  cookieVal, _ := r.Cookie("message")

  if cookieVal != nil {
    fmt.Fprintln(w, "We found: "+string(cookieVal.Value)+", but try to refresh!")
    cookie := http.Cookie{Name: "message", Value: "", Expires: time.Now(), HttpOnly: true}
    http.SetCookie(w, &cookie)
  } else {
    fmt.Fprintln(w, "That cookie was gone in a flash")
  }

}
The finishHandler function does the magic of a flash message—removes the cookie if and only if a value has been found. This ensures that the cookie is a one-time retrievable value:
func main() {

  http.HandleFunc("/start", startHandler)
  http.HandleFunc("/middle", middleHandler)
  http.HandleFunc("/finish", finishHandler)
  log.Fatal(http.ListenAndServe(port, nil))

}
The following example is our HTML for POSTing our cookie value to the /middle handler:
<html>
<head><title>Flash Message</title></head>
<body>
<form action="/middle" method="POST">
  <input type="text" name="message" />
  <input type="submit" value="Send Message" />
</form>
</body>
</html>
If you do as the page suggests and refresh again, the cookie value would have been removed and the page will not render, as you've previously seen.
To begin the flash message, we hit our /start endpoint and enter an intended value and then click on the Send Message button:

At this point, we'll be sent to the /middle endpoint, which will set the cookie value and HTTP redirect to /finish:

And now we can see our value. Since the /finish endpoint handler also unsets the cookie, we'll be unable to retrieve that value again. Here's what happens if we do what /finish tells us on its first appearance:

That's all for now.
Creating a store
To utilize the Gorilla sessions, we first need to invoke a cookie store, which will hold all the variables that we want to keep associated with a user. You can test this out pretty easily by the following code:
package main

import (
  "fmt"
  "github.com/gorilla/sessions"
  "log"
  "net/http"
)

func cookieHandler(w http.ResponseWriter, r *http.Request) {
  var cookieStore = sessions.NewCookieStore([]byte("ideally, some random piece of entropy"))
  session, _ := cookieStore.Get(r, "mystore")
  if value, exists := session.Values["hello"]; exists {
    fmt.Fprintln(w, value)
  } else {
    session.Values["hello"] = "(world)"
    session.Save(r, w)
    fmt.Fprintln(w, "We just set the value!")
  }
}

func main() {
  http.HandleFunc("/test", cookieHandler)
  log.Fatal(http.ListenAndServe(":8080", nil))
}
The first time you hit your URL and endpoint, you'll see We just set the value!, as shown in the following screenshot:
In the second request, you should see (world), as shown in the following screenshot:
A couple of notes here. First, you must set cookies before sending anything else through your io.Writer (in this case the ResponseWriter w). If you flip these lines:
    session.Save(r, w)
    fmt.Fprintln(w, "We just set the value!")
You can see this in action. You'll never get the value set to your cookie store.
So now, let's apply it to our application. We will want to initiate a session store before any requests to /login or /register.
We'll initialize a global sessionStore:
var database *sql.DB
var sessionStore = sessions.NewCookieStore([]byte("our-social-network-application"))
Feel free to group these, as well, in a var (). Next, we'll want to create four simple functions that will get an active session, update a current one, generate a session ID, and evaluate an existing cookie. These will allow us to check if a user is logged in by a cookie's session ID and enable persistent logins.
First, the getSessionUID function, which will return a user's ID if a session already exists:
func getSessionUID(sid string) int {
  user := User{}
  err := database.QueryRow("SELECT user_id FROM sessions WHERE session_id=?", sid).Scan(user.Id)
  if err != nil {
    fmt.Println(err.Error)
    return 0
  }
  return user.Id
}
Next, the update function, which will be called with every front-facing request, thus enabling a timestamp update or inclusion of a user ID if a new log in is attempted:
func updateSession(sid string, uid int) {
  const timeFmt = "2006-01-02T15:04:05.999999999"
  tstamp := time.Now().Format(timeFmt)
  _, err := database.Exec("INSERT INTO sessions SET session_id=?, user_id=?, session_update=? ON DUPLICATE KEY UPDATE user_id=?, session_update=?", sid, uid, tstamp, uid, tstamp)
  if err != nil {
    fmt.Println(err.Error)
  }
}
An important part is the ability to generate a strongly-random byte array (cast to string) that will allow unique identifiers. We do that with the following generateSessionId() function:
func generateSessionId() string {
  sid := make([]byte, 24)
  _, err := io.ReadFull(rand.Reader, sid)
  if err != nil {
    log.Fatal("Could not generate session id")
  }
  return base64.URLEncoding.EncodeToString(sid)
}
And finally, we have the function that will be called with every request to check for a cookie's session or create one if it doesn't exist.
func validateSession(w http.ResponseWriter, r *http.Request) {
  session, _ := sessionStore.Get(r, "app-session")
  if sid, valid := session.Values["sid"]; valid {
    currentUID := getSessionUID(sid.(string))
    updateSession(sid.(string), currentUID)
    UserSession.Id = string(currentUID)
  } else {
    newSID := generateSessionId()
    session.Values["sid"] = newSID
    session.Save(r, w)
    UserSession.Id = newSID
    updateSession(newSID, 0)
  }
  fmt.Println(session.ID)
}
This is predicated on having a global Session struct, in this case defined as:
var UserSession Session
This leaves us with just one piece—to call validateSession() on our ServePage() method and LoginPost() method and then validate the passwords on the latter and update our session on a successful login attempt:
func LoginPOST(w http.ResponseWriter, r *http.Request) {
  validateSession(w, r)
In our previously defined check against the form values, if a valid user is found, we'll update the session directly:
  u := User{}
  name := r.FormValue("user_name")
  pass := r.FormValue("user_password")
  password := weakPasswordHash(pass)
  err := database.QueryRow("SELECT user_id, user_name FROM users WHERE user_name=? and user_password=?", name, password).Scan(&u.Id, &u.Name)
  if err != nil {
    fmt.Fprintln(w, err.Error)
    u.Id = 0
    u.Name = ""
  } else {
    updateSession(UserSession.Id, u.Id)
    fmt.Fprintln(w, u.Name)
}As mentioned earlier in this chapter, Gorilla sessions offer a simple system to utilize a single-use and cookie-based data transfer between requests.
The idea behind a flash message is not all that different than an in-browser/server message queue. It's most frequently utilized in a process such as this:
- A form is POSTed
- The data is processed
- A header redirect is initiated
- The resulting page needs some access to information about the
POSTprocess (success, error)
At the end of this process, the message should be removed so that the message is not duplicated erroneously at some other point. Gorilla makes this incredibly easy, and we'll look at that shortly, but it makes sense to show a quick example of how this can be accomplished in native Go.
To start, we'll create a simple HTTP server that includes a starting point handler called startHandler:
package main

import (
  "fmt"
  "html/template"
  "log"
  "net/http"
  "time"
)

var (
  templates = template.Must(template.ParseGlob("templates/*"))
  port      = ":8080"
)

func startHandler(w http.ResponseWriter, r *http.Request) {
  err := templates.ExecuteTemplate(w, "ch6-flash.html", nil)
  if err != nil {
    log.Fatal("Template ch6-flash missing")
  }
}
We're not doing anything special here, just rendering our form:
func middleHandler(w http.ResponseWriter, r *http.Request) {
  cookieValue := r.PostFormValue("message")
  cookie := http.Cookie{Name: "message", Value: "message:" + cookieValue, Expires: time.Now().Add(60 * time.Second), HttpOnly: true}
  http.SetCookie(w, &cookie)
  http.Redirect(w, r, "/finish", 301)
}
Our middleHandler demonstrates creating cookies through a Cookie struct, as described earlier in this chapter. There's nothing important to note here except the fact that you may want to extend the expiration out a bit, just to ensure that there's no way a cookie could expire (naturally) between requests:
func finishHandler(w http.ResponseWriter, r *http.Request) {
  cookieVal, _ := r.Cookie("message")

  if cookieVal != nil {
    fmt.Fprintln(w, "We found: "+string(cookieVal.Value)+", but try to refresh!")
    cookie := http.Cookie{Name: "message", Value: "", Expires: time.Now(), HttpOnly: true}
    http.SetCookie(w, &cookie)
  } else {
    fmt.Fprintln(w, "That cookie was gone in a flash")
  }

}
The finishHandler function does the magic of a flash message—removes the cookie if and only if a value has been found. This ensures that the cookie is a one-time retrievable value:
func main() {

  http.HandleFunc("/start", startHandler)
  http.HandleFunc("/middle", middleHandler)
  http.HandleFunc("/finish", finishHandler)
  log.Fatal(http.ListenAndServe(port, nil))

}
The following example is our HTML for POSTing our cookie value to the /middle handler:
<html>
<head><title>Flash Message</title></head>
<body>
<form action="/middle" method="POST">
  <input type="text" name="message" />
  <input type="submit" value="Send Message" />
</form>
</body>
</html>
If you do as the page suggests and refresh again, the cookie value would have been removed and the page will not render, as you've previously seen.
To begin the flash message, we hit our /start endpoint and enter an intended value and then click on the Send Message button:
At this point, we'll be sent to the /middle endpoint, which will set the cookie value and HTTP redirect to /finish:
And now we can see our value. Since the /finish endpoint handler also unsets the cookie, we'll be unable to retrieve that value again. Here's what happens if we do what /finish tells us on its first appearance:
That's all for now.
Utilizing flash messages
As mentioned earlier in this chapter, Gorilla sessions offer a simple system to utilize a single-use and cookie-based data transfer between requests.
The idea behind a flash message is not all that different than an in-browser/server message queue. It's most frequently utilized in a process such as this:
- A form is POSTed
- The data is processed
- A header redirect is initiated
- The resulting page needs some access to information about the
POSTprocess (success, error)
At the end of this process, the message should be removed so that the message is not duplicated erroneously at some other point. Gorilla makes this incredibly easy, and we'll look at that shortly, but it makes sense to show a quick example of how this can be accomplished in native Go.
To start, we'll create a simple HTTP server that includes a starting point handler called startHandler:
package main

import (
  "fmt"
  "html/template"
  "log"
  "net/http"
  "time"
)

var (
  templates = template.Must(template.ParseGlob("templates/*"))
  port      = ":8080"
)

func startHandler(w http.ResponseWriter, r *http.Request) {
  err := templates.ExecuteTemplate(w, "ch6-flash.html", nil)
  if err != nil {
    log.Fatal("Template ch6-flash missing")
  }
}
We're not doing anything special here, just rendering our form:
func middleHandler(w http.ResponseWriter, r *http.Request) {
  cookieValue := r.PostFormValue("message")
  cookie := http.Cookie{Name: "message", Value: "message:" + cookieValue, Expires: time.Now().Add(60 * time.Second), HttpOnly: true}
  http.SetCookie(w, &cookie)
  http.Redirect(w, r, "/finish", 301)
}
Our middleHandler demonstrates creating cookies through a Cookie struct, as described earlier in this chapter. There's nothing important to note here except the fact that you may want to extend the expiration out a bit, just to ensure that there's no way a cookie could expire (naturally) between requests:
func finishHandler(w http.ResponseWriter, r *http.Request) {
  cookieVal, _ := r.Cookie("message")

  if cookieVal != nil {
    fmt.Fprintln(w, "We found: "+string(cookieVal.Value)+", but try to refresh!")
    cookie := http.Cookie{Name: "message", Value: "", Expires: time.Now(), HttpOnly: true}
    http.SetCookie(w, &cookie)
  } else {
    fmt.Fprintln(w, "That cookie was gone in a flash")
  }

}
The finishHandler function does the magic of a flash message—removes the cookie if and only if a value has been found. This ensures that the cookie is a one-time retrievable value:
func main() {

  http.HandleFunc("/start", startHandler)
  http.HandleFunc("/middle", middleHandler)
  http.HandleFunc("/finish", finishHandler)
  log.Fatal(http.ListenAndServe(port, nil))

}
The following example is our HTML for POSTing our cookie value to the /middle handler:
<html>
<head><title>Flash Message</title></head>
<body>
<form action="/middle" method="POST">
  <input type="text" name="message" />
  <input type="submit" value="Send Message" />
</form>
</body>
</html>
If you do as the page suggests and refresh again, the cookie value would have been removed and the page will not render, as you've previously seen.
To begin the flash message, we hit our /start endpoint and enter an intended value and then click on the Send Message button:
At this point, we'll be sent to the /middle endpoint, which will set the cookie value and HTTP redirect to /finish:
And now we can see our value. Since the /finish endpoint handler also unsets the cookie, we'll be unable to retrieve that value again. Here's what happens if we do what /finish tells us on its first appearance:
That's all for now.
Hopefully by this point you have a grasp of how to utilize basic cookies and sessions in Go, either through native Go or through the use of a framework, such as Gorilla. We've tried to demonstrate the inner workings of the latter so you're able to build without additional libraries obfuscating the functionality.
We've implemented sessions into our application to enable persistent state between requests. This is the very basis of authentication for the Web. By enabling users and sessions table in our database, we're able to log users in, register a session, and associate that session with the proper user on subsequent requests.
By utilizing flash messages, we made use of a very specific feature that allows transfer of information between two endpoints without enabling an additional request that may look like an error to the user or generate erroneous output. Our flash messages works just once and then expire.
In Chapter 7, Microservices and Communication, we'll look at connecting disparate systems and applications across our existing and new APIs to allow event-based actions to be coordinated between those systems. This will facilitate connecting to other services within the same environment as well as those outside of our application.
Our application is beginning to get a little more real now. In the previous chapter, we added some APIs and client-side interfaces to them.
Microservices have become very hot in the last few years, primarily because they reduce the developmental and support weight of a very large or monolithic application. By breaking apart these monoliths, microservices enable a more agile and concurrent development. They can allow separate teams to work on separate parts of the application without worrying too much about conflicts, backwards compatibility issues, or stepping on the toes of other parts of the application.
In this chapter, we'll introduce microservices and explore how Go can work within them, to enable them and even drive their central mechanisms.
To sum this all up, we will be covering the following aspects:
- Introducing the microservice approach
- Pros and cons of utilizing microservices
- Understanding the heart of microservices
- Communicating between microservices
- Putting a message on the wire
- Reading from another service
If you've not yet encountered the term microservice or explored its meaning in depth, we can very quickly demystify it. Microservices are, in essence, independent functions of an overall application being broken apart and made accessible via some universally known protocol.
The microservice approach is, usually, utilized to break apart a very large monolithic application.
Imagine your standard web application in the mid-2000s. When new functionality is needed, let's say a function that emails new users, it's added directly to the codebase and integrated with the rest of the application.
As the application grows, so does the necessary test coverage. So, it increases the potential for critical errors too. In this scenario, a critical error doesn't just bring down that component, in this case the e-mailing system; it takes down the entire application.
This can be a nightmare to track down, patch, and re-deploy, and it's exactly the type of nightmare that microservices were designed to address.
If the e-mailing part of the application is separated into its own app, it has a level of isolation and insulation that makes finding problems much easier. It also means that the entire stack doesn't fall down just because someone introduced a critical error into one small part of the whole app, as shown in the following figure:
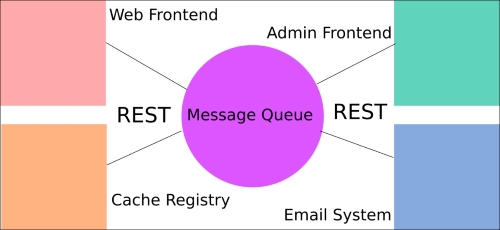
Consider the following basic example architecture, where an application is split into four separate concepts, which represent their own applications in the microservices framework.
Once, every single piece existed in its own application; now they are broken apart into smaller and more manageable systems. Communication between the applications happens via a message queue utilizing REST API endpoints.
If microservices seem like a panacea at this point, we should also note that this approach does not come without its own set of issues. Whether the tradeoff is worth it or not depends heavily on an overall organizational approach.
As mentioned earlier, stability and error detection comprise a big production-level win for microservices. But if you think of the flip side of applications not breaking, it could also mean that issues go hidden for longer than they otherwise would. It's hard to ignore the entire site being down, but it could be hours before anyone realizes that e-mails have not been sent, unless some very robust logging is in place.
But there are other big pros to microservices. For one, utilizing an external standard communication protocol (REST, for example) means that you're not locked into a single language.
If, for example, some part of your application can be written better in Node than in Go, you can do that without having to rewrite an entire application. This is a frequent temptation for developers: rewriting the whole thing because the new and shiny language app or feature is introduced. Well, microservices safely enable this behavior—it allows a developer or a group of developers to try something without needing to go deeper than the specific function they wish to write.
This, too, comes with a potentially negative scenario—since the application components are decoupled, so can the institutional knowledge around them be decoupled. Few developers may know enough to keep the service operating ideally. Other members of the group may lack the language knowledge to jump in and fix critical errors.
One final, but important, consideration is that microservice architecture generally means a distributed environment by default. This leads us to the biggest immediate caveat, which is the fact that this situation almost always means that eventual consistency is the name of the game.
Since every message must depend on multiple external services, you're subject to several layers of latency to get a change enacted.
You might be wondering about one thing as you consider this system to design dissonant services that work in congress: what's the communication platform? To answer this, we'll say there is an easy answer and a more intricate one.
The easy answer is REST. This is great news, as you're likely to be well versed in REST or you at least understand some portion of it from Chapter 5, Frontend Integration with RESTful APIs. There we described the basics of API communication utilizing RESTful, stateless protocols and implementing HTTP verbs as actions.
Which leads us to the more complex answer: not everything in a large or involved application can operate on REST alone. Some things require state or at least some level of long-lasting consistency.
For the latter problem, most microservice architectures are centered on a message queue as a platform for information sharing and dissemination. A message queue serves as a conduit to receive REST requests from one service and holds it until another service retrieves the request for further processing.
There are a number of approaches to communicate between microservices, as mentioned; REST endpoints provide a nice landing pad for messages. You may recall the preceding graphic, which shows a message queue as the central conduit between services. This is one of the most common ways to handle message passing and we'll use RabbitMQ to demonstrate this.
In this case, we'll show when new users register to an e-mail queue for the delivery of a message in our RabbitMQ installation, which will then be picked up by an emailing microservice.
Note
You can read more about RabbitMQ, which utilizes Advanced Message Queuing Protocol (AMQP) here: https://www.rabbitmq.com/.
To install an AMQP client for Go, we'll recommend Sean Treadway's AMQP package. You can install it with a go get command. You can get it at github.com/streadway/amqp
There are a lot of approaches to use RabbitMQ. For example, one allows multiple workers to accomplish the same thing, as a method for distributing works among available resources.
Assuredly, as a system grows, it is likely to find use for that method. But in our tiny example, we want to segregate tasks based on a specific channel. Of course, this is not analogous to Go's concurrency channels, so keep that in mind when you read about this approach.
But to explain this method, we may have separate exchanges to route our messages. In our example, we might have a log queue where messages are aggregated from all services into a single log location, or a cache expiration method that removes cached items from memory when they're deleted from the database.
In this example, though, we'll implement an e-mail queue that can take a message from any other service and use its contents to send an e-mail. This keeps all e-mail functionality outside of core and supportive services.
Recall that in Chapter 5, Frontend Integration with RESTful APIs, we added register and login methods. The one we're most interested in here is RegisterPOST(), where we allowed users to register to our site and then comment on our posts.
It's not uncommon for newly registered users to get an e-mail, either for confirmation of identity or for a simple welcome message. We'll do the latter here, but adding confirmation is trivial; it's just a matter of producing a key, delivering via e-mail and then enabling the user once the link is hit.
Since we're using an external package, the first thing we need to do is import it.
Here's how we do it:
import (
  "bufio"
  "crypto/rand"
  "crypto/sha1"
  "database/sql"
  "encoding/base64"
  "encoding/json"
  "fmt"
  _ "github.com/go-sql-driver/mysql"
  "github.com/gorilla/mux"
  "github.com/gorilla/sessions"
  "github.com/streadway/amqp"
  "html/template"
  "io"
  "log"
  "net/http"
  "regexp"
  "text/template"
  "time"
)
Note that here we've included text/template, which is not strictly necessary since we have html/template, but we've noted here in case you wish to use it in a separate process. We have also included bufio, which we'll use as part of the same templating process.
For the sake of sending an e-mail, it will be helpful to have a message and a title for the e-mail, so let's declare these. In a production environment, we'd probably have a separate language file, but we don't have much else to show at this point:
var WelcomeTitle = "You've successfully registered!"
var WelcomeEmail = "Welcome to our CMS, {{Email}}!  We're glad you could join us."
These simply represent the e-mail variables we need to utilize when we have a successful registration.
Since we're putting a message on the wire and yielding some responsibility for the application's logic to another service, for now we'll only need to ensure that our message has been received by RabbitMQ.
Next, we'll need to connect to the queue, which we can pass either by reference or reconnect with each message. Generally, you'll want to keep the connection in the queue for a long time, but you may choose to reconnect and close your connection each time while testing.
In order to do so, we'll add our MQ host information to our constants:
const (
  DBHost  = "127.0.0.1"
  DBPort  = ":3306"
  DBUser  = "root"
  DBPass  = ""
  DBDbase = "cms"
  PORT    = ":8080"
  MQHost  = "127.0.0.1"
  MQPort  = ":5672"
)
When we create a connection, we'll use the somewhat familiar TCP Dial() method, which returns an MQ connection. Here is our function for connecting:
func MQConnect() (*amqp.Connection, *amqp.Channel, error) {
  url := "amqp://" + MQHost + MQPort
  conn, err := amqp.Dial(url)
  if err != nil {
    return nil, nil, err
  }
  channel, err := conn.Channel()
  if err != nil {
    return nil, nil, err
  }
  if _, err := channel.QueueDeclare("", false, true, false, false, nil); err != nil {
    return nil, nil, err
  }
  return conn, channel, nil
}
We can choose to pass the connection by reference or sustain it as a global with all applicable caveats considered here.
Tip
You can read a bit more about RabbitMQ connections and detecting disrupted connections at https://www.rabbitmq.com/heartbeats.html
Technically, any producer (in this case our application) doesn't push messages to the queue; rather, it pushes them to the exchange. RabbitMQ allows you to find exchanges with the rabbitmqctl list_exchanges command (rather than list_queues). Here, we're using an empty exchange, which is totally valid. The distinction between a queue and an exchange is non-trivial; the latter is responsible for having defined the rules surrounding a message, en route to a queue or queues.
Inside our RegisterPOST(), let's send a JSON-encoded message when a successful registration takes place. We'll want a very simple struct to maintain the data we'll need:
type RegistrationData struct {
  Email   string `json:"email"`
  Message string `json:"message"`
}
Now we'll create a new RegistrationData struct if, and only if, the registration process succeeds:
  res, err := database.Exec("INSERT INTO users SET user_name=?, user_guid=?, user_email=?, user_password=?", name, guid, email, password)

  if err != nil {
    fmt.Fprintln(w, err.Error)
  } else {
    Email := RegistrationData{Email: email, Message: ""}
    message, err := template.New("email").Parse(WelcomeEmail)
    var mbuf bytes.Buffer
    message.Execute(&mbuf, Email)
    MQPublish(json.Marshal(mbuf.String()))
    http.Redirect(w, r, "/page/"+pageGUID, 301)
  }
And finally, we'll need the function that actually sends our data, MQPublish():
func MQPublish(message []byte) {
  err = channel.Publish(
    "email", // exchange
    "",      // routing key
    false,   // mandatory
    false,   // immediate
    amqp.Publishing{
      ContentType: "text/plain",
      Body:        []byte(message),
    })
}Now that we've sent a message to our message queue in our app, let's use another microservice to pluck that from the queue on the other end.
To demonstrate the flexibility of a microservice design, our secondary service will be a Python script that connects to the MQ and listens for messages on the e-mail queue, when it finds one. It will parse the message and send an e-mail. Optionally, it could publish a status message back on the queue or log it, but we won't go down that road for now:
import pika
import json
import smtplib
from email.mime.text import MIMEText

connection = pika.BlockingConnection(pika.ConnectionParameters( host='localhost'))
channel = connection.channel()
channel.queue_declare(queue='email')

print ' [*] Waiting for messages. To exit press CTRL+C'

def callback(ch, method, properties, body):
    print " [x] Received %r" % (body,)
    parsed = json.loads(body)
    msg = MIMEText()
    msg['From'] = 'Me'
    msg['To'] = parsed['email']
    msg['Subject'] = parsed['message']
    s = smtplib.SMTP('localhost')
    s.sendmail('Me', parsed['email'], msg.as_string())
    s.quit()

channel.basic_consume(callback,
                      queue='email',
                      no_ack=True)

channel.start_consuming()In this chapter, we looked at experimenting with utilizing microservices as a way to dissect your app into separate domains of responsibility. In this example, we delegated the e-mail aspect of our application to another service written in Python.
We did this to utilize the concept of microservices or interconnected smaller applications as callable networked functions. This ethos is driving a large part of the Web of late and has myriad benefits and drawbacks.
In doing this, we implemented a message queue, which operates as the backbone of our communications system, allowing each component to speak to the other in a reliable and repeatable way. In this case, we used a Python application to read messages sent from our Go application across RabbitMQ and take that e-mail data and process it.
In Chapter 8, Logging and Testing, we'll focus on logging and testing, which we can use to extend the microservices concept so that we can recover from errors and understand where things might go awry in the process.
In the previous chapter, we discussed delegating application responsibility to networked services accessible by API and intra-process communication and handled by a message queue.
This approach mimics an emerging trend of breaking large monolithic applications into smaller chunks; thus, allowing developers to leverage dissonant languages, frameworks, and designs.
We listed a few upsides and downsides of this approach; while most of the upsides dealt with keeping the development agile and lean while preventing catastrophic and cascading errors that might bring down an entire application, a large downside is the fragility of each individual component. For example, if our e-mail microservice had bad code as a part of a large application, the error would make itself known quickly because it would almost assuredly have a direct and detectable impact on another component. But by isolating processes as part of microservices, we also isolate their state and status.
This is where the contents of this chapter come into play—the ability to test and log within a Go application is the strength of the language's design. By utilizing these in our application, it grows to include more microservices; due to which we can be in a better position to keep track of any issues with a cog in the system without imposing too much additional complexity to the overall application.
In this chapter we will cover the following topics:
- Introducing logging in Go
- Logging to IO
- Formatting your output
- Using panics and fatal errors
- Introducing testing in Go
Go comes with innumerable ways to display output to stdout, most commonly the fmt package's Print and Println. In fact, you can eschew the fmt package entirely and just use print() or println().
In mature applications, you're unlikely to see too many of these, because simply displaying an output without having the capability to store that somewhere for debugging or later analysis is rare and lacks much utility. Even if you're just outputting minor feedback to a user, it often makes sense to do so and keep the ability to save that to a file or elsewhere, this is where the log package comes into play. Most of the examples in this book have used log.Println in lieu of fmt.Println for this very reason. It's trivial to make that change if, at some point, you choose to supplant stdout with some other (or additional) io.Writer.
So far we've been logging in to stdout, but you can utilize any io.Writer to ingest the log data. In fact, you can use multiple io.Writers if you want the output to be routed to more than one place.
Most mature applications will write to more than one log file to delineate between the various types of messages that need to be retained.
The most common use case for this is found in web server. They typically keep an access.log and an error.log file to allow the analysis of all successful requests; however, they also maintain separate logging of different types of messages.
In the following example, we modify our logging concept to include errors as well as warnings:
package main

import (
  "log"
  "os"
)
var (
  Warn   *log.Logger
  Error  *log.Logger
  Notice *log.Logger
)
func main() {
  warnFile, err := os.OpenFile("warnings.log", os.O_RDWR|os.O_APPEND, 0660)
  defer warnFile.Close()
  if err != nil {
    log.Fatal(err)
  }
  errorFile, err := os.OpenFile("error.log", os.O_RDWR|os.O_APPEND, 0660)
  defer errorFile.Close()
  if err != nil {
    log.Fatal(err)
  }

  Warn = log.New(warnFile, "WARNING: ", Log.LstdFlags
)

  Warn.Println("Messages written to a file called 'warnings.log' are likely to be ignored :(")

  Error = log.New(errorFile, "ERROR: ", log.Ldate|log.Ltime)
  Error.SetOutput(errorFile)
  Error.Println("Error messages, on the other hand, tend to catch attention!")
}
We can take this approach to store all sorts of information. For example, if we wanted to store registration errors, we can create a specific registration error logger and allow a similar approach if we encounter an error in that process as shown:
  res, err := database.Exec("INSERT INTO users SET user_name=?, user_guid=?, user_email=?, user_password=?", name, guid, email, passwordEnc)

  if err != nil {
    fmt.Fprintln(w, err.Error)
    RegError.Println("Could not complete registration:", err.Error)
  } else {
    http.Redirect(w, r, "/page/"+pageGUID, 301)
  }
Multiple loggers
Most mature applications will write to more than one log file to delineate between the various types of messages that need to be retained.
The most common use case for this is found in web server. They typically keep an access.log and an error.log file to allow the analysis of all successful requests; however, they also maintain separate logging of different types of messages.
In the following example, we modify our logging concept to include errors as well as warnings:
package main

import (
  "log"
  "os"
)
var (
  Warn   *log.Logger
  Error  *log.Logger
  Notice *log.Logger
)
func main() {
  warnFile, err := os.OpenFile("warnings.log", os.O_RDWR|os.O_APPEND, 0660)
  defer warnFile.Close()
  if err != nil {
    log.Fatal(err)
  }
  errorFile, err := os.OpenFile("error.log", os.O_RDWR|os.O_APPEND, 0660)
  defer errorFile.Close()
  if err != nil {
    log.Fatal(err)
  }

  Warn = log.New(warnFile, "WARNING: ", Log.LstdFlags
)

  Warn.Println("Messages written to a file called 'warnings.log' are likely to be ignored :(")

  Error = log.New(errorFile, "ERROR: ", log.Ldate|log.Ltime)
  Error.SetOutput(errorFile)
  Error.Println("Error messages, on the other hand, tend to catch attention!")
}
We can take this approach to store all sorts of information. For example, if we wanted to store registration errors, we can create a specific registration error logger and allow a similar approach if we encounter an error in that process as shown:
  res, err := database.Exec("INSERT INTO users SET user_name=?, user_guid=?, user_email=?, user_password=?", name, guid, email, passwordEnc)

  if err != nil {
    fmt.Fprintln(w, err.Error)
    RegError.Println("Could not complete registration:", err.Error)
  } else {
    http.Redirect(w, r, "/page/"+pageGUID, 301)
}When instantiating a new Logger, you can pass a few useful parameters and/or helper strings to help define and clarify the output. Each log entry can be prepended with a string, which can be helpful while reviewing multiple types of log entries. You can also define the type of date and time formatting that you would like on each entry.
To create a custom formatted log, just invoke the New() function with an io.Writer as shown:
package main

import (
  "log"
  "os"
)

var (
  Warn   *log.Logger
  Error  *log.Logger
  Notice *log.Logger
)

func main() {
  warnFile, err := os.OpenFile("warnings.log", os.O_RDWR|os.O_APPEND, 0660)
  defer warnFile.Close()
  if err != nil {
    log.Fatal(err)
  }
  Warn = log.New(warnFile, "WARNING: ", log.Ldate|log.Ltime)

  Warn.Println("Messages written to a file called 'warnings.log' are likely to be ignored :(")
  log.Println("Done!")
}
This not only allows us to utilize stdout with our log.Println function but also store more significant messages in a log file called warnings.log. Using the os.O_RDWR|os.O_APPEND constants allow us to write to the file and use an append file mode, which is useful for logging.
In addition to simply storing messages from your applications, you can create application panics and fatal errors that will prevent the application from continuing. This is critical for any use case where errors that do not halt execution lead to potential security issues, data loss, or any other unintended consequence. These types of mechanisms are generally relegated to the most critical of errors.
When to use a panic() method is not always clear, but in practice this should be relegated to errors that are unrecoverable. An unrecoverable error typically means the one where state becomes ambiguous or cannot otherwise be guaranteed.
For example, operations on acquired database records that fail to return expected results from the database may be considered unrecoverable because future operations might occur on outdated or missing data.
In the following example, we can implement a panic where we can't create a new user; this is important so that we don't attempt to redirect or move forward with any further creation steps:
  if err != nil {
    fmt.Fprintln(w, err.Error)
    RegError.Println("Could not complete registration:", err.Error)
    panic("Error with registration,")
  } else {
    http.Redirect(w, r, "/page/"+pageGUID, 301)
  }
Note that if you want to force this error, you can just make an intentional MySQL error in your query:
res, err := database.Exec("INSERT INTENTIONAL_ERROR INTO users SET user_name=?, user_guid=?, user_email=?, user_password=?", name, guid, email, passwordEnc)When this error is triggered you will find this in your respective log file or stdout:

In the preceding example, we utilize the panic as a hard stop, one that will prevent further execution that could lead to further errors and/or data inconsistency. If it need not be a hard stop, utilizing the recover() function allows you to re-enter application flow once the problem has been addressed or mitigated.
Go comes packaged with a great deal of wonderful tools for making sure your code is clean, well-formatted, free of race conditions, and so on. From go vet to go fmt, many of the helper applications that you need to install separately in other languages come as a package with Go.
Testing is a critical step for software-development. Unit testing and test-driven development helps find bugs that aren't immediately apparent, especially to the developer. Often we're too close and too familiar with the application to make the types of usability mistakes that can invoke the otherwise undiscovered errors.
Go's testing package allows unit testing of actual functionality as well as making certain that all of the dependencies (network, file system locations) are available; testing in disparate environments allows you to discover these errors before users do.
If you're already utilizing unit tests, Go's implementation will be both familiar and pleasant to get started in:
package example

func Square(x int) int {
  y := x * x
  return y
}
This is saved as example.go. Next, create another Go file that tests this square root functionality, with the following code:
package example

import (
  "testing"
)

func TestSquare(t *testing.T) {
  if v := Square(4); v != 16 {
    t.Error("expected", 16, "got", v)
  }
}
You can run this by entering the directory and simply typing go test -v. As expected, this passes given our test input:

This example is obviously trivial, but to demonstrate what you will see if your tests fail, let's change our Square() function as shown:
func Square(x int) int {
  y := x
  return y
}
And again after running the test, we get:
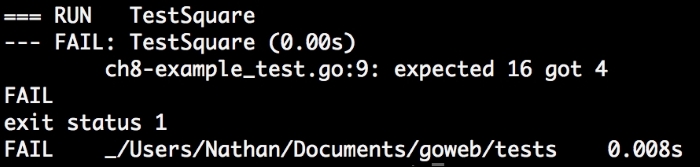
Running command-line tests against command-line applications is different than interacting with the Web. Our application being the one that includes standard HTML endpoints as well as API endpoints; testing it requires more nuance than the approach we used earlier.
Luckily, Go also includes a package for specifically testing the results of an HTTP application, net/http/httptest.
Unlike the preceding example, httptest lets us evaluate a number of pieces of metadata returned from our individual functions, which act as handlers in the HTTP version of unit tests.
So let's look at a simple way of evaluating what our HTTP server might be producing, by generating a quick endpoint that simply returns the day of the year.
To begin, we'll add another endpoint to our API. Lets separate this handler example into its own application to isolate its impact:
package main

import (
  "fmt"
  "net/http"
  "time"
)

func testHandler(w http.ResponseWriter, r *http.Request) {
  t := time.Now()
  fmt.Fprintln(w, t.YearDay())
}

func main() {
  http.HandleFunc("/test", testHandler)
  http.ListenAndServe(":8080", nil)
}
This will simply return the day (1-366) of the year through the HTTP endpoint /test. So how do we test this?
First, we need a new file specifically for testing. When it comes to how much test coverage you'll need to hit, which is often helpful to the developer or organization—ideally we'd want to hit every endpoint and method to get a fairly comprehensive coverage. For this example, we'll make sure that one of our API endpoints returns a proper status code and that a GET request returns what we expect to see in the development:
package main

import (
  "io/ioutil"
  "net/http"
  "net/http/httptest"
  "testing"
)

func TestHandler(t *testing.T) {
  res := httptest.NewRecorder()
  path := "http://localhost:4000/test"
  o, err := http.NewRequest("GET", path, nil)
  http.DefaultServeMux.ServeHTTP(res, req)
  response, err := ioutil.ReadAll(res.Body)
  if string(response) != "115" || err != nil {
    t.Errorf("Expected [], got %s", string(response))
  }
}
Now, we can implement this in our actual application by making certain that our endpoints pass (200) or fail (404) and return the text we expect them to return. We could also automate adding new content and validating it, and you should be equipped to take that on after these examples.
Given the fact that we have a hello-world endpoint, let's write a quick test that validates our response from the endpoint and have a look at how we can get a proper response in a test.go file:
package main

import (
  "net/http"
  "net/http/httptest"
  "testing"
)

func TestHelloWorld(t *testing.T) {


  req, err := http.NewRequest("GET", "/page/hello-world", nil)
  if err != nil {
    t.Fatal("Creating 'GET /page/hello-world' request failed!")
  }
  rec := httptest.NewRecorder()
  Router().ServeHTTP(rec, req)
}
Here we can test that we're getting the status code we expect, which is not necessarily a trivial test despite its simplicity. In practice, we'd probably also create one that should fail and another test that checks to make sure that we get the HTTP response we expect. But this sets the stage for more complex test suites, such as sanity tests or deployment tests. For example, we might generate development-only pages that generate HTML content from templates and check the output to ensure our page access and our template parsing work as we expect.
Note
Read more about the testing with http and the httptest package at https://golang.org/pkg/net/http/httptest/
Simply building an application is not even half the battle and user-testing as a developer introduces a huge gap in testing strategy. Test coverage is a critical weapon when it comes to finding bugs, before they ever manifest to an end user.
Luckily, Go provides all the tools necessary to implement automated unit tests and the logging architecture necessary to support it.
In this chapter, we looked at both loggers and testing options. By producing multiple loggers for different messages, we were able separate warnings from errors brought about by internal application failures.
We then examined unit testing using the test and the httptest packages to automatically check our application and keep it current by testing for potential breaking changes.
In Chapter 9, Security, we'll look at implementing security more thoroughly; from better TLS/SSL, to preventing injection and man-in-the-middle and cross-site request forgery attacks in our application.
In the previous chapter we looked at how to store information generated by our application as it works as well as adding unit tests to our suite to ensure that the application behaves as we expect it to and diagnose errors when it does not.
In that chapter, we did not add a lot of functionality to our blog app; so let's get back to that now. We'll also extend some of the logging and testing functionality from this chapter into our new features.
Till now, we have been working on the skeleton of a web application that implements some basic inputs and outputs of blog data and user-submitted comments. Just like any public networked server, ours is subject to a variety of attack vectors.
None of these are unique to Go, but we have an arsenal of tools at our disposal to implement the best practices and extend our server and application to mitigate common issues.
When building a publicly accessible networked application, one quick and easy reference guide for common attack vectors is the Open Web Application Security Project (OWASP), which provides a periodically updated list of the most critical areas where security issues manifest. OWASP can be found at https://www.owasp.org/. Its Top Ten Project compiles the 10 most common and/or critical network security issues. While it's not a comprehensive list and has a habit of becoming dated between updates, but it still remains a good first start when compiling potential vectors.
A few of the most pervasive vectors of the years have unfortunately stuck around; despite the fact that security experts have been shouting from the rooftops of their severity. Some have seen a rapid decrease in exposure across the Web (like injection), but they still tend to stick around longer, for years and years, even as legacy applications phase out.
Here is a glimpse of four of the most recent top 10 vulnerabilities, from late 2013, some of which we'll look at in this chapter:
- Injections: Any case where untrusted data has an opportunity to be processed without escaping, thus allowing data manipulation or access to data or systems, normally its not exposed publicly. Most commonly this is an SQL injection.
- Broken authentication: This is caused due to poor encryption algorithms, weak password requirements, session hijacking is feasible.
- XSS: Cross-site scripting allows an attacker to access sensitive information by injecting and executing scripts on another site.
- Cross-site request forgery: Unlike XSS, this allows the attack vector to originate from another site, but it fools a user into completing some action on another site.
While the other attack vectors range from being relevant to irrelevant for our use case, it is worth evaluating the ones that we aren't covering, to see what other places might be rife for exploitation.
To get going, we'll look at the best ways to implement and force HTTPS in your applications using Go.
In Chapter 5, Frontend Integration with RESTful APIs, we looked at creating self-signed certificates and utilizing HTTPS/TLS in our app. But let's review quickly why this matters so much in terms of overall security for not just our application but the Web in general.
First, simple HTTP generally produces no encryption for traffic, particularly for vital request header values, such as cookies and query parameters. We say generally here because RFC 2817 does specify a system use TLS over the HTTP protocol, but it's all but unused. Most importantly, it would not give users the type of palpable feedback necessary to register that a site is secure.
Second and similarly, HTTP traffic is subsequently vulnerable to man-in-the-middle attacks.
One other side effect: Google (and perhaps other search engines) begun to favor HTTPS traffic over less secure counterparts.
Until relatively recently, HTTPS was relegated primarily to e-commerce applications, but the rise in available and prevalent attacks utilizing the deficiencies of HTTP—like sidejacking and man-in-the-middle attacks—began to push much of the Web toward HTTPS.
You may have heard of the resulting movement and motto HTTPS Everywhere, which also bled into the browser plugins that force site usage to implement the most secure available protocol for any given site.
One of the easiest things we can do to extend the work in Chapter 6, Session and Cookies is to require that all traffic goes through HTTPS by rerouting the HTTP traffic. There are other ways of doing this, as we'll see at the end of the chapter, but it can be accomplished fairly simply.
First, we'll implement a goroutine to concurrently serve our HTTPS and HTTP traffic using the tls.ListenAndServe and http.ListenAndServe respectively:
  var wg sync.WaitGroup
  wg.Add(1)
  go func() {
    http.ListenAndServe(PORT, http.HandlerFunc(redirectNonSecure))
    wg.Done()
  }()
  wg.Add(1)
  go func() {
    http.ListenAndServeTLS(SECUREPORT, "cert.pem", "key.pem", routes)
    wg.Done()
  }()

  wg.Wait()
This assumes that we set a SECUREPORT constant to, likely, ":443" just as we set PORT to ":8080", or whatever you chose. There's nothing preventing you from using another port for HTTPS; the benefit here is that the browser directs https:// requests to port 443 by default, just as it directs HTTP requests to ports 80 and sometimes fallback to port 8080. Remember that you'll need to run as sudo or administrator in many cases to launch with ports below 1000.
You'll note in the preceding example that we're utilizing a separate handler for HTTP traffic called redirectNonSecure. This fulfills a very basic purpose, as you'll see here:
func redirectNonSecure(w http.ResponseWriter, r *http.Request) {
  log.Println("Non-secure request initiated, redirecting.")
  redirectURL := "https://" + serverName + r.RequestURI
  http.Redirect(w, r, redirectURL, http.StatusMovedPermanently)
}
Here, serverName is set explicitly.
There are some potential issues with gleaning the domain or server name from the request, so it's best to set this explicitly if you can.
Another very useful piece to add here is HTTP Strict Transport Security (HSTS), an approach that, when combined with compliant consumers, aspires to mitigate protocol downgrade attacks (such as forcing/redirecting to HTTP).
This is nothing more than an HTTPS header that, when consumed, will automatically handle and force the https:// requests for requests that would otherwise utilize less secure protocols.
OWASP recommends the following setting for this header:
Strict-Transport-Security: max-age=31536000; includeSubDomains; preload
Note that this header is ignored over HTTP.
While injection remains one of the biggest attack vectors across the Web today, most languages have simple and elegant ways of preventing or largely mitigating the odds of leaving vulnerable SQL injections in place with prepared statements and sanitized inputs.
But even with languages that provide these services, there is still an opportunity to leave areas open for exploits.
One of the core tenets of any software development whether on the Web or a server or a standalone executable is to never trust input data acquired from an external (and sometimes internal) source.
This tenet stands true for any language, though some make interfacing with a database safer and/or easier either through prepared queries or abstractions, such as Object-relational mapping (ORM).
Natively, Go doesn't have any ORM and since there technically isn't even an O (Object) (Go not being purely object-oriented), it's hard to replicate a lot of what object-oriented languages have in this area.
There are, however, a number of third-party libraries that attempt to coerce ORM through interfaces and structs, but a lot of this could be very easily written by hand since you probably know your schemas and data structures better than any library, even in the abstract sense.
For SQL, however, Go has a robust and consistent interface for almost any database that supports SQL.
To show how an SQL injection exploit can simply surface in a Go application, we'll compare a raw SQL query to a prepared statement.
When we select pages from our database, we use the following query:
err := database.QueryRow("SELECT page_title,page_content,page_date FROM pages WHERE page_guid="+requestGUID, pageGUID).Scan(&thisPage.Title, &thisPage.Content, &thisPage.Date)This shows us how to open up your application to injection vulnerabilities by accepting unsanitized user input. In this case, anyone requesting a page like
/page/foo;delete from pages could, in theory, empty your pages table in a hurry.
We have some preliminary sanitization at the router level that does help in this regard. As our mux routes only include alphanumeric characters, we can avoid some of the characters that would otherwise need to be escaped being routed to our ServePage or APIPage handlers:
  routes.HandleFunc("/page/{guid:[0-9a-zA\\-]+}", ServePage)
  routes.HandleFunc("/api/page/{id:[\\w\\d\\-]+}", APIPage).
    Methods("GET").
    Schemes("https")
This is not a foolproof way of addressing this, though. The preceding query took raw input and appended it to the SQL query, but we can handle this much better with parameterized, prepared queries in Go. The following is what we ended up using:
  err := database.QueryRow("SELECT page_title,page_content,page_date FROM pages WHERE page_guid=?", pageGUID).Scan(&thisPage.Title, &thisPage.Content, &thisPage.Date)
  if err != nil {
    http.Error(w, http.StatusText(404), http.StatusNotFound)
    log.Println("Couldn't get page!")
    return
  }
This approach is available in any of Go's query interfaces, which take a query using ? in place of values as a variadic:
res, err := db.Exec("INSERT INTO table SET field=?, field2=?", value1, value2)
rows, err := db.Query("SELECT * FROM table WHERE field2=?",value2)
statement, err := db.Prepare("SELECT * FROM table WHERE field2=?",value2)
row, err := db.QueryRow("SELECT * FROM table WHERE field=?",value1)
While all of these fulfill a slightly different purpose within the world of SQL, they all implement the prepared query in the same way.
We've touched briefly upon cross-site scripting and limiting this as a vector makes your application safer for all users, against the actions of a few bad apples. The crux of the issue is the ability for one user to add dangerous content that will be shown to users without scrubbing out the aspects that make it dangerous.
Ultimately you have a choice here—sanitize the data as it comes in or sanitize the data as you present it to other users.
In other words, if someone produces a block of comment text that includes a script tag, you must take care to stop that from ever being rendered by another user's browser. You can choose to save the raw HTML and then strip all, or only the sensitive tags on the output rendering. Or, you can encode it as it's entered.
There's no right answer; however, you may discover value in following the former approach, where you accept anything and sanitize the output.
There is risk with either, but this approach allows you to keep the original intent of the message should you choose to change your approach down the road. The downside is that of course you can accidentally allow some of this raw data to slip through unsanitized:
template.HTMLEscapeString(string)
template.JSEscapeString(inputData)
The first function will take the data and remove the formatting of the HTML to produce a plaintext version of the message input by a user.
The second function will do something similar but for JavaScript-specific values. You can test these very easily with a quick script similar to the following example:
package main

import (
  "fmt"
  "github.com/gorilla/mux"
  "html/template"
  "net/http"
)

func HTMLHandler(w http.ResponseWriter, r *http.Request) {
  input := r.URL.Query().Get("input")
  fmt.Fprintln(w, input)
}

func HTMLHandlerSafe(w http.ResponseWriter, r *http.Request) {
  input := r.URL.Query().Get("input")
  input = template.HTMLEscapeString(input)
  fmt.Fprintln(w, input)
}

func JSHandler(w http.ResponseWriter, r *http.Request) {
  input := r.URL.Query().Get("input")
  fmt.Fprintln(w, input)
}

func JSHandlerSafe(w http.ResponseWriter, r *http.Request) {
  input := r.URL.Query().Get("input")
  input = template.JSEscapeString(input)
  fmt.Fprintln(w, input)
}

func main() {
  router := mux.NewRouter()
  router.HandleFunc("/html", HTMLHandler)
  router.HandleFunc("/js", JSHandler)
  router.HandleFunc("/html_safe", HTMLHandlerSafe)
  router.HandleFunc("/js_safe", JSHandlerSafe)
  http.ListenAndServe(":8080", router)
}
If we request from the unsafe endpoint, we'll get our data back:

Compare this with /html_safe, which automatically escapes the input, where you can see the content in its sanitized form:

None of this is foolproof, but if you choose to take input data as the user submits it, you'll want to look at ways to relay that information on resulting display without opening up other users to XSS.
While we won't go very deeply into CSRF in this book, the general gist is that it is a slew of methods that malicious actors can use to fool a user into performing an undesired action on another site.
As it's at least tangentially related to XSS in approach, it's worth talking about now.
The biggest place where this manifests is in forms; think of it as a Twitter form that allows you to send tweets. If a third party forced a request on a user's behalf without their consent, think of something similar to this:
<h1>Post to our guestbook (and not twitter, we swear!)</h1>
  <form action="https://www.twitter.com/tweet" method="POST">
  <input type="text" placeholder="Your Name" />
  <textarea placeholder="Your Message"></textarea>
  <input type="hidden" name="tweet_message" value="Make sure to check out this awesome, malicious site and post on their guestbook" />
  <input type="submit" value="Post ONLY to our guestbook" />
</form>
Without any protection, anyone who posts to this guestbook would inadvertently help spread spam to this attack.
Obviously, Twitter is a mature application that has long ago handled this, but you get the general idea. You might think that restricting referrers will fix this problem, but that can also be spoofed.
The shortest solution is to generate secure tokens for form submissions, which prevents other sites from being able to construct a valid request.
Of course, our old friend Gorilla also provides a few helpful tools in this regard. Most relevant is the csrf package, which includes tools to produce tokens for requests as well as prebaked form fields that will produce 403 if violated or ignored.
The simplest way to produce a token is to include it as part of the interface that your handler will be using to produce a template, as so from our ApplicationAuthenticate() handler:
    Authorize.TemplateTag = csrf.TemplateField(r)
    t.ExecuteTemplate(w, "signup_form.tmpl", Authorize)
At this point we'll need to expose {{.csrfField}} in our template. To validate, we'll need to chain it to our ListenAndServe call:
http.ListenAndServe(PORT, csrf.Protect([]byte("32-byte-long-auth-key"))(r))One of the attack vectors we looked at earlier was session hijacking, which we discussed in the context of HTTP versus HTTPS and the way others can see the types of information that are critical to identity on a website.
Finding this data is incredibly simple on public networks for a lot of non-HTTPS applications that utilize sessions as definitive IDs. In fact, some large applications have allowed session IDs to be passed in URLs
In our application, we've used Gorilla's securecookie package, which does not rely on HTTPS because the cookie values themselves are encoded and validated using HMAC hashing.
Producing the key itself can be very simple, as demonstrated in our application and the securecookie documentation:
var hashKey = []byte("secret hash key")
var blockKey = []byte("secret-er block key")
var secureKey = securecookie.New(hashKey, blockKey)
Note
For more info on Gorilla's securecookie package see: http://www.gorillatoolkit.org/pkg/securecookie
Presently, our app's server has HTTPS first and secure cookies, which means that we likely feel a little more confident about storing and identifying data in the cookie itself. Most of our create/update/delete operations are happening at the API level, which still implements session checking to ensure our users are authenticated.
One of the more helpful packages for quickly implementing some of the security fixes (and others) mentioned in this chapter is a package from Cory Jacobsen called, helpfully, secure.
Secure offers a host of useful utilities, such as SSLRedirects (as we implemented in this chapter), allowed Hosts, HSTS options, and X-Frame-Options shorthand for preventing your site from being loaded into frames.
A good amount of this covers some of the topics that we looked at in this chapter and is largely the best practice. As a piece of middleware, secure can be an easy way to quickly cover some of those best practices in one swoop.
While this chapter is not a comprehensive review of web security issues and solutions, we hoped to address some of the biggest and most common vectors as surfaced by OWASP and others.
Within this chapter we covered or reviewed the best practices to prevent some of these issues from creeping into your applications.
In Chapter 10, Caching, Proxies, and Improved Performance, we'll look at how to make your application scale with increased traffic while remaining performant and speedy.
We have covered a great deal about the web application that you'll need to connect to data sources, render templates, utilize SSL/TLS, build APIs for single-page applications, and so on.
While the fundamentals are clear, you may find that putting an application built on these guidelines into production would lead to some quick problems, particularly under heavy load.
We've implemented some of the best security practices in the last chapter by addressing some of the most common security issues in web applications. Let's do the same here in this chapter, by applying the best practices against some of the biggest issues of performance and speed.
To do this, we'll look at some of the most common bottlenecks in the pipeline and see how we can reduce these to make our application as performant as possible in production.
Specifically, we'll be identifying those bottlenecks and then looking to reverse proxies and load balancing, implementing caching into our application, utilizing SPDY, and look at how to use managed cloud services to augment our speed initiatives by reducing the number of requests that get to our application.
By this chapter's end, we hope to produce tools that can help any Go application squeeze every bit of performance out of our environment.
In this chapter, we will cover the following topics:
- Identifying bottlenecks
- Implementing reverse proxies
- Implementing caching strategies
- Implementing HTTP/2
To simplify things a little, there are two types of bottlenecks for your application, those caused by development and programming deficiencies and those inherent to an underlying software or infrastructure limitation.
The answer to the former is simple, identify the poor design and fix it. Putting patches around bad code can hide the security vulnerabilities or delay even bigger performance issues from being discovered in a timely manner.
Sometimes these issues are born from a lack of stress testing; a code that is performant locally is not guaranteed to scale without applying artificial load. A lack of this testing sometimes leads to surprise downtime in production.
However, ignoring bad code as a source of issues, lets take a look at some of the other frequent offenders:
- Disk I/O
- Database access
- High memory/CPU usage
- Lack of concurrency support
There are of course hundreds of offenders, such as network issues, garbage collection overhead in some applications, not compressing payloads/headers, non-database deadlocks, and so on.
High memory and CPU usage is most often the result rather than the cause, but a lot of the other causes are specific to certain languages or environments.
For our application, we could have a weak point at the database layer. Since we're doing no caching, every request will hit the database multiple times. ACID-compliant databases (such as MySQL/PostgreSQL) are notorious for failing under loads, which would not be a problem on the same hardware for less strict key/value stores and NoSQL solutions. The cost of database consistency contributes heavily to this and it's one of the trade-offs of choosing a traditional relational database.
As we know by now, unlike a lot of languages, Go comes with a complete and mature web server platform with net/http.
Of late, some other languages have been shipped with small toy servers intended for local development, but they are not intended for production. In fact, many specifically warn against it. Some common ones are WEBrick for Ruby, Python's SimpleHTTPServer, and PHP's -S. Most of these suffer from concurrency issues that prevent them from being viable choices in production.
Go's net/http is different; by default, it handles these issues with aplomb out of the box. Obviously, much of this depends on the underlying hardware, but in a pinch you could use it natively with success. Many sites are using net/http to serve non-trivial amounts of traffic.
But even strong underlying web servers have some inherent limitations:
- They lack failover or distributed options
- They have limited caching options upstream
- They cannot easily load balance the incoming traffic
- They cannot easily concentrate on centralized logging
This is where a reverse proxy comes into play. A reverse proxy accepts all the incoming traffic on behalf of one or more servers and distributes it by applying the preceding (and other) options and benefits. Another example is URL rewriting, which is more applicable for underlying services that may not have built-in routing and URL rewriting.
There are two big advantages of throwing a simple reverse proxy in front of your web server, such as Go; they are caching options and the ability to serve static content without hitting the underlying application.
One of the most popular options for reverse proxying sites is Nginx (pronounced Engine-X). While Nginx is a web server itself, it gained acclaim early on for being lightweight with a focus on concurrency. It quickly became the frontend du jour for front line defense of a web application in front of an otherwise slower or heavier web server, such as Apache. The situation has changed a bit in recent years, as Apache has caught up in terms of concurrency options and utilization of alternative approaches to events and threading. The following is an example of a reverse proxy Nginx configuration:
server {
  listen 80;
  root /var/;
  index index.html index.htm;

  large_client_header_buffers 4 16k;

  # Make site accessible from http://localhost/
  server_name localhost

  location / {
    proxy_pass http://localhost:8080;
    proxy_redirect off;
    proxy_set_header Host $host;
    proxy_set_header X-Real-IP $remote_addr;
    proxy_set_header X-Forwarded-For $proxy_add_x_forwarded_for;
  }

}
With this in place, make sure that your Go app is running on port 8080 and restart Nginx. Requests to http//:port 80 will be served through Nginx as a reverse proxy to your application. You can check this through viewing headers or in the Developer tools in your browser:

Remember that we wish to support TLS/SSL whenever possible, but providing a reverse proxy here is just a matter of changing the ports. Our application should run on another port, likely a nearby port for clarity and then our reverse proxy would run on port 443.
As a reminder, any port is legal for HTTP or HTTPS. However, when a port is not specified, the browsers automatically direct to 443 for secure connections. It's as simple as modifying the nginx.conf and our app's constant:
server {
  listen 443;
  location / {
     proxy_pass http://localhost:444;
Lets see how to modify our application as shown in the following code:
const (
  DBHost  = "127.0.0.1"
  DBPort  = ":3306"
  DBUser  = "root"
  DBPass  = ""
  DBDbase = "cms"
  PORT    = ":444"
)
This allows us to pass through SSL requests with a frontend proxy.
There are a number of ways to decide when to create and when to expire the cache items, so we'll look at one of the easier and faster methods for doing so. But if you are interested in developing this further, you might consider other caching strategies; some of which can provide efficiencies for resource usage and performance.
One common tactic to maintain cache stability within allocated resources (disk space, memory) is the Least Recently Used (LRU) system for cache expiration. In this model, utilizing information about the last cache access time (creation or update) and the cache management system can remove the oldest entry in the list.
This has a number of benefits for performance. First, if we assume that the most recently created/updated cache entries are for entries that are presently the most popular, we can remove entries that are not being accessed much sooner; in order to free up the resources for the existing and new resources that might be accessed much more frequently.
This is a fair assumption, assuming the allocated resources for caching is not inconsequential. If you have a large volume for file cache or a lot of memory for memcache, the oldest entries, in terms of last access, are quite likely not being utilized with great frequency.
There is a related and more granular strategy called Least Frequently Used that maintains strict statistics on the usage of the cache entries themselves. This not only removes the need for assumptions about cache data but also adds overhead for the statistics maintenance.
For our demonstrations here, we will be using LRU.
Our first approach is probably best described as a classical one for caching, but a method not without issues. We'll utilize the disk to create file-based caches for individual endpoints, both API and Web.
So what are the issues associated with caching in the filesystem? Well, previously in the chapter, we mentioned that disk can introduce its own bottleneck. Here, we're doing a trade-off to protect the access to our database in lieu of potentially running into other issues with disk I/O.
This gets particularly complicated if our cache directory gets very big. At this point we end up introducing more file access issues.
Another downside is that we have to manage our cache; because the filesystem is not ephemeral and our available space is. We'll need to be able to expire cache files by hand. This introduces another round of maintenance and another point of failure.
All that said, it's still a useful exercise and can still be utilized if you're willing to take on some of the potential pitfalls:
package cache

const (
  Location "/var/cache/"
)

type CacheItem struct {
  TTL int
  Key string
}

func newCache(endpoint string, params ...[]string) {

}

func (c CacheItem) Get() (bool, string) {
  return true, ""
}

func (c CacheItem) Set() bool {

}

func (c CacheItem) Clear() bool {

}
This sets the stage to do a few things, such as create unique keys based on an endpoint and query parameters, check for the existence of a cache file, and if it does not exist, get the requested data as per normal.
In our application, we can implement this simply. Let's put a file caching layer in front of our /page endpoint as shown:
func ServePage(w http.ResponseWriter, r *http.Request) {
  vars := mux.Vars(r)
  pageGUID := vars["guid"]
  thisPage := Page{}
  cached := cache.newCache("page",pageGUID)
The preceding code creates a new CacheItem. We utilize the variadic params to generate a reference filename:
func newCache(endpoint string, params ...[]string) CacheItem {
cacheName := endponit + "_" + strings.Join(params, "_")
c := CacheItem{}
return c
}
When we have a CacheItem object, we can check using the Get() method, which will return true if the cache is still valid, otherwise the method will return false. We utilize filesystem information to determine if a cache item is within its valid time-to-live:
  valid, cachedData := cached.Get()
  if valid {
    thisPage.Content = cachedData
    fmt.Fprintln(w, thisPage)
    return
  }
If we find an existing item via the Get() method, we'll check to make sure that it has been updated within the set TTL:
func (c CacheItem) Get() (bool, string) {

  stats, err := os.Stat(c.Key)
  if err != nil {
    return false, ""
  }

  age := time.Nanoseconds() - stats.ModTime()
  if age <= c.TTL {
    cache, _ := ioutil.ReadFile(c.Key)
    return true, cache
  } else {
    return false, ""
  }
}
If the code is valid and within the TTL, we'll return true and the file's body will be updated. Otherwise, we will allow a passthrough to the page retrieval and generation. At the tail of this we can set the cache data:
  t, _ := template.ParseFiles("templates/blog.html")
  cached.Set(t, thisPage)
  t.Execute(w, thisPage)
We then save this as:
func (c CacheItem) Set(data []byte) bool {
  err := ioutil.WriteFile(c.Key, data, 0644)
}
This function effectively writes the value of our cache file.
We now have a working system that will take individual endpoints and innumerable query parameters and create a file-based cache library, ultimately preventing unnecessary queries to our database, if data has not been changed.
In practice we'd want to limit this to mostly read-based pages and avoid putting blind caching on any write or update endpoints, particularly on our API.
Just as file system caching became a lot more palatable because storage prices plummeted, we've seen a similar move in RAM, trailing just behind hard storage. The big advantage here is speed, caching in memory can be insanely fast for obvious reasons.
Memcache, and its distributed sibling Memcached, evolved out of a need to create a light and super-fast caching for LiveJournal and a proto-social network from Brad Fitzpatrick. If that name feels familiar, it's because Brad now works at Google and is a serious contributor to the Go language itself.
As a drop-in replacement for our file caching system, Memcached will work similarly. The only major change is our key lookups, which will be going against working memory instead of doing file checks.
Note
To use memcache with Go language, go to godoc.org/github.com/bradfitz/gomemcache/memcache from Brad Fitz, and install it using go get command.
Using Least Recently Used
One common tactic to maintain cache stability within allocated resources (disk space, memory) is the Least Recently Used (LRU) system for cache expiration. In this model, utilizing information about the last cache access time (creation or update) and the cache management system can remove the oldest entry in the list.
This has a number of benefits for performance. First, if we assume that the most recently created/updated cache entries are for entries that are presently the most popular, we can remove entries that are not being accessed much sooner; in order to free up the resources for the existing and new resources that might be accessed much more frequently.
This is a fair assumption, assuming the allocated resources for caching is not inconsequential. If you have a large volume for file cache or a lot of memory for memcache, the oldest entries, in terms of last access, are quite likely not being utilized with great frequency.
There is a related and more granular strategy called Least Frequently Used that maintains strict statistics on the usage of the cache entries themselves. This not only removes the need for assumptions about cache data but also adds overhead for the statistics maintenance.
For our demonstrations here, we will be using LRU.
Our first approach is probably best described as a classical one for caching, but a method not without issues. We'll utilize the disk to create file-based caches for individual endpoints, both API and Web.
So what are the issues associated with caching in the filesystem? Well, previously in the chapter, we mentioned that disk can introduce its own bottleneck. Here, we're doing a trade-off to protect the access to our database in lieu of potentially running into other issues with disk I/O.
This gets particularly complicated if our cache directory gets very big. At this point we end up introducing more file access issues.
Another downside is that we have to manage our cache; because the filesystem is not ephemeral and our available space is. We'll need to be able to expire cache files by hand. This introduces another round of maintenance and another point of failure.
All that said, it's still a useful exercise and can still be utilized if you're willing to take on some of the potential pitfalls:
package cache

const (
  Location "/var/cache/"
)

type CacheItem struct {
  TTL int
  Key string
}

func newCache(endpoint string, params ...[]string) {

}

func (c CacheItem) Get() (bool, string) {
  return true, ""
}

func (c CacheItem) Set() bool {

}

func (c CacheItem) Clear() bool {

}
This sets the stage to do a few things, such as create unique keys based on an endpoint and query parameters, check for the existence of a cache file, and if it does not exist, get the requested data as per normal.
In our application, we can implement this simply. Let's put a file caching layer in front of our /page endpoint as shown:
func ServePage(w http.ResponseWriter, r *http.Request) {
  vars := mux.Vars(r)
  pageGUID := vars["guid"]
  thisPage := Page{}
  cached := cache.newCache("page",pageGUID)
The preceding code creates a new CacheItem. We utilize the variadic params to generate a reference filename:
func newCache(endpoint string, params ...[]string) CacheItem {
cacheName := endponit + "_" + strings.Join(params, "_")
c := CacheItem{}
return c
}
When we have a CacheItem object, we can check using the Get() method, which will return true if the cache is still valid, otherwise the method will return false. We utilize filesystem information to determine if a cache item is within its valid time-to-live:
  valid, cachedData := cached.Get()
  if valid {
    thisPage.Content = cachedData
    fmt.Fprintln(w, thisPage)
    return
  }
If we find an existing item via the Get() method, we'll check to make sure that it has been updated within the set TTL:
func (c CacheItem) Get() (bool, string) {

  stats, err := os.Stat(c.Key)
  if err != nil {
    return false, ""
  }

  age := time.Nanoseconds() - stats.ModTime()
  if age <= c.TTL {
    cache, _ := ioutil.ReadFile(c.Key)
    return true, cache
  } else {
    return false, ""
  }
}
If the code is valid and within the TTL, we'll return true and the file's body will be updated. Otherwise, we will allow a passthrough to the page retrieval and generation. At the tail of this we can set the cache data:
  t, _ := template.ParseFiles("templates/blog.html")
  cached.Set(t, thisPage)
  t.Execute(w, thisPage)
We then save this as:
func (c CacheItem) Set(data []byte) bool {
  err := ioutil.WriteFile(c.Key, data, 0644)
}
This function effectively writes the value of our cache file.
We now have a working system that will take individual endpoints and innumerable query parameters and create a file-based cache library, ultimately preventing unnecessary queries to our database, if data has not been changed.
In practice we'd want to limit this to mostly read-based pages and avoid putting blind caching on any write or update endpoints, particularly on our API.
Just as file system caching became a lot more palatable because storage prices plummeted, we've seen a similar move in RAM, trailing just behind hard storage. The big advantage here is speed, caching in memory can be insanely fast for obvious reasons.
Memcache, and its distributed sibling Memcached, evolved out of a need to create a light and super-fast caching for LiveJournal and a proto-social network from Brad Fitzpatrick. If that name feels familiar, it's because Brad now works at Google and is a serious contributor to the Go language itself.
As a drop-in replacement for our file caching system, Memcached will work similarly. The only major change is our key lookups, which will be going against working memory instead of doing file checks.
Note
To use memcache with Go language, go to godoc.org/github.com/bradfitz/gomemcache/memcache from Brad Fitz, and install it using go get command.
Caching by file
Our first approach is probably best described as a classical one for caching, but a method not without issues. We'll utilize the disk to create file-based caches for individual endpoints, both API and Web.
So what are the issues associated with caching in the filesystem? Well, previously in the chapter, we mentioned that disk can introduce its own bottleneck. Here, we're doing a trade-off to protect the access to our database in lieu of potentially running into other issues with disk I/O.
This gets particularly complicated if our cache directory gets very big. At this point we end up introducing more file access issues.
Another downside is that we have to manage our cache; because the filesystem is not ephemeral and our available space is. We'll need to be able to expire cache files by hand. This introduces another round of maintenance and another point of failure.
All that said, it's still a useful exercise and can still be utilized if you're willing to take on some of the potential pitfalls:
package cache

const (
  Location "/var/cache/"
)

type CacheItem struct {
  TTL int
  Key string
}

func newCache(endpoint string, params ...[]string) {

}

func (c CacheItem) Get() (bool, string) {
  return true, ""
}

func (c CacheItem) Set() bool {

}

func (c CacheItem) Clear() bool {

}
This sets the stage to do a few things, such as create unique keys based on an endpoint and query parameters, check for the existence of a cache file, and if it does not exist, get the requested data as per normal.
In our application, we can implement this simply. Let's put a file caching layer in front of our /page endpoint as shown:
func ServePage(w http.ResponseWriter, r *http.Request) {
  vars := mux.Vars(r)
  pageGUID := vars["guid"]
  thisPage := Page{}
  cached := cache.newCache("page",pageGUID)
The preceding code creates a new CacheItem. We utilize the variadic params to generate a reference filename:
func newCache(endpoint string, params ...[]string) CacheItem {
cacheName := endponit + "_" + strings.Join(params, "_")
c := CacheItem{}
return c
}
When we have a CacheItem object, we can check using the Get() method, which will return true if the cache is still valid, otherwise the method will return false. We utilize filesystem information to determine if a cache item is within its valid time-to-live:
  valid, cachedData := cached.Get()
  if valid {
    thisPage.Content = cachedData
    fmt.Fprintln(w, thisPage)
    return
  }
If we find an existing item via the Get() method, we'll check to make sure that it has been updated within the set TTL:
func (c CacheItem) Get() (bool, string) {

  stats, err := os.Stat(c.Key)
  if err != nil {
    return false, ""
  }

  age := time.Nanoseconds() - stats.ModTime()
  if age <= c.TTL {
    cache, _ := ioutil.ReadFile(c.Key)
    return true, cache
  } else {
    return false, ""
  }
}
If the code is valid and within the TTL, we'll return true and the file's body will be updated. Otherwise, we will allow a passthrough to the page retrieval and generation. At the tail of this we can set the cache data:
  t, _ := template.ParseFiles("templates/blog.html")
  cached.Set(t, thisPage)
  t.Execute(w, thisPage)
We then save this as:
func (c CacheItem) Set(data []byte) bool {
  err := ioutil.WriteFile(c.Key, data, 0644)
}
This function effectively writes the value of our cache file.
We now have a working system that will take individual endpoints and innumerable query parameters and create a file-based cache library, ultimately preventing unnecessary queries to our database, if data has not been changed.
In practice we'd want to limit this to mostly read-based pages and avoid putting blind caching on any write or update endpoints, particularly on our API.
Just as file system caching became a lot more palatable because storage prices plummeted, we've seen a similar move in RAM, trailing just behind hard storage. The big advantage here is speed, caching in memory can be insanely fast for obvious reasons.
Memcache, and its distributed sibling Memcached, evolved out of a need to create a light and super-fast caching for LiveJournal and a proto-social network from Brad Fitzpatrick. If that name feels familiar, it's because Brad now works at Google and is a serious contributor to the Go language itself.
As a drop-in replacement for our file caching system, Memcached will work similarly. The only major change is our key lookups, which will be going against working memory instead of doing file checks.
Note
To use memcache with Go language, go to godoc.org/github.com/bradfitz/gomemcache/memcache from Brad Fitz, and install it using go get command.
Caching in memory
Just as file system caching became a lot more palatable because storage prices plummeted, we've seen a similar move in RAM, trailing just behind hard storage. The big advantage here is speed, caching in memory can be insanely fast for obvious reasons.
Memcache, and its distributed sibling Memcached, evolved out of a need to create a light and super-fast caching for LiveJournal and a proto-social network from Brad Fitzpatrick. If that name feels familiar, it's because Brad now works at Google and is a serious contributor to the Go language itself.
As a drop-in replacement for our file caching system, Memcached will work similarly. The only major change is our key lookups, which will be going against working memory instead of doing file checks.
Note
To use memcache with Go language, go to godoc.org/github.com/bradfitz/gomemcache/memcache from Brad Fitz, and install it using go get command.
One of the more interesting, perhaps noble, initiatives that Google has invested in within the last five years has been a focus on making the Web faster. Through tools, such as PageSpeed, Google has sought to push the Web as a whole to be faster, leaner, and more user-friendly.
No doubt this initiative is not entirely altruistic. Google has built their business on extensive web search and crawlers are always at the mercy of the speed of the pages they crawl. The faster the web pages, the faster and more comprehensive is the crawling; therefore, less time and less infrastructure resulting in less money required. The bottom line here is that a faster web benefits Google, as much as it does people creating and viewing web sites.
But this is mutually beneficial. If web sites are faster to comply with Google's preferences, everyone benefits with a faster Web.
This brings us to HTTP/2, a version of HTTP that replaces 1.1, introduced in 1999 and largely the defacto method for most of the Web. HTTP/2 also envelops and implements a lot of SPDY, a makeshift protocol that Google developed and supported through Chrome.
HTTP/2 and SPDY introduce a host of optimizations including header compression and non-blocking and multiplexed request handling.
If you're using version 1.6, net/http supports HTTP/2 out of the box. If you're using version 1.5 or earlier, you can use the experimental package.
In this chapter, we focused on quick wins for increasing the overall performance for our application, by reducing impact on our underlying application's bottlenecks, namely our database.
We've implemented caching at the file level and described how to translate that into a memory-based caching system. We looked at SPDY and HTTP/2, which has now become a part of the underlying Go net/http package by default.
This in no way represents all the optimizations that we may need to produce highly performant code, but hits on some of the most common bottlenecks that can keep applications that work well in development from behaving similarly in production under heavy load.
This is where we end the book; hope you all enjoyed the ride!