


In this chapter, we will cover how to access Canvas and navigate the home screen, which is called the dashboard. Once you have learned your way around the site, you will learn how to set up your Canvas profile, enter your contact information, adjust your general settings, and configure your notification preferences. Next, we will learn how to create a Canvas course, specifically, how to create a course yourself versus how to begin participating in a course that has been set up by your institution. Once we have created your course, we will be ready to move on to building your course in the next chapter.
A wide range of institutions across the world use Canvas as their institutional learning management system (LMS). In addition, Canvas is usable in a variety of learning situations outside of traditional institutions. To accommodate the different situations in which users may find themselves while teaching or learning, Canvas offers two types of accounts.
To get started, let's discuss the two types of Canvas accounts that you may encounter.
If the college, university, or K-12 school that you work for uses Canvas for its LMS, you will most likely receive information from the Information Technology (IT) department or an administrator regarding the best ways to access and use Canvas. When Canvas is fully integrated into a university's enrollment and course registration system, for example, you may likely be able to log in using the same username and password you use to access your school e-mail account. In addition, once you log in, you may find that the IT department has enabled or disabled certain settings to maintain consistency for the institution. Each situation is slightly different, so reach out to someone in the IT or administrative departments to find out specific information for your school.
Canvas offers a Free for Teachers account for educators who do not have access to Canvas through an institution. This account allows you to register using any e-mail address, then create and build courses that you would like to teach, regardless of whether you work for an institution that uses Canvas as its LMS. We will go over how to set up a Free for Teachers account in the next section, where we will begin with a discussion of how to access Canvas. As a note, all examples and screenshots in this book are taken from a Free for Teachers account.
To begin, open your web browser (for example, Internet Explorer, Safari, Google Chrome, or Mozilla Firefox). If you are using an institution-specific Canvas site, consult any information you have received from your school, specifically looking for the URL (web address) for your school's Canvas site. After we address how to log in for institutional Canvas accounts, we will cover how to access and log in to a Free for Teachers account.
To access your institution's Canvas site, perform the following steps:
Open your web browser and enter the URL for your institution's Canvas site.
You can also copy and paste the URL from any informational e-mails you may have received from your institution. While your institution's Canvas URL may follow a variety of formats, a common formula for the institutional Canvas URL is
http://institution.instructure.comin which you will enter the actual name of your school instead of "institution".If you have instructions from the IT or administrative team at your school, follow those instructions to set up your account. As mentioned previously, each situation is slightly different, so you may need to get support for your specific case if you have questions.
Often, you will receive an e-mail invitation to join Canvas that includes a link to follow and clear step-by-step instructions once you follow the link to Canvas. In other cases, the institutional ID that you use to access your school e-mail account or registration system may automatically be carried over to Canvas, depending on how your school has integrated Canvas with the rest of their management systems.
The following steps will walk you through how to create your own Free for Teachers account within Canvas:
To create a Free for Teachers account, open your web browser and navigate to canvas.instructure.com.
When the page loads, click on Need a Canvas account? Click here, it's free! and you will be taken to a registration page.

Select whether you are a Teacher, Student, or Parent from the Title drop-down menu.
Then, fill in your information on the registration screen, take a look at terms of use and privacy policy, check the You agree to the terms of use and acknowledge the privacy policy checkbox, and click on the blue box at the bottom-right corner of the window. This box will read Start Teaching, Start Learning, or Start Participating depending on whether you are a teacher, student, or parent. The following screenshot displays what you will see when you create an account as a Teacher:

Once you submit your registration, you will receive a confirmation e-mail as well as a welcome e-mail. The confirmation e-mail will include a link that you must follow to complete your registration and create your password.
Once you have followed the e-mail link to confirm your registration, you can log in at http://canvas.instructure.com again using your e-mail address and a new password to begin using Canvas!
When you log in for the first time, you will be taken to the Canvas dashboard. There are four main sections of the dashboard, which we'll familiarize ourselves with now, then go into more detail as we learn about what you can do within each section of Canvas:
In the top-right corner of the dashboard, you will see your name, Inbox, Settings, Logout, and Help. This menu, shown in the following screenshot, will usually be visible to you regardless of the page you are viewing in Canvas:

Along the top-left side of the screen, you will see the Canvas logo (or your institution's logo), and a list of tabs that read Home, Assignments, Grades, and Calendar. Once you get started with your course or courses, the Home link will turn into a Courses link with a drop-down menu. This top menu will also usually be visible to you on any page you are viewing in Canvas, and you can always access your Canvas dashboard by clicking on the logo in the top-left corner, as seen in the following screenshot:

In the center of the dashboard, you will see a Welcome to Canvas! message, a message with a Configure Communication Preferences button to configure the communication preferences, and a Recent Activity section at the bottom. The Recent Activity section functions like the Newsfeed on Facebook or the Twitter feed on Twitter. Eventually, this section of your dashboard will display items such as announcements that have been posted in courses, messages that have been sent to you, and assignments that have been submitted to your courses. The Recent Activity section is a quick and easy way to check what has happened in your courses while you've been away from your computer. This section, which only appears on the Canvas dashboard, is shown in the following screenshot:

The Coming Up section on the right side of your screen will eventually be filled with helpful reminders about what's coming up on the calendars for all of your courses:
You can click on View Calendar to see a calendar layout of what's going on in all of your courses including assignment due dates, online meetings, and more.
Once your courses are up and running, you will also see a To Do list displayed above the Coming Up section. The To Do list will show you any assignments that need to be graded for any of your courses along with the number of submissions that need to be graded.
You will also see a Start a New Course button that will allow you to start a new course under the Coming Up section. We will get to this button soon, but as you can guess, this is the button you will click on to create a brand new course. This section, as displayed in the following screenshot, also only appears on the dashboard:

Another helpful section to notice is the menu at the very bottom of the screen. This menu includes links to Help, Privacy policy, Terms of service, Facebook, and Twitter. These links are useful guides to general information about Instructure as a company and your usage of Canvas. The Help link that appears in this menu will take you to the same page as the Help link in the top-right menu. The bottom menu, shown in the following screenshot, will usually be visible to you on any page you are viewing within Canvas:

Now that you're familiar with the basic layout of the Canvas dashboard, let's work through how to set up your personal settings and communication preferences.
In this section, we will address how to set up your Canvas profile, adjust your general account settings, and personalize your notification settings. If you are using an institutional account, the ability to adjust your profile, settings, and notifications may be limited or different than described in this section. While your individual situation may vary, let's start by covering how to set up your Canvas profile, which other users will see as they interact with you on Canvas.
Your Canvas profile includes your profile picture, biography, and website links. To begin, perform the following steps:
Click on your name in the top-right menu of the dashboard.
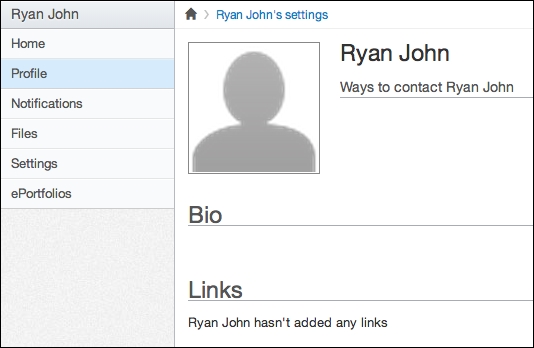
This will bring you to your profile page. Your profile page is a part of your account settings, which are laid out similarly to the way Canvas courses are laid out.
Your other account settings appear on the left-side menu as shown in the following screenshot, but for now, let's update your profile picture:
Including a photo of yourself makes your presence on Canvas immediately more relatable and inviting. When participants can see a photo of someone who is writing to them or is posting on discussion boards, the Canvas community becomes more vibrant, personalized, and engaging. To add or change your profile picture, perform the following steps:
Click on the gray outline of a person next to your name on your profile page. Notice that when you hover your mouse over this gray image, an icon appears in the bottom-right part of the image that looks like a pencil. This pencil icon is the symbol for editing something within Canvas, so in most situations, you can click on the pencil icon wherever you see it in order to edit what you're looking at. In the following screenshot, you see an example of the gray outline as well as the editing pencil icon seen throughout Canvas:

After you click on the pencil icon, a pop-up window will appear with three options along the top side: Upload a Picture, Take a Picture, and From Gravatar.
To upload a photo from your computer, click on Upload a Picture and then click on choose a picture below it.
From there, another pop-up window will appear, which will allow you to select the image you would like to use as your profile picture from your computer. Once you have found the picture on your computer, click on the file and then click on Open.
Next, you can crop the picture into a square using the cropping tools that appear. After you have cropped your photo, click on Save and your picture will be updated. The following screenshot displays the cropping tools as well as the Save button:

If you click on Take a Picture at the top of the pop-up window, your webcam will open and you will be able to take a new photo to use as your profile picture.
If you have a Gravatar account (a separate account from Canvas), you can click on From Gravatar to select your profile picture from your Gravatar account.
After you click on the Save button, the profile picture window will close and you will see that the image you selected has replaced the default gray outline profile picture as displayed in the following screenshot:

To edit what other Canvas users can see about you, you can adjust your name, title, and bio, as well as add links to your personal or professional websites. As with your profile picture, any information you add to your Canvas profile will help participants gain a better understanding of who you are as a person. Within a fully online learning environment, establishing personal connections with participants can be very important in building a productive and comfortable learning community. To add information to your profile, perform the following steps:
Begin on your profile page and click on Edit Profile on the right side of the screen.
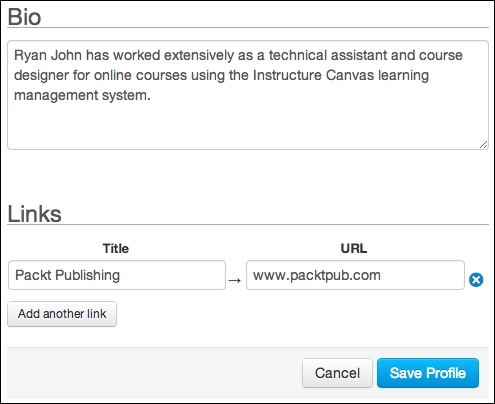
This will open editing boxes for your Name, Title, Bio, and Links fields. You can click on each editing box to adjust or add content.
When you are finished editing, click on Save Profile at the bottom of the screen before moving on, as shown in the following screenshot:
Once you have saved your updates, they will be visible to other Canvas users when they view your profile. You may notice a message under the Ways to Contact Me section that mentions you have not registered any services. Next, we will learn how to adjust your account settings and add alternative forms of contact including e-mail addresses, cell phone numbers, or registered services such as Facebook, Twitter, Skype, or LinkedIn.
To adjust your account settings such as your display name, contact information, language, time zone, and integrated web services, click on the Settings link in the top-right menu:

You can also access your settings by clicking on the Settings link on the left-side menu of your profile page. Let's begin by adjusting your contact information so anything you receive from Canvas goes to an address, device, or program that you check frequently.
On your Settings page, the Ways to Contact section on the right-side menu includes the e-mail address with which you have registered and the option to add more e-mail addresses as well as more methods of contact. To add an e-mail address, perform the following steps:
Click on the Add Email Address link.
A pop-up window will appear that will let you add as many alternate e-mail addresses as you would like, with the option of signing in to Canvas with any of them.
If you would like to sign in to Canvas using a new e-mail, type in the new e-mail address, check the box next to I want to log in to Canvas using this email address, and then click on Register Email in the bottom-right corner of the pop-up window, as shown in the following screenshot:

Once you click on Register Email, the pop-up window will close and you can continue editing your contact information.
One of the unique features of Canvas is the ability to receive notifications from Canvas directly to your cell phone. Depending on your desired level of availability to participants and how frequently you would like to monitor activity with your courses, you may choose to add your cell phone number and receive notifications via SMS texts. For example, this feature might be a wise option if you consistently check your cell phone but rarely check your e-mail. To add your cell phone number in order to receive SMS text message notifications, perform the following steps:
Click on Add Contact Method under the Ways to Contact section on the right-side menu of the Settings page.
In the pop-up window, enter your cell phone number and select your provider. The SMS e-mail address should automatically appear once you select your provider. Note that Canvas SMS services are currently geared toward US providers.
Once you have entered your number and selected your provider, click on Register SMS in the bottom-right corner of the pop-up window, as shown in the following screenshot:

You will then see a new pop-up window (next screenshot) appear in your browser that asks for a confirmation code. You should receive an SMS text on your cell phone with the confirmation code, which you should then enter into the pop-up window on your screen and click on Confirm. If you do not receive an SMS text with a confirmation number and you entered your phone number correctly, click on the Re-Send Confirmation link in the pop-up window. If you entered your number incorrectly, close the pop-up window and begin the process again by clicking on Add Contact Method under the Ways to Contact section on the right-side menu of the Settings page:

Once you have confirmed your cell phone number, you will be able to receive notifications via text messages.
As with many other online services you may have encountered, configuring the general settings of your Canvas account is important for proper and accurate functioning of your account. Your general settings include your name, preferred language, current time zone, and password. Also found within the general settings menu are the options to receive Instructure informational e-mails and delete your account. To edit your general settings, perform the following steps:
Navigate to the main Settings page.
On the right-side menu, click on the Edit Settings button underneath the Ways to Contact menu as shown in the following screenshot:

You will see textboxes and drop-down menus appear in the center part of the screen. When adjusting the Full Name, Display Name, and Sortable Name fields for your account, each section includes a brief description of where that display name will appear. For example, if you are teaching a college course, you may want your name to be displayed with the title of
ProfessororDr.for discussion posts, messages, and comments. The following screenshot provides an example of each type of name:
Below your name settings, you can use the Language and Time Zone drop-down menus to adjust the language of your Canvas experience as well as the time zone in which you live. To adjust your time zone, click on the drop-down menu and select from the listed options.
You can check the box next to I want to receive information, news and tips from Instructure, as shown in the following screenshot, if you would like Instructure to e-mail you about certain features of Canvas. You will not receive informational product e-mails from Instructure if you do not check this box, though you will receive course notification e-mails based on your notification settings:

To change your password, check the box next to Change Password and a new menu will open below that checkbox.
Using the drop-down menu that appears, select the e-mail address you would like to change the password for, then enter your old password, your new password, and confirm your new password in the appropriate boxes as shown in the following screenshot:

When finished, click on the blue Update Settings box below your settings information.
The option to delete your account also appears within the menu to edit your general settings. To delete your account, perform the following steps:
Navigate to the the main Settings page and click on the Edit Settings button underneath the Ways to Contact menu.
Scroll down and click on the red Delete My Account link.
You will be taken to a new page that asks if you really want to delete your account. If you are positive you would like to delete your account, click on the button that says Delete [Your Name] and your account will be permanently deleted, as shown in the following screenshot:

Moving on from your general account settings, let's explore some of the innovative connections you can configure between Canvas and other common online services, referred to as Registered Services.
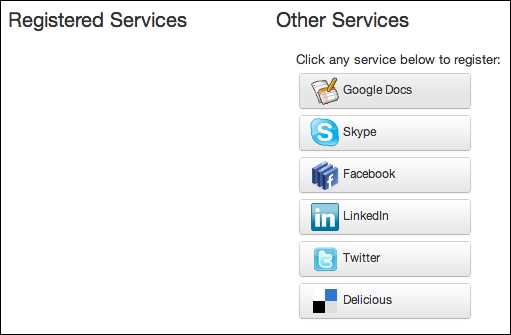
Canvas allows you to link registered services to your Canvas account in order to better integrate Canvas into your life online. Utilizing Registered Services allows you to connect Canvas to other websites, programs, and networks you already use when you are online. Again, if you are using an institutional account, your options for external services may be limited or different compared to those discussed in this section. If you already have accounts with any of the services seen in the following screenshot, you can link your Canvas profile to your external accounts to utilize the features of those external services:
To connect the preceding services to your Canvas account as registered services, perform the following steps:
Click on the service you would like to link to your Canvas account.
Each service has slightly different instructions that appear, so follow the onscreen instructions carefully to link your Canvas account to your external service account.
Once you have linked Canvas to one of the listed services, that service will appear under the Registered Services heading, as shown in the following screenshot:

One of the most common reasons to register an external service with Canvas is to receive Canvas notifications while you are logged in to that external service. To adjust these options, let's now discuss how to customize your notification preferences.
Your notification preferences are some of the most important things to know how to adjust when using Canvas. The same goes for your students, since not being notified of an announcement or a direct message could mean missing an online meeting or assignment if their notification preferences are not adjusted appropriately. The easiest way to access your notification settings is to click on Notifications on the left menu of your account Settings page. If you've just added a profile picture, updated your profile, and edited your general account settings, look to the left of your screen and click on Notifications, as shown in the following screenshot:
The Notifications page allows you to adjust the following:
When you open your Notification Preferences, you will see a spreadsheet-like grid, shown in the following screenshot, which lists the course activities you can be notified about in the left column and the method of notification along the top row:
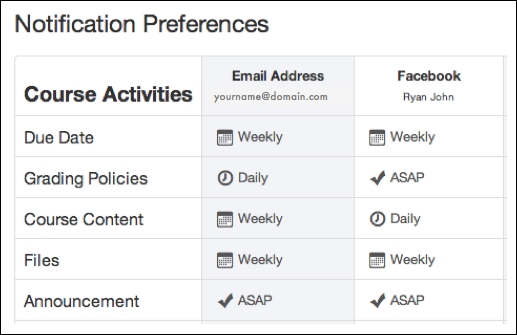
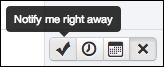
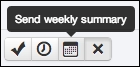
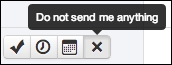
The methods of notification along the top come from the contact information and the registered services that you have configured in your general account settings. You will notice that in the center of the grid, you can hover your mouse over the cross sections of Course Activities and your chosen methods of contact. If you hover your mouse over any of these cross sections, you can select one of the four options for how frequently Canvas will notify you about the selected activity. The following screenshots show each option:
To adjust your notification preferences, perform the following steps:
Locate the course activity you would like to be notified about.
Then, find the method of contact through which you would like to be notified about that activity.
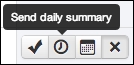
Within the Notification Preferences grid, click on one of the four notification frequency options to set the notification method and frequency. For example, the following screenshot displays the Send daily summary option to send a daily summary for any changes to Grading Policies:

Once you have selected the notification frequency, you will see an icon with the selected frequency show up on the grid.
Your notification preferences are automatically saved once you select them.
As you become more familiar with Canvas and begin participating in courses, you may decide to return to your notification settings once you have a better idea of your needs and preferences.
Now that we've covered all of the basics of setting up your profile, adjusting your settings, and customizing your notification preferences, let's get started with creating your course!
As mentioned at the beginning of this chapter, your Canvas account will fall under the umbrella of an institutional Canvas account or a Free for Teachers account. Creating a course is different for both types of accounts, and you may find that your specific institution's Canvas situation might be a hybrid of both, depending on how your school has chosen to integrate Canvas with its other systems. To begin, let's start with how to access your new blank course if it has been set up by your institution's IT or other administrative department.
If your school uses Canvas as its LMS, you will mostly likely not need to deal with the initial creation of your Canvas course. In fact, you may not have the ability to create your own Canvas course; in this case, you will need to go through your IT or administrative department to create a course within your institution's Canvas site. Often, the IT or administrative department will have all of your courses created automatically when they create the course within the institutional course registration system.
When courses are created automatically, you will often also be automatically added to those courses, at which point they will appear when you log in to Canvas without any action on your part. Alternately, if your IT team manually creates your course, you will receive an e-mail inviting you to officially join the course. After the IT or administrative teams have created your course, you will receive an e-mail that informs you that you have been invited to participate in your course as a teacher. The following screenshot is a sample of what the e-mail may contain:

From there, you should follow the link in the main body of the e-mail:
You will be directed to the Canvas login page for your institution, where you should log in using your institutional username and password or the username and password you set up with your IT or other administrative department.
Once you log in, your dashboard should include Decline or Accept buttons to decline or accept the course invitation. Once you click on Accept, the course will show up on the top-left menu under the Courses link.
From there, you can click on Courses, select the course you have just joined, and begin the course building process that we will cover in Chapter 2, Building Your Canvas Course.
If you are not using Canvas through an institution, you will need to create a course using your Free for Teachers account.
If you are using the Free for Teachers version of Canvas, you can create a new course from your dashboard. For institutional account users, you may also have this option depending on how your IT team has configured Canvas. To create a new course, perform the following steps:
Navigate to your Canvas dashboard.
On the right-side menu, click on the button that says Start a New Course.
From there, a pop-up window will appear within your browser. In that window, you can name your course, assign an abbreviation and course number, select the content license from a drop-down menu, and choose whether you would like the course to be publicly accessible. In most cases, you will probably want to keep your course private, but you may choose whichever option is most applicable to your unique course situation.
Once you have entered all the information for your course, click on Create course.
The following screenshot shows you how the pop-up window will look like and offers examples of what you might want to include when setting up your course:

Your course is now created! After you click on Create course, you will be taken to the home page of your new course. You'll notice that the course layout is similar to what we saw while editing your account settings. We will go over how to navigate your course in more detail throughout the rest of the book, but you should see that:
The top-right menu is still visible and unchanged
The top-left menu is still visible and unchanged
The left-side menu lists specific locations and options within the course
The center of the screen displays the main content of the course home page
The right-side menu displays the Coming Up section along with the option to post a new announcement
The bottom menu is still visible and unchanged
Also, note that a course checklist hovers at the bottom of the screen. This checklist will walk you through the various steps in adding content to and publishing your course.
When you create your course, it will remain unpublished until you choose to publish it. Until your course is published, only teachers, designers, and teacher's assistants (TAs) that have been added to the course will be able to access the course content. Once the course is published, students you have added to the course will be able to access the course content. You will see the message displayed in the following screenshot when your course is unpublished:

Depending on how you would like your course to run, it is up to you when you decide to officially publish your course and allow all participants to access the content. In later chapters, we will cover how to control exactly what participants can see within your course once it is published, but at this point it is probably best to wait until you have finished designing your course before officially publishing it.
Now that we have created your first course, we can begin building the course by adding and organizing content in the coming chapters.
At the beginning of this chapter, we discussed the different types of Canvas accounts you might encounter. We discussed how to set up and access an institutional Canvas account and a Free for Teachers Canvas account, and then we moved on to navigate Canvas once we logged in. After examining the various menus of the Canvas dashboard, we covered how to edit your profile, including how to add a profile picture, and update your bio and links. From there, we learned how to adjust your account settings including contact information, your display name, preferred language, and time zone. We worked through how to change your password and what to do if you need to delete your account for any reason. Next, we covered how to link registered services to your accounts such as Facebook, Twitter, Skype, and LinkedIn, and then we explored the extensive notification preferences that Canvas allows you to adjust. At the end of the chapter, you learned how to create a course, both from an institutional account and a Free for Teachers account perspective.
As we move forward into Chapter 2, Building Your Canvas Course, we will dive into adding content to your course and learn how to tailor your Canvas course to meet your needs and the needs of your students.

