In this chapter we will cover:
Installing Joomla! 2.5 in your web space
Increasing the Joomla! session lifetime
Installing VirtueMart and the core add-ons
Familiarizing yourself with VirtueMart
Removing the VirtueMart AIO component
Creating a link to our store
Removing the currency not defined error
Filling out the company information section
Fixing the safe path warning
Setting up your company identity in VirtueMart
Creating a menu for your must-have information
Displaying the core VirtueMart menus
Welcome to Setting Up Shop. As the name suggests, by the end of this chapter you will have a working Joomla!/VirtueMart installation, with some core e-commerce features such as a shopping cart, product search, and fully functioning backend control panel.
The first step is to install Joomla! itself, then VirtueMart and its core components, and then we move on to the first steps of configuration of the VirtueMart. Then we will create the must-have e-commerce pages such as About us. Next we create a custom menu to link to the must-have pages that we just created, and finish up by arranging some core e-commerce modules such as a shopping cart.
Let's not waste any time. If you have your Joomla! site already, you can skip this recipe. If you haven't got one, you will in about 10 minutes.
Let's get started by downloading and installing Joomla!
Head on over to www.joomla.org. Click on the Download button and grab a copy of Joomla! 2.5 and place the ZIP file on your desktop. Fire up FileZilla and make ready a connection to your web space where your new VirtueMart store will be "set up." If you have never done this before, follow the quick guide.
This is really easy. Perform the following steps:
Run FileZilla.
Navigate to File | Site Manager | New Site.
Enter the details shown in the following table:
Field
Value
Host
The FTP web address supplied by your host. Often this is the same as your website URL.
Logon type
Normal.
User
Your username supplied by your web hosting company.
Password
Your password supplied by the web hosting company.
The other values are usually fine as they are.
Click on Connect.
Your web space is on the right of the FileZilla window and your computer is on the left. You can move files about in FileZilla in a manner similar to your operating system. Browse to the folders you require on the left and right. Then do drag-and-drop between them as shown in the following screenshot:

Log in to your web hosting control panel. You will need a MySQL database and this will need to be created in your control panel. When you have done so, here will most likely be a database details screen where you can grab the details ready for the installation of your Joomla! site, namely Database name, Username, Password, Hostname, and Database type, usually MySQLi.
Here it is in 12 simple steps and about as many minutes to a functioning Joomla! site:
Using FileZilla, drag the file
Joomla_2.5.x-Stable-Full_Package.zipfrom your desktop to your web space pointed to by your web store URL. This should ideally take about two minutes, but if you have a slow internet connection (like mine), then you might like to grab a cup of tea, and perhaps a walk in the park.In your web hosts file manager find the file you just uploaded and unzip it.
In your web browser go to the home URL of your new site,
www.yoursite.com. You will see the following screenshot:
Choose your language such as English (United States) from the list and click on the Next button in the top-right corner. Now we have the following screenshot:

Tip
If you have any (No) indicators in the top box, then there is an incompatibility between Joomla! and your web hosts. You will need to contact your web host to fix the problem. If you have any (On/Off) indicators you can proceed but make a note of the warning and research its potential implications.
When you're ready to proceed, click on the Next button.
The next screen asks you to agree to the GNU General Public License. The license allows you to do almost anything with Joomla! for free! What's not to agree about? Click on the Next button again.
On the next screen we need to fill out our database information from our web hosts. The stuff we got ready earlier. In the following screenshot, enter your database details that we prepared in the Getting ready section. For Database Type choose Mysqli. Click on Next. Refer to the following screenshot:

The next screen is usually left blank as it is not needed. Click on Next.
Nearly there. Choose a Site name, Username, and Password. Enter your e-mail address for the Joomla! system to use, to contact you.
Tip
If you are new to Joomla! it could be useful to click on the Install sample data button. These are some dummy articles and categories that flesh out your new site. It makes it easier to click around and explore the admin control panel to learn what is going on. As we will cover very little (except VirtueMart essential) Joomla! specific stuff, it is probably a good idea to do this if you are new to this.
Click on Next.
Click on the Remove installation folder button to remove the installation folder and prevent someone from reinstalling over all your hard work.

Go and explore your new Joomla! control panel and your site by clicking on the appropriate buttons in the top right.
So what just happened there was that we ran the Joomla! install. In the process we gave the system everything it needs to create a site and the admin features needed to develop it. Now, we are almost done as the next step is to install the VirtueMart component to turn our world beating CMS into an e-commerce selling machine.
Some of the recipes we undertake will often mean that we start the work in some part of the Joomla! control panel and then leave it partly done while reading further or perhaps gathering information elsewhere. Joomla!, in an effort to be helpful and secure, will log us out after 15 minutes.
I would suggest that changing this session lifetime to 60 minutes is sufficient to virtually always avoid entering loads of data, only to have that data wiped because we hadn't saved it yet and Joomla! logged us out.
Log in to your Joomla! control panel using the username and password you chose in the first recipe:
Now from the Joomla! drop-down menu navigate to Site | Global Configuration, then find this area on the right-hand side of the screen.

Now simply change the 15 in the Session Lifetime box to
60and click on Save in the top right.
The change of the session lifetime to 60 changes an entry in the Joomla! configuration settings and prevents the system from logging us out after 15 minutes of inactivity. That period is now 60 minutes and we are much less likely to lose some configuration settings before we had a chance to click on Save.
Tip
It is still possible to lose work and when it does happen because we have increased the session lifetime it is possible that the amount of work we lose could be greater than before! So save regularly when prompted and whenever you have some settings or awkward configurations in a form that is unsaved.
After this super quick, complexity free recipe, you will have a new option in your Joomla! components menu, that is VirtueMart. Clicking on the VirtueMart component link will open up a wealth of configuration and settings comparable to many standalone shopping cart systems.
Let's get the files necessary to do the installation. Head over to www.virtuemart.net and click on the Download tab. Download the latest stable version available. Got it? Let's go.
Let's install VirtueMart:
Unzip the downloaded file named
com_virtuemart.2.0.18a_extract_first.targz.zip. This reveals two more files.Log in to your Joomla! admin control panel by going to
www.yoursite.com/administrator, navigate to Extensions | Extension Manager from the top menu and you will see the following screenshot:
We will use the first option labeled Upload Package File. Click on Browse and find the recently extracted VirtueMart file named
com_virtuemart.2.0.xx.tar.gz.When you have selected the correct file you can click on Upload & Install.
You should now see something like the following screenshot. Don't worry about the warning. We will come to that in the next recipe when we do some basic configurations:

If you get an error about the size of the upload or your browser just whirs around and never completes the task then do this: use FileZilla to upload the
com_virtuemart.2.0.xx.tar.gzfile to the TMP folder in the root of your Joomla! installation folder.You can now use the section labeled Install from directory to get things done.
After uploading the file just add
/com_virtuemart.2.0.xx.tar.gzto the end of the default file path and click on Install. All should now be good. Any time the Joomla! package installer fails to upload and install a package then you can do the same.The core VirtueMart product is now installed, but before we conclude this recipe, let's add the VirtueMart AIO (all in one) extensions. This is all the virtually essential, predeterminable VirtueMart settings and modules, all of which are neatly lumped together in one installation.
From the same Extension Manager: Install page, click on Browse, select the
com_virtuemart.2.0.xxx_ext_aio.tar.gzfile, and click on Upload & Install.You might have noticed the following message:

That is because once you have used the component and it has done its work it is no longer necessary to leave it installed. We will deal with that when we do some basic VirtueMart configuration later in this chapter.
The two files that we uploaded and installed constitute an entire e-commerce system. They contain everything that you need to handle such as the complex products and shipping options, attach to payment gateways, and managing your inventory.
Now would be a good time, especially if this is your first VirtueMart installation, to go and check out some of the features, buttons, and menus. Don't worry about configuring anything, we will start all that in the next recipe. Also, you will probably keep getting that Safe path empty... warning. Again, we will deal with that soon. From the top menu navigate to Components | VirtueMart. The following is the screenshot of VirtueMart:

We will have a very brief look at each major VirtueMart section. By the end of this exploratory recipe, any reader new to VirtueMart will have a good feel for where to get things done.
Let's get used to VirtueMart with a hands-on exploration:
As we have done before, from the Joomla! control panel navigate to Components | VirtueMart.
Click on the big Products button. You could also use the left-hand menu and click on Products, then Products again to arrive at the same place.
If you look on the main left-hand menu you will see that in the Products drop-down, as well as the actual Products link, where we are at the moment, there are a number of other product-related options such as:
Product Categories: This is where we create the structure of our catalogue
Custom Fields: This is where we can define detailed attributes that we can then apply to our products
Inventory link: This helps us to monitor the stock levels
Taxes and Calculation Rules: This is just about gets its own whole chapter (Chapter 3, Shipping and Taxes)
Product Reviews: This kind of speaks for itself
Have a click on each of the options on the VirtueMart screen to see what is there. We will go into more detail on each.
Click on the Orders and Shoppers drop-down menu. You will see the following options:
Orders: This tops the list and it is potentially the most exciting link. When your store is running right, you will spend a lot of time here, managing the orders that your customers have made.
Revenue Report: This allows you to sort your ordered data by a multitude of criteria and the date ranges in order to see your sales, refunds (gasp!), and so on.
Shoppers: This lets you view and edit the details of all your customers.
Shopper Groups: This lets you create different types of customer, if perhaps you want to distinguish between wholesale and retail.
Coupons: This allows you to create exciting discounts and coupon offers.
Following are the next set of buttons:
Manufacturers: This helps you in managing and arranging the manufacturer, if the manufacturer is an important distinction in your catalog.
Shop: In this menu we will do the fundamental configuration, starting in the next recipe.
Shipping and Payments: This option will teach us how to devise simple yet appropriate options for our customers, to have their orders sent, and to pay you.
Configuration: This menu is deep and wide. We will be popping in here throughout many of the chapters. Notice how some of the options have long sprawling pages and multiple tabs as well (yuck!). I promise it is not as bad as it looks and we will break it down into the individual recipes as we proceed.
Tools: This menu consists of a number of links to different help sources including the VirtueMart forum.
Tools and Migration: This section consists of a few kinds of Self Destruct buttons, so it is a good place to play VirtueMart Russian roulette, but we will look at how and when to use them properly too. It is probably best not to click on them yet.
By dividing up all the functions of VirtueMart into logical (fairly logical anyway) areas, it keeps the control panel from having overly complicated forms and buttons. If it looks complex then it is only because it is unfamiliar. Soon you will be clicking and configuring without a care.
Remember the warning we received about removing the AIO component in the Installing Joomla! 2.5 in your web space recipe? We can delete the AIO component because its only purpose in life was to install some VirtueMart settings. Now it has been done, so we will remove it.
We are just going to whiz through this so we can get onto the next thing. So log in to your Joomla! control panel and we will get it done!
Let's remove the AIO component using the following steps:
Navigate to Extensions | Extension Manager and then click on the Manage tab.
You can find the required entry quickly by typing
allinoneinto the Filter box and clicking on Search.Select the VirtueMart_allinone checkbox. The following is a screenshot showing all of these steps together:

Now click on the Uninstall icon and then we can move on, burdened with a little bit less baggage than before.
The next minor issue is of being able to visit your store from the front end. If you go then you will find that the front end (customer facing) part of your store isn't there! We will fix this with a main menu link.
To create the link to your store we will use the features of Joomla!:
Navigate to Menu | Main Menu | Add New Menu Item. We now have this on the left-hand side of the new Menu Item screen. Look at the following screenshot:

Click on the Select button next to the first option Menu Item Type. From the list under the VirtueMart heading choose Front Page.
For Menu Title, enter the word or words that will appear in the main menu. I chose
Shop. That will do. We will revisit other settings when we look at topics such as SEO and templates in later chapters.
At this point, it is likely that you will have these unsightly errors on the home page. Let's get rid of the COM_VIRTUEMART_CONF_WARN_NO_CURRENCEY_DEFINED error. The error will be displayed as shown in the following screenshot:

Removing this error will only take a minute:
In your admin panel navigate to Components | VirtueMart.
Now from the menu on the left, click on Shop and choose the
SHOPlink that is immediately below it. In the top left is the following form in the Vendor Information box.
Just enter a name for your business and a name for your shop. Then click on Save.
Click on Configuration, then click on Currencies, unpublish everything, then select the currencies you want, and then continue. Now on the right-hand side you will see the Currency box as shown in the following screenshot:

Go ahead and select your currency in the top box. In the box below that, you can click on it to accept another currency. Do this for every currency you want to accept. Now click on the Save button in the top right of the screen and the currency warning will disappear.

We will get rid of this new distraction now.
Fill in the details as follows:
As suggested in the message, click on the Additional Information tab just below the message itself.
Scroll to the bottom of the page and you will see the following form as shown in the screenshot but without any data in it:

And don't forget to click on Save in the top right-hand corner when you are done.
VirtueMart was just warning us that the most basic information required to configure the store was missing. Now it is entered, the warning is gone. We will enter more data about your company soon.
We are making rapid progress. Remember the Safe path empty... warning? Here we will fix it.
This will only take a minute:
Click on the drop-down menu titled Configuration. Immediately below is a Configuration link, click on that too. The following screenshot shows the warning that appears at the top of the page:

The safe path warning requires us to make a folder outside of the publicly accessible web folder, where VirtueMart can store sensitive data (credit card info, text messages from previous partners, and so on).
Note
We are going to do what it says on the warning but we will choose our own folder name for a bit of added security. No website can be made hacker proof. But if we move sensitive data to an area of your web space that cannot be accessed directly or via a simple URL, then we force a would-be hacker to work harder to get that data. Once these steps are complete VirtueMart will use the new folders.
Create a new folder in the location suggested. It should be the folder up from the working Joomla! install. So the new folder will be in the same folder as the Joomla! install folder but not in the Joomla! install folder itself.
Name the folder something memorable but not obvious such as
vm_stuff. Not too intriguing but clear to you.Inside the
vm_stufffolder create another folder and call itinvoices.Now we will tell VirtueMart where it is and what we called it. The actual path to this folder will vary depending upon your web host and your specific situation. So this is a consistent way to describe how to get your path accurately.
In your Joomla! control panel click on Site | Global Configuration and select the System tab. You will see a box labeled Path to Log Folder. The following screenshot shows the path that we need:

On the end of the path is your
joomlafolder/logs. Copy the path excluding yourjoomlafolder/logs. Make sure to leave the trailing/on in the end. Now, we will paste it into the appropriate place in VirtueMart and add thevm_stuffat the end.Navigate to Components | VirtueMart, then from the left-hand menu, select the Configuration and choose the Templates tab. Scroll near the bottom of the screen until you see the following screenshot:

Paste the path you copied earlier and add the name of the folder you created onto the end of the trailing
/. Click on Save. The warning will be gone.
You might remember in a previous recipe we had entered some basic personal information such as name and address. We did this because VirtueMart wouldn't let us save/change anything else until we did it. Now we have tidied up all those niggling warnings, we can revisit and enter full details for our new store to be, as well as taking care of some of the e-commerce must-haves at the same time.
Now we can blast through this recipe as quickly as possible. The following are a few things to have in hand:
A really cool logo for your store/company. A bit more on acquiring this is in the chapter on design and layout.
A copy of your store's terms of service. There are lots of free terms of service templates on the web but this is one of those few areas where it might be worth spending a few dollars on advice, specific to your company, especially if you are selling something unusual, bespoke or controversial.
Have to hand any further legal information.
Here is the important one—a really neat description of your business and who you are. A kind of About us but more interesting than all those dull About us pages out there. You can use images in this description as well.
Here's how you can set up your company's identity in a few simple steps:
Go to your VirtueMart control panel. Click on Shop, either from the left-hand menu or the big icon in the main part of the page as shown in the following screenshot:

Scroll down to the following screenshot:

Browse to your pre-prepared logo and upload it. Now we could finish the recipe first but it is always a good idea to save changes as you go. If you get a phone call and leave the control panel, then after a short period of time, you will be logged out and your changes will be lost.
Scroll down and in the Description box paste your neat description. Click on Save. Repeat these simple steps for your terms of service and legal information.
So where is all the information that we have entered into VirtueMart so far? It is tucked away in the VirtueMart database waiting for someone to summon it. The way that we achieve this is by linking to it.
We will create a menu of links to the page that we created in the previous recipe. Then we will create a Joomla! module. A module is a deployable container. We will then be able to assign our menu to the module and deploy it somewhere useful for our customers to use.
In your Joomla! control panel navigate to Menus | Menu Manager | Add New Menu. You will see the following screenshot:

In the Title box enter the title that you want to appear for this menu, such as
Our Shopor something similar.In the Menu type box just make it the same as the Title but all lower case and replace spaces with underscores. So mine would be
our_shop.In the Description field I put all the must-have links. All of the examples I give should have the marks removed. Click on Save & Close in the top right of the screen.
Now hover over the Menus drop-down and then hover over the newly created menu. In my case that's
Our Shopand click on Add New Menu Item. This might look like a somewhat complicated page but for now there is very little to it. We will revisit much of what we skip over when we look at the chapters on SEO and also design. The following screenshot depicts the important part of what you will see.
This is what we need to do for now.
Click on the Select button to the right of the Menu Item Type label. Scroll down to near the bottom of the pop up window and choose Displays vendor details.
The next box down, Menu Title, refers to the actual text that will make up the menu item (link) so put something like About Us. Click on Save & Close. It should be simple now to add as many standard VirtueMart links as you like to this menu. Why not go ahead and add a link to your terms of service?
Click on the New button near the top-right of the screen to get the New Menu Item configuration screen.
This is made nice and simple for us by the Joomla! system. Click on Menus and you should see a list of menus. In my list there are just two. One main menu and the other is the menu we just created. Look over to the right of the menu we just created and there is a helpful hint on what to do next, as shown in the following screenshot:
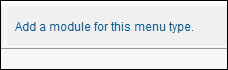
Click on the Add a module for this menu type link shown in the previous screenshot. The Joomla! system has kindly created a ready-to-configure module for us. All we need to do is fill in the blanks.
We could have got to the same place manually by navigating to Extensions | Module Manager | New. Also, note on the right-hand side that our menu has already been assigned to this module, as shown in the following screenshot:

We would have had to do these ourselves if we had decided to go the manual route. So let's finish off this module and display it to the world. Choose a title for our new module and click on the button to choose if you want the title to be shown on your site.
Try both ways if you are not sure what the difference will be. The following screenshot shows you exactly where to do this:

Finally, we need to decide where to show the module on the site. Click on the Select position button and choose where to display the module. If you are new to Joomla! this is a really good time to experiment.
Choose the position-7 position which is top-left.
Click on Save and have a look at your site to view the changes, as shown in the following screenshot:

VirtueMart is a component of Joomla!. Therefore it is often necessary to interact with Joomla! itself in order to achieve things in VirtueMart. Just then, we basically made a Joomla! menu using predefined (by the VirtueMart component) VirtueMart links, then placed that menu in a Joomla! module, and displayed it to the world.
If you are new to Joomla! and all these modules, menus, and positioning them are getting you down, then the next recipe might help. We will be enabling and positioning some of the everyday VirtueMart modules such as the shopping cart. This should help you begin to understand the relationship between the different aspects of Joomla! and its components. We will do this in the next recipe.
Even if this apparent complexity does not evaporate entirely, it is enough to know at this stage that the complexity is for good reasons. It provides us with the properties of flexibility and extendibility. When you finally get your head round Joomla!, you will realize you can do almost anything with it.
Also every recipe in this book, although they do get more in depth, will show every click along the way. So a complete understanding will not be necessary to get things done.
Now we will display and arrange some of the VirtueMart modules. Let's try and do this in a way that might be used in our final trading Joomla! e-commerce site. Of course, you probably have very specific layout plans. But this recipe should show enough of the ins and outs for you to make any modifications to suit your plan.
First we need a plan. Here is a good one. We want a product search in the top right and a product category box on the left of the module. Next we want a shopping cart on the right with a currency choice selector under that. Basic, but functional.
Let's start with the product search box. This is distinct from the regular Joomla! search box that searches the Joomla! articles. You might have noticed that the VirtueMart search box is already enabled for us. So we just need to move it to the top right of our site:
Navigate to Extensions | Module Manager. Near the top of the list you will see the VM-Search in Shop module.
Notice in the Position column it is shown as in position-4. This is what we need to change, as shown in the following screenshot:

Click on VM - Search in Shop. You now see the following screenshot:

Click on the Select Position button and choose position-0. This does assume you haven't changed the template from the default one. If you have, it doesn't matter, just look down the Templates column for the search position for your template.
Click on Save when you are done. Check the store front and you should see your product search box neatly positioned.
Next we will position the Product Categories box. Now at the moment we don't have any product categories but we will in the next chapter. So let's position it on the left ready.
If you are not on the Module Manager screen, then navigate to Extensions | Module Manager from the main Joomla! menu.
Now click on the New button. You will see the Select a module type pop up. Click on VirtueMart Category and you will then be able to fine-tune the module.
Let's name ours
Categories. Click on the Select Position button and choose position-4. In the following screenshot it shows what the key parts of the configuration will look like when you are done:
position-4 is the same position that the VM - Search in Shop module was in before we moved it. Click on Save to position your new module. You can't see it yet. But it is there.
Now we want the shopping cart and the Currency Selection box on the right. Notice they are already visible but on the left. The following steps show how to move them over:
Go to the Module Manager page (you know where it is).
First click on VM - Shopping Cart.
Click on the Select Position button and change the position to
position-8.Click on Save. Done! Now do the same for the Currency Selector box.
Page layout in Joomla! is done with modules. Modules can be custom-made like the Menu module we created previously or can be predefined but with optional settings like the modules we just positioned.
Did you notice that in the main Module Manager page there were a few more modules than those which actually exist on the site pages? Remember the Product Categories module that was seemingly invisible? Well, there are a number of other VirtueMart modules which are already enabled for us that will seemingly spring to life when there is some relevant content to show in them. We will get to that in the next chapter when we look at merchandising your VirtueMart store.