


Sharing files, watching movies, listening to music, and all the other media-related activities are abundantly proposed as Internet services. Any provider can propose an MP3 aside books and eggs; you have to choose among subscriptions that most of the time include items that you don't need or never use. The chapters in this book won't discuss these online services that, if you do the math, cost you a lot, including questioning your privacy, of course. Instead, you are going to be like these providers, and the best one too. Why the best? Because you are the person who is best placed to know what you need. Indeed, as you will know how to implement the services that please you, you'll have the functionalities that will suit you the most.
I'm sure you'll prefer to select the applications you'll like to have at home instead of choosing among the fee subscriptions that providers impose on you.
Let's use an example: if you subscribe to Netflix or Spotify, you pay for the music or video titles you choose among their catalogs. It is obvious that these on-demand content providers offer an impressive choice, but this implies the following two major drawbacks.
As royalties to the majors are required, any media content supplier is forced to constantly pay the titles it offers. This is the reason why:
You might not be able to find a song
You might find a studio recorded version although you wanted the live version
Your music/movies selections might be removed from your playlist because the legal rights have changed
Although the ability to add personal files has been added recently, there are a few limitations, as follows:
You cannot perform a search in these topics or restrict a search to your collection
It also lacks a ranking by genre or composer, for enthusiasts of classical and film music
Artists' profiles still do not distinguish between studio albums, concerts, and compilations
The solution that we are going to implement is based on different software, according to our choices. I mean real choices. Quoting Wikipedia, a server can be defined as follows:
A server is a running instance of an application (
software) capable of accepting requests from the client and giving responses accordingly. Servers can run on any computer including dedicated computers, which individually are also often referred to as "the server."
That being said, you want a media server but you are not comfortable with these technologies, which might scare you or put you off. The applications used in this book are really straightforward to install and use; particularly, open source applications have been selected.
Additionally, we are going to use an embedded board instead of the heavy, large, and power-consuming PCs so that we can also drastically reduce the costs. While we will focus on BeagleBone Black in this book, the chapters have been written to use most of the boards available on the market, such as Raspberry Pi, WandBoard, CubieBoard, and some others, as long as the board supports Linux and has a network connection.
The main goal of this approach is that you learn to be independent enough so that the next time you receive a promotional e-mail with music streaming advertising, you'll throw it away, smiling proudly.
This chapter is about installing a MediaDrop server, which will be introduced shortly. As promised, it will be quite easy (really easy, in fact); no compilation or library will be invoked. Before the installation process itself, we will have a quick look at some situations that an embedded board is able to resolve. We will also find out why we should consider a server philosophy instead of a traditional computer. This will impact the remaining part of the book because the board will be accessed through an SSH connection; we will also have to take into consideration our available free space to store our applications and media contents. Then, we will start the installation part for the MediaDrop server itself. Management and security tasks have been split in additional chapters, so you can skip them and get back later if you want.
Welcome to the first step of your independence.
In this chapter, we will talk about the following topics:
Looking at daily scenarios for media usage
Down to the cave is a server without a head—headless servers
Preparing BeagleBone to be a server
Let's get acquainted with our friend – MediaDrop
MediaDrop installation steps
Testing time – "Hello Server"
Switching from development to production
Let's take a walk in our new MediaDrop server
With some examples being more explicit than others, here's a sample of the situations you might already face or will face soon. Such a platform as MediaDrop can resolve them by nature:
You have been requested to build a media system that is able to display a presentation video clip of a product you intend to promote (in a market, company, and so on). A BeagleBone board with remote management will be handy, most of all if you have a lot of videos to handle.
From the precedent point, compare the different PC and BeagleBone budgets.
Your wife asked you to watch the latest TV show episode from Netflix, but she doesn't want to use any computer for it. Really?
As an employee, you want to improve yourself. Having access to e-learning would be a good thing. Does the local proxy server grant you access to such media-related things? A local device having access to local contents is so easy to deploy for each desktop.
A company wants its employees to use internal communication—easy and fast as podcasts by using the boards on the local network
Behind such a strange title are the motivations for the server that you will optimize needing to be headless. Even though BeagleBone is able to display GUIs, shiny graphics, and desktops, you need to get used to interacting with your server as if you are in a cave with limited light and no eye-candy gadgets. Here are some of the reasons why:
Resources: The most important reason is that a graphical desktop consumes the most amount of resources. Consider not only the GUI resources but also the graphical server it relies on; therefore, it needs more CPU, memory, and disk space.
Space: Our server can be physically anywhere. Thanks to its reduced dimensions, it is easy to put BeagleBone in a place and forget about it. This can be next to the desktop, behind your monitor, in a cupboard, and in your car as well.
Access and simplicity: If you need to get access to a server or maybe several servers, you will really not want to bother connecting to each dedicated server. If you need to administer 11 desktops, this will require you to connect to each one. On the other hand, by using a console environment, you are ensured having the same behaviors each time.
Among others, these reasons justify the time that you are going to spend on your experiments. It's worth it.
As mentioned previously, we will use the BeagleBone Black embedded board for our experiments. It is assumed that you will have completed the following:
After visiting the Getting Started page (http://beagleboard.org/getting-started) and executing all the mentioned steps, the board will be just started and you will be connected to it. All through the book, the PuTTY program was used for this.
The board is using the current official
bone-debian-7.5-2014-05-14-2gb, which is related to a 2 GB SD card (as shown in the next screenshot). Nevertheless, it's strongly advised that you use cards with a larger size and we'll soon see why.Your board is identified in your local network; when required, we'll use the address
192.168.0.15, which you will need to adapt according to your local network. Most of the rooters provide a web interface for this purpose.The default credentials are
debianas the username andtemppwdas the password.
BeagleBone Black has the advantage of booting either from an SD card or on-board flash (eMMC). The pros and cons of each of these is beyond the scope of this chapter. Generally, for this book, you should rely on the SD card support for the following reasons:
You can use all the space you want without sacrificing any other partition: On flash, you are limited to the provided space, which is again limited by design.
You can change your mind whenever you want: If you want to install all the applications described in this book, you can either use different SD cards or buy a bigger one.
It is an error-proof solution: If you have never burnt any electronic device or broken the code, you should. Of course, not intentionally but because you pushed the limits. Many inventions have been found by accident, such as Penicillin, Teflon, and even Brownies and Tatin tart. So, if sometimes you are not able to boot the system, you will always have the possibility to get back to the situation you started with, using the SD card, by writing a new image to it.
The SD card induces small additional latencies that you won't even notice, so it is better to use it as a sandbox. So feel free to explore and try crazy things so that you can learn without limitations and worry.
If you update or install anything right away after a boot, you will encounter problems related to disk space.
Indeed, if you use PuTTY (www.putty.org) or any other SSH software to connect yourself to the board (such as, 192.168.0.15) and look at the rootfs space information, you can guess that the available size will be quickly saturated.

The SD card has little space left the first time
So, as the server administrator, it is up to you to resolve the size constraints.
Note
Like everyone else, you might want to use an SD card with a bigger size. This will produce exactly the same result as in the preceding figure, as you will use the same partition scheme.
The next topic will describe how you can achieve this task easily.
The default free space is really small; for example, you can fill it completely with just one upgrade. As a result, the very first thing to do at boot is to resize the /root partition.
Resizing a partition is not recommended for first timers. The good news is that you won't have to enter many commands; you can make your life easy by relying on a dedicated script provided with the board, which will do all that for you.
Enter the following two commands:
debian@beaglebone:~$ cd /opt/scripts/tools/
debian@beaglebone:/opt/scripts/tools/$ git pull

In this directory, we have downloaded the last code from the official repository, so we can start the script thereafter:
debian@beaglebone:/opt/scripts/tools/$ sudo ./grow_partition.sh
While running, this script will display a lot of details, which, thanks to the author, you don't have to care about.

These are the commands that you won't have to learn
You can now go on to reboot your board (don't forget to press the user's button), as follows:
debian@beaglebone:/opt/scripts/tools/$ sudo reboot
Now, if you check, you'll see that the free space has been resized to the SD card's capabilities.

An 8-GB resized SD card
Now, you can continue with the update and upgrade…
Tip
The local /root partition from the SD card is fast to implement and easy to use. Nevertheless, thinking about how you will organize your server is a good habit. Linux can handle multiple remote filesystems that you can write to. For instance, for all your media contents, you can use an NFS partition from a distant drive or a device that supports uPnP.
Through this chapter, we'll talk about a great project called MediaDrop (http://mediadrop.net/), which lets you manage music, movies, and podcasts through a nice web interface.
Mediadrop has all the features that a media server can offer, as follows:
HTML5 and Flash video
A CMS-like interface available from a browser and mobile devices (iPhone and Android)
Have as many users as you want, without any restrictions to access your content, unless you choose to have restrictions
User management with many capabilities, such as comment editor, like buttons, tags, and so on
Storage capability, which lets you choose where your file will be located
An administration-dedicated interface with easy access
Social media sharing (Twitter, Facebook, and so on) and video/audio links possibility
It's open source, which means that you have access to the engine itself, you can improve it, or you can become a part of this community at https://github.com/mediadrop/mediadrop
The Mediadrop platform can be extended through Python scripts
The following sections will take you through the installation of Mediadrop.
Now that your system is ready to accept all the applications you want to install, let's begin with the MySQL part:
debian@beaglebone:~$ install mysql-server mysql-client
Note
Actually, sudo apt-get install works behind the scenes. From this point onwards, we'll rely on aliases to ease our life from the command line. Refer to the Appendix to get all the details.
During this you'll be asked for the database's root password, then the remaining system files:
debian@beaglebone:~$ install libjpeg-dev zlib1g-dev libfreetype6-dev libmysqlclient-dev python-dev
Finally, the Python-related requirements that will help you in virtual environments can be installed using the following command:
debian@beaglebone:~$ install python-setuptools python-virtualenv
With system requirements in place, you can set up MediaDrop in just six installation steps. Before doing that, you need to define a database for it.
You need to create some credentials and assign a user to a new MediaDrop database. It requires you to type only a few commands. If this is something that you don't want to do, the script is available on the GitHub companion website at https://github.com/dlewin/BeagleboneBlack-Server-Book.
Just execute the following command:
./create_mediadropdb.sh
Instead, if you are like me and want to control your entire system, then open a MySQL console, and pay attention to the syntax of the following command (with the ;):
debian@beaglebone:~$ mysql –u root –p
Then, fill in the password you have defined in the installation steps.
You will now have access to the MySQL console for all the database operations that MediaDrop requires. Now, perform the following steps:
Create your user with a password:
create user 'debian'@'localhost'IDENTIFIED BY 'temppwd';Create the
MediaDropdatabase; pay attention to the use of capital letters:create database MediaDrop;Now, we tell that we want to work on this database:
use MediaDrop;Set some rights on this database for the
debianuser:grant create,insert,update,select,delete on MediaDrop.* to debian@localhost; exit
Here's a screenshot that shows these operations along with the related MySQL feedback you should get:

MediaDrop has been programmed in Python, a simple but powerful language that we'll also use in Chapter 6, Illuminate Your Imagination with Your Own Projects. As plugins are also in Python, you are free to extend the platform as you wish.
Let's see how to define a dedicated environment for this purpose.

Virtual environments introduce a functionality provided with Python that I like to use: actually, with this functionality, you can resolve the problems of software versions and incompatibility. The principle is to use as many virtual spaces with different packages or executables as you want without any confusion that might create a broken system. Thanks to the isolation provided by this tool, you are guaranteed that it is kept as you want it to be and thus you always have a safe system.
Note
If you want to know more about virtualenv, take a look at https://virtualenv.readthedocs.org/en/latest/. There is also a virtualenvwrapper that is intended to ease the creation and deletion of many virtual environments at https://virtualenvwrapper.readthedocs.org/en/latest/.
Currently, we are using the 0.10.3 version of MediaDrop, but nothing stops you from trying the next version in order to test any side effects on your architecture. Thus, instead of executing the current environment, you'll just have to start MediaDrop from the n+1 environment.
Virtual environment is presented just here, but you should create an environment each time you need different usages of an application or dependencies. It requires just less than a minute and can be done by performing the following steps:
Create the environment with a specific name; in our case,
venv:debian@beaglebone:~$ virtualenv --distribute venvEnter the dedicated virtual environment:
debian@beaglebone:~$ source venv/bin/activate
That's all! You are in now. Cool, eh?
The command prompt is preceded by the virtual environment's name, so you can guess which environment is currently activated, which is shown in the screenshot that follows the code:
(venv)debian@beaglebone:~$

You can now install any package you want; it will only be accessible in the currently activated environment.
For installation, retrieve the last stable release from downloads:
(venv)debian@beaglebone:~$ mkdir MediaDrop
(venv)debian@beaglebone:~$ cd MediaDrop
(venv)debian@beaglebone:~/MediaDrop$ wget http://static.mediadrop.net/releases/MediaCore-0.10.3.tar.gz
Note
You can find all the releases at http://static.mediadrop.net/releases/.
Then, perform the following steps:
Extract the archive:
(venv)debian@beaglebone:~/MediaDrop$ tar xvzf MediaCore-0.10.3.tar.gzEnter the new directory to launch the installation script:
(venv)debian@beaglebone:~/MediaDrop$ cd MediaCore-0.10.3

(venv)debian@beaglebone:~/MediaDrop/MediaCore-0.10.3$ python setup.py develop
This will take a few minutes, as it checks and downloads the required dependencies, and will end with the following lines:
Finished processing dependencies for MediaCore==0.10.3

(venv)debian@beaglebone:~/MediaDrop/MediaCore-0.10.3$ cd ..

(venv)debian@beaglebone:~/MediaDrop$
From here, the recommended installation is to enter the following:
(venv)debian@beaglebone:~/MediaDrop$ paster make-config MediaCore production.ini
This will generate the production.ini file, which the server will use as a configuration file. So, we can adapt by editing it.
What we want to do here is tell which database we created and the related credentials. So, edit the production.ini file, with nano (or vim) in order to focus on the [app:main] section, as we want to change the following line:
sqlalchemy.url = mysql://username:pass@localhost/dbname?charset=utf8&use_unicode=0
The settings are shown in the following screenshot:

At the same time, as port 8080 is already used, let's change this to an available port, something such as 8082. As you'll see later on, many servers use the 8080 port for their configuration settings, and obviously only one application will be able to use this port, which means that according to your configurations, you will have to decide which application will use the 8080 port.
Note
Additionally, you can eventually customize your configuration file with an e-mail that will let you receive notifications from the server. You will then need to install a local SMTP server and apply the settings in this production.ini file at the [DEFAULT] section.
Now, save and quit the editor. We are done with the configuration part.
We have completed all the configuration steps, and we are now going to deploy all the website data content.
To do this, copy the data directory from the sources to be at the same level as your production.ini file:
(venv)debian@beaglebone:~/MediaDrop$ cp -a MediaCore-0.10.3/data/.
Give it the write permissions for the debian user; when some content is uploaded, it will be written here:
(venv)debian@beaglebone:~/MediaDrop$ chmod 666 data
It's now time to fill the MediaDrop database we've created previously with some tables and required data. We just have to call a predefined command:
(venv)debian@beaglebone:~/MediaDrop$ paster setup-app deployment.ini
You have a server that is waiting to be started locally:
(venv)debian@beaglebone:~/MediaDrop$ paster serve --reload production.ini
source env/bin/activate

You need to wait for the last line to be displayed before you move on, which means that the server is ready to answer the request.
Note
Take the example of your command, which ends with the following line of code:
IOError: [Errno 2] No such file or directory: '/home/debian/production.ini'
You might not be in the good path; using the ls command, check whether the production.ini file exists in the current directory.
Now, from anywhere on your local network, enter the address of your board with the defined port—for me, it's 192.168.0.15:8082.
Welcome to your own new world; you should see the home page, as shown in the following screenshot:

This is more than just a simple welcome screen; you also have some interesting videos that show you how to use your contents as well as how to add videos and podcasts, with examples.
You can even try and upload content right now if you want.
Note
Currently, the server has been started manually. In Chapter 4, Getting Your Own Video and Feeds, we will see how to start the streaming service automatically on boot. This is a way to customize the boot process so that you know how to add a service such as MediaDrop at the start.
Until now, we have been using the server as the debian user. This can be improved to better suit a server, which means that MediaDrop should be located at /var/www so that it is seen by the Apache server that is provided along with the Debian image for BeagleBone Black. We will just copy and adapt our previous experiments using the following commands:
(venv)debian@beaglebone:~/MediaDrop$ sudo mkdir /var/www/MediaDrop
(venv)debian@beaglebone:~/MediaDrop$ sudo cp -R MediaDrop/ /var/www
(venv)debian@beaglebone:~/MediaDrop$ cd /var/www/ MediaDrop/
As this is the final version, we don't need the sources in it:
(venv)debian@beaglebone:/var/www/MediaDrop$ sudo rm –fr MediaCore-0.10.3
We also grant the root user, as shown here:
(venv)debian@beaglebone:/var/www/MediaDrop$ sudo chmod 777 -R data
Finally, you can start the server as usual:
(venv)debian@beaglebone:/var/www/MediaDrop$ paster serve --reload production.ini

We are done with the configuration part, and you can now play around with the different settings if you wish, as this project has more to propose. For access to the complete documentation, go to http://mediadrop.net.
The server is running well with you as the captain. No one else will try to look into your files and send you a warning about moderation or deletion. That being said, it also implies that no one else will manage the server for you. So what? Most of the default settings are fine; maybe a few of them need to be reset. We can take a quick look to explain what this is all about.
To access the admin interface, just add admin at the end of your address, as shown here:
http://192.168.0.15:8082/admin/
You will be asked for the default credentials:
User : admin
Password : admin
As an administrator, the first thing you need to do is change the default password; this is the most obvious thing that an attacker will try, so go to Users, as shown in the following screenshot:
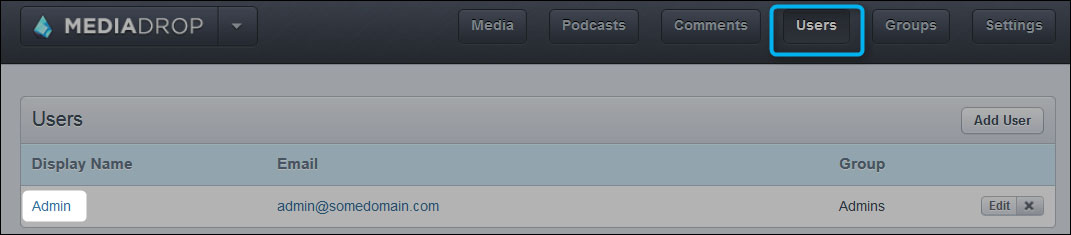
You should have a unique user: admin. Click on this to go to the user's profile in order to change the password.
Tip
If you have defined an SMTP server, you will also be interested in filling in your e-mail in here.
Now, click on Save.
Now, let's go through some of the settings together; click on the Settings button to access the settings that are not related to rights, as shown here:

In this section, you'll find everything related to the overall settings.
This setting is used for the following actions:
To customize the interface, such as colors and background images
To display the login link for all the users
To enable/disable buttons, such as Share, Embed, Like, and so on
The customization is really interesting here because you can use your own CSS, HTML header, and footer, so you can have a personalized interface.
This part is important as you will need to enhance the provided categories for your needs.

While I won't explain what a category is, I can, however, say that there are useful combinations to create because a category can be related to another one as a child category, which lets you define subcategories. If all the users can use categories, only granted users will be able to define them. We will see how this is done in the next chapter.
In addition, an additional advantage is that categories are integrated during a textual search. This also includes entire sets of simple categories or more complex categories that can be made from a parent category, including many children categories.
The following functions are related to comments:
Allow or disable
Functions related to your Facebook account (needs application ID)
You might want all the comments to be approved before publication
If you have an Akismet account, put your key in here so that the comments will be automatically filtered
A dictionary, so you can add words to be filtered from the comments
You can choose the type of events that you need to be warned about, as follows:
Media Uploaded
Comment Posted
Support Requested
A list of players is provided with the server; these are capabilities that handle most of the media that a user will upload such as Vimeo, Youtube, DailyMotion, and so on.
I recommend that you allow all of them (click on the green light on the left-hand side) and define your preferred player using Priority, with arrows beside each player.
Each published video can be submitted to like/dislike votes. For your information and contrary to what one might think, popularity is not just the result of any addition/subtraction but it is a dedicated equation of the following form:
popularity_points = log_X(media.likes) + media.age/Y
This equation is clearly explained in the documentation at http://mediadrop.net/docs/user/admin/settings.html#popularity.
Both the decay exponent and lifetime are adaptable in this section.
Tags are related to categories, but are nevertheless different. You can use them when you post a micro description of one or two words (recommended), but they are also useful for searches. Moreover, when users browse contents tags, they also help to get an overall opinion.
As with Categories, you need to have granted access in order to define tags.
Here, you will find the setting that you might look after the most.
Indeed, there is a default 300 MB size limit for each upload, so you might end up with the following error, shown in the screenshot:

Don't confuse size limits and directory rights. What is the common thread between the two, you might ask? It's that if you forget to set the /data directory, you will have the same upload error when posting a link to a file.
This is an important section under options that aims to list all the locations for the files, and mainly two of them need to be explained:

This points to the place where your content will be kept. This is really handy because you can modify the default partition scheme on BeagleBone if you have a local USB hard drive.
For a dedicated remote partition such as NFS or another type, there is:
Remote URLs
Here, you can specify the partition that accepts the files.
We finally found what we were looking for: a simple way to publish any media in a local network. We can upload a video, picture, or music to be shared with just a few settings that are as easy as a mouse click. Thanks to this intuitive interface, you can skip the complicated settings while not sacrificing by paying an expensive fee. Once you have completed this part, you won't have to redo.
We are going to continue, with the next chapter, to go deeper into the MediaDrop server; we will explore the subjects that have been introduced here, such as submissions and daily tasks that will help you through automatic and social group notifications as well. This is where you will learn more about the administrator role.
