


 Download code from GitHub
Setting Up Your Development Environment
Let's start with questioning the premise of this entire book, Angular itself. Why learn Angular, but not React, Vue, or some other framework? First, I won't be making an argument against learning any new tool. I believe that every tool has its place and purpose. Becoming somewhat proficient in React or Vue can only help further your understanding of Angular. Single Page Application (SPA) frameworks such as Backbone or Angular have grabbed my full attention since 2012, when I realized server-side rendered templates are impossible to maintain and cause very expensive rewrites of software systems. If you're intent on creating maintainable software, decoupling of APIs and business logic from the user interface (UI) is the prime directive you must abide by.
The question is, why get good at Angular? I have found that Angular neatly fits the Pareto principal. It has become a mature and evolving platform, allowing you to achieve 80% of tasks with 20% of the effort. Furthermore, starting with version 4, in Long Term Support (LTS) until October 2018, every major release is supported for 18 months, creating a continuum of learning, staying up-to-date and deprecating old features. From the perspective of a full-stack developer, this continuum is invaluable, since your skills and training will remain useful and fresh for many years to come.
This first chapter will help you and your team members create a consistent development environment. It can be tough for beginners to create the correct development environment, which is essential for a frustration-free development experience. For seasoned developers and teams, achieving a consistent and minimal development environment remains a challenge. Once achieved, such a development environment helps avoid many IT-related issues, including ongoing maintenance, licensing, and upgrade costs.
Instructions on installing GitHub Desktop, Node.js, Angular CLI, and Docker will be a good reference from absolute beginners all the way to seasoned teams, along with strategies to automate and ensure the correct and consistent configuration of your development environment.
Feel free to skip this chapter if you already have a robust development environment setup; however, beware that some of the environmental assumptions declared in this chapter may result in some instructions not working for you in later chapters. Come back to this chapter as a reference if you run into issues or need to help a colleague, pupil, or friend set up their development environment.
In this chapter, you will learn the following:
- Working with CLI package managers to install and update software:
- Chocolatey on Windows 10
- Homebrew on macOS X
- Using scripting to automate installation using:
- Powershell on Windows 10
- Bash on macOS X
- Achieving a consistent and cross-platform development environment
You should be familiar with these:
- JavaScript ES2015+
- Frontend development basics
- RESTful APIs
The supported operating system are as follows:
- Windows 10 Pro v1703+ with PowerShell v5.1+
- macOS Sierra v10.12.6+ with Terminal (Bash or Oh My Zsh)
- Most of the suggested software also works on Linux systems, but your experience may vary
The suggested cross-platform software is as follows:
- Node 8.10+ (except non-LTS versions)
- npm 5.7.1+
- GitHub Desktop 1.0.0+
- Visual Studio Code v1.16.0+
- Google Chrome 64+
CLI package managers
Installing software through a Graphical User Interface (GUI) is slow and difficult to automate. As a full-stack developer, whether you're a Windows or a Mac user, you must rely on Command-Line Interface (CLI) package managers to efficiently install and configure the software you will be depending on. Remember, anything that can be expressed as a CLI command can also be automated.
Install Chocolatey for Windows
Chocolatey is a CLI-based package manager for Windows, which can be used for automated software installation. To install Chocolatey on Windows, you will need to run an elevated command shell:
- Launch the Start menu
- Start typing in PowerShell
- You should see Windows PowerShell Desktop App as a search result
- Right-click on Windows PowerShell and select Run as Administrator
- This will trigger a User Account Control (UAC) warning; select Yes to continue
- Execute the following command in PowerShell to install the Chocolatey package manager:
PS> Set-ExecutionPolicy AllSigned; iex ((New-Object System.Net.WebClient).DownloadString('https://chocolatey.org/install.ps1'))
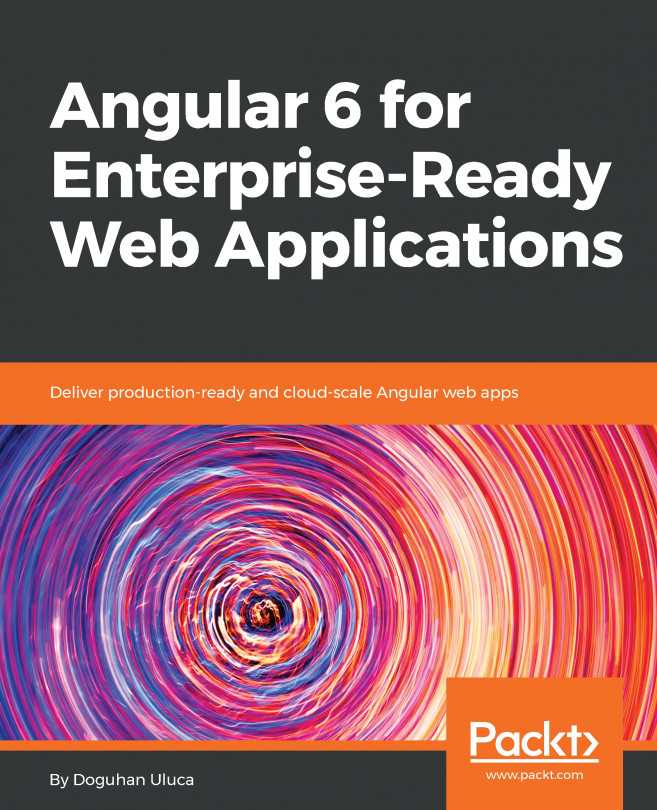
- Verify your Chocolatey installation by executing choco
- You should see a similar output, as shown in the following screenshot:
For more information, refer to: https://chocolatey.org/install.
Installing Homebrew for macOS
Homebrew is a CLI-based package manager for macOS, which can be used for automated software installation. To install Homebrew on macOS, you will need to run a command shell.
- Launch Spotlight Search with ⌘ + Space
- Type in terminal
- Execute the following command in the Terminal to install the Homebrew package manager:
$ /usr/bin/ruby -e "$(curl -fsSL https://raw.githubusercontent.com/Homebrew/install/master/install)"
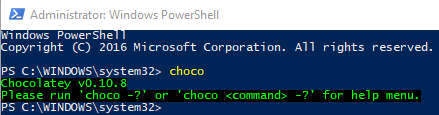
- Verify your Homebrew installation by executing brew
- You should see a similar output, as follows:
- To enable access to additional software, execute the following command:
$ brew tap caskroom/cask
For more information, check out: https://brew.sh/.
Git and GitHub Desktop
This section aims to establish a best practice Git configuration that's suitable for the widest audience possible. In order to make the best use of this section and subsequent chapters of this book, it is presumed that you, the reader, have the following prerequisites fulfilled:
- An understanding of what Source Code Management and Git are
- Create a free account on GitHub.com
Why use GitHub?
If you are a Git user, chances are that you also use an online repository, such as GitHub, Bitbucket, or GitLab. Each repository has a free-tier for open source projects, coupled with robust websites with varying feature sets, including on-premise Enterprise options that you can pay for. GitHub, with 38+ million repositories hosted in 2016, is by far the most popular online repository. GitHub is widely considered a baseline utility that will never go offline by the community.
Over time, GitHub has added many rich features that have transformed it from a mere repository to an online platform. Throughout this book, I’ll be referencing GitHub features and functionalities, so you can leverage its capabilities to transform the way you develop, maintain, and release software.
Why use GitHub Desktop?
It is true that the Git CLI tool is powerful, and you will be just fine if you stick to it. However, we, full-stack developers, are worried about a variety of concerns. In your rush to complete the task at hand, you can easily ruin your and sometimes your team's day, by following bad or incomplete advice.
See the following screenshot of such advice from StackOverflow (http://stackoverflow.com/questions/1125968/force-git-to-overwrite-local-files-on-pull):

If you execute the preceding command, be prepared to lose uncommitted local changes. Unfortunately, novice users have a tendency to follow the simplest and most direct instructions, potentially leading to lost work. If you think your past commits are safe, think twice! When it comes to Git, if you can imagine it, it can be done through the CLI.
Thankfully, with GitHub, you can protect branches and implement the GitHub workflow, which entails branching, committing, merging, updating, and submitting pull requests. The protections and the workflow help prevent harmful Git commands from making irreversible changes and enable a level of quality control so that your team remains productive. Performing all of these actions through the CLI, especially when there are merge conflicts, can get complicated and tedious.
For a more in-depth understanding of the benefits and pitfalls of Git and GitHub, you can read my 2016 article on the topic at: Bit.ly/InDepthGitHub.
Installing Git and GitHub Desktop
GitHub Desktop provides an easy-to-use GUI to execute the GitHub workflow, in a manner that is consistent across Windows and macOS. Consistency is highly valuable when on-boarding new or junior team members or if you're not a frequent contributor to the code base.
- Execute the installation command:
For Windows:
PS> choco install git github-desktop -y
For macOS:
$ brew install git && brew cask install github-desktop
- Verify your Git installation by executing git --version and observe the version number returned
- Verify your GitHub Desktop installation by launching the application
- Sign in to https://github.com/ on GitHub Desktop
- Once you have created a repository, you can launch the application from your Terminal by executing this:
$ github path/to/repo
- If you are already on the correct folder, you can type in the following command instead:
$ github .
Node.js
This section aims to establish a best practice JavaScript development environment. To make the best use of this book, it is presumed that you have the following prerequisites fulfilled:
- Awareness of the modern JavaScript ecosystem and tools
- NodeJS's site: https://nodejs.org
- Npm's site: https://www.npmjs.com
- Angular's site: https://angular.io
- Legacy AngularJS's site: https://angularjs.org/
- Yarn's site: https://yarnpkg.com
- React's site: https://facebook.github.io/react
Node.js is JavaScript that runs anywhere. It's an open source project that aimed to run JavaScript on the server, built on Google Chrome's V8 JavaScript engine. In late 2015, Node.js stabilized and announced enterprise-friendly 18 month LTS cycles that brought predictability and stability to the platform, paired with a more frequently updated, but more experimental, Latest branch. Node also ships bundled with npm, the Node package manager, and as of 2018, npm is the largest repository of JavaScript packages in the world.
For a more detailed look into Node's history, read my two-part article on Node at: Bit.ly/NodeJSHistory.
Existing Node.js Installation
If you installed Node.js before, when installing a new version of Node using choco or brew, ensure that you read the command outputs carefully. Your package manager may return caveats or additional instructions to follow, so you can successfully complete the installation.
It is also highly likely that your system or folder permissions have been edited manually in the past, which may interfere with a frustration-free operation of Node. If the following commands do not resolve your issues, use the GUI installer from Node's site as a last resort.
Regardless, you must take care to uninstall all global tools that were installed using npm -g previously. With every major Node version, there's a chance that native bindings between your tool and Node have been invalidated. Further, global tools rapidly fall out of date and project-specific tools quick go out of sync. As a result, installing tools globally is now an anti-pattern that has been replaced with better techniques, which are covered in the next section and under the Angular CLI section in Chapter 2, Create a Local Weather Web Application.
Installing Node.js
This book will presume that you're using Node 8.4 or a later version. Odd numbered versions of Node are not meant to be long lived. 6.x.x, 8.x.x, 10.x.x, and so on are okay, but avoid 7.x.x, 9.x.x, and so on, at all costs.
- Execute the installation command:
For Windows:
PS> choco install nodejs-lts -y
For macOS:
$ brew install node@8
- Verify installation of Node by executing node -v
- Verify npm by executing npm -v
The npm repository contains numerous useful and mature CLI commands that are often cross-platform. Listed here are the ones I rely on frequently and choose to install globally for performance reasons:
- npx: Executes CLI tools by downloading the latest version on demand or project-specific local node_modules folder. It ships with npm 5 and will allow you to run code generators that frequently update without a global install.
- rimraf: The Unix command rm -rf, but works on Windows as well. Very useful in deleting the node_modules folder, especially when Windows is unable to do so due to the nested folder structure.
- npm-update: Analyzes your project folder and reports on which package have newer versions or not, with the option to be able to update all of them, if you so wish.
- n: Dead easy to tool to switch between versions of Node quickly, without having to remember the specific version number. Unfortunately, it only works on macOS/Linux.
- http-server: Simple, zero-configuration command-line HTTP server, which is a great way to locally test static HTML/CSS pages or even the dist folder of your Angular or React project.
- npm-windows-upgrade: Necessary to upgrade npm on Windows.
Visual Studio Code
Visual Studio Code (VS Code) is one of the best code editors/IDEs out there. It's free and it's cross-platform. The remarkable thing is that VS Code has the lightning fast performance of a code editor, think NotePad++ or Sublime Text, but the feature set and conveniences of costly IDEs, think Visual Studio or WebStorm. For JavaScript development, this speed is essential and is a tremendous quality-of-life improvement for a developer, who frequently switches back and forth between different projects. VS Code brings together an integrated terminal, easy-to-use extension system, transparent settings, excellent search and replace functionalities, and, in my opinion, the best Node.js debugger that exists.
Installing Visual Studio Code
For Angular development, this book will be leveraging VS Code. It is highly recommended that you also use VS Code.
- Execute the installation command:
For Windows:
PS> choco install VisualStudioCode -y
For macOS:
$ brew cask install visual-studio-code
One of the best features of Visual Studio Code is that you can also launch it from the CLI. If you're in a folder that you'd like to be editing, simply execute code . or a particular file by executing code ~/.bashrc or code readme.md.
- Verify install by launching Visual Studio Code
- Navigate to a folder and execute code .
- This will open up a new VS Code window with the Explorer displaying the contents of the current folder
For more information, refer to https://code.visualstudio.com.
Automation for Windows and macOS
At the beginning of the chapter, I proclaimed anything that can be expressed as a CLI command can also be automated. Throughout the setup process, we have ensured that every tool being used was set up and their functionality verifiable through a CLI command. This means we can easily create a PowerShell or bash script to string these commands together and ease the task of setting up and verifying new environments. In fact, I have created a rudimentary implementation of these scripts, which you may download from the Chapter 1 folder of the GitHub Repository for this book:
- Navigate to https://github.com/duluca/web-dev-environment-setup to find the scripts
- Execute install-windows-deps.ps1 in PowerShell to install and verify dependencies on Windows
- Execute install-mac-deps.sh in Terminal to install and verify dependencies on macOS
The harsh reality is that these scripts do not represent a very capable or resilient solution. Scripts can't be executed or managed remotely, and they can't easily recover from errors or survive machine boot cycles. In addition, your IT requirements may be above and beyond what is covered here.
If you deal with large teams and frequent turnover, an automation tool will pay dividends handsomely, whereas if you're on your own or part of a smaller, stable team, it will be vastly overkill. I encourage you to explore tools such as Puppet, Chef, Ansible, and Vagrant to help you decide which one may best fit your needs or if a simple script is just good enough.
Summary
In this chapter, you mastered the use of CLI-based package managers for both Windows and macOS to speed up and automate the set up of development environments for you and your colleagues. By reducing variance from one developer's environment to the next, your team can overcome any individual configuration issue more easily and remain focused on the execution of the task at hand more often. With a collective understanding of a common environment, no single individual on the team will carry the burden of having to help troubleshoot everyone else's issues. As a result, your team will be more productive. By leveraging more sophisticated and resilient tools, mid-to-large sized organizations will be able to achieve great savings in their IT budgets.
In the next chapter, you will become familiar with the new Angular platform, optimize your web development environment, leverage Kanban using Waffle and GitHub issues, learn Angular fundamentals to build a simple web app with a full-stack architecture in mind, and get introduced to reactive programming with RxJS.
Further reading
The article on Automating the Setup of the Local Developer Machine by Vishwas Parameshwarappa is a great place to start for using Vagrant. You can find the article at Red-gate.com/simple-talk/sysadmin/general/automating-setup-local-developer-machine.


