


 Download code from GitHub
In this chapter, you'll get your local environment set up for the rest of the book. Whether you're onmacOS, Linux, or Windows, we'll install MongoDB and Robomongo.
More specifically, we'll cover the following topics:
- MongoDB and Robomongo installation for Linux and macOS
- MongoDB and Robomongo installation for Windows
This section is for macOS and Linux users. If you are on Windows, I have written a separate section for you.
The first thing we'll do is to download and set up MongoDB, as this will be the database we will use. We'll be using a third-party service to host our database when we eventually deploy it to Heroku, but on our local machine we'll need to download MongoDB so that we can start up a database server. This will let us connect to it via our Node applications to read and write data.
In order to grab the database, we'll head over to mongodb.com. Then we can go to the Download page and download the appropriate version.
On this page, scroll down and select Community Server; this is the one we'll be using. Also, there are options for different operating systems, whether it's Windows, Linux, macOS, or Solaris. I'm on macOS, so I'll use this download:

If you're on Linux, click on Linux; then go to the Version drop down and select the appropriate version. For example, if you're on Ubuntu 14.04, you can download the correct one from the Linux tab. Then, you can simply click on the Download button and follow along.
Next you can open it up. We'll just extract the directory, creating a brand new folder in the Downloads folder. If you're on Linux, you might need to manually extract the contents of that archive into the Downloads folder.
Now this folder contains a bin folder, and in there we have all of the executables that we need in order to do things such as connecting to the database and starting a database server:

Before we go ahead and run any of them. We'll rename this directory to mongo and then move it into the user directory. You can see that now in the user directory, I have the mongo folder. We'll also create a brand new directory alongside of mongo called mongo-data, and this will store the actual data inside of the database:

So when we insert a new record into the Todos table, for example, that will live in the mongo-data folder. Once you have the mongo folder moved into the user directory and you have the new mongo-data folder, you are ready to actually run the database server from Terminal. I'll go into Terminal and navigate into that brand new mongo folder that is in the user directory, where I currently am, so I can cd into mongo, then I'll cd into the bin directory by tacking it on right there:
cd mongo/binFrom here, we have a bunch of executables that we can run:

We have things such as bisondump and mongodump. In this section, we'll focus on:mongod, which will start up the database server, andmongo, which will let us connect to the server and run some commands. Just like when we typenodewe can run some JavaScript commands right in Terminal, when we typemongo, we'll be able to run some Mongo commands to insert, fetch, or do anything we like with the data.
First up though, let's start up the database server. I'll use ./ to run a file in the current directory. The file we'll run is called mongod; also, we do need to provide one argument: the dbpath argument. The dbpath argument will get set equal to the path of the directory we just created, the mongo-data directory. I'll use ~ (the tilde) to navigate to the user directory, and then to /mongo-data, as shown here:
./mongod --dbpath ~/mongo-dataRunning this command will start up the server. This will create an active connection, which we can connect to for manipulating our data. The last line that you see when you run the command should be, waiting for connections on port 27017:

If you see this, it means that your server is up and running.
Next up, let's open a new tab, which starts in the exact same directory, and this time around, instead of running mongod, we'll run the mongo file:
./mongoWhen we run mongo, we open up a console. It connects to the database server we just started, and from here, we can start running some commands. These commands are just to test that things are working as expected. We'll be going over all of this in detail later in this section. For now though, we can access db.Todos, and then we'll call .insert to create a brand new Todo record. I'll call it like a function:
db.Todos.insert({})Next, inside of insert, we'll pass in our document. This will be the MongoDB document we want to create. For now, we'll keep things really simple. On our object, we'll specify one attribute, text, setting it equal to a string. Inside of quotes, type anything you want to do. I'll say Film new node course:
db.Todos.insert({text: 'Film new node course'})With your command looking just like this, you can press enter, and you should get back a WriteResult object with an nInserted property, which is short for the number inserted: a value set to 1. This means that one new record was created, and that is fantastic!

Now that we've inserted a record, let's fetch the record just to make sure that everything worked as expected.
Instead of calling insert, we'll call find without any arguments. We want to return every single item in the Todos collection:
db.Todos.find()When I run this, what do we get? We get one object-looking thing back:

We have our text attribute set to the text that we provided, and we have an _id property. This is the unique identifier for each record, which we'll talk about later. As long as you're seeing the text property coming back to what you set, you are good to go.
We can shut down the mongo command. However, we will still leave the mongod command running because there's one more thing I want to install. It's called Robomongo, and it's a graphic user interface for managing your Mongo database. This will be really useful as you start playing around with Mongo. You'll be able to view the exact data saved in the database; you can manipulate it and do all sorts of stuff.
Over in Finder, we have our mongo-data directory, and you can see that there is a ton of stuff in here. This means that our data was successfully saved. All of the data is in this mongo-data directory. To download and install Robomongo, which is available for Linux, Windows and macOS, we'll head over to robomongo.org and grab the installer for our operating system:

We can click on Download Robo 3T and download the most recent version; it should automatically detect your OS. Download the installer for either Linux or macOS. The one for macOS is really simple. It's one of those installers where you take the icon and drag it into the Applications folder. For Linux, you'll need to extract the archive and run the program in the bin directory. This will start up Robomongo on your Linux distribution.
Since I'm using macOS, I'll just quickly drag the icon over to Applications, and then we can play around with the program itself. Next, I'll open it up inside the Finder. When you first open up Robomongo, you might get a warning like the following on macOS, since it's a program that we downloaded and it's not from an identified macOS developer:

This is fine; most programs you download from the web will not be official since they did not come from the App Store. You can right-click on the downloaded package, select Open, and then click on Open again to run that program. When you first open it, you'll see some screens like the following:

We have a little screen in the background and a list of connections; currently that list is empty. What we need to do is to create a connection for our local MongoDB database so that we can connect to it and manipulate that data. We have Create. I'll click on this, and the only thing we'll need to update is Name. I'll give it a more descriptive name, such as Local Mongo Database. I'll set Address to localhost and the 27017port iscorrect; there's no need to change these. So, I'll click onSave:

Next, I'll double-click on the database to connect to it. Inside the tiny window, we have our database. We are connected to it; we can do all sorts of things to manage it.
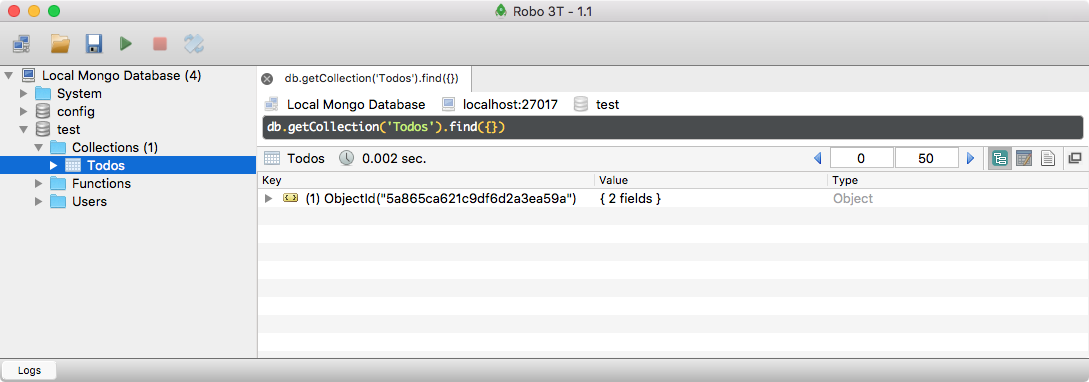
We can open up the test database, and in there, we should see one Collections folder. If we expand this folder, we have our Todos collection, and from there, we can right-click on the collection. Next, click on View Documents, and we should get our one Todo item, the one that we created over inside the Mongo console:
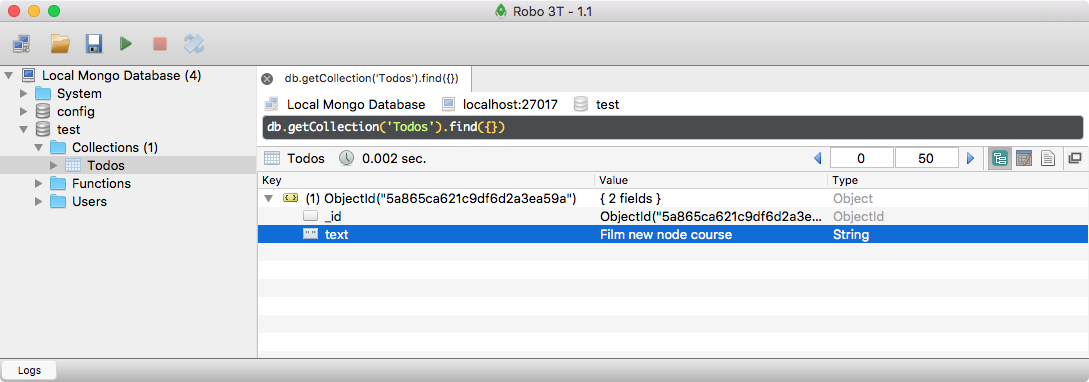
I can expand it to view thetext property. Film new node courseshows up:
If you're on Windows, this is the installation section for you. If you're on Linux or macOS, the previous section was for you; you can skip this one. Our goal here is to install MongoDB on our machines, which will let us create a local MongoDB database server. We'll be able to connect to that server with Node.js, and we'll be able to read and write data to the database. This will be fantastic for the Todo API, which will be responsible for reading and writing various Todo-related information.
To get started, we'll grab the MongoDB installer by going over to mongodb.com. Here we can click on the big green Download button; also, we can see several options on this page:

We'll use Community Server and for Windows. If you go to the Version drop down, none of the versions there will look right for you. The top one is what we want: Windows Server 08 R2 64-bit and later with SSL support. Let's start to download this. It is slightly big; just a tad over 100 MB, so it will take a moment for the download to begin.
I'll start it up. It's one of those basic installers, where you click on Next a few times and you agree to a license agreement. Click on the Custom option for a second, although we will be following through with the Complete option. When you click on Custom, it will show you where on your machine it's going to be installed, and this is important. Here, you can see that for me it's on C:\Program Files\MongoDB\Server, then in the 3.2 directory:
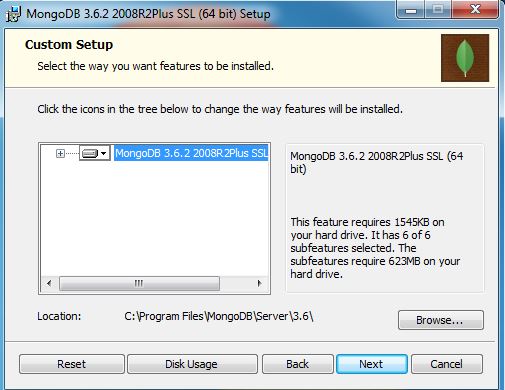
This is going to be important because we'll need to navigate into this directory in order to start up the MongoDB server. I will go back though, and I will be using the Complete option, which installs everything we need. Now we can actually start the installation process. Usually, you have to click on Yes, verifying that you want to install the software. I'll go ahead and do that, and then we are done.
Now once it's installed, we'll navigate into Command Prompt and boot up a server. The first thing we need to do is to navigate into that Program Files directory. I'm in Command Prompt. I recommend that you use Command Prompt and not Git Bash. Git Bash will not work for starting up the MongoDB server. I'll navigate to the root of my machine using cd/, and then we can start navigating to that path using the following command:
cd Program Files/MongoDB/Server/3.2This is the directory where MongoDB was installed. I can use dir to print out the contents of this directory, and what we care about here is the bin directory:
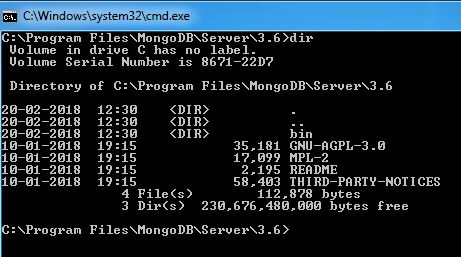
We can navigate into bin using cd bin, and print its contents out using dir. Also, this directory contains a whole bunch of executables that we'll use to do things such as starting up our server and connecting to it:

The first executable we'll run is this mongod.exe file. This will start our local MongoDB database. Before we can go ahead and run this EXE, there is one more thing we need to do. Over in the generic File Explorer, we need to create a directory where all of our data can be stored. To do this, I'll put mine in my user directory by going to the C:/Users/Andrew directory. I'll make a new folder, and I'll call this folder mongo-data. Now, the mongo-data directory is where all of our data will actually be stored. This is the path that we need to specify when we run the mongod.exe command; we need to tell Mongo where to store the data.
Over in Command Prompt, we can now start this command. I'll run mongod.exe, passing in as the dbpath argument, the path to that folder we just created. In my case, it's /Users/Andrew/mongo-data. Now if your username is different, which it obviously is, or you put the folder in a different directory, you'll need to specify the absolute path to the mongo-data folder. Once you have that though, you can start up the server by running the following command:
mongod.exe --dbpath /Users/Andrew/mongo-dataYou'll get a long list of output:

The only thing you need to care about is that, at the very bottom, you should see waiting for connections on port 27017. If you see this, then you are good to go. But now that the server is up, let's connect to it and issue some commands to create and read some data.
To do this, we'll open up a second Command Prompt window and navigate into that same bin directory using cd/Program Files/MongoDB/Server/3.2/bin. From here, we'll run mongo.exe. Note that we're not running the mongod command; we're running mongo.exe. This will connect to our local MongoDB database, and it will put us in sort of a Command Prompt view of our database. We'll be able to issue various Mongo commands to manipulate the data, kind of like we can run Node from Command Prompt to run various JavaScript statements right inside the console. When we run this, we're going to connect to the database. Over in the first console window, you can see that connection accepted shows up. We do have a new connection. In the first console window now, we can run some commands to create and read data. Now I don't expect you to take away anything from these commands. We'll not talk about the ins and outs of MongoDB just yet. All I want to do is to make sure that when you run them, it works as expected.
To get started, let's create a new Todo from the console. This can be done via db.Todos, and on this Todos collection, we'll call the .insertmethod.Also, we'll callinsertwith one argument, an object; this object can have any properties we want to add to the record. For example, I want to set atextproperty. This is the thing I actually need to do. Inside quotes, I can put something. I'll go withCreate new Node course:
db.Todos.insert({text: 'Create new Node course'})Now when I run this command, it will actually make the insert into our database and we should get a writeResult object back, with an nInserted property set to 1. This means that one record was inserted.
Now that we have one Todo in our database, we can try to fetch it using db.Todos once again. This time, instead of calling insert to add a record, we'll call find with no arguments provided. This will return every single Todo inside of our database:
db.Todos.find()When I run this command, We get an object-looking thing where we have a text property set to Create new Node course. We also have an _id property. The _id property is MongoDB's unique identifier, and this is the property that they use to give your document; in this case, a Todo, a unique identifier. We'll be talking more about _id and about all of the commands we just ran, a little later. For now, we can close this using Ctrl + C. We've successfully disconnected from Mongo, and now we can also close the second Command Prompt window.
Before we move on, there is one more thing I want to do. We'll be installing a program called Robomongo—a GUI for MongoDB. It will let you connect to your local database as well as real databases, which we'll be talking about later. Also, it'll let you view all the data, manipulate it and do anything you could do inside a database GUI. It's really useful; sometimes you just need to dive into a database to see exactly what the data looks like.
In order to get this started, we'll head over to a new tab and go to robomongo.org:

Here we can grab the installer by going to Download. We'll download the latest version, and I'm on Windows. I want the installer, not the portable version, so I'll click on the first link here:

This is going to start a really small download, just 17 MB, and we can click on Next a few times through this one to get Robomongo installed on our machines.
I'll start the process, confirming installation and clicking on Next just a couple of times. There's no need to do anything custom inside the settings. We'll run the installer with all of the default settings applied. Now we can actually run the program by finishing all the steps in the installer. When you run Robomongo, you'll be greeted with a MongoDB Connections screen:
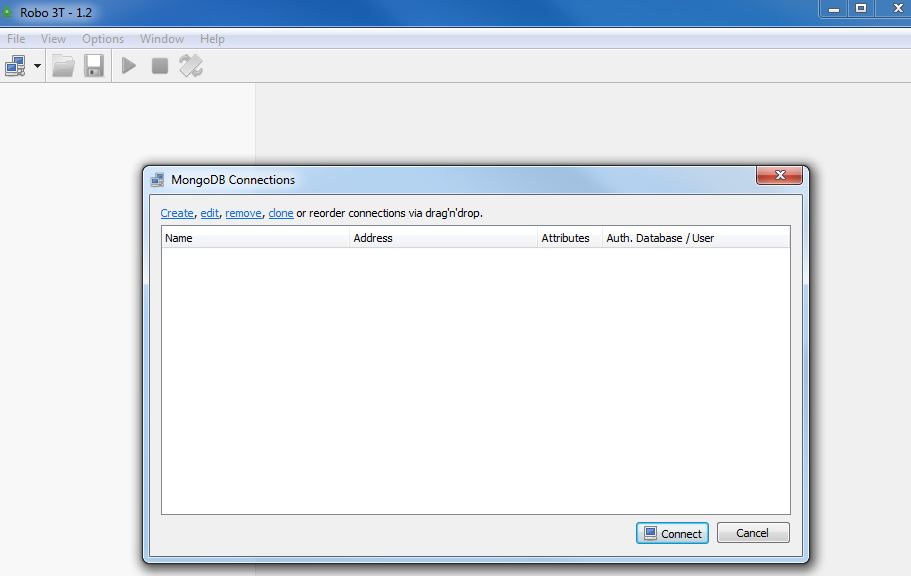
This screen lets you configure all of the connections for Robomongo. You might have a local connection for your local database, and you might have a connection to a real URL where your actual production data is stored. We'll get into all that later.
For now, we'll click on Create. By default, your localhostaddressand your27017portdo not need to be changed:
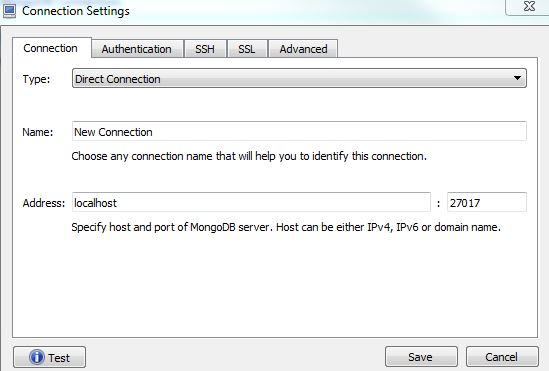
All I'm going to do is to change the name so that it's a little easier to identify. I'll go with Local Mongo Database. Now, we can save our new connection and actually connect to the database by simply double-clicking on it. When we do that, we get a little tree view of our database. We have this test database; this is the one that's created by default, which we can expand. Then we can expand our Collections folder and see the Todos collection. This is the collection we created inside the console. I'll right-click on this and go to View Documents. When I view the documents, I actually get to view the individual records:

Here, I see my _id and text properties that have Create new Node course sitting in the above image.
If you are seeing this, then this means that you have a local Mongo server running, and it also means that you've successfully inserted data into it.
In this chapter, you downloaded and ran the MongoDB database server. This means that we have a local database server we can connect to from our Node application. We also installed Robomongo, which lets us connect to our local database so that we can view and manipulate data. This comes in handy when you're debugging or managing data, or doing anything else with your Mongo database. We'll be using it throughout the book, and you'll begin to see why it's valuable in the later chapters. For now though, you are all set up. You are ready to continue on and start building the Todo API.