


 Download code from GitHub
2. Building User Screen Flows
Overview
This chapter covers the Android activity lifecycle and explains how the Android system interacts with your app. By the end of this chapter, you'll have learned how to build user journeys through different screens. You'll also be able to use activity tasks and launch modes, save and restore the state of your activity, use logs to report on your application, and share data between screens.
Introduction
The previous chapter introduced you to the core elements of Android development, from configuring your app using the AndroidManifest.xml file, working with simple activities, and the Android resource structure, to building an app with build.gradle and running an app on a virtual device. In this chapter, you'll go further and learn how the Android system interacts with your app through the Android lifecycle, how you are notified of changes to your app's state, and how you can use the Android lifecycle to respond to these changes. You'll then progress to learning how to create user journeys through your app and how to share data between screens. You'll be introduced to different techniques to achieve these goals so that you'll be able to use them in your own apps and recognize them when you see them used in other apps.
The Activity Lifecycle
In the previous chapter, we used the onCreate(saveInstanceState: Bundle?) method to display a layout in the UI of our screen. Now, we'll explore in more detail how the Android system interacts with your application to make this happen. As soon as an Activity is launched, it goes through a series of steps to take it through initialization and preparing it to be displayed to being partially displayed, and then fully displayed. There are also steps that correspond with your application being hidden, backgrounded, and then destroyed. This process is called the Activity lifecycle. For every one of these steps, there is a callback that your Activity can use to perform actions such as creating and changing the display and saving data when your app has been put into the background and then restoring that data after your app comes back into the foreground. You can consider these callbacks as hooks into how the system interacts with your activity/screen.
Every Activity has a parent Activity class that it extends. These callbacks are made on your Activity's parent, and it's up to you to decide whether you need to implement them in your own Activity to take any corresponding action. Every one of these callback functions has the override keyword. The override keyword in Kotlin means that either this function is providing an implementation of an interface or an abstract method, or, in the case of your Activity here, which is a subclass, it is providing the implementation that will override its parent.
Now that you know how the Activity lifecycle works in general, let's go into more detail about the principal callbacks you will work with in order, from creating an Activity to the Activity being destroyed:
override fun onCreate(savedInstanceState: Bundle?): This is the callback that you will use the most for activities that draw a full-sized screen. It's here where you prepare your Activity layout to be displayed. At this stage, after the method completes, it is still not displayed to the user, although it will appear that way if you don't implement any other callbacks. You usually set up the UI of your Activity here by calling thesetContentViewmethodsetContentView(R.layout.activity_main) and carry out any initialization that is required. This method is only called once in its lifecycle unless the Activity is created again. This happens by default for some actions (such as rotating the phone from portrait to landscape orientation, for example). ThesavedInstanceStateparameter of theBundle?type (?means the type can be null) in its simplest form is a map of key-value pairs optimized to save and restore data. It will be null if this is the first time that the Activity has been run after the app has started or if the Activity is being created for the first time or recreated without any states being saved. It may contain a saved state if it has been saved in theonSaveInstanceState(outState: Bundle?)callback prior to the Activity being recreated.override fun onRestart(): When the Activity restarts, this is called immediately beforeonStart(). It is important to be clear about the difference between restarting an Activity and recreating an activity. When the Activity is backgrounded by pressing the home button—for instance, when it comes back into the foreground again—onRestart()will be called. Recreating an Activity is what happens when a configuration change happens, such as the device being rotated. The Activity is finished and then created again.override fun onStart(): This is the callback made when the Activity first comes into view. Also, after the app is backgrounded by pressing either the back, home, or therecents/overviewhardware buttons, on selecting the app again from therecents/overviewmenu or the launcher, this function will be run. It is the first of the visible lifecycle methods.override fun onRestoreInstanceState(savedInstanceState: Bundle?): If the state has been saved usingonSaveInstanceState(outState: Bundle?)this is the method which the system calls afteronStart()where you can retrieve theBundlestate instead of restoring the state duringonCreate(savedInstanceState: Bundle?)override fun onResume(): This callback is run as the final stage of creating an Activity for the first time, and also when the app has been backgrounded and then is brought into the foreground. Upon the completion of this callback, the screen/activity is ready to be used, receive user events, and be responsive.override fun onSaveInstanceState(outState: Bundle?): If you want to save the state of the activity, this function can do so. You add key-value pairs using one of the convenience functions depending on the data type. The data will then be available if your Activity is recreated inonCreate(saveInstanceState: Bundle?)andonRestoreInstanceState(savedInstanceState: Bundle?).override fun onPause(): This function is called when the Activity starts to be backgrounded or another dialog or Activity comes into the foreground.override fun onStop(): This function is called when the Activity is hidden, either because it is being backgrounded or another Activity is being launched on top of it.override fun onDestroy(): This is called by the system to kill the Activity when system resources are low, whenfinish()is called explicitly on the Activity, or, more commonly, when the Activity is killed by the user closing the app from the recents/overview button.
Now that you understand what these common lifecycle callbacks do, let's implement them to see when they are called.
Exercise 2.01: Logging the Activity Callbacks
Let's create an application called Activity Callbacks with an empty Activity, as you did previously in Chapter 1, Creating Your First App. The aim of this exercise is to log the Activity callbacks and the order that they occur for common operations:
- After the application has been created,
MainActivitywill appear as follows:package com.example.activitycallbacks import androidx.appcompat.app.AppCompatActivity import android.os.Bundle class MainActivity : AppCompatActivity() { override fun onCreate(savedInstanceState: Bundle?) { super.onCreate(savedInstanceState) setContentView(R.layout.activity_main) } }In order to verify the order of the callbacks, let's add a log statement at the end of each callback. To prepare the Activity for logging, import the Android log package by adding
import android.util.Logto theimportstatements. Then, add a constant to the class to identify your Activity. Constants in Kotlin are identified by theconstkeyword and can be declared at the top level (outside the class) or in an object within the class. Top level constants are generally used if they are required to be public. For private constants, Kotlin provides a convenient way to add static functionality to classes by declaring a companion object. Add the following at the bottom of the class belowonCreate(savedInstanceState: Bundle?):companion object { private const val TAG = "MainActivity" }Then add a log statement at the end of
onCreate(savedInstanceState: Bundle?):Log.d(TAG, "onCreate")
Our Activity should now have the following code:
package com.example.activitycallbacks import android.os.Bundle import android.util.Log import androidx.appcompat.app.AppCompatActivity class MainActivity : AppCompatActivity() { override fun onCreate(savedInstanceState: Bundle?) { super.onCreate(savedInstanceState) setContentView(R.layout.activity_main) Log.d(TAG, "onCreate") } companion object { private const val TAG = "MainActivity" } }din the preceding log statement refers to debug. There are six different log levels that can be used to output message information from the least to most important -vfor verbose,dfor debug,ifor info,wfor warn,efor error, andwtffor what a terrible failure. (This last log level highlights an exception that should never occur.)Log.v(TAG, "verbose message") Log.d(TAG, "debug message") Log.i(TAG, "info message") Log.w(TAG, "warning message") Log.e(TAG, "error message") Log.wtf(TAG, "what a terrible failure message")
- Now, let's see how the logs are displayed in Android Studio. Open the
Logcatwindow. It can be accessed by clicking on theLogcattab at the bottom of the screen and also from the toolbar by going toView|Tool Windows|Logcat. - Run the app on the virtual device and examine the
Logcatwindow output. You should see the log statement you have added formatted like the following line in Figure 2.1:
Figure 2.1: Log output in Logcat
- Log statements can be quite difficult to interpret at first glance, so let's break down the following statement into its separate parts:
2020-03-03 20:36:12.308 21415-21415/com.example.activitycallbacks D/MainActivity: onCreate
Let's examine the elements of the log statement in detail:

Figure 2.2: Table explaining a log statement
You can examine the output of the different log levels by changing the log filter from
Debugto other options in the drop-down menu. If you selectVerbose, as the name implies, you will see a lot of output. - What's great about the
TAGoption of the log statement is that it enables you to filter the log statements that are reported in theLogcatwindow of Android Studio by typing in the text of the tag, as shown in Figure 2.3:
Figure 2.3: Filtering log statements by the TAG name
So, if you are debugging an issue in your Activity, you can type in the
TAGname and add logs to your Activity to see the sequence of log statements. This is what you are going to do next by implementing the principal Activity callbacks and adding a log statement to each one to see when they are run. - Place your cursor on a new line after the closing brace of the
onCreate(savedInstanceState: Bundle?)function and then add theonRestart()callback with a log statement. Make sure you call through tosuper.onRestart()so that the existing functionality of the Activity callback works as expected:override fun onRestart() { super.onRestart() Log.d(TAG, "onRestart") } - You will find that once you start typing the name of the function, Android Studio's autocomplete feature will suggest options for the name of the function you want to override.
Note
In Android Studio you can start typing the name of a function, and autocomplete options will pop up with suggestions for functions to override. Alternatively, if you go to the top menu and then
Code|Generate|Override methods, you can select the methods to override.Do this for all of the following callback functions:
onCreate(savedInstanceState: Bundle?)
onRestart()
onStart()
onRestoreInstanceState(savedInstanceState: Bundle?)
onResume()
onPause()
onStop()
onSaveInstanceStateoutState: Bundle?)
onDestroy()
- Your Activity should now have the following code (truncated here). You can see the full code on GitHub at http://packt.live/38W7jU5
The completed activity will now override the callbacks with your implementation, which adds a log message:
package com.example.activitycallbacks import android.os.Bundle import android.util.Log import androidx.appcompat.app.AppCompatActivity class MainActivity : AppCompatActivity() { override fun onCreate(savedInstanceState: Bundle?) { super.onCreate(savedInstanceState) setContentView(R.layout.activity_main) Log.d(TAG, "onCreate") } override fun onRestart() { super.onRestart() Log.d(TAG, "onRestart") } //Remaining callbacks follow: see github link above companion object { private const val TAG = "MainActivity" } } - Run the app, and then once it has loaded, as in Figure 2.4, look at the
Logcatoutput; you should see the following log statements (this is a shortened version):D/MainActivity: onCreate D/MainActivity: onStart D/MainActivity: onResume
The Activity has been created, started, and then prepared for the user to interact with:

Figure 2.4: The app loaded and displaying MainActivity
- Press the round home button in the center of the bottom navigation controls and background the app. You should now see the following Logcat output:
D/MainActivity: onPause D/MainActivity: onStop D/MainActivity: onSaveInstanceState
For apps which target below Android Pie (API 28) then
onSaveInstanceState(outState: Bundle?)may also be called beforeonPause()oronStop(). - Now, bring the app back into the foreground by pressing the recents/overview button (usually a square or three vertical lines) on the right and selecting the app, or by going to the launcher and opening the app. You should now see the following:
D/MainActivity: onRestart D/MainActivity: onStart D/MainActivity: onResume
The Activity has been restarted. You might have noticed that the
onRestoreInstanceState(savedInstanceState: Bundle)function was not called. This is because the Activity was not destroyed and recreated. - Press the triangle back button on the left of the bottom navigation controls (it may also be on the right) and you will see the Activity being destroyed. You can also do this by pressing the recents/overview button and then swiping the app upward to kill the activity. This is the output:
D/MainActivity: onPause D/MainActivity: onStop D/MainActivity: onDestroy
- Launch your app again and then rotate the phone. You might find that the phone does not rotate and the display is sideways. If this happens drag down the status bar at the very top of the virtual device and select the auto-rotate button 2nd from the right in the settings.

Figure 2.5: Quick settings bar with Wi-Fi and Auto-rotate button selected
You should see the following callbacks:
D/MainActivity: onCreate D/MainActivity: onStart D/MainActivity: onResume D/MainActivity: onPause D/MainActivity: onStop D/MainActivity: onSaveInstanceState D/MainActivity: onDestroy D/MainActivity: onCreate D/MainActivity: onStart D/MainActivity: onRestoreInstanceState D/MainActivity: onResume
Please note that as stated in step 11, the order of the
onSaveInstanceState(outState: Bundle?)callback may vary. - Configuration changes, such as rotating the phone, by default recreate the activity. You can choose not to handle certain configuration changes in the app, which will then not recreate the activity. To do this for rotation, add
android:configChanges="orientation|screenSize|screenLayout"toMainActivityin theAndroidManifest.xmlfile. Launch the app and then rotate the phone, and these are the only callbacks that you have added toMainActivitythat you will see:D/MainActivity: onCreate D/MainActivity: onStart D/MainActivity: onResume
The
orientationandscreenSizevalues have the same function for different Android API levels for detecting screen orientation changes. ThescreenLayoutvalue detects other layout changes which might occur on foldable phones. These are some of the config changes you can choose to handle yourself (another common one iskeyboardHiddento react to changes in accessing the keyboard). The app will still be notified by the system of these changes through the following callback:override fun onConfigurationChanged(newConfig: Configuration) { super.onConfigurationChanged(newConfig) Log.d(TAG, "onConfigurationChanged") }If you add this callback function to
MainActivity, and you have addedandroid:configChanges="orientation|screenSize|screenLayout"toMainActivityin the manifest, you will see it called on rotation.
In this exercise, you have learned about the principal Activity callbacks and how they run when a user carries out common operations with your app through the system's interaction with MainActivity. In the next section, you will cover saving the state and restoring it, as well as see more examples of how the Activity lifecycle works.
Saving and Restoring the Activity State
In this section, you'll explore how your Activity saves and restores the state. As you've learned in the previous section, configuration changes, such as rotating the phone, cause the Activity to be recreated. This can also happen if the system has to kill your app in order to free up memory. In these scenarios, it is important to preserve the state of the Activity and then restore it. In the next two exercises, you'll work through an example ensuring that the user's data is restored when TextView is created and populated from a user's data after filling in a form.
Exercise 2.02: Saving and Restoring the State in Layouts
In this exercise, firstly create an application called Save and Restore with an empty activity. The app you are going to create will have a simple form that offers a discount code for a user's favorite restaurant if they enter some personal details (no actual information will be sent anywhere, so your data is safe):
- Open up the
strings.xmlfile (located inapp|src|main|res|values|strings.xml) and create the following strings that you'll need for your app:<resources> <string name="app_name">Save And Restore</string> <string name="header_text">Enter your name and email for a discount code at Your Favorite Restaurant! </string> <string name="first_name_label">First Name:</string> <string name="email_label">Email:</string> <string name="last_name_label">Last Name:</string> <string name="discount_code_button">GET DISCOUNT</string> <string name="discount_code_confirmation">Your discount code is below %s. Enjoy!</string> </resources>
- You are also going to specify some text sizes, layout margins, and padding directly, so create the
dimens.xmlfile in theapp|src|main|res|valuesfolder and add the dimensions you'll need for the app (you can do this by right-clicking on theres|valuesfolder within Android Studio and selectingNewvalues):<?xml version="1.0" encoding="utf-8"?> <resources> <dimen name="grid_4">4dp</dimen> <dimen name="grid_8">8dp</dimen> <dimen name="grid_12">12dp</dimen> <dimen name="grid_16">16dp</dimen> <dimen name="grid_24">24dp</dimen> <dimen name="grid_32">32dp</dimen> <dimen name="default_text_size">20sp</dimen> <dimen name="discount_code_text_size">20sp</dimen> </resources>
Here, you are specifying all the dimensions you need in the exercise. You will see here that
default_text_sizeanddiscount_code_text_sizeare specified insp. They represent the same values as density-independent pixels, which not only define the size measurement according to the density of the device that your app is being run on but also change the text size according to the user's preference, defined inSettings|Display|Font style(this might beFont size and styleor something similar, depending on the exact device you are using). - In
R.layout.activity_main, add the following XML, creating a containing layout file and adding header aTextViewwith theEnter your name and email for a discount code at Your Favorite Restaurant!text. This is done by adding theandroid:textattribute with the@string/header_textvalue:<?xml version="1.0" encoding="utf-8"?> <androidx.constraintlayout.widget.ConstraintLayout xmlns:android="http://schemas.android.com/apk/res/android" xmlns:app="http://schemas.android.com/apk/res-auto" xmlns:tools="http://schemas.android.com/tools" android:layout_width="match_parent" android:layout_height="match_parent" android:padding="@dimen/grid_4" android:layout_marginTop="@dimen/grid_4" tools:context=".MainActivity"> <TextView android:id="@+id/header_text" android:gravity="center" android:textSize="@dimen/default_text_size" android:paddingStart="@dimen/grid_8" android:paddingEnd="@dimen/grid_8" android:layout_width="wrap_content" android:layout_height="wrap_content" android:text="@string/header_text" app:layout_constraintTop_toTopOf="parent" app:layout_constraintEnd_toEndOf="parent" app:layout_constraintStart_toStartOf="parent"/> </androidx.constraintlayout.widget.ConstraintLayout>
You are using
ConstraintLayoutfor constraining Views against the parent View and sibling Views.Although you should normally specify the display of the View with styles, you can do this directly in the XML, as is done for some attributes here. The value of the
android:textSizeattribute is@dimen/default_text_size, defined in the previous code block, which you use to avoid repetition, and it enables you to change all the text size in one place. Using styles is the preferred option for setting text sizes as you will get sensible defaults and you can override the value in the style or, as you are doing here, on the individual Views.Other attributes that affect positioning are also specified directly here in the Views. The most common ones are padding and margin. Padding is applied on the inside of Views and is the space between the text and the border. Margin is specified on the outside of Views and is the space from the outer edges of Views. For example,
android:paddinginConstraintLayoutsets the padding for the View with the specified value on all sides. Alternatively, you can specify the padding for one of the four sides of a View withandroid:paddingTop,android:paddingBottom,android:paddingStart, andandroid:paddingEnd. This pattern also exists to specify margins, soandroid:layout_marginspecifies the margin value for all four sides of a View andandroid:layoutMarginTop,android:layoutMarginBottom,android:layoutMarginStart, andandroid:layoutMarginEndallow setting the margin for individual sides.For API levels less than 17 (and your app supports down to 16) you also have to add
android:layoutMarginLeftif you useandroid:layoutMarginStartandandroid:layoutMarginRightif you useandroid:layoutMarginEnd. In order to have consistency and uniformity throughout the app, you define the margin and padding values as dimensions contained within thedimens.xmlfile.To position the content within a View, you can specify
android:gravity. Thecentervalue constrains the content both vertically and horizontally within the View. - Next, add three
EditTextviews below theheader_textfor the user to add their first name, last name, and email:<EditText android:id="@+id/first_name" android:textSize="@dimen/default_text_size" android:layout_marginStart="@dimen/grid_24" android:layout_marginLeft="@dimen/grid_24" android:layout_marginEnd="@dimen/grid_16" android:layout_marginRight="@dimen/grid_16" android:layout_width="wrap_content" android:layout_height="wrap_content" android:hint="@string/first_name_label" android:inputType="text" app:layout_constraintTop_toBottomOf="@id/header_text" app:layout_constraintStart_toStartOf="parent" /> <EditText android:textSize="@dimen/default_text_size" android:layout_marginEnd="@dimen/grid_24" android:layout_marginRight="@dimen/grid_24" android:layout_width="wrap_content" android:layout_height="wrap_content" android:hint="@string/last_name_label" android:inputType="text" app:layout_constraintTop_toBottomOf="@id/header_text" app:layout_constraintStart_toEndOf="@id/first_name" app:layout_constraintEnd_toEndOf="parent" /> <!-- android:inputType="textEmailAddress" is not enforced, but is a hint to the IME (Input Method Editor) usually a keyboard to configure the display for an email - typically by showing the '@' symbol --> <EditText android:id="@+id/email" android:textSize="@dimen/default_text_size" android:layout_marginStart="@dimen/grid_24" android:layout_marginLeft="@dimen/grid_24" android:layout_marginEnd="@dimen/grid_32" android:layout_marginRight="@dimen/grid_32" android:layout_width="match_parent" android:layout_height="wrap_content" android:hint="@string/email_label" android:inputType="textEmailAddress" app:layout_constraintTop_toBottomOf="@id/first_name" app:layout_constraintEnd_toEndOf="parent" app:layout_constraintStart_toStartOf="parent" />
The
EditTextfields have aninputTypeattribute to specify the type of input that can be entered into the form field. Some values, such asnumberonEditText, restrict the input that can be entered into the field, and on selecting the field, suggest how the keyboard is displayed. Others, such asandroid:inputType="textEmailAddress", will not enforce an@symbol being added to the form field, but will give a hint to the keyboard to display it. - Finally, add a button for the user to press to generate a discount code, and display the discount code itself and a confirmation message:
    <Button
        android:id="@+id/discount_button"
        android:textSize="@dimen/default_text_size"
        android:layout_marginTop="@dimen/grid_12"
        android:gravity="center"
        android:layout_width="wrap_content"
        android:layout_height="wrap_content"
        android:text="@string/discount_code_button"
        app:layout_constraintTop_toBottomOf="@id/email"
        app:layout_constraintEnd_toEndOf="parent"
        app:layout_constraintStart_toStartOf="parent"/>
    <TextView
        android:id="@+id/discount_code_confirmation"
        android:gravity="center"
        android:textSize="@dimen/default_text_size"
        android:paddingStart="@dimen/grid_16"
        android:paddingEnd="@dimen/grid_16"
        android:layout_marginTop="@dimen/grid_8"
        android:layout_width="match_parent"
        android:layout_height="wrap_content"
        app:layout_constraintTop_toBottomOf="@id/discount_button"
        app:layout_constraintEnd_toEndOf="parent"
        app:layout_constraintStart_toStartOf="parent"
        tools:text="Hey John Smith! Here is your discount code" />
    <TextView
        android:id="@+id/discount_code"
        android:gravity="center"
        android:textSize="@dimen/discount_code_text_size"
        android:textStyle="bold"
        android:layout_marginTop="@dimen/grid_8"
        android:layout_width="match_parent"
        android:layout_height="wrap_content"
        app:layout_constraintTop_toBottomOf="@id/discount_code           _confirmation"
        app:layout_constraintEnd_toEndOf="parent"
        app:layout_constraintStart_toStartOf="parent"
        tools:text="XHFG6H9O" />
There are also some attributes that you haven't seen before. The tools namespace
xmlns:tools="http://schemas.android.com/tools"which was specified at the top of the xml layout file enables certain features that can be used when creating your app to assist with configuration and design. The attributes are removed when you build your app, so they don't contribute to the overall size of the app. You are using thetools:textattribute to show the text that will typically be displayed in the form fields. This helps when you switch to theDesignview from viewing the XML in theCodeview in Android Studio as you can see an approximation of how your layout displays on a device. - Run the app and you should see the output displayed in Figure 2.6:

Figure 2.6: The Activity screen on the first launch
- Enter some text into each of the form fields:

Figure 2.7: The EditText fields filled in
- Now, use the second rotate button in the virtual device controls (
 ) to rotate the phone 90 degrees to the right:
Figure 2.8: The virtual device turned to landscape orientation
Can you spot what has happened? The
Last Namefield value is no longer set. It has been lost in the process of recreating the activity. Why is this? Well, in the case of theEditTextfields, the Android framework will preserve the state of the fields if they have an ID set on them. - Go back to the
activity_main.xmllayout file and add an ID for theLast Namevalue in theEditTextfield:<EditText android:id="@+id/last_name" android:textSize="@dimen/default_text_size" android:layout_marginEnd="@dimen/grid_24" android:layout_width="wrap_content" android:layout_height="wrap_content" android:hint="@string/last_name_label" android:inputType="text" app:layout_constraintTop_toBottomOf="@id/header_text" app:layout_constraintStart_toEndOf="@id/first_name" app:layout_constraintEnd_toEndOf="parent" tools:text="Last Name:"/>
When you run up the app again and rotate the device, it will preserve the value you have entered. You've now seen that you need to set an ID on the EditText fields to preserve the state. For the EditText fields, it's common to retain the state on a configuration change when the user is entering details into a form so that it is the default behavior if the field has an ID. Obviously, you want to get the details of the EditText field once the user has entered some text, which is why you set an ID, but setting an ID for other field types, such as TextView, does not retain the state if you update them and you need to save the state yourself. Setting IDs for Views that enable scrolling, such as RecyclerView, is also important as it enables the scroll position to be maintained when the Activity is recreated.
Now, you have defined the layout for the screen, but you have not added any logic for creating and displaying the discount code. In the next exercise, we will work through this.
The layout created in this exercise is available at http://packt.live/35RSdgz.
You can find the code for the entire exercise at http://packt.live/3p1AZF3.
Exercise 2.03: Saving and Restoring the State with Callbacks
The aim of this exercise is to bring all the UI elements in the layout together to generate a discount code after the user has entered their data. In order to do this, you will have to add logic to the button to retrieve all the EditText fields and then display a confirmation to the user, as well as generate a discount code:
- Open up
MainActivity.ktand replace the default empty Activity from the project creation. A snippet of the code is shown here, but you'll need to use the link given below to find the full code block you need to add:MainActivity.kt
14  class MainActivity : AppCompatActivity() {
15
16    private val discountButton: Button
17        get() = findViewById(R.id.discount_button)
18
19    private val firstName: EditText
20        get() = findViewById(R.id.first_name)
21
22    private val lastName: EditText
23        get() = findViewById(R.id.last_name)
24
25    private val email: EditText
26        get() = findViewById(R.id.email)
27
28    private val discountCodeConfirmation: TextView
29        get() = findViewById(R.id             .discount_code_confirmation)
30
31    private val discountCode: TextView
32        get() = findViewById(R.id.discount_code)
33
34    override fun onCreate(savedInstanceState: Bundle?) {
35        super.onCreate(savedInstanceState)
36        setContentView(R.layout.activity_main)
37        Log.d(TAG, "onCreate")
You can find the complete code here http://packt.live/38XcdQS.
The
get() = …is a custom accessor for a property.Upon clicking the discount button, you retrieve the values from the
first_nameandlast_namefields, concatenate them with a space, and then use a string resource to format the discount code confirmation text. The string you reference in thestrings.xmlfile is as follows:<string name="discount_code_confirmation">Hey %s! Here is your discount code</string>
The
%svalue specifies a string value to be replaced when the string resource is retrieved. This is done by passing in the full name when getting the string:getString(R.string.discount_code_confirmation, fullName)
The code is generated by using the UUID (Universally Unique Identifier) library from the
java.utilpackage. This creates a unique id, and then thetake()Kotlin function is used to get the first eight characters before setting these to uppercase. Finally, discount_code is set in the view, the keyboard is hidden, and all the form fields are set back to their initial values. - Run the app and enter some text into the name and email fields, and then click on
GET DISCOUNT:
Figure 2.9: Screen displayed after the user has generated a discount code
The app behaves as expected, showing the confirmation.
- Now, rotate the phone (pressing the fifth button down with the arrow on the right-hand side of the virtual device picture) and observe the result:

Figure 2.10: Discount code no longer displaying on the screen
Oh, no! The discount code has gone. The
TextViewfields do not retain the state, so you will have to save the state yourself. - Go back into
MainActivity.ktand add the following Activity callbacks:override fun onRestoreInstanceState(savedInstanceState: Bundle) { super.onRestoreInstanceState(savedInstanceState) Log.d(TAG, "onRestoreInstanceState") } override fun onSaveInstanceState(outState: Bundle) { super.onSaveInstanceState(outState) Log.d(TAG, "onSaveInstanceState") }These callbacks, as the names declare, enable you to save and restore the instance state.
onSaveInstanceState(outState: Bundle)allows you to add key-value pairs from your Activity when it is being backgrounded or destroyed, which you can retrieve in eitheronCreate(savedInstanceState: Bundle?)oronRestoreInstanceState(savedInstanceState: Bundle).So, you have two callbacks to retrieve the state once it has been set. If you are doing a lot of initialization in
onCreate(savedInstanceState: Bundle), it might be better to useonRestoreInstanceState(savedInstanceState: Bundle)to retrieve this instance state when your Activity is being recreated. In this way, it's clear which state is being recreated. However, you might prefer to useonCreate(savedInstanceState: Bundle)if there is minimal setup required.Whichever of the two callbacks you decide to use, you will have to get the state you set in the
onSaveInstanceState(outState: Bundle)call. For the next step in the exercise, you will useonRestoreInstanceState(savedInstanceState: Bundle). - Add two constants to the
MainActivitycompanion object:private const val DISCOUNT_CONFIRMATION_MESSAGE = "DISCOUNT_CONFIRMATION_MESSAGE" private const val DISCOUNT_CODE = "DISCOUNT_CODE"
- Now, add these constants as keys for the values you want to save and retrieve by making the following additions to the Activity:
override fun onRestoreInstanceState( savedInstanceState: Bundle) { super.onRestoreInstanceState(savedInstanceState) Log.d(TAG, "onRestoreInstanceState") //Get the discount code or an empty string if it hasn't been set discountCode.text = savedInstanceState .getString(DISCOUNT_CODE,"") //Get the discount confirmation message or an empty string if it hasn't been set discountCodeConfirmation.text = savedInstanceState.getString( DISCOUNT_CONFIRMATION_MESSAGE,"") } override fun onSaveInstanceState(outState: Bundle) { super.onSaveInstanceState(outState) Log.d(TAG, "onSaveInstanceState") outState.putString(DISCOUNT_CODE, discountCode.text.toString()) outState.putString(DISCOUNT_CONFIRMATION_MESSAGE, discountCodeConfirmation.text.toString()) } - Run the app, enter the values into the
EditTextfields, and then generate a discount code. Then, rotate the device and you will see that the discount code is restored in Figure 2.11:
Figure 2.11: Discount code continues to be displayed on the screen
In this exercise, you first saw how the state of the EditText fields is maintained on configuration changes. You also saved and restored the instance state using the Activity lifecycle onSaveInstanceState(outState: Bundle) and onCreate(savedInstanceState: Bundle?)/onRestoreInstanceState(savedInstanceState: Bundle) functions. These functions provide a way to save and restore simple data. The Android framework also provides ViewModel, an Android architecture component that is lifecycle-aware. The mechanisms of how to save and restore this state (with ViewModel) are managed by the framework, so you don't have to explicitly manage it as you have done in the preceding example. You will learn how to use this component in Chapter 10, Android Architecture Components.
So far, you have created a single-screen app. Although it is possible for simple apps to use one Activity, it is likely that you will want to organize your app into different activities that handle different functions. So, in the next section, you will add another Activity to an app and navigate between the activities.
Activity Interaction with Intents
An intent in Android is a communication mechanism between components. Within your own app, a lot of the time, you will want another specific Activity to start when some action happens in the current activity. Specifying exactly which Activity will start is called an explicit intent. On other occasions, you will want to get access to a system component, such as the camera. As you can't access these components directly, you will have to send an intent, which the system resolves in order to open the camera. These are called implicit intents. An intent filter has to be set up in order to register to respond to these events. Go to the AndroidManifest.xml file and you will see an example of two intent filters set within the <intent-filter> XML element:
<activity android:name=".MainActivity">
    <intent-filter>
        <action android:name="android.intent.action.MAIN" />
        <category android:name="android.intent.category.          LAUNCHER" />
    </intent-filter>
</activity>
The one specified with <action android:name="android.intent.action.MAIN" /> means that this is the main entry point into the app. Depending on which category is set, it governs which Activity first starts when the app is started. The other intent filter that is specified is <category android:name="android.intent.category.LAUNCHER" />, which defines that the app should appear in the launcher. When combined, the two intent filters define that when the app is started from the launcher, MainActivity should be started. Removing any one of these intent filters results in the "Error running 'app': Default Activity not found" message. As the app has not got a main entry point, it can't be launched, which is what also happens when you remove <action android:name="android.intent.action.MAIN". />. If you remove <category android:name="android.intent.category.LAUNCHER" /> and don't specify a category, then there is nowhere that it can be launched from.
For the next exercise, you will see how intents work to navigate around your app.
Exercise 2.04: An Introduction to Intents
The goal of this exercise is to create a simple app that uses intents to display text to the user based on their input. Create a new project in Android Studio and select an empty Activity. Once you have set up the project, go to the toolbar and select File | New | Activity | Empty Activity. Call it WelcomeActivity and leave all the other defaults as they are. It will be added to the AndroidManifest.xml file, ready to use. The issue you have now that you've added WelcomeActivity is how do you do anything with it? MainActivity starts when you launch the app, but you need a way to launch WelcomeActivity and then, optionally, pass data to it, which is when you use intents:
- In order to work through this example, add the following code to the
strings.xmlfile. These are the strings you'll be using in the app:<resources> <string name="app_name">Intents Introduction</string> <string name="header_text">Please enter your name and then we\'ll get started!</string> <string name="welcome_text">Hello %s, we hope you enjoy using the app!</string> <string name="full_name_label">Enter your full name:</string> <string name="submit_button_text">SUBMIT</string> </resources>
- Next, update the styles in the
themes.xmlfile adding the header style.<style name="header" parent= "TextAppearance.AppCompat.Title"> <item name="android:gravity">center</item> <item name="android:layout_marginStart">24dp</item> <item name="android:layout_marginEnd">24dp</item> <item name="android:layout_marginLeft">24dp</item> <item name="android:layout_marginRight">24dp</item> <item name="android:textSize">20sp</item> </style> <!-- continued below -->
Next, add the
fullname,button, andpagestyles:<style name="full_name" parent= "TextAppearance.AppCompat.Body1"> <item name="android:layout_marginTop">16dp</item> <item name="android:layout_gravity">center</item> <item name="android:textSize">20sp</item> <item name="android:inputType">text</item> </style> <style name="button" parent= "TextAppearance.AppCompat.Button"> <item name="android:layout_margin">16dp</item> <item name="android:gravity">center</item> <item name="android:textSize">20sp</item> </style> <style name="page"> <item name="android:layout_margin">8dp</item> <item name="android:padding">8dp</item> </style>
Normally, you wouldn't specify dimensions directly in the styles themselves. They should be referenced as
dimensvalues so that they can be updated in one place, are more uniform, and can be labeled to represent what the dimension actually is. This is not done here for simplicity. - Next, change the
MainActivitylayout inactivity_main.xmland add aTextViewheader:<?xml version="1.0" encoding="utf-8"?> <androidx.constraintlayout.widget.ConstraintLayout xmlns:android="http://schemas.android.com/apk/res/android" xmlns:app="http://schemas.android.com/apk/res-auto" xmlns:tools="http://schemas.android.com/tools" android:layout_width="match_parent" android:layout_height="match_parent" style="@style/page" tools:context=".MainActivity"> <TextView android:id="@+id/header_text" style="@style/header" android:layout_width="wrap_content" android:layout_height="wrap_content" android:text="@string/header_text" app:layout_constraintTop_toTopOf="parent" app:layout_constraintEnd_toEndOf="parent" app:layout_constraintStart_toStartOf="parent"/> </androidx.constraintlayout.widget.ConstraintLayout>
This should be the first View displayed, and as it's constrained using
ConstraintLayoutto the top of its parent, it displays at the top of the screen. As it's also constrained to both the start and end of its parent, it will be displayed in the middle when you run the app, as shown in Figure 2.12:
Figure 2.12: Initial app display after adding the TextView header
- Now, add an
EditTextfield for the full name and aButtonfield for the submit button in theactivity_main.xmlfile below theTextViewheader:<EditText android:id="@+id/full_name" style="@style/full_name" android:layout_width="wrap_content" android:layout_height="wrap_content" android:hint="@string/full_name_label" app:layout_constraintTop_toBottomOf="@id/header_text" app:layout_constraintStart_toStartOf="parent" app:layout_constraintEnd_toEndOf="parent"/> <Button android:id="@+id/submit_button" style="@style/button" android:layout_width="wrap_content" android:layout_height="wrap_content" android:text="@string/submit_button_text" app:layout_constraintTop_toBottomOf="@id/full_name" app:layout_constraintEnd_toEndOf="parent" app:layout_constraintStart_toStartOf="parent"/>
The app, when run, looks as in Figure 2.13:

Figure 2.13: The app display after adding the EditText full name field and submit button
You now need to configure the button so that when it's clicked, it retrieves the user's full name from the
EditTextfield and then sends it in an intent, which startsWelcomeActivity. - Update the
activity_welcome.xmllayout file to prepare to do this:<?xml version="1.0" encoding="utf-8"?> <androidx.constraintlayout.widget.ConstraintLayout xmlns:android="http://schemas.android.com/apk/res/android" xmlns:app="http://schemas.android.com/apk/res-auto" xmlns:tools="http://schemas.android.com/tools" android:layout_width="match_parent" android:layout_height="match_parent" style="@style/page" tools:context=".WelcomeActivity"> <TextView android:id="@+id/welcome_text" style="@style/header" android:layout_width="wrap_content" android:layout_height="wrap_content" app:layout_constraintTop_toTopOf="parent" app:layout_constraintEnd_toEndOf="parent" app:layout_constraintStart_toStartOf="parent" app:layout_constraintBottom_toBottomOf="parent" tools:text="Welcome John Smith we hope you enjoy using the app!"/> </androidx.constraintlayout.widget.ConstraintLayout>
You are adding a
TextViewfield to display the full name of the user with a welcome message. The logic to create the full name and welcome message will be shown in the next step. - Now, open
MainActivityand add a constant value above the class header and also update the imports:package com.example.intentsintroduction import android.content.Intent import android.os.Bundle import android.widget.Button import android.widget.EditText import android.widget.Toast import androidx.appcompat.app.AppCompatActivity const val FULL_NAME_KEY = "FULL_NAME_KEY" class MainActivity : AppCompatActivity()…
You will use the constant to set the key to hold the full name of the user by setting it in the intent.
- Then, add the following code to the bottom of
onCreate(savedInstanceState: Bundle?):findViewById<Button>(R.id.submit_button).setOnClickListener { val fullName = findViewById<EditText>(R.id.full_name) .text.toString().trim() if (fullName.isNotEmpty()) { //Set the name of the Activity to launch Intent(this, WelcomeActivity::class.java) .also { welcomeIntent -> //Add the data welcomeIntent.putExtra(FULL_NAME_KEY, fullName) //Launch startActivity(welcomeIntent) } } else { Toast.makeText(this, getString( R.string.full_name_label), Toast.LENGTH_LONG).show() } }There is logic to retrieve the value of the full name and verify that the user has filled this in; otherwise, a pop-up toast message will be shown if it is blank. The main logic, however, takes the
fullNamevalue of theEditTextfield and creates an explicit intent to startWelcomeActivity. Thealsoscope function allows you to carry on using the intent you've just created,Intent(this, WelcomeActivity::class.java), and further operate on it by using something called a lambda expression. The lambda argument here has a default name ofitbut here for clarity we've called itwelcomeIntent. Then, you use the lambda argument in thewelcomeIntent.putExtra(FULL_NAME_KEY, fullName)line to add thefullNamefield, usingFULL_NAME_KEYas the key andfullNameas the value to the extras that the intent holds.Then, you use the intent to start
WelcomeActivity. - Now, run the app, enter your name, and press
SUBMIT, as shown in Figure 2.14:
Figure 2.14: The default screen displayed when the intent extras data is not processed
Well, that's not very impressive. You've added the logic to send the user's name, but not to display it.
- To enable this, please open
WelcomeActivityand add the following to the bottom of theonCreate(savedInstanceState: Bundle?)callback://Get the intent which started this activity intent?.let { //Set the welcome message val fullName = it.getStringExtra(FULL_NAME_KEY) findViewById<TextView>(R.id.welcome_text).text = getString(R.string.welcome_text, fullName) }We reference the intent that started the Activity with
intent?.let{} whichspecifies that theletblock will be run if the intent is not null, andletis a scope function in which you can reference the context object with a default lambda argument ofit. This means you don't have to assign a variable before you can use it. You reference the intent withitand then retrieve the string value that was passed from theMainActivityintent by getting the stringFULL_NAME_KEYextra key. You then format the<string name="welcome_text">Hello %s, we hope you enjoy using the app!</string>resource string by getting the string from the resources and passing in thefullnamevalue retrieved from the intent. Finally, this is set as the text ofTextView. - Run the app again, and a simple greeting will be displayed, as in Figure 2.15:

Figure 2.15: User welcome message displayed
This exercise, although very simple in terms of layouts and user interaction, allows the demonstration of some core principles of intents. You will use them to add navigation and create user flows from one section of your app to another. In the next section, you will see how you can use intents to launch an Activity and receive a result back from it.
Exercise 2.05: Retrieving a Result from an Activity
For some user flows, you will only launch an Activity for the sole purpose of retrieving a result back from it. This pattern is often used to ask permission to use a particular feature, popping up a dialog with a question about whether the user gives their permission to access contacts, the calendar, and so on, and then reporting the result of yes or no back to the calling Activity. In this exercise, you will ask the user to pick their favorite color of the rainbow, and then once that is chosen, display the result in the calling activity:
- Create a new project named
Activity Resultsand add the following strings to thestrings.xmlfile:<string name="header_text_main">Please click the button below to choose your favorite color of the rainbow! </string> <string name="header_text_picker">Rainbow Colors</string> <string name="footer_text_picker">Click the button above which is your favorite color of the rainbow. </string> <string name="color_chosen_message">%s is your favorite color!</string> <string name="submit_button_text">CHOOSE COLOR</string> <string name="red">RED</string> <string name="orange">ORANGE</string> <string name="yellow">YELLOW</string> <string name="green">GREEN</string> <string name="blue">BLUE</string> <string name="indigo">INDIGO</string> <string name="violet">VIOLET</string> <string name="unexpected_color">Unexpected color</string>
- Add the following colors to colors.xml
    <!--Colors of the Rainbow -->
    <color name="red">#FF0000</color>
    <color name="orange">#FF7F00</color>
    <color name="yellow">#FFFF00</color>
    <color name="green">#00FF00</color>
    <color name="blue">#0000FF</color>
    <color name="indigo">#4B0082</color>
    <color name="violet">#9400D3</color>
- Add the relevant new styles to the
themes.xmlfile. A snippet is shown below, but you'll need to follow the link given to see all the code that you need to add:themes.xml
11    <!-- Style for page header on launch screen -->
12    <style name="header" parent=        "TextAppearance.AppCompat.Title">
13        <item name="android:gravity">center</item>
14        <item name="android:layout_marginStart">24dp</item>
15        <item name="android:layout_marginEnd">24dp</item>
16        <item name="android:layout_marginLeft">24dp</item>
17        <item name="android:layout_marginRight">24dp</item>
18        <item name="android:textSize">20sp</item>
19    </style>
20
21    <!-- Style for page header on rainbow color         selection screen -->
22    <style name="header.rainbows" parent="header">
23        <item name="android:textSize">22sp</item>
24        <item name="android:textAllCaps">true</item>
25    </style>
You can find the complete code here http://packt.live/39J0qES.
Note
Dimensions have not been added to
dimens.xmlfor simplicity. - Now, you have to set up the Activity that will set the result you receive in
MainActivity. Go toFile|New|Activity|EmptyActivityand create an Activity calledRainbowColorPickerActivity. - Update the
activity_main.xmllayout file to display a header, a button, and then a hiddenandroid:visibility="gone"View, which will be made visible and set with the user's favorite color of the rainbow when the result is reported:<?xml version="1.0" encoding="utf-8"?> <androidx.constraintlayout.widget.ConstraintLayout xmlns:android="http://schemas.android.com/apk/res/android" xmlns:app="http://schemas.android.com/apk/res-auto" xmlns:tools="http://schemas.android.com/tools" android:layout_width="match_parent" android:layout_height="match_parent" style="@style/page" tools:context=".MainActivity"> <TextView android:id="@+id/header_text" style="@style/header" android:layout_width="wrap_content" android:layout_height="wrap_content" android:text="@string/header_text_main" app:layout_constraintTop_toTopOf="parent" app:layout_constraintEnd_toEndOf="parent" app:layout_constraintStart_toStartOf="parent"/> <Button android:id="@+id/submit_button" style="@style/button" android:layout_width="wrap_content" android:layout_height="wrap_content" android:text="@string/submit_button_text" app:layout_constraintTop_toBottomOf="@id/header_text" app:layout_constraintEnd_toEndOf="parent" app:layout_constraintStart_toStartOf="parent"/> <TextView android:id="@+id/rainbow_color" style="@style/color_block" android:visibility="gone" app:layout_constraintTop_toBottomOf="@id/ submit_button" app:layout_constraintStart_toStartOf="parent" app:layout_constraintEnd_toEndOf="parent" tools:text="This is your favorite color of the rainbow"/> </androidx.constraintlayout.widget.ConstraintLayout>
- You'll be using the
startActivityForResult(Intent intent, int requestCode)function to get a result back from the Activity you launch. In order to ensure that the result you get back is from the operation you expected, you have to setrequestCode. Add this constant for the request code, and two others to set keys for the values we want to use in the intent, as well as a default color above the class header in MainActivity so it is displayed as follows with the package name and imports:package com.example.activityresults import android.content.Intent import androidx.appcompat.app.AppCompatActivity import android.os.Bundle import android.widget.Button import android.widget.TextView const val PICK_RAINBOW_COLOR_INTENT = 1 // The request code // Key to return rainbow color name in intent const val RAINBOW_COLOR_NAME = "RAINBOW_COLOR_NAME" // Key to return rainbow color in intent const val RAINBOW_COLOR = "RAINBOW_COLOR" const val DEFAULT_COLOR = "#FFFFFF" // White class MainActivity : AppCompatActivity()…
- Then, at the bottom of
onCreate(savedInstanceState: Bundle?)inMainActivityadd the following:findViewById<Button>(R.id.submit_button).setOnClickListener { //Set the name of the Activity to launch passing //in request code Intent(this, RainbowColorPickerActivity::class.java) .also { rainbowColorPickerIntent -> startActivityForResult( rainbowColorPickerIntent, PICK_RAINBOW_COLOR_INTENT ) } }This uses the syntax you used previously with
alsoto create an intent and use it with a named lambda parameter of the context object. In this case, you are usingrainbowColorPickerIntentto refer to the intent you just created withIntent(this, RainbowColorPickerActivity::class.java).The key call is
startActivityForResult(rainbowColorPickerIntent, PICK_RAINBOW_COLOR_INTENT), which launchesRainbowColorPickerActivitywith a request code. So, when do we get this result back? You receive the result when it is set by overridingonActivityResult(requestCode: Int, resultCode: Int, data: Intent?).This call specifies the request code, which you can check to confirm that it is the same as the request code you sent.
resultCodereports the status of the operation. You can set your own code, but it is usually set toActivity.RESULT_OKorActivity.RESULT_CANCELED, and the last parameter,data, is the intent that has been set by the activity started for the result, RainbowColorPickerActivity. - Add the following to
onActivityResult(requestCode: Int, resultCode: Int, data: Intent?)callback inMainActivity:override fun onActivityResult(requestCode: Int, resultCode: Int, data: Intent?) { super.onActivityResult(requestCode, resultCode, data) if (requestCode == PICK_RAINBOW_COLOR_INTENT && resultCode == Activity.RESULT_OK) { val backgroundColor = data?.getIntExtra(RAINBOW_COLOR, Color.parseColor(DEFAULT_COLOR)) ?: Color.parseColor(DEFAULT_COLOR) val colorName = data?.getStringExtra (RAINBOW_COLOR_NAME) ?: "" val colorMessage = getString (R.string.color_chosen_message, colorName) val rainbowColor = findViewById <TextView>(R.id.rainbow_color) rainbowColor.setBackgroundColor(ContextCompat.getColor(this, backgroundColor)) rainbowColor.text = colorMessage rainbowColor.isVisible = true } } - So, you check that the request code and response code values are what is expected, and then proceed to query the intent data for the values you are expecting. For this exercise, you want to get the background color name (
colorName) and the hexadecimal value of the color (backgroundColor) so that we can display it. The?operator checks whether the value is null (that is, not set in the intent), and if so, the Elvis operator (?:) sets the default value. The color message uses String formatting to set a message replacing the placeholder in the resource value with the color name. Now that you've got the colors, you can make therainbow_colorTextViewfield visible and set the background color of the View tobackgroundColorand add text displaying the name of the user's favorite color of the rainbow. - For the layout of the
RainbowColorPickerActivityactivity, you are going to display a button with a background color and color name for each of the seven colors of the rainbow:RED,ORANGE,YELLOW,GREEN,BLUE,INDIGO, andVIOLET. These will be displayed in aLinearLayoutvertical list. For most of the layout files in the course, you will be usingConstrainLayout, as it provides fine-grained positioning of individual Views. For situations where you need to display a vertical or horizontal list of a small number of items,LinearLayoutis also a good choice. If you need to display a large number of items, thenRecyclerViewis a better option as it can cache layouts for individual rows and recycle views that are no longer displayed on the screen. You will learn aboutRecyclerViewin Chapter 5, RecyclerView. - The first thing you need to do in
RainbowColorPickerActivityis create the layout. This will be where you present the user with the option to choose their favorite color of the rainbow. - Open
activity_rainbow_color_picker.xmland replace the layout, inserting the following:<?xml version="1.0" encoding="utf-8"?> <ScrollView xmlns:android="http://schemas.android.com/apk/res/android" xmlns:app="http://schemas.android.com/apk/res-auto" xmlns:tools="http://schemas.android.com/tools" android:layout_width="match_parent" android:layout_height="wrap_content"> </ScrollView>
We are adding
ScrollViewto allow the contents to scroll if the screen height cannot display all of the items.ScrollViewcan only take one child View, which is the layout to scroll. - Next, add
LinearLayoutwithinScrollViewto display the contained views in the order that they are added with a header and a footer. The first child View is a header with the title of the page and the last View that is added is a footer with instructions to the user to pick their favorite color:<LinearLayout style="@style/page" android:layout_width="match_parent" android:layout_height="wrap_content" android:gravity="center_horizontal" android:orientation="vertical" tools:context=".RainbowColorPickerActivity"> <TextView android:id="@+id/header_text" style="@style/header.rainbows" android:layout_width="wrap_content" android:layout_height="wrap_content" android:text="@string/header_text_picker" app:layout_constraintEnd_toEndOf="parent" app:layout_constraintStart_toStartOf="parent" app:layout_constraintTop_toTopOf="parent"/> <TextView style="@style/body" android:layout_width="wrap_content" android:layout_height="wrap_content" android:text="@string/footer_text_picker" app:layout_constraintEnd_toEndOf="parent" app:layout_constraintStart_toStartOf="parent" app:layout_constraintTop_toTopOf="parent"/> </LinearLayout>
The layout should now look as in Figure 2.16 in the app:

Figure 2.16: Rainbow colors screen with a header and footer
- Now, finally, add the button views between the header and the footer to select a color of the rainbow, and then run the app:
    <Button
        android:id="@+id/red_button"
        style="@style/button"
        android:layout_width="wrap_content"
        android:layout_height="wrap_content"
        android:background="@color/red"
        android:text="@string/red"/>
    <Button
        .......
        android:text="@string/orange"/>
    <Button
        .......
        android:text="@string/yellow"/>
    <Button
        .......
        android:text="@string/green"/>
    <Button
        .......
        android:text="@string/blue"/>
    <Button
        .......
        android:text="@string/indigo"/>
    <Button
        .......
        android:text="@string/violet"/>
The preceding layout created is available at the following link: http://packt.live/2M7okBX
These Views are buttons that are displayed in the order of the colors of the rainbow. Although there is a button label for the color and the background color, which is filled in with the appropriate color, the most important XML attribute is
id. This is what you will use in the Activity to prepare the result of what is returned to the calling activity. - Now, open
RainbowColorPickerActivityand replace the content with the following:package com.example.activityresults import android.app.Activity import android.content.Intent import androidx.appcompat.app.AppCompatActivity import android.os.Bundle import android.view.View import android.widget.Toast class RainbowColorPickerActivity : AppCompatActivity() { override fun onCreate(savedInstanceState: Bundle?) { super.onCreate(savedInstanceState) setContentView(R.layout.activity_rainbow_color_picker) } private fun setRainbowColor(colorName: String, color: Int) { Intent().let { pickedColorIntent -> pickedColorIntent.putExtra(RAINBOW_COLOR_NAME, colorName) pickedColorIntent.putExtra(RAINBOW_COLOR, color) setResult(Activity.RESULT_OK, pickedColorIntent) finish() } } }This is the function that creates an intent and puts the relevant String extras holding the rainbow color name and the rainbow color
hexvalue. The result is then returned to the calling Activity, and as you have no further use of this Activity, you callfinish()so that the calling Activity is displayed. The way that you retrieve the rainbow color that the user has chosen is done by adding a listener for all the buttons in the layout. - Now, add the following to the bottom of
onCreate(savedInstanceState: Bundle?):val colorPickerClickListener = View.OnClickListener { view -> when (view.id) { R.id.red_button -> setRainbowColor( getString(R.string.red), R.color.red) R.id.orange_button -> setRainbowColor( getString(R.string.orange), R.color.orange) R.id.yellow_button -> setRainbowColor( getString(R.string.yellow), R.color.yellow) R.id.green_button -> setRainbowColor( getString(R.string.green), R.color.green) R.id.blue_button -> setRainbowColor( getString(R.string.blue), R.color.blue) R.id.indigo_button -> setRainbowColor( getString(R.string.indigo), R.color.indigo) R.id.violet_button -> setRainbowColor( getString(R.string.violet), R.color.violet) else -> { Toast.makeText(this, getString( R.string.unexpected_color), Toast.LENGTH_LONG) .show() } } }The
colorPickerClickListenerclick listener added in the preceding code determines which colors to set for thesetRainbowColor(colorName: String, color: Int)function by using awhenstatement. Thewhenstatement is the equivalent of theswitchstatement in Java and languages based on C. It allows multiple conditions to be satisfied with one branch and is more concise. In the preceding example,view.idis matched against the IDs of the rainbow layout buttons and when found, executes the branch, setting the color name and hex value from the string resources to pass intosetRainbowColor(colorName: String, color: Int). - Now, add this click listener to the buttons from the layout:
findViewById<View>(R.id.red_button).setOnClickListener(  colorPickerClickListener)
findViewById<View>(R.id.orange_button).setOnClickListener(  colorPickerClickListener)
findViewById<View>(R.id.yellow_button).setOnClickListener(  colorPickerClickListener)
findViewById<View>(R.id.green_button).setOnClickListener(  colorPickerClickListener)
findViewById<View>(R.id.blue_button).setOnClickListener(  colorPickerClickListener)
findViewById<View>(R.id.indigo_button).setOnClickListener(  colorPickerClickListener)
findViewById<View>(R.id.violet_button).setOnClickListener(  colorPickerClickListener)
Every button has a
ClickListenerinterface attached, and as the operation is the same, they have the sameClickListenerinterface attached. Then, when the button is pressed, it sets the result of the color that the user has chosen and returns it to the calling activity. - Now, run the app and press the
CHOOSE COLORbutton, as shown in Figure 2.17:
Figure 2.17: The rainbow colors app start screen
- Now, select your favorite color of the rainbow:

Figure 2.18: The rainbow colors selection screen
- Once you've chosen your favorite color, a screen with your favorite color will be displayed, as shown in Figure 2.19:

Figure 2.19: The app displaying the selected color
As you can see, the app displays the color that you've selected as your favorite color in Figure 2.19.
This exercise introduced you to another way of creating user flows using startActivityForResult. This can be very useful for carrying out a dedicated Task where you need a result before proceeding with the user's flow through the app. Next, you will explore launch modes and how they impact the flow of user journeys when building apps.
Intents, Tasks, and Launch Modes
Up until now, you have been using the standard behavior for creating Activities and moving from one Activity to the next. The flow you have been using is the default, and in most cases, this will be the one you choose to use. When you open the app from the launcher with the default behavior, it creates its own Task, and each Activity you create is added to a back stack, so when you open three Activities one after the other as part of your user's journey, pressing the back button three times will move the user back through the previous screens/Activities and then go back to the device's home screen, while still keeping the app open.
The launch mode for this type of Activity is called Standard; it is the default and doesn't need specifying in the Activity element of AndroidManifest.xml. Even if you launch the same Activity three times, one after the other, there will be three instances of the same activity that exhibit the behavior described previously.
For some apps, you may want to change this behavior. The scenario most commonly used that doesn't conform to this pattern is when you want to relaunch an Activity without creating a new separate instance. A common use case for this is when you have a home screen with a main menu and different news stories that the user can read. Once the user has gone through to an individual news story and then presses another news story title from the menu, when the user presses the back button, they will expect to return to the home screen and not the previous news story. The launch mode that can help here is called singleTop. If a singleTop Activity is at the top of the Task (top, in this context, means most recently added), when the same singleTop Activity is launched, then instead of creating a new Activity, it uses the same Activity and runs the onNewIntent callback. In the preceding scenario, this could then use the same activity to display a different news story. In this callback, you receive an intent, and you can then process this intent as you have done previously in onCreate.
There are two other launch modes to be aware of, called SingleTask and SingleInstance. These are not for general use and are only used for special scenarios. For both of these launch modes, only one Activity of this type can exist in the application and it is always at the root of its Task. If you launch an Activity with this launch mode, it will create a new Task. If it already exists, then it will route the intent through the onNewIntent call and not create another instance. The only difference between SingleTask and SingleInstance is that SingleInstance is the one and only Activity of its Task. No new Activities can be launched into its Task. In contrast, SingleTask does allow other Activities to be launched into its Task, but the SingleTask Activity is always at the root.
These launch modes can be added to the XML of AndroidManifest.xml or created programmatically by adding intent flags. The most common ones used are the following:
FLAG_ACTIVITY_NEW_TASK: Launches the Activity into a new Task.FLAG_ACTIVITY_CLEAR_TASK: Clears the current Task, so finishes all Activities and launches the Activity at the root of the current Task.FLAG_ACTIVITY_SINGLE_TOP: Replicates the launch mode of thelaunchMode="singleTop"XML.FLAG_ACTIVITY_CLEAR_TOP: Removes all Activities that are above any other instances of the same activity. If this is launched on a standard launch mode Activity, then it will clear the Task down to the first existing instance of the same Activity, and then launch another instance of the same Activity. This will probably not be what you want, and you can launch this flag with theFLAG_ACTIVITY_SINGLE_TOPflag to clear all the activities down to the same instance of the Activity you are launching and not create a new instance, but instead route a new intent to the existing Activity. To create an Activity using these twointentflags, you would do the following:val intent = Intent(this, MainActivity::class.java).apply { flags = Intent.FLAG_ACTIVITY_CLEAR_TOP or Intent.FLAG_ACTIVITY_SINGLE_TOP } startActivity(intent)
If an intent launches an Activity with one or more of the intent flags specified in the preceding code block, then the launch mode specified overrides the one that is set in the AndroidManifest.xml file.
Intent flags can be combined in multiple ways. For more information, see the official documentation at https://developer.android.com/reference/android/content/Intent.
You'll explore the differences in the behavior of these two launch modes in the next exercise.
Exercise 2.06: Setting the Launch Mode of an Activity
This exercise has many different layout files and Activities to illustrate the two most commonly used launch modes. Please download the code from http://packt.live/2LFWo8t and then we will go through the exercise at http://packt.live/2XUo3Vk:
- Open up the
activity_main.xmlfile and examine it.This illustrates a new concept when using layout files. If you have a layout file and you would like to include it in another layout, you can use the
<include>XML element (have a look at the following snippet of the layout file):<include layout="@layout/letters" android:id="@+id/letters_layout" android:layout_width="wrap_content" android:layout_height="wrap_content" app:layout_constraintLeft_toLeftOf="parent" app:layout_constraintRight_toRightOf="parent" app:layout_constraintTop_toBottomOf="@id/ launch_mode_standard"/> <include layout="@layout/numbers" android:layout_width="wrap_content" android:layout_height="wrap_content" app:layout_constraintLeft_toLeftOf="parent" app:layout_constraintRight_toRightOf="parent" app:layout_constraintTop_toBottomOf="@id/ launch_mode_single_top"/>
The preceding layout uses the
includeXML element to include the two layout files:letters.xmlandnumbers.xml. - Open up and inspect the
letters.xmlandnumbers.xmlfiles found in theres|layoutfolder. These are very similar and are only differentiated from the buttons they contain by the ID of the buttons themselves and the text label they display. - Run the app and you will see the following screen:

Figure 2.20: App displaying both the standard and single top modes
In order to demonstrate/illustrate the difference between
standardandsingleTopactivity launch modes, you have to launch two or three activities one after the other. - Open up
MainActivityand examine the contents of the code block inonCreate(savedInstanceState: Bundle?)after the signature:val buttonClickListener = View.OnClickListener { view -> when (view.id) { R.id.letterA -> startActivity(Intent(this, ActivityA::class.java)) //Other letters and numbers follow the same pattern/flow else -> { Toast.makeText( this, getString(R.string.unexpected_button_pressed), Toast.LENGTH_LONG ) .show() } } } findViewById<View>(R.id.letterA).setOnClickListener(buttonClickListener) //The buttonClickListener is set on all the number and letter views }The logic contained in the main Activity and the other activities is basically the same. It displays an Activity and allows the user to press a button to launch another Activity using the same logic of creating a ClickListener and setting it on the button you saw in Exercise 2.05, Retrieving a Result from an Activity.
- Open the
AndroidManifest.xmlfile and you will see the following:<?xml version="1.0" encoding="utf-8"?> <manifest xmlns:android="http://schemas.android.com/apk/res/android" package="com.example.launchmodes"> <application android:allowBackup="true" android:icon="@mipmap/ic_launcher" android:label="@string/app_name" android:roundIcon="@mipmap/ic_launcher_round" android:supportsRtl="true" android:theme="@style/Theme.LaunchModes"> <activity android:name=".ActivityA" android:launchMode="standard"/> <activity android:name=".ActivityB" android:launchMode="standard"/> <activity android:name=".ActivityC" android:launchMode="standard"/> <activity android:name=".ActivityOne" android:launchMode="singleTop"/> <activity android:name=".ActivityTwo" android:launchMode="singleTop"/> <activity android:name=".ActivityThree" android:launchMode="singleTop"/> <activity android:name=".MainActivity"> <intent-filter> <action android:name= "android.intent.action.MAIN" /> <category android:name= "android.intent.category.LAUNCHER" /> </intent-filter> </activity> </application> </manifest>
You launch an Activity based on a button pressed on the main screen, but the letter and number activities have a different launch mode, which you can see specified in the
AndroidManifest.xmlfile.The
standardlaunch mode is specified here to illustrate the difference betweenstandardandsingleTop, butstandardis the default and would be how the Activity is launched if theandroid:launchModeXML attribute was not present. - Press one of the letters under the
Standardheading and you will see the following screen (withAor lettersCorB):
Figure 2.21: The app displaying standard activity
- Keep on pressing any of the letter buttons, which will launch another Activity. Logs have been added to show this sequence of launching activities. Here is the log after pressing 10 letter Activities randomly:
2019-10-23 20:50:51.097 15281-15281/com.example.launchmodes D/MainActivity: onCreate
2019-10-23 20:51:16.182 15281-15281/com.example.launchmodes D/Activity B: onCreate
2019-10-23 20:51:18.821 15281-15281/com.example.launchmodes D/Activity B: onCreate
2019-10-23 20:51:19.353 15281-15281/com.example.launchmodes D/Activity C: onCreate
2019-10-23 20:51:20.334 15281-15281/com.example.launchmodes D/Activity A: onCreate
2019-10-23 20:51:20.980 15281-15281/com.example.launchmodes D/Activity B: onCreate
2019-10-23 20:51:21.853 15281-15281/com.example.launchmodes D/Activity B: onCreate
2019-10-23 20:51:23.007 15281-15281/com.example.launchmodes D/Activity C: onCreate
2019-10-23 20:51:23.887 15281-15281/com.example.launchmodes D/Activity B: onCreate
2019-10-23 20:51:24.349 15281-15281/com.example.launchmodes D/Activity C: onCreate
If you observe the preceding log, every time the user presses a character button in launch mode, a new instance of the character Activity is launched and added to the back stack.
- Close the app, making sure it is not backgrounded (or in the recents/overview menu) but is actually closed, and then open the app again and press one of the number buttons under the
Single Topheading:
Figure 2.22: The app displaying the Single Top activity
- Press the number buttons 10 times, but make sure you press the same number button at least twice sequentially before pressing another number button.
The logs you should see in the
Logcatwindow (View|Tool Windows|Logcat) should be similar to the following:2019-10-23 21:04:50.201 15549-15549/com.example.launchmodes D/MainActivity: onCreate 2019-10-23 21:05:04.503 15549-15549/com.example.launchmodes D/Activity 2: onCreate 2019-10-23 21:05:08.262 15549-15549/com.example.launchmodes D/Activity 3: onCreate 2019-10-23 21:05:09.133 15549-15549/com.example.launchmodes D/Activity 3: onNewIntent 2019-10-23 21:05:10.684 15549-15549/com.example.launchmodes D/Activity 1: onCreate 2019-10-23 21:05:12.069 15549-15549/com.example.launchmodes D/Activity 2: onNewIntent 2019-10-23 21:05:13.604 15549-15549/com.example.launchmodes D/Activity 3: onCreate 2019-10-23 21:05:14.671 15549-15549/com.example.launchmodes D/Activity 1: onCreate 2019-10-23 21:05:27.542 15549-15549/com.example.launchmodes D/Activity 3: onNewIntent 2019-10-23 21:05:31.593 15549-15549/com.example.launchmodes D/Activity 3: onNewIntent 2019-10-23 21:05:38.124 15549-15549/com.example.launchmodes D/Activity 1: onCreate
You'll notice that instead of calling onCreate when you pressed the same button again, the Activity is not created, but a call is made to onNewIntent. If you press the back button, you'll notice that it will take you less than 10 clicks to back out of the app and return to the home screen, reflecting the fact that 10 activities have not been created.
Activity 2.01: Creating a Login Form
The aim of this activity is to create a login form with username and password fields. Once the values in these fields are submitted, check these entered values against hardcoded values and display a welcome message if they match, or an error message if they don't, and return the user to the login form. The steps needed to achieve this are the following:
- Create a form with username and password
EditTextViews and aLOGINbutton. - Add a
ClickListenerinterface to the button to react to a button press event. - Validate that the form fields are filled in.
- Check the submitted username and password fields against the hardcoded values.
- Display a welcome message with the username if successful and hide the form.
- Display an error message if not successful and redirect the user back to the form.
There are a few possible ways that you could go about trying to complete this activity. Here are three ideas for approaches you could adopt:
- Use a
singleTopActivity and send an intent to route to the same Activity to validate the credentials. - Use a standard Activity to pass a username and password to another Activity and validate the credentials.
- Use
startActivityForResultto carry out the validation in another Activity and then return the result.
The completed app, upon its first loading, should look as in Figure 2.23:
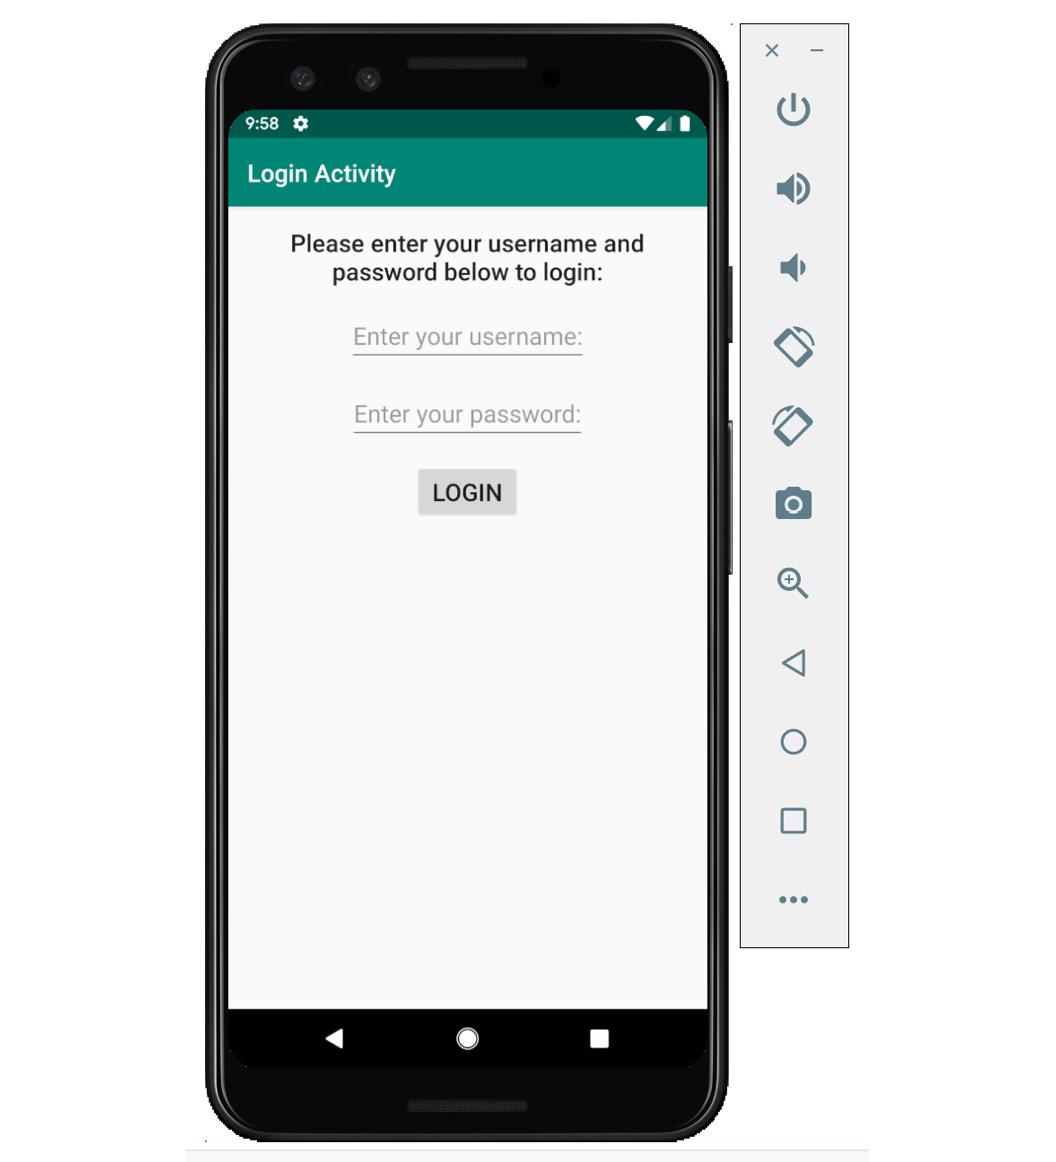
Figure 2.23: The app display when first loaded
Note
The solution to this activity can be found at: http://packt.live/3sKj1cp.
The source code for all the exercises and the activity in this chapter is located at http://packt.live/3o12sp4.
Summary
In this chapter, you have covered a lot of the groundwork of how your application interacts with the Android framework, from the Activity lifecycle callbacks to retaining the state in your activities, navigating from one screen to another, and how intents and launch modes make this happen. These are core concepts that you need to understand in order to move on to more advanced topics.
In the next chapter, you will be introduced to fragments and how they fit into the architecture of your application, as well as exploring more of the Android resources framework.


