Download code from GitHub
Setting Up Your Development Environment
This chapter demonstrates how you and your team members can create a consistent development environment so that your entire team has the same great web development experience – the importance of which is highlighted in the preface of the book. It can be tough for beginners to create the right development environment, which is essential for a frustration-free development experience. For seasoned developers and teams, achieving a consistent and minimal development environment remains a challenge. Once achieved, such a development environment helps avoid many IT-related issues, including ongoing maintenance, licensing, and upgrade costs.
Instructions on installing GitHub Desktop, Node.js, the Angular CLI, and Docker are a useful reference for those from absolute beginners to seasoned teams, along with strategies for how to automate and ensure the correct and consistent configuration of your development environment.
Feel free to skip this chapter if you already have a robust development environment set up; however, beware that some of the environmental assumptions declared in this chapter may result in some instructions not working for you in later chapters. Come back to this chapter as a reference if you run into issues or need to help a colleague, pupil, or friend to set up their development environment. Automated installation scripts to set up your development environment can be found at https://github.com/duluca/web-dev-environment-setup.
To make the most of this book, you should be familiar with JavaScript ES2015+, frontend development basics, and RESTful APIs.
The recommended operating systems are Windows 10 Pro v1903+ with PowerShell v7+, or macOS Sierra v10.15+ with Terminal (Bash or Oh My Zsh). Most of the suggested software in this book also works on Linux systems, but your experience may vary depending on your particular setup.
It is standard practice for developers to use Google Chrome 80+ when developing web applications. However, you may also use the Chromium-based Microsoft Edge browser 80+. You should definitely install the cross-platform PowerShell on Windows from https://github.com/PowerShell/PowerShell/releases, which gives you access to chain operators && and ||. Additionally, get the new Windows Terminal from the Microsoft Store for a superior command-line experience on Windows.
In this chapter, you are going to learn how to do the following:
- Work with the CLI package managers Chocolatey and Homebrew to install and update software
- Use those package managers to install GitHub, Node.js, and other essential programs
- Use scripting to automate installation using PowerShell or Bash
- Generate an Angular application using the Angular CLI
- Achieve a consistent and cross-platform development environment using automated tools
Let's start by learning about CLI-based package managers that you can use to install your development tools. In the next section, you'll see that using CLI tools is a superior method compared to dealing with individual installers. It is much easier to automate CLI tools, which makes setup and maintenance tasks repeatable and fast.
CLI package managers
Installing software through a Graphical User Interface (GUI) is slow and challenging to automate. As a full-stack developer, whether you're a Windows or a Mac user, you must rely on Command-Line Interface (CLI) package managers to efficiently install and configure the software you depend on.
Remember, anything that can be expressed as a CLI command can also be automated.
Installing Chocolatey for Windows
Chocolatey is a CLI-based package manager for Windows that can be used for automated software installation. To install Chocolatey on Windows, you need to run an elevated command shell:
- Launch the Start menu
- Start typing in
PowerShell - You should see Windows PowerShell Desktop App as a search result
- Right-click on Windows PowerShell and select Run as Administrator
- This triggers a User Account Control (UAC) warning; select Yes to continue
- Execute the install command found at https://chocolatey.org/install in PowerShell to install the Chocolatey package manager:
PS> Set-ExecutionPolicy Bypass -Scope Process -Force; [System.Net.ServicePointManager]::SecurityProtocol = [System.Net.ServicePointManager]::SecurityProtocol -bor 3072; iex ((New-Object System.Net.WebClient).DownloadString('https://chocolatey.org/install.ps1')) - Verify your Chocolatey installation by executing
choco - You should see a similar output to the one shown in the following screenshot:
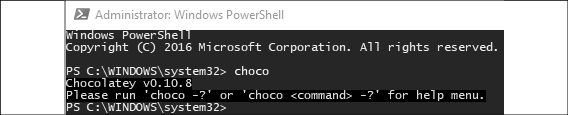
Figure 2.1: Successful installation of Chocolatey
All subsequent Chocolatey commands must also be executed from an elevated command shell. Alternatively, it is possible to install Chocolatey in a non-administrator setting that doesn't require an elevated command shell. However, this results in a non-standard and less secure development environment, and certain applications installed through the tool may still require elevation.
Scoop is an alternative to Chocolatey that provides a more Unix-like experience. If you prefer Unix-style tools and commands, you can install Scoop at https://scoop.sh/ or by executing:
$ iwr -useb get.scoop.sh | iex
For more information on Chocolatey, refer to https://chocolatey.org/install.
Installing Homebrew for macOS
Homebrew is a CLI-based package manager for macOS that can be used for automated software installation. To install Homebrew on macOS, you need to run a command shell:
- Launch Spotlight Search with
 + Space
 - Type in
terminal - Execute the following command in Terminal to install the Homebrew package manager:
$ /usr/bin/ruby -e "$(curl -fsSL https://raw.githubusercontent.com/Homebrew/install/master/install)" - Verify your Homebrew installation by executing
brew - You should see a similar output to the following:
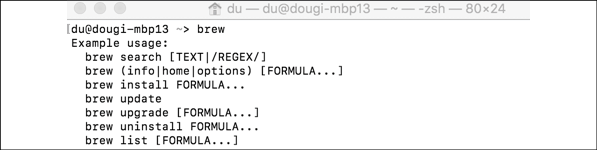
Figure 2.2: Successful installation of Homebrew
- To enable access to additional software, execute the following command:
$ brew tap caskroom/cask
On macOS, if you run into permissions issues while installing brew packages, related to chown'ing /usr/local, you need to execute the sudo chown -R $(whoami) $(brew --prefix)/* command. This command reinstates user-level ownership to brew packages, which is more secure than broad superuser/su-level access.
For more information, check out https://brew.sh/.
Installing development tools
In this section, you'll install all the development tools you need to start developing a web application. Git and GitHub Desktop establish a source code repository on your machine and allow you to sync your code with a remote repository. Node.js is a JavaScript runtime for your PC and it ships with the Node Package Manager or npm. Npm manages third-party source code including Angular. Visual Studio Code is an Integrated Development Environment or IDE.
To automatically install all of the web development tools required for this book, execute the following commands for your OS to configure your environment.
On Windows PowerShell, execute:
PS> Install-Script -Name setup-windows-dev-env
PS> setup-windows-dev-env.ps1
On MacOS Terminal, execute:
$> bash <(wget -O - https://git.io/JvHi1)
For more information refer to https://github.com/duluca/web-dev-environment-setup.
Once you install your IDE, you're ready to start development. This section also contains instructions to install Docker, a lightweight containerization platform, and configure various cloud services. These tools will become relevant in later chapters. If you want a quicker start to your Angular adventure, you can skip them for now.
Git and GitHub Desktop
This section aims to establish a best practice Git configuration that's suitable for the broadest audience possible. To make the best use of this section and subsequent chapters of this book, I presume you have the following prerequisites fulfilled:
- An understanding of what source code management and Git actually are
- A free account created on GitHub.com
Why use GitHub?
If you are a Git user, the chances are that you also use an online repository, such as GitHub, Bitbucket, or GitLab. Each repository has a free tier for open source projects, coupled with robust websites with different feature sets, including on-premise Enterprise options that you can pay for. GitHub, with 38+ million repositories hosted in 2016, is by far the most popular online repository. It is widely considered a baseline utility that never goes offline by the community.
Over time, GitHub has added many rich features that have transformed it from a mere repository to an online platform. Throughout this book, I'll be referencing GitHub features and functionalities so you can leverage its capabilities to transform the way you develop, maintain, and release software.
Why use GitHub Desktop?
The Git CLI tool is indeed powerful, and you will be just fine if you stick to it. However, we full-stack developers are worried about a variety of concerns. In a rush to complete the task at hand, you can easily ruin your, and sometimes your team's, day by following incorrect or incomplete advice.
See the following screenshot for an example of such advice from Stack Overflow (http://stackoverflow.com/questions/1125968/force-git-to-overwrite-local-files-on-pull):

Figure 2.3: An example of a command not to run blindly
If you execute the preceding command, be prepared to lose uncommitted local changes. Unfortunately, novice users tend to follow the most straightforward and most direct instructions, potentially leading to lost work. If you think your past commits are safe, think twice! When it comes to Git, if you can imagine it, it can be done through the CLI.
Thankfully, with GitHub, you can protect branches and implement the GitHub workflow, which entails branching, committing, merging, updating, and submitting pull requests. The protections and the workflow help prevent harmful Git commands from making irreversible changes and enable a level of quality control so that your team remains productive. Performing all of these actions through the CLI, especially when there are merge conflicts, can get complicated and tedious.
Note that Git ships with a CLI tool named Git Bash, which is a Unix-based shell that you can use to execute git and other commands. Bash is readily available on Linux and macOS computers. Windows 10 is rapidly improving its terminal support with Windows Subsystem for Linux (WSL) and alias to Unix commands in PowerShell, so the need to use Git Bash on Windows is rapidly disappearing. If you would like to learn more about Git Bash see the tutorial at Atlassian's website at https://www.atlassian.com/git/tutorials/git-bash.
For a more in-depth understanding of the benefits and pitfalls of Git and GitHub, you can read my 2016 article on the topic at Bit.ly/InDepthGitHub.
Installing Git and GitHub Desktop
GitHub Desktop provides an easy-to-use GUI to execute the GitHub workflow in a manner that is consistent across Windows and macOS. Consistency is highly valuable when onboarding new or junior team members, or if you're not a frequent contributor to the code base. We recommend you install GitHub Desktop 2.2+.
- Execute the installation command:
For Windows:
PS> choco install git github-desktop -yFor macOS:
$ brew install git && brew cask install github - Verify your Git installation by executing
git --versionand observe the version number returnedYou need to restart your Terminal after the installation of a new CLI tool. However, you can avoid relaunching your Terminal and save some time by refreshing or sourcing your environment variables. On Windows, execute
refreshenv; on macOS, executesource ~/.bashrcorsource ~/.zshrc. - Verify your GitHub Desktop installation by launching the application
- Sign in to https://github.com/ on GitHub Desktop
- Once you have created a repository, you can launch the application from your Terminal by executing this:
$ github path/to/repo - If you are already in the correct folder, you can type in the following command instead:
$ github .
For Windows, on GitHub Desktop launch, if you get stuck on the sign in screen, close the application, relaunch it as an administrator, complete the setup, and then you may use it normally, without having to launch it as an administrator again. For more information, refer to https://desktop.github.com/.
Next, we'll go over several strategies for having a smoother experience with Git by properly registering your GitHub credentials.
Using your GitHub credentials in Git
When you interact with your repository on GitHub, the git command is leveraged by the tools you're using, like your IDE, to push or pull content. To have a smooth experience with Git, it is a good idea to register your GitHub credentials with Git properly.
There are three major strategies to accomplish this:
- Configure SSH – which is the best and most secure way to interact with any remote computer system, because no passwords are exchanged. You can follow the latest guide from GitHub to configure SSH at https://help.github.com/articles/connecting-to-github-with-ssh.
- Cache your GitHub password in Git – sometimes SSH won't be supported by the tool you use, so you may need to cache your password. You can do so by executing the following command:
For Windows:
PS> git config --global credential.helper wincredFor macOS:
$ git credential-osxkeychain
$ git config --global credential.helper osxkeychain
For further guidance, refer to the GitHub guide at https://help.github.com/articles/caching-your-github-password-in-git.
- Create a personal access token – this is a strategy that falls in between SSH and password usage from a security perspective because SSH keys and tokens can be revoked at any time from GitHub, but once your password is leaked or compromised, you may lose control of everything.
If you're using two-factor authentication, which you absolutely should, then instead of caching your password, you need to create a personal access token at https://github.com/settings/tokens and use the token instead of your password. In Chapter 3, Creating a Basic Angular App, we cover how you can set up a token to work with Visual Studio Code, the preferred IDE for this book.
Check out TJ Holowaychuk's git-extras tool, which can provide repo summary, changelog population, author commit percentage, and more useful information about your repos at https://github.com/tj/git-extras.
Node.js
This section aims to establish a best practice JavaScript development environment. I presume that you have an awareness of the modern JavaScript ecosystem and tools. At a minimum, make sure to familiarize yourself with the following resources:
- Node.js's website: https://nodejs.org
- Npm's website: https://www.npmjs.com
- Angular's website: https://angular.io
- The legacy AngularJS website: https://angularjs.org/
- Yarn's website: https://yarnpkg.com
- React's website: https://facebook.github.io/react
Node.js is JavaScript that runs anywhere. It's an open source project that aims to run JavaScript on the server, built on Google Chrome's V8 JavaScript engine. In late 2015, Node.js stabilized and announced enterprise-friendly 18-month LTS cycles that brought predictability and stability to the platform, paired with a more frequently updated, but more experimental, latest branch.
Node also ships bundled with npm, the Node Package Manager, and as of 2018, npm is the largest repository of JavaScript packages in the world.
For a more detailed look into Node's history, read my two-part article on Node at Bit.ly/NodeJSHistory.
You may have heard of Yarn and how it's faster or better than npm. As of npm 5, which ships bundled with Node 8, npm is more feature-rich, easier to use, and on par with Yarn in terms of performance. Yarn is published by Facebook, which also created React. It must be noted that Yarn relies on the npm repository, so whichever tool you use, you get access to the same library of packages.
Existing Node.js installation
If you have installed Node.js before, when installing a new version of Node using choco or brew, ensure that you read the command outputs carefully. Your package manager may return caveats or additional instructions to follow so you can successfully complete the installation.
It is also highly likely that your system or folder permissions have been edited manually in the past, which may interfere with the frustration-free operation of Node. If the following commands do not resolve your issues, use the GUI installer from Node's website as a last resort.
To see a list of your global install packages, execute npm list -g --depth=0. To uninstall a global package, execute npm uninstall -g package-name. I would recommend that you uninstall all globally installed packages and restart from scratch with the suggestions provided in the next section.
Regardless, you must take care to uninstall all global tools that were installed using npm -g previously. With every major Node version, there's a chance that native bindings between your tool and Node have been invalidated. Further, global tools rapidly fall out of date and project-specific tools quickly go out of sync. As a result, installing tools globally is now an anti-pattern that has been replaced with better techniques, which are covered in the next section and in the Angular CLI section in Chapter 3, Creating a Basic Angular App.
Installing Node.js
This book presumes that you're using Node 12.13 or a later version. Odd-numbered versions of Node are not meant to be long-lived. 8.x.x, 10.x.x, 12.x.x, and so on are okay, but avoid 9.x.x, 11.x.x, and so on, at all costs, as they are meant to be experimental.
- Execute the installation command:
For Windows:
PS> choco install nodejs-lts -yFor macOS:
$ brew install node@10 - Verify the installation of Node by executing
node -v - Verify npm by executing
npm -vNote that on Windows, you should never upgrade your npm version using npm
install -g npm, as highlighted in Appendix C, Keeping Angular and Tools Evergreen. You can find this appendix online from https://static.packt-cdn.com/downloads/9781838648800_Appendix_C_Keeping_Angular_and_Tools_Evergreen.pdf or at https://expertlysimple.io/stay-evergreen. It is highly recommended that you use the npm-windows-upgrade npm package.
For this book, make sure that you've got npm v.6.12+. Now, let's go over some handy npm packages you may want to install globally.
Global npm packages
The npm repository contains numerous useful and mature CLI commands that are often cross-platform. Listed here are the ones I rely on frequently and choose to install globally for performance reasons:
npx: Executes CLI tools by downloading the latest version on-demand or the project-specific localnode_modulesfolder. Npx ships with npm 5+ and allows you to run code generators that frequently update without a global install.rimraf: The Unix commandrm -rfworks on Windows as well. It's very useful for deleting thenode_modulesfolder, especially when Windows is unable to do so due to the nested folder structure.npm-check-updates: Analyzes your project folder and reports on which package has newer versions or not, with the option to be able to update all of them if you so wish.ncufor short.n: A dead easy to tool to switch between versions of Node quickly, without having to remember the specific version number, which works on macOS/Linux. For Windows, you can use the choco package,nvs; bothnandnvsare covered in the Appendix C, Keeping Angular and Tools Evergreen.http-server: A simple, zero-configuration command-line HTTP server, which is a great way to locally test static HTML/CSS pages or even thedistfolder of your Angular or React project.npm-windows-upgrade: Necessary to upgrade npm on Windows.npkill: Easily find and remove old and heavynode_modulesfolders and reclaim gigabytes of disk space.You can use npm-check-updates to keep all of your global packages up to date by executing
ncu -g.
If you run into EACCES permissions errors while installing global packages on macOS, refer to the guide from npm at https://docs.npmjs.com/getting-started/fixing-npm-permissions.
Visual Studio Code
Visual Studio Code (VS Code) is one of the best code editors/IDEs out there, built and maintained by Microsoft. It's free and cross-platform. The remarkable thing is that VS Code has the lightning-fast performance of a code editor – think NotePad++ or Sublime Text – but the feature set and convenience of costly IDEs – think Visual Studio or WebStorm. For JavaScript development, this speed is essential and is a tremendous quality-of-life improvement for a developer who frequently switches back and forth between different projects. VS Code brings together an integrated terminal, easy-to-use extension system, transparent settings, excellent search and replace functionalities, and, in my opinion, the best Node.js debugger that exists.
This book does not require you to use VS Code. If you wish to use another IDE like WebStorm you may do so. WebStorm is a paid product and delivers a great development experience out of the box, whereas VS Code requires a lot of customization. This book offers automated scripts to configure VS Code for an optimal Angular development experience.
You can find more about WebStorm at https://www.jetbrains.com/webstorm.
Installing Visual Studio Code
For Angular development, this book leverages VS Code v1.42+. I highly recommend that you also use the latest version of VS Code.
- Execute the installation command:
For Windows:
PS> choco install VisualStudioCode -yFor macOS:
$ brew cask install visual-studio-codeOne of the best features of VS Code is that you can also launch it from the CLI. If you're in a folder that you'd like to be editing, simply execute
code .or a particular file by executingcode ~/.bashrcorcode readme.md. - Verify the installation by launching VS Code
- Navigate to a folder and execute
code - This opens up a new VS Code window with the Explorer displaying the contents of the current folder
For more information, refer to https://code.visualstudio.com.
With VS Code installed, you're ready to start development. If you want a quicker start to your Angular adventure, skip ahead to the Angular CLI section and refer back to this section when you need Docker and the tools for various cloud services.
Docker
Docker is a lightweight container virtualization platform with workflows and tooling that help manage and deploy applications.
Installing Docker
To be able to build and run containers, you must first install the Docker execution environment on your computer.
Windows support for Docker can be challenging. You must have a PC with a CPU that supports virtualization extensions, which is not a guarantee on laptops. You must also have a Pro version of Windows with Hyper-V enabled. On the flip side, Windows Server has native support for Docker, which is an unprecedented amount of support shown by Microsoft toward the industry initiative to adopt Docker and containerization.
- Install Docker by executing the following command:
For Windows:
PS> choco install docker docker-for-windows -yFor macOS:
$ brew install docker
- Execute
docker -vto verify the installation
Cloud services
Throughout the book, we'll use various cloud providers to perform deployments of the apps that you are going to build. Each service ships with a CLI tool that facilities the deployment of your app from your Terminal or a continuous integration (CI) environment in the cloud.
Vercel Now
Vercel Now is a cloud platform for static sites and serverless functions. With a simple CLI command, you host websites and deploy web services instantly. This book leverages a free-tier Vercel Now account.
- Create a Vercel Now account at https://vercel.com.
- Install the CLI tool by executing:
$ npm i -g now - Verify the installation by executing:
$ now login - Follow the instructions to complete the login process. You should see a message similar to the one that follows:
> We sent an email to xxxxx@gmail.com. Please follow the steps provided inside it and make sure the security code matches Classical Slow Worm
√ Email confirmed
> Congratulations! You are now logged in. In order to deploy something, run `now`
For more information, refer to https://vercel.com.
Google Firebase
Firebase is Google's cloud platform tailored for hosting mobile and web apps with authentication, push notifications, cloud functions, databases, machine learning, and analytics support. This book leverages a free-tier Firebase account.
- Create a Firebase account at https://firebase.google.com/.
- Install the CLI tool by executing:
$ npm i -g firebase-tools - Verify the installation by executing:
$ firebase login - Follow the instructions to complete the login process. You should see a message similar to the one that follows:
Waiting for authentication...
+  Success! Logged in as xxxxxx@gmail.com
For more information, refer to https://firebase.google.com/.
Google Cloud
Google Cloud is Google's world-class cloud infrastructure for enterprises. This book leverages Google Cloud Run for managed container deployments to the cloud. When you first sign up, you may receive free credits to use Google Cloud. However, this is an optional exercise, as you may incur charges while using this service if you forget to tear down your deployment.
- Create a Google Cloud account at https://cloud.google.com/
- Execute the installation command:
For Windows:
PS> choco install gcloudsdk -yIf you have trouble installing
gcloudsdkfromchoco, then tryscoop, as mentioned earlier in the chapter. Execute the commands that follow:$ scoop bucket add extras $ scoop install gcloudFor macOS:
$ brew install google-cloud-sdk - Verify the installation by executing
gcloud --version - Execute
gcloud initto finish the setup
For more information, refer to https://cloud.google.com/run/.
Amazon Web Services
Amazon Web Services (AWS) is a globally deployed cloud infrastructure provided by Amazon. AWS is a widely popular tool with businesses and governments, making it a lucrative service for IT professionals. Chapter 13, Highly Available Cloud Infrastructure on AWS, goes in-depth on how to work with AWS and perform a scalable container-based deployment.
- Execute the installation command:
For Windows:
PS> choco upgrade awscli -yFor macOS:
$ brew install awscli
$ brew upgrade awscli
Note that running the upgrade command on choco and brew ensures that you have the latest version of any given tool if they were previously installed on your environment.
- Verify the installation by executing
aws --version
For more information, refer to https://aws.amazon.com/.
Setup automation for Windows and macOS
At the beginning of the chapter, I proclaimed anything that can be expressed as a CLI command can also be automated. Throughout the setup process, we have ensured that every tool being used was set up and its functionality was verifiable through a CLI command. This means we can easily create a PowerShell or bash script to string these commands together and ease the task of setting up and verifying new environments.
Let's implement rudimentary but effective scripts to help set up your development environment.
PowerShell script
For Windows-based development environments, you need to create a PowerShell script.
- Create a file named
setup-windows-dev-env.ps1 - Insert the following text, also available at https://github.com/duluca/web-dev-environment-setup, in the file:
setup-windows-dev-env.ps1 # This script is intentionally kept simple to demonstrate basic automation techniques. Write-Output "You must run this script in an elevated command shell, using 'Run as Administrator'" $title = "Setup Web Development Environment" $message = "Select the appropriate option to continue (Absolutely NO WARRANTIES or GUARANTEES are provided):" $yes = New-Object System.Management.Automation.Host.ChoiceDescription "&Install Software using Chocolatey", ` "Setup development environment." $no = New-Object System.Management.Automation.Host.ChoiceDescription "&Exit", ` "Do not execute script." $options = [System.Management.Automation.Host.ChoiceDescription[]]($yes, $no) $result = $host.ui.PromptForChoice($title, $message, $options, 1) switch ($result) { 0 { Write-Output "Installing chocolatey" Set-ExecutionPolicy Bypass -Scope Process -Force; Invoke-Expression ((New-Object System.Net.WebClient).DownloadString('https://chocolatey.org/install.ps1')) Write-Output "Refreshing environment variables. If rest of the script fails, restart elevated shell and rerun script." $env:Path = [System.Environment]::GetEnvironmentVariable("Path", "Machine") + ";" + [System.Environment]::GetEnvironmentVariable("Path", "User") Write-Output "Assuming chocolatey is already installed" Write-Output "Installing Git & GitHub Desktop" choco.exe upgrade git github-desktop -y Write-Output "Installing NodeJS and NVS" choco.exe upgrade nodejs-lts nvs -y Write-Output "Installing Docker" choco.exe upgrade docker docker-for-windows -y Write-Output "Installing AWS" choco.exe upgrade awscli -y Write-Output "Installing VS Code" choco.exe upgrade VisualStudioCode -y RefreshEnv.cmd Write-Output "Results:" Write-Output "Verify installation of AWS, Docker, GitHub Desktop and VS Code manually." $gitVersion = git.exe --version Write-Output "git: $gitVersion" $nodeVersion = node.exe -v Write-Output "Node: $nodeVersion" $npmVersion = npm.cmd -v Write-Output "npm: $npmVersion" } 1 { "Aborted." } } - To execute the script, run:
PS> Set-ExecutionPolicy Unrestricted; .\setup-windows-dev-env.ps1
Alternatively, you can install and execute the script directly from the PowerShell Gallery, located at https://www.powershellgallery.com, by executing the following command:
PS> Install-Script -Name setup-windows-dev-env
PS> setup-windows-dev-env.ps1
By executing this script, you have successfully set up your development environment on Windows.
If you're interested in publishing your own scripts to the PowerShell Gallery or generally interested in advancing your PowerShell skills, I suggest you install PowerShell Core, a multi-platform version of PowerShell. from https://github.com/PowerShell/PowerShell.
Now, let's look into how you can achieve a similar setup on Mac.
Bash script
For Mac-based development environments, you need to create a bash script.
- Create a file named
setup-mac-dev-env.sh - Run
chmod a+x setup-mac-dev-env.shto make the file executable - Insert the following text, also available at https://github.com/duluca/web-dev-environment-setup, in the file:
setup-mac-dev-env.sh #!/bin/bash echo "Execute Installation Script" read -r -p "Absolutely NO WARRANTIES or GUARANTEES are provided. Are you sure you want to continue? [y/N] " response if [[ "$response" =~ ^([yY][eE][sS]|[yY])+$ ]] then echo "Installing brew" /usr/bin/ruby -e "$(curl -fsSL https://raw.githubusercontent.com/Homebrew/install/master/install)" echo "Installing git" brew install git brew upgrade git echo "Installing GitHub Desktop" brew cask install github brew cask upgrade github echo "Installing NodeJS" brew install node@12 brew upgrade node@12 echo "Installing Docker" brew cask install docker brew cask upgrade docker echo "Installing AWS" brew install awscli brew upgrade awscli echo "Installing VS Code" brew cask install visual-studio-code brew cask upgrade visual-studio-code echo "Results:" echo "Verify installation of AWS, Docker, GitHub Desktop and VS Code manually." gitVersion=$(git --version) echo "git: $gitVersion" nodeVersion=$(node -v) echo "Node: $nodeVersion" npmVersion=$(npm -v) echo "npm: $npmVersion" else echo "Aborted." fi - To execute the script, run:
$ ./setup-mac-dev-env.sh
By executing this script, you have successfully set up your development environment on Mac. Here is an example of a more sophisticated install and verify routine, where you can check to see if a particular program, like brew or node, is already installed, before attempting to install them:
echo "Checking if brew is installed"
which -s brew
if [[ $? != 0 ]] ; then
    echo "Installing brew"
    /usr/bin/ruby -e "$(curl -fsSL https://raw.githubusercontent.com/Homebrew/install/master/install)" < /dev/null
else
    echo "Found brew"
fi
echo "Checking for Node version ${NODE_VERSION}"
node -v | grep ${NODE_VERSION}
if [[ $? != 0 ]] ; then
    echo "Installing Node version ${NODE_VERSION}"
    brew install nodejs
else
    echo "Found Node version ${NODE_VERSION}"
fi
Now, you have a pretty good idea of what it looks like to automate the execution of your scripts. The harsh reality is that these scripts do not represent a very capable or resilient solution. Scripts can't be executed or managed remotely, and they can't quickly recover from errors or survive machine boot cycles. Besides, your IT requirements may be above and beyond what is covered here.
If you deal with large teams and have a frequent turnover of staff, an automation tool pays dividends handsomely, whereas if you're on your own or part of a smaller, stable team, it is overkill. I encourage you to explore tools such as Puppet, Chef, Ansible, and Vagrant to help you decide which one best fits your needs or whether a simple script is just good enough.
The Angular CLI
The Angular CLI tool, ng, is an official Angular project to ensure that newly created Angular applications have a uniform architecture, following the best practices perfected by the community over time. This means that any Angular application you encounter going forward should have the same general shape.
Setting up your development directory
Setting up a dedicated dev directory is a lifesaver. Since all the data under this directory is backed up using GitHub, you can safely configure your antivirus, cloud sync, or backup software to ignore it. This helps significantly reduce CPU, disk, and network utilization. As a full-stack developer, you're likely to be multitasking a lot, so avoiding unnecessary activity has a net positive impact on performance, power, and data consumption daily, especially if your development environment is a laptop that is resource-starved or you wish to squeeze as much battery life as possible when you're on the move.
Creating a dev folder directly in the c:\ drive is very important on Windows. Earlier versions of Windows, or rather NTFS, can't handle file paths longer than 260 characters. This may seem adequate at first, but when you install npm packages in a folder structure that is already deep in the hierarchy, the node_modules folder structure can get deep enough to hit this limit very easily. With npm 3+, a new, flatter package installation strategy was introduced, which helps with npm-related issues, but being as close to the root folder as possible helps tremendously with any tool.
Create your dev folder using the following commands:
For Windows:
PS> mkdir c:\dev
PS> cd c:\dev
For macOS:
$ mkdir ~/dev
$ cd ~/dev
In Unix-based operating systems, ~ (pronounced tilde) is a shortcut to the current user's home directory, which resides under /Users/your-user-name.
Now that your development directory is ready, let's start with generating your Angular application.
Generating your Angular application
The Angular CLI is an official Angular project to ensure that newly created Angular applications have a uniform architecture, following the best practices perfected by the community over time. This means that any Angular application you encounter going forward should have the same general shape. The Angular CLI goes beyond initial code generation; you'll use it frequently to create new components, directives, pipes, services, modules, and more. The Angular CLI also helps during development, with live-reloading features so that you can quickly see the results of your changes. The Angular CLI can also test, lint, and build optimized versions of your code for a production release. Furthermore, as new Angular versions are released, the Angular CLI helps you upgrade your code by automatically rewriting portions of it so that it remains compatible with potential breaking changes.
Installing the Angular CLI
The documentation at https://angular.io/guide/quickstart guides you on how to install @angular/cli as a global npm package. Do not do this. Over time, as the Angular CLI is upgraded, it is a constant irritant to have to keep the global and the in-project version in sync. If you don't, the tool complains endlessly. Additionally, if you are working on multiple projects, you end up with varying versions of the Angular CLI over time. As a result, your commands may not return the results you expect or the results your team members get.
The strategy detailed in the next section makes the initial configuration of your Angular project a bit more complicated than it needs to be; however, you'll more than make up for this pain if you have to return to a project a few months or a year later. In that case, you could use the version of the tool that you last used on the project, instead of some future version that may require upgrades that you're not willing to perform. In the next section, you'll use this best practice to initialize your Angular app.
Initializing your Angular app
The main way to initialize your app is by using the Angular CLI. Let's initialize the application for development using npx, which is already installed on your system from when you installed the latest version of Node LTS, from PowerShell/Terminal:
- Under your
devfolder, executenpx @angular/cli new local-weather-app - Select No, when asked Would you like to add Angular routing?
- Select CSS, when asked Which stylesheet format would you like to use?
- On your terminal, you should see a success message similar to this:
$ npx @angular/cli new local-weather-app
...
CREATE local-weather-app/src/environments/environment.ts (662 bytes)
CREATE local-weather-app/src/app/app-routing.module.ts (245 bytes) CREATE local-weather-app/src/app/app.module.ts (393 bytes)
CREATE local-weather-app/src/app/app.component.html (1152 bytes) CREATE local-weather-app/src/app/app.component.spec.ts (1086 bytes) CREATE local-weather-app/src/app/app.component.ts (207 bytes) CREATE local-weather-app/src/app/app.component.css (0 bytes)
CREATE local-weather-app/e2e/protractor.conf.js (752 bytes) CREATE local-weather-app/e2e/tsconfig.e2e.json (213 bytes) CREATE local-weather-app/e2e/src/app.e2e-spec.ts (632 bytes) CREATE local-weather-app/e2e/src/app.po.ts (251 bytes)
added 1076 packages from 1026 contributors and audited 42608 packages in 62.832s
found 0 vulnerabilities Successfully initialized git.
Project 'local-weather-app' successfully created.
Your project folder—local-weather-app—has been initialized as a Git repository and scaffolded with the initial file and folder structure, which should look like this:
local-weather-app
├── .editorconfig
├── .git
├── .gitignore
├── angular.json
├── e2e
│ ├── protractor.conf.js
│ ├── src
│ │ ├── app.e2e-spec.ts
│ │ └── app.po.ts
│ └── tsconfig.e2e.json
├── package.json
├── README.md
├── src
│ ├── app
│ │ ├── app-routing.module.ts
│ │ ├── app.component.css
│ │ ├── app.component.html
│ │ ├── app.component.spec.ts
│ │ ├── app.component.ts
│ │ └── app.module.ts
│ ├── assets
│ │ └── .gitkeep
│ ├── browserslist
│ ├── environments
│ │ ├── environment.prod.ts
│ │ └── environment.ts
│ ├── favicon.ico
│ ├── index.html
│ ├── karma.conf.js
│ ├── main.ts
│ ├── polyfills.ts
│ ├── styles.css
│ ├── test.ts
│ ├── tsconfig.app.json
│ ├── tsconfig.spec.json
│ └── tslint.json
├── tsconfig.json
└── tslint.json
The alias for @angular/cli is ng. If you were to install the Angular CLI globally, you would execute ng new local-weather-app, but we didn't do this. So, it is essential to remember that, going forward, you execute the ng command, but this time under the local-weather-app directory. The latest version of the Angular CLI has been installed under the node_modules/.bin directory so that you can run ng commands such as npx ng generate component my-new-component and continue working efficiently.
If you are on macOS, you can further improve your development experience by implementing shell auto-fallback, which removes the necessity of having to use the npx command. If an unknown command is found, npx takes over the request. If the package already locally exists under node_modules/.bin, npx passes along your request to the correct binary. So, you can run commands like ng g c my-new-component as if they're globally installed. Refer to npx's readme on how to set this up, at npmjs.com/package/npx#shell-auto-fallback.
Publishing a Git repository using GitHub Desktop
GitHub Desktop allows you to create a new repository directly within the application:
- Open GitHub for Desktop
- File | Add local repository...
- Locate the
local-weather-appfolder by clicking on Choose... - Click on Add repository
- Note that the Angular CLI already created the first commit for you in the History tab
- Finally, click on Publish repository, marked in the following screenshot as 6:
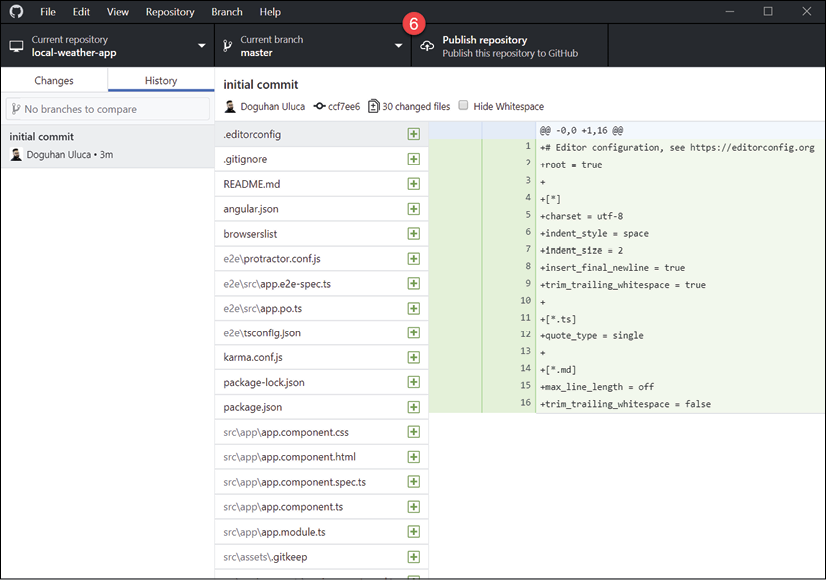
Figure 2.4: GitHub Desktop
Inspecting and updating package.json
Package.json is the single most important configuration file that you should be keenly aware of at all times. Your project's scripts, runtime, and development dependencies are stored in this file.
- Open
package.jsonand locate the name and version properties:package.json { "name": "local-weather-app", "version": "0.0.0", "license": "MIT", ... - Rename your app to whatever you wish; I used
localcast-weather - Set your version number to
1.0.0npmuses semantic versioning (semver), where version number digits represent Major.Minor.Patch increments. Semver starts version numbers at1.0.0for any published API, though it doesn't prevent0.x.xversioning. As the author of a web application, the versioning of your app has no real impact on you, outside of internal tooling, team, or company communication purposes. However, the versioning of your dependencies is critical to the reliability of your application. In summary, patch versions should just be bug fixes. Minor versions add functionality without breaking the existing features, and major version increments are free to make incompatible API changes. However, any update is risky to the tested behavior of your application. Therefore, thepackage-lock.jsonfile stores the entire dependency tree of your application, so the exact state of your application can be replicated by other developers or CI servers. For more information, visit: https://semver.org/.In the following code block, observe that the
scriptsproperty contains a collection of helpful starter scripts that you can expand on. Thestartandtestcommands are npm defaults, so they can just be executed bynpm startornpm test. However, the other commands are custom commands that must be prepended with therunkeyword. For example, in order to build your application, you must usenpm run build:package.json ... "scripts": { "ng": "ng", "start": "ng serve", "build": "ng build", "test": "ng test", "lint": "ng lint", "e2e": "ng e2e" }, ...Before the introduction of npx, if you wanted to use the Angular CLI without a global install, you would have to run it with
npm run ng -- g c my-new-component. The double-dashes are needed to let npm know where the command-line tool name ends and the options begin. For example, in order to start your Angular application on a port other than the default4200, you need to runnpm start -- --port 5000. - Update your
package.jsonfile to run your development version of the app from a little-used port like5000as the new default behavior:package.json ... "start": "ng serve --port 5000", ...Under the dependencies property, you can observe your runtime dependencies. These are libraries that get packaged up alongside your code and shipped to the client browser. It's essential to keep this list to a minimum:
package.json
...
  "dependencies": {
    "@angular/animations": "~9.0.0",
    "@angular/common": "~9.0.0",
    "@angular/compiler": "~9.0.0",
    "@angular/core": "~9.0.0",
    "@angular/forms": "~9.0.0",
    "@angular/platform-browser": "~9.0.0",
    "@angular/platform-browser-dynamic": "~9.0.0",
    "@angular/router": "~9.0.0",
    "rxjs": "~6.5.3",
    "tslib": "^1.10.0",
    "zone.js": "~0.10.2"
  },
...
In the preceding example, all Angular components are on the same version. As you install additional Angular components or upgrade individual ones, it is advisable to keep all Angular packages on the same version. This is especially easy to do since npm doesn't require the --save option anymore to permanently update the package version. For example, just executing npm install @angular/router is sufficient to update the version in package.json. This is a positive change overall, since what you see in package.json matches what is actually installed. However, you must be careful, because npm also automatically updates package-lock.json, which propagates your, potentially unintended, changes to your team members.
Your development dependencies are stored under the devDependencies property. When installing new tools for your project, you must take care to append the command with --save-dev so that your dependency is correctly categorized. Dev dependencies are only used during development and not shipped to the client browser. You should familiarize yourself with every single one of these packages and their specific purpose. If you are unfamiliar with a package shown as we move on, your best resource to learn more about them is https://www.npmjs.com/:
package.json
...
  "devDependencies": {
    "@angular-devkit/build-angular": "~0.900.0",
    "@angular/cli": "~9.0.0",
    "@angular/compiler-cli": "~9.0.0",
    "@angular/language-service": "~9.0.0",
    "@types/node": "^12.11.1",
    "@types/jasmine": "~3.4.0",
    "@types/jasminewd2": "~2.0.3",
    "codelyzer": "^5.1.2",
    "jasmine-core": "~3.5.0",
    "jasmine-spec-reporter": "~4.2.1",
    "karma": "~4.3.0",
    "karma-chrome-launcher": "~3.1.0",
    "karma-coverage-istanbul-reporter": "~2.1.0",
    "karma-jasmine": "~2.0.1",
    "karma-jasmine-html-reporter": "^1.4.2",
    "protractor": "~5.4.2",
    "ts-node": "~8.3.0",
    "tslint": "~5.18.0",
    "typescript": "~3.6.4"
  }
...
The characters in front of the version numbers have specific meanings in semver:
- The tilde,
~, enables tilde ranges when all three digits of the version number are defined, allowing patch version upgrades to be automatically applied - The up-caret character,
^, enables caret ranges, allowing minor version upgrades to be automatically applied - A lack of any character signals npm to install that exact version of the library on your machine
You may notice that major version upgrades aren't allowed to happen automatically. In general, updating packages can be risky. In order to ensure no package is updating without your explicit knowledge, you may install exact version packages by using npm's --save-exact option. Let's experiment with this behavior by installing an npm package that I published called dev-norms, a CLI tool that generates a markdown file with sensible default norms for your team to have a conversation about, as shown here:
- Under the
local-weather-appdirectory, executenpm install dev-norms --save-dev --save-exact. Note that "dev-norms": "1.7.0" or similar has been added topackage.jsonwithpackage-lock.jsonautomatically updated to reflect the changes accordingly. - After the tool is installed, execute
npx dev-norms create. A file nameddev-norms.mdhas been created containing the developer norms mentioned previously.
- Save your changes to
package.json.
Working with stale packages comes with its risks. With npm 6, the npm audit command has been introduced to make you aware of any vulnerabilities discovered in packages you're using. During npm install, if you receive any vulnerability notices, you may execute npm audit to find out details about any potential risk.
In the next section, you'll commit the changes you have made to Git.
Committing code using VS Code
To commit your changes to Git and then synchronize your commits to GitHub, you can use VS Code:
- Switch over to the Source Control pane, marked as 1 here:

Figure 2.5: Visual Studio Code Source Control pane
- Enter a commit message in the box marked as 2
- Click on the check-mark icon, marked as 3, to commit your changes
- Finally, synchronize your changes with your GitHub repository by clicking on the refresh icon, marked as 4
If you have two-factor authentication enabled, as you should, GitHub may ask for your credentials. In this case, you need to create a personal access token. Follow the instructions below to get this done:
- Go to the page https://github.com/settings/tokens
- Generate a new token and copy it
- Attempt to re-sync your change within VS Code
- Ignore the GitHub authentication window, which presents you with VS Code's credential input bar
- Enter your GitHub username, not your email
- Paste in the token as your password
- The sync should succeed, and subsequent syncs shouldn't prompt for a password
See the Git and Github Desktop section earlier in this chapter for a wider discussion of the various methods you can use to connect your Git client to GitHub.
Going forward, you can do most Git operations from within VS Code.
Running your Angular app
Run your Angular app to check whether it works. During development, you can execute npm start through the ng serve command; this action transpiles, packages, and serves the code on localhost with live-reloading enabled:
- Execute
npm start - Navigate to
http://localhost:5000 - You should see a rendered page similar to this:

Figure 2.6: Default Angular CLI landing page
- Stop your application by pressing Ctrl + C in the integrated terminal
Congrats! You're ready to start developing your web application. If you ran into any trouble during your setup, see the next section on how you can verify your code against the sample project on GitHub.
Verifying your code
The most up-to-date versions of the sample code for the book are on GitHub at the repository linked following. The repository contains the final and completed state of the code. You can verify your progress at the end of a chapter by looking for the end-of-chapter snapshot of code under the projects folder.
For Chapter 2:
- Clone the repo https://github.com/duluca/local-weather-app
- Execute
npm installon the root folder to install dependencies - The code sample for this chapter is under the sub-folder:
projects/ch2 - To run the Angular app for this chapter, execute:
npx ng serve ch2 - To run Angular Unit Tests for this chapter, execute:
npx ng test ch2 --watch=false
Beware that the source code in the book or on GitHub may not always match the code generated by Angular CLI. There may also be slight differences in implementation between the code in the book and what's on GitHub because the ecosystem is ever evolving. It is natural for the sample code to change over time. Also on GitHub, expect to find corrections, fixes to support newer versions of libraries, or side-by-side implementations of multiple techniques for the reader to observe. The reader is only expected to implement the ideal solution recommended in the book. If you find errors or have questions, please create an issue or submit a pull request on GitHub for the benefit of all readers.
In the next section, I'll cover how you can optimize VS Code for Angular for the best possible development experience.
Optimizing VS Code for Angular
It is essential to optimize your IDE to have a great development experience. If you leverage the automated tools that I present in this section, you can quickly configure your IDE and your Angular project with dozens of settings that work well together.
Configuring your project automatically
To quickly apply configuration steps covered in the upcoming chapters, run the commands that follow:
- Install the Angular VS Code task:
npm i -g mrm-task-angular-vscode - Apply the Angular VS Code configuration:
npx mrm angular-vscode - Install the npm Scripts for the Docker task:
npm i -g mrm-task-npm-docker - Apply the npm Scripts for Docker configuration:
npx mrm npm-dockerThese settings are continually tweaked to adapt to the ever-evolving landscape of extensions, plugins, Angular, and VS Code. Always make sure to install a fresh version of the task by rerunning the install command to get the latest version.
- Execute
npm run style:fix
- Execute
npm run lint:fix
For more information on the mrm tasks, refer to:
- https://github.com/expertly-simple/mrm-task-angular-vscode
- https://github.com/expertly-simple/mrm-task-npm-docker
- https://github.com/expertly-simple/mrm-task-npm-aws
Note that mrm-task-npm-aws sets up npm scripts for AWS ECS, which is used in Chapter 13, Highly Available Cloud Infrastructure on AWS.
You may verify your configuration against the sample projects on GitHub. However, note that the configuration pieces will be applied at the root of the repository and not under the projects folder.
The next three sections cover the settings that were automatically applied previously. Feel free to skip ahead and refer back if you have questions.
VS Code auto save
Saving files all the time can get tedious. You can enable automatic saving by doing the following:
- Open VS Code
- Toggle the setting under File | Auto Save
You can further customize many aspects of VS Code's behavior by launching Preferences. The keyboard shortcut to launch Preferences is [Ctrl + ,] on Windows and [ + ,] on macOS.
IDE settings
You can share such settings with your coworkers by creating a .vscode folder in the root of your project directory and placing a settings.json file in it. If you commit this file to the repository, everyone will share the same IDE experience. Unfortunately, individuals aren't able to override these settings with their local preferences, so ensure that shared settings are minimal and are agreed upon as a team norm.
Here are the customizations that I use for an optimal, battery-life-conscious Angular development experience:
.vscode/settings.json
{
  "debug.openExplorerOnEnd": true,
  "editor.tabSize": 2,
  "editor.rulers": [90],
  "editor.autoIndent": "full",
  "editor.cursorBlinking": "solid",
  "editor.formatOnType": false,       // Adjust the intensity of
  "editor.formatOnPaste": false,         auto-formatting to taste
  "editor.formatOnSave": true,
  "editor.minimap.enabled": false,
  "editor.codeActionsOnSave": {
    "source.organizeImports": false,
    "source.fixAll.tslint": true,
  },
  "explorer.openEditors.visible": 0,
  "files.trimTrailingWhitespace": true,
  "files.autoSave": "onFocusChange",
  "git.confirmSync": false,
  "git.enableSmartCommit": true,
  "npm.enableScriptExplorer": true,
  "typescript.tsdk": "node_modules/typescript/lib",
  "workbench.iconTheme": "material-icon-theme",     // Requires
                                                  Material Icon
                                                Theme Extension
  "auto-close-tag.SublimeText3Mode": true,          // Requires Auto
                                              Close Tag Extension
  "html.autoClosingTags": false,
  "peacock.affectActivityBar": true,               // Requires Peacock
  "peacock.affectStatusBar": true,                           Extension
  "peacock.affectTitleBar": false,
  "workbench.colorCustomizations": {
    "activityBar.background": "#d04649",
    "activityBar.activeBorder": "#37cb34",
    "activityBar.foreground": "#e7e7e7",
    "activityBar.inactiveForeground": "#e7e7e799",
    "activityBarBadge.background": "#37cb34",
    "activityBarBadge.foreground": "#15202b",
    "statusBar.background": "#b52e31",
    "statusBarItem.hoverBackground": "#d04649",
    "statusBar.foreground": "#e7e7e7"
  },
  "peacock.color": "#b52e31",
  "gitlens.menus": {                              // Requires GitLens
    "editorGroup": false                               Extension
  },
  "ng-evergreen.upgradeChannel": "Latest"            // Requires Angular
                                                  Evergreen Extension
}
In later sections, as we add tools that enforce our coding style, be careful not to introduce new settings that overlap or contradict each other.
IDE extensions
For a magical development experience with VS Code and Angular, you should install the Angular Essentials extension pack created and curated by John Papa. John Papa is one of the leading champions and thought leaders in the Angular community. He continuously and relentlessly seeks the best possible development experience you can attain so that you are more productive and happier as a developer. To learn more about Angular Essentials, see this blog post at https://johnpapa.net/rec-ng-extensions and the GitHub repo at https://github.com/johnpapa/vscode-angular-essentials.
I highly recommend you follow John Papa on Twitter at @john_papa.
Similar to settings, you can also share recommended extensions via a JSON file. These are the extensions that I use for Angular development:
.vscode/extensions.json
{
  "recommendations":[
    "johnpapa.angular-essentials",
    "PKief.material-icon-theme",
    "formulahendry.auto-close-tag",
    "ms-azuretools.vscode-docker",
    "eamodio.gitlens",
    "WallabyJs.quokka-vscode",
    "amatiasq.sort-imports",
    "DSKWRK.vscode-generate-getter-setter",
    "esbenp.prettier-vscode",
    "HookyQR.beautify",
    "expertly-simple.ng-evergreen",
    "msjsdiag.debugger-for-edge"
  ]
}
VS Code also recommends some extensions for you to install. I would caution against installing too many extensions, as these noticeably start slowing down the launch performance and optimal operation of VS Code.
The VS Code ecosystem is an ever-evolving, dynamic, and rich ecosystem. As such, certain extensions or settings may disappear, stop working, or have bugs in them. If you run into any trouble or are simply curious, you can find the latest versions of my preferred VS Code configuration files on GitHub at http://bit.ly/ngCodeSettings.
Scripting code styling and linting
You can customize the code styling enforcement and code generation behavior in VS Code and the Angular CLI. The most crucial goal of automating the enforcement of code styling and linting rules is to set common ground between developers. If the team can't agree on what styling to follow, a coin toss is better than no agreement. Development teams should be focused on code quality and let automated tools worry about the indentation of their code, location of brackets, and spaces between parentheses. In large teams, any deviation in styling can cause significant headaches with merge conflicts. It is highly recommended that you implement mechanisms to enforce standards.
I prefer StandardJS settings for JavaScript, which codify a minimal approach to writing code while maintaining high readability. This means two spaces for tabs and no semicolons. In addition to the reduced keystrokes, StandardJS also takes less horizontal space, which is especially valuable when your IDE can only utilize half of the screen, with the other half taken up by the browser. You can read more about StandardJS at: https://standardjs.com/.
With the default settings, your code looks like:
import { AppComponent } from "./app.component";
With StandardJS settings, your code looks like:
import { AppComponent } from './app.component'
If you don't like this style, it is okay. While I'll be sharing my preferred settings following, feel free to tweak them to your liking. The mechanism we implement to enforce the rules remains the same regardless.
To apply and enforce code styling rules, we use some tools that provide both a CLI tool and a VS Code extension:
- Prettier – used to format
.tsfiles - ImportSort/SortImports – used to organize TypeScript import statements
- Beautify – used to format
.htmlfiles, - TSLint – used as a static code analysis tool to check code readability, maintainability, and functionality errors
Our goal is to end up with four scripts:
style– to check if our code adheres to styling rulesstyle:fix– to automatically format code files as per styling ruleslint– to check if our code has any linting errorslint:fix– to automatically fix auto-fixable linting errors
The style and lint commands would be utilized by our CI server to ensure that every team member is adhering to the same coding standards. The style:fix and lint:fix commands would help developers adhere to coding standards with as little effort as possible.
These tools are constantly updated. The behavior of these tools may shift over time, so keep an eye out and don't hesitate to experiment with adding/removing tools to this mixture to achieve the configuration that works for you.
Before we set up our dependencies and configuration files, ensure that all the extensions recommended in the IDE extensions section are installed.
Configuring tooling
You can start making the configuration changes by following these steps:
- Make sure the Prettier – Code formatter, TSLint, sort-imports, and Beautify extensions are installed (already included in
extensions.jsonfrom the previous section) - Install the CLI tools by executing the following command:
  npm i -D prettier tslint-config-prettier tslint-plugin-prettier
  npm i -D js-beautify
  npm i -D import-sort import-sort-cli import-sort-parser-typescript import-sort-style-module
  npm i -D tslint tslint-etc
With npm, you can use
ias an alias forinstalland-Dinstead of the more verbose--save- devoption. However, if you mistype-Das-d, you end up saving the package as a production dependency. - Edit
package.jsonby appending animportSortattribute at the end of the file:package.json ... "importSort": { ".ts, .tsx": { "parser": "typescript", "style": "module", "options": {} } } ... - Update the
tslint.jsonrules for integration with Prettier andtslint-etc:tslint.json { "extends": [ "tslint:recommended", "tslint-config-prettier", "tslint-plugin-prettier", "tslint-etc" ], "rules": { "prettier": true, "no-unused-declaration": true, ... "quotemark": [true, "single", "avoid-escape"], ... "semicolon": [ true, "never"], ... "max-line-length": [ true,90], ... } - Add a new file to the root of your project, named
.jsbeautifyrc:.jsbeautifyrc { "indent_size": 2, "wrap_line_length": 90, "language": { "html": [ "html" ] } } - Add a new file to the root of your project, named
.prettierrc:. prettierrc { "tabWidth": 2, "useTabs": false, "printWidth": 90, "semi": false, "singleQuote": true, "trailingComma": "es5", "jsxBracketSameLine": true } - Add a new file to the root of your project, named
.prettierignore. Note that this file doesn't have curly brackets:. prettierignore **/*.html
Now we are done configuring all the tooling necessary to implement our style and lint scripts.
Implementing a style checker and fixer
Let's implement npm scripts for style and style:fix commands. Npm scripts are a great way to document CLI scripts that your team needs to execute across different platforms and even on a CI server.
Now, let's add our first script:
- Edit the
package.jsonscripts attribute to addstyleandstyle:fixcommands:package.json ... "scripts": { "style:fix": "import-sort --write \"**/{src,tests,e2e}/*.ts\" && prettier --write \"**/{src,tests,e2e}/*.{*css,ts}\" && js-beautify \"src/**/*.html\"", "style": "import-sort -l \"**/{src,tests,e2e}/*.ts\" && prettier --check \"**/{src,tests,e2e}/*.{*css,ts}\"", ... } ... - Execute
npm run styleto see the files that do not adhere to styling rules - Execute
npm run style:fixto update all your files to the new style - Observe all the file changes in GitHub Desktop
- Commit your changes
When you utilize inline templates in Angular, the inlined portion of HTML is formatted by Prettier instead of Beautify. In most of these cases, your code will look good, but if your HTML elements have too many attributes, your code will be formatted in a very verbose manner. In order to prevent this from happening, you may select the relevant HTML code and run the Beautify selection command within VS Code. If you add // prettier-ignore above the template property, Prettier will stop messing up your beautified HTML.
Now, let's configure our linting scripts.
Implementing a lint checker and fixer
A lint command already exists in package.json. We overwrite the existing lint command with our own and implement an additional lint:fix command.
Add the new scripts:
- Edit the
package.jsonscripts attribute to replacelintand addlint:fixcommands:package.json ... "scripts": { ... "lint": "tslint --config tslint.json --project . -e \"**/{test,polyfills}.ts\"", "lint:fix": "tslint --config tslint.json --fix --project . -e \"**/{test,polyfills}.ts\"", ... } ...Note that unlike the style scripts, we're excluding
test.tsandpolyfills.tsfrom being linted. These files ship with linting errors; they are unlikely to be edited frequently and since they have no bearing on the quality of our code, we can safely ignore them. - Execute
npm run lintto see the files that have linting errors - Execute
npm run lint:fixto fix any auto-fixable errors - If there are further errors, then Ctrl/cmd + click on the files and manually fix the errors
- Observe all the file changes in GitHub Desktop
- Commit your changes
- Don't forget to push your changes to your repository!
Sometimes, as you type in new code or generate new components using the Angular CLI, you may encounter double-quotes or semicolons being underlined with a red squiggly line to indicate an issue. We have configured VS Code to automatically format files on saving, which happens automatically when the window loses focus. When auto-formatting is triggered, the file updates and formatting related errors disappear.
When we cover CI in Chapter 4, Automated Testing, CI, and Release to Production, we are going to run our style and lint checker as part of our pipeline.
Next, configure the ng tool to get the autocomplete functionality in the terminal.
Configuring Angular CLI autocomplete
You can get an autocomplete experience in your terminal when using the Angular CLI. Execute the appropriate command for your *nix environment:
- For the bash shell:
$ ng completion --bash >> ~/.bashrc $ source ~/.bashrc - For the zsh shell:
$ ng completion --zsh >> ~/.zshrc $ source ~/.zshrc - For Windows users using the Git bash shell:
$ ng completion --bash >> ~/.bash_profile
$ source ~/.bash_profile
Next, let's learn about the VS Code Auto Fixer.
VS Code Auto Fixer
Sometimes, a yellow bulb icon appears next to a line of code. This might happen because you have typed some code that violates a rule defined in tslint.json. If you click on the bulb, you will see an action labeled as a Fix. You can take advantage of these auto-fixers to allow VS Code to fix your code automatically. The screenshot that follows shows an example of an Unnecessary semicolon issue:

Figure 2.7: VS Code Auto Fixer
Congratulations – you're done setting up your development environment!
Summary
In this chapter, you mastered the use of CLI-based package managers for both Windows and macOS to speed up and automate the setup of development environments for you and your colleagues. You also created your first Angular project and optimized its configuration for development using Visual Studio Code. You then implemented automated style checkers and fixers to enforce coding standards and styling across your team. The lint checker and fixer you implemented will automatically catch potential coding errors and maintainability issues.
The automated scripts you have created codify your team norms and document them for new and existing members alike. By reducing variance from one developer's environment to the next, your team can overcome any individual configuration issue more efficiently and remain focused on the execution of the task at hand. With a collective understanding of a common environment, no single individual on the team carries the burden of having to help troubleshoot everyone else's issues. The same idea applies to the shape and style of your code files.
When a team member looks at another team member's code, it looks stylistically identical, which makes it easier to troubleshoot and debug an issue. As a result, your team is more productive. By leveraging more sophisticated and resilient tools, mid-to-large sized organizations can achieve considerable savings in their IT budgets.
In the next chapter, you're going to learn more about the Angular platform, leverage Kanban using GitHub projects and GitHub issues, learn Angular fundamentals to build a simple web app with a full-stack architecture in mind, and get introduced to reactive programming with RxJS.
Further reading
The article on Automating the Setup of the Local Developer Machine by Vishwas Parameshwarappa is a great place to start for using Vagrant, found at https://www.vagrantup.com. You can find the article at https://Red-gate.com/simple-talk/sysadmin/general/automating-setup-local-developer-machine.
Other tools include Chef, found at https://www.chef.io/, and Puppet, found at https://puppet.com. Some developers prefer to work within Docker containers during coding, found at https://www.docker.com. This is done to isolate different versions of SDKs from each other. Specific development tools cannot be scoped to a given folder and must be installed globally or OS-wide, making it very difficult to work on multiple projects at the same time. I recommend staying away from this type of setup if you can avoid it. In the future, I expect such chores are going to be automated by IDEs, as CPU core counts increase, and virtualization tech has better hardware acceleration.
We'll leverage Docker a little later in this book, but we'll use it to isolate our production software dependencies from their surrounding elements, like our local development environment or a server in the cloud.
Questions
Answer the following questions as best as you can to ensure that you've understood the key concepts from this chapter without Googling. Do you need help answering the questions? See Appendix D, Self-Assessment Answers online at https://static.packt-cdn.com/downloads/9781838648800_Appendix_D_Self-Assessment_Answers.pdf or visit https://expertlysimple.io/angular-self-assessment.
- What are the motivations for using a CLI tool as opposed to a GUI?
- For your specific operating system, what is the suggested package manager to use?
- What are some of the benefits of using a package manager?
- What are the benefits of keeping the development environments of the members of your development team as similar to one another as possible?